
Score global de préparation IA
Résultat combiné de tous les signaux de l’audit.
Moyen
Audit de préparation IA: 21/09/2026Données techniques publiques
Score global de préparation IA
Résultat combiné de tous les signaux de l’audit.
Évaluation globale de préparation IA
Workflow (langbase.com) a obtenu 55/100 lors de l’audit technique automatisé de préparation à l’IA. llms.txt était accessible, llms-full.txt avait un format incorrect et ai.txt était disponible. L’analyse de robots.txt a trouvé 0 robots IA explicitement autorisés, 0 bloqués et 0 sitemaps déclarés. La complétude du balisage de la page d’accueil atteint 0% ; aucun type Schema.org détecté. Balises OpenGraph détectées : 0. Les résultats correspondent aux réponses publiques observées le 2026-09-21T01:17:38.548Z.
L’audit combine les fichiers lisibles par les machines, les règles des robots, les sitemaps et le balisage de la page d’accueil. llms.txt est accessible et contient 497 265 jetons.
robots.txt est disponible ; robots IA bloqués : 0. Sitemaps déclarés : 0. Aucun type Schema.org détecté.
Profil Lighthouse mobile : performance —/100, accessibilité 84/100, SEO 92/100.
Une mesure Lighthouse mobile. La catégorie expérimentale Agentic Browsing est présentée séparément et ne remplace pas le score global de LLMSMap.
Performance
Accessibilité
Bonnes pratiques
SEO technique
Agentic Browsing
Lighthouse n’a pas renvoyé de score de performance comparable pour cette mesure.
Accessibilité : 84/100, bonnes pratiques : 88/100, SEO technique : 92/100. La catégorie expérimentale Agentic Browsing atteint 22/100 et reste distincte du score global de LLMSMap.
Découpez les longues tâches JavaScript, différez les scripts et styles non critiques et réduisez les chaînes de requêtes bloquantes.
Supprimez le CSS et le JavaScript inutilisés, chargez les widgets lourds à la demande et limitez les scripts tiers.
Servez des formats modernes adaptés, donnez la priorité au visuel principal et chargez tardivement le contenu sous la ligne de flottaison.
Nommez clairement boutons, liens et champs et structurez les titres et régions sémantiques.
Premier contenu
Contenu principal
Stabilité visuelle
Temps de blocage
Vitesse visuelle
Fichiers lisibles par les machines, règles des robots, découverte et balisage de la page d’accueil.
Format incorrect : l’URL llms-full.txt ne renvoie pas de texte ou de Markdown.
https://langbase.com/llms-full.txtAucun sitemap déclaré dans robots.txt
Aucun balisage Schema.org trouvé sur la page d’accueil
Aucune balise OpenGraph trouvée sur la page d’accueil
D’après l’analyse de robots.txt
<doc>
<metadata>
<title>Page</title>
<url>https://langbase.com/docs/</url>
</metadata>
<content>
import { Guides } from '@/components/Guides';
import { Resources } from '@/components/Resources';
import { Courses } from '@/components/Courses';
import { HeroPattern } from '@/components/HeroPattern';
import { generateMetadata } from '@/lib/generate-metadata';
<a href="https://studio.langbase.com" className="hidden lg:flex h-full w-full items-center justify-center mb-4">
<img src="/docs/logo-bg-black.svg" className="flex h-full w-full mt-0 shadow-[0_2px_3px_0_theme(colors.black/15%),0_0_0_1px_theme(colors.white/1%),0_-1px_0_0_theme(colors.white/2%)] rounded-[3rem]" />
</a>
<h1 className="flex lg:hidden">Langbase Docs</h1>
### Langbase is the most powerful serverless AI cloud for building and deploying AI agents.
Build, deploy, and scale serverless AI agents with tools and memory (RAG). Simple AI primitives no bloated frameworks, all with a world-class developer experience without using any frameworks.
<CTAButtons
primary={{ href: 'https://command.new', text: 'Vibe code AI agents', sub:'with Command.new' }}
secondary={{ href: '/examples/agent-architectures', text: 'Agent architectures', sub:'(no frameworks)' }}
/>
---
<ProductsTable />
---
## Why Langbase?
Langbase is the best way to build and deploy AI agents.
Our mission: AI for all. Not just ML wizards. Every. Single. Developer.
**Build AI agents without any bloated frameworks**. You write the logic, we handle the logistics.
Compared to complex AI frameworks, Langbase is serverless and [the first composable AI platform][composable].
1. Start by building simple [AI agents (pipes)](/pipe)
2. Then train serverless semantic [Memory agents (RAG)](/memory) to get accurate and trusted results
<Img
caption="Langbase — The most powerful serverless AI Agents platform"
light="https://raw.githubusercontent.com/LangbaseInc/docs-images/refs/heads/main/langbase/why-langbase.jpg"
dark="https://raw.githubusercontent.com/LangbaseInc/docs-images/refs/heads/main/langbase/why-langbase.jpg"
/>
---
<Resources />
<Courses />
---
<Guides />
---
<Note sub="Join today">
**Langbase is free for anyone to [get started][signup]**.
We process billions of AI messages tokens daily, used by thousands of developers. [Tweet][x] us — what will you ship with Langbase?
It all [started][start] with a developer thinking … GPT is amazing, I want it everywhere, that's what ⌘ Langbase does for me.
</Note>
{/* <Features /> */}
[pipe]: /pipe
[memory]: /memory
[studio]: https://studio.langbase.com
[composable]: /composable-ai
[start]: https://langbase.fyi/starting-langbase
[signup]: https://langbase.fyi/awesome
[x]: https://twitter.com/LangbaseInc
[li]: https://www.linkedin.com/company/langbase/
[email]: mailto:support@langbase.com?subject=Pipe-Quickstart&body=Ref:%20https://langbase.com/docs/pipe/quickstart
[api]: /api-reference
[sdk]: /sdk
</content>
</doc>
<doc>
<metadata>
<title>Workflow</title>
<url>https://langbase.com/docs/workflow/</url>
</metadata>
<content>
import { generateMetadata } from '@/lib/generate-metadata';
<LanguageProvider defaultLanguage='typescript'>
# Workflow
Workflow, an AI Primitive by Langbase, helps you build multi-step agentic applications by breaking them into simple steps with built-in durable features like timeouts and retries.
Building AI applications often requires orchestrating multiple operations that depend on each other. Workflow enables you to:
- Orchestrate operations in both sequential and parallel execution patterns
- Create conditional execution paths based on previous step results
- Implement resilient processes with configurable retry strategies
- Set time boundaries to prevent operations from running indefinitely
- Track execution flow with detailed step-by-step logging
<CTAButtons
primary={{ href: '/sdk/workflow', text: 'Start with Langbase SDK' }}
/>
---
## Quickstart
This workflow example shows how to build a simple email processing workflow that summarizes the email, analyzes the sentiment, and determines if a response is needed.
## Step #1: Generate Langbase API key
Every request you send to Langbase needs an [API key](/api-reference/api-keys). This guide assumes you already have one. If not, please check the instructions below.
<Spoiler title="Get your Langbase API key: User or Org">
You can generate API keys from the [Langbase Studio](https://studio.langbase.com) by following these steps:
1. Switch to your user or org account.
2. From the sidebar, click on the `API keys`.
3. From here you can create a new API key or manage existing ones.
For more details, follow the [Langbase API keys](/api-reference/api-keys) documentation.
</Spoiler>
---
## Step #2: Setup your project [lang]
Create a new directory for your project and navigate to it.
<CodeGroup exampleTitle="Project setup" title="Project setup">
```bash {{ title: 'bash' }}
mkdir langbase-workflow
cd langbase-workflow
```
</CodeGroup>
### Initialize the project
<LanguageContent language="typescript">
Create a new Node.js project.
<CodeGroup exampleTitle="Initialize project" title="Initialize project">
```bash {{ title: 'npm' }}
npm init -y
```
```bash {{ title: 'pnpm' }}
pnpm init
```
```bash {{ title: 'yarn' }}
yarn init -y
```
</CodeGroup>
</LanguageContent>
<LanguageContent language="python">
Now let's create a new virtual environment and activate it.
<CodeGroup exampleTitle="Initialize project" title="Initialize project">
```bash {{ title: 'macOS/Linux' }}
python -m venv .venv && source .venv/bin/activate
```
```bash {{ title: 'Windows' }}
python -m venv .venv && .venv\Scripts\activate
```
</CodeGroup>
</LanguageContent>
### Install Langbase SDK
Install Langbase SDK:
<LanguageContent language="typescript">
<CodeGroup exampleTitle="Install the SDK" title="Install the SDK">
```bash {{ title: 'npm' }}
npm i langbase
```
```bash {{ title: 'pnpm' }}
pnpm i langbase
```
```bash {{ title: 'yarn' }}
yarn add langbase
```
</CodeGroup>
Install `dotenv` for environment variables and `@types/node` packages:
<CodeGroup exampleTitle="Install other dependencies" title="Install other dependencies">
```bash {{ title: 'npm' }}
npm i dotenv -D @types/node
```
```bash {{ title: 'pnpm' }}
pnpm i dotenv -D @types/node
```
```bash {{ title: 'yarn' }}
yarn add dotenv -D @types/node
```
</CodeGroup>
</LanguageContent>
<LanguageContent language="python">
<CodeGroup exampleTitle="Install the SDK" title="Install the SDK">
```bash {{ title: 'pip' }}
pip install langbase python-dotenv
```
</CodeGroup>
</LanguageContent>
### Create an env file
Create a new file called `.env` and paste the following code:
- `LANGBASE_API_KEY`: Your Langbase API key
- `LLM_API_KEY`: Your LLM API key
<CodeGroup exampleTitle="Set your API keys" title="Set your API keys">
```bash
LANGBASE_API_KEY=<USER/ORG_API_KEY>
LLM_API_KEY=<LLM_API_KEY>
```
</CodeGroup>
## Step #3: Create a new workflow
<LanguageContent language="typescript">
Create a new file called `workflow.ts` and paste the following code.
</LanguageContent>
<LanguageContent language="python">
Create a new file called `workflow.py` and paste the following code.
</LanguageContent>
In this example, we create an email processing workflow that summarizes the email, analyzes the sentiment, and determines if a response is needed.
Each step in the workflow requires at least:
1. An `id` to identify the step
2. A `run` function that contains the logic for the step
The `run` function can be an async function that returns a value or a promise. The retruned value will be available to the next step in the workflow.
<LanguageContent language="typescript">
<CodeGroup exampleTitle="workflow.ts" title="workflow.ts">
```ts
import 'dotenv/config';
import {Langbase} from 'langbase';
async function processEmail({emailContent}: {emailContent: string}) {
// Initialize Langbase
const langbase = new Langbase({
apiKey: process.env.LANGBASE_API_KEY!,
});
// Create a new workflow
const workflow = langbase.workflow({
debug: true,
});
const { step } = workflow;
try {
// Steps 1 & 2: Run summary and sentiment analysis in parallel
const [summary, sentiment] = await Promise.all([
step({
id: 'summarize_email', // The id for the step
run: async () => {
const { output } = await langbase.agent.run({
model: 'openai:gpt-4.1-mini',
instructions: `Create a concise summary of this email. Focus on the main points,
requests, and any action items mentioned.`,
apiKey: process.env.OPENAI_API_KEY!,
input: [{role: 'user', content: emailContent}],
stream: false,
});
return output;
},
}),
step({
id: 'analyze_sentiment',
run: async () => {
const { output } = await langbase.agent.run({
model: 'openai:gpt-4.1-mini',
instructions: `Analyze the sentiment of this email. Provide a brief analysis
that includes the overall tone (positive, neutral, or negative) and any notable
emotional elements.`,
apiKey: process.env.OPENAI_API_KEY!,
input: [{role: 'user', content: emailContent}],
stream: false,
});
return output;
},
}),
]);
// Step 3: Determine if response is needed (using the results from previous steps)
const responseNeeded = await step({
id: 'determine_response_needed',
run: async () => {
const { output } = await langbase.agent.run({
model: 'openai:gpt-4.1-mini',
instructions: `Based on the email summary and sentiment analysis, determine if a
response is needed. Answer with 'yes' if a response is required, or 'no' if no
response is needed. Consider factors like: Does the email contain a question?
Is there an explicit request? Is it urgent?`,
apiKey: process.env.OPENAI_API_KEY!,
input: [
{
role: 'user',
content: `Email: ${emailContent}\n\nSummary: ${summary}\n\nSentiment: ${sentiment}\n\nDoes this email
require a response?`,
},
],
stream: false,
});
return output.toLowerCase().includes('yes');
},
});
// Step 4: Generate response if needed
let response: string | null = null;
if (responseNeeded) {
response = await step({
id: 'generate_response',
run: async () => {
const { output } = await langbase.agent.run({
model: 'openai:gpt-4.1-mini',
instructions: `Generate a professional email response. Address all questions
and requests from the original email. Be helpful, clear, and maintain a
professional tone that matches the original email sentiment.`,
apiKey: process.env.OPENAI_API_KEY!,
input: [
{
role: 'user',
content: `Original Email: ${emailContent}\n\nSummary: ${summary}\n\n
Sentiment Analysis: ${sentiment}\n\nPlease draft a response email.`,
},
],
stream: false,
});
return output;
},
});
}
// Return the results
return {
summary,
sentiment,
responseNeeded,
response,
};
} catch (error) {
console.error('Email processing workflow failed:', error);
throw error;
} finally {
// Optional: Use to enable tracing
await workflow.end();
}
}
async function main() {
const sampleEmail = `
Subject: Pricing Information and Demo Request
Hello,
I came across your platform and I'm interested in learning more about your product
for our growing company. Could you please send me some information on your pricing tiers?
We're particularly interested in the enterprise tier as we now have a team of about
50 people who would need access. Would it be possible to schedule a demo sometime next week?
Thanks in advance for your help!
Best regards,
Jamie
`;
const results = await processEmail({emailContent: sampleEmail});
console.log(JSON.stringify(results, null, 2));
}
main();
````
</CodeGroup>
</LanguageContent>
<LanguageContent language="python">
<CodeGroup exampleTitle="workflow.py" title="workflow.py">
```py
import os
import json
import asyncio
from langbase import Langbase, Workflow
from dotenv import load_dotenv
load_dotenv()
async def process_email(email_content: str):
"""
Process an email through a workflow that includes:
1. Summarization
2. Sentiment analysis
3. Response need determination
4. Response generation (if needed)
"""
# Initialize Langbase
langbase = Langbase(api_key=os.getenv('LANGBASE_API_KEY'))
# Create a new workflow with debug enabled
workflow = Workflow(debug=True)
try:
# Steps 1 & 2: Run summary and sentiment analysis in parallel
async def summarize_email():
response = langbase.agent.run(
model='openai:gpt-4.1-mini',
instructions="""Create a concise summary of this email. Focus on the main points,
requests, and any action items mentioned.""",
api_key=os.getenv('OPENAI_API_KEY'),
input=[{'role': 'user', 'content': email_content}],
stream=False
)
return response['output']
async def analyze_sentiment():
response = langbase.agent.run(
model='openai:gpt-4.1-mini',
instructions="""Analyze the sentiment of this email. Provide a brief analysis
that includes the overall tone (positive, neutral, or negative) and any notable
emotional elements.""",
api_key=os.getenv('OPENAI_API_KEY'),
input=[{'role': 'user', 'content': email_content}],
stream=False
)
return response['output']
summary, sentiment = await asyncio.gather(
workflow.step({'id': 'summarize_email', 'run': summarize_email}),
workflow.step({'id': 'analyze_sentiment', 'run': analyze_sentiment})
)
# Step 3: Determine if response is needed (using the results from previous steps)
async def determine_response_needed():
response = langbase.agent.run(
model='openai:gpt-4.1-mini',
instructions="""Based on the email summary and sentiment analysis, determine if a
response is needed. Answer with 'yes' if a response is required, or 'no' if no
response is needed. Consider factors like: Does the email contain a question?
Is there an explicit request? Is it urgent?""",
api_key=os.getenv('OPENAI_API_KEY'),
input=[{
'role': 'user',
'content': f"""Email: {email_content}
Summary: {summary}
Sentiment: {sentiment}
Does this email require a response?"""
}],
stream=False
)
return 'yes' in response['output'].lower()
response_needed = await workflow.step({
'id': 'determine_response_needed',
'run': determine_response_needed
})
# Step 4: Generate response if needed
response = None
if response_needed:
async def generate_response():
response = langbase.agent.run(
model='openai:gpt-4.1-mini',
instructions="""Generate a professional email response. Address all questions
and requests from the original email. Be helpful, clear, and maintain a
professional tone that matches the original email sentiment.""",
api_key=os.getenv('OPENAI_API_KEY'),
input=[{
'role': 'user',
'content': f"""Original Email: {email_content}
Summary: {summary}
Sentiment Analysis: {sentiment}
Please draft a response email."""
}],
stream=False
)
return response['output']
response = await workflow.step({
'id': 'generate_response',
'run': generate_response
})
# Return the results
return {
'summary': summary,
'sentiment': sentiment,
'responseNeeded': response_needed,
'response': response
}
except Exception as error:
print(f'Email processing workflow failed: {error}')
raise error
async def main():
sample_email = """
Subject: Pricing Information and Demo Request
Hello,
I came across your platform and I'm interested in learning more about your product
for our growing company. Could you please send me some information on your pricing tiers?
We're particularly interested in the enterprise tier as we now have a team of about
50 people who would need access. Would it be possible to schedule a demo sometime next week?
Thanks in advance for your help!
Best regards,
Jamie
"""
results = await process_email(email_content=sample_email)
print(json.dumps(results, indent=2))
if __name__ == '__main__':
asyncio.run(main())
```
</CodeGroup>
</LanguageContent>
## Step #4: Run the workflow
<LanguageContent language="typescript">
<CodeGroup exampleTitle="Run the example" title="Run the example">
```bash
npx tsx workflow.ts
````
</CodeGroup>
</LanguageContent>
<LanguageContent language="python">
<CodeGroup exampleTitle="Run the example" title="Run the example">
```bash
python workflow.py
````
</CodeGroup>
</LanguageContent>
This workflow efficiently processes an email through multiple steps:
1. Email Summarization and Sentiment Analysis are run in parallel.
2. After the summary and sentiment analysis are complete, the response determination step is run.
3. If a response is needed, the response generation step is run.
By running sentiment analysis and response determination in parallel, we optimize the workflow's execution time without sacrificing functionality. Each step still has access to the data it needs from previous steps.
<CodeGroup exampleTitle="Workflow output" title="Workflow output">
```json
{
"summary": "The sender is interested in learning more about the product for their
company of about 50 people. They are requesting pricing information, particularly for
the enterprise tier, and would like to schedule a demo next week.",
"sentiment": "positive",
"responseNeeded": true,
"response": "Subject: RE: Pricing Information and Demo Request
Hello Jamie,
Thank you for your interest in our platform! I'd be happy to provide you with
information about our pricing tiers and arrange a demo for your team.
For an enterprise-level organization with 50 users, our Enterprise tier would indeed
be the most suitable option. This package includes:
- Unlimited access for all team members
- Advanced security features
- Dedicated account manager
- Custom integrations
- Priority support
I've attached our complete pricing brochure with detailed information about all our
plans. For your team size, we offer custom pricing with volume discounts.
Regarding the demo, I'd be delighted to schedule one for next week. Could you please
let me know what days and times work best for you and your team? Our demos typically
take about 45 minutes and include time for questions.
If you have any specific features or use cases you'd like us to focus on during the demo,
please let me know so I can tailor the presentation to your needs.
Looking forward to hearing from you and showing you how our platform can benefit your
growing company.
Best regards,
[Your Name]
[Your Position]
[Contact Information]"
}
```
</CodeGroup>
---
## Next Steps
- Build something cool with Langbase [APIs](/api-reference) and [SDK](/sdk).
- Join our [Discord community](https://langbase.com/discord) for feedback, requests, and support.
---
</LanguageProvider>
</content>
</doc>
<doc>
<metadata>
<title>Tools</title>
<url>https://langbase.com/docs/tools/</url>
</metadata>
<content>
import { generateMetadata } from '@/lib/generate-metadata';
<LanguageProvider defaultLanguage='typescript'>
# Tools
Tools, an AI Primitive by Langbase, allows you to extend the capabilities of your AI applications. They enable you to integrate functionality such as web search, crawling, and other specialized tasks into your AI workflows.
By using tools, you can enhance the performance and versatility of your AI agents, making them more capable of handling complex tasks and providing valuable insights.
<CTAButtons
primary={{ href: '/sdk/tools', text: 'Start with Langbase SDK' }}
secondary={{ href: '/api-reference/tools', text: 'API reference' }}
/>
---
## Quickstart: Using Langbase Tools
---
## Let's get started
In this guide, we'll use the Langbase SDK to interact with the Tools API, specifically focusing on web crawling and web search capabilities:
---
## Step #1: Generate Langbase API key
Every request you send to Langbase needs an [API key](/api-reference/api-keys). This guide assumes you already have one. If not, please check the instructions below.
<Spoiler title="Get your Langbase API key: User or Org">
You can generate API keys from the [Langbase Studio](https://studio.langbase.com) by following these steps:
1. Switch to your user or org account.
2. From the sidebar, click on the `API keys`.
3. From here you can create a new API key or manage existing ones.
</Spoiler>
<Note sub="External API Keys">
Some tools require external API keys. For this guide, you'll need:
- [Spider.cloud](https://spider.cloud) API key for web crawling
- [Exa](https://dashboard.exa.ai/api-keys) API key for web search
</Note>
---
## Step #2: Setup your project [lang]
Create a new directory for your project and navigate to it.
<CodeGroup exampleTitle="Project setup" title="Project setup">
```bash
mkdir langbase-tools && cd langbase-tools
```
</CodeGroup>
### Initialize the project
<LanguageContent language="typescript">
Create a new Node.js project.
<CodeGroup exampleTitle="Initialize project" title="Initialize project">
```bash {{ title: 'npm' }}
npm init -y
```
```bash {{ title: 'pnpm' }}
pnpm init
```
```bash {{ title: 'yarn' }}
yarn init -y
```
</CodeGroup>
</LanguageContent>
<LanguageContent language="python">
Now let's create a new virtual environment and activate it.
<CodeGroup exampleTitle="Initialize project" title="Initialize project">
```bash {{ title: 'macOS/Linux' }}
python -m venv .venv && source .venv/bin/activate
```
```bash {{ title: 'Windows' }}
python -m venv .venv && .venv\Scripts\activate
```
</CodeGroup>
</LanguageContent>
### Install dependencies
You will use the [Langbase SDK](/sdk) and `dotenv` to manage environment variables.
<LanguageContent language="typescript">
<CodeGroup exampleTitle="Install dependencies" title="Install dependencies">
```bash {{ title: 'npm' }}
npm i langbase dotenv
```
```bash {{ title: 'pnpm' }}
pnpm add langbase dotenv
```
```bash {{ title: 'yarn' }}
yarn add langbase dotenv
```
</CodeGroup>
</LanguageContent>
<LanguageContent language="python">
<CodeGroup exampleTitle="Install dependencies" title="Install dependencies">
```bash
pip install langbase python-dotenv
```
</CodeGroup>
</LanguageContent>
### Create an env file
Create a `.env` file in the root of your project and add your API keys:
```bash {{ title: '.env' }}
LANGBASE_API_KEY=your_langbase_api_key_here
SPIDER_CLOUD_API_KEY=your_spider_cloud_api_key_here
EXA_API_KEY=your_exa_api_key_here
```
---
## Step #3: Web Crawling with Langbase Tools
<LanguageContent language="typescript">
Let's create a file named `web-crawler.ts` that demonstrates how to use the web crawling tool:
<CodeGroup exampleTitle="Web Crawling" title="web-crawler.ts">
```ts {{ title: 'TypeScript' }}
import 'dotenv/config';
import { Langbase } from 'langbase';
const langbase = new Langbase({
apiKey: process.env.LANGBASE_API_KEY!,
});
async function main() {
// Use the crawl tool to extract content from these URLs
const crawlResults = await langbase.tools.crawl({
url: ['https://langbase.com', 'https://langbase.com/about'],
apiKey: process.env.SPIDER_CLOUD_API_KEY!,
maxPages: 1 // Limit the crawl to 1 pages
});
// Display the results
console.log(crawlResults);
}
main()
```
</CodeGroup>
</LanguageContent>
<LanguageContent language="python">
Let's create a file named `web-crawler.py` that demonstrates how to use the web crawling tool:
<CodeGroup exampleTitle="Web Crawling" title="web-crawler.py">
```python {{ title: 'Python' }}
import os
import json
from langbase import Langbase
from dotenv import load_dotenv
load_dotenv()
langbase = Langbase(api_key=os.getenv('LANGBASE_API_KEY'))
def main():
results = langbase.tools.crawl(
url=['https://langbase.com', 'https://langbase.com/about'],
max_pages=1,
api_key=os.getenv('CRAWL_KEY')
)
print(json.dumps(results, indent=2))
if __name__ == '__main__':
main()
```
</CodeGroup>
</LanguageContent>
---
## Step #4: Run the web crawler
Run the script to crawl the specified websites:
<LanguageContent language="typescript">
<CodeGroup exampleTitle="Run the crawler" title="Run the crawler">
```bash {{ title: 'npm' }}
npx tsx web-crawler.ts
```
```bash {{ title: 'pnpm' }}
pnpm dlx tsx web-crawler.ts
```
</CodeGroup>
</LanguageContent>
<LanguageContent language="python">
<CodeGroup exampleTitle="Run the crawler" title="Run the crawler">
```bash
python web-crawler.py
```
</CodeGroup>
</LanguageContent>
You should see output showing the crawled URLs and extracted content:
```js
[
{
"url": "https://langbase.com/about",
"content": "⌘Langbase –Serverless AI Agents platform# # ⌘Langbase –Serverless AI Agents platformThe most powerful serverless platform for building AI agents. Build. Deploy. Scale."
},
{
"url": "https://langbase.com",
"content": "⌘Langbase –Serverless AI Agents platform# # ⌘Langbase –Serverless AI Agents platformThe most powerful serverless platform for building AI agents. Build. Deploy. Scale."
}
]
```
---
## Step #5: Web Search with Langbase Tools
<LanguageContent language="typescript">
Now, let's create a file named `web-search.ts` that demonstrates how to use the web search tool:
<CodeGroup exampleTitle="Web Search" title="web-search.ts">
```ts {{ title: 'TypeScript' }}
import 'dotenv/config';
import { Langbase } from 'langbase';
const langbase = new Langbase({
apiKey: process.env.LANGBASE_API_KEY!,
});
async function main() {
// Perform a web search query
const results = await langbase.tools.webSearch({
service: 'exa',
totalResults: 2,
query: 'What is Langbase?',
domains: ['https://langbase.com'],
apiKey: process.env.EXA_API_KEY!, // Find Exa key: https://dashboard.exa.ai/api-keys
});
console.log(results);
}
main()
```
</CodeGroup>
</LanguageContent>
<LanguageContent language="python">
Now, let's create a file named `web-search.py` that demonstrates how to use the web search tool:
<CodeGroup exampleTitle="Web Search" title="web-search.py">
```python {{ title: 'Python' }}
import json
import os
from dotenv import load_dotenv
from langbase import Langbase
load_dotenv()
def main():
langbase_api_key = os.getenv("LANGBASE_API_KEY")
search_api_key = os.getenv("EXA_API_KEY")
langbase = Langbase(api_key=langbase_api_key)
search_results = langbase.tools.web_search(
query="What is Langbase?",
service="exa",
total_results=2,
domains=["https://langbase.com"],
api_key=search_api_key,
)
print(json.dumps(search_results, indent=2))
if __name__ == "__main__":
main()
```
</CodeGroup>
</LanguageContent>
---
## Step #6: Run the web search [lang]
Run the script to perform web searches:
<LanguageContent language="typescript">
<CodeGroup exampleTitle="Run the search" title="Run the search">
```bash {{ title: 'npm' }}
npx tsx web-search.ts
```
```bash {{ title: 'pnpm' }}
pnpm dlx tsx web-search.ts
```
</CodeGroup>
</LanguageContent>
<LanguageContent language="python">
<CodeGroup exampleTitle="Run the search" title="Run the search">
```bash
python web-search.py
```
</CodeGroup>
</LanguageContent>
You should see output showing the search results:
```js
[
{
"url": "https://langbase.com/",
"content": "The most powerful serverless platform for building AI products. Build agentic AI agents with pipes, memory and tools."
},
{
"url": "https://langbase.com/about",
"content": "The most powerful serverless platform for building AI products. Build agentic AI agents with pipes, memory and tools."
}
]
```
---
## Next Steps
- Combine tools with other Langbase primitives like Embed and Chunk to build more powerful AI apps
- Use these tools to enhance your RAG (Retrieval-Augmented Generation) systems with real-time web data
- Build something cool with Langbase [SDK](/sdk) and [APIs](/api-reference)
- Join our [Discord community](https://langbase.com/discord) for feedback, requests, and support
---
</LanguageProvider>
</content>
</doc>
<doc>
<metadata>
<title>Supported Models and Providers</title>
<url>https://langbase.com/docs/supported-models-and-providers/</url>
</metadata>
<content>
import { generateMetadata } from '@/lib/generate-metadata';
# Supported Models and Providers
<div className="mt-6 text-xl leading-8">
Langbase supports a wide range of latest Large Language Models (LLMs) and providers. We are continuously adding support for the latest models as they are released. Here are some of the models and providers supported by Langbase.
</div>
## Supported LLM Providers
We currently support the following LLM providers.
- [OpenAI](#open-ai)
- [Anthropic](#anthropic)
- [Google AI](#google-ai)
- [Together](#together)
- [Fireworks AI](#fireworks-ai)
- [Groq](#groq)
- [Deepseek](#deepseek)
- [Perplexity](#perplexity)
- [Mistral AI](#mistral-ai)
- [Cohere](#cohere)
- [xAI](#x-ai)
- [Azure OpenAI](#azure-open-ai)
- [OpenRouter](#open-router)
You can use any of these providers to build your Pipe, by adding your provider's key. Please feel free to request any specific provider you would like to use.
---
## Supported LLM Models
We support the following LLM models from the above providers. Please feel free to request any specific model you would like to use.
## OpenAI
| Model | Provider | Owner | Context | Cost* |
|---------------------------------------------------------------------------------------|----------|--------|---------|----------------------------------------------|
| gpt-5.6-sol <br/> ID: <InlineCopy content="openai:gpt-5.6-sol" /> | OpenAI | OpenAI | 1M | $5 prompt <br/> $30 completion |
| gpt-5.6-terra <br/> ID: <InlineCopy content="openai:gpt-5.6-terra" /> | OpenAI | OpenAI | 1M | $2.5 prompt <br/> $15 completion |
| gpt-5.6-luna <br/> ID: <InlineCopy content="openai:gpt-5.6-luna" /> | OpenAI | OpenAI | 1M | $1 prompt <br/> $6 completion |
| gpt-5.5 <br/> ID: <InlineCopy content="openai:gpt-5.5-2026-04-23" /> | OpenAI | OpenAI | 1M | $5 prompt <br/> $30 completion |
| gpt-5.4 <br/> ID: <InlineCopy content="openai:gpt-5.4-2026-03-05" /> | OpenAI | OpenAI | 1M | $2.5 prompt <br/> $15 completion |
| gpt-5.4-mini <br/> ID: <InlineCopy content="openai:gpt-5.4-mini-2026-03-17" /> | OpenAI | OpenAI | 400,000 | $0.75 prompt <br/> $4.5 completion |
| gpt-5.4-nano <br/> ID: <InlineCopy content="openai:gpt-5.4-nano-2026-03-17" /> | OpenAI | OpenAI | 400,000 | $0.2 prompt <br/> $1.25 completion |
| gpt-5.2 <br/> ID: <InlineCopy content="openai:gpt-5.2-2025-12-11" /> | OpenAI | OpenAI | 400,000 | $1.75 prompt <br/> $14 completion |
| gpt-5.1-chat-latest <br/> ID: <InlineCopy content="openai:gpt-5.1-chat-latest" /> | OpenAI | OpenAI | 128,000 | $1.25 prompt <br/> $10 completion |
| gpt-5.1 <br/> ID: <InlineCopy content="openai:gpt-5.1-2025-11-13" /> | OpenAI | OpenAI | 400,000 | $1.25 prompt <br/> $10 completion |
| gpt-5 <br/> ID: <InlineCopy content="openai:gpt-5-2025-08-07" /> | OpenAI | OpenAI | 400,000 | $1.25 prompt <br/> $10 completion |
| gpt-5-chat <br/> ID: <InlineCopy content="openai:gpt-5-chat-latest" /> | OpenAI | OpenAI | 400,000 | $1.25 prompt <br/> $10 completion |
| gpt-5-mini <br/> ID: <InlineCopy content="openai:gpt-5-mini-2025-08-07" /> | OpenAI | OpenAI | 400,000 | $0.25 prompt <br/> $2 completion |
| gpt-5-nano <br/> ID: <InlineCopy content="openai:gpt-5-nano-2025-08-07" /> | OpenAI | OpenAI | 400,000 | $0.05 prompt <br/> $0.4 completion |
| o3 <br/> ID: <InlineCopy content="openai:o3" /> | OpenAI | OpenAI | 200,000 | $2 prompt <br/> $8 completion |
| o4-mini <br/> ID: <InlineCopy content="openai:o4-mini" /> | OpenAI | OpenAI | 200,000 | $1.1 prompt <br/> $4.4 completion |
| o3-mini <br/> ID: <InlineCopy content="openai:o3-mini" /> | OpenAI | OpenAI | 200,000 | $1.1 prompt <br/> $4.4 completion |
| o1 <br/> ID: <InlineCopy content="openai:o1" /> | OpenAI | OpenAI | 200,000 | $15.0 prompt <br/> $60.0 completion |
| o1-preview <br/> ID: <InlineCopy content="openai:o1-preview" /> | OpenAI | OpenAI | 128,000 | $15.0 prompt <br/> $60.0 completion |
| o1-mini <br/> ID: <InlineCopy content="openai:o1-mini" /> | OpenAI | OpenAI | 128,000 | $3.0 prompt <br/> $12.0 completion |
| gpt-4.1 <br/> ID: <InlineCopy content="openai:gpt-4.1" /> | OpenAI | OpenAI | 1M | $2 prompt <br/> $8.0 completion |
| gpt-4.1-mini <br/> ID: <InlineCopy content="openai:gpt-4.1-mini" /> | OpenAI | OpenAI | 1M | $0.4 prompt <br/> $1.6 completion |
| gpt-4.1-nano <br/> ID: <InlineCopy content="openai:gpt-4.1-nano" /> | OpenAI | OpenAI | 1M | $0.1 prompt <br/> $0.4 completion |
| gpt-4o <br/> ID: <InlineCopy content="openai:gpt-4o" /> | OpenAI | OpenAI | 128,000 | $2.5 prompt <br/> $10.0 completion |
| chatgpt-4o-latest <br/> ID: <InlineCopy content="openai:chatgpt-4o-latest" /> | OpenAI | OpenAI | 128,000 | $5 prompt <br/> $15.0 completion |
| gpt-4o-2024-08-06 <br/> ID: <InlineCopy content="openai:gpt-4o-2024-08-06" /> | OpenAI | OpenAI | 128,000 | $2.5 prompt <br/> $10.0 completion |
| gpt-4o-mini <br/> ID: <InlineCopy content="openai:gpt-4o-mini" /> | OpenAI | OpenAI | 128,000 | $0.15 prompt <br/> $0.6 completion |
| gpt-4-turbo <br/> ID: <InlineCopy content="openai:gpt-4-turbo" /> | OpenAI | OpenAI | 128,000 | $10.0 prompt <br/> $30.0 completion |
| gpt-4-turbo-preview <br/> ID: <InlineCopy content="openai:gpt-4-turbo-preview" /> | OpenAI | OpenAI | 128,000 | $10.0 prompt <br/> $30.0 completion |
| gpt-4-0125-preview <br/> ID: <InlineCopy content="openai:gpt-4-0125-preview" /> | OpenAI | OpenAI | 128,000 | $10.0 prompt <br/> $30.0 completion |
| gpt-4-1106-preview <br/> ID: <InlineCopy content="openai:gpt-4-1106-preview" /> | OpenAI | OpenAI | 128,000 | $10.0 prompt <br/> $30.0 completion |
| gpt-4 <br/> ID: <InlineCopy content="openai:gpt-4" /> | OpenAI | OpenAI | 8,192 | $30.0 prompt <br/> $60.0 completion |
| gpt-4-0613 <br/> ID: <InlineCopy content="openai:gpt-4-0613" /> | OpenAI | OpenAI | 8,192 | $30.0 prompt <br/> $60.0 completion |
| gpt-4-32k <br/> ID: <InlineCopy content="openai:gpt-4-32k" /> | OpenAI | OpenAI | 32,768 | $60.0 prompt <br/> $120.0 completion |
| gpt-3.5-turbo-0125 <br/> ID: <InlineCopy content="openai:gpt-3.5-turbo-0125" /> | OpenAI | OpenAI | 16,385 | $0.5 prompt <br/> $1.5 completion |
| gpt-3.5-turbo-1106 <br/> ID: <InlineCopy content="openai:gpt-3.5-turbo-1106" /> | OpenAI | OpenAI | 16,385 | $1.0 prompt <br/> $2.0 completion |
| gpt-3.5-turbo <br/> ID: <InlineCopy content="openai:gpt-3.5-turbo" /> | OpenAI | OpenAI | 4,096 | $1.5 prompt <br/> $2.0 completion |
| gpt-3.5-turbo-16k <br/> ID: <InlineCopy content="openai:gpt-3.5-turbo-16k" /> | OpenAI | OpenAI | 16,385 | $3.0 prompt <br/> $4.0 completion |
<span className='text-xs'>* USD per Million tokens</span>
## Anthropic
| Model | Provider | Owner | Context | Cost* |
|--------------------------------------------------------------------------------------------|-----------|-----------|---------|---------------------------------------------|
| claude-opus-4.8 <br/> ID: <InlineCopy content="anthropic:claude-opus-4-8" /> | Anthropic | Anthropic | 1M | $5 prompt <br/> $25 completion |
| claude-opus-4.7 <br/> ID: <InlineCopy content="anthropic:claude-opus-4-7" /> | Anthropic | Anthropic | 1M | $5 prompt <br/> $25 completion |
| claude-opus-4.6 <br/> ID: <InlineCopy content="anthropic:claude-opus-4-6" /> | Anthropic | Anthropic | 1M | $5 prompt <br/> $25 completion |
| claude-sonnet-5 <br/> ID: <InlineCopy content="anthropic:claude-sonnet-5" /> | Anthropic | Anthropic | 1M | $3 prompt <br/> $15 completion |
| claude-sonnet-4.6 <br/> ID: <InlineCopy content="anthropic:claude-sonnet-4-6" /> | Anthropic | Anthropic | 1M | $3 prompt <br/> $15 completion |
| claude-opus-4.5 <br/> ID: <InlineCopy content="anthropic:claude-opus-4-5-20251115" /> | Anthropic | Anthropic | 200K | $5 prompt <br/> $25 completion |
| claude-haiku-4.5 <br/> ID: <InlineCopy content="anthropic:claude-haiku-4-5-20251001" /> | Anthropic | Anthropic | 200K | $1 prompt <br/> $5 completion |
| claude-opus-4-20250514 <br/> ID: <InlineCopy content="anthropic:claude-opus-4-20250514" /> | Anthropic | Anthropic | 200K | $15 prompt <br/> $75 completion |
| claude-sonnet-4-20250514 <br/> ID: <InlineCopy content="anthropic:claude-sonnet-4-20250514" /> | Anthropic | Anthropic | 200K | $3 prompt <br/> $15 completion |
| claude-3.7-sonnet-latest <br/> ID: <InlineCopy content="anthropic:claude-3-7-sonnet-latest" /> | Anthropic | Anthropic | 200K | $3 prompt <br/> $15 completion |
| claude-3.7-sonnet-20250219 <br/> ID: <InlineCopy content="anthropic:claude-3-7-sonnet-20250219" /> | Anthropic | Anthropic | 200K | $3 prompt <br/> $15 completion |
| claude-3.5-sonnet-latest <br/> ID: <InlineCopy content="anthropic:claude-3-5-sonnet-latest" /> | Anthropic | Anthropic | 200K | $3 prompt <br/> $15 completion |
| claude-3-5-haiku-20241022 <br/> ID: <InlineCopy content="anthropic:claude-3-5-haiku-20241022" /> | Anthropic | Anthropic | 200K | $1 prompt <br/> $5 completion |
| claude-3.5-sonnet-20240620 <br/> ID: <InlineCopy content="anthropic:claude-3-5-sonnet-20240620" /> | Anthropic | Anthropic | 200K | $3 prompt <br/> $15 completion |
| claude-3-opus <br/> ID: <InlineCopy content="anthropic:claude-3-opus-20240229" /> | Anthropic | Anthropic | 200K | $15 prompt <br/> $75 completion |
| claude-3-sonnet <br/> ID: <InlineCopy content="anthropic:claude-3-sonnet-20240229" /> | Anthropic | Anthropic | 200K | $3 prompt <br/> $15 completion |
| claude-3-haiku <br/> ID: <InlineCopy content="anthropic:claude-3-haiku-20240307" /> | Anthropic | Anthropic | 200K | $0.25 prompt <br/> $1.25 completion |
<span className='text-xs'>* USD per Million tokens</span>
## Google AI
| Model | Provider | Owner | Context | Cost* |
|-----------------------------------------------------------------------------------------------------------------------|----------|--------|---------|-----------------------------------------------|
| gemini-3.1-pro-preview <br/> ID: <InlineCopy content="google:gemini-3.1-pro-preview" /> | Google | Google | 1M | $2 prompt <br/> $12 completion |
| gemini-3.8-flash <br/> ID: <InlineCopy content="google:gemini-3.8-flash" /> | Google | Google | 1M | $0.75 prompt <br/> $3.75 completion |
| gemini-3.7-flash <br/> ID: <InlineCopy content="google:gemini-3.7-flash" /> | Google | Google | 1M | $0.75 prompt <br/> $3.75 completion |
| gemini-3.6-flash <br/> ID: <InlineCopy content="google:gemini-3.6-flash" /> | Google | Google | 1M | $0.75 prompt <br/> $3.75 completion |
| gemini-3.5-flash <br/> ID: <InlineCopy content="google:gemini-3.5-flash" /> | Google | Google | 1M | $1.5 prompt <br/> $9 completion |
| gemini-3.5-flash-lite <br/> ID: <InlineCopy content="google:gemini-3.5-flash-lite" /> | Google | Google | 1M | $0.3 prompt <br/> $2.5 completion |
| gemini-3-pro-preview <br/> ID: <InlineCopy content="google:gemini-3-pro-preview" /> | Google | Google | 1M | $2 prompt <br/> $12 completion |
| gemini-3-flash-preview <br/> ID: <InlineCopy content="google:gemini-3-flash-preview" /> | Google | Google | 1M | $0.15 prompt <br/> $0.6 completion |
| gemini-2.5-pro <br/> ID: <InlineCopy content="google:gemini-2.5-pro" /> | Google | Google | 1M | $1.25 prompt <br/> $10 completion |
| gemini-2.5-flash <br/> ID: <InlineCopy content="google:gemini-2.5-flash" /> | Google | Google | 1M | $0.3 prompt <br/> $2.5 completion |
| gemini-2.5-flash-lite-preview-06-17 <br/> ID: <InlineCopy content="google:gemini-2.5-flash-lite-preview-06-17" /> | Google | Google | 1M | $0.1 prompt <br/> $0.4 completion |
| gemini-2.5-pro-preview-06-05 <br/> ID: <InlineCopy content="google:gemini-2.5-pro-preview-06-05" /> | Google | Google | 1M | $1.25 prompt <br/> $10 completion |
| gemini-2.5-pro-preview-05-06 <br/> ID: <InlineCopy content="google:gemini-2.5-pro-preview-05-06" /> | Google | Google | 1M | $1.25 prompt <br/> $10 completion |
| gemini-2.5-flash-preview-05-20 <br/> ID: <InlineCopy content="google:gemini-2.5-flash-preview-05-20" /> | Google | Google | 1M | $0.15 prompt <br/> $3.50 completion |
| gemini-2.5-flash-preview-04-17 <br/> ID: <InlineCopy content="google:gemini-2.5-flash-preview-04-17" /> | Google | Google | 1M | $0.15 prompt <br/> $3.50 completion |
| gemini-2.5-pro-preview-03-25 <br/> ID: <InlineCopy content="google:gemini-2.5-pro-preview-03-25" /> | Google | Google | 1M | $1.25 prompt <br/> $10 completion |
| gemini-2.0-flash <br/> ID: <InlineCopy content="google:gemini-2.0-flash" /> | Google | Google | 1M | $0.1 prompt <br/> $0.4 completion |
| gemini-2.0-flash-lite <br/> ID: <InlineCopy content="google:gemini-2.0-flash-lite" /> | Google | Google | 1M | $0.075 prompt <br/> $0.3 completion |
| gemini-1.5-pro <br/> ID: <InlineCopy content="google:gemini-1.5-pro-latest" /> | Google | Google | up to 1M | $7 prompt <br/> $21 completion |
| gemini-1.5-flash <br/> ID: <InlineCopy content="google:gemini-1.5-flash-latest" /> | Google | Google | up to 1M | $0.075 prompt <br/> $0.3 completion |
| gemini-1.5-flash-8b <br/> ID: <InlineCopy content="google:gemini-1.5-flash-8b-latest" /> | Google | Google | up to 1M | $0.0375 prompt <br/> $0.15 completion |
| gemini-1.0-pro <br/> ID: <InlineCopy content="google:gemini-pro" /> | Google | Google | 30,720 | $0.5 prompt <br/> $1.5 completion |
<span className='text-xs'>* USD per Million tokens</span>
## OpenRouter
| Model | Provider | Owner | Context | Cost* |
|------------------------------------------------------------------------------------------------------------------------------------|------------|------------|---------|----------------------------------------------|
| anthropic/claude-3.7-sonnet <br/> ID: <InlineCopy content="openrouter:anthropic/claude-3.7-sonnet" /> | OpenRouter | Anthropic | 200,000 | $3 prompt <br/> $5 completion |
| grok-4 <br/> ID: <InlineCopy content="openrouter:xai/grok-4" /> | OpenRouter | xAI | 256,000 | $3 prompt <br/> $15 completion |
| anthropic/claude-3.7-sonnet:thinking <br/> ID: <InlineCopy content="openrouter:anthropic/claude-3.7-sonnet:thinking" /> | OpenRouter | Anthropic | 200,000 | $3 prompt <br/> $15 completion |
| mistralai/magistral-medium-2506:thinking <br/> ID: <InlineCopy content="openrouter:mistralai/magistral-medium-2506:thinking" /> | OpenRouter | Mistral | 40K | $2 prompt <br/> $5 completion |
| openai/o1-pro <br/> ID: <InlineCopy content="openrouter:openai/o1-pro" /> | OpenRouter | OpenAI | 200,000 | $150 prompt <br/> $600 completion |
| anthropic/claude-3.5-sonnet <br/> ID: <InlineCopy content="openrouter:anthropic/claude-3.5-sonnet" /> | OpenRouter | Anthropic | 200,000 | $3 prompt <br/> $15 completion |
| xai/grok-3-beta <br/> ID: <InlineCopy content="openrouter:xai/grok-3-beta" /> | xAI | xAI | 131,072 | $3 prompt <br/> $15 completion |
| xai/grok-3-mini-beta <br/> ID: <InlineCopy content="openrouter:xai/grok-3-mini-beta" /> | xAI | xAI | 131,072 | $0.3 prompt <br/> $0.5 completion |
| cohere/command-a <br/> ID: <InlineCopy content="openrouter:cohere/command-a" /> | OpenRouter | Cohere | 256,000 | $2.5 prompt <br/> $10 completion |
| perplexity/sonar-deep-research <br/> ID: <InlineCopy content="openrouter:perplexity/sonar-deep-research" /> | OpenRouter | Perplexity | 200,000 | $2 prompt <br/> $8 completion |
| deepseek/deepseek-r1:free <br/> ID: <InlineCopy content="openrouter:deepseek/deepseek-r1:free" /> | OpenRouter | DeepSeek | 164,000 | $0 prompt <br/> $0 completion |
| deepseek-chat-v3-0324:free <br/> ID: <InlineCopy content="openrouter:deepseek-chat-v3-0324:free" /> | OpenRouter | DeepSeek | 131,000 | $0 prompt <br/> $0 completion |
| deepseek-chat-v3-0324 <br/> ID: <InlineCopy content="openrouter:deepseek-chat-v3-0324" /> | OpenRouter | DeepSeek | 131,000 | $0.27 prompt <br/> $1.1 completion |
| google/gemini-2.0-flash-001 <br/> ID: <InlineCopy content="openrouter:google/gemini-2.0-flash-001" /> | OpenRouter | Google | 1M | $0.1 prompt <br/> $0.4 completion |
| google/gemma-3-27b-it:free <br/> ID: <InlineCopy content="openrouter:google/gemma-3-27b-it:free" /> | OpenRouter | Google | 96,000 | $0 prompt <br/> $0 completion |
| mistralai/mistral-nemo <br/> ID: <InlineCopy content="openrouter:mistralai/mistral-nemo" /> | OpenRouter | Mistral | 131K | $0.035 prompt <br/> $0.08 completion |
<span className='block text-xs'>* USD per Million tokens</span>
## Together
| Model | Provider | Owner | Context | Cost* |
|----------------------------------------------------------------------------------------------------------------------------------------|----------|------------|---------|----------------------------------------------------|
| Moonshot Kimi K2 <br/> ID: <InlineCopy content="together:moonshotai/Kimi-K2-Instruct" /> | Together | Moonshot | 131,072 | $1 prompt <br/> $3 completion |
| Llama-4-Maverick-17B-128E-Instruct-FP8 <br/> ID: <InlineCopy content="together:meta-llama/Llama-4-Maverick-17B-128E-Instruct-FP8" /> | Together | Meta | 500,000 | $0.27 prompt <br/> $0.85 completion |
| Llama-4-Scout-17B-16E-Instruct <br/> ID: <InlineCopy content="together:meta-llama/Llama-4-Scout-17B-16E-Instruct" /> | Together | Meta | 300,000 | $0.18 prompt <br/> $0.59 completion |
| Llama-3.3-70B-Instruct-Turbo <br/> ID: <InlineCopy content="together:meta-llama/Llama-3.3-70B-Instruct-Turbo" /> | Together | Meta | 131,072 | $0.88 prompt <br/> $0.88 completion |
| Llama-3.2-90B-Vision-Instruct-Turbo <br/> ID: <InlineCopy content="together:meta-llama/Llama-3.2-90B-Vision-Instruct-Turbo" /> | Together | Meta | 128,000 | $1.2 prompt <br/> $1.2 completion |
| Llama-3.2-11B-Vision-Instruct-Turbo <br/> ID: <InlineCopy content="together:meta-llama/Llama-3.2-11B-Vision-Instruct-Turbo" /> | Together | Meta | 128,000 | $0.18 prompt <br/> $0.18 completion |
| Qwen2.5-VL-72B-Instruct <br/> ID: <InlineCopy content="together:Qwen/Qwen2.5-VL-72B-Instruct" /> | Together | Qwen | 131,072 | $1.95 prompt <br/> $8 completion |
| deepseek-v3 <br/> ID: <InlineCopy content="together:deepseek-ai/DeepSeek-V3" /> | Together | Deepseek | 131,072 | $1.25 prompt <br/> $1.25 completion |
| Llama-3.1-405B-Instruct-Turbo <br/> ID: <InlineCopy content="together:meta-llama/Meta-Llama-3.1-405B-Instruct-Turbo" /> | Together | Meta | 4,096 | $5 prompt <br/> $5 completion |
| Qwen2.5-72b <br/> ID: <InlineCopy content="together:Qwen/Qwen2.5-72B-Instruct-Turbo" /> | Together | Qwen | 32,768 | $0.9 prompt <br/> $0.9 completion |
| Llama-3.1-70B-Instruct-Turbo <br/> ID: <InlineCopy content="together:meta-llama/Meta-Llama-3.1-70B-Instruct-Turbo" /> | Together | Meta | 8,192 | $0.88 prompt <br/> $0.88 completion |
| Llama-3.1-8B-Instruct-Turbo <br/> ID: <InlineCopy content="together:meta-llama/Meta-Llama-3.1-8B-Instruct-Turbo" /> | Together | Meta | 8,192 | $0.18 prompt <br/> $0.18 completion |
| Llama-3-70b-chat-hf <br/> ID: <InlineCopy content="together:meta-llama/Llama-3-70b-chat-hf" /> | Together | Meta | 8,192 | $0.9 prompt <br/> $0.9 completion |
| Llama-3-8b-chat-hf <br/> ID: <InlineCopy content="together:meta-llama/Llama-3-8b-chat-hf" /> | Together | Meta | 8,192 | $0.2 prompt <br/> $0.2 completion |
| Llama-2-13b-chat-hf <br/> ID: <InlineCopy content="together:meta-llama/Llama-2-13b-chat-hf" /> | Together | Meta | 4,096 | $0.225 prompt <br/> $0.225 completion |
| gemma-2b-it <br/> ID: <InlineCopy content="together:google/gemma-2b-it" /> | Together | Google | 8,192 | $0.1 prompt <br/> $0.1 completion |
| 7B-Instruct-v0.1 <br/> ID: <InlineCopy content="together:mistralai/Mistral-7B-Instruct-v0.1" /> | Together | Mistral | 4,096 | $0.2 prompt <br/> $0.2 completion |
| 7B-Instruct-v0.2 <br/> ID: <InlineCopy content="together:mistralai/Mistral-7B-Instruct-v0.2" /> | Together | Mistral | 32,768 | $0.2 prompt <br/> $0.2 completion |
| Mixtral-8x7B-Instruct-v0.1 <br/> ID: <InlineCopy content="together:mistralai/Mixtral-8x7B-Instruct-v0.1" /> | Together | Mistral | 32,768 | $0.6 prompt <br/> $0.6 completion |
| Mixtral-8x22B-Instruct-v0.1 <br/> ID: <InlineCopy content="together:mistralai/Mixtral-8x22B-Instruct-v0.1" /> | Together | Mistral | 64,000 | $1.2 prompt <br/> $1.2 completion |
| DBRX-instruct <br/> ID: <InlineCopy content="together:databricks/dbrx-instruct" /> | Together | Databricks | 32,768 | $1.2 prompt <br/> $1.2 completion |
<span className='text-xs'>* USD per Million tokens</span>
## Fireworks AI
| Model | Provider | Owner | Context | Cost* |
|-------------------------------------------------------------------------------------------------|--------------|----------|---------|--------------------------------------------------|
| Llama 4 Maverick Instruct (Basic) <br/> ID: <InlineCopy content="fireworks:llama4-maverick-instruct-basic" /> | Fireworks AI | Meta | 1M | $0.22 prompt <br/> $0.88 completion |
| Llama 4 Scout Instruct (Basic) <br/> ID: <InlineCopy content="fireworks:llama4-scout-instruct-basic" /> | Fireworks AI | Meta | 128,000 | $0.15 prompt <br/> $0.60 completion |
| Llama 3.3 70B Instruct <br/> ID: <InlineCopy content="fireworks:llama-v3p3-70b-instruct" /> | Fireworks AI | Meta | 131,072 | $0.9 prompt <br/> $0.9 completion |
| deepseek-v3 <br/> ID: <InlineCopy content="fireworks:deepseek-v3" /> | Fireworks AI | Deepseek | 131,072 | $0.9 prompt <br/> $0.9 completion |
| Llama-3.2-3b <br/> ID: <InlineCopy content="fireworks:llama-v3p2-3b-instruct" /> | Fireworks AI | Meta | 131,072 | $0.1 prompt <br/> $0.1 completion |
| Llama-3.2-1b <br/> ID: <InlineCopy content="fireworks:llama-v3p2-1b-instruct" /> | Fireworks AI | Meta | 131,072 | $0.1 prompt <br/> $0.1 completion |
| Llama-3.1-405b <br/> ID: <InlineCopy content="fireworks:llama-v3p1-405b-instruct" /> | Fireworks AI | Meta | 131,072 | $3 prompt <br/> $3 completion |
| Qwen2.5-72b <br/> ID: <InlineCopy content="fireworks:qwen2p5-72b-instruct" /> | Fireworks AI | Qwen | 32,768 | $0.9 prompt <br/> $0.9 completion |
| Llama-3.1-70b <br/> ID: <InlineCopy content="fireworks:llama-v3p1-70b-instruct" /> | Fireworks AI | Meta | 131,072 | $0.9 prompt <br/> $0.9 completion |
| Llama-3.1-8b <br/> ID: <InlineCopy content="fireworks:llama-v3p1-8b-instruct" /> | Fireworks AI | Meta | 131,072 | $0.2 prompt <br/> $0.2 completion |
| yi-large <br/> ID: <InlineCopy content="fireworks:yi-large" /> | Fireworks AI | 01.AI | 32,768 | $3 prompt <br/> $3 completion |
| Llama-3-70b <br/> ID: <InlineCopy content="fireworks:llama-v3-70b-instruct" /> | Fireworks AI | Meta | 8,192 | $0.9 prompt <br/> $0.9 completion |
<span className='text-xs'>* USD per Million tokens</span>
## Groq
| Model | Provider | Owner | Context | Cost* |
|--------------------------------------------------------------------------------------------------------------------------|----------|----------|---------|----------------------------------------------------|
| Moonshot Kimi K2 <br/> ID: <InlineCopy content="groq:moonshotai/kimi-k2-instruct" /> | Groq | Moonshot | 131,072 | $1 prompt <br/> $3 completion |
| Llama-4-Maverick-17B-128E-Instruct <br/> ID: <InlineCopy content="groq:meta-llama/llama-4-maverick-17b-128e-instruct" /> | Groq | Meta | 131,000 | $0.11 prompt <br/> $0.34 completion |
| Llama-4-Scout-17B-16E-Instruct <br/> ID: <InlineCopy content="groq:meta-llama/llama-4-scout-17b-16e-instruct" /> | Groq | Meta | 131,000 | $0.50 prompt <br/> $0.77 completion |
| qwen3-32b <br/> ID: <InlineCopy content="groq:qwen/qwen3-32b" /> | Groq | Qwen | 131,072 | $0.29 prompt <br/> $0.59 completion |
| Llama-3.3-70b-versatile <br/> ID: <InlineCopy content="groq:llama-3.3-70b-versatile" /> | Groq | Meta | 128,000 | $0.59 prompt <br/> $0.79 completion |
| deepseek-r1-distill-llama-70b <br/> ID: <InlineCopy content="groq:deepseek-r1-distill-llama-70b" /> | Groq | DeepSeek | 128,000 | $0.75 prompt <br/> $0.99 completion |
| Llama-3.1-70b-versatile <br/> ID: <InlineCopy content="groq:llama-3.1-70b-versatile" /> | Groq | Meta | 131,072 | $0.59 prompt <br/> $0.79 completion |
| Llama-3.1-8b-instant <br/> ID: <InlineCopy content="groq:llama-3.1-8b-instant" /> | Groq | Meta | 131,072 | $0.59 prompt <br/> $0.79 completion |
| Llama-3-70b <br/> ID: <InlineCopy content="groq:llama3-70b-8192" /> | Groq | Meta | 8,192 | $0.59 prompt <br/> $0.79 completion |
| Llama-3-8b <br/> ID: <InlineCopy content="groq:llama3-8b-8192" /> | Groq | Meta | 8,192 | $0.05 prompt <br/> $0.1 completion |
| gemma2-9b-it <br/> ID: <InlineCopy content="groq:gemma2-9b-it" /> | Groq | Google | 8,192 | $0.2 prompt <br/> $0.2 completion |
<span className='text-xs'>* USD per Million tokens</span>
## Perplexity
Perplexity models run on the [Perplexity Agent API](https://docs.perplexity.ai/docs/agent-api/quickstart). Perplexity retires its Sonar chat completions API on September 27, 2026; Langbase migrated ahead of that date, so existing pipes and agents using the model IDs below keep working without changes.
| Model | Provider | Owner | Context | Cost* |
|---------------------------------------------------------------------------------------------------------------------|------------|------------|---------|--------------------------------------------|
| sonar-pro <br/> ID: <InlineCopy content="perplexity:sonar-pro" /> <br/> Agent API preset `low` (Pro Search): multi-step web search that also fetches full pages, for deeper research with more citations. | Perplexity | Perplexity | Varies | $0.2 prompt <br/> $1.2 completion |
| sonar <br/> ID: <InlineCopy content="perplexity:sonar" /> <br/> Agent API preset `fast`: quick single-step web search with inline citations, for simpler queries and follow-ups. | Perplexity | Perplexity | Varies | $0.2 prompt <br/> $1.2 completion |
| medium <br/> ID: <InlineCopy content="perplexity:medium" /> <br/> Agent API preset `medium` (Deep Research): multi-step research across many sources with page fetching, for detailed analysis and reports. | Perplexity | Perplexity | Varies | $0.2 prompt <br/> $1.2 completion |
| high <br/> ID: <InlineCopy content="perplexity:high" /> <br/> Agent API preset `high` (Advanced Deep Research): the deepest research tier on a frontier model (currently `openai/gpt-5.6-sol`), for long-form reports. | Perplexity | Perplexity | Varies | $5 prompt <br/> $30 completion |
| perplexity/sonar <br/> ID: <InlineCopy content="perplexity:perplexity/sonar" /> <br/> Perplexity's Sonar model called directly with the web search tool available; the model searches when it decides the question needs it. The cheapest grounded option for simple queries. | Perplexity | Perplexity | 128,000 | $0.25 prompt <br/> $2.5 completion |
<span className='text-xs'>* USD per Million tokens, billed by Perplexity at the rate of the model behind each preset (currently <code>openai/gpt-5.6-luna</code> for <code>fast</code>, <code>low</code> and <code>medium</code>, <code>openai/gpt-5.6-sol</code> for <code>high</code>). Perplexity additionally charges <strong>$2.50 per 1,000 web searches</strong> and <strong>$0.50 per 1,000 page fetches</strong> made by the preset.</span>
<Note>
Responses include the web sources Perplexity used. Non-streaming runs return them as `citations` (URLs) and `search_results` (URL, title, snippet, date) on the raw response; streaming runs include them on the final chunk. The answer text carries inline markers such as `[1]` (`sonar`) or `[web:1]` (`sonar-pro`) that refer to those sources.
</Note>
## Mistral AI
| Model | Provider | Owner | Context | Cost* |
|----------------------------------------------------------------------------------------------------|------------|------------|---------|----------------------------------------------|
| Magistral Medium 2506 <br/> ID: <InlineCopy content="mistralai:magistral-medium-2506" /> | OpenRouter | Mistral | 40K | $2 prompt <br/> $5 completion |
| Mistral Large 2 <br/> ID: <InlineCopy content="mistral:mistral-large-latest" /> | Mistral AI | Mistral AI | 128K | $3 prompt <br/> $9 completion |
| Pixtral Large <br/> ID: <InlineCopy content="mistral:pixtral-large-latest" /> | Mistral AI | Mistral AI | 128K | $2 prompt <br/> $6 completion |
| Pixtral 12B <br/> ID: <InlineCopy content="mistral:pixtral-12b" /> | Mistral AI | Mistral AI | 128K | $0.15 prompt <br/> $0.15 completion |
| Mistral Nemo <br/> ID: <InlineCopy content="mistral:open-mistral-nemo" /> | Mistral AI | Mistral AI | 128K | $0.3 prompt <br/> $0.3 completion |
| Codestral <br/> ID: <InlineCopy content="mistral:codestral-latest" /> | Mistral AI | Mistral AI | 32,768 | $1 prompt <br/> $3 completion |
<span className='text-xs'>* USD per Million tokens</span>
## Deepseek
| Model | Provider | Owner | Context | Cost* |
|----------------------------------------------------------------------------------------|----------|----------|---------|-------------------------------------|
| deepseek-reasoner <br/> ID: <InlineCopy content="deepseek:deepseek-reasoner" /> | Deepseek | Deepseek | 64K | $0.55 prompt <br/> $2.19 completion |
| deepseek-chat <br/> ID: <InlineCopy content="deepseek:deepseek-chat" /> | Deepseek | Deepseek | 64K | $0.14 prompt <br/> $0.28 completion |
<span className='text-xs'>* USD per Million tokens</span>
## xAI
| Model | Provider | Owner | Context | Cost* |
|-------------------------------------------------------------------------------------------|----------|-------|---------|-----------------------------------|
| grok-code-fast-1 <br/> ID: <InlineCopy content="xai:grok-code-fast-1" /> | xAI | xAI | 256,000 | $0.2 prompt <br/> $1.5 completion |
| grok-4-fast-reasoning <br/> ID: <InlineCopy content="xai:grok-4-fast-reasoning" /> | xAI | xAI | 2,000,000 | $0.2 prompt <br/> $0.5 completion |
| grok-4-fast-non-reasoning <br/> ID: <InlineCopy content="xai:grok-4-fast-non-reasoning" /> | xAI | xAI | 2,000,000 | $0.2 prompt <br/> $0.5 completion |
| grok-4 <br/> ID: <InlineCopy content="xai:grok-4" /> | xAI | xAI | 256,000 | $3 prompt <br/> $15 completion |
| grok-3-beta <br/> ID: <InlineCopy content="xai:grok-3-beta" /> | xAI | xAI | 131,072 | $3 prompt <br/> $15 completion |
| grok-3-fast-beta <br/> ID: <InlineCopy content="xai:grok-3-fast-beta" /> | xAI | xAI | 131,072 | $5 prompt <br/> $25 completion |
| grok-3-mini-beta <br/> ID: <InlineCopy content="xai:grok-3-mini-beta" /> | xAI | xAI | 131,072 | $0.3 prompt <br/> $0.5 completion |
| grok-3-mini-fast-beta <br/> ID: <InlineCopy content="xai:grok-3-mini-fast-beta" /> | xAI | xAI | 131,072 | $0.6 prompt <br/> $4 completion |
| grok-2-1212 <br/> ID: <InlineCopy content="xai:grok-2-1212" /> | xAI | xAI | 131,072 | $2 prompt <br/> $10 completion |
| grok-2-vision-1212 <br/> ID: <InlineCopy content="xai:grok-2-vision-1212" /> | xAI | xAI | 32K | $2 prompt <br/> $10 completion |
| grok-beta <br/> ID: <InlineCopy content="xai:grok-beta" /> | xAI | xAI | 131,072 | $5 prompt <br/> $15 completion |
<span className='text-xs'>* USD per Million tokens</span>
## Azure OpenAI
| Model | Provider | Owner | Context | Cost* |
|-----------------------------------------------------------------------------------------------|----------|--------|---------|------------------------------------------------|
| o1 <br/> ID: <InlineCopy content="azureopenai:o1" /> | OpenAI | OpenAI | 200,000 | $16.5 prompt <br/> $66.0 completion |
| o3-mini <br/> ID: <InlineCopy content="azureopenai:o3-mini" /> | OpenAI | OpenAI | 200,000 | $1.21 prompt <br/> $4.84 completion |
| o1-preview <br/> ID: <InlineCopy content="azureopenai:o1-preview" /> | OpenAI | OpenAI | 128,000 | $16.5 prompt <br/> $66.0 completion |
| o1-mini <br/> ID: <InlineCopy content="azureopenai:o1-mini" /> | OpenAI | OpenAI | 128,000 | $3.3 prompt <br/> $13.2 completion |
| gpt-4.5-preview <br/> ID: <InlineCopy content="azureopenai:gpt-4.5-preview" /> | OpenAI | OpenAI | 128,000 | $75 prompt <br/> $150 completion |
| gpt-4o <br/> ID: <InlineCopy content="azureopenai:gpt-4o" /> | OpenAI | OpenAI | 128,000 | $2.75 prompt <br/> $11.0 completion |
| gpt-4o-mini <br/> ID: <InlineCopy content="azureopenai:gpt-4o-mini" /> | OpenAI | OpenAI | 128,000 | $0.165 prompt <br/> $0.66 completion |
[<span className='text-xs'>Learn how to use Azure OpenAI models in Langbase</span>](/integrations/azure-openai)
<span className='block text-xs'>* USD per Million tokens</span>
## Cohere
| Model | Provider | Owner | Context | Cost* |
|---------------------------------------------------------------------------|----------|--------|---------|-------------------------------------------|
| command-r <br/> ID: <InlineCopy content="cohere:command-r" /> | Cohere | Cohere | 128K | $0.5 prompt <br/> $1.5 completion |
| command-r-plus <br/> ID: <InlineCopy content="cohere:command-r-plus" /> | Cohere | Cohere | 128K | $3 prompt <br/> $15 completion |
<span className='text-xs'>* USD per Million tokens</span>
---
## JSON Mode Support
See the [list of models that support JSON mode](/features/json-mode) and how to use it in your Pipe.
<Note>
Completion and Prompt costs are based on the provider's pricing. Langbase does not charge on top of the provider's costs.
</Note>
---
## Tool Support
The following models support tool calls on Langbase.
<Note>
OpenAI GPT-5.4 and newer models (GPT-5.4, GPT-5.5, GPT-5.6) only support tool calls when the reasoning effort is `none`. Langbase applies this automatically when a run on these models includes tools, so tool calls work out of the box. You can also set the reasoning effort to `none` explicitly in your pipe's reasoning settings or via the `reasoning_effort` parameter.
</Note>
### OpenAI
| Model | Parallel Tool Call Support | Tool Choice Support |
|-------------------------------------------------------------------------------------|----------------------------|---------------------|
| gpt-5.6-sol <br/> ID: <InlineCopy content="openai:gpt-5.6-sol" /> | `true` | `true` |
| gpt-5.6-terra <br/> ID: <InlineCopy content="openai:gpt-5.6-terra" /> | `true` | `true` |
| gpt-5.6-luna <br/> ID: <InlineCopy content="openai:gpt-5.6-luna" /> | `true` | `true` |
| gpt-5.5 <br/> ID: <InlineCopy content="openai:gpt-5.5-2026-04-23" /> | `true` | `true` |
| gpt-5.4 <br/> ID: <InlineCopy content="openai:gpt-5.4-2026-03-05" /> | `true` | `true` |
| gpt-5.4-mini <br/> ID: <InlineCopy content="openai:gpt-5.4-mini-2026-03-17" /> | `true` | `true` |
| gpt-5.4-nano <br/> ID: <InlineCopy content="openai:gpt-5.4-nano-2026-03-17" /> | `true` | `true` |
| gpt-5.2 <br/> ID: <InlineCopy content="openai:gpt-5.2-2025-12-11" /> | `true` | `true` |
| gpt-5.1-chat-latest <br/> ID: <InlineCopy content="openai:gpt-5.1-chat-latest" /> | `true` | `true` |
| gpt-5.1 <br/> ID: <InlineCopy content="openai:gpt-5.1-2025-11-13" /> | `true` | `true` |
| o3 <br/> ID: <InlineCopy content="openai:o3" /> | `true` | `true` |
| o4-mini <br/> ID: <InlineCopy content="openai:o4-mini" /> | `true` | `true` |
| gpt-4.1 <br/> ID: <InlineCopy content="openai:gpt-4.1" /> | `true` | `true` |
| gpt-4.1-mini <br/> ID: <InlineCopy content="openai:gpt-4.1-mini" /> | `true` | `true` |
| gpt-4.1-nano <br/> ID: <InlineCopy content="openai:gpt-4.1-nano" /> | `false` | `true` |
| gpt-4.5-preview <br/> ID: <InlineCopy content="openai:gpt-4.5-preview" /> | `true` | `true` |
| o1 <br/> ID: <InlineCopy content="openai:o1" /> | `true` | `true` |
| o3-mini <br/> ID: <InlineCopy content="openai:o3-mini" /> | `true` | `true` |
| o1-preview <br/> ID: <InlineCopy content="openai:o1-preview" /> | `true` | `true` |
| o1-mini <br/> ID: <InlineCopy content="openai:o1-mini" /> | `true` | `true` |
| gpt-4o <br/> ID: <InlineCopy content="openai:gpt-4o" /> | `true` | `true` |
| gpt-4o-2024-08-06 <br/> ID: <InlineCopy content="openai:gpt-4o-2024-08-06" /> | `true` | `true` |
| gpt-4o-mini <br/> ID: <InlineCopy content="openai:gpt-4o-mini" /> | `true` | `true` |
| gpt-4-turbo <br/> ID: <InlineCopy content="openai:gpt-4-turbo" /> | `true` | `true` |
| gpt-4-turbo-preview <br/> ID: <InlineCopy content="openai:gpt-4-turbo-preview" /> | `true` | `true` |
| gpt-4-0125-preview <br/> ID: <InlineCopy content="openai:gpt-4-0125-preview" /> | `true` | `true` |
| gpt-4-1106-preview <br/> ID: <InlineCopy content="openai:gpt-4-1106-preview" /> | `true` | `true` |
| gpt-4 <br/> ID: <InlineCopy content="openai:gpt-4" /> | `true` | `true` |
| gpt-4-0613 <br/> ID: <InlineCopy content="openai:gpt-4-0613" /> | `true` | `true` |
| gpt-4-32k <br/> ID: <InlineCopy content="openai:gpt-4-32k" /> | `true` | `true` |
| gpt-3.5-turbo-0125 <br/> ID: <InlineCopy content="openai:gpt-3.5-turbo-0125" /> | `true` | `true` |
| gpt-3.5-turbo-1106 <br/> ID: <InlineCopy content="openai:gpt-3.5-turbo-1106" /> | `true` | `true` |
| gpt-3.5-turbo <br/> ID: <InlineCopy content="openai:gpt-3.5-turbo" /> | `true` | `true` |
| gpt-3.5-turbo-16k <br/> ID: <InlineCopy content="openai:gpt-3.5-turbo-16k" /> | `true` | `true` |
### Google
| Model | Parallel Tool Call Support | Tool Choice Support |
|--------------------------------------------------------------------------------------|----------|--------|
| gemini-3.1-pro-preview <br/> ID: <InlineCopy content="google:gemini-3.1-pro-preview" /> | `true` | `true`|
| gemini-3.8-flash <br/> ID: <InlineCopy content="google:gemini-3.8-flash" /> | `true` | `true`|
| gemini-3.7-flash <br/> ID: <InlineCopy content="google:gemini-3.7-flash" /> | `true` | `true`|
| gemini-3.6-flash <br/> ID: <InlineCopy content="google:gemini-3.6-flash" /> | `true` | `true`|
| gemini-3.5-flash <br/> ID: <InlineCopy content="google:gemini-3.5-flash" /> | `true` | `true`|
| gemini-3.5-flash-lite <br/> ID: <InlineCopy content="google:gemini-3.5-flash-lite" /> | `true` | `true`|
| gemini-3-pro-preview <br/> ID: <InlineCopy content="google:gemini-3-pro-preview" /> | `true` | `true`|
| gemini-3-flash-preview <br/> ID: <InlineCopy content="google:gemini-3-flash-preview" /> | `true` | `true`|
| gemini-2.5-flash-preview-04-17 <br/> ID: <InlineCopy content="google:gemini-2.5-flash-preview-04-17" /> | `true` | `true`|
| gemini-2.5-pro-exp-03-25 <br/> ID: <InlineCopy content="google:gemini-2.5-pro-exp-03-25" /> | `true` | `true`|
| gemini-2.5-pro-preview-03-25 <br/> ID: <InlineCopy content="google:gemini-2.5-pro-preview-03-25" /> | `true` | `true`|
| gemini-1.5-pro <br/> ID: <InlineCopy content="google:gemini-1.5-pro-latest" /> | `true` | `true`|
| gemini-2.0-flash-exp <br/> ID: <InlineCopy content="google:gemini-2.0-flash-exp" /> | `true` | `true` | up to 1M | $0.075 prompt <br/> $0.3 completion |
| gemini-1.5-flash <br/> ID: <InlineCopy content="google:gemini-1.5-flash-latest" /> | `true` | `true`|
| gemini-1.5-flash-8b <br/> ID: <InlineCopy content="google:gemini-1.5-flash-8b-latest" /> | `true` | `true`|
| gemini-1.0-pro <br/> ID: <InlineCopy content="google:gemini-pro" /> | `false` | `false` |
### Anthropic
| Model | Parallel Tool Call Support | Tool Choice Support |
|------------------------------------------------------------------------------------------------------|-----------|-----------|
| claude-opus-4.8 <br/> ID: <InlineCopy content="anthropic:claude-opus-4-8" /> | `true` | `true` |
| claude-opus-4.7 <br/> ID: <InlineCopy content="anthropic:claude-opus-4-7" /> | `true` | `true` |
| claude-opus-4.6 <br/> ID: <InlineCopy content="anthropic:claude-opus-4-6" /> | `true` | `true` |
| claude-sonnet-5 <br/> ID: <InlineCopy content="anthropic:claude-sonnet-5" /> | `true` | `true` |
| claude-sonnet-4.6 <br/> ID: <InlineCopy content="anthropic:claude-sonnet-4-6" /> | `true` | `true` |
| claude-opus-4.5 <br/> ID: <InlineCopy content="anthropic:claude-opus-4-5-20251115" /> | `true` | `true` |
| claude-haiku-4.5 <br/> ID: <InlineCopy content="anthropic:claude-haiku-4-5-20251001" /> | `true` | `true` |
| claude-3.7-sonnet-latest <br/> ID: <InlineCopy content="anthropic:claude-3-7-sonnet-latest" /> | `true` | `true` |
| claude-3.7-sonnet-20250219 <br/> ID: <InlineCopy content="anthropic:claude-3-7-sonnet-20250219" /> | `true` | `true` |
| claude-3.5-sonnet-latest <br/> ID: <InlineCopy content="anthropic:claude-3-5-sonnet-latest" /> | `true` | `true` |
| claude-3.5-sonnet-20240620 <br/> ID: <InlineCopy content="anthropic:claude-3-5-sonnet-20240620" /> | `true` | `true` |
| claude-3-opus <br/> ID: <InlineCopy content="anthropic:claude-3-opus-20240229" /> | `true` | `true` |
| claude-3-sonnet <br/> ID: <InlineCopy content="anthropic:claude-3-sonnet-20240229" /> | `true` | `true` |
| claude-3-haiku <br/> ID: <InlineCopy content="anthropic:claude-3-haiku-20240307" /> | `true` | `true` |
### Together AI
| Model | Parallel Tool Call Support | Tool Choice Support |
|---------------------------------------------------------------------------------------------------------------------------|----------|------------|
| Llama-3.1-405B-Instruct-Turbo <br/> ID: <InlineCopy content="together:meta-llama/Meta-Llama-3.1-405B-Instruct-Turbo" /> | `false` | `true` |
| Llama-3.1-70B-Instruct-Turbo <br/> ID: <InlineCopy content="together:meta-llama/Meta-Llama-3.1-70B-Instruct-Turbo" /> | `false` | `true` |
| Llama-3.1-8B-Instruct-Turbo <br/> ID: <InlineCopy content="together:meta-llama/Meta-Llama-3.1-8B-Instruct-Turbo" /> | `false` | `true` |
| 7B-Instruct-v0.1 <br/> ID: <InlineCopy content="together:mistralai/Mistral-7B-Instruct-v0.1" /> | `false` | `true` |
| Mixtral-8x7B-Instruct-v0.1 <br/> ID: <InlineCopy content="together:mistralai/Mixtral-8x7B-Instruct-v0.1" /> | `false` | `true` |
## Deepseek
| Model | Parallel Tool Call Support | Tool Choice Support |
|------------------------------------------------------------------------------|----------------------------|---------------------|
| deepseek-chat <br/> ID: <InlineCopy content="deepseek:deepseek-chat" /> |`false` |`true` |
### xAI
| Model | Parallel Tool Call Support | Tool Choice Support |
|------------------------------------------------------------------------------|----------------------------|---------------------|
| grok-code-fast-1 <br/> ID: <InlineCopy content="xai:grok-code-fast-1" /> |`true` |`true` |
| grok-4-fast-reasoning <br/> ID: <InlineCopy content="xai:grok-4-fast-reasoning" /> |`true` |`true` |
| grok-4-fast-non-reasoning <br/> ID: <InlineCopy content="xai:grok-4-fast-non-reasoning" /> |`true` |`true` |
| grok-4 <br/> ID: <InlineCopy content="xai:grok-4" /> |`true` |`true` |
---
## Deprecated Models
The following models are deprecated and no longer available for use in pipes. It is recommended to switch to a supported model.
| Model | Provider | Owner | Deprecated on | Reason |
|-----------------------------------|--------------|------------|----------------------|------------------------------|
| Mixtral-8x7B | Groq | 01-07-2025 | Discontinued by Groq | |
| gemini-2.5-pro-exp-03-25 | Google | Google | 15-06-2025 | Discontinued by Perplexity |
| llama-3.1-sonar-huge-128k-online | Perplexity | Meta | 21-02-2025 | Discontinued by Perplexity |
| llama-3.1-sonar-large-128k-online | Perplexity | Meta | 21-02-2025 | Discontinued by Perplexity |
| llama-3.1-sonar-small-128k-online | Perplexity | Meta | 21-02-2025 | Discontinued by Perplexity |
| llama-3.1-sonar-large-128k-chat | Perplexity | Meta | 23-01-2025 | Discontinued by Perplexity |
| llama-3.1-sonar-small-128k-chat | Perplexity | Meta | 23-01-2025 | Discontinued by Perplexity |
| gemma-7b-it | Groq | Google | 01-01-2025 | Discontinued by Groq |
| qwen2-72b | Fireworks AI | QwenLM | 13-08-2024 | Discontinued by Fireworks AI |
| Llama-3-70b-chat-hf | Together AI | Meta | 15-09-2024 | Discontinued by Together AI |
| Llama-2-7B-32K-Instruct | Together AI | Meta | 15-09-2024 | Discontinued by Together AI |
| gemma-7b-it | Together AI | Meta | 15-09-2024 | Discontinued by Together AI |
---
</content>
</doc>
<doc>
<metadata>
<title>Threads</title>
<url>https://langbase.com/docs/threads/</url>
</metadata>
<content>
import { generateMetadata } from '@/lib/generate-metadata';
<LanguageProvider defaultLanguage='typescript'>
# Threads
Threads, an AI Primitive by Langbase, allows you to manage conversation history and context. They are essential for building conversational applications that require context management and organization of conversation threads.
Threads help you maintain a coherent conversation flow, making it easier to build applications that require context-aware interactions.
<CTAButtons
primary={{ href: '/sdk/threads', text: 'Start with Langbase SDK' }}
secondary={{ href: '/api-reference/threads', text: 'API reference' }}
/>
---
## Quickstart: Managing Conversations with Threads
---
## Let's get started
In this guide, we'll use the Langbase SDK to interact with the Threads API:
---
## Step #1: Generate Langbase API key
Every request you send to Langbase needs an [API key](/api-reference/api-keys). This guide assumes you already have one. If not, please check the instructions below.
<Spoiler title="Get your Langbase API key: User or Org">
You can generate API keys from the [Langbase Studio](https://studio.langbase.com) by following these steps:
1. Switch to your user or org account.
2. From the sidebar, click on the `API keys`.
3. From here you can create a new API key or manage existing ones.
For more details, follow the [Langbase API keys](/api-reference/api-keys) documentation.
</Spoiler>
---
## Step #2: Setup your project [lang]
Create a new directory for your project and navigate to it.
<CodeGroup exampleTitle="Project setup" title="Project setup">
```bash
mkdir conversation-app && cd conversation-app
```
</CodeGroup>
### Initialize the project
<LanguageContent language="typescript">
Create a new Node.js project.
<CodeGroup exampleTitle="Initialize project" title="Initialize project">
```bash {{ title: 'npm' }}
npm init -y
```
```bash {{ title: 'pnpm' }}
pnpm init
```
```bash {{ title: 'yarn' }}
yarn init -y
```
</CodeGroup>
</LanguageContent>
<LanguageContent language="python">
Now let's create a new virtual environment and activate it.
<CodeGroup exampleTitle="Initialize project" title="Initialize project">
```bash {{ title: 'macOS/Linux' }}
python -m venv .venv && source .venv/bin/activate
```
```bash {{ title: 'Windows' }}
python -m venv .venv && .venv\Scripts\activate
```
</CodeGroup>
</LanguageContent>
### Install dependencies
You will use the [Langbase SDK](/sdk) to work with threads and `dotenv` to manage environment variables.
<LanguageContent language="typescript">
<CodeGroup exampleTitle="Install dependencies" title="Install dependencies">
```bash {{ title: 'npm' }}
npm i langbase dotenv
```
```bash {{ title: 'pnpm' }}
pnpm add langbase dotenv
```
```bash {{ title: 'yarn' }}
yarn add langbase dotenv
```
</CodeGroup>
</LanguageContent>
<LanguageContent language="python">
<CodeGroup exampleTitle="Install dependencies" title="Install dependencies">
```bash {{ title: 'pip' }}
pip install langbase python-dotenv
```
</CodeGroup>
</LanguageContent>
### Create an env file
Create a `.env` file in the root of your project and add your Langbase API key:
```bash {{ title: '.env' }}
LANGBASE_API_KEY=your_api_key_here
```
---
## Step #3: Create a new thread
<LanguageContent language="typescript">
Let's create a file named `create-thread.ts` to demonstrate how to create a new thread:
<CodeGroup exampleTitle="Create a thread" title="create-thread.ts">
```ts {{ title: 'TypeScript' }}
import 'dotenv/config';
import { Langbase } from 'langbase';
const langbase = new Langbase({
apiKey: process.env.LANGBASE_API_KEY!,
});
async function main() {
// Create a new thread with initial messages and metadata
const thread = await langbase.threads.create({
// Metadata for organization and filtering
metadata: {
userId: "user-456",
topic: "billing-question",
channel: "website"
},
// Initial messages to start the conversation
messages: [
{
role: "system",
content: "You are a helpful customer support agent. Be concise and friendly in your responses."
},
{
role: "user",
content: "Hi, I have a question about my recent bill."
}
]
});
console.log('Thread created:', thread);
}
main()
```
</CodeGroup>
Run the script to create your first thread:
<CodeGroup exampleTitle="Run the script" title="Run the script">
```bash {{ title: 'npm' }}
npx tsx create-thread.ts
```
```bash {{ title: 'pnpm' }}
pnpm dlx tsx create-thread.ts
```
</CodeGroup>
</LanguageContent>
<LanguageContent language="python">
Let's create a file named `create-thread.py` to demonstrate how to create a new thread:
<CodeGroup exampleTitle="Create a thread" title="create-thread.py">
```py {{ title: 'Python' }}
import json
import os
from dotenv import load_dotenv
from langbase import Langbase
def main():
load_dotenv()
# Get API key from environment variable
langbase_api_key = os.getenv("LANGBASE_API_KEY")
# Initialize the client
langbase = Langbase(api_key=langbase_api_key)
# Create a thread with metadata and initial messages
try:
thread = langbase.threads.create(
metadata={
"userId": "user-456",
"topic": "billing-question",
"channel": "website"
},
messages=[
{
"role": "system",
"content": "You are a helpful customer support agent. Be concise and friendly in your responses."
},
{
"role": "user",
"content": "Hi, I have a question about my recent bill."
}
]
)
print(json.dumps(thread, indent=2))
except Exception as e:
print(f"Error creating thread: {e}")
if __name__ == "__main__":
main()
```
</CodeGroup>
Run the script to create your first thread:
<CodeGroup exampleTitle="Run the script" title="Run the script">
```bash {{ title: 'python' }}
python create-thread.py
```
</CodeGroup>
</LanguageContent>
You should see output similar to this:
```json
{
"id": "06d1be7e-94fb-4219-b983-931089680ebb",
"object": "thread",
"created_at": 1714322048,
"metadata": {
"userId": "user-456",
"topic": "billing-question",
"channel": "website"
}
}
```
---
## Step #4: Add messages to a thread
<LanguageContent language="typescript">
Now let's create a file named `append-messages.ts` to add more messages to our thread:
<CodeGroup exampleTitle="Append messages" title="append-messages.ts">
```ts {{ title: 'TypeScript' }}
import 'dotenv/config';
import { Langbase } from 'langbase';
const langbase = new Langbase({
apiKey: process.env.LANGBASE_API_KEY!,
});
async function main() {
const threadId = "06d1be7e-94fb-4219-b983-931089680ebb";
// Add an assistant response and a follow-up user message
const messages = await langbase.threads.append({
threadId,
messages: [
{
role: "assistant",
content: "I'd be happy to help with your billing question. Could you please provide your account number or the specific charge you're inquiring about?"
},
{
role: "user",
content: "My account number is AC-9876. I was charged twice for the same service on April 15.",
metadata: {
timestamp: new Date().toISOString(),
device: "mobile"
}
}
]
});
console.log(`Added ${messages.length} messages to thread ${threadId}`);
console.log('Messages:', messages);
}
main()
```
</CodeGroup>
Run the script to append messages to your thread:
<CodeGroup exampleTitle="Run the script" title="Run the script">
```bash {{ title: 'npm' }}
npx tsx append-messages.ts
```
```bash {{ title: 'pnpm' }}
pnpm dlx tsx append-messages.ts
```
</CodeGroup>
</LanguageContent>
<LanguageContent language="python">
Now let's create a file named `append-messages.py` to add more messages to our thread:
<CodeGroup exampleTitle="Append messages" title="append-messages.py">
```py {{ title: 'Python' }}
import os
from dotenv import load_dotenv
from langbase import Langbase
def main():
load_dotenv()
# Get API key from environment variable
langbase_api_key = os.getenv("LANGBASE_API_KEY")
# Initialize the client
langbase = Langbase(api_key=langbase_api_key)
# Thread ID to append messages to
thread_id = "thread_123" # Replace with your actual thread ID
# Messages to append
messages = [
{
role: "assistant",
content: "I'd be happy to help with your billing question. Could you please provide your account number or the specific charge you're inquiring about?"
},
{
role: "user",
content: "My account number is AC-9876. I was charged twice for the same service on April 15.",
metadata: {
timestamp: new Date().toISOString(),
device: "mobile"
}
}
]
# Append messages to the thread
try:
response = langbase.threads.append(thread_id=thread_id, messages=messages)
print(f"Successfully appended {len(response)} messages to thread '{thread_id}'")
except Exception as e:
print(f"Error appending messages to thread: {e}")
if __name__ == "__main__":
main()
```
</CodeGroup>
Run the script to append messages to your thread:
<CodeGroup exampleTitle="Run the script" title="Run the script">
```bash {{ title: 'python' }}
python append-messages.py
```
</CodeGroup>
</LanguageContent>
---
## Step #5: Retrieve thread messages
<LanguageContent language="typescript">
Let's create a file named `list-messages.ts` to retrieve all messages in our thread:
<CodeGroup exampleTitle="List messages" title="list-messages.ts">
```ts {{ title: 'TypeScript' }}
import 'dotenv/config';
import { Langbase } from 'langbase';
const langbase = new Langbase({
apiKey: process.env.LANGBASE_API_KEY!,
});
async function main() {
const threadId = "06d1be7e-94fb-4219-b983-931089680ebb";
// List all messages in the thread
const messages = await langbase.threads.messages.list({
threadId
});
console.log(`Retrieved ${messages.length} messages from thread ${threadId}`);
// Display the conversation
messages.forEach(msg => {
console.log(`[${msg.role}]: ${msg.content}`);
});
}
main()
```
</CodeGroup>
Run the script to see all messages in your thread:
<CodeGroup exampleTitle="Run the script" title="Run the script">
```bash {{ title: 'npm' }}
npx tsx list-messages.ts
```
```bash {{ title: 'pnpm' }}
pnpm dlx tsx list-messages.ts
```
</CodeGroup>
</LanguageContent>
<LanguageContent language="python">
Let's create a file named `list-messages.py` to retrieve all messages in our thread:
<CodeGroup exampleTitle="List messages" title="list-messages.py">
```py {{ title: 'Python' }}
import json
import os
from dotenv import load_dotenv
from langbase import Langbase
def main():
load_dotenv()
# Get API key from environment variable
langbase_api_key = os.getenv("LANGBASE_API_KEY")
# Initialize the client
langbase = Langbase(api_key=langbase_api_key)
# List all threads
try:
threads = langbase.threads.messages.list(thread_id="thread_123")
print(json.dumps(threads, indent=2))
except Exception as e:
print(f"Error listing threads: {e}")
if __name__ == "__main__":
main()
```
</CodeGroup>
Run the script to see all messages in your thread:
<CodeGroup exampleTitle="Run the script" title="Run the script">
```bash {{ title: 'python' }}
python list-messages.py
```
</CodeGroup>
</LanguageContent>
The output should show the entire conversation history in chronological order:
```
Retrieved 4 messages from thread 06d1be7e-94fb-4219-b983-931089680ebb
[system]: You are a helpful customer support agent. Be concise and friendly in your responses.
[user]: Hi, I have a question about my recent bill.
[assistant]: I'd be happy to help with your billing question. Could you please provide your account number or the specific charge you're inquiring about?
[user]: My account number is AC-9876. I was charged twice for the same service on April 15.
```
---
## Next Steps
- Build something cool with Langbase [SDK](/sdk) and [APIs](/api-reference).
- Join our [Discord community](https://langbase.com/discord) for feedback, requests, and support.
---
</LanguageProvider>
</content>
</doc>
<doc>
<metadata>
<title>AI Solutions by ⌘ Langbase</title>
<url>https://langbase.com/docs/solutions/</url>
</metadata>
<content>
import { generateMetadata } from '@/lib/generate-metadata';
# AI Solutions by ⌘ Langbase
⌘ Langbase is the composable infrastructure and developer experience to build, collaborate, and deploy any AI apps/features. Our mission is to make AI accessible to everyone, any developer not just AI/ML experts. We are the only [composable AI infrastructure][composable]. That's all we do.
In software engineering, composition is a powerful concept. It allows for building complex systems from simple, interchangeable parts. Think Legos, Docker containers, React components. Langbase extends this concept to AI infrastructure with our **Composable AI** stack using [Pipes][pipe] and [Memory][memory].
Here are some carefully crafted **Langbase** powered **AI solutions**:
- [Legal](/solutions/legal/)
- [Finance](/solutions/finance/)
- [Education](/solutions/education/)
- [Marketing](/solutions/marketing/)
- [Technology](/solutions/technology/)
- [Healthcare](/solutions/healthcare/)
- [Administration](/solutions/administration/)
- [News and Media](/solutions/news-media/)
- [Customer Support](/solutions/customer-support/)
---
[composable]: /composable-ai
[pipe]: /pipe
[memory]: /memory
</content>
</doc>
<doc>
<metadata>
<title>Langbase SDK</title>
<url>https://langbase.com/docs/sdk/</url>
</metadata>
<content>
import { generateMetadata } from '@/lib/generate-metadata';
# Langbase SDK
Langbase provides a TypeScript, Python AI SDK with a phenomenal developer experience to help developers write less code and move fast. Use any LLM, build complex memory agents, compose pipe agents into a pipeline. **The SDK is designed for Python, JavaScript, TypeScript, Node.js, Next.js, React and the likes.**
Langbase is an API-first platform delivering exceptional developer experience. Our APIs are simple, intuitive, and designed for seamless integration. With clear documentation, practical code examples, and responsive [community support](https://langbase.com/discord), we help you build quickly and efficiently.
<CTAButtons
primary={{ href: '/examples', text: '⌘ Langbase AI SDK Examples' }}
secondary={{ href: '/sdk/pipe', text: 'Explore API' }}
/>
---
### Table of contents
- [Authentication](#authentication)
- [Core functionality](#core-functionality)
- [Next steps](#next-steps)
---
## Authentication
The Langbase SDK uses API keys for authentication. You can create API keys at a user or org account level. Some SDK methods like when running a pipe allow you to specify a pipe specific API key as well.
<Spoiler title="Get your Langbase API key: User or Org">
You can generate API keys from the [Langbase Studio](https://studio.langbase.com) by following these steps:
1. Switch to your user or org account.
2. From the sidebar, click on the `API keys`.
3. From here you can create a new API key or manage existing ones.
For more details follow the [Langbase API keys](/api-reference/api-keys) documentation.
</Spoiler>
Create an `.env` file in the root of your project and add your Langbase API key.
```bash {{ title: '.env' }}
LANGBASE_API_KEY=xxxxxxxxx
```
Replace xxxxxxxxx with your Langbase API key.
With Langbase SDK, you can set your API key as follows:
<ContentTabs>
<ContentTab title="TypeScript SDK">
<CodeGroup exampleTitle="TypeScript" title="TypeScript">
```ts {{ title: 'index.ts' }}
import {Langbase} from 'langbase';
const langbase = new Langbase({
apiKey: process.env.LANGBASE_API_KEY
});
```
</CodeGroup>
</ContentTab>
<ContentTab title="Python SDK">
<CodeGroup title="Python" exampleTitle="Python">
```python {{ title: 'main.py' }}
from langbase import Langbase
import os
from dotenv import load_dotenv
load_dotenv()
langbase_api_key = os.getenv("LANGBASE_API_KEY")
langbase = Langbase(api_key=langbase_api_key)
```
</CodeGroup>
</ContentTab>
</ContentTabs>
<Info sub="Important" >
<strong>Treat your API keys like passwords. Keep them secret — use only on the server side.</strong>
Remember to keep your API key secret! Your Langbase API key is server side only. Never share it or expose it in client-side code like browsers or apps. For production requests, route them through your own backend server where you can securely load your API key from an environment variable or key management service.
</Info>
---
## Core functionality
Langbase SDK provides the following core functionality:
### Pipe
Use the SDK to manage the pipes in your Langbase account. Create, update, list, and run AI Pipes
- [Run pipe](/sdk/pipe/run)
- [Create pipe](/sdk/pipe/create)
- [Update pipe](/sdk/pipe/update)
- [List pipe](/sdk/pipe/list)
- [usePipe()](/sdk/pipe/use-pipe)
### Memory
Use the SDK to programmatically manage memories in your Langbase account. Since documents are stored in memories, you can also manage documents using the SDK.
- [Create memory](/sdk/memory/create)
- [List memory](/sdk/memory/list)
- [Delete memory](/sdk/memory/delete)
- [Retrieve memory](/sdk/memory/retrieve)
- [List documents](/sdk/memory/document-list)
- [Delete document](/sdk/memory/document-delete)
- [Upload document](/sdk/memory/document-upload)
- [Embeddings Retry](/sdk/memory/document-embeddings-retry)
### Workflow
Use the SDK to programmatically manage workflows in your Langbase account.
- [Workflow](/sdk/workflow)
### Agent
Use the SDK to programmatically manage agents in your Langbase account.
- [Agent](/sdk/agent/run)
### Threads
Use the SDK to programmatically manage threads in your Langbase account.
- [Create](/sdk/threads/create)
- [Update](/sdk/threads/update)
- [Get](/sdk/threads/get)
- [Delete](/sdk/threads/delete)
- [Append Messages](/sdk/threads/append-messages)
- [List Messages](/sdk/threads/list-messages)
### Parser
Use the SDK to parse text into structured data.
- [Parser](/sdk/parser)
### Chunker
Use the SDK to chunk text into smaller pieces.
- [Chunker](/sdk/chunker)
### Embed
Use the SDK to embed text into a vector space.
- [Embed](/sdk/embed)
### Tools
Use the SDK to manage tools in your Langbase account.
- [Web Search](/sdk/tools/web-search)
- [Crawl](/sdk/tools/crawl)
<Note sub="Explore code examples" className="mt-12">
Streaming text works differently in Node.js vs browser. Please check out different [examples](/sdk/examples) like the Next.js examples or the React example.
</Note>
---
## Next steps
Time to build. Check out the quickstart examples or Explore the API reference.
<CTAButtons
primary={{ href: '/sdk/examples', text: '⌘ Langbase AI SDK Examples' }}
secondary={{ href: '/sdk/pipe', text: 'Explore API' }}
/>
---
</content>
</doc>
<doc>
<metadata>
<title>What is an AI Agent? (Pipe)</title>
<url>https://langbase.com/docs/pipe/</url>
</metadata>
<content>
import { generateMetadata } from '@/lib/generate-metadata';
# What is an AI Agent? (Pipe)
AI Agents can understand context and take meaningful actions. They can be used to automate tasks, research and analyze information, or help users with their queries.
Pipe is your custom-built AI agent as an API. It's the easiest way to build, deploy, and scale AI agents without having to manage or update any infrastructure.
<CTAButtons
primary={{ href: '/pipe/quickstart', text: '⌘ Quickstart', sub:'(build an AI Assistant Pipe)' }}
secondary={{ href: '/sdk/pipe', text: 'Use Langbase SDK' }}
/>
---
Pipe lets you build AI agents and RAG apps without thinking about servers, GPUs, RAG, and infra.
It is a high-level layer to Large Language Models (LLMs) that creates a personalized AI assistant for your queries and prompts. A pipe can leverage any LLM models, tools, and knowledge base with your datasets to assist with your queries.
Pipe can connect [any LLM](/supported-models-and-providers/) to any data to build any developer API workflow.
---
<Img
light="/docs/pipe/pipe.png"
dark="/docs/pipe/pipe.png"
alt="What is a Pipe"
caption="What is a Pipe"
/>
---
### P → **`Prompt`** Prompt engineering and orchestration.
### I → **`Instructions`** Instruction training few-shot, persona, character, etc.
### P → **`Personalization`** Knowledge base, variables, and safety hallucination engine.
### E → **`Engine`** Experiments, API Engine, evals, and enterprise governance.
---
### Next steps
Time to build. Check out the quickstart overview example or Explore the API reference.
<CTAButtons
primary={{ href: '/pipe/quickstart', text: '⌘ Quickstart', sub:'(build an AI Assistant Pipe)' }}
secondary={{ href: '/api-reference/pipe', text: 'Explore API' }}
/>
---
</content>
</doc>
<doc>
<metadata>
<title>Parser</title>
<url>https://langbase.com/docs/parser/</url>
</metadata>
<content>
import { generateMetadata } from '@/lib/generate-metadata';
<LanguageProvider defaultLanguage='typescript'>
# Parser
Parser, an AI Primitive by Langbase, allows you to extract text content from various document formats. This is particularly useful when you need to process documents before using them in your AI applications.
Parser can handle a variety of formats, including PDFs, CSVs, and more. By converting these documents into plain text, you can easily analyze, search, or manipulate the content as needed.
<CTAButtons
primary={{ href: '/sdk/parser', text: 'Start with Langbase SDK' }}
secondary={{ href: '/api-reference/parser', text: 'API reference' }}
/>
---
## Quickstart: Extracting Text from Documents
---
## Let's get started
In this guide, we'll use the Langbase SDK to interact with the Parser API:
---
## Step #1: Generate Langbase API key
Every request you send to Langbase needs an [API key](/api-reference/api-keys). This guide assumes you already have one. If not, please check the instructions below.
<Spoiler title="Get your Langbase API key: User or Org">
You can generate API keys from the [Langbase Studio](https://studio.langbase.com) by following these steps:
1. Switch to your user or org account.
2. From the sidebar, click on the `API keys`.
3. From here you can create a new API key or manage existing ones.
For more details, follow the [Langbase API keys](/api-reference/api-keys) documentation.
</Spoiler>
---
## Step #2: Setup your project [lang]
Create a new directory for your project and navigate to it.
<CodeGroup exampleTitle="Project setup" title="Project setup">
```bash
mkdir document-parser && cd document-parser
```
</CodeGroup>
### Initialize the project
<LanguageContent language="typescript">
Create a new Node.js project.
<CodeGroup exampleTitle="Initialize project" title="Initialize project">
```bash {{ title: 'npm' }}
npm init -y
```
```bash {{ title: 'pnpm' }}
pnpm init
```
```bash {{ title: 'yarn' }}
yarn init -y
```
</CodeGroup>
</LanguageContent>
<LanguageContent language="python">
Now let's create a new virtual environment and activate it.
<CodeGroup exampleTitle="Initialize project" title="Initialize project">
```bash {{ title: 'pip' }}
pip install langbase python-dotenv
```
</CodeGroup>
</LanguageContent>
### Install dependencies
You will use the [Langbase SDK](/sdk) to work with Parser and `dotenv` to manage environment variables.
<LanguageContent language="typescript">
<CodeGroup exampleTitle="Install dependencies" title="Install dependencies">
```bash {{ title: 'npm' }}
npm i langbase dotenv
```
```bash {{ title: 'pnpm' }}
pnpm add langbase dotenv
```
```bash {{ title: 'yarn' }}
yarn add langbase dotenv
```
</CodeGroup>
</LanguageContent>
<LanguageContent language="python">
<CodeGroup exampleTitle="Install dependencies" title="Install dependencies">
```bash {{ title: 'pip' }}
pip install langbase python-dotenv
```
</CodeGroup>
</LanguageContent>
### Create an env file
Create a `.env` file in the root of your project and add your Langbase API key:
```bash {{ title: '.env' }}
LANGBASE_API_KEY=your_api_key_here
```
---
## Step #3: Parse a PDF document
<LanguageContent language="typescript">
Now, let's create a file named `parse-pdf.ts` to demonstrate how to parse the document. You can download a sample PDF document from the below.
<DownloadSampleDoc
href="/docs/composable-ai.pdf"
btnText="Download Composable AI PDF"
/>
Move the downloaded PDF document to your project directory.
<CodeGroup exampleTitle="Parse PDF document" title="parse-pdf.ts">
```ts {{ title: 'TypeScript' }}
import 'dotenv/config';
import { Langbase } from 'langbase';
import { readFile } from 'fs/promises';
const langbase = new Langbase({
apiKey: process.env.LANGBASE_API_KEY!,
});
async function main() {
try {
// Read the PDF document
const buffer = await readFile('composable-ai.pdf');
// Parse the PDF document
const result = await langbase.parser({
document: buffer,
documentName: 'composable-ai.pdf',
contentType: 'application/pdf',
});
console.log('Parsed document name:', result.documentName);
console.log('Parse document content:', result.content);
} catch (error) {
console.error('Error parsing PDF:', error);
}
}
main();
```
</CodeGroup>
</LanguageContent>
<LanguageContent language="python">
Now, let's create a file named `parse-pdf.py` to demonstrate how to parse the document. You can download a sample PDF document from the below.
<DownloadSampleDoc
href="/docs/composable-ai.pdf"
btnText="Download Composable AI PDF"
/>
Move the downloaded PDF document to your project directory.
<CodeGroup exampleTitle="Parse PDF document" title="parse-pdf.py">
```python {{ title: 'Python' }}
import json
import os
import pathlib
from dotenv import load_dotenv
from langbase import Langbase
load_dotenv()
langbase_api_key = os.getenv("LANGBASE_API_KEY")
langbase = Langbase(api_key=langbase_api_key)
def main():
# Get the path to the PDF document
document_path = pathlib.Path(__file__).parent / "composable-ai.pdf"
# Read the file
with open(document_path, "rb") as file:
document_content = file.read()
# Parse the document
results = langbase.parser(
document=document_content,
document_name="composable-ai.pdf",
content_type="application/pdf",
)
print('Parsed document name:', results['document_name'])
print('Parse document content:', results['content'])
if __name__ == "__main__":
main()
```
</CodeGroup>
</LanguageContent>
Run the script to parse your document:
<LanguageContent language='typescript'>
<CodeGroup exampleTitle="Run the script" title="Run the script">
```bash {{ title: 'npm' }}
npx tsx parse-pdf.ts
```
```bash {{ title: 'pnpm' }}
pnpm dlx tsx parse-pdf.ts
```
</CodeGroup>
</LanguageContent>
<LanguageContent language='python'>
<CodeGroup exampleTitle="Run the script" title="Run the script">
```bash {{ title: 'pip' }}
python parse-pdf.py
```
</CodeGroup>
</LanguageContent>
You should see output similar to this:
```
Parsed document name: composable-ai.pdf
Parse document content: Composable AI
In software engineering, composition is a powerful concept. It allows for building
complex systems from simple, interchangeable parts. Think Legos, Docker
containers, React components. Langbase extends this concept to AI infrastructure
with our
Composable AI
stack using Pipes and Memory.
Composable and personalized AI
: With Langbase, you can compose multiple
models together into pipelines. It's easier to think about, easier to develop for, and
each pipe lets you choose which model to use for each task. You can see cost of
every step. And allow your customers to hyper-personalize.
Effortlessly zero-config AI infra
: Maybe you want to use a smaller, domain-specific
model for one task, and a larger general-purpose model for another task. Langbase
makes it easy to use the right primitives and tools for each part of the job and
provides developers with a zero-config composable AI infrastructure.
That's a nice way of saying,
you get a unicorn-scale API in minutes, not months
.
The most common problem
I hear about in Gen AI space is that my AI agents
are too complex and I can't scale them, too much AI talking to AI. I don't have
control, I don't understand the cost, and the impact of this change vs that. Time
from new model to prod is too long. Feels static, my customers can't personalize
The Developer Friendly Future of AI Infrastructure
Why Composable AI?
Command.new
Launching soon in limited beta
Join the waitlist
Langbase
it.
Langbase fixes all this. AA
I have built an AI email agent that can read my emails, understand the sentiment,
summarize, and respond to them. Let's break it down to how it works, hint several
pipes working together to make smart personalized decisions.
1.
I created a pipe:
email-sentiment
this one reads my emails to understand the
sentiment
2.
email-summarizer
pipe it summarizes my emails so I can quickly understand
Example: Composable AI Email Agent
Langbase Email Agent reference architecture
them
3.
email-decision-maker
pipe should I respond? is it urgent? is it a newsletter?
4.
If
email-decision-maker
pipe says
yes
, then I need to respond. This invokes the
final pipe
5.
email-writer
pipe writes a draft response to my emails with one of the eight
formats I have
Ah, the power of composition. I can swap out any of these pipes with a new one.
Flexibility
: Swap components without rewriting everything
Reusability
: Build complex systems from simple, tested parts
Scalability
: Optimize at the component level for better performance
Observability
: Monitor and debug each step of your AI pipeline
Control flow
Maybe I want to use a different sentiment analysis model
Or maybe I want to use a different summarizer when I'm on vacation
I can chose a different LLM (small or large) based on the task
BTW I definitely use a different
decision-maker
pipe on a busy day.
Extensibility
Add more when needed
: I can also add more pipes to this pipeline. Maybe I
want to add a pipe that checks my calendar or the weather before I respond to an
email. You get the idea. Always bet on composition.
Eight Formats to write emails
: And I have several formats. Because Pipes are
composable, I have eight different versions of
email-writer
pipe. I have a pipe
email-pick-writer
that picks the correct pipe to draft a response with. Why? I talk
to my friends differently than my investors, reports, managers, vendors you
name it.
Why Composable AI is powerful?
Long-term memory and context awareness
By the way, I have all my emails in an
emails-store
memory, which any of these
pipes can refer to if needed. That's managed semantic RAG over all the emails I
have ever received.
And yes, my
emails-smart-spam
memory knows all the pesky smart spam emails
that I don't want to see in my inbox.
Cost & Observability
Because each intent and action is mapped out Pipe which is an excellent
primitive for using LLMs, I can see everything related to cost, usage, and
effectiveness of each pipe. I can see how many emails were processed, how
many were responded to, how many were marked as spam, etc.
I can switch LLMs for any of these actions, fork a pipe, and see how it performs. I
can version my pipes and see how the new version performs against the old one.
And we're just getting started
Why Developers Love It
Modular
: Build, test, and deploy pipes x memorysets independently
Extensible
: API-first no dependency on a single language
Version Control Friendly
: Track changes at the pipe level
Cost-Effective
: Optimize resource usage for each AI task
Stakeholder Friendly
: Collaborate with your team on each pipe and memory. All
your R&D team, engineering, product, GTM (marketing, sales), and even
stakeholders can collaborate on the same pipe. It's like a Google Doc x GitHub
for AI. That's what makes it so powerful.
Each pipe and memory are like a docker container. You can have any number of
pipes and memorysets.
Can't wait to share more exciting examples of composable AI. We're cookin!!
We'll share more on this soon. Follow us on Twitter and LinkedIn for updates.
Previous
Introduction
Next
API Reference
Langbase, Inc. © Copyright 2025. All rights reserved.
```
---
## Next Steps
- Try parsing different file formats using the Langbase Parser API
- Integrate the parsed content with other Langbase features
- Build something cool with Langbase [SDK](/sdk) and [APIs](/api-reference).
- Join our [Discord community](https://langbase.com/discord) for feedback, requests, and support
---
</LanguageProvider>
</content>
</doc>
<doc>
<metadata>
<title>Memory Agents</title>
<url>https://langbase.com/docs/memory/</url>
</metadata>
<content>
import { generateMetadata } from '@/lib/generate-metadata';
# Memory Agents
Memory agents are AI agents that have human like long-term memory. You can train AI agents with your data and knowledge base without having to manage vector storage, servers, or infrastructure.
Langbase memory agents represent the next frontier in semantic retrieval-augmented generation (RAG) as a serverless and infinitely scalable API designed for developers. 30-50x less expensive than the competition, with industry-leading accuracy in advanced agentic routing and intelligent reranking.
<CTAButtons
primary={{ href: '/memory/quickstart', text: '⌘ Quickstart', sub:'(build an AI feature with Memory)' }}
secondary={{ href: '/sdk/memory', text: 'Start with Langbase SDK' }}
/>
<Img
light="https://raw.githubusercontent.com/LangbaseInc/docs-images/refs/heads/main/docs/memory/memory-agents-v2.jpg"
dark="https://raw.githubusercontent.com/LangbaseInc/docs-images/refs/heads/main/docs/memory/memory-agents-v2.jpg"
alt="Memory agents on Langbase"
caption="Memory agents: Upload. Train. Chat."
/>
**Large Language Models (LLMs) have a universal constraint.** They don't know anything about your private data. They are trained on public data, and they hallucinate when you ask them questions they don't have the answers to.
**Memory agents solve this problem** by dynamically attaching private data to any LLM at scale, with industry-leading accuracy in advanced agentic routing and intelligent reranking.
**Every Langbase org/user can have millions of personalized RAG knowledge bases** tailored for individual users or specific use cases. Traditional vector storage architecture makes this impossible.
So, memory agents are a managed context search API for developers. Empowering developers with a long-term memory solution that can acquire, process, retain, and later retrieve information. Combining vector storage, RAG (Retrieval-Augmented Generation), and internet access to help you build powerful AI features and products.
---
### Core functionality
- **Upload**: Upload documents, files, and web content to context
- **Process**: Automatically extract, embed, and create semantic index
- **Query**: Recall and retrieve relevant context using natural language queries
- **Rerank**: Automatically rerank retrieved results for higher relevance
- **Accuracy**: Near zero hallucinations with accurate context-aware information
---
### Key features
- **Semantic understanding**: Go beyond keyword matching with context-aware search
- **Vector storage**: Efficient hybrid similarity search for large-scale data
- **Semantic RAG**: Enhance LLM outputs with retrieved information from Memory
- **Internet access**: Augment your private data with up-to-date web content
<Note sub="Why?" className="mt-12">
All Large Language Models (LLMs) share one limitation, i.e. **Hallucination**.
LLMs don't know anything about your private data. They are trained on public data, and they hallucinate when you ask them questions they don't know the answers to.
This limitation makes it difficult for LLMs to provide accurate responses to your queries. Langbase long-term Memory solves this problem by allowing you to attach your private data to any LLM.
</Note>
---
In a Retrieval Augmented Generation (RAG) system, Memory is used with [Pipe agents](/pipe) to retrieve relevant data for queries.
The process involves:
- Creating query embeddings.
- Retrieving matching data from Memory.
- Augmenting the query with this data of 3-20 chunks.
- Using it to generate accurate, context-aware responses.
This integration ensures precise answers and enables use cases like document summarization, question-answering, and more.
---
<h1 className="text-3xl">Semantic Retrieval Augmented Generation (sRAG)</h1>
In a semantic RAG system, when an LLM is queried, it is provided with additional information relevant to the query from the Memory. This extra information helps the LLM to provide more accurate and relevant responses.
Below is the list of steps performed in a RAG system:
0. **Query**: User queries the LLM through Pipe. Embeddings are generated for the query.
1. **Retrieval**: Pipe retrieves query-relevant information from the Memory through similarity search.
2. **Augmentation**: Retrieved information is augmented with the query.
3. **Generation**: The augmented information is fed to the LLM to generate a response.
---
### Next steps
Time to build. Check out the quickstart overview example or Explore the API reference.
<CTAButtons
primary={{ href: '/memory/quickstart', text: '⌘ Quickstart', sub:'(build an AI feature with Memory)' }}
secondary={{ href: '/sdk/memory', text: 'Start with Langbase SDK' }}
/>
---
</content>
</doc>
<doc>
<metadata>
<title>MCP Servers</title>
<url>https://langbase.com/docs/mcp-servers/</url>
</metadata>
<content>
import { generateMetadata } from '@/lib/generate-metadata';
# MCP Servers
Langbase provides comprehensive support for Model Context Protocol (MCP). Connect AI models to both Langbase-provided and third-party MCP servers.
<CTAButtons
primary={{ href: '/mcp-servers/remote-mcp-server', text: 'Langbase Remote MCP Server' }}
secondary={{ href: '/mcp-servers/docs-mcp-server', text: 'Langbase Docs MCP Server' }}
/>
---
### Table of contents
- [What is MCP?](#what-is-mcp)
- [Langbase Remote MCP Server](#langbase-remote-mcp-server)
- [Langbase Docs MCP Server](#langbase-docs-mcp-server)
- [Third-party MCP servers with Langbase](#third-party-mcp-servers-with-langbase)
---
## What is MCP?
Model Context Protocol (MCP) is an open protocol that standardizes how applications provide context to LLMs. It provides a standardized way to connect AI models to different data sources and tools. You can deploy servers locally or remotely depending on your use case here are some of useful resources:
- [Official MCP Documentation](https://modelcontextprotocol.io/introduction) - The official documentation of the Model Context Protocol by Anthropic.
- [MCP GitHub Repository](https://github.com/modelcontextprotocol) - The official github repository with SDKs, servers implementations and more.
- [Cloudflare Remote MCP Server Guide](https://developers.cloudflare.com/agents/guides/remote-mcp-server/) - Step-by-step guide for deploying the Remote MCP Server.
---
## Langbase Remote MCP Server
Langbase provides a fully compliant Remote MCP server that enables direct interaction with your Langbase pipes, memories, and agents. Create new pipe agents, upload documents to memory, run existing pipes, and manage your entire Langbase workspace seamlessly from your IDE.
This server transforms your development environment into a powerful AI workspace where you can build, test, and deploy AI agents without leaving your code editor.
<CTAButtons
example
primary={{ href: '/mcp-servers/remote-mcp-server', text: '⌘ Explore Docs' }}
/>
## Langbase Docs MCP Server
The Langbase Docs MCP server allows IDEs like Cursor, Windsurf, etc., to access Langbase documentation. It provides LLMs with up-to-date context about Langbase APIs, SDK, and other resources present in the docs, enabling LLMs to deliver accurate and relevant answers to your Langbase-related queries.
Perfect for getting instant help with Langbase SDK, API, and troubleshooting directly in your IDE.
<CTAButtons
example
primary={{ href: '/mcp-servers/docs-mcp-server', text: '⌘ Explore Docs' }}
/>
---
## Third-party MCP servers with Langbase
Langbase provides comprehensive support for third-party MCP servers. Leverage external tools and data sources with our platform. Integrate popular MCP servers like Slack, Cloudflare Browser Rendering, Intercom and more.
MCP servers work with agent primitive. This enables you to create powerful AI agents that access external tools through a unified interface.
To use third-party MCP servers, include them in the `mcp_servers` parameter:
<CodeGroup title="Using third-party MCP servers with agent" exampleTitle="Using third-party MCP servers with agent">
```ts
const response = await langbase.agent.run({
model: 'openai:gpt-4.1-mini',
instructions: 'You are a helpful assistant.',
input: [
{
role: 'user',
content: 'What transport protocols does the MCP spec support?',
},
],
mcp_servers: [
{
type: 'url',
name: 'deepwiki',
url: 'https://mcp.deepwiki.com/sse',
},
],
stream: false,
});
```
</CodeGroup>
This approach combines Langbase infrastructure with specialized MCP servers.
---
## Next Steps
- Build something cool with [Langbase Remote MCP Server](/mcp-servers/remote-mcp-server) from your IDEs.
- Integrate [Langbase Docs MCP Server](/mcp-servers/docs-mcp-server) inside your IDEs and build with our [Langbase SDK](/sdk).
- Explore [Popular MCP Servers](/mcp-servers/popular-mcp-servers) that work with Langbase.
- Join our [Discord community](https://langbase.com/discord) for feedback, requests, and support.
---
</content>
</doc>
<doc>
<metadata>
<title>LLM Parameters Guide</title>
<url>https://langbase.com/docs/llm-parameters/</url>
</metadata>
<content>
import { generateMetadata } from '@/lib/generate-metadata';
import { LLMParametersGuide } from '@/components/LLMParametersGuide';
# LLM Parameters Guide
Learn how to control and fine-tune language model behavior with core LLM parameters
<LLMParametersGuide />
</content>
</doc>
<doc>
<metadata>
<title>Images</title>
<url>https://langbase.com/docs/images/</url>
</metadata>
<content>
import { generateMetadata } from '@/lib/generate-metadata';
<LanguageProvider defaultLanguage='typescript'>
# Images
The Images primitive makes it incredibly simple to generate stunning AI images using leading models from OpenAI, Together AI, Google, and more. In this quickstart, you'll learn how to generate your first AI image using Langbase.
<CTAButtons
primary={{ href: '/sdk/images', text: 'Start with Langbase SDK' }}
secondary={{ href: '/api-reference/images', text: 'API Reference' }}
/>
---
## Quickstart: Generate Your First AI Image
---
## Let's get started
In this guide, we'll use the Langbase SDK to interact with the Images API:
---
## Step #1: Generate Langbase API key
Every request you send to Langbase needs an [API key](/api-reference/api-keys). This guide assumes you already have one. In case you do not have an API key, please check the instructions below.
<Spoiler title="Get your Langbase API key: User or Org">
You can generate API keys from the [Langbase Studio](https://studio.langbase.com) by following these steps:
1. Switch to your user or org account.
2. From the sidebar, click on the `API keys`.
3. From here you can create a new API key or manage existing ones.
For more details follow the [Langbase API keys](/api-reference/api-keys) documentation.
</Spoiler>
---
## Step #2: Add LLM API keys
The Images API requires an LLM API key from your chosen image generation provider. Navigate to [LLM API keys](https://langbase.com/settings/keys#keyset) page and add keys for providers like OpenAI, Together AI, Google, etc.
<Spoiler title="Add LLM API keys to your account">
You can add LLM API keys in your account using [Langbase Studio](https://studio.langbase.com) by following these steps:
1. Switch to your user or org account.
2. From the sidebar, click on the `API keys` and scroll down to the LLM API keys section.
3. From here you can add LLM API keys for different providers like OpenAI, Together AI, Google, etc.
</Spoiler>
---
## Step #3: Setup your project [lang]
Create a new directory for your project and navigate to it.
<CodeGroup exampleTitle="Project setup" title="Project setup">
```bash
mkdir ai-image-generator && cd ai-image-generator
```
</CodeGroup>
### Initialize the project
<LanguageContent language="typescript">
Create a new Node.js project.
<CodeGroup exampleTitle="Initialize project" title="Initialize project">
```bash {{ title: 'npm' }}
npm init -y
```
```bash {{ title: 'pnpm' }}
pnpm init
```
```bash {{ title: 'yarn' }}
yarn init -y
```
</CodeGroup>
</LanguageContent>
<LanguageContent language="python">
Now let's create a new virtual environment and activate it.
<CodeGroup exampleTitle="Initialize project" title="Initialize project">
```bash {{ title: 'macOS/Linux' }}
python -m venv .venv && source .venv/bin/activate
```
```bash {{ title: 'Windows' }}
python -m venv .venv && .venv\Scripts\activate
```
</CodeGroup>
</LanguageContent>
### Install dependencies
You will use the [Langbase SDK](/sdk) to generate images and `dotenv` to manage environment variables. So, let's install these dependencies.
<LanguageContent language="typescript">
<CodeGroup exampleTitle="Install dependencies" title="Install dependencies">
```bash {{ title: 'npm' }}
npm i langbase dotenv
```
```bash {{ title: 'pnpm' }}
pnpm add langbase dotenv
```
```bash {{ title: 'yarn' }}
yarn add langbase dotenv
```
</CodeGroup>
</LanguageContent>
<LanguageContent language="python">
<CodeGroup exampleTitle="Install dependencies" title="Install dependencies">
```bash {{ title: 'pip' }}
pip install langbase python-dotenv
```
</CodeGroup>
</LanguageContent>
### Create an env file
Create a `.env` file in the root of your project and add the following environment variables:
```bash {{ title: '.env' }}
LANGBASE_API_KEY=xxxxxxxxx
OPENAI_API_KEY=xxxxxxxxx
```
Replace `xxxxxxxxx` with your Langbase API key and your OpenAI API key (or any other provider's key).
---
## Step #4: Generate your first AI image
<LanguageContent language="typescript">
Create a new file named `generate-image.ts` and add the following code to generate an AI image:
<CodeGroup exampleTitle="Generate AI image" title="generate-image.ts">
```ts {{ title: 'TypeScript' }}
import 'dotenv/config';
import { Langbase } from 'langbase';
const langbase = new Langbase({
apiKey: process.env.LANGBASE_API_KEY!,
});
async function main() {
const result = await langbase.images.generate({
prompt: "A futuristic cityscape with flying cars and neon lights, cyberpunk style, highly detailed, 8k resolution",
model: "openai:gpt-image-1",
apiKey: process.env.OPENAI_API_KEY!
});
console.log('✅ Image generated successfully!');
console.log('Image URL:', result.choices[0].message.images[0].image_url.url);
}
main();
```
</CodeGroup>
Let's generate your first AI image by running the above file:
<CodeGroup exampleTitle="Generate image" title="Generate image">
```bash {{ title: 'npm' }}
npx tsx generate-image.ts
```
```bash {{ title: 'pnpm' }}
pnpm dlx tsx generate-image.ts
```
</CodeGroup>
</LanguageContent>
<LanguageContent language="python">
Create a new file named `generate-image.py` and add the following code to generate an AI image:
<CodeGroup exampleTitle="Generate AI image" title="generate-image.py">
```py {{ title: 'Python' }}
import os
import json
from langbase import Langbase
from dotenv import load_dotenv
load_dotenv()
langbase = Langbase(api_key=os.getenv('LANGBASE_API_KEY'))
def main():
result = langbase.images.generate(
prompt="A futuristic cityscape with flying cars and neon lights, cyberpunk style, highly detailed, 8k resolution",
model="openai:gpt-image-1",
api_key=os.getenv('OPENAI_API_KEY')
)
print('✅ Image generated successfully!')
print('Image URL:', result['choices'][0]['message']['images'][0]['image_url']['url'])
if __name__ == "__main__":
main()
```
</CodeGroup>
Let's generate your first AI image by running the above file:
<CodeGroup exampleTitle="Generate image" title="Generate image">
```bash {{ title: 'pip' }}
python generate-image.py
```
</CodeGroup>
</LanguageContent>
This will generate an AI image based on the prompt and return the image URL. You can open the URL in your browser to view the generated image.
---
✨ **Congrats, you have generated your first AI image**. We're excited to see what you create with it.
---
## Next Steps
Feel free to experiment with different models, prompts, and parameters.
- Next up, use the [API Reference](/api-reference/images) to learn more about the Images API.
- Check out [Images examples](/images/examples) for more use cases.
- Join our [Discord community](https://langbase.com/discord) for feedback, requests, and support.
Share your feedback and suggestions with us. Post on [𝕏 (Twitter)][x], [LinkedIn][li], or [email us][email].
We're here to help you turn your ideas into AI.
Let's go!
---
[x]: https://twitter.com/LangbaseInc
[li]: https://www.linkedin.com/company/langbase/
[email]: mailto:support@langbase.com?subject=Images-Quickstart&body=Ref:%20https://langbase.com/docs/images/quickstart
</LanguageProvider>
</content>
</doc>
<doc>
<metadata>
<title>Examples</title>
<url>https://langbase.com/docs/examples/</url>
</metadata>
<content>
import { ExampleAccordion } from '@/components/mdx/example-card';
import { generateMetadata } from '@/lib/generate-metadata';
# Examples
Here’s a list of examples to help you create pipe agents, memory agents, manage threads, and more.
<ExampleAccordion type="Pipe Agent" />
---
</content>
</doc>
<doc>
<metadata>
<title>Embed</title>
<url>https://langbase.com/docs/embed/</url>
</metadata>
<content>
import { generateMetadata } from '@/lib/generate-metadata';
<LanguageProvider defaultLanguage='typescript'>
# Embed
Embed, an AI Primitive by Langbase, allows you to convert text into vector embeddings. This is particularly useful for semantic search, text similarity comparisons, and other NLP tasks.
Embedding text into vectors enables you to perform complex queries and analyses that go beyond simple keyword matching. It allows you to capture the semantic meaning of the text, making it easier to find relevant information based on context rather than just keywords.
<CTAButtons
primary={{ href: '/sdk/embed', text: 'Start with Langbase SDK' }}
secondary={{ href: '/api-reference/embed', text: 'API reference' }}
/>
---
## Quickstart: Converting Text to Vector Embeddings
---
## Let's get started
In this guide, we'll use the Langbase SDK to interact with the Embed API:
---
## Step #1: Generate Langbase API key
Every request you send to Langbase needs an [API key](/api-reference/api-keys). This guide assumes you already have one. If not, please check the instructions below.
<Spoiler title="Get your Langbase API key: User or Org">
You can generate API keys from the [Langbase Studio](https://studio.langbase.com) by following these steps:
1. Switch to your user or org account.
2. From the sidebar, click on the `API keys`.
3. From here you can create a new API key or manage existing ones.
</Spoiler>
<Note sub="Embedding Models API Keys">
Please add the [LLM API keys](/features/keysets) for the embedding models you want to use in your API key settings.
</Note>
---
## Step #2: Setup your project [lang]
Create a new directory for your project and navigate to it.
<CodeGroup exampleTitle="Project setup" title="Project setup">
```bash
mkdir text-embedder && cd text-embedder
```
</CodeGroup>
### Initialize the project
<LanguageContent language="typescript">
Create a new Node.js project.
<CodeGroup exampleTitle="Initialize project" title="Initialize project">
```bash {{ title: 'npm' }}
npm init -y
```
```bash {{ title: 'pnpm' }}
pnpm init
```
```bash {{ title: 'yarn' }}
yarn init -y
```
</CodeGroup>
</LanguageContent>
<LanguageContent language="python">
Now let's create a new virtual environment and activate it.
<CodeGroup exampleTitle="Initialize project" title="Initialize project">
```bash {{ title: 'macOS/Linux' }}
python -m venv .venv && source .venv/bin/activate
```
```bash {{ title: 'Windows' }}
python -m venv .venv && .venv\Scripts\activate
```
</CodeGroup>
</LanguageContent>
### Install dependencies
You will use the [Langbase SDK](/sdk) to work with Embed and `dotenv` to manage environment variables.
<LanguageContent language="typescript">
<CodeGroup exampleTitle="Install dependencies" title="Install dependencies">
```bash {{ title: 'npm' }}
npm i langbase dotenv
```
```bash {{ title: 'pnpm' }}
pnpm add langbase dotenv
```
```bash {{ title: 'yarn' }}
yarn add langbase dotenv
```
</CodeGroup>
</LanguageContent>
<LanguageContent language="python">
<CodeGroup exampleTitle="Install dependencies" title="Install dependencies">
```bash
pip install langbase python-dotenv
```
</CodeGroup>
</LanguageContent>
### Create an env file
Create a `.env` file in the root of your project and add your Langbase API key:
```bash {{ title: '.env' }}
LANGBASE_API_KEY=your_api_key_here
```
## Step #3: Create an embedding generator
<LanguageContent language="typescript">
Let's create a file named `generate-embeddings.ts` in your project directory that will demonstrate how to generate embeddings for text chunks:
```ts{{ title: 'generate-embeddings.ts' }}
import 'dotenv/config';
import { Langbase } from 'langbase';
const langbase = new Langbase({
apiKey: process.env.LANGBASE_API_KEY!,
});
async function main() {
// Define some text chunks to embed
const textChunks = [
"Artificial intelligence is transforming how we interact with technology",
"Machine learning algorithms can identify patterns in large datasets",
"Natural language processing helps computers understand human language",
"Vector embeddings represent text as points in a high-dimensional space"
];
try {
// Generate embeddings
const embeddings = await langbase.embed({
chunks: textChunks,
// Optional: specify the embedding model
// embeddingModel: "openai:text-embedding-3-large"
});
console.log("Number of embeddings generated:", embeddings.length);
console.log("First embedding (showing first 5 dimensions):", embeddings[0].slice(0, 5));
console.log("Embedding dimensions:", embeddings[0].length);
// Log the full first embedding vector
console.log("\nComplete first embedding vector:");
console.log(embeddings[0]);
} catch (error) {
console.error("Error generating embeddings:", error);
}
}
main();
```
</LanguageContent>
<LanguageContent language="python">
Let's create a file named `generate-embeddings.py` in your project directory that will demonstrate how to generate embeddings for text chunks:
```python{{ title: 'generate-embeddings.py' }}
import os
import json
from langbase import Langbase
from dotenv import load_dotenv
load_dotenv()
langbase = Langbase(api_key=os.getenv('LANGBASE_API_KEY'))
def main():
textChunks = [
"Artificial intelligence is transforming how we interact with technology",
"Machine learning algorithms can identify patterns in large datasets",
"Natural language processing helps computers understand human language",
"Vector embeddings represent text as points in a high-dimensional space"
]
response = langbase.embed(
chunks=textChunks,
embedding_model='openai:text-embedding-3-large'
)
print("Number of embeddings generated:", len(response))
print("First embedding (showing first 5 dimensions):", response[0][:5])
print("Embedding dimensions:", len(response[0]))
# Log the full first embedding vector
print("\nComplete first embedding vector:")
print(response[0])
# print(json.dumps(response, indent=2))
if __name__ == '__main__':
main()
```
</LanguageContent>
## Step #4: Run the script
Run the script to generate embeddings for your text chunks:
<LanguageContent language="typescript">
<CodeGroup exampleTitle="Run the script" title="Run the script">
```bash {{ title: 'npm' }}
npx tsx generate-embeddings.ts
```
```bash {{ title: 'pnpm' }}
pnpm dlx tsx generate-embeddings.ts
```
</CodeGroup>
</LanguageContent>
<LanguageContent language="python">
<CodeGroup exampleTitle="Run the script" title="Run the script">
```bash {{ title: 'python' }}
python generate-embeddings.py
```
</CodeGroup>
</LanguageContent>
You should see output showing the number of embeddings generated, a sample of the first embedding vector, and the full details of the first embedding vector:
```
Number of embeddings generated: 4
First embedding (showing first 5 dimensions): [-0.023, 0.128, -0.194, 0.067, -0.022]
Embedding dimensions: 1536
Complete first embedding vector:
[-0.023, 0.128, -0.194, 0.067, -0.022, ... ]
```
## Next Steps
- Build a semantic search system using your embeddings
- Combine with other Langbase primitives like Chunk to process documents before embedding
- Create a RAG (Retrieval-Augmented Generation) system using your embedded documents
- Join our [Discord community](https://langbase.com/discord) for feedback, requests, and support
---
</LanguageProvider>
</content>
</doc>
<doc>
<metadata>
<title>Composable AI</title>
<url>https://langbase.com/docs/composable-ai/</url>
</metadata>
<content>
import { generateMetadata } from '@/lib/generate-metadata';
# Composable AI
## The Developer Friendly Future of AI Infrastructure
In software engineering, composition is a powerful concept. It allows for building complex systems from simple, interchangeable parts. Think Legos, Docker containers, React components. Langbase extends this concept to AI infrastructure with our **Composable AI** stack using [Pipes][pipe] and [Memory][memory].
---
## Why Composable AI?
**Composable and personalized AI**: With Langbase, you can compose multiple models together into pipelines. It's easier to think about, easier to develop for, and each pipe lets you choose which model to use for each task. You can see cost of every step. And allow your customers to hyper-personalize.
**Effortlessly zero-config AI infra**: Maybe you want to use a smaller, domain-specific model for one task, and a larger general-purpose model for another task. Langbase makes it easy to use the right primitives and tools for each part of the job and provides developers with a zero-config composable AI infrastructure.
That's a nice way of saying, *you get a unicorn-scale API in minutes, not months*.
> **The most common problem** I hear about in Gen AI space is that my AI agents are too complex and I can't scale them, too much AI talking to AI. I don't have control, I don't understand the cost, and the impact of this change vs that. Time from new model to prod is too long. Feels static, my customers can't personalize it. ⌘ Langbase fixes all this. — [AA](https://www.linkedin.com/in/MrAhmadAwais/)
---
<DesktopOnly>
## Interactive Example: Composable AI Email Agent
But how does Composable AI work?
Here's an interactive example of a composable AI Email Agent: Classifies, summarizes, responds. Click to send a spam or valid email and check how composable it is: Swap any pipes, any LLM, hyper-personalize (you or your users), observe costs. Everything is composable.
<Flows/>
---
</DesktopOnly>
## Example: Composable AI Email Agent
<Img
light="/docs/email-agent.png"
dark="/docs/email-agent.png"
alt="⌘ Langbase Email Agent"
caption="⌘ Langbase Email Agent reference architecture"
/>
I have built an AI email agent that can read my emails, understand the sentiment, summarize, and respond to them. Let's break it down to how it works, hint several pipes working together to make smart personalized decisions.
1. I created a pipe: `email-sentiment` — this one reads my emails to understand the sentiment
2. `email-summarizer` pipe — it summarizes my emails so I can quickly understand them
3. `email-decision-maker` pipe — should I respond? is it urgent? is it a newsletter?
4. If `email-decision-maker` pipe says *yes*, then I need to respond. This invokes the final pipe
5. `email-writer` pipe — writes a draft response to my emails with one of the eight formats I have
## Why Composable AI is powerful?
Ah, the power of composition. I can swap out any of these pipes with a new one.
- **Flexibility**: Swap components without rewriting everything
- **Reusability**: Build complex systems from simple, tested parts
- **Scalability**: Optimize at the component level for better performance
- **Observability**: Monitor and debug each step of your AI pipeline
### Control flow
- Maybe I want to use a different sentiment analysis model
- Or maybe I want to use a different summarizer when I'm on vacation
- I can chose a different LLM (small or large) based on the task
- BTW I definitely use a different `decision-maker` pipe on a busy day.
### Extensibility
- **Add more when needed**: I can also add more pipes to this pipeline. Maybe I want to add a pipe that checks my calendar or the weather before I respond to an email. You get the idea. Always bet on composition.
- **Eight Formats to write emails**: And I have several formats. Because Pipes are composable, I have eight different versions of `email-writer` pipe. I have a pipe `email-pick-writer` that picks the correct pipe to draft a response with. Why? I talk to my friends differently than my investors, reports, managers, vendors — you name it.
### Long-term memory and context awareness
- By the way, I have all my emails in an `emails-store` memory, which any of these pipes can refer to if needed. That's managed [semantic RAG][memory] over all the emails I have ever received.
- And yes, my `emails-smart-spam` memory knows all the pesky smart spam emails that I don't want to see in my inbox.
### Cost & Observability
- Because each intent and action is mapped out Pipe — which is an excellent primitive for using LLMs, I can see everything related to cost, usage, and effectiveness of each pipe. I can see how many emails were processed, how many were responded to, how many were marked as spam, etc.
- I can switch LLMs for any of these actions, [fork a pipe][fork], and see how it performs. I can version my pipes and see how the new version performs against the old one.
- And we're just getting started …
### Why Developers Love It
- **Modular**: Build, test, and deploy pipes x memorysets independently
- **Extensible**: API-first no dependency on a single language
- **Version Control Friendly**: Track changes at the pipe level
- **Cost-Effective**: Optimize resource usage for each AI task
- **Stakeholder Friendly**: Collaborate with your team on each pipe and memory. All your R&D team, engineering, product, GTM (marketing, sales), and even stakeholders can collaborate on the same pipe. It's like a Google Doc x GitHub for AI. That's what makes it so powerful.
---
Each pipe and memory are like a docker container. You can have any number of pipes and memorysets.
Can't wait to share more exciting examples of composable AI. We're cookin!!
We'll share more on this soon. Follow us on [Twitter][x] and [LinkedIn][li] for updates.
[pipe]: /pipe/
[memory]: /memory
[signup]: https://langbase.fyi/awesome
[x]: https://twitter.com/LangbaseInc
[li]: https://www.linkedin.com/company/langbase/
[email]: mailto:support@langbase.com?subject=Pipe-Quickstart&body=Ref:%20https://langbase.com/docs/pipe/quickstart
[fork]: https://langbase.com/docs/features/fork
---
</content>
</doc>
<doc>
<metadata>
<title>Command – Vibe Code AI Agents</title>
<url>https://langbase.com/docs/command/</url>
</metadata>
<content>
import { generateMetadata } from '@/lib/generate-metadata';
# Command – Vibe Code AI Agents
**Command – Computer Human AI** by Langbase lets you vibe code AI agents. Like an on-demand AI engineer, it turns prompts into **production ready** agents.
Prompt your AI agent idea, and Command builds a fully functional agent — complete with **API** and the **Agent App** that are deployed on Langbase, the most powerful AI serverless platform.
Key features of Command include:
- **Agent IDE**: A powerful code editor for editing, debugging, and observing the agent
- **Agent App**: Every agent has a production-ready, shareable app
- **Agent API**: Ready-to-use API for your agent, with code snippets
- **Deployments**: Scalable, production ready deployments
- **Prompt Modes**: Agent and App modes for specific updates
- **Version Control**: Track changes and revert to previous versions
- **Fork Agents**: Copy other agents and make them your own
- **Share**: Live deployed URLs to share your agents with the world
- **Flow**: Visualized flows for understanding complex agent logic
- **Memory Agents**: Ready-to-use RAG pipeline
- **Agent Readme**: Automatically generated documentation for your agent
<CTAButtons
example
className="my-8"
primary={{
href: 'https://command.new',
text: 'Try Command.new and build your first agent',
}}
/>
---
## Quickstart: Vibe code and deploy AI agents with Command.
In this guide, we will use [Command.new](https://Command.new) to build an AI Support Agent that will answer user queries relevant to company documentation.
---
## Prerequisites
To follow this guide, you will need a **Command/Langbase Account**. Sign up at [Command.new](https://command.new) if you haven't already.
---
## Step #1: Create Your First Agent with Command
You can prompt Command for vibe coding AI agents. Just describe what you want to create in the prompt box. The more specific you are, the better the results.
Enter an initial prompt for your agent idea, and Command will continue from there. You can keep refining and adjusting your agent as you go.
Let's use the following prompt:
> Build an AI Support agent that uses my docs as memory for autonomous AutoRAG
<Img
light="https://raw.githubusercontent.com/LangbaseInc/docs-images/refs/heads/main/docs/command/prompt-1.png"
dark="https://raw.githubusercontent.com/LangbaseInc/docs-images/refs/heads/main/docs/command/prompt-1.png"
alt="Prompt Command"
caption=""
/>
## Step #2: Vibe code and refine your agent
When you enter a prompt, Command begins the agent creation process. It lays out the foundational structure of your agent, and starts generating the necessary code to bring it to life. This includes:
- `agent.ts` – The main logic of your agent and its workflow
- `app` – Agent app directory, which contains the app and frontend code (React components) for your agent
Command generates the agent code in real-time in the Agent IDE, where all code generation and editing takes place. You can toggle between files, edit them manually or prompt Command to make changes.
<Img
light="https://raw.githubusercontent.com/LangbaseInc/docs-images/refs/heads/main/docs/command/command-agent-created.jpg"
dark="https://raw.githubusercontent.com/LangbaseInc/docs-images/refs/heads/main/docs/command/command-agent-created.jpg"
alt="Agent created by Command"
caption="Agent created by Command"
/>
## Step #3: Add files to agent memory
Command intelligently detects when an agent requires access to private or extended data (RAG). In such cases, it automatically creates [memory agents](/memory) — specialized agents equipped with human-like long-term memory.
In this case, Command has created a **Support Docs** memory for us. It will store the company documentation and provide it to the Support Agent when needed.
### Step 3.1: Download sample file
For this guide, you can download and use this example documentation file.
<DownloadSampleDoc
href="/docs/agent-architectures.txt"
btnText="Download example file about agents architectures"
/>
Next, open the memories tab and click on the **Support Docs** memory.
<Img
light="https://raw.githubusercontent.com/LangbaseInc/docs-images/refs/heads/main/docs/command/command-memory-1.jpg"
dark="https://raw.githubusercontent.com/LangbaseInc/docs-images/refs/heads/main/docs/command/command-memory-1.jpg"
alt="Memory Agents inside Command"
caption="Memory tab"
/>
### Step 3.2: Upload document to memory
Upload the downloaded documentation file to the memory agent. You can add any documents that your agent needs to reference when answering user queries.
Once uploaded, the documents are parsed, chunked, and embedded, making them searchable and retrievable by the agent.
<Img
light="https://raw.githubusercontent.com/LangbaseInc/docs-images/refs/heads/main/docs/command/command-memory-2.jpg"
dark="https://raw.githubusercontent.com/LangbaseInc/docs-images/refs/heads/main/docs/command/command-memory-2.jpg"
alt="Uploading documents to memory agent"
caption="Uploading document to memory"
/>
## Step #4: Deploy the agent
When you're ready, click **Deploy** in the top-right corner. If your agent uses specific LLMs or tools, you may need to add API keys in the **Environment Variables** section.
If you are a Langbase user and have LLM keys saved in your [profile keyset](https://langbase.com/settings/keys#keyset), they'll be automatically imported here. You can set environment variables per agent to securely store sensitive info like API keys, keeping them out of your code.
You can see **Logs** for each deployment to help you track progress and troubleshoot any issues. Once deployment is complete, your agent will be ready to use.
<Img
light="https://raw.githubusercontent.com/LangbaseInc/docs-images/refs/heads/main/docs/command/command-deploy.jpg"
dark="https://raw.githubusercontent.com/LangbaseInc/docs-images/refs/heads/main/docs/command/command-deploy.jpg"
alt="Deploying the agent"
caption="Deploying the agent"
/>
Once deployed, you will have access to:
- **Agent App** – A prod-ready app to interact with, and share the agent
- **Agent API** – Ready-to-use, scalable serverless endpoint for your agent
- **Agent Flow** – A visual, diagrammatic representation of the agent's logic, to understand how it works
You can also edit the agent's code, or download it if you prefer to self-host it.
## Step #6: Use the agent through Agent App
Alongside the agent, Command automatically generates a full-fledged application for the agent. We call them Agent Apps, and they are:
- Production ready
- Auto update when the agent changes
- Fully hosted, instantly shareable
- Mobile & desktop ready
- Customizable using the **App Prompt Mode**
Navigate to the **App** tab, where you can test and use your agent through UI.
<Img
light="https://raw.githubusercontent.com/LangbaseInc/docs-images/refs/heads/main/docs/command/command-api.jpg"
dark="https://raw.githubusercontent.com/LangbaseInc/docs-images/refs/heads/main/docs/command/command-app.jpg"
alt="Using the Agent App"
caption="Using the Agent App"
/>
You can test the agent with a prompt like ***"What is prompt chaining architecture?"*** and it should respond with an answer based on the documentation you uploaded.
For more observability, agent app has a **Console** for debugging and observing the agent's behavior. It logs every API call and response made by the agent.
## Step #7: Use the agent through Agent API
Now that you have deployed your AI support agent on Command, you can use it in your apps, websites, or literally anywhere you want.
1. Go to the **API tab**.
2. Retrieve your **API base URL** and **API key**.
3. Make sure to never use your API key on client-side code. Always use it on server-side code. Your API key is like a password, keep it safe. If you think it's compromised, you can always regenerate a new one.
<Img
light="https://raw.githubusercontent.com/LangbaseInc/docs-images/refs/heads/main/docs/command/command-api.jpg"
dark="https://raw.githubusercontent.com/LangbaseInc/docs-images/refs/heads/main/docs/command/command-api.jpg"
alt="Using the Agent API"
caption="Using the Agent API"
/>
You will also find code snippets there for various languages to help you get started quickly. Here's an example snippet of agent API call in Node.js:
```js {{title: 'Calling the Agent API in Node.js'}}
async function main() {
const api = `https://api.langbase.com/devlangbase/doc-rag-support-agent-2dfd`;
const response = await fetch(api, {
method: 'POST',
headers: {
'Authorization': `Bearer YOUR_LANGBASE_API_KEY`,
'Content-Type': 'application/json'
},
body: JSON.stringify({"input":""})
});
if (!response.ok) {
throw new Error(`Error: ${response.statusText}`);
}
const agentResponse = await response.json();
console.log('Agent response:', agentResponse);
}
```
## Step #8: Bonus – Visualize Your Agent's Logic with Agent Flow
But wait, there's more. Command automatically generates a visual **Agent Flow** to help you understand how your agent works. Keep an eye on your agent's Flow to ensure it behaves as intended.
Agents can quickly become complex, with multiple decision paths, tools, and branching conditions. The Agent Flow provides a clear view of the agent's logic, including its decision paths, tools used, and branching conditions.
<Img
light="https://raw.githubusercontent.com/LangbaseInc/docs-images/refs/heads/main/docs/command/command-flow.jpg"
dark="https://raw.githubusercontent.com/LangbaseInc/docs-images/refs/heads/main/docs/command/command-flow.jpg"
alt="Agent Flow"
caption="Agent Flow"
/>
---
## What Will You Build?
Command gives you the tools to spin up agents that actually do things — no complex setup, no boilerplate.
Here are a few ideas to get your wheels turning:
* **AI Onboarding Agent** – Help new hires ramp up without bugging your team.
* **Research Assistant** – A lightweight Perplexity-style bot tuned to your workflow.
* **Meeting Summary Agent** – Drop in a transcript, get back action items and TL;DRs.
* **Social Media Agent** – Generate posts that sound like you (on your best day).
* **AI Email Agent** – Triage and respond to emails so you don't have to.
* **Recruitment Agent** – Parse resumes, write job descriptions, compare candidates.
## Next Steps
You're all set up. Here's what to try next:
* Build an agent that solves a real problem—and share it with the world.
* Explore what you can do with [Langbase APIs](/api-reference) and [SDK](/sdk).
* Drop by our [Discord](https://langbase.com/discord) to get help, give feedback, or show off what you've made.
---
</content>
</doc>
<doc>
<metadata>
<title>Chunker</title>
<url>https://langbase.com/docs/chunker/</url>
</metadata>
<content>
import { generateMetadata } from '@/lib/generate-metadata';
<LanguageProvider defaultLanguage='typescript'>
# Chunker
Chunker, an AI Primitive by Langbase, allows you to split text into smaller, manageable pieces. This is especially useful for RAG pipelines or when you need to work with only specific sections of a document.
Especially, useful when building AI agents RAG. Chunking text can help improve the performance of your AI applications by allowing you to focus on relevant sections of text, making it easier to analyze and process information. This is especially beneficial for large documents where you may not need to use the entire content.
<CTAButtons
primary={{ href: '/sdk/chunker', text: 'Start with Langbase SDK' }}
secondary={{ href: '/api-reference/chunker', text: 'API reference' }}
/>
---
## Quickstart: Splitting Text into Chunks
---
## Let's get started
In this guide, we'll use the Langbase SDK to interact with the Chunker API:
---
## Step #1: Generate Langbase API key
Every request you send to Langbase needs an [API key](/api-reference/api-keys). This guide assumes you already have one. If not, please check the instructions below.
<Spoiler title="Get your Langbase API key: User or Org">
You can generate API keys from the [Langbase Studio](https://studio.langbase.com) by following these steps:
1. Switch to your user or org account.
2. From the sidebar, click on the `API keys`.
3. From here you can create a new API key or manage existing ones.
For more details, follow the [Langbase API keys](/api-reference/api-keys) documentation.
</Spoiler>
---
## Step #2: Setup your project [lang]
Create a new directory for your project and navigate to it.
<CodeGroup exampleTitle="Project setup" title="Project setup">
```bash
mkdir document-chunker && cd document-chunker
```
</CodeGroup>
### Initialize the project
Create a new Node.js project.
<LanguageContent language="typescript">
<CodeGroup exampleTitle="Initialize project" title="Initialize project">
```bash {{ title: 'npm' }}
npm init -y
```
```bash {{ title: 'pnpm' }}
pnpm init
```
```bash {{ title: 'yarn' }}
yarn init -y
```
</CodeGroup>
</LanguageContent>
<LanguageContent language="python">
<CodeGroup exampleTitle="Initialize project" title="Initialize project">
```bash {{ title: 'macOS/Linux' }}
python -m venv .venv && source .venv/bin/activate
```
```bash {{ title: 'Windows' }}
python -m venv .venv && .venv\Scripts\activate
```
</CodeGroup>
</LanguageContent>
### Install dependencies
You will use the [Langbase SDK](/sdk) to work with Chunker and `dotenv` to manage environment variables.
<LanguageContent language="typescript">
<CodeGroup exampleTitle="Install dependencies" title="Install dependencies">
```bash {{ title: 'npm' }}
npm i langbase dotenv
```
```bash {{ title: 'pnpm' }}
pnpm add langbase dotenv
```
```bash {{ title: 'yarn' }}
yarn add langbase dotenv
```
</CodeGroup>
</LanguageContent>
<LanguageContent language="python">
<CodeGroup exampleTitle="Install dependencies" title="Install dependencies">
```bash
pip install langbase python-dotenv
```
</CodeGroup>
</LanguageContent>
### Create an env file
Create a `.env` file in the root of your project and add your Langbase API key:
```bash {{ title: '.env' }}
LANGBASE_API_KEY=your_api_key_here
```
---
## Step #3: Chunk the text
Now, let's create a simple script to demonstrate how to split the text content into chunks:
<LanguageContent language="typescript">
<CodeGroup exampleTitle="Chunk text" title="chunk-text.ts">
```ts {{ title: 'TypeScript' }}
import 'dotenv/config';
import { Langbase } from 'langbase';
// Initialize the Langbase client
const langbase = new Langbase({
apiKey: process.env.LANGBASE_API_KEY!,
});
async function main(content) {
// Chunk the document
const chunks = await langbase.chunker({
content,
chunkMaxLength: 1024,
chunkOverlap: 256
});
console.log(`Total chunks created: ${chunks.length}`);
console.log('Chunks:', chunks);
}
// Document content to chunk
const content = `Composable AI
The Developer Friendly Future of AI Infrastructure
In software engineering, composition is a powerful concept. It allows for building complex systems from simple, interchangeable parts. Think Legos, Docker containers, React components. Langbase extends this concept to AI infrastructure with our Composable AI stack using Pipes and Memory.
Why Composable AI?
Composable and personalized AI: With Langbase, you can compose multiple models together into pipelines. It's easier to think about, easier to develop for, and each pipe lets you choose which model to use for each task. You can see cost of every step. And allow your customers to hyper-personalize.
Effortlessly zero-config AI infra: Maybe you want to use a smaller, domain-specific model for one task, and a larger general-purpose model for another task. Langbase makes it easy to use the right primitives and tools for each part of the job and provides developers with a zero-config composable AI infrastructure.
That's a nice way of saying, you get a unicorn-scale API in minutes, not months.
The most common problem I hear about in Gen AI space is that my AI agents are too complex and I can't scale them, too much AI talking to AI. I don't have control, I don't understand the cost, and the impact of this change vs that. Time from new model to prod is too long. Feels static, my customers can't personalize it. ⌘ Langbase fixes all this. — AA
Interactive Example: Composable AI Email Agent
But how does Composable AI work?
Here's an interactive example of a composable AI Email Agent: Classifies, summarizes, responds. Click to send a spam or valid email and check how composable it is: Swap any pipes, any LLM, hyper-personalize (you or your users), observe costs. Everything is composable.
I'm stuck and frustrated because the billing API isn't working and the API documentation is outdated.
Congratulations! You have been selected as the winner of a $100 million lottery!
Send a demo request to understand composable AIarrow
Example: Composable AI Email Agent
⌘ Langbase Email Agent
⌘ Langbase Email Agent reference architecture
I have built an AI email agent that can read my emails, understand the sentiment, summarize, and respond to them. Let's break it down to how it works, hint several pipes working together to make smart personalized decisions.
I created a pipe: email-sentiment — this one reads my emails to understand the sentiment
email-summarizer pipe — it summarizes my emails so I can quickly understand them
email-decision-maker pipe — should I respond? is it urgent? is it a newsletter?
If email-decision-maker pipe says yes, then I need to respond. This invokes the final pipe
email-writer pipe — writes a draft response to my emails with one of the eight formats I have
Why Composable AI is powerful?
Ah, the power of composition. I can swap out any of these pipes with a new one.
Flexibility: Swap components without rewriting everything
Reusability: Build complex systems from simple, tested parts
Scalability: Optimize at the component level for better performance
Observability: Monitor and debug each step of your AI pipeline
Control flow
Maybe I want to use a different sentiment analysis model
Or maybe I want to use a different summarizer when I'm on vacation
I can chose a different LLM (small or large) based on the task
BTW I definitely use a different decision-maker pipe on a busy day.
Extensibility
Add more when needed: I can also add more pipes to this pipeline. Maybe I want to add a pipe that checks my calendar or the weather before I respond to an email. You get the idea. Always bet on composition.
Eight Formats to write emails: And I have several formats. Because Pipes are composable, I have eight different versions of email-writer pipe. I have a pipe email-pick-writer that picks the correct pipe to draft a response with. Why? I talk to my friends differently than my investors, reports, managers, vendors — you name it.
Long-term memory and context awareness
By the way, I have all my emails in an emails-store memory, which any of these pipes can refer to if needed. That's managed semantic RAG over all the emails I have ever received.
And yes, my emails-smart-spam memory knows all the pesky smart spam emails that I don't want to see in my inbox.
Cost & Observability
Because each intent and action is mapped out Pipe — which is an excellent primitive for using LLMs, I can see everything related to cost, usage, and effectiveness of each pipe. I can see how many emails were processed, how many were responded to, how many were marked as spam, etc.
I can switch LLMs for any of these actions, fork a pipe, and see how it performs. I can version my pipes and see how the new version performs against the old one.
And we're just getting started …
Why Developers Love It
Modular: Build, test, and deploy pipes x memorysets independently
Extensible: API-first no dependency on a single language
Version Control Friendly: Track changes at the pipe level
Cost-Effective: Optimize resource usage for each AI task
Stakeholder Friendly: Collaborate with your team on each pipe and memory. All your R&D team, engineering, product, GTM (marketing, sales), and even stakeholders can collaborate on the same pipe. It's like a Google Doc x GitHub for AI. That's what makes it so powerful.
Each pipe and memory are like a docker container. You can have any number of pipes and memorysets.
Can't wait to share more exciting examples of composable AI. We're cookin!!
We'll share more on this soon. Follow us on Twitter and LinkedIn for updates.
`;
// Chunk the content.
main(content);
```
</CodeGroup>
</LanguageContent>
<LanguageContent language="python">
<CodeGroup exampleTitle="Chunk text" title="chunk-text.py">
```python {{ title: 'Python' }}
import os
import json
from langbase import Langbase
from dotenv import load_dotenv
load_dotenv()
langbase = Langbase(api_key=os.getenv('LANGBASE_API_KEY'))
def main():
content = """Composable AI
The Developer Friendly Future of AI Infrastructure
In software engineering, composition is a powerful concept. It allows for building complex systems from simple, interchangeable parts. Think Legos, Docker containers, React components. Langbase extends this concept to AI infrastructure with our Composable AI stack using Pipes and Memory.
Why Composable AI?
Composable and personalized AI: With Langbase, you can compose multiple models together into pipelines. It's easier to think about, easier to develop for, and each pipe lets you choose which model to use for each task. You can see cost of every step. And allow your customers to hyper-personalize.
Effortlessly zero-config AI infra: Maybe you want to use a smaller, domain-specific model for one task, and a larger general-purpose model for another task. Langbase makes it easy to use the right primitives and tools for each part of the job and provides developers with a zero-config composable AI infrastructure.
That's a nice way of saying, you get a unicorn-scale API in minutes, not months.
The most common problem I hear about in Gen AI space is that my AI agents are too complex and I can't scale them, too much AI talking to AI. I don't have control, I don't understand the cost, and the impact of this change vs that. Time from new model to prod is too long. Feels static, my customers can't personalize it. ⌘ Langbase fixes all this. — AA
Interactive Example: Composable AI Email Agent
But how does Composable AI work?
Here's an interactive example of a composable AI Email Agent: Classifies, summarizes, responds. Click to send a spam or valid email and check how composable it is: Swap any pipes, any LLM, hyper-personalize (you or your users), observe costs. Everything is composable.
I'm stuck and frustrated because the billing API isn't working and the API documentation is outdated.
Congratulations! You have been selected as the winner of a $100 million lottery!
Send a demo request to understand composable AIarrow
Example: Composable AI Email Agent
⌘ Langbase Email Agent
⌘ Langbase Email Agent reference architecture
I have built an AI email agent that can read my emails, understand the sentiment, summarize, and respond to them. Let's break it down to how it works, hint several pipes working together to make smart personalized decisions.
I created a pipe: email-sentiment — this one reads my emails to understand the sentiment
email-summarizer pipe — it summarizes my emails so I can quickly understand them
email-decision-maker pipe — should I respond? is it urgent? is it a newsletter?
If email-decision-maker pipe says yes, then I need to respond. This invokes the final pipe
email-writer pipe — writes a draft response to my emails with one of the eight formats I have
Why Composable AI is powerful?
Ah, the power of composition. I can swap out any of these pipes with a new one.
Flexibility: Swap components without rewriting everything
Reusability: Build complex systems from simple, tested parts
Scalability: Optimize at the component level for better performance
Observability: Monitor and debug each step of your AI pipeline
Control flow
Maybe I want to use a different sentiment analysis model
Or maybe I want to use a different summarizer when I'm on vacation
I can chose a different LLM (small or large) based on the task
BTW I definitely use a different decision-maker pipe on a busy day.
Extensibility
Add more when needed: I can also add more pipes to this pipeline. Maybe I want to add a pipe that checks my calendar or the weather before I respond to an email. You get the idea. Always bet on composition.
Eight Formats to write emails: And I have several formats. Because Pipes are composable, I have eight different versions of email-writer pipe. I have a pipe email-pick-writer that picks the correct pipe to draft a response with. Why? I talk to my friends differently than my investors, reports, managers, vendors — you name it.
Long-term memory and context awareness
By the way, I have all my emails in an emails-store memory, which any of these pipes can refer to if needed. That's managed semantic RAG over all the emails I have ever received.
And yes, my emails-smart-spam memory knows all the pesky smart spam emails that I don't want to see in my inbox.
Cost & Observability
Because each intent and action is mapped out Pipe — which is an excellent primitive for using LLMs, I can see everything related to cost, usage, and effectiveness of each pipe. I can see how many emails were processed, how many were responded to, how many were marked as spam, etc.
I can switch LLMs for any of these actions, fork a pipe, and see how it performs. I can version my pipes and see how the new version performs against the old one.
And we're just getting started …
Why Developers Love It
Modular: Build, test, and deploy pipes x memorysets independently
Extensible: API-first no dependency on a single language
Version Control Friendly: Track changes at the pipe level
Cost-Effective: Optimize resource usage for each AI task
Stakeholder Friendly: Collaborate with your team on each pipe and memory. All your R&D team, engineering, product, GTM (marketing, sales), and even stakeholders can collaborate on the same pipe. It's like a Google Doc x GitHub for AI. That's what makes it so powerful.
Each pipe and memory are like a docker container. You can have any number of pipes and memorysets.
Can't wait to share more exciting examples of composable AI. We're cookin!!
We'll share more on this soon. Follow us on Twitter and LinkedIn for updates."""
results = langbase.chunker(
content=content,
chunk_max_length=1024,
chunk_overlap=256
)
print(json.dumps(results, indent=2))
if __name__ == '__main__':
main()
```
</CodeGroup>
</LanguageContent>
Run the script to chunk your document:
<LanguageContent language="typescript">
<CodeGroup exampleTitle="Run the script" title="Run the script">
```bash {{ title: 'npm' }}
npx tsx chunk-text.ts
```
```bash {{ title: 'pnpm' }}
pnpm dlx tsx chunk-text.ts
```
</CodeGroup>
</LanguageContent>
<LanguageContent language="python">
<CodeGroup exampleTitle="Run the script" title="Run the script">
```bash
python chunk-text.py
```
</CodeGroup>
</LanguageContent>
You should get the output similar to this: 9 chunks created: from the document.
```shell
Total chunks created: 9
Chunks: [
'Composable AI\n' +
'The Developer Friendly Future of AI Infrastructure\n' +
'In software engineering, composition is a powerful concept. It allows for building complex systems from simple, interchangeable parts. Think Legos, Docker containers, React compon
...
...
...
]
```
---
## Next Steps
- Use [Langbase SDK to integrate Chunker primitive](/sdk/chunker) into your AI agents and apps
- Check out the [Chunker API reference](/api-reference/chunker) for more details on the parameters and options available
- Experiment with different chunk sizes and overlaps to find the optimal settings for your use case
- Integrate document chunking into your RAG (Retrieval-Augmented Generation) pipeline
- Combine with other Langbase primitives like [Parser](/sdk/parser) to process various document formats
- Join our [Discord community](https://langbase.com/discord) for feedback, requests, and support
---
</LanguageProvider>
</content>
</doc>
<doc>
<metadata>
<title>Langbase API</title>
<url>https://langbase.com/docs/api-reference/</url>
</metadata>
<content>
import { generateMetadata } from '@/lib/generate-metadata';
# Langbase API
Langbase is an API-first platform delivering exceptional developer experience. Our APIs are simple, intuitive, and designed for seamless integration. With clear documentation, practical code examples, and responsive [community support](https://langbase.com/discord), we help you build quickly and efficiently.
---
### Table of contents
- [Introduction](#introduction)
- [Authentication](#authentication)
- [Langbase API Reference](#langbase-api-reference)
---
## Introduction
You can interact with Langbase APIs using
1. HTTP requests from any language,
2. or via our official [Langbase SDK](/sdk) (Node.js).
To install the official Node.js Langbase SDK, run the following command in your Node.js project directory:
<CodeGroup exampleTitle="Install the SDK" title="Install the SDK">
```bash {{ title: 'npm' }}
npm i langbase
```
```bash {{ title: 'pnpm' }}
pnpm i langbase
```
```bash {{ title: 'yarn' }}
yarn add langbase
```
</CodeGroup>
From here on you can use the [Langbase SDK](/sdk) to interact with Langbase APIs.
---
## Authentication
The Langbase API uses API keys for authentication. You can create API keys at a user or org account level. Some API endpoints like when running a pipe allow you to specify a pipe specific API key as well.
<Spoiler title="Get your Langbase API key: User or Org">
You can generate API keys from the [Langbase Studio](https://studio.langbase.com) by following these steps:
1. Switch to your user or org account.
2. From the sidebar, click on the `API keys`.
3. From here you can create a new API key or manage existing ones.
For more details, follow the [Langbase API keys](/api-reference/api-keys) documentation.
</Spoiler>
All API requests should include your API key in an Authorization HTTP header as follows:
```bash {{ title: '.env' }}
Authorization: Bearer LANGBASE_API_KEY
```
With Langbase SDK, you can set your API key as follows:
<CodeGroup exampleTitle="Install the SDK" title="Install the SDK">
```ts {{ title: 'typescript' }}
import {Langbase} from 'langbase';
const langbase = new Langbase({
apiKey: process.env.LANGBASE_API_KEY
});
```
```py {{ title: 'python' }}
from langbase import Langbase
from dotenv import load_dotenv
load_dotenv()
langbase_api_key = os.environ.get("LANGBASE_API_KEY")
langbase = Langbase(api_key=langbase_api_key)
```
</CodeGroup>
<Info sub="Important" >
<strong>Treat your API keys like passwords. Keep them secret — use only on the server side.</strong>
Remember to keep your API key secret! Your Langbase API key is server side only. Never share it or expose it in client-side code like browsers or apps. For production requests, route them through your own backend server where you can securely load your API key from an environment variable or key management service.
</Info>
---
## Langbase API Reference
Explore the Langbase API reference to build AI agents with memory.
- [Pipe](/api-reference/pipe) AI agents for any LLM
- [Memory](/api-reference/memory) agents and documents for RAG
- [Threads](/api-reference/threads) for conversation and context
- [Parser](/api-reference/parser) document
- [Chunker](/api-reference/chunker) document
- [Embed](/api-reference/embed) text
- [Agent](/api-reference/agent) Runtime LLM agent
- [Tools](/api-reference/tools) to perform crawls and web search
- [Errors](/api-reference/errors) Common API errors and how to handle them
- [Limits](/api-reference/limits) API rate limits and usage
- [Deprecated](/api-reference/deprecated) Deprecated APIs
- [Migration Guides](/api-reference/migrate-to-api-v1) from `beta` to `v1`
---
### Next Steps
- Build something cool with Langbase APIs.
- Join our [Discord community](https://langbase.com/discord) for feedback, requests, and support.
---
</content>
</doc>
<doc>
<metadata>
<title>What is Langbase Agent?</title>
<url>https://langbase.com/docs/agent/</url>
</metadata>
<content>
import { generateMetadata } from '@/lib/generate-metadata';
<LanguageProvider defaultLanguage='typescript'>
# What is Langbase Agent?
Agent, an AI Primitive by Langbase, works as a runtime LLM agent. You can specify all parameters at runtime and get the response from the agent.
Agent uses our unified LLM API to provide a consistent interface for interacting with 100+ LLMs across all the top LLM providers. See the list of [supported models and providers here](/supported-models-and-providers).
All cutting-edge LLM features are supported, including streaming, JSON mode, tool calling, structured outputs, vision, and more. It is designed to be used in a variety of applications, including agentic workflows, chatbots, virtual assistants, and other AI-powered applications.
<CTAButtons
primary={{ href: '/sdk/agent/run', text: 'Start with Langbase SDK' }}
secondary={{ href: '/api-reference/agent', text: 'API reference' }}
/>
---
## Quickstart: Create a Runtime AI Agent
---
## Let's get started
In this guide, we'll use the Langbase SDK to create an AI agent that can summarize user support queries.
---
## Step #1: Generate Langbase API key
Every request you send to Langbase needs an [API key](/api-reference/api-keys). This guide assumes you already have one. If not, please check the instructions below.
<Spoiler title="Get your Langbase API key: User or Org">
You can generate API keys from the [Langbase Studio](https://studio.langbase.com) by following these steps:
1. Switch to your user or org account.
2. From the sidebar, click on the `API keys`.
3. From here you can create a new API key or manage existing ones.
For more details follow the [Langbase API keys](/api-reference/api-keys) documentation.
</Spoiler>
---
## Step #2: Setup your project [lang]
Create a new directory for your project and navigate to it.
<CodeGroup exampleTitle="Project setup" title="Project setup">
```bash
mkdir agent && cd agent
```
</CodeGroup>
### Initialize the project
Create a new Node.js project.
<LanguageContent language="typescript">
<CodeGroup exampleTitle="Initialize project" title="Initialize project">
```bash {{ title: 'npm' }}
npm init -y
```
```bash {{ title: 'pnpm' }}
pnpm init
```
```bash {{ title: 'yarn' }}
yarn init -y
```
</CodeGroup>
</LanguageContent>
<LanguageContent language="python">
<CodeGroup exampleTitle="Initialize project" title="Initialize project">
```bash {{ title: 'macOS/Linux' }}
python -m venv .venv && source .venv/bin/activate
```
```bash {{ title: 'Windows' }}
python -m venv .venv && .venv\Scripts\activate
```
</CodeGroup>
</LanguageContent>
### Install dependencies
You will use the [Langbase SDK](/sdk) to run the agent and `dotenv` to manage environment variables.
<LanguageContent language="typescript">
<CodeGroup exampleTitle="Install dependencies" title="Install dependencies">
```bash {{ title: 'npm' }}
npm i langbase dotenv
```
```bash {{ title: 'pnpm' }}
pnpm add langbase dotenv
```
```bash {{ title: 'yarn' }}
yarn add langbase dotenv
```
</CodeGroup>
</LanguageContent>
<LanguageContent language="python">
<CodeGroup exampleTitle="Install dependencies" title="Install dependencies">
```bash
pip install langbase python-dotenv
```
</CodeGroup>
</LanguageContent>
### Create an env file
Create a `.env` file in the root of your project. You will need two environment variables:
1. `LANGBASE_API_KEY`: Your Langbase API key.
2. `LLM_API_KEY`: Your LLM provider API key.
```bash {{ title: '.env' }}
LANGBASE_API_KEY=your_api_key_here
LLM_API_KEY=your_llm_api_key_here
```
---
## Step #2: Configure and Run the agent
<LanguageContent language="typescript">
Now let's create a new file called `agent.ts` in the root of your project. This file will contain the code and configuration of the agent.
</LanguageContent>
<LanguageContent language="python">
Now let's create a new file called `agent.py` in the root of your project. This file will contain the code and configuration of the agent.
</LanguageContent>
We will use OpenAI GPT-4.1 model, but you can use any other supported model [listed here](supported-models-and-providers).
In instructions, which are like system prompts, we will specify that the agent is a support agent and should summarize user support queries. Finally, we will provide the user query as input to the agent.
<LanguageContent language="typescript">
<CodeGroup exampleTitle="Support agent" title="agent.ts">
```ts {{ title: 'TypeScript' }}
import { Langbase } from 'langbase';
import dotenv from 'dotenv';
dotenv.config();
// Initialize the Langbase client
const langbase = new Langbase({
apiKey: process.env.LANGBASE_API_KEY!
});
async function main() {
const response = await langbase.agent.run({
model: 'openai:gpt-4.1',
stream: false,
apiKey: process.env.LLM_API_KEY!,
instructions: 'You are an AI agent that summarizes user support queries for a support agent.',
input: 'I am having trouble logging into my account. I keep getting an error message that says "Invalid credentials." I have tried resetting my password, but it still does not work. Can you help me?',
});
console.log('Agent Response:', response.output);
}
main();
```
</CodeGroup>
Run the agent by executing the script `agent.ts`.
<CodeGroup exampleTitle="Run the script" title="Run the script">
```bash {{ title: 'npm' }}
npx tsx agent.ts
```
```bash {{ title: 'pnpm' }}
pnpm dlx tsx agent.ts
```
```bash {{ title: 'yarn' }}
yarn dlx tsx agent.ts
```
</CodeGroup>
</LanguageContent>
<LanguageContent language="python">
<CodeGroup exampleTitle="Support agent" title="agent.py">
```python {{ title: 'Python' }}
import os
from dotenv import load_dotenv
from langbase import Langbase
load_dotenv()
def main():
langbase_api_key = os.environ.get("LANGBASE_API_KEY")
llm_api_key = os.environ.get("LLM_API_KEY")
langbase = Langbase(api_key=langbase_api_key)
# Run the agent
response = langbase.agent.run(
stream=False,
model="openai:gpt-4.1-mini",
api_key=llm_api_key,
instructions='You are an AI agent that summarizes user support queries for a support agent.',
input='I am having trouble logging into my account. I keep getting an error message that says "Invalid credentials." I have tried resetting my password, but it still does not work. Can you help me?',
)
print("response:", response.get("output"))
if __name__ == "__main__":
main()
```
</CodeGroup>
<CodeGroup exampleTitle="Run the script" title="Run the script">
```bash
python agent.py
```
</CodeGroup>
</LanguageContent>
You should see an output similar to:
```txt
Agent Response: User can't log in. Gets "Invalid credentials" error even after password reset. Needs help.
```
---
## Next Steps
Now that you have a basic understanding of how to create and run an agent, you can explore more advanced features and configurations. Here are some suggestions:
- Set `stream: true` for [streaming responses](/examples/agent/run-stream) (great for chat related applications)
- Use [structured outputs](/examples/agent/run-agent-structured-output) to get structured data from the agent
- Explore more code examples of agents [here](/examples/agent)
- Create complex AI workflows with multiple agents in [Langbase Workflow](/workflow)
</LanguageProvider>
</content>
</doc>
<doc>
<metadata>
<title>Building Products with Generative AI</title>
<url>https://langbase.com/docs/workshops/building-products-with-ai/</url>
</metadata>
<content>
import { generateMetadata } from '@/lib/generate-metadata';
# Building Products with Generative AI
In this workshop, you will learn how to build a simple AI Assistant using Langbase Pipes and Memory tools. We'll then convert this AI Assistant into a product — an AI chatbot that can be shipped to users.
---
## Workshop Outline
1. **Introduction to Generative AI**
- What is Generative AI?
- Use cases and applications
- Langbase Pipes and Memory sets
2. **Building an AI Assistant with Pipes**
- Creating and deploying a simple AI Assistant
- Few shot training the AI Assistant
3. **Converting the AI Assistant into a Product**
- Designing and building an open-source AI chatbot using [LangUI.dev]
- Integrating the AI chatbot with Pipes and Memory
- Shipping the AI chatbot to users
---
## Prerequisites
Basic understanding of Web technologies (HTML, CSS, JavaScript, React, Next.js, APIs).
## Build an AI Chatbot with Pipes — ⌘ Langbase
An AI Chatbot example to help you create chatbots for any use case. This chatbot is built by using an AI Pipe on Langbase, it works with 30+ LLMs (OpenAI, Gemini, Mistral, Llama, Gemma, etc), any Data (10M+ context with Memory sets), and any Framework (standard web API you can use with any software).
Check out the live demo [here][demo].
## Features
- 💬 [AI Chatbot][demo] — Built with an [AI Pipe on ⌘ Langbase][pipe]
- ⚡️ Streaming — Real-time chat experience with streamed responses
- 🗣️ Q/A — Ask questions and get pre-defined answers with your preferred AI model and tone
- 🔋 Responsive and open source — Works on all devices and platforms
## Learn more
1. Check the [AI Chatbot Pipe on ⌘ Langbase][pipe]
2. Read the [source code on GitHub][gh] for this example
3. Go through Documentaion: [Pipe Quick Start][qs]
4. Learn more about [Pipes & Memory features on ⌘ Langbase][docs]
## Get started
Let's get started with the project:
To get started with Langbase, you'll need to [create a free personal account on Langbase.com][signup] and verify your email address. _Done? Cool, cool!_
1. Fork the [AI Chatbot Pipe][pipe] on ⌘ Langbase.
2. Go to the API tab to copy the Pipe's API key (to be used on server-side only).
3. Download the example project folder from [here][download] or clone the reppository.
4. `cd` into the project directory and open it in your code editor.
5. Duplicate the `.env.example` file in this project and rename it to `.env.local`.
6. Add the following environment variables:
```shell
# Replace `PIPE_API_KEY` with the copied API key.
NEXT_LB_PIPE_API_KEY="PIPE_API_KEY"
# Install the dependencies using the following command:
npm install
# Run the project using the following command:
npm run dev
```
Your app template should now be running on [localhost:3000][local].
> NOTE:
> This is a Next.js project, so you can build and deploy it to any platform of your choice, like Vercel, Netlify, Cloudflare, etc.
## Authors
This project is created by [Langbase][lb] ([@LangbaseInc][lbx]) team members, with contributions from:
- Ahmad Awais ([@MrAhmadAwais][xaa]) - Founder & CEO, [Langbase][lb]
- Ahmad Bilal ([@AhmadBilalDev][xab]) - Founding Engineer, [Langbase][lb]
**_Built by ⌘ [Langbase.com][lb] — Ship composable AI with hyper-personalized memory!_**
---
[LangUI]: https://langui.dev
[demo]: https://ai-chatbot.langbase.dev
[lb]: https://langbase.com
[lbx]: https://x.com/LangbaseInc
[pipe]: https://langbase.com/examples/ai-chatbot
[gh]: https://github.com/LangbaseInc/langbase-examples/tree/main/examples/ai-chatbot
[cover]: https://raw.githubusercontent.com/LangbaseInc/docs-images/main/examples/ai-chatbot/ai-chatbot-langbase.png
[download]: https://download-directory.github.io/?url=https://github.com/LangbaseInc/langbase-examples/tree/main/examples/ai-chatbot
[signup]: https://langbase.fyi/io
[qs]: https://langbase.com/docs/pipe/quickstart
[docs]: https://langbase.com/docs
[xaa]: https://x.com/MrAhmadAwais
[xab]: https://x.com/AhmadBilalDev
[local]: http://localhost:3000
[mit]: https://img.shields.io/badge/license-MIT-blue.svg?style=for-the-badge&color=%23000000
[fork]: https://img.shields.io/badge/FORK%20ON-%E2%8C%98%20Langbase-000000.svg?style=for-the-badge&logo=%E2%8C%98%20Langbase&logoColor=000000
</content>
</doc>
<doc>
<metadata>
<title>Translation</title>
<url>https://langbase.com/docs/use-cases/translation/</url>
</metadata>
<content>
import { generateMetadata } from '@/lib/generate-metadata';
# Translation
Enhancing communication across different languages can greatly improve services and experiences in various sectors. With AI-powered translation, you can streamline multilingual customer support, develop multilingual chatbots, simplify localized knowledge bases, and more.
Langbase empowers developers to build these translation solutions using [Pipes](/pipe/quickstart), allowing for easy customization and integration.
Take a look at our [AI Translator](https://ai-translator.langbase.dev/) example powered by a simple AI Generate [Pipe](https://langbase.com/examples/ai-translator) on Langbase.
<div className="not-prose mb-16 mt-6 flex gap-3">
<Button href="https://ai-translator.langbase.dev/" arrow="right">
Live demo
</Button>
<Button
href="https://langbase.com/examples/ai-translator"
variant="outline-muted"
>
Fork on <strong>⌘ Langbase</strong>
</Button>
</div>
Here are some examples of how translation can be applied across various sectors:
---
## Customer Support
- **Multilingual Chatbots:** AI translators can enable chatbots to understand and respond to customer queries in multiple languages, improving customer experience and expanding reach.
- **Real-time Translation:** Customer service representatives can use AI translators to communicate with customers in real-time, regardless of language barriers.
- **Knowledge Base Localization:** Automatically translate FAQs, help articles, and other support documents into different languages to cater to a global audience.
- **Voice Support:** Translate spoken language during support calls to facilitate communication between customers and support agents who speak different languages.
_Check out this [**Pipe**](https://langbase.com/langbase/cs-ai-translator) to translate **customer support messages** to understand and respond to customer queries in multiple languages._
<Img
caption="Customer Support AI Translator"
light="https://raw.githubusercontent.com/LangbaseInc/docs-images/main/solutions/cs-ai-translator-light.jpg"
dark="https://raw.githubusercontent.com/LangbaseInc/docs-images/main/solutions/cs-ai-translator-dark.jpg"
/>
---
## Technology
- **Software Localization:** Translate software interfaces, user manuals, and documentation into various languages to make technology products accessible to a global market.
- **Technical Support:** Provide multilingual technical support through AI-powered translators, enabling support teams to assist users worldwide effectively.
- **Developer Collaboration:** Translate comments, documentation, and code reviews in multilingual development teams to enhance collaboration and productivity.
- **API Integration:** Integrate AI translation services into apps and platforms, offering users the ability to use them in their preferred language.
_Check out this [**Pipe**](https://langbase.com/langbase/software-docs-translator) to translate **software documentation** to make it accessible to a global market._
<Img
caption="Software Documentation Translator"
light="https://raw.githubusercontent.com/LangbaseInc/docs-images/main/solutions/software-docs-translator-light.jpg"
dark="https://raw.githubusercontent.com/LangbaseInc/docs-images/main/solutions/software-docs-translator-dark.jpg"
/>
---
## Marketing
- **Campaign Localization:** Translate marketing campaigns, advertisements, and social media posts to target diverse linguistic groups.
- **Content Marketing:** Automatically translate blog posts, articles, and other content marketing materials to reach a broader audience.
- **Customer Feedback:** Translate customer reviews and feedback from different languages to gain insights from a global customer base.
- **SEO Optimization:** Translate keywords and optimize multilingual SEO strategies to improve search engine rankings in different languages.
_Check out this [**Pipe**](https://langbase.com/langbase/marketing-content-translator) to translate **marketing content** to reach a broader audience._
<Img
caption="Marketing Content Translator"
light="https://raw.githubusercontent.com/LangbaseInc/docs-images/main/solutions/marketing-content-translator-light.jpg"
dark="https://raw.githubusercontent.com/LangbaseInc/docs-images/main/solutions/marketing-content-translator-dark.jpg"
/>
---
## News & Media
- **Content Translation:** Translate news articles, reports, and multimedia content to provide information to a global audience.
- **Subtitle Generation:** Automatically generate subtitles for videos and broadcasts in multiple languages to increase accessibility.
- **Real-time Reporting:** Translate live news reports and updates in real-time to cater to international viewers.
- **Audience Engagement:** Engage with a global audience on social media by translating posts and comments.
_Check out this [**Pipe**](https://langbase.com/langbase/social-media-content-translator) to translate **social media content** to provide information to a global audience._
<Img
caption="Social Media Content Translator"
light="https://raw.githubusercontent.com/LangbaseInc/docs-images/main/solutions/social-media-content-translator-light.jpg"
dark="https://raw.githubusercontent.com/LangbaseInc/docs-images/main/solutions/social-media-content-translator-dark.jpg"
/>
---
## Healthcare
- **Patient Communication:** Translate medical instructions, consent forms, and communication between healthcare providers and patients who speak different languages.
- **Telemedicine:** Facilitate multilingual consultations between doctors and patients via telemedicine platforms using real-time translation.
- **Medical Research:** Translate medical research papers, clinical trial documentation, and pharmaceutical information to share knowledge globally.
- **Training & Education:** Provide translated medical training materials and courses to healthcare professionals around the world.
_Check out this [**Pipe**](https://langbase.com/langbase/patient-and-doctor-notes-translator) to translate **records and notes** for communication between healthcare providers and patients._
<Img
caption="Patient Records and Doctor Notes Translator"
light="https://raw.githubusercontent.com/LangbaseInc/docs-images/main/solutions/patient-and-doctor-notes-translator-light.jpg"
dark="https://raw.githubusercontent.com/LangbaseInc/docs-images/main/solutions/patient-and-doctor-notes-translator-dark.jpg"
/>
---
## Legal
- **Document Translation:** Translate legal documents, contracts, and agreements for international clients and cases.
- **Court Interpretation:** Use AI translators for real-time translation during court proceedings involving non-native speakers.
- **Client Communication:** Translate communications between lawyers and clients who speak different languages.
- **Regulatory Compliance:** Ensure legal documents are accurately translated to comply with regulatory requirements in different jurisdictions.
_Check out this [**Pipe**](https://langbase.com/langbase/contract-translator) to translate **legal contracts** for international clients and cases._
<Img
caption="Legal Contract Translator"
light="https://raw.githubusercontent.com/LangbaseInc/docs-images/main/solutions/contract-translator-light.jpg"
dark="https://raw.githubusercontent.com/LangbaseInc/docs-images/main/solutions/contract-translator-dark.jpg"
/>
---
## Finance
- **Multilingual Banking Services:** Offer banking services and support in multiple languages to cater to an international clientele.
- **Document Processing:** Translate financial statements, reports, and other documents for global stakeholders.
- **Market Analysis:** Translate market research reports and financial news to inform global investment decisions.
- **Customer Communication:** Facilitate multilingual communication between financial advisors and clients.
_Check out this [**Pipe**](https://langbase.com/langbase/financial-report-translator) to translate **financial reports** for global stakeholders._
<Img
caption="Financial Report Translator"
light="https://raw.githubusercontent.com/LangbaseInc/docs-images/main/solutions/financial-report-translator-light.jpg"
dark="https://raw.githubusercontent.com/LangbaseInc/docs-images/main/solutions/financial-report-translator-dark.jpg"
/>
---
## Education & E-Learning
- **Course Localization:** Translate online courses, e-learning modules, and educational materials to reach a wider audience.
- **Student Support:** Provide multilingual support for international students through AI-powered translation in chats and emails.
- **Collaborative Learning:** Enable students and educators from different linguistic backgrounds to collaborate and communicate effectively.
- **Content Creation:** Translate educational content, including textbooks, research papers, and instructional videos, to make learning accessible to non-native speakers.
_Check out this [**Pipe**](https://langbase.com/langbase/lecture-notes-translator) to translate **lecture notes** to make learning accessible to non-native speakers._
<Img
caption="Lecture Notes Translator"
light="https://raw.githubusercontent.com/LangbaseInc/docs-images/main/solutions/lecture-notes-translator-light.jpg"
dark="https://raw.githubusercontent.com/LangbaseInc/docs-images/main/solutions/lecture-notes-translator-dark.jpg"
/>
---
</content>
</doc>
<doc>
<metadata>
<title>Text Summarization</title>
<url>https://langbase.com/docs/use-cases/text-summarization/</url>
</metadata>
<content>
import { generateMetadata } from '@/lib/generate-metadata';
# Text Summarization
Regardless of the industry, text summarization can significantly enhance decision-making and provide quick insights from large volumes of text data.
Using [Pipes](/pipe/quickstart) on Langbase, anyone can build any kind of text summarization solutions, each tailored for different industries and use cases.
Here are some examples of how text summarization can be applied across various sectors:
---
## Customer Support
- **Ticket Summarization:** Summarize customer support tickets to help support agents understand issues quickly and provide faster resolutions.
- **AI-Powered Query Response:** Enable customer support to use AI to generate accurate answers to user queries based on the provided docs. This improves accuracy and speeds up the support process.
- **FAQ Generation:** Automatically generate FAQ entries from customer inquiries and support interactions.
_Check out this [**Pipe**](https://langbase.com/examples/cs-tickets-to-faq-summarizer) to summarize **customer support tickets** into **FAQ entries**._
<Img
caption="CS Tickets to FAQ Summarizer"
light="https://raw.githubusercontent.com/LangbaseInc/docs-images/main/solutions/cs-tickets-to-faq-summarizer-light.jpg"
dark="https://raw.githubusercontent.com/LangbaseInc/docs-images/main/solutions/cs-tickets-to-faq-summarizer-dark.jpg"
/>
---
## Technology
- **Software Documentation Summarization:** Summarize extensive software documentation and technical manuals to provide developers and users with quick references and key points.
- **Bug Report Summarization:** Summarize bug reports to highlight critical issues and solutions, helping development teams prioritize and address problems more efficiently.
- **API Documentation Summarization:** Summarize API documentation to make it easier for developers to understand how to integrate and use different APIs, enhancing productivity and reducing learning time.
_Check out this [**Pipe**](https://langbase.com/langbase/bug-report-summarizer) to summarize **bug report** into a **concise summary**._
<Img
caption="Bug Report Summarizer"
light="https://raw.githubusercontent.com/LangbaseInc/docs-images/main/solutions/bug-report-summarizer-light.jpg"
dark="https://raw.githubusercontent.com/LangbaseInc/docs-images/main/solutions/bug-report-summarizer-dark.jpg"
/>
---
## Marketing
- **Content Summarization:** Summarize marketing content such as blogs, whitepapers, and reports to create short snippets for promotional purposes, improving content reach and engagement.
- **Campaign Analysis:** Summarize customer feedback and campaign performance data to derive actionable insights, helping marketers refine their strategies.
_Check out this [**Pipe**](https://langbase.com/examples/campaign-analysis-summarizer) that summarizes the **customer feedback** and **compaign performance data** to determine the success of your campaign._
<Img
caption="Campaign Analysis Summarizer"
light="https://raw.githubusercontent.com/LangbaseInc/docs-images/main/solutions/campaign-analysis-summarizer-light.jpg"
dark="https://raw.githubusercontent.com/LangbaseInc/docs-images/main/solutions/campaign-analysis-summarizer-dark.jpg"
/>
---
## News and Media
- **Automatic News Summarization:** Media companies can use summarization to provide brief summaries of news articles, helping readers quickly grasp the main points.
- **Social Media Monitoring:** Summarize trending topics and user comments to keep track of public sentiment and emerging issues.
_Get a quick overview of **public sentiment** and **emerging issues** with this [**Pipe**](https://langbase.com/langbase/social-media-sentiment-analysis-summarizer) that summarizes trending topics and user comments._
<Img
caption="Social Media Sentiment Analysis Summarizer"
light="https://raw.githubusercontent.com/LangbaseInc/docs-images/main/solutions/social-media-sentiment-analysis-summarizer-light.jpg"
dark="https://raw.githubusercontent.com/LangbaseInc/docs-images/main/solutions/social-media-sentiment-analysis-summarizer-dark.jpg"
/>
---
## Healthcare
- **Medical Records Summarization:** Summarize patient records and doctors’ notes to provide a quick review for medical practitioners, improving the efficiency and quality of care.
- **Research Summaries:** Condense large volumes of medical research papers into key findings, making it easier for healthcare professionals to stay updated with the latest developments.
_Check out this [**Pipe**](https://langbase.com/langbase/patient-and-doctor-notes-summarizer) that summarizes **patient records** and **doctors' notes** to provide a quick overview about the patient._
<Img
caption="Patient and Doctor Notes Summarizer"
light="https://raw.githubusercontent.com/LangbaseInc/docs-images/main/solutions/patient-and-doctor-notes-summarizer-light.jpg"
dark="https://raw.githubusercontent.com/LangbaseInc/docs-images/main/solutions/patient-and-doctor-notes-summarizer-dark.jpg"
/>
---
## Legal
- **Contract Summaries:** Extract and summarize the key points from legal contracts, facilitating faster reviews and negotiations.
- **Case Law Summarization:** Summarize legal documents and case law to provide lawyers and judges with concise overviews of lengthy texts, aiding in quicker and more informed decision-making.
_Check out this [**Pipe**](https://langbase.com/langbase/contract-summarizer) that summarizes **contracts** to provide a quick **overview** of the key points._
<Img
caption="Contract Summarizer"
light="https://raw.githubusercontent.com/LangbaseInc/docs-images/main/solutions/contract-summarizer-light.jpg"
dark="https://raw.githubusercontent.com/LangbaseInc/docs-images/main/solutions/contract-summarizer-dark.jpg"
/>
---
## Finance
- **Earnings Reports Summarization:** Summarize quarterly and annual earnings reports to provide quick insights into a company's performance, helping investors and analysts make informed decisions.
- **Market Analysis:** Condense financial news, market trends, and analysis reports to keep traders and analysts updated with essential information.
_Check out this [**Pipe**](https://langbase.com/langbase/earning-report-summarizer) that summarizes **earnings reports** to provide **insights** into company's performance._
<Img
caption="Earning Report Summarizer"
light="https://raw.githubusercontent.com/LangbaseInc/docs-images/main/solutions/earning-report-summarizer-light.jpg"
dark="https://raw.githubusercontent.com/LangbaseInc/docs-images/main/solutions/earning-report-summarizer-dark.jpg"
/>
---
## Education and E-Learning
- **Lecture Summaries:** Summarize lecture notes and academic articles to provide students with quick reviews and study aids, enhancing learning efficiency.
- **Content Curation:** Summarize e-learning content to help learners quickly grasp essential points, making the learning process more effective.
_Check out this [**Pipe**](https://langbase.com/langbase/lecture-notes-summarizer) that summarizes **lecture notes** to provide a quick review for students._
<Img
caption="Lecture Notes Summarizer"
light="https://raw.githubusercontent.com/LangbaseInc/docs-images/main/solutions/lecture-notes-summarizer-light.jpg"
dark="https://raw.githubusercontent.com/LangbaseInc/docs-images/main/solutions/lecture-notes-summarizer-dark.jpg"
/>
---
</content>
</doc>
<doc>
<metadata>
<title>AI Chatbot</title>
<url>https://langbase.com/docs/use-cases/ai-chatbot/</url>
</metadata>
<content>
import { generateMetadata } from '@/lib/generate-metadata';
# AI Chatbot
Chatbots are everywhere nowadays, helping out in different industries to answer questions and provide support. But most of them work in a fixed way: you choose from preset options, and that's it.
The problem? They can't handle questions that aren't on their list. That's where AI-powered chatbots step in. They act more like real assistants, ready to help customers with anything related to your company.
With Langbase, you can easily create custom AI chatbots for your business using just one Chat Pipe API.
Take a look at our [AI Chatbot](https://ai-chatbot.langbase.dev/) example powered by a simple AI Chat [Pipe](https://langbase.com/examples/ai-chatbot) on Langbase.
<div className="not-prose mb-16 mt-6 flex gap-3">
<Button href="https://ai-chatbot.langbase.dev/" arrow="right">
Live demo
</Button>
<Button
href="https://langbase.com/examples/ai-chatbot"
variant="outline-muted"
>
Fork on <strong>⌘ Langbase</strong>
</Button>
</div>
Here are some examples of how AI Chatbots can be adopted into different industries.
## Customer Support
- **24/7 Assistance:** AI Chatbots can offer round-the-clock customer service, answering common queries and handling simple tasks without human intervention.
- **Support Ticket System Integration:** You can create a chatbot using a Langbase pipe to automatically create and update support tickets based on user interactions.
- **Complaint Resolution:** Route complex issues to the appropriate department, ensuring efficient resolution.
- **Technical Support:** Offer troubleshooting assistance for common product technical problems, guiding users through step-by-step solutions.
## Marketing
- **Lead Generation:** AI-powered Chatbots can engage with website visitors, qualify leads, and capture contact information for the sales team.
- **Personalized Campaigns:** Deliver tailored marketing messages based on user behavior and preferences to increase engagement and conversions.
- **Feedback Collection:** Conduct surveys and gather customer feedback to improve products and services.
## News and Media
- **Interactive Storytelling:** AI Chatbots can provide interactive experiences, allowing users to explore news stories in depth through conversation.
- **Subscription Management:** Users can manage their subscriptions, update preferences, and renew services through AI-powered chatbots.
## Healthcare
- **Appointment Scheduling:** AI-powered chatbots can help patients book, reschedule, or cancel appointments with healthcare providers.
- **Symptom Checker:** Provide preliminary health assessments and suggest possible conditions based on reported symptoms.
## Legal
- **Document Automation:** AI chatbots can assist in drafting legal documents and contracts by asking users relevant questions.
- **Legal Advice:** Provide clients with general legal information and guidance on common legal issues.
- **Appointment Scheduling:** Manage scheduling appointments between clients and legal professionals.
## Finance
- **Account Information:** Chatbots help users check account balances and view transaction history.
- **Savings Tips:** Provide users with simple tips on how to save money.
- **Loan Info:** Chatbots offer information about loan products and eligibility.
## Education & E-Learning
- **Student Support:** AI chatbots can answer student queries about course material, deadlines, and academic policies.
- **Enrollment Assistance:** Prospective students can get information about programs, application processes, and deadlines.
- **Interactive Learning:** Chatbots can facilitate interactive learning sessions, quizzes, and practice tests to enhance student engagement.
</content>
</doc>
<doc>
<metadata>
<title>Page</title>
<url>https://langbase.com/docs/threads/platform/</url>
</metadata>
<content>
import { generateMetadata } from '@/lib/generate-metadata';
## Platform
Limits and pricing for Threads primitive on the Langbase Platform are as follows:
1. **[Limits](/threads/platform/limits)**: Rate and usage limits.
2. **[Pricing](/threads/platform/pricing)**: Pricing details for the Agent primitive.
</content>
</doc>
<doc>
<metadata>
<title>Technology</title>
<url>https://langbase.com/docs/solutions/technology/</url>
</metadata>
<content>
import { generateMetadata } from '@/lib/generate-metadata';
# Technology
_Here are some carefully crafted **Langbase** powered **AI solutions** for tech industry:_
---
## Text Summarization
- **Software Documentation Summarization:** Summarize extensive software documentation and technical manuals to provide developers and users with quick references and key points.
- **Bug Report Summarization:** Summarize bug reports to highlight critical issues and solutions, helping development teams prioritize and address problems more efficiently.
- **API Documentation Summarization:** Summarize API documentation to make it easier for developers to understand how to integrate and use different APIs, enhancing productivity and reducing learning time.
_Check out this [**Pipe**](https://langbase.com/langbase/bug-report-summarizer) to summarize **bug report** into a **concise summary**._
<CTAButtons
example
primary={{ href: 'https://langbase.com/langbase/bug-report-summarizer', text: '⌘ Pipe Playground' }}
secondary={{ href: 'https://langbase.com/langbase/bug-report-summarizer/fork', text: 'Fork pipe' }}
/>
<Img
caption="Bug Report Summarizer"
light="https://raw.githubusercontent.com/LangbaseInc/docs-images/main/solutions/bug-report-summarizer-light.jpg"
dark="https://raw.githubusercontent.com/LangbaseInc/docs-images/main/solutions/bug-report-summarizer-dark.jpg"
/>
---
## Translation
- **Software Localization:** Translate software interfaces, user manuals, and documentation into various languages to make technology products accessible to a global market.
- **Technical Support:** Provide multilingual technical support through AI-powered translators, enabling support teams to assist users worldwide effectively.
- **Developer Collaboration:** Translate comments, documentation, and code reviews in multilingual development teams to enhance collaboration and productivity.
- **API Integration:** Integrate AI translation services into apps and platforms, offering users the ability to use them in their preferred language.
_Check out this [**Pipe**](https://langbase.com/langbase/software-docs-translator) to translate **software documentation** to make it accessible to a global market._
<CTAButtons
example
primary={{ href: 'https://langbase.com/langbase/software-docs-translator', text: '⌘ Pipe Playground' }}
secondary={{ href: 'https://langbase.com/langbase/software-docs-translator/fork', text: 'Fork pipe' }}
/>
<Img
caption="Software Documentation Translator"
light="https://raw.githubusercontent.com/LangbaseInc/docs-images/main/solutions/software-docs-translator-light.jpg"
dark="https://raw.githubusercontent.com/LangbaseInc/docs-images/main/solutions/software-docs-translator-dark.jpg"
/>
---
## Resume Preparation
- **Skill Identification**: Highlight relevant skills for the job.
- **Experience Tailoring**: Customize work experience to match job requirements.
- **Keyword Optimization**: Add industry-specific keywords for ATS.
- **Achievement Highlighting**: Emphasize notable achievements and results.
- **Format Enhancement**: Improve layout and design for readability.
- **Cover Letter Integration**: Create a cover letter that aligns with your resume.
_Check out this RAG based [**Pipe**](https://langbase.com/langbase/resume-analyst) to analyze your **resume** and tailor it for a given job description_
<CTAButtons
example
primary={{ href: 'https://langbase.com/langbase/resume-analyst', text: '⌘ Pipe Playground' }}
secondary={{ href: 'https://langbase.com/langbase/resume-analyst/fork', text: 'Fork pipe' }}
/>
<Note title="Memory is not public">
Forked Pipe does not contain any memory. Please create a memory, add
document, and attach it to the Pipe to use the solution. [Learn more about
memory](/memory/quickstart#step-1-create-a-memory).
</Note>
<Img
caption="Resume Analyst"
light="https://raw.githubusercontent.com/LangbaseInc/docs-images/main/solutions/resume-analyst-light.jpg"
dark="https://raw.githubusercontent.com/LangbaseInc/docs-images/main/solutions/resume-analyst-dark.jpg"
/>
---
## Pseudocode Generator
- **Clarity and Readability**: Simplifies complex logic into an easy-to-understand format.
- **Language Agnostic**: Can be applied across different programming languages.
- **Problem Solving**: Helps in visualizing the solution before coding.
- **Collaboration**: Facilitates communication and understanding among team members.
- **Debugging Aid**: Identifies logical errors early in the development process.
- **Planning**: Serves as a blueprint for the actual code implementation.
- **Efficiency**: Streamlines the coding process by providing a clear plan.
_Check out this [**Pipe**](https://langbase.com/examples/pseudocode-generation) to integrate pseudocode alongside code in your preferred language, enhancing the learning experience for your users._
<CTAButtons
example
primary={{ href: 'https://langbase.com/examples/pseudocode-generation', text: '⌘ Pipe Playground' }}
secondary={{ href: 'https://langbase.com/examples/pseudocode-generation/fork', text: 'Fork pipe' }}
/>
<Img
caption="Pseudocode Generator"
light="https://raw.githubusercontent.com/LangbaseInc/docs-images/main/solutions/pseudocode-generation-light.jpg"
dark="https://raw.githubusercontent.com/LangbaseInc/docs-images/main/solutions/pseudocode-generation-dark.jpg"
/>
---
## CSV Juggler
- **ETL Pipelines**: Convert CSV vendor data to JSON for ETL processing.
- **System Interoperability**: Transform data formats for seamless data exchange between systems.
- **API Development**: Generate sample JSON data from CSV inputs for API testing.
_Check out this [**Pipe**](https://langbase.com/examples/csv-juggler) to streamline data transformation by converting CSV data to JSON, XML and vice versa, enhancing system interoperability, and aiding API development for your users._
<CTAButtons
example
primary={{ href: 'https://langbase.com/examples/csv-juggler', text: '⌘ Pipe Playground' }}
secondary={{ href: 'https://langbase.com/examples/csv-juggler/fork', text: 'Fork pipe' }}
/>
<Img
caption="CSV Juggler"
light="https://raw.githubusercontent.com/LangbaseInc/docs-images/main/solutions/csv-juggler-light.jpg"
dark="https://raw.githubusercontent.com/LangbaseInc/docs-images/main/solutions/csv-juggler-dark.jpg"
/>
---
## IT Linux Support Assistant
- **System Administration**: Provide step-by-step guidance on installing, configuring, and maintaining Ubuntu systems.
- **Troubleshooting**: Offer expert solutions for resolving Ubuntu-specific and general Linux issues.
- **Advanced Topics**: Assist with advanced networking, security, virtualization, and enterprise-level system design on Ubuntu.
_Check out this [**Pipe**](https://langbase.com/examples/it-linux-support-bot) to enhance Ubuntu system administration by providing guidance on installation, troubleshooting, and advanced topics like networking and security for your users._
<CTAButtons
example
primary={{ href: 'https://langbase.com/examples/it-linux-support-bot', text: '⌘ Pipe Playground' }}
secondary={{ href: 'https://langbase.com/examples/it-linux-support-bot/fork', text: 'Fork pipe' }}
/>
<Img
caption="IT Linux Support Assistant"
light="https://raw.githubusercontent.com/LangbaseInc/docs-images/main/solutions/it-linux-support-bot-light.jpg"
dark="https://raw.githubusercontent.com/LangbaseInc/docs-images/main/solutions/it-linux-support-bot-dark.jpg"
/>
---
## API Security Consultant (OWASP 2023) Chatbot
- **Comprehensive API Security Assessments**: Evaluate APIs for vulnerabilities based on OWASP 2023 Top 10 API Security Risks.
- **Developer Training and Education**: Guide developers in implementing best security practices for APIs.
- **Continuous Compliance Monitoring**: Ensure APIs maintain compliance with security standards and regulations.
_Check out this [**Pipe**](https://langbase.com/examples/api-sec-consultant), go through a comprehensive checklist to get insights on Web API Security best practices and estimate information security risks in your APIs implementation._
<CTAButtons
example
primary={{ href: 'https://langbase.com/examples/api-sec-consultant', text: '⌘ Pipe Playground' }}
secondary={{ href: 'https://langbase.com/examples/api-sec-consultant/fork', text: 'Fork pipe' }}
/>
---
## Midjourney Expert
- **Visual Concept Refinement**: Assist creatives in transforming vague ideas into detailed, Midjourney-optimized prompts for precise image generation.
_Check out this [**Pipe**](https://langbase.com/examples/midjourney-expert), guide your creative vision through a comprehensive questionnaire to craft detailed, optimized prompts for stunning AI-generated images._
<CTAButtons
example
primary={{ href: 'https://langbase.com/examples/midjourney-expert', text: '⌘ Pipe Playground' }}
secondary={{ href: 'https://langbase.com/examples/midjourney-expert/fork', text: 'Fork pipe' }}
/>
<Img
caption="Midjourney Expert"
light="https://raw.githubusercontent.com/LangbaseInc/docs-images/main/solutions/midjourney-expert-light.jpg"
dark="https://raw.githubusercontent.com/LangbaseInc/docs-images/main/solutions/midjourney-expert-dark.jpg"
/>
---
## PII (Personally Identifiable Information) Anonymizer
- **Document Sanitization**: Automatically remove sensitive personal information from various document types to ensure compliance with privacy regulations and protect individual identities.
- **Data Breach Prevention**: Scan outgoing communications and files in real-time to detect and redact personally identifiable information, minimizing the risk of accidental data exposure.
_Check out this [**Pipe**](https://langbase.com/examples/pi-anonymizer), that instantly removes personal information from any text, keeping your sensitive data safe and secure._
<CTAButtons
example
primary={{ href: 'https://langbase.com/examples/pi-anonymizer', text: '⌘ Pipe Playground' }}
secondary={{ href: 'https://langbase.com/examples/pi-anonymizer/fork', text: 'Fork pipe' }}
/>
<Img
caption="PII Anonymizer"
light="https://raw.githubusercontent.com/LangbaseInc/docs-images/main/solutions/pi-anonymizer-light.jpg"
dark="https://raw.githubusercontent.com/LangbaseInc/docs-images/main/solutions/pi-anonymizer-dark.jpg"
/>
---
## Web Security (OWASP) Consultant
- **Comprehensive Security Assessments**: Evaluate web applications for vulnerabilities based on OWASP 2021 Top 10.
- **Developer Training and Education**: Guide developers in secure coding practices in real-time.
- **Continuous Compliance Monitoring**: Ensure ongoing compliance with security standards and regulations.
_Check out this [**Pipe**](https://langbase.com/examples/web-sec-consultant) to navigate a comprehensive OWASP Top 10 checklist to gain invaluable insights on web security best practices and estimate potential vulnerabilities in your web application implementation._
<CTAButtons
example
primary={{ href: 'https://langbase.com/examples/web-sec-consultant', text: '⌘ Pipe Playground' }}
secondary={{ href: 'https://langbase.com/examples/web-sec-consultant/fork', text: 'Fork pipe' }}
/>
<Img
caption="Web Security (OWASP) Consultant"
light="https://raw.githubusercontent.com/LangbaseInc/docs-images/main/solutions/web-sec-consultant-light.jpg"
dark="https://raw.githubusercontent.com/LangbaseInc/docs-images/main/solutions/web-sec-consultant-dark.jpg"
/>
---
## ASCII Software Architect
- **Code Comprehension**: Quickly visualize complex codebases as ASCII UML diagrams to aid in understanding and analysis.
- **Design Documentation**: Generate clear, text-based UML representations for inclusion in code comments, README files, or technical specifications.
- **Collaborative Planning**: Facilitate remote pair programming and architecture discussions by instantly sharing ASCII UML diagrams of proposed designs.
- **Legacy System Analysis**: Rapidly create visual representations of older codebases to assist in modernization and refactoring efforts.
_Check out this [**Pipe**](https://langbase.com/examples/ascii-software-architect) that instantly transforms your code into ASCII UML diagrams, improve software design workflows, accelerates code comprehension, and enhances team communication for developers and architects alike._
<CTAButtons
example
primary={{ href: 'https://langbase.com/examples/ascii-software-architect', text: '⌘ Pipe Playground' }}
secondary={{ href: 'https://langbase.com/examples/ascii-software-architect/fork', text: 'Fork pipe' }}
/>
<Img
caption="ASCII Software Architect"
light="https://raw.githubusercontent.com/LangbaseInc/docs-images/main/solutions/ascii-software-architect-light.jpg"
dark="https://raw.githubusercontent.com/LangbaseInc/docs-images/main/solutions/ascii-software-architect-dark.jpg"
/>
---
</content>
</doc>
<doc>
<metadata>
<title>News and Media</title>
<url>https://langbase.com/docs/solutions/news-media/</url>
</metadata>
<content>
import { generateMetadata } from '@/lib/generate-metadata';
# News and Media
_Here are some carefully crafted **Langbase** powered **AI solutions** for news and media industry:_
---
## Text Summarization
- **Automatic News Summarization:** Media companies can use summarization to provide brief summaries of news articles, helping readers quickly grasp the main points.
- **Social Media Monitoring:** Summarize trending topics and user comments to keep track of public sentiment and emerging issues.
_Get a quick overview of **public sentiment** and **emerging issues** with this [**Pipe**](https://langbase.com/langbase/social-media-sentiment-analysis-summarizer) that summarizes trending topics and user comments._
<CTAButtons
example
primary={{ href: 'https://langbase.com/langbase/social-media-sentiment-analysis-summarizer', text: '⌘ Pipe Playground' }}
secondary={{ href: 'https://langbase.com/langbase/social-media-sentiment-analysis-summarizer/fork', text: 'Fork pipe' }}
/>
<Img
caption="Social Media Sentiment Analysis Summarizer"
light="https://raw.githubusercontent.com/LangbaseInc/docs-images/main/solutions/social-media-sentiment-analysis-summarizer-light.jpg"
dark="https://raw.githubusercontent.com/LangbaseInc/docs-images/main/solutions/social-media-sentiment-analysis-summarizer-dark.jpg"
/>
---
## Translation
- **Content Translation:** Translate news articles, reports, and multimedia content to provide information to a global audience.
- **Subtitle Generation:** Automatically generate subtitles for videos and broadcasts in multiple languages to increase accessibility.
- **Real-time Reporting:** Translate live news reports and updates in real-time to cater to international viewers.
- **Audience Engagement:** Engage with a global audience on social media by translating posts and comments.
_Check out this [**Pipe**](https://langbase.com/langbase/social-media-content-translator) to translate **social media content** to provide information to a global audience._
<CTAButtons
example
primary={{ href: 'https://langbase.com/langbase/social-media-content-translator', text: '⌘ Pipe Playground' }}
secondary={{ href: 'https://langbase.com/langbase/social-media-content-translator/fork', text: 'Fork pipe' }}
/>
<Img
caption="Social Media Content Translator"
light="https://raw.githubusercontent.com/LangbaseInc/docs-images/main/solutions/social-media-content-translator-light.jpg"
dark="https://raw.githubusercontent.com/LangbaseInc/docs-images/main/solutions/social-media-content-translator-dark.jpg"
/>
---
## AI Chatbot
- **Interactive Storytelling:** AI Chatbots can provide interactive experiences, allowing users to explore news stories in depth through conversation.
- **Subscription Management:** Users can manage their subscriptions, update preferences, and renew services through AI-powered chatbots.
---
## Flick Finder Gen AI Assistant
- **Personalized Entertainment**: Provide tailored movie and TV series recommendations based on user preferences, enhancing viewing experiences.
- **Comprehensive Reviews**: Offer detailed ratings and reviews from multiple platforms, assisting users in making informed decisions about what to watch.
_Check out this [**Pipe**](https://langbase.com/examples/flick-finder) discover your next favorite movie or TV series._
<CTAButtons
example
primary={{ href: 'https://langbase.com/examples/flick-finder', text: '⌘ Pipe Playground' }}
secondary={{ href: 'https://langbase.com/examples/flick-finder/fork', text: 'Fork pipe' }}
/>
<Img
caption="Flick Finder Gen AI Assistant"
light="https://raw.githubusercontent.com/LangbaseInc/docs-images/main/solutions/flick-finder-light.jpg"
dark="https://raw.githubusercontent.com/LangbaseInc/docs-images/main/solutions/flick-finder-dark.jpg"
/>
---
## StyleScribe AI Assistant
- **Content Adaptation**: Transform user-written articles or blog posts into the style of famous authors, enhancing writing quality and engagement.
- **Style Learning**: Assist writers in understanding and emulating the writing techniques of renowned authors, improving their own writing skills and versatility.
_Explore this [**Pipe**](https://langbase.com/examples/style-scribe-bot) to effortlessly transform your text into the **style of renowned authors** for any platform._
<CTAButtons
example
primary={{ href: 'https://langbase.com/examples/style-scribe-bot', text: '⌘ Pipe Playground' }}
secondary={{ href: 'https://langbase.com/examples/style-scribe-bot/fork', text: 'Fork pipe' }}
/>
---
</content>
</doc>
<doc>
<metadata>
<title>Marketing</title>
<url>https://langbase.com/docs/solutions/marketing/</url>
</metadata>
<content>
import { generateMetadata } from '@/lib/generate-metadata';
# Marketing
_Here are some carefully crafted **Langbase** powered **AI solutions** for marketing:_
---
## Text Summarization
- **Content Summarization:** Summarize marketing content such as blogs, whitepapers, and reports to create short snippets for promotional purposes, improving content reach and engagement.
- **Campaign Analysis:** Summarize customer feedback and campaign performance data to derive actionable insights, helping marketers refine their strategies.
_Check out this [**Pipe**](https://langbase.com/examples/campaign-analysis-summarizer) that summarizes the **customer feedback** and **campaign performance data** to determine the success of your campaign._
<CTAButtons
example
primary={{ href: 'https://langbase.com/examples/campaign-analysis-summarizer', text: '⌘ Pipe Playground' }}
secondary={{ href: 'https://langbase.com/examples/campaign-analysis-summarizer/fork', text: 'Fork pipe' }}
/>
<Img
caption="Campaign Analysis Summarizer"
light="https://raw.githubusercontent.com/LangbaseInc/docs-images/main/solutions/campaign-analysis-summarizer-light.jpg"
dark="https://raw.githubusercontent.com/LangbaseInc/docs-images/main/solutions/campaign-analysis-summarizer-dark.jpg"
/>
---
## Onboarding Emails
In the competitive landscape of marketing, whether it is for a SaaS, finance, or a services product, acquiring new users is difficult. One way to achieve this is through effective onboarding emails.
- **Data-Driven Personalization:** A purpose-built Langbase pipe can generate context-aware emails highly relevant to the user's needs and pain points, making it more likely to resonate with them. It can help marketing companies create highly effective onboarding emails.
- **Efficiency and Consistency:** Writing onboarding emails manually can be time-consuming, especially when you need to create personalized content for different segments of your user base. You can monitor, manage, and customize Langbase pipes to ensure that your emails are consistent and effective.
_Check out this [**Pipe**](https://langbase.com/langbase/marketing-onboarding-email) that generates emails which leverage the PAS strategy to address user pain points, amplify the urgency to solve these issues, and present the new feature or solution in a persuasive manner._
<CTAButtons
example
primary={{ href: 'https://langbase.com/langbase/marketing-onboarding-email', text: '⌘ Pipe Playground' }}
secondary={{ href: 'https://langbase.com/langbase/marketing-onboarding-email/fork', text: 'Fork pipe' }}
/>
<Img
caption="Marketing Onboarding Email Generator"
light="https://raw.githubusercontent.com/LangbaseInc/docs-images/main/solutions/onboarding-email-gen-light.jpg"
dark="https://raw.githubusercontent.com/LangbaseInc/docs-images/main/solutions/onboarding-email-gen-dark.jpg"
/>
---
## Translation
- **Campaign Localization:** Translate marketing campaigns, advertisements, and social media posts to target diverse linguistic groups.
- **Content Marketing:** Automatically translate blog posts, articles, and other content marketing materials to reach a broader audience.
- **Customer Feedback:** Translate customer reviews and feedback from different languages to gain insights from a global customer base.
- **SEO Optimization:** Translate keywords and optimize multilingual SEO strategies to improve search engine rankings in different languages.
_Check out this [**Pipe**](https://langbase.com/langbase/marketing-content-translator) to translate **marketing content** to reach a broader audience._
<CTAButtons
example
primary={{ href: 'https://langbase.com/langbase/marketing-content-translator', text: '⌘ Pipe Playground' }}
secondary={{ href: 'https://langbase.com/langbase/marketing-content-translator/fork', text: 'Fork pipe' }}
/>
<Img
caption="Marketing Content Translator"
light="https://raw.githubusercontent.com/LangbaseInc/docs-images/main/solutions/marketing-content-translator-light.jpg"
dark="https://raw.githubusercontent.com/LangbaseInc/docs-images/main/solutions/marketing-content-translator-dark.jpg"
/>
---
## AI Chatbot
- **Lead Generation:** AI-powered Chatbots can engage with website visitors, qualify leads, and capture contact information for the sales team.
- **Personalized Campaigns:** Deliver tailored marketing messages based on user behavior and preferences to increase engagement and conversions.
- **Feedback Collection:** Conduct surveys and gather customer feedback to improve products and services.
---
## Shoes expert
- **Personalized Footwear Recommendations**: Suggest ideal Nike and Adidas shoes based on user preferences for price, style, and intended use (e.g., running, casual wear, sports).
- **Price-Performance Analysis**: Compare shoes within a specified budget, highlighting the best value options considering factors like discounts, ratings, and features.
- **Multi-Channel Shopping Assistance**: Provide consistent, knowledgeable support across various platforms, including e-commerce websites, mobile apps, and in-store kiosks, enhancing the omnichannel shopping experience.
_Check out this [**Pipe**](https://langbase.com/examples/shoes-expert) to elevate your footwear shopping experience with **personalized Nike and Adidas recommendations, smart price-performance comparisons, and seamless multi-channel support** for your customers._
<CTAButtons
example
primary={{ href: 'https://langbase.com/examples/shoes-expert', text: '⌘ Pipe Playground' }}
secondary={{ href: 'https://langbase.com/examples/shoes-expert/fork', text: 'Fork pipe' }}
/>
<Img
caption="Shoes expert"
light="https://raw.githubusercontent.com/LangbaseInc/docs-images/main/solutions/shoes-expert-light.jpg"
dark="https://raw.githubusercontent.com/LangbaseInc/docs-images/main/solutions/shoes-expert-dark.jpg"
/>
---
## Electronics expert
- **Informed Consumer Choices**: Enable shoppers to quickly compare complex electronic products based on their specific needs and preferences.
- **Technical Specification Analysis**: Assist professionals in evaluating and selecting electronic components for projects by comparing detailed datasheets.
_Check out this [**Pipe**](https://langbase.com/examples/electronics-expert) to enhance product selection with personalized recommendations, detailed specification analysis, and **interactive decision support** for your customers._
<CTAButtons
example
primary={{ href: 'https://langbase.com/examples/electronics-expert', text: '⌘ Pipe Playground' }}
secondary={{ href: 'https://langbase.com/examples/electronics-expert/fork', text: 'Fork pipe' }}
/>
<Img
caption="Electronics expert"
light="https://raw.githubusercontent.com/LangbaseInc/docs-images/main/solutions/electronics-expert-light.jpg"
dark="https://raw.githubusercontent.com/LangbaseInc/docs-images/main/solutions/electronics-expert-dark.jpg"
/>
---
## Product Review Generator
- **Consumer Experience Synthesis**: Transform individual user experiences into concise, informative reviews that highlight key product features, performance metrics, and potential drawbacks for prospective buyers.
- **Balanced Feedback Generation**: Create nuanced product assessments that objectively present both strengths and areas for improvement, tailored to specific satisfaction levels and product categories to aid consumer decision-making.
_Check out this [**Pipe**](https://langbase.com/examples/product-review-generator) to transform user experiences into concise, insightful reviews, offering potential buyers authentic perspectives and interactive guidance for smarter purchasing decisions._
<CTAButtons
example
primary={{ href: 'https://langbase.com/examples/product-review-generator', text: '⌘ Pipe Playground' }}
secondary={{ href: 'https://langbase.com/examples/product-review-generator/fork', text: 'Fork pipe' }}
/>
<Img
caption="Product Review Generator"
light="https://raw.githubusercontent.com/LangbaseInc/docs-images/main/solutions/product-review-generator-light.jpg"
dark="https://raw.githubusercontent.com/LangbaseInc/docs-images/main/solutions/product-review-generator-dark.jpg"
/>
---
## Book Buddy Chatbot
- **Personalized Book Discovery**: Help users find popular books based on their preferred categories, enhancing their reading experience.
- **Best Seller Verification**: Verify if a book is a best seller and provide brief summaries, aiding informed reading choices.
_Check out this [**Pipe**](https://langbase.com/examples/book-buddy), to **integrate bestseller lists**, personalized suggestions, and book summaries into your application, enhancing your user's engagement and literary discovery._
<CTAButtons
example
primary={{ href: 'https://langbase.com/examples/book-buddy', text: '⌘ Pipe Playground' }}
secondary={{ href: 'https://langbase.com/examples/book-buddy/fork', text: 'Fork pipe' }}
/>
<Img
caption="Book Buddy Chatbot"
light="https://raw.githubusercontent.com/LangbaseInc/docs-images/main/solutions/book-buddy-light.jpg"
dark="https://raw.githubusercontent.com/LangbaseInc/docs-images/main/solutions/book-buddy-dark.jpg"
/>
---
</content>
</doc>
<doc>
<metadata>
<title>Legal</title>
<url>https://langbase.com/docs/solutions/legal/</url>
</metadata>
<content>
import { generateMetadata } from '@/lib/generate-metadata';
# Legal
_Here are some carefully crafted **Langbase** powered **AI solutions** for legal industry:_
---
## Text Summarization
- **Contract Summaries:** Extract and summarize the key points from legal contracts, facilitating faster reviews and negotiations.
- **Case Law Summarization:** Summarize legal documents and case law to provide lawyers and judges with concise overviews of lengthy texts, aiding in quicker and more informed decision-making.
_Check out this [**Pipe**](https://langbase.com/langbase/contract-summarizer) that summarizes **contracts** to provide a quick **overview** of the key points._
<CTAButtons
example
primary={{ href: 'https://langbase.com/langbase/contract-summarizer', text: '⌘ Pipe Playground' }}
secondary={{ href: 'https://langbase.com/langbase/contract-summarizer/fork', text: 'Fork pipe' }}
/>
<Img
caption="Contract Summarizer"
light="https://raw.githubusercontent.com/LangbaseInc/docs-images/main/solutions/contract-summarizer-light.jpg"
dark="https://raw.githubusercontent.com/LangbaseInc/docs-images/main/solutions/contract-summarizer-dark.jpg"
/>
---
## Translation
- **Document Translation:** Translate legal documents, contracts, and agreements for international clients and cases.
- **Court Interpretation:** Use AI translators for real-time translation during court proceedings involving non-native speakers.
- **Client Communication:** Translate communications between lawyers and clients who speak different languages.
- **Regulatory Compliance:** Ensure legal documents are accurately translated to comply with regulatory requirements in different jurisdictions.
_Check out this [**Pipe**](https://langbase.com/langbase/contract-translator) to translate **legal contracts** for international clients and cases._
<CTAButtons
example
primary={{ href: 'https://langbase.com/langbase/contract-translator', text: '⌘ Pipe Playground' }}
secondary={{ href: 'https://langbase.com/langbase/contract-translator/fork', text: 'Fork pipe' }}
/>
<Img
caption="Legal Contract Translator"
light="https://raw.githubusercontent.com/LangbaseInc/docs-images/main/solutions/contract-translator-light.jpg"
dark="https://raw.githubusercontent.com/LangbaseInc/docs-images/main/solutions/contract-translator-dark.jpg"
/>
---
## Understanding Legal Contracts
- **Contract Analysis:** Extract key information, clauses, and obligations from contracts to provide summary.
- **Contract Comparison:** Compare multiple contracts to identify similarities, differences, and potential risks.
- **Contract Risk Assessment:** Analyze contracts to identify potential risks, liabilities, and compliance issues.
_Check out this RAG based [**Pipe**](https://langbase.com/langbase/contract-analyzer) that analyzes pdf **contracts** to answer queries._
<CTAButtons
example
primary={{ href: 'https://langbase.com/langbase/contract-analyzer', text: '⌘ Pipe Playground' }}
secondary={{ href: 'https://langbase.com/langbase/contract-analyzer/fork', text: 'Fork pipe' }}
/>
<Note title="Memory is not public">
Forked Pipe does not contain any memory. Please create a memory, add
document, and attach it to the Pipe to use the solution. [Learn more about
memory](/memory/quickstart#step-1-create-a-memory).
</Note>
<Img
caption="Legal Contract Analyzer"
light="https://raw.githubusercontent.com/LangbaseInc/docs-images/main/solutions/contract-analyzer-light.jpg"
dark="https://raw.githubusercontent.com/LangbaseInc/docs-images/main/solutions/contract-analyzer-dark.jpg"
/>
---
## AI Chatbot
- **Document Automation:** AI chatbots can assist in drafting legal documents and contracts by asking users relevant questions.
- **Legal Advice:** Provide clients general legal information and guidance on common legal issues.
- **Appointment Scheduling:** Manage scheduling appointments between clients and legal professionals.
---
</content>
</doc>
<doc>
<metadata>
<title>Healthcare</title>
<url>https://langbase.com/docs/solutions/healthcare/</url>
</metadata>
<content>
import { generateMetadata } from '@/lib/generate-metadata';
# Healthcare
_Here are some carefully crafted **Langbase** powered **AI solutions** for healthcare industry:_
---
## Text Summarization
- **Medical Records Summarization:** Summarize patient records and doctors’ notes to provide a quick review for medical practitioners, improving the efficiency and quality of care.
- **Research Summaries:** Condense large volumes of medical research papers into key findings, making it easier for healthcare professionals to stay updated with the latest developments.
_Check out this [**Pipe**](https://langbase.com/langbase/patient-and-doctor-notes-summarizer) that summarizes **patient records** and **doctors' notes** to provide a quick overview about the patient._
<CTAButtons
example
primary={{ href: 'https://langbase.com/langbase/patient-and-doctor-notes-summarizer', text: '⌘ Pipe Playground' }}
secondary={{ href: 'https://langbase.com/langbase/patient-and-doctor-notes-summarizer/fork', text: 'Fork pipe' }}
/>
<Img
caption="Patient and Doctor Notes Summarizer"
light="https://raw.githubusercontent.com/LangbaseInc/docs-images/main/solutions/patient-and-doctor-notes-summarizer-light.jpg"
dark="https://raw.githubusercontent.com/LangbaseInc/docs-images/main/solutions/patient-and-doctor-notes-summarizer-dark.jpg"
/>
---
## Translation
- **Patient Communication:** Translate medical instructions, consent forms, and communication between healthcare providers and patients who speak different languages.
- **Telemedicine:** Facilitate multilingual consultations between doctors and patients via telemedicine platforms using real-time translation.
- **Medical Research:** Translate medical research papers, clinical trial documentation, and pharmaceutical information to share knowledge globally.
- **Training & Education:** Provide translated medical training materials and courses to healthcare professionals around the world.
_Check out this [**Pipe**](https://langbase.com/langbase/patient-and-doctor-notes-translator) to translate **records and notes** for communication between healthcare providers and patients._
<CTAButtons
example
primary={{ href: 'https://langbase.com/langbase/patient-and-doctor-notes-translator', text: '⌘ Pipe Playground' }}
secondary={{ href: 'https://langbase.com/langbase/patient-and-doctor-notes-translator/fork', text: 'Fork pipe' }}
/>
<Img
caption="Patient Records and Doctor Notes Translator"
light="https://raw.githubusercontent.com/LangbaseInc/docs-images/main/solutions/patient-and-doctor-notes-translator-light.jpg"
dark="https://raw.githubusercontent.com/LangbaseInc/docs-images/main/solutions/patient-and-doctor-notes-translator-dark.jpg"
/>
---
## AI Chatbot
- **Appointment Scheduling:** AI-powered chatbots can help patients book, reschedule, or cancel appointments with healthcare providers.
- **Symptom Checker:** Provide preliminary health assessments and suggest possible conditions based on reported symptoms.
- **Diet Management Plan**: AI chatbots can manage prescriptions, allowing patients to upload and discuss their prescriptions for better medication adherence.
_Check out this RAG based [**Pipe**](https://langbase.com/langbase/diabetes-management-plan) that helps in managing diabetes by answering questions based on your doctor's notes._
<CTAButtons
example
primary={{ href: 'https://langbase.com/langbase/diabetes-management-plan', text: '⌘ Pipe Playground' }}
secondary={{ href: 'https://langbase.com/langbase/diabetes-management-plan/fork', text: 'Fork pipe' }}
/>
<Note title="Memory is not public">
Forked Pipe does not contain any memory. Please create a memory, add
document, and attach it to the Pipe to use the solution. [Learn more about
memory](/memory/quickstart#step-1-create-a-memory).
</Note>
<Img
caption="Diabetes Management Plan"
light="https://raw.githubusercontent.com/LangbaseInc/docs-images/main/solutions/diabetes-management-plan-light.jpg"
dark="https://raw.githubusercontent.com/LangbaseInc/docs-images/main/solutions/diabetes-management-plan-dark.jpg"
/>
---
## AI Drug Assistant
_Check out this [**Pipe**](https://langbase.com/examples/ai-drug-assistant) to access comprehensive drug information, personalized medication management guidance, and **interactive pharmaceutical knowledge support** for informed healthcare decisions._
<CTAButtons
example
primary={{ href: 'https://langbase.com/examples/ai-drug-assistant', text: '⌘ Pipe Playground' }}
secondary={{ href: 'https://langbase.com/examples/ai-drug-assistant/fork', text: 'Fork pipe' }}
/>
<Img
caption="AI Drug Assistant"
light="https://raw.githubusercontent.com/LangbaseInc/docs-images/main/solutions/ai-drug-assistant-light.jpg"
dark="https://raw.githubusercontent.com/LangbaseInc/docs-images/main/solutions/ai-drug-assistant-dark.jpg"
/>
---
</content>
</doc>
<doc>
<metadata>
<title>Finance</title>
<url>https://langbase.com/docs/solutions/finance/</url>
</metadata>
<content>
import { generateMetadata } from '@/lib/generate-metadata';
# Finance
_Here are some carefully crafted **Langbase** powered **AI solutions** for finance industry:_
---
## Text Summarization
- **Earnings Reports Summarization:** Summarize quarterly and annual earnings reports to provide quick insights into a company's performance, helping investors and analysts make informed decisions.
- **Market Analysis:** Condense financial news, market trends, and analysis reports to keep traders and analysts updated with essential information.
_Check out this [**Pipe**](https://langbase.com/langbase/earning-report-summarizer) that summarizes **earnings reports** to provide **insights** into company's performance._
<CTAButtons
example
primary={{ href: 'https://langbase.com/langbase/earning-report-summarizer', text: '⌘ Pipe Playground' }}
secondary={{ href: 'https://langbase.com/langbase/earning-report-summarizer/fork', text: 'Fork pipe' }}
/>
<Img
caption="Earning Report Summarizer"
light="https://raw.githubusercontent.com/LangbaseInc/docs-images/main/solutions/earning-report-summarizer-light.jpg"
dark="https://raw.githubusercontent.com/LangbaseInc/docs-images/main/solutions/earning-report-summarizer-dark.jpg"
/>
---
## Translation
- **Multilingual Banking Services:** Offer banking services and support in multiple languages to cater to an international clientele.
- **Document Processing:** Translate financial statements, reports, and other documents for global stakeholders.
- **Market Analysis:** Translate market research reports and financial news to inform global investment decisions.
- **Customer Communication:** Facilitate multilingual communication between financial advisors and clients.
_Check out this [**Pipe**](https://langbase.com/langbase/financial-report-translator) to translate **financial reports** for global stakeholders._
<CTAButtons
example
primary={{ href: 'https://langbase.com/langbase/financial-report-translator', text: '⌘ Pipe Playground' }}
secondary={{ href: 'https://langbase.com/langbase/financial-report-translator/fork', text: 'Fork pipe' }}
/>
<Img
caption="Financial Report Translator"
light="https://raw.githubusercontent.com/LangbaseInc/docs-images/main/solutions/financial-report-translator-light.jpg"
dark="https://raw.githubusercontent.com/LangbaseInc/docs-images/main/solutions/financial-report-translator-dark.jpg"
/>
---
## AI Chatbot
- **Account Information:** Chatbots help users check account balances and view transaction history.
- **Savings Tips:** Provide users with simple tips on how to save money.
- **Loan Info:** Chatbots offer information about loan products and eligibility.
_Check out this RAG based [**Pipe**](https://langbase.com/langbase/financial-report-analyst) to analyze **financial reports** and provide insights._
<CTAButtons
example
primary={{ href: 'https://langbase.com/langbase/financial-report-analyst', text: '⌘ Pipe Playground' }}
secondary={{ href: 'https://langbase.com/langbase/financial-report-analyst/fork', text: 'Fork pipe' }}
/>
<Note title="Memory is not public">
Forked Pipe does not contain any memory. Please create a memory, add
document, and attach it to the Pipe to use the solution. [Learn more about
memory](/memory/quickstart#step-1-create-a-memory).
</Note>
<Img
caption="Financial Report Analyst"
light="https://raw.githubusercontent.com/LangbaseInc/docs-images/main/solutions/financial-report-analyst-light.jpg"
dark="https://raw.githubusercontent.com/LangbaseInc/docs-images/main/solutions/financial-report-analyst-dark.jpg"
/>
---
## Excel Master
- **Quick Calculations**: Facilitates the quick generation of complex calculations in an easy and understandable way.
- **Performance and Sales Tracking**: Assists managers in calculating and interpreting performance and sales metrics across departments and time periods.
- **Excel Mastery**: Supports anyone looking to handle and develop complex Excel formulas, providing advanced calculation tools and detailed explanations.
_Check out this [**Pipe**](https://langbase.com/examples/excel-master) to master Excel skills by facilitating quick calculations, and explanations for your users._
<CTAButtons
example
primary={{ href: 'https://langbase.com/examples/excel-master', text: '⌘ Pipe Playground' }}
secondary={{ href: 'https://langbase.com/examples/excel-master/fork', text: 'Fork pipe' }}
/>
<Img
caption="Excel Master"
light="https://raw.githubusercontent.com/LangbaseInc/docs-images/main/solutions/excel-master-light.jpg"
dark="https://raw.githubusercontent.com/LangbaseInc/docs-images/main/solutions/excel-master-dark.jpg"
/>
---
</content>
</doc>
<doc>
<metadata>
<title>Education</title>
<url>https://langbase.com/docs/solutions/education/</url>
</metadata>
<content>
import { generateMetadata } from '@/lib/generate-metadata';
# Education
_Here are some carefully crafted **Langbase** powered **AI solutions** for education industry:_
---
## Text Summarization
- **Lecture Summaries:** Summarize lecture notes and academic articles to provide students with quick reviews and study aids, enhancing learning efficiency.
- **Content Curation:** Summarize e-learning content to help learners quickly grasp essential points, making the learning process more effective.
_Check out this [**Pipe**](https://langbase.com/langbase/lecture-notes-summarizer) that summarizes **lecture notes** to provide a quick review for students._
<CTAButtons
example
primary={{ href: 'https://langbase.com/langbase/lecture-notes-summarizer', text: '⌘ Pipe Playground' }}
secondary={{ href: 'https://langbase.com/langbase/lecture-notes-summarizer/fork', text: 'Fork pipe' }}
/>
<Img
caption="Lecture Notes Summarizer"
light="https://raw.githubusercontent.com/LangbaseInc/docs-images/main/solutions/lecture-notes-summarizer-light.jpg"
dark="https://raw.githubusercontent.com/LangbaseInc/docs-images/main/solutions/lecture-notes-summarizer-dark.jpg"
/>
---
## Translation
- **Course Localization:** Translate online courses, e-learning modules, and educational materials to reach a wider audience.
- **Student Support:** Provide multilingual support for international students through AI-powered translation in chats and emails.
- **Collaborative Learning:** Enable students and educators from different linguistic backgrounds to collaborate and communicate effectively.
- **Content Creation:** Translate educational content, including textbooks, research papers, and instructional videos, to make learning accessible to non-native speakers.
_Check out this [**Pipe**](https://langbase.com/langbase/lecture-notes-translator) to translate **lecture notes** to make learning accessible to non-native speakers._
<CTAButtons
example
primary={{ href: 'https://langbase.com/langbase/lecture-notes-translator', text: '⌘ Pipe Playground' }}
secondary={{ href: 'https://langbase.com/langbase/lecture-notes-translator/fork', text: 'Fork pipe' }}
/>
<Img
caption="Lecture Notes Translator"
light="https://raw.githubusercontent.com/LangbaseInc/docs-images/main/solutions/lecture-notes-translator-light.jpg"
dark="https://raw.githubusercontent.com/LangbaseInc/docs-images/main/solutions/lecture-notes-translator-dark.jpg"
/>
---
## AI Chatbot
- **Student Support:** AI chatbots can answer student queries about course material, deadlines, and academic policies.
- **Enrollment Assistance:** Prospective students can get information about programs, application processes, and deadlines.
- **Interactive Learning:** Chatbots can facilitate interactive learning sessions, quizzes, and practice tests to enhance student engagement.
_Check out this chatbot [**Pipe**](https://langbase.com/langbase/employee-handbook-chatbot) that can answer queries related to company policies and guidelines for employees._
<CTAButtons
example
primary={{ href: 'https://langbase.com/langbase/employee-handbook-chatbot', text: '⌘ Pipe Playground' }}
secondary={{ href: 'https://langbase.com/langbase/employee-handbook-chatbot/fork', text: 'Fork pipe' }}
/>
<Note title="Memory is not public">
Forked Pipe does not contain any memory. Please create a memory, add document, and attach it to the Pipe to use the solution. [Learn more about memory](/memory/quickstart#step-1-create-a-memory).
</Note>
<Img
caption="Employee Handbook Chatbot"
light="https://raw.githubusercontent.com/LangbaseInc/docs-images/main/solutions/employee-handbook-chatbot-light.jpg"
dark="https://raw.githubusercontent.com/LangbaseInc/docs-images/main/solutions/employee-handbook-chatbot-dark.jpg"
/>
---
## JavaScript Tutor
- **Personalized Learning**: Adaptive educational tutors that adjust content and pace based on student responses.
- **Customer Service**: Complex problem resolution across multiple interactions in retail or tech support.
- **E-commerce Solutions**: Guided shopping experiences with product recommendations and purchase assistance over multiple sessions.
- **Travel Planning**: Interactive travel assistants helping users plan trips over multiple sessions.
- **Professional Skill Development**: Continuous learning platforms for various professional skills, from coding to management.
_Check out this [**Pipe**](https://langbase.com/examples/js-tutor) to enhance JavaScript learning with personalized lessons, complex problem resolution, and **interactive professional skill development** for your users._
<CTAButtons
example
primary={{ href: 'https://langbase.com/examples/js-tutor', text: '⌘ Pipe Playground' }}
secondary={{ href: 'https://langbase.com/examples/js-tutor/fork', text: 'Fork pipe' }}
/>
<Img
caption="JavaScript Tutor"
light="https://raw.githubusercontent.com/LangbaseInc/docs-images/main/solutions/js-tutor-light.jpg"
dark="https://raw.githubusercontent.com/LangbaseInc/docs-images/main/solutions/js-tutor-dark.jpg"
/>
---
## Rust Tutor
- **Personalized Learning**: Adaptive educational tutors that adjust content and pace based on student responses.
- **Customer Service**: Complex problem resolution across multiple interactions in retail or tech support.
- **E-commerce Solutions**: Guided shopping experiences with product recommendations and purchase assistance over multiple sessions.
- **Travel Planning**: Interactive travel assistants helping users plan trips over multiple sessions.
- **Professional Skill Development**: Continuous learning platforms for various professional skills, from coding to management.
_Check out this [**Pipe**](https://langbase.com/examples/rust-tutor) to enhance Rust learning with personalized lessons, **guided learning experience**, and interactive professional skill development for your users._
<CTAButtons
example
primary={{ href: 'https://langbase.com/examples/rust-tutor', text: '⌘ Pipe Playground' }}
secondary={{ href: 'https://langbase.com/examples/rust-tutor/fork', text: 'Fork pipe' }}
/>
<Img
caption="Rust Tutor"
light="https://raw.githubusercontent.com/LangbaseInc/docs-images/main/solutions/rust-tutor-light.jpg"
dark="https://raw.githubusercontent.com/LangbaseInc/docs-images/main/solutions/rust-tutor-dark.jpg"
/>
---
## Expert proofreader
- **Language Refinement**: Improve academic and professional language usage.
- **Style Consistency**: Ensure adherence to specified style guides (APA, MLA, Chicago, etc.).
- **Grammar Correction**: Identify and fix grammatical errors and awkward phrasing.
- **Clarity Enhancement**: Refine complex ideas into clear, concise language.
- **Technical Accuracy**: Verify correct usage of field-specific terminology and jargon.
- **Citation Verification**: Check and correct citations and references for accuracy.
- **Tone Adjustment**: Adapt writing tone to suit the intended audience and purpose.
- **Formatting Uniformity**: Ensure consistent formatting throughout the document.
- **ESL Support**: Assist non-native English writers in producing fluent text.
- **Readability Improvement**: Enhance overall document structure and flow for better comprehension.
_Check out this [**Pipe**](https://langbase.com/examples/expert-proofreader) to **improve document** quality by refining language, ensuring style consistency, correcting grammar, and enhancing readability for your users._
<CTAButtons
example
primary={{ href: 'https://langbase.com/examples/expert-proofreader', text: '⌘ Pipe Playground' }}
secondary={{ href: 'https://langbase.com/examples/expert-proofreader/fork', text: 'Fork pipe' }}
/>
<Img
caption="Expert proofreader"
light="https://raw.githubusercontent.com/LangbaseInc/docs-images/main/solutions/expert-proofreader-light.jpg"
dark="https://raw.githubusercontent.com/LangbaseInc/docs-images/main/solutions/expert-proofreader-dark.jpg"
/>
---
## LaTeX Expert
- **Code Generation**: Create valid LaTeX code for document structures, equations, tables, and figures.
- **Syntax Explanation**: Clarify LaTeX commands and provide educational comments within the code.
- **Error Resolution**: Identify and troubleshoot common LaTeX compilation issues.
- **Best Practices Guidance**: Offer tips on document organization, package usage, and LaTeX conventions.
- **Complete Document Provision**: Supply fully compilable LaTeX documents for user testing and learning.
_Check out this [**Pipe**](https://langbase.com/examples/latex-expert) to **streamline LaTeX document creation** by generating code, explaining syntax, resolving errors, and providing best practices for your users._
<CTAButtons
example
primary={{ href: 'https://langbase.com/examples/latex-expert', text: '⌘ Pipe Playground' }}
secondary={{ href: 'https://langbase.com/examples/latex-expert/fork', text: 'Fork pipe' }}
/>
<Img
caption="LaTeX Expert"
light="https://raw.githubusercontent.com/LangbaseInc/docs-images/main/solutions/latex-expert-light.jpg"
dark="https://raw.githubusercontent.com/LangbaseInc/docs-images/main/solutions/latex-expert-dark.jpg"
/>
---
## English CEFR level examiner
- **Candidate Seniority Assessment**: Evaluate job applicants' seniority level and experience through a series of structured questions to better match them with appropriate roles.
- **Employee Training**: Assess current skill levels and provide personalized learning paths to help employees upskill effectively.
- **Customer Support**: Assist users in troubleshooting coding issues or understanding software features through interactive problem-solving.
- **E-Commerce Customer Understanding**: Use a simple questionnaire to assess customer requirements, summarize their sentiment, and inform better product design.
- **Team Skill Assessment**: Evaluate team members' skills to assign tasks more effectively and identify training needs for skill development.
_Check out this [**Pipe**](https://langbase.com/examples/cefr-level-assessment-bot) to **streamline skill assessment** by evaluating seniority, guiding employee training, supporting customer queries, understanding e-commerce needs, and assessing team skills for your users._
<CTAButtons
example
primary={{ href: 'https://langbase.com/examples/cefr-level-assessment-bot', text: '⌘ Pipe Playground' }}
secondary={{ href: 'https://langbase.com/examples/cefr-level-assessment-bot/fork', text: 'Fork pipe' }}
/>
<Img
caption="English CEFR level examiner Chatbot"
light="https://raw.githubusercontent.com/LangbaseInc/docs-images/main/solutions/cfr-level-assessment-bot-light.jpg"
dark="https://raw.githubusercontent.com/LangbaseInc/docs-images/main/solutions/cfr-level-assessment-bot-dark.jpg"
/>
---
## AI Master Chef
- **Personalized Meal Planning**: Generate customized weekly meal plans based on dietary preferences and available ingredients.
- **Interactive Cooking Lessons**: Guide users through real-time, step-by-step cooking instructions for complex dishes.
_Check out this [**Pipe**](https://langbase.com/examples/ai-master-chef) to transform your culinary skills, explore global cuisines, create personalized meal plans, and **turn any ingredients into gourmet dishes tailored to your tastes and dietary needs**._
<CTAButtons
example
primary={{ href: 'https://langbase.com/examples/ai-master-chef', text: '⌘ Pipe Playground' }}
secondary={{ href: 'https://langbase.com/examples/ai-master-chef/fork', text: 'Fork pipe' }}
/>
<Img
caption="AI Master Chef"
light="https://raw.githubusercontent.com/LangbaseInc/docs-images/main/solutions/ai-master-chef-light.jpg"
dark="https://raw.githubusercontent.com/LangbaseInc/docs-images/main/solutions/ai-master-chef-dark.jpg"
/>
---
## ParaphraseParrot Chatbot
- **Essay Enhancement**: Improve academic papers by offering varied sentence structures and vocabulary to enrich writing style.
- **Content Variation**: Generate diverse phrasings for headlines, social media posts, and marketing copy to A/B test engagement.
- **Writer's Block Buster**: Provide alternative expressions for key points in articles, blogs, or scripts to spark creativity and overcome writing stagnation.
- **Communication Training**: Help non-native speakers practice expressing ideas in multiple ways to enhance language fluency.
_Check out this [**Pipe**](https://langbase.com/examples/paraphrase-parrrot) to transforms mundane sentences into captivating expressions, **effortlessly rephrasing your ideas with flair, injecting idioms**, and offering multiple versions to perfectly capture your intended message._
<CTAButtons
example
primary={{ href: 'https://langbase.com/examples/paraphrase-parrrot', text: '⌘ Pipe Playground' }}
secondary={{ href: 'https://langbase.com/examples/paraphrase-parrrot/fork', text: 'Fork pipe' }}
/>
<Img
caption="ParaphraseParrot Chatbot"
light="https://raw.githubusercontent.com/LangbaseInc/docs-images/main/solutions/paraphrase-parrot-light.jpg"
dark="https://raw.githubusercontent.com/LangbaseInc/docs-images/main/solutions/paraphrase-parrot-dark.jpg"
/>
---
## Career Prep Coach
- **Job Seeker Preparation**: Simulate realistic interview scenarios for various industries, helping candidates refine their responses and boost confidence.
- **HR Training**: Assist HR professionals in honing their interviewing skills, ensuring fair and effective candidate evaluations across different roles.
_Check out this [**Pipe**](https://langbase.com/examples/career-prep-coach) to ace your job interviews by **simulating real scenarios**, providing expert feedback, crafting STAR responses, and boosting your confidence across various industries and roles._
<CTAButtons
example
primary={{ href: 'https://langbase.com/examples/career-prep-coach', text: '⌘ Pipe Playground' }}
secondary={{ href: 'https://langbase.com/examples/career-prep-coach/fork', text: 'Fork pipe' }}
/>
<Img
caption="Career Prep Coach Chatbot"
light="https://raw.githubusercontent.com/LangbaseInc/docs-images/main/solutions/career-prep-coach-light.jpg"
dark="https://raw.githubusercontent.com/LangbaseInc/docs-images/main/solutions/career-prep-coach-dark.jpg"
/>
---
## PolyExplainer Chatbot
- **Adaptive Science Communication**: Seamlessly translate complex scientific concepts across five cognitive levels, from child to expert, enhancing understanding for diverse audiences.
_Check out this [**Pipe**](https://langbase.com/examples/poly-explainer-bot) that decodes complex scientific and engineering concepts across five cognitive levels, effortlessly adapting explanations from child-friendly analogies to expert-level discourse, ensuring crystal-clear understanding for any audience._
<CTAButtons
example
primary={{ href: 'https://langbase.com/examples/poly-explainer-bot', text: '⌘ Pipe Playground' }}
secondary={{ href: 'https://langbase.com/examples/poly-explainer-bot/fork', text: 'Fork pipe' }}
/>
<Img
caption="PolyExplainer Chatbot"
light="https://raw.githubusercontent.com/LangbaseInc/docs-images/main/solutions/poly-explainer-light.jpg"
dark="https://raw.githubusercontent.com/LangbaseInc/docs-images/main/solutions/poly-explainer-dark.jpg"
/>
---
## Proverb Pro Chatbot
- **Language Learning**: Aid non-native speakers in mastering idiomatic expressions, boosting language proficiency and cultural understanding.
- **Content Enhancement**: Help writers and creators use idioms and proverbs accurately, enriching content across various mediums.
_Check out this [**Pipe**](https://langbase.com/examples/proverb-pro), your go-to guide for decoding idioms and proverbs, offering clear explanations, usage examples, and origins to enrich your language skills and writing with colorful expressions._
<CTAButtons
example
primary={{ href: 'https://langbase.com/examples/proverb-pro', text: '⌘ Pipe Playground' }}
secondary={{ href: 'https://langbase.com/examples/proverb-pro/fork', text: 'Fork pipe' }}
/>
<Img
caption="Proverb Pro Chatbot"
light="https://raw.githubusercontent.com/LangbaseInc/docs-images/main/solutions/proverb-pro-light.jpg"
dark="https://raw.githubusercontent.com/LangbaseInc/docs-images/main/solutions/proverb-pro-dark.jpg"
/>
---
## SQL Tutor Chatbot
- **Rapid Skill Acquisition**: Accelerate learning of essential SQL commands and concepts for immediate application in data tasks.
- **Efficient Onboarding**: Enable quick upskilling for new team members, streamlining their integration into database management roles.
_Check out this [**Pipe**](https://langbase.com/examples/sql-tutor) to enhance SQL learning with personalized lessons, **guided learning experience**, and interactive professional skill development for your users._
<CTAButtons
example
primary={{ href: 'https://langbase.com/examples/sql-tutor', text: '⌘ Pipe Playground' }}
secondary={{ href: 'https://langbase.com/examples/sql-tutor/fork', text: 'Fork pipe' }}
/>
<Img
caption="SQL Tutor Chatbot"
light="https://raw.githubusercontent.com/LangbaseInc/docs-images/main/solutions/sql-tutor-light.jpg"
dark="https://raw.githubusercontent.com/LangbaseInc/docs-images/main/solutions/sql-tutor-dark.jpg"
/>
---
## MatPyConverter Chatbot
- **Cross-Platform Code Migration**: Assist researchers and engineers in transitioning projects between MATLAB and Python environments, facilitating collaboration and leveraging platform-specific advantages.
_Check out this [**Pipe**](https://langbase.com/examples/mat-py-converter) to seamlessly integrate **MATLAB-Python code translation**, enabling cross-platform compatibility and expanding your user base across scientific computing environments._
<CTAButtons
example
primary={{ href: 'https://langbase.com/examples/mat-py-converter', text: '⌘ Pipe Playground' }}
secondary={{ href: 'https://langbase.com/examples/mat-py-converter/fork', text: 'Fork pipe' }}
/>
---
## Python Tutor Chatbot
- **Skill Development**: Assist beginners and advanced users in mastering Python programming through interactive and personalized lessons.
- **Practical Application**: Help users implement Python in real-world projects, enhancing their coding skills with hands-on examples and exercises.
_Check out this [**Pipe**](https://langbase.com/examples/python-tutor) to enhance Python learning with personalized lessons, **guided learning experiences, and interactive skill development** for your users._
<CTAButtons
example
primary={{ href: 'https://langbase.com/examples/python-tutor', text: '⌘ Pipe Playground' }}
secondary={{ href: 'https://langbase.com/examples/python-tutor/fork', text: 'Fork pipe' }}
/>
---
## Question and Answer Expert
- **Automated Contextual Questions**:Automated content generation for study guides or FAQ sections, allowing users to quickly create relevant question-and-answer sets on specific topics from a larger body of content.
_Check out this [**Pipe**](https://langbase.com/examples/question-and-answer-expert) to empower your app with **intelligent Q&A generation**, turning any content into interactive learning experiences._
<CTAButtons
example
primary={{ href: 'https://langbase.com/examples/question-and-answer-expert', text: '⌘ Pipe Playground' }}
secondary={{ href: 'https://langbase.com/examples/question-and-answer-expert/fork', text: 'Fork pipe' }}
/>
<Img
caption="Question and Answer Expert"
light="https://raw.githubusercontent.com/LangbaseInc/docs-images/main/solutions/question-and-answer-expert-light.jpg"
dark="https://raw.githubusercontent.com/LangbaseInc/docs-images/main/solutions/question-and-answer-expert-dark.jpg"
/>
---
## Bash Tutor Chatbot
- **Interactive Learning**: Guide users through hands-on Bash exercises, providing real-time feedback and explanations to reinforce concepts.
- **Skill Assessment**: Evaluate users' Bash proficiency through targeted questions and practical challenges, identifying areas for improvement.
- **Customized Curriculum**: Adapt the learning path based on users' goals and prior experience, focusing on relevant Bash topics for their specific needs.
_Check out this [**Pipe**](https://langbase.com/examples/bash-tutor) to empower your users with an intelligent Bash learning companion that offers personalized, **interactive tutorials and real-time feedback**, transforming command-line novices into confident shell scripters._
<CTAButtons
example
primary={{ href: 'https://langbase.com/examples/bash-tutor', text: '⌘ Pipe Playground' }}
secondary={{ href: 'https://langbase.com/examples/bash-tutor/fork', text: 'Fork pipe' }}
/>
---
## ASCII-artie
- **Visual Communication Enhancement**: Transform plain text ideas into engaging ASCII art for vivid expression in text-only environments.
- **Educational Illustration**: Generate ASCII versions of concepts, figures, or scenes for accessible, text-based educational materials.
_Check out this [**Pipe**](https://langbase.com/examples/ascii-artie) to enable your users to create simple, personalized ASCII art effortlessly, adding a touch of creativity and fun to their digital interactions._
<CTAButtons
example
primary={{ href: 'https://langbase.com/examples/ascii-artie', text: '⌘ Pipe Playground' }}
secondary={{ href: 'https://langbase.com/examples/ascii-artie/fork', text: 'Fork pipe' }}
/>
---
</content>
</doc>
<doc>
<metadata>
<title>Customer Support</title>
<url>https://langbase.com/docs/solutions/customer-support/</url>
</metadata>
<content>
import { generateMetadata } from '@/lib/generate-metadata';
# Customer Support
_Here are some carefully crafted **Langbase** powered **AI solutions** for customer support:_
---
## Ticket Summarization
- **Ticket Summarization:** Summarize customer support tickets to help support agents understand issues quickly and provide faster resolutions.
- **AI-Powered Query Response:** Enable customer support to use AI to generate accurate answers to user queries based on the provided docs. This improving accuracy and speeds up the support process.
- **FAQ Generation:** Automatically generate FAQ entries from customer inquiries and support interactions.
_Check out this [**Pipe**](https://langbase.com/examples/cs-tickets-to-faq-summarizer) to summarize **customer support tickets** into **FAQ entries**._
<CTAButtons
example
primary={{ href: 'https://langbase.com/examples/cs-tickets-to-faq-summarizer', text: '⌘ Pipe Playground' }}
secondary={{ href: 'https://langbase.com/examples/cs-tickets-to-faq-summarizer/fork', text: 'Fork pipe' }}
/>
<Img
caption="CS Tickets to FAQ Summarizer"
light="https://raw.githubusercontent.com/LangbaseInc/docs-images/main/solutions/cs-tickets-to-faq-summarizer-light.jpg"
dark="https://raw.githubusercontent.com/LangbaseInc/docs-images/main/solutions/cs-tickets-to-faq-summarizer-dark.jpg"
/>
---
## Translation
- **Multilingual Chatbots:** AI translators can enable chatbots to understand and respond to customer queries in multiple languages, improving customer experience and expanding reach.
- **Real-time Translation:** Customer service representatives can use AI translators to communicate with customers in real-time, regardless of language barriers.
- **Knowledge Base Localization:** Automatically translate FAQs, help articles, and other support documents into different languages to cater to a global audience.
- **Voice Support:** Translate spoken language during support calls to facilitate communication between customers and support agents who speak different languages.
_Check out this [**Pipe**](https://langbase.com/langbase/cs-ai-translator) to translate **customer support messages** to understand and respond to customer queries in multiple languages._
<CTAButtons
example
primary={{ href: 'https://langbase.com/langbase/cs-ai-translator', text: '⌘ Pipe Playground' }}
secondary={{ href: 'https://langbase.com/langbase/cs-ai-translator/fork', text: 'Fork pipe' }}
/>
<Img
caption="Customer Support AI Translator"
light="https://raw.githubusercontent.com/LangbaseInc/docs-images/main/solutions/cs-ai-translator-light.jpg"
dark="https://raw.githubusercontent.com/LangbaseInc/docs-images/main/solutions/cs-ai-translator-dark.jpg"
/>
---
## Documentation Bot
- **Instant Document Access:** AI chatbots provide immediate access to relevant documents, reducing the time spent searching through databases.
- **Document Search Assistance:** You can create a chatbot using a Langbase pipe to help users find specific documents based on keywords and queries.
- **Policy and Procedure Guidance:** Chatbots guide users through company policies and procedures, offering step-by-step assistance for better understanding and compliance.
_Check out this RAG based [**Pipe**](https://langbase.com/langbase/docs-bot) that Langbase Pipe FAQs to answer your questions._
<CTAButtons
example
primary={{ href: 'https://langbase.com/langbase/docs-bot', text: '⌘ Pipe Playground' }}
secondary={{ href: 'https://langbase.com/langbase/docs-bot/fork', text: 'Fork pipe' }}
/>
<Note title="Memory is not public">
Forked Pipe does not contain any memory. Please create a memory, add
document, and attach it to the Pipe to use the solution. [Learn more about
memory](/memory/quickstart#step-1-create-a-memory).
</Note>
<Img
caption="Documentation Bot"
light="https://raw.githubusercontent.com/LangbaseInc/docs-images/main/solutions/docs-bot-light.jpg"
dark="https://raw.githubusercontent.com/LangbaseInc/docs-images/main/solutions/docs-bot-dark.jpg"
/>
---
## AI Chatbot
- **24/7 Automated Assistance:** AI Chatbots can handle common customer queries around the clock, reducing the need for human agents.
- **Support Ticket System Integration:** You can create a chatbot using a Langbase pipe to automatically create and update support tickets based on user interactions.
- **Product Troubleshooting:** Chatbots can guide customers through troubleshooting steps for common issues with products or services.
_Check out this [**Pipe**](https://langbase.com/langbase/support-ticket-chatbot) that can converse with the user, extract information and create an appropriate **customer support ticket**._
<CTAButtons
example
primary={{ href: 'https://langbase.com/langbase/support-ticket-chatbot', text: '⌘ Pipe Playground' }}
secondary={{ href: 'https://langbase.com/langbase/support-ticket-chatbot/fork', text: 'Fork pipe' }}
/>
<Img
caption="Customer Support Ticket Chatbot"
light="https://raw.githubusercontent.com/LangbaseInc/docs-images/main/solutions/cs-ai-support-ticket-light.jpg"
dark="https://raw.githubusercontent.com/LangbaseInc/docs-images/main/solutions/cs-ai-support-ticket-dark.jpg"
/>
---
## Customer Support Chatbot with Memory (RAG)
Documentation can be saved as memory and attached to the Pipe to allow LLMs to use it for generating responses. SAAS customer support AI agent pipe with RAG memory pipeline.
- **Memory (RAG) based Chatbot:** You can create a chatbot using a Langbase pipe that uses the RAG model to generate responses based on the provided documentation.
- **Accurate answers:** AI chatbots can provide accurate answers to customer queries based on the provided documentation. It improves the quality of support and with trains on new docs in minutes.
_Check out this RAG based [**Pipe**](https://langbase.com/langbase/customer-support) that uses documentation docs to generate responses._
<CTAButtons
example
primary={{ href: 'https://langbase.com/langbase/customer-support', text: '⌘ Pipe Playground' }}
secondary={{ href: 'https://langbase.com/langbase/customer-support/fork', text: 'Fork pipe' }}
/>
<Note title="Memory is not public">
Your forked AI pipe agent will not contain any memory. Please create a memory, add your
documents, and attach it to the Pipe to use this solution. [Learn more about
memory](/memory/quickstart#step-1-create-a-memory).
</Note>
<Img
caption="Customer Support Chatbot"
light="https://raw.githubusercontent.com/LangbaseInc/docs-images/main/solutions/customer-support-light.jpg"
dark="https://raw.githubusercontent.com/LangbaseInc/docs-images/main/solutions/customer-support-dark.jpg"
/>
---
</content>
</doc>
<doc>
<metadata>
<title>Administration</title>
<url>https://langbase.com/docs/solutions/administration/</url>
</metadata>
<content>
import { generateMetadata } from '@/lib/generate-metadata';
# Administration
_Here are some carefully crafted **Langbase** powered **AI solutions** for administration:_
{/* ---
## Text Summarization
- **Documents Summarization:** Summarize lengthy administrative documents, reports, and policies into concise summaries for quick reference.
- **Research Summaries:** Summarize research papers, articles, and studies to provide a quick overview of the key findings and insights.
- **Meeting Minutes:** Summarize meeting minutes, discussions, and action items to capture the key points and decisions made during meetings.
*Check out this [**Pipe**](https://langbase.com/langbase/patient-and-doctor-notes-summarizer) that summarizes **patient records** and **doctors' notes** to provide a quick overview about the patient.*
<Img
caption="Patient and Doctor Notes Summarizer"
light="https://raw.githubusercontent.com/LangbaseInc/docs-images/main/solutions/patient-and-doctor-notes-summarizer-light.jpg"
dark="https://raw.githubusercontent.com/LangbaseInc/docs-images/main/solutions/patient-and-doctor-notes-summarizer-dark.jpg"
/>
---
## Translation
- **Patient Communication:** Translate medical instructions, consent forms, and communication between healthcare providers and patients who speak different languages.
- **Telemedicine:** Facilitate multilingual consultations between doctors and patients via telemedicine platforms using real-time translation.
- **Medical Research:** Translate medical research papers, clinical trial documentation, and pharmaceutical information to share knowledge globally.
- **Training & Education:** Provide translated medical training materials and courses to healthcare professionals around the world.
_Check out this [**Pipe**](https://langbase.com/langbase/patient-and-doctor-notes-translator) to translate **records and notes** for communication between healthcare providers and patients._
<Img
caption="Patient Records and Doctor Notes Translator"
light="https://raw.githubusercontent.com/LangbaseInc/docs-images/main/solutions/patient-and-doctor-notes-translator-light.jpg"
dark="https://raw.githubusercontent.com/LangbaseInc/docs-images/main/solutions/patient-and-doctor-notes-translator-dark.jpg"
/> */}
---
## Recruitment
- **Resume Analysis**: Extract key skills, experience, and qualifications from resumes to provide a summary.
- **Resume Comparison**: Compare multiple resumes to identify expertise, and filter potential candidates.
- **Resume Screening**: Analyze resumes to identify potential red flags, gaps, and compliance issues.
_Check out this RAG based [**Pipe**](https://langbase.com/langbase/software-engineer-hiring) that analyzes resumse of multiple candidates and shortlist them for given expertise._
<CTAButtons
example
primary={{ href: 'https://langbase.com/langbase/software-engineer-hiring', text: '⌘ Pipe Playground' }}
secondary={{ href: 'https://langbase.com/langbase/software-engineer-hiring/fork', text: 'Fork pipe' }}
/>
<Note title="Memory is not public">
Forked Pipe does not contain any memory. Please create a memory, add document, and attach it to the Pipe to use the solution. [Learn more about memory](/memory/quickstart#step-1-create-a-memory).
</Note>
<Img
caption="Software Engineer Resumes Analyst"
light="https://raw.githubusercontent.com/LangbaseInc/docs-images/main/solutions/swe-hiring-light.jpg"
dark="https://raw.githubusercontent.com/LangbaseInc/docs-images/main/solutions/swe-hiring-dark.jpg"
/>
---
## AI Chatbot
- **Meeting Coordination**: AI-powered chatbots can help employees schedule, reschedule, or cancel meetings with colleagues and clients.
- **Task Prioritization**: Provide preliminary task assessments and suggest possible priorities based on reported urgency and importance.
- **Employee Handbook Access**: AI-powered chatbots provide instant access to the company's handbook, offering quick answers to policy questions and guidance on company protocols.
_Check out this chatbot [**Pipe**](https://langbase.com/langbase/employee-handbook-chatbot) that can answer queries related to company policies and guidelines for employees._
<CTAButtons
example
primary={{ href: 'https://langbase.com/langbase/employee-handbook-chatbot', text: '⌘ Pipe Playground' }}
secondary={{ href: 'https://langbase.com/langbase/employee-handbook-chatbot/fork', text: 'Fork pipe' }}
/>
<Note title="Memory is not public">
Forked Pipe does not contain any memory. Please create a memory, add document, and attach it to the Pipe to use the solution. [Learn more about memory](/memory/quickstart#step-1-create-a-memory).
</Note>
<Img
caption="Employee Handbook Chatbot"
light="https://raw.githubusercontent.com/LangbaseInc/docs-images/main/solutions/employee-handbook-chatbot-light.jpg"
dark="https://raw.githubusercontent.com/LangbaseInc/docs-images/main/solutions/employee-handbook-chatbot-dark.jpg"
/>
---
## Onboarding AI Assistant
- **Streamlined Onboarding Process**: Automate and standardize the equipment and access setup procedures, reducing human error and ensuring consistent onboarding experiences across the organization.
- **Real-time Issue Resolution**: Instantly generate support tickets for missing equipment or access issues, minimizing delays in the onboarding process and improving new employee productivity.
- **24/7 Availability**: Provide round-the-clock assistance for new employees, allowing them to complete onboarding tasks at their own pace and accommodating different time zones or work schedules.
_Check out this [**Pipe**](https://langbase.com/examples/onboarding-ai-assistant) to streamline new hire integration, **automate equipment setup verification, and provide instant support** for a smooth and efficient onboarding experience across your organization._
<CTAButtons
example
primary={{ href: 'https://langbase.com/examples/onboarding-ai-assistant', text: '⌘ Pipe Playground' }}
secondary={{ href: 'https://langbase.com/examples/onboarding-ai-assistant/fork', text: 'Fork pipe' }}
/>
<Img
caption="Onboarding AI Assistant"
light="https://raw.githubusercontent.com/LangbaseInc/docs-images/main/solutions/onboarding-ai-assistant-light.jpg"
dark="https://raw.githubusercontent.com/LangbaseInc/docs-images/main/solutions/onboarding-ai-assistant-dark.jpg"
/>
---
## Stock AI Assistant
- **Predictive Restocking**: Forecast demand and automate reorder processes to maintain optimal inventory levels across all product lines.
- **Real-time Inventory Alerts**: Monitor stock levels continuously and instantly notify managers of low-stock items or unusual inventory fluctuations.
_Check out this [**Pipe**](https://langbase.com/examples/stock-assistant) to streamline stock management, automate reordering processes, and **provide instant inventory insights** for efficient and cost-effective retail operations across your store network._
<CTAButtons
example
primary={{ href: 'https://langbase.com/examples/stock-assistant', text: '⌘ Pipe Playground' }}
secondary={{ href: 'https://langbase.com/examples/stock-assistant/fork', text: 'Fork pipe' }}
/>
<Img
caption="Stock AI Assistant"
light="https://raw.githubusercontent.com/LangbaseInc/docs-images/main/solutions/stock-assistant-light.jpg"
dark="https://raw.githubusercontent.com/LangbaseInc/docs-images/main/solutions/stock-assistant-dark.jpg"
/>
---
## AI-Assistant DevScreener (HR support ChatBot for initial screening)
- **Candidate Experience Enhancement**: Deliver a personalized, responsive interview experience that adapts to each applicant's profile, providing a professional first impression while efficiently gathering crucial information.
- **Talent Pool Optimization**: Systematically evaluate and categorize applicants based on their responses, enabling HR teams to quickly identify top candidates for different positions and experience levels.
_Check out this [**Pipe**](https://langbase.com/examples/dev-screener) to streamline candidate evaluation, **automate initial interviews**, and gain instant insights into applicant qualifications for effective tech talent acquisition across your organization._
<CTAButtons
example
primary={{ href: 'https://langbase.com/examples/dev-screener', text: '⌘ Pipe Playground' }}
secondary={{ href: 'https://langbase.com/examples/dev-screener/fork', text: 'Fork pipe' }}
/>
<Img
caption="AI-Assistant DevScreener"
light="https://raw.githubusercontent.com/LangbaseInc/docs-images/main/solutions/dev-screener-light.jpg"
dark="https://raw.githubusercontent.com/LangbaseInc/docs-images/main/solutions/dev-screener-dark.jpg"
/>
---
## MemoAssistant (Transform Video Conference transcripts into Memo)
- **Meeting Efficiency**: Instantly convert lengthy, jargon-filled team discussions into clear, actionable summaries, saving hours of post-meeting documentation time.
- **Cross-Team Communication**: Bridge knowledge gaps by translating technical meetings into accessible reports for non-technical stakeholders, ensuring alignment across departments.
_Explore this [**Pipe**](https://langbase.com/examples/memo-assistant) to transform video transcripts into clear, concise meeting summaries, capturing key points, decisions, and action items for seamless follow-up and enhanced productivity._
<CTAButtons
example
primary={{ href: 'https://langbase.com/examples/memo-assistant', text: '⌘ Pipe Playground' }}
secondary={{ href: 'https://langbase.com/examples/memo-assistant/fork', text: 'Fork pipe' }}
/>
<Img
caption="MemoAssistant for video transcripts"
light="https://raw.githubusercontent.com/LangbaseInc/docs-images/main/solutions/memo-assistant-light.jpg"
dark="https://raw.githubusercontent.com/LangbaseInc/docs-images/main/solutions/memo-assistant-dark.jpg"
/>
---
</content>
</doc>
<doc>
<metadata>
<title>Workflow <span className="text-sm font-mono text-muted-foreground/70 ml-2">Workflow</span></title>
<url>https://langbase.com/docs/sdk/workflow/</url>
</metadata>
<content>
import { generateMetadata } from '@/lib/generate-metadata';
import { LanguageProvider, SimpleLanguageToggle, LanguageContent } from '@/components/LanguageToggle';
# Workflow <span className="text-sm font-mono text-muted-foreground/70 ml-2">Workflow</span>
<LanguageProvider defaultLanguage='typescript'>
The workflow primitive allows you to create and manage a sequence of steps with advanced features like timeouts, retries, and error handling. It's designed to facilitate complex task orchestration in your AI applications.
---
## Generate a User/Org API key
You will need to generate an API key to authenticate your requests. For more information, visit the [User/Org API key documentation](/api-reference/api-keys).
<Spoiler title="Get your Langbase API key: User or Org">
You can generate API keys from the [Langbase Studio](https://studio.langbase.com) by following these steps:
1. Switch to your user or org account.
2. From the sidebar, click on the `API keys`.
3. From here, you can create a new API key or manage existing ones.
For more details, follow the [Langbase API keys](/api-reference/api-keys) documentation.
</Spoiler>
---
<div className="flex justify-between items-end">
<h3 className="text-2xl w-full">API reference</h3>
<div className="flex md:hidden items-end mb-1">
<SimpleLanguageToggle/>
</div>
</div>
## `new Workflow(config)`
<Row>
<Col>
<LanguageContent language="typescript">
Create a new Workflow instance by instantiating the `Workflow` class.
<CodeGroup exampleTitle="Workflow" title="Class Instantiation">
```ts {{ title: 'index.ts' }}
const workflow = new Workflow(config);
// with types
const workflow = new Workflow(config?: WorkflowConfig);
```
</CodeGroup>
</LanguageContent>
<LanguageContent language="python">
Create a new Workflow instance by instantiating the `Workflow` class.
<CodeGroup exampleTitle="Workflow" title="Class Instantiation">
```python {{ title: 'main.py' }}
workflow = Workflow(**config)
```
</CodeGroup>
</LanguageContent>
## config
<Properties>
<Property name="config" type="WorkflowConfig">
```ts {{title: 'WorkflowConfig Object'}}
debug?: boolean;
```
*Following are the properties of the config object.*
</Property>
</Properties>
---
### debug
<Properties>
<Property name="debug" type="boolean">
When set to `true`, detailed execution logs for each step will be printed to the console. This includes the step, start/end times, timeouts, retries, and any errors encountered.
Default: `false`
</Property>
</Properties>
---
## workflow.step(config)
<Properties>
<Property name="step" type="Function">
Define and execute a step in the workflow.
<LanguageContent language="typescript">
```ts {{title: 'step Function Signature'}}
step<T = any>(config: StepConfig<T>): Promise<T>
```
</LanguageContent>
<LanguageContent language="python">
```python {{title: 'step Function Signature'}}
async def step(config: StepConfig[T]) -> T:
```
</LanguageContent>
The `step` function accepts a configuration object and returns a Promise that resolves to the result of the step execution.
</Property>
</Properties>
---
### StepConfig
<Properties>
<Property name="config" type="StepConfig<T>">
<LanguageContent language="typescript">
```bash {{title: 'StepConfig Object'}}
id: string;
timeout?: number;
retries?: RetryConfig;
run: () => Promise<T>;
```
</LanguageContent>
<LanguageContent language="python">
```bash {{title: 'StepConfig Object'}}
id: string
timeout?: number
retries?: RetryConfig
run: async def run() -> T:
```
</LanguageContent>
*Following are the properties of the step config object.*
</Property>
</Properties>
---
<Properties>
<Property name="id" type="string" required="true">
A unique identifier for the step. This ID is used in logs and for storing the step's output in the workflow context.
</Property>
<Property name="timeout" type="number">
Maximum time in milliseconds that the step is allowed to run before timing out. If not specified, the step will run until completion, or until it fails.
</Property>
<Property name="retries" type="RetryConfig">
Configuration for retry behavior if the step fails.
```ts {{title: 'RetryConfig Object'}}
limit: number;
delay: number;
backoff: 'exponential' | 'linear' | 'fixed';
```
<Sub name="limit" type="number" required="true">
Maximum number of retry attempts after the initial try.
</Sub>
<Sub name="delay" type="number" required="true">
Base delay in milliseconds between retry attempts.
</Sub>
<Sub name="backoff" type="string" required="true">
Strategy for increasing the delay between retries:
- `exponential`: Delay doubles with each retry attempt (delay * 2^attempt)
- `linear`: Delay increases linearly with each attempt (delay * attempt)
- `fixed`: Delay remains constant for all retry attempts
</Sub>
</Property>
<Property name="run" type="Function" required="true">
The function to execute for a step. Must return a Promise that resolves to the step result.
<LanguageContent language="typescript">
```ts {{title: 'run Function Signature'}}
() => Promise<T>
```
</LanguageContent>
<LanguageContent language="python">
```python {{title: 'run Function Signature'}}
async def run() -> Any
```
</LanguageContent>
</Property>
</Properties>
</Col>
<Col>
<div className="flex justify-between items-end">
<h3 className="text-2xl w-full">Usage example</h3>
<div className="hidden md:flex items-end mb-2">
<SimpleLanguageToggle/>
</div>
</div>
<LanguageContent language="typescript">
<CodeGroup exampleTitle="Install the SDK" title="Install the SDK">
```bash {{ title: 'npm' }}
npm i langbase
```
```bash {{ title: 'pnpm' }}
pnpm i langbase
```
```bash {{ title: 'yarn' }}
yarn add langbase
```
</CodeGroup>
</LanguageContent>
<LanguageContent language="python">
<CodeGroup exampleTitle="Install the SDK" title="Install the SDK">
```bash {{ title: 'pip' }}
pip install langbase python-dotenv
```
</CodeGroup>
</LanguageContent>
### Environment variables
<CodeGroup exampleTitle="Environment variables" title="Environment variables">
```bash {{ title: '.env file' }}
LANGBASE_API_KEY="<USER/ORG-API-KEY>"
LLM_API_KEY="<YOUR-LLM-API-KEY>"
```
</CodeGroup>
### `Workflow` examples
<LanguageContent language="typescript">
<CodeGroup exampleTitle="workflow" title="workflow">
```ts {{ title: 'Basic Workflow' }}
import { Langbase } from 'langbase';
const langbase = new Langbase({
apiKey: process.env.LANGBASE_API_KEY!,
});
async function main() {
const workflow = langbase.workflow({
debug: true,
});
const { step } = workflow;
try {
// Step 1: Fetch data
const data = await step({
id: 'fetch-data',
run: async () => {
// Simulate API call
return { topic: 'climate change' };
},
});
// Step 2: Generate content using the Agent
const content = await step({
id: 'generate-content',
timeout: 8000, // 8 second timeout
run: async () => {
const { output } = await langbase.agent.run({
model: 'openai:gpt-4o-mini',
instructions: 'You are a helpful AI Agent.',
input: `Write a short paragraph about ${data.topic}`,
llmKey: process.env.LLM_API_KEY!,
stream: false,
});
return output;
},
});
console.log('Final result:', content);
} catch (error) {
console.error('Workflow failed:', error);
} finally {
// Optional: Use to enable tracing
await workflow.end();
}
}
main();
```
```ts {{ title: 'With Retries' }}
import { Langbase } from 'langbase';
const langbase = new Langbase({
apiKey: process.env.LANGBASE_API_KEY!,
});
async function main() {
const workflow = langbase.workflow({
debug: true,
});
const { step } = workflow;
try {
// Step 1: Fetch external data with retries
const weatherData = await step({
id: 'fetch-weather',
timeout: 5000, // 5 second timeout
retries: {
limit: 3,
delay: 1000,
backoff: 'exponential',
},
run: async () => {
const response = await fetch('https://api.weather.example/forecast');
return response.json();
},
});
// Step 2: Process data
const processedData = await step({
id: 'process-data',
run: async () => {
// Process the weather data
return {
location: weatherData.location,
temperature: weatherData.current.temperature,
forecast: weatherData.forecast.summary,
};
},
});
// Step 3: Generate report with Agent
const report = await step({
id: 'generate-report',
timeout: 10000, // 10 second timeout
run: async () => {
const { output } = await langbase.agent.run({
model: 'openai:gpt-4o-mini',
instructions: 'You are a weather reporter.',
input: `Create a weather report for ${processedData.location}
where the temperature is ${processedData.temperature}°C with
a forecast of "${processedData.forecast}"`,
llmKey: process.env.LLM_API_KEY!,
stream: false,
});
return output;
},
});
console.log('Weather Report:', report);
} catch (error) {
console.error('Workflow failed:', error);
} finally {
// Optional: Use to enable tracing
await workflow.end();
}
}
main();
```
```ts {{ title: 'Parallel Steps' }}
import { Langbase } from 'langbase';
const langbase = new Langbase({
apiKey: process.env.LANGBASE_API_KEY!,
});
async function main() {
const workflow = langbase.workflow({
debug: true,
});
const { step } = workflow;
try {
// Run multiple steps in parallel
const [summaryResult, translationResult] = await Promise.all([
step({
id: 'generate-summary',
run: async () => {
const { output } = await langbase.agent.run({
model: 'openai:gpt-4o-mini',
input: 'Summarize the benefits of AI in healthcare',
llmKey: process.env.LLM_API_KEY!,
stream: false,
});
return output;
},
}),
step({
id: 'translate-text',
run: async () => {
const { output } = await langbase.agent.run({
model: 'openai:gpt-4o-mini',
input: `Translate "Artificial Intelligence is
transforming our world" to French`,
llmKey: process.env.LLM_API_KEY!,
stream: false,
});
return output;
},
}),
]);
console.log('Summary:', summaryResult);
console.log('Translation:', translationResult);
} catch (error) {
console.error('Workflow failed:', error);
} finally {
// Optional: Use to enable tracing
await workflow.end();
}
}
main();
```
</CodeGroup>
</LanguageContent>
<LanguageContent language="python">
<CodeGroup exampleTitle="workflow" title="workflow">
```python {{ title: 'Basic Workflow' }}
import asyncio
import os
from dotenv import load_dotenv
from langbase import Langbase, Workflow
load_dotenv()
async def main():
# Initialize Langbase
langbase = Langbase(api_key=os.environ.get("LANGBASE_API_KEY"))
# Create workflow with debug mode
workflow = Workflow(debug=True)
try:
# Step 1: Fetch data
async def fetch_data():
# Simulate API call
return {"topic": "climate change"}
data = await workflow.step({
"id": "fetch_data",
"run": fetch_data
})
# Step 2: Generate content using the Agent
async def generate_content():
response = langbase.agent.run(
model="openai:gpt-4o-mini",
instructions="You are a helpful AI Agent.",
input=f"Write a short paragraph about {data['topic']}",
api_key=os.environ.get("LLM_API_KEY"),
stream=False,
)
return response.get("output")
content = await workflow.step({
"id": "generate_content",
"timeout": 8000, # 8 second timeout
"run": generate_content
})
print("Final result:", content)
except Exception as error:
print(f"Workflow failed: {error}")
if __name__ == "__main__":
asyncio.run(main())
```
```python {{ title: 'Email Processing Workflow' }}
"""
Email Processing Workflow
This example demonstrates how to create a workflow that analyzes
an email and generates a response when needed.
"""
import asyncio
import json
import os
from dotenv import load_dotenv
from langbase import Langbase, Workflow
load_dotenv()
async def process_email(email_content: str):
"""
Process an email by summarizing, analyzing sentiment,
determining if response is needed, and generating a response if necessary.
"""
# Check for required environment variables
langbase_api_key = os.environ.get("LANGBASE_API_KEY")
llm_api_key = os.environ.get("LLM_API_KEY")
if not langbase_api_key or not llm_api_key:
print("❌ Missing required environment variables.")
exit(1)
# Initialize Langbase
langbase = Langbase(api_key=langbase_api_key)
workflow = Workflow(debug=True)
try:
# Steps 1 & 2: Run summary and sentiment analysis in parallel
async def summarize_email():
response = langbase.agent.run(
model="openai:gpt-4o-mini",
instructions="""Create a concise summary of this email.
Focus on the main points, requests, and any action items mentioned.""",
api_key=llm_api_key,
input=[{"role": "user", "content": email_content}],
stream=False,
)
return response.get("output")
async def analyze_sentiment():
response = langbase.agent.run(
model="openai:gpt-4o-mini",
instructions="""Analyze the sentiment of this email.
Provide a brief analysis that includes the overall tone
(positive, neutral, or negative) and any notable emotional elements.""",
api_key=llm_api_key,
input=[{"role": "user", "content": email_content}],
stream=False,
)
return response.get("output")
# Execute summary and sentiment analysis steps in parallel
summary = await workflow.step({"id": "summarize_email", "run": summarize_email})
sentiment = await workflow.step({"id": "analyze_sentiment", "run": analyze_sentiment})
# Step 3: Determine if response is needed
async def determine_response_needed():
response = langbase.agent.run(
model="openai:gpt-4o-mini",
instructions="""Based on the email summary and sentiment analysis,
determine if a response is needed. Answer with 'yes' if a response
is required, or 'no' if no response is needed.""",
api_key=llm_api_key,
input=[{
"role": "user",
"content": f"""Email: {email_content}
Summary: {summary}
Sentiment: {sentiment}
Does this email require a response?"""
}],
stream=False,
)
return "yes" in response.get("output", "").lower()
response_needed = await workflow.step({
"id": "determine_response_needed",
"run": determine_response_needed
})
# Step 4: Generate response if needed
response = None
if response_needed:
async def generate_response():
response = langbase.agent.run(
model="openai:gpt-4o-mini",
instructions="""Generate a professional email response.
Address all questions and requests from the original email.""",
api_key=llm_api_key,
input=[{
"role": "user",
"content": f"""Original Email: {email_content}
Summary: {summary}
Sentiment Analysis: {sentiment}
Please draft a response email."""
}],
stream=False,
)
return response.get("output")
response = await workflow.step({
"id": "generate_response",
"run": generate_response
})
return {
"summary": summary,
"sentiment": sentiment,
"response_needed": response_needed,
"response": response,
}
except Exception as error:
print(f"Email processing workflow failed: {error}")
raise error
async def main():
sample_email = """
Subject: Pricing Information and Demo Request
Hello,
I came across your platform and I'm interested in learning more
about your product for our growing company. Could you please send
me some information on your pricing tiers? We're particularly
interested in the enterprise tier as we now have a team of about
50 people who would need access.
Would it be possible to schedule a demo sometime next week?
Thanks in advance for your help!
Best regards,
Jamie
"""
results = await process_email(sample_email)
print(json.dumps(results, indent=2, ensure_ascii=False))
if __name__ == "__main__":
asyncio.run(main())
```
```python {{ title: 'Summarization with Retries' }}
"""
Summarization Workflow
This example demonstrates how to create a workflow that summarizes
text input with parallel processing and retry configuration.
"""
import asyncio
import json
import os
from dotenv import load_dotenv
from langbase import Langbase, Workflow
load_dotenv()
async def process_text(input_text: str):
"""
Process text input by summarizing it with retry logic and debug mode.
"""
# Check for required environment variables
langbase_api_key = os.environ.get("LANGBASE_API_KEY")
llm_api_key = os.environ.get("LLM_API_KEY")
if not langbase_api_key or not llm_api_key:
print("❌ Missing required environment variables.")
exit(1)
# Initialize Langbase
langbase = Langbase(api_key=langbase_api_key)
workflow = Workflow(debug=True)
try:
# Define a single step with retries
async def process_text_step():
response = langbase.agent.run(
model="openai:gpt-4o",
instructions="""Summarize the following text in a single paragraph.
Be concise but capture the key information.""",
api_key=llm_api_key,
input=[{"role": "user", "content": input_text}],
stream=False,
)
return response.get("output")
response = await workflow.step({
"id": "process_text",
"retries": {"limit": 2, "delay": 1000, "backoff": "exponential"},
"run": process_text_step,
})
return {"response": response}
except Exception as error:
print(f"Workflow step failed: {error}")
raise error
async def main():
sample_text = """
Langbase is the most powerful serverless AI platform for building
AI agents with memory. Build, deploy, and scale AI agents with tools
and memory (RAG). Simple AI primitives with a world-class developer
experience without using any frameworks. Compared to complex AI
frameworks, Langbase is serverless and the first composable AI platform.
"""
results = await process_text(sample_text)
print(json.dumps(results, indent=2, ensure_ascii=False))
if __name__ == "__main__":
asyncio.run(main())
```
</CodeGroup>
</LanguageContent>
## Example outputs
<CodeGroup exampleTitle="Example Outputs" title="Example Outputs">
```json {{ title: 'Basic Workflow' }}
🔄 Starting step: fetch-data
⏱️ Step fetch-data: 5.214ms
📤 Output: { "topic": "climate change" }
✅ Completed step: fetch-data
🔄 Starting step: generate-content
⏳ Timeout: 8000ms
⏱️ Step generate-content: 2352.871ms
📤 Output: "Climate change represents one of the most urgent global challenges
of our time. Rising temperatures, shifting weather patterns, and increasingly
frequent extreme weather events are disrupting ecosystems and threatening
communities worldwide. Caused primarily by human activities like burning
fossil fuels and deforestation, climate change requires immediate collective
action through policy reforms, technological innovation, and individual
lifestyle changes to mitigate its worst effects and build a sustainable
future for coming generations."
✅ Completed step: generate-content
Final result: "Climate change represents one of the most urgent global
challenges of our time. Rising temperatures, shifting weather patterns, and
increasingly frequent extreme weather events are disrupting ecosystems and
threatening communities worldwide. Caused primarily by human activities like
burning fossil fuels and deforestation, climate change requires immediate
collective action through policy reforms, technological innovation, and
individual lifestyle changes to mitigate its worst effects and build a
sustainable future for coming generations."
```
```json {{ title: 'With Retries' }}
🔄 Starting step: fetch-weather
⏳ Timeout: 5000ms
🔄 Retries: {"limit":3,"delay":1000,"backoff":"exponential"}
⚠️ Attempt 1 failed, retrying in 1000ms...
Error: fetch failed
⚠️ Attempt 2 failed, retrying in 2000ms...
Error: fetch failed
⏱️ Step fetch-weather: 8217.631ms
📤 Output: {
"location": "San Francisco, CA",
"current": {
"temperature": 18,
"conditions": "Partly Cloudy"
},
"forecast": {
"summary": "Partly cloudy with a slight chance of evening fog",
"high": 21,
"low": 14
}
}
✅ Completed step: fetch-weather
🔄 Starting step: process-data
⏱️ Step process-data: 0.981ms
📤 Output: {
"location": "San Francisco, CA",
"temperature": 18,
"forecast": "Partly cloudy with a slight chance of evening fog"
}
✅ Completed step: process-data
🔄 Starting step: generate-report
⏳ Timeout: 10000ms
⏱️ Step generate-report: 2854.326ms
📤 Output: "Good afternoon, San Francisco! Today we're looking at mild
conditions across the Bay Area. Current temperature in San Francisco is
sitting at a comfortable 18°C, making it a pleasant day to be outdoors.
Looking ahead, expect it to remain partly cloudy with a slight chance of
evening fog rolling in from the Pacific. If you're planning evening
activities, you might want to bring an extra layer as that fog could bring a
slight drop in temperature. Back to you in the studio!"
✅ Completed step: generate-report
Weather Report: "Good afternoon, San Francisco! Today we're looking at mild
conditions across the Bay Area. Current temperature in San Francisco is
sitting at a comfortable 18°C, making it a pleasant day to be outdoors.
Looking ahead, expect it to remain partly cloudy with a slight chance of
evening fog rolling in from the Pacific. If you're planning evening
activities, you might want to bring an extra layer as that fog could bring a
slight drop in temperature. Back to you in the studio!"
```
```json {{ title: 'Parallel Steps' }}
🔄 Starting step: generate-summary
🔄 Starting step: translate-text
⏱️ Step generate-summary: 1523.123ms
📤 Output: "AI in healthcare offers numerous benefits including: improved
diagnosis accuracy through image recognition, personalized treatment plans
based on patient data, predictive analytics for early disease detection,
streamlined administrative tasks reducing staff burden, enhanced drug
discovery and development processes, remote patient monitoring through IoT
devices, and improved accessibility to quality healthcare for underserved
populations."
✅ Completed step: generate-summary
⏱️ Step translate-text: 785.451ms
📤 Output: "L'Intelligence Artificielle transforme notre monde."
✅ Completed step: translate-text
Summary: "AI in healthcare offers numerous benefits including: improved
diagnosis accuracy through image recognition, personalized treatment plans
based on patient data, predictive analytics for early disease detection,
streamlined administrative tasks reducing staff burden, enhanced drug
discovery and development processes, remote patient monitoring through
IoT devices, and improved accessibility to quality healthcare for underserved
populations."
Translation: "L'Intelligence Artificielle transforme notre monde."
```
</CodeGroup>
</Col>
</Row>
</LanguageProvider>
---
</content>
</doc>
<doc>
<metadata>
<title>Tools <span className="text-sm font-mono text-muted-foreground/70 ml-2">langbase.tools</span></title>
<url>https://langbase.com/docs/sdk/tools/</url>
</metadata>
<content>
import { generateMetadata } from '@/lib/generate-metadata';
# Tools <span className="text-sm font-mono text-muted-foreground/70 ml-2">langbase.tools</span>
Tools, an AI Primitive by Langbase, allows you to extend the capabilities of your AI applications. They enable you to integrate functionality such as web search, crawling, and other specialized tasks into your AI workflows.
By using tools, you can enhance the performance and versatility of your AI agents, making them more capable of handling complex tasks and providing valuable insights.
The Langbase SDK provides a set of powerful tools to enhance your AI applications. These tools can be used to extend the capabilities of your AI agents and provide additional functionality.
---
## Available Tools
---
### Web Search
The Web Search tool allows your AI agents to perform real-time web searches and retrieve information from the internet. This is particularly useful for tasks that require up-to-date information or fact-checking.
[Learn more about Web Search](/sdk/tools/web-search)
### Crawler
The Crawler tool enables your AI agents to extract and process information from web pages. It can be used to gather data from websites, parse content, and integrate it into your AI workflows.
[Learn more about Crawler](/sdk/tools/crawler)
---
</content>
</doc>
<doc>
<metadata>
<title>Pipe <span className="text-sm font-mono text-muted-foreground/70 ml-2">langbase.pipe</span></title>
<url>https://langbase.com/docs/sdk/pipe/</url>
</metadata>
<content>
import { generateMetadata } from '@/lib/generate-metadata';
# Pipe <span className="text-sm font-mono text-muted-foreground/70 ml-2">langbase.pipe</span>
Pipe is an AI agent available as a serverless API. You write the logic, Langbase handles the logistics. It's the easiest way to build, deploy, and scale AI agents without having to manage or update any infrastructure.
Use the SDK to manage the pipes in your Langbase account. Create, update, list, and run AI Pipes
- [Run pipe](/sdk/pipe/run)
- [Create pipe](/sdk/pipe/create)
- [Update pipe](/sdk/pipe/update)
- [List pipe](/sdk/pipe/list)
- [usePipe()](/sdk/pipe/use-pipe)
---
</content>
</doc>
<doc>
<metadata>
<title>Threads <span className="text-sm font-mono text-muted-foreground/70 ml-2">langbase.threads()</span></title>
<url>https://langbase.com/docs/sdk/threads/</url>
</metadata>
<content>
import { generateMetadata } from '@/lib/generate-metadata';
# Threads <span className="text-sm font-mono text-muted-foreground/70 ml-2">langbase.threads()</span>
Threads, an AI Primitive by Langbase, allows you to manage conversation history and context. They are essential for building conversational applications that require context management and organization of conversation threads.
You can use the `threads()` functions to manage conversation threads. Threads help you organize and maintain conversation history, making it easier to build conversational applications.
- [Create Thread](/sdk/threads/create)
- [Update Thread](/sdk/threads/update)
- [Get Thread](/sdk/threads/get)
- [Delete Thread](/sdk/threads/delete)
- [Append Messages](/sdk/threads/append-messages)
- [List Messages](/sdk/threads/list-messages)
---
</content>
</doc>
<doc>
<metadata>
<title>Parser <span className="text-sm font-mono text-muted-foreground/70 ml-2">langbase.parser()</span></title>
<url>https://langbase.com/docs/sdk/parser/</url>
</metadata>
<content>
import { generateMetadata } from '@/lib/generate-metadata';
import { LanguageProvider, SimpleLanguageToggle, LanguageContent } from '@/components/LanguageToggle';
# Parser <span className="text-sm font-mono text-muted-foreground/70 ml-2">langbase.parser()</span>
<LanguageProvider defaultLanguage='typescript'>
Parser, an AI Primitive by Langbase, allows you to extract text content from various document formats. This is particularly useful when you need to process documents before using them in your AI applications.
You can use the `parser()` function to extract text content from various document formats. This is particularly useful when you need to process documents before using them in your AI applications.
---
## Generate a User/Org API key
You will need to generate an API key to authenticate your requests. For more information, visit the [User/Org API key documentation](/api-reference/api-keys).
<Spoiler title="Get your Langbase API key: User or Org">
You can generate API keys from the [Langbase Studio](https://studio.langbase.com) by following these steps:
1. Switch to your user or org account.
2. From the sidebar, click on the `API keys`.
3. From here you can create a new API key or manage existing ones.
For more details, follow the [Langbase API keys](/api-reference/api-keys) documentation.
</Spoiler>
---
## Limitations
- Maximum file size: **10 MB**
- Supported file formats:
- Text files (`.txt`)
- Markdown (`.md`)
- PDF documents (`.pdf`)
- CSV files (`.csv`)
- Excel spreadsheets (`.xlsx`, `.xls`)
- Common programming language files (`.js`, `.py`, `.java`, etc.)
---
<div className="flex justify-between items-end">
<h3 className="text-2xl w-full">API reference</h3>
<div className="flex md:hidden items-end mb-1">
<SimpleLanguageToggle/>
</div>
</div>
### `langbase.parser(options)`
<Row>
<Col>
Parse documents by running the `langbase.parser()` function.
<LanguageContent language="typescript">
<CodeGroup exampleTitle="langbase.parser()" title="Function Signature">
```ts {{ title: 'index.ts' }}
langbase.parser(options);
// with types
langbase.parser(options: ParserOptions);
```
</CodeGroup>
</LanguageContent>
<LanguageContent language="python">
<CodeGroup exampleTitle="parser()" title="Function Signature">
```python {{ title: 'main.py' }}
langbase.parser(**options)
```
</CodeGroup>
</LanguageContent>
## options
<Properties>
<Property name="options" type="ParserOptions">
<LanguageContent language="typescript">
```bash {{title: 'ParserOptions Object'}}
document: Buffer | File | FormData | ReadableStream;
documentName: string;
contentType: ContentType;
```
</LanguageContent>
<LanguageContent language="python">
```bash {{title: 'ParserOptions Object'}}
document: Buffer | File | FormData | ReadableStream
document_name: string
content_type: ContentType
```
</LanguageContent>
*Following are the properties of the options object.*
</Property>
</Properties>
---
### document
<Properties>
<Property name="document" type="Buffer | File | FormData | ReadableStream" required="true">
The input document to be parsed. Must be one of the supported file formats and under **10 MB** in size.
</Property>
</Properties>
---
<LanguageContent language="typescript">
### documentName
<Properties>
<Property name="documentName" type="string" required="true">
The name of the document, including its extension (e.g., `document.pdf`).
</Property>
</Properties>
</LanguageContent>
<LanguageContent language="python">
### document_name
<Properties>
<Property name="document_name" type="string" required="true">
The name of the document including its extension (e.g., `document.pdf`).
</Property>
</Properties>
</LanguageContent>
---
<LanguageContent language="typescript">
### contentType
<Properties>
<Property name="contentType" type="ContentType" required="true">
The MIME type of the document. Supported MIME types based on file format:
- Text files (`.txt`): `text/plain`
- Markdown (`.md`): `text/markdown`
- PDF documents (`.pdf`): `application/pdf`
- CSV files (`.csv`): `text/csv`
- Excel spreadsheets:
- `.xlsx`: `application/vnd.openxmlformats-officedocument.spreadsheetml.sheet`
- `.xls`: `application/vnd.ms-excel`
- Programming language files (all use `text/plain`):
- `.js`: `text/plain`
- `.py`: `text/plain`
- `.java`: `text/plain`
- `.cpp`: `text/plain`
- `.cs`: `text/plain`
- Other code files: `text/plain`
</Property>
</Properties>
</LanguageContent>
<LanguageContent language="python">
### content_type
<Properties>
<Property name="content_type" type="ContentType" required="true">
The MIME type of the document. Supported MIME types based on file format:
- Text files (`.txt`): `text/plain`
- Markdown (`.md`): `text/markdown`
- PDF documents (`.pdf`): `application/pdf`
- CSV files (`.csv`): `text/csv`
- Excel spreadsheets:
- `.xlsx`: `application/vnd.openxmlformats-officedocument.spreadsheetml.sheet`
- `.xls`: `application/vnd.ms-excel`
- Programming language files (all use `text/plain`):
- `.js`: `text/plain`
- `.py`: `text/plain`
- `.java`: `text/plain`
- `.cpp`: `text/plain`
- `.cs`: `text/plain`
- Other code files: `text/plain`
</Property>
</Properties>
</LanguageContent>
</Col>
<Col>
<div className="flex justify-between items-end">
<h3 className="text-2xl w-full">Usage example</h3>
<div className="hidden md:flex items-end mb-2">
<SimpleLanguageToggle/>
</div>
</div>
<LanguageContent language="typescript">
<CodeGroup exampleTitle="Install the SDK" title="Install the SDK">
```bash {{ title: 'npm' }}
npm i langbase
```
```bash {{ title: 'pnpm' }}
pnpm i langbase
```
```bash {{ title: 'yarn' }}
yarn add langbase
```
</CodeGroup>
</LanguageContent>
<LanguageContent language="python">
<CodeGroup exampleTitle="Install the SDK" title="Install the SDK">
```bash {{ title: 'pip' }}
pip install langbase python-dotenv
```
</CodeGroup>
</LanguageContent>
### Environment variables
```bash {{ title: '.env file' }}
LANGBASE_API_KEY="<USER/ORG-API-KEY>"
```
### `langbase.parser()` examples
<LanguageContent language="typescript">
<CodeGroup exampleTitle="langbase.parser()" title="langbase.parser()">
```ts {{ title: 'Basic' }}
import { Langbase } from 'langbase';
const langbase = new Langbase({
apiKey: process.env.LANGBASE_API_KEY!,
});
async function main() {
const document = new File(['Your document content'], 'document.txt', {
type: 'text/plain'
});
const result = await langbase.parser({
document: document,
documentName: 'document.txt',
contentType: 'text/plain'
});
console.log('Parsed content:', result);
}
main();
```
```ts {{ title: 'PDF Document' }}
import { Langbase } from 'langbase';
const langbase = new Langbase({
apiKey: process.env.LANGBASE_API_KEY!,
});
async function main() {
// Assuming you're in a browser environment
const fileInput = document.querySelector('input[type="file"]');
const pdfFile = fileInput.files[0];
const result = await langbase.parser({
document: pdfFile,
documentName: 'document.pdf',
contentType: 'application/pdf'
});
console.log('Parsed content:', result);
}
main();
```
```ts {{ title: 'Node.js' }}
import { Langbase } from 'langbase';
import { readFile } from 'fs/promises';
const langbase = new Langbase({
apiKey: process.env.LANGBASE_API_KEY!,
});
async function main() {
const buffer = await readFile('path/to/document.pdf');
const document = new File([buffer], 'document.pdf', {
type: 'application/pdf'
});
const result = await langbase.parser({
document: document,
documentName: 'document.pdf',
contentType: 'application/pdf'
});
console.log('Parsed content:', result);
}
main();
```
</CodeGroup>
</LanguageContent>
<LanguageContent language="python">
<CodeGroup exampleTitle="parser()" title="parser()">
```python {{ title: 'Basic' }}
import json
import os
import pathlib
from dotenv import load_dotenv
from langbase import Langbase
load_dotenv()
# Get API key from environment variable
langbase_api_key = os.getenv("LANGBASE_API_KEY")
# Initialize the client
langbase = Langbase(api_key=langbase_api_key)
def main():
try:
# Get the path to the document
document_path = pathlib.Path(__file__).parent / "composable-ai.md"
# Read the file
with open(document_path, "rb") as file:
document_content = file.read()
# Parse the document
results = langbase.parser(
document=document_content,
document_name="composable-ai.md",
content_type="text/markdown",
)
# Print the results
print(json.dumps(results, indent=2))
except Exception as e:
print(f"Error parsing document: {e}")
if __name__ == "__main__":
main()
```
```python {{ title: 'PDF Document' }}
import json
import os
import pathlib
from dotenv import load_dotenv
from langbase import Langbase
load_dotenv()
# Get API key from environment variable
langbase_api_key = os.getenv("LANGBASE_API_KEY")
# Initialize the client
langbase = Langbase(api_key=langbase_api_key)
def main():
try:
# Get the path to the PDF document
document_path = pathlib.Path(__file__).parent / "document.pdf"
# Read the file
with open(document_path, "rb") as file:
document_content = file.read()
# Parse the document
results = langbase.parser(
document=document_content,
document_name="document.pdf",
content_type="application/pdf",
)
# Print the results
print(json.dumps(results, indent=2))
except Exception as e:
print(f"Error parsing document: {e}")
if __name__ == "__main__":
main()
```
</CodeGroup>
</LanguageContent>
</Col>
</Row>
---
<Row>
<Col>
## Response
<LanguageContent language="typescript">
Response of `langbase.parser()` is a `Promise<ParserResponse>`.
```ts {{title: 'ParserResponse Type'}}
documentName: string;
content: string;
```
<Properties>
<Property name="documentName" type="string">
The name of the parsed document.
</Property>
<Property name="content" type="string">
The extracted text content from the document.
</Property>
</Properties>
</LanguageContent>
<LanguageContent language="python">
Response of `langbase.parser()` is a `ParserResponse`.
```bash {{title: 'ParserResponse Type'}}
document_name: string
content: string
```
<Properties>
<Property name="document_name" type="string">
The name of the parsed document.
</Property>
<Property name="content" type="string">
The extracted text content from the document.
</Property>
</Properties>
</LanguageContent>
</Col>
<Col sticky>
<LanguageContent language="typescript">
```json {{ title: 'ParserResponse Example' }}
{
"documentName": "document.pdf",
"content": "Extracted text content from the document..."
}
```
</LanguageContent>
<LanguageContent language="python">
```json {{ title: 'ParserResponse Example' }}
{
"document_name": "document.pdf",
"content": "Extracted text content from the document..."
}
```
</LanguageContent>
</Col>
</Row>
</LanguageProvider>
---
</content>
</doc>
<doc>
<metadata>
<title>Memory <span className="text-sm font-mono text-muted-foreground/70 ml-2">langbase.memory</span></title>
<url>https://langbase.com/docs/sdk/memory/</url>
</metadata>
<content>
import { generateMetadata } from '@/lib/generate-metadata';
# Memory <span className="text-sm font-mono text-muted-foreground/70 ml-2">langbase.memory</span>
Memory agents are AI agents that have human like long-term memory. You can train AI agents with your data and knowledge base without having to manage vector storage, servers, or infrastructure.
Langbase memory agents represent the next frontier in semantic retrieval-augmented generation (RAG) as a serverless and infinitely scalable API designed for developers. 30-50x less expensive than the competition, with industry-leading accuracy in advanced agentic routing and intelligent reranking.
Langbase TypeScript SDK allows you to programmatically manage memory agents in your Langbase account. Since documents are stored in memory agents, you can also manage documents using the SDK.
- [Create memory](/sdk/memory/create)
- [List memory](/sdk/memory/list)
- [Delete memory](/sdk/memory/delete)
- [Retrieve memory](/sdk/memory/retrieve)
- [List documents](/sdk/memory/document-list)
- [Delete document](/sdk/memory/document-delete)
- [Upload document](/sdk/memory/document-upload)
- [Embeddings Retry](/sdk/memory/document-embeddings-retry)
---
</content>
</doc>
<doc>
<metadata>
<title>Primitive: LLM <span className="text-sm font-mono text-muted-foreground/70 ml-2">langbase.llm.run()</span></title>
<url>https://langbase.com/docs/sdk/llm/</url>
</metadata>
<content>
import { generateMetadata } from '@/lib/generate-metadata';
# Primitive: LLM <span className="text-sm font-mono text-muted-foreground/70 ml-2">langbase.llm.run()</span>
You can use the `llm.run()` function as runtime LLM, meaning you have to specify all parameters at runtime. `llm.run()` is useful when you want fine control over the LLM model and its parameters.
---
## Generate a User/Org API key
You will need to generate an API key to authenticate your requests. For more information, visit the [User/Org API key documentation](/api-reference/api-keys).
<Spoiler title="Get your Langbase API key: User or Org">
You can generate API keys from the [Langbase Studio](https://studio.langbase.com) by following these steps:
1. Switch to your user or org account.
2. From the sidebar, click on the `API keys`.
3. From here you can create a new API key or manage existing ones.
For more details follow the [Langbase API keys](/api-reference/api-keys) documentation.
</Spoiler>
---
## API reference
## `langbase.llm.run(options)`
<Row>
<Col>
Request LLM by running the `langbase.llm.run()` function.
<CodeGroup exampleTitle="langbase.llm.run()" title="Function Signature">
```ts {{ title: 'index.ts' }}
langbase.llm.run(options);
// with types.
langbase.llm.run(options: LlmOptions);
```
</CodeGroup>
## options
<Properties>
<Property name="options" type="LlmOptions">
```ts {{title: 'LlmOptions Object'}}
interface LlmOptions {
model: string;
llmKey: string;
messages: Message[];
stream?: boolean;
tools?: Tool[];
tool_choice?: 'auto' | 'required' | ToolChoice;
parallel_tool_calls?: boolean;
top_p?: number;
max_tokens?: number;
temperature?: number;
presence_penalty?: number;
frequency_penalty?: number;
stop?: string[];
customModelParams?: Record<string, any>;
}
```
*Following are the properties of the options object.*
</Property>
</Properties>
---
### model
<Properties>
<Property name="model" type="string" required="true">
LLM model. Combination of model provider and model id, like `openai:gpt-4o-mini`
Format: `provider:model_id`
You can copy the ID of a model from the list of [supported LLM models](/supported-models-and-providers) at Langbase.
</Property>
</Properties>
---
### llmKey
<Properties>
<Property name="llmKey" type="string" required="true">
LLM API key for the selected model.
</Property>
</Properties>
---
### messages
<Properties>
<Property name="messages" type="Array<Message>" required="true">
A messages array including the following properties.
```ts {{title: 'Message Object'}}
interface Message {
role: 'user' | 'assistant' | 'system'| 'tool';
content: string | ContentType[] | null;
name?: string;
tool_call_id?: string;
}
```
---
<Properties>
<Property name="role" type="'user' | 'assistant' | 'system'| 'tool'">
The role of the author of this message.
</Property>
<Property name="content" type="string | ContentType[] | null">
The content of the message.
1. `String` For text generation, it's a plain string.
2. `Null` or `undefined` Tool call messages can have no content.
3. `ContentType[]` Array used in vision and audio models, where content consists of structured parts (e.g., text, image URLs).
```js {{ title: 'ContentType Object' }}
interface ContentType {
type: string;
text?: string | undefined;
image_url?:
| {
url: string;
detail?: string | undefined;
}
| undefined;
};
```
</Property>
<Property name="name" type="string">
The name of the tool called by LLM
</Property>
<Property name="tool_call_id" type="string">
The id of the tool called by LLM
</Property>
</Properties>
</Property>
</Properties>
---
### stream
<Properties>
<Property name="stream" type="boolean">
Whether to stream the response or not. If `true`, the response will be streamed.
</Property>
</Properties>
---
### tools
<Properties>
<Property name="tools" type="Array<Tools>">
A list of tools the model may call.
```ts {{title: 'Tools Object'}}
interface ToolsOptions {
type: 'function';
function: FunctionOptions
}
```
<Properties>
<Property name="type" type="'function'">
The type of the tool. Currently, only `function` is supported.
</Property>
<Property name="function" type="FunctionOptions">
The function that the model may call.
```ts {{title: 'FunctionOptions Object'}}
export interface FunctionOptions {
name: string;
description?: string;
parameters?: Record<string, unknown>
}
```
<Property name="name" type="string">
The name of the function to call.
</Property>
<Property name="description" type="string">
The description of the function.
</Property>
<Property name="parameters" type="Record<string, unknown>">
The parameters of the function.
</Property>
</Property>
</Properties>
</Property>
</Properties>
---
### tool_choice
<Properties>
<Property name="tool_choice" type="'auto' | 'required' | ToolChoice">
Tool usage configuration.
<Properties>
<Property name="'auto'" type="string">
Model decides when to use tools.
</Property>
<Property name="'required'" type="string">
Model must use specified tools.
</Property>
<Property name="ToolChoice" type="object">
Forces use of a specific function.
```ts {{title: 'ToolChoice Object'}}
interface ToolChoice {
type: 'function';
function: {
name: string;
};
}
```
</Property>
</Properties>
</Property>
</Properties>
---
### parallel_tool_calls
<Properties>
<Property name="parallel_tool_calls" type="boolean">
Call multiple tools in parallel, allowing the effects and results of these function calls to be resolved in parallel.
</Property>
</Properties>
---
### temperature
<Properties>
<Property name="temperature" type="number">
What sampling temperature to use, between 0 and 2. Higher values like 0.8 will make the output more random. Lower values like 0.2 will make it more focused and deterministic.
Default: `0.7`
</Property>
</Properties>
---
### top_p
<Properties>
<Property name="top_p" type="number">
An alternative to sampling with temperature, called nucleus sampling, where the model considers the results of the tokens with top_p probability mass. So 0.1 means only the tokens comprising the top 10% probability mass are considered.
Default: `1`
</Property>
</Properties>
---
### max_tokens
<Properties>
<Property name="max_tokens" type="number">
Maximum number of tokens in the response message returned.
Default: `1000`
</Property>
</Properties>
---
### presence_penalty
<Properties>
<Property name="presence_penalty" type="number">
Penalizes a word based on its occurrence in the input text.
Default: `0`
</Property>
</Properties>
---
### frequency_penalty
<Properties>
<Property name="frequency_penalty" type="number">
Penalizes a word based on how frequently it appears in the training data.
Default: `0`
</Property>
</Properties>
---
### stop
<Properties>
<Property name="stop" type="string[]">
Up to 4 sequences where the API will stop generating further tokens.
</Property>
</Properties>
---
### customModelParams
<Properties>
<Property name="customModelParams" type="Record<string, any>">
Additional parameters to pass to the model as key-value pairs. These parameters are passed on to the model as-is.
```ts {{title: 'CustomModelParams Object'}}
interface CustomModelParams {
[key: string]: any;
}
```
Example:
```ts
{
"logprobs": true,
"service_tier": "auto",
}
```
</Property>
</Properties>
</Col>
<Col>
## Usage example
<CodeGroup exampleTitle="Install the SDK" title="Install the SDK">
```bash {{ title: 'npm' }}
npm i langbase
```
```bash {{ title: 'pnpm' }}
pnpm i langbase
```
```bash {{ title: 'yarn' }}
yarn add langbase
```
</CodeGroup>
### Environment variables
```bash {{ title: '.env file' }}
LANGBASE_API_KEY="<USER/ORG-API-KEY>"
LLM_API_KEY="<YOUR-LLM-API-KEY>"
```
### `langbase.llm()` examples
<CodeGroup exampleTitle="langbase.llm()" title="langbase.llm()">
```ts {{ title: 'Non-stream' }}
import {Langbase} from 'langbase';
const langbase = new Langbase({
apiKey: process.env.LANGBASE_API_KEY!,
});
async function main() {
const {completion} = await langbase.llm.run({
model: 'openai:gpt-4o-mini',
messages: [
{
role: 'system',
content: 'You are a helpful assistant.',
},
{
role: 'user',
content: 'Who is an AI Engineer?',
},
],
llmKey: process.env.LLM_API_KEY!,
stream: false,
});
console.log('Completion:', completion);
}
main();
```
```ts {{ title: 'Stream' }}
import {getRunner, Langbase} from 'langbase';
const langbase = new Langbase({
apiKey: process.env.LANGBASE_API_KEY!,
});
async function main() {
const {stream, rawResponse} = await langbase.llm.run({
model: 'openai:gpt-4o-mini',
messages: [
{
role: 'system',
content: 'You are a helpful assistant.',
},
{
role: 'user',
content: 'Who is an AI Engineer?',
},
],
llmKey: process.env.LLM_API_KEY!,
stream: true,
});
// Convert the stream to a stream runner.
const runner = getRunner(stream);
runner.on('connect', () => {
console.log('Stream started.\n');
});
runner.on('content', content => {
process.stdout.write(content);
});
runner.on('end', () => {
console.log('\nStream ended.');
});
runner.on('error', error => {
console.error('Error:', error);
});
}
main();
```
```ts {{ title: 'Tool Calling' }}
// Tool Calling Example
import { Langbase } from 'langbase';
const langbase = new Langbase({
apiKey: process.env.LANGBASE_API_KEY!,
});
async function main() {
const tools = [
{
type: 'function',
function: {
name: 'get_current_weather',
description: 'Get the current weather in a given location',
parameters: {
type: 'object',
properties: {
location: {
type: 'string',
description: 'The city and state, e.g. San Francisco, CA',
},
unit: { type: 'string', enum: ['celsius', 'fahrenheit'] },
},
required: ['location'],
},
},
},
];
const response = await langbase.llm.run({
model: 'openai:gpt-4o-mini',
messages: [
{
role: 'user',
content: 'What is the weather like in SF today?',
},
],
tools: tools,
tool_choice: 'auto',
llmKey: process.env.LLM_API_KEY!,
stream: false,
});
console.log(response);
}
main();
```
</CodeGroup>
</Col>
</Row>
---
<Row>
<Col>
## Response
Response of `langbase.llm.run()` is a `Promise<RunResponse | RunResponseStream>` object.
### RunResponse Object
```ts {{title: 'RunResponse Object'}}
interface RunResponse {
completion: string;
id: string;
object: string;
created: number;
model: string;
choices: ChoiceGenerate[];
usage: Usage;
system_fingerprint: string | null;
rawResponse?: {
headers: Record<string, string>;
};
}
```
<Properties>
<Property name="completion" type="string">
The generated text completion.
</Property>
<Property name="id" type="string">
The ID of the raw response.
</Property>
<Property name="object" type="string">
The object type name of the response.
</Property>
<Property name="created" type="number">
The timestamp of the response creation.
</Property>
<Property name="model" type="string">
The model used to generate the response.
</Property>
<Property name="choices" type="ChoiceGenerate[]">
A list of chat completion choices. Can contain more than one elements if n is greater than 1.
```ts {{title: 'Choice Object for langbase.llm() with stream off'}}
interface ChoiceGenerate {
index: number;
message: Message;
logprobs: boolean | null;
finish_reason: string;
}
```
</Property>
<Sub name="index" type="number">
The index of the choice in the list of choices.
</Sub>
<Sub name="message" type="Message">
A messages array including `role` and `content` params.
```ts {{title: 'Message Object'}}
interface Message {
role: 'user' | 'assistant' | 'system'| 'tool';
content: string | null;
tool_calls?: ToolCall[];
}
```
<Sub name="role" type="'user' | 'assistant' | 'system'| 'tool'">
The role of the author of this message.
</Sub>
<Sub name="content" type="string | null">
The contents of the chunk message. Null if a tool is called.
</Sub>
<Sub name="tool_calls" type="Array<ToolCall>">
The array of the tools called by LLM
```ts {{title: 'ToolCall Object'}}
interface ToolCall {
id: string;
type: 'function';
function: Function;
}
```
<Sub name="id" type="string">
The ID of the tool call.
</Sub>
<Sub name="type" type="'function'">
The type of the tool. Currently, only `function` is supported.
</Sub>
<Sub name="function" type="Function">
The function that the model called.
```ts {{title: 'Function Object'}}
export interface Function {
name: string;
arguments: string;
}
```
<Sub name="name" type="string">
The name of the function to call.
</Sub>
<Sub name="arguments" type="string">
The arguments to call the function with, as generated by the model in JSON format.
</Sub>
</Sub>
</Sub>
</Sub>
<Sub name="logprobs" type="boolean or null">
Log probability information for the choice. Whether to return log probabilities of the output tokens or not. If true, returns the log probabilities of each output token returned in the `content` of `message`.
</Sub>
<Sub name="finish_reason" type="string">
The reason the model stopped generating tokens. This will be `stop` if the model hit a natural stop point or a provided stop sequence, length if the maximum number of tokens specified in the request was reached, `content_filter` if content was omitted due to a flag from our content filters, `tool_calls` if the model called a tool, or `function_call` (deprecated) if the model called a function. It could also be `eos` end of sequence and depends on the type of LLM, you can check their docs.
</Sub>
<Property name="usage" type="Usage">
The usage object including the following properties.
```ts {{title: 'Usage Object'}}
interface Usage {
prompt_tokens: number;
completion_tokens: number;
total_tokens: number;
}
```
<Sub name="prompt_tokens" type="number">
The number of tokens in the prompt (input).
</Sub>
<Sub name="completion_tokens" type="number">
The number of tokens in the completion (output).
</Sub>
<Sub name="total_tokens" type="number">
The total number of tokens.
</Sub>
</Property>
<Property name="system_fingerprint" type="string">
This fingerprint represents the backend configuration that the model runs with.
</Property>
<Property name="rawResponse" type="Object">
The different headers of the response.
</Property>
</Properties>
---
### RunResponseStream Object
Response of `langbase.llm.run()` with `stream: true` is a `Promise<RunResponseStream>`.
```ts {{title: 'RunResponseStream Object'}}
interface RunResponseStream {
stream: ReadableStream<any>;
rawResponse?: {
headers: Record<string, string>;
};
}
```
<Properties>
<Property name="rawResponse" type="Object">
The different headers of the response.
</Property>
<Property name="stream" type="ReadableStream">
Stream is an object with a streamed sequence of StreamChunk objects.
```ts {{title: 'StreamResponse Object'}}
type StreamResponse = ReadableStream<StreamChunk>;
```
### StreamChunk
<Property name="StreamChunk" type="StreamChunk">
Represents a streamed chunk of a completion response returned by model, based on the provided input.
```js {{title: 'StreamChunk Object'}}
interface StreamChunk {
id: string;
object: string;
created: number;
model: string;
choices: ChoiceStream[];
}
```
A `StreamChunk` object has the following properties.
<Properties>
<Property name="id" type="string">
The ID of the response.
</Property>
<Property name="object" type="string">
The object type name of the response.
</Property>
<Property name="created" type="number">
The timestamp of the response creation.
</Property>
<Property name="model" type="string">
The model used to generate the response.
</Property>
<Property name="choices" type="ChoiceStream[]">
A list of chat completion choices. Can contain more than one elements if n is greater than 1.
```js {{title: 'Choice Object for langbase.llm() with stream true'}}
interface ChoiceStream {
index: number;
delta: Delta;
logprobs: boolean | null;
finish_reason: string;
}
```
</Property>
<Sub name="index" type="number">
The index of the choice in the list of choices.
</Sub>
<Sub name="delta" type="Delta">
A chat completion delta generated by streamed model responses.
```js {{title: 'Delta Object'}}
interface Delta {
role?: Role;
content?: string | null;
tool_calls?: ToolCall[];
}
```
<Sub name="role" type="'user' | 'assistant' | 'system'| 'tool'">
The role of the author of this message.
</Sub>
<Sub name="content" type="string | null">
The contents of the chunk message. Null if a tool is called.
</Sub>
<Sub name="tool_calls" type="Array<ToolCall>">
The array of the tools called by LLM
```js {{title: 'ToolCall Object'}}
interface ToolCall {
id: string;
type: 'function';
function: Function;
}
```
<Sub name="id" type="string">
The ID of the tool call.
</Sub>
<Sub name="type" type="'function'">
The type of the tool. Currently, only `function` is supported.
</Sub>
<Sub name="function" type="Function">
The function that the model called.
```js {{title: 'Function Object'}}
export interface Function {
name: string;
arguments: string;
}
```
<Sub name="name" type="string">
The name of the function to call.
</Sub>
<Sub name="arguments" type="string">
The arguments to call the function with, as generated by the model in JSON format.
</Sub>
</Sub>
</Sub>
</Sub>
<Sub name="logprobs" type="boolean or null">
Log probability information for the choice. Whether to return log probabilities of the output tokens or not. If true, returns the log probabilities of each output token returned in the `content` of `message`.
</Sub>
<Sub name="finish_reason" type="string">
The reason the model stopped generating tokens. This will be `stop` if the model hit a natural stop point or a provided stop sequence, length if the maximum number of tokens specified in the request was reached, `content_filter` if content was omitted due to a flag from our content filters, `tool_calls` if the model called a tool, or `function_call` (deprecated) if the model called a function. It could also be `eos` end of sequence and depends on the type of LLM, you can check their docs.
</Sub>
</Properties>
</Property>
</Property>
</Properties>
</Col>
<Col sticky>
```json {{ title: 'RunResponse type of langbase.llm.run()' }}
{
"completion": "AI Engineer is a person who designs, builds, and maintains AI systems.",
"id": "chatcmpl-123",
"object": "chat.completion",
"created": 1720131129,
"model": "gpt-4o-mini",
"choices": [
{
"index": 0,
"message": {
"role": "assistant",
"content": "AI Engineer is a person who designs, builds, and maintains AI systems."
},
"logprobs": null,
"finish_reason": "stop"
}
],
"usage": {
"prompt_tokens": 28,
"completion_tokens": 36,
"total_tokens": 64
},
"system_fingerprint": "fp_123"
}
```
```js {{ title: 'RunResponseStream of langbase.llm() with stream true' }}
{
"stream": StreamResponse // example of streamed chunks below.
}
```
```json {{ title: 'StreamResponse has stream chunks' }}
// A stream chunk looks like this …
{
"id": "chatcmpl-123",
"object": "chat.completion.chunk",
"created": 1719848588,
"model": "gpt-4o-mini",
"system_fingerprint": "fp_44709d6fcb",
"choices": [{
"index": 0,
"delta": { "content": "Hi" },
"logprobs": null,
"finish_reason": null
}]
}
// More chunks as they come in...
{"id":"chatcmpl-123","object":"chat.completion.chunk","created":1719848588,"model":"gpt-4o-mini","system_fingerprint":"fp_44709d6fcb","choices":[{"index":0,"delta":{"content":"there"},"logprobs":null,"finish_reason":null}]}
…
{"id":"chatcmpl-123","object":"chat.completion.chunk","created":1719848588,"model":"gpt-4o-mini","system_fingerprint":"fp_44709d6fcb","choices":[{"index":0,"delta":{},"logprobs":null,"finish_reason":"stop"}]}
```
</Col>
</Row>
---
</content>
</doc>
<doc>
<metadata>
<title>Images <span className="text-sm font-mono text-muted-foreground/70 ml-2">langbase.images.generate()</span></title>
<url>https://langbase.com/docs/sdk/images/</url>
</metadata>
<content>
import { generateMetadata } from '@/lib/generate-metadata';
import { LanguageProvider, SimpleLanguageToggle, LanguageContent } from '@/components/LanguageToggle';
# Images <span className="text-sm font-mono text-muted-foreground/70 ml-2">langbase.images.generate()</span>
<LanguageProvider defaultLanguage='typescript'>
Images, an AI Primitive by Langbase, allows you to generate AI images using various models from different providers like OpenAI, Together AI, Google, and OpenRouter. Create stunning visuals from text prompts with a unified API interface.
Image generation enables you to create custom visuals for your applications, from marketing materials to user-generated content. It allows you to leverage the power of state-of-the-art AI models without managing multiple provider integrations.
You can use the `images.generate()` function to generate AI images from text descriptions. This is particularly useful for content creation, design workflows, and creative applications.
---
## Generate a User/Org API key
You will need to generate an API key to authenticate your requests. For more information, visit the [User/Org API key documentation](/api-reference/api-keys).
<Spoiler title="Get your Langbase API key: User or Org">
You can generate API keys from the [Langbase Studio](https://studio.langbase.com) by following these steps:
1. Switch to your user or org account.
2. From the sidebar, click on the `API keys`.
3. From here you can create a new API key or manage existing ones.
For more details, follow the [Langbase API keys](/api-reference/api-keys) documentation.
</Spoiler>
<Note sub="LLM API Keys Required">
You'll need to add the [LLM API keys](/features/keysets) for the image generation providers you want to use. Pass your provider API key in the `apiKey` parameter.
</Note>
---
<div className="flex justify-between items-end">
<h3 className="text-2xl w-full">API reference</h3>
<div className="flex md:hidden items-end mb-1">
<SimpleLanguageToggle/>
</div>
</div>
## `langbase.images.generate(options)`
<Row>
<Col>
Generate AI images by running the `langbase.images.generate()` function.
<LanguageContent language="typescript">
<CodeGroup exampleTitle="langbase.images.generate()" title="Function Signature">
```ts {{ title: 'index.ts' }}
langbase.images.generate(options);
// with types
langbase.images.generate(options: ImageGenerationOptions);
```
</CodeGroup>
</LanguageContent>
<LanguageContent language="python">
<CodeGroup exampleTitle="images.generate()" title="Function Signature">
```python {{ title: 'main.py' }}
langbase.images.generate(**options)
```
</CodeGroup>
</LanguageContent>
## options
<Properties>
<Property name="options" type="ImageGenerationOptions">
<LanguageContent language="typescript">
```bash {{title: 'ImageGenerationOptions Object'}}
prompt: string;
model: string;
width?: number;
height?: number;
n?: number;
steps?: number;
image_url?: string;
apiKey: string;
```
</LanguageContent>
<LanguageContent language="python">
```bash {{title: 'ImageGenerationOptions Object'}}
prompt: str
model: str
width?: int
height?: int
n?: int
steps?: int
image_url?: str
api_key: str
```
</LanguageContent>
*Following are the properties of the options object.*
</Property>
</Properties>
---
<LanguageContent language="typescript">
### prompt
<Properties>
<Property name="prompt" type="string" required="true">
A text description of the image you want to generate. Be descriptive for best results.
</Property>
</Properties>
</LanguageContent>
<LanguageContent language="python">
### prompt
<Properties>
<Property name="prompt" type="str" required="true">
A text description of the image you want to generate. Be descriptive for best results.
</Property>
</Properties>
</LanguageContent>
<LanguageContent language="typescript">
### model
<Properties>
<Property name="model" type="string" required="true">
The image generation model to use. Format: `provider:model-name`
Examples:
- `openai:gpt-image-1`
- `openai:dall-e-3`
- `openai:dall-e-2`
- `together:black-forest-labs/FLUX.1-schnell-Free`
- `google:gemini-2.5-flash-image-preview`
- `openrouter:google/gemini-2.5-flash-image-preview`
</Property>
</Properties>
</LanguageContent>
<LanguageContent language="python">
### model
<Properties>
<Property name="model" type="str" required="true">
The image generation model to use. Format: `provider:model-name`
Examples:
- `openai:gpt-image-1`
- `openai:dall-e-3`
- `openai:dall-e-2`
- `together:black-forest-labs/FLUX.1-schnell-Free`
- `google:gemini-2.5-flash-image-preview`
- `openrouter:google/gemini-2.5-flash-image-preview`
</Property>
</Properties>
</LanguageContent>
<LanguageContent language="typescript">
### apiKey
<Properties>
<Property name="apiKey" type="string" required="true">
Your LLM provider API key (OpenAI, Together AI, Google, etc.).
</Property>
</Properties>
</LanguageContent>
<LanguageContent language="python">
### api_key
<Properties>
<Property name="api_key" type="str" required="true">
Your LLM provider API key (OpenAI, Together AI, Google, etc.).
</Property>
</Properties>
</LanguageContent>
<LanguageContent language="typescript">
### width
<Properties>
<Property name="width" type="number">
The width of the generated image in pixels. Default varies by model.
Common values: `1024`, `1792`, `512`
</Property>
</Properties>
</LanguageContent>
<LanguageContent language="python">
### width
<Properties>
<Property name="width" type="int">
The width of the generated image in pixels. Default varies by model.
Common values: `1024`, `1792`, `512`
</Property>
</Properties>
</LanguageContent>
<LanguageContent language="typescript">
### height
<Properties>
<Property name="height" type="number">
The height of the generated image in pixels. Default varies by model.
Common values: `1024`, `1792`, `512`
</Property>
</Properties>
</LanguageContent>
<LanguageContent language="python">
### height
<Properties>
<Property name="height" type="int">
The height of the generated image in pixels. Default varies by model.
Common values: `1024`, `1792`, `512`
</Property>
</Properties>
</LanguageContent>
<LanguageContent language="typescript">
### n
<Properties>
<Property name="n" type="number">
The number of images to generate.
Default: `1`
</Property>
</Properties>
</LanguageContent>
<LanguageContent language="python">
### n
<Properties>
<Property name="n" type="int">
The number of images to generate.
Default: `1`
</Property>
</Properties>
</LanguageContent>
<LanguageContent language="typescript">
### steps
<Properties>
<Property name="steps" type="number">
Number of inference steps (for models that support it).
Higher values may produce better quality but take longer.
</Property>
</Properties>
</LanguageContent>
<LanguageContent language="python">
### steps
<Properties>
<Property name="steps" type="int">
Number of inference steps (for models that support it).
Higher values may produce better quality but take longer.
</Property>
</Properties>
</LanguageContent>
<LanguageContent language="typescript">
### image_url
<Properties>
<Property name="image_url" type="string">
Base image URL for image-to-image generation (if supported by the model).
</Property>
</Properties>
</LanguageContent>
<LanguageContent language="python">
### image_url
<Properties>
<Property name="image_url" type="str">
Base image URL for image-to-image generation (if supported by the model).
</Property>
</Properties>
</LanguageContent>
</Col>
<Col>
<div className="flex justify-between items-end">
<h3 className="text-2xl w-full">Usage example</h3>
<div className="hidden md:flex items-end mb-2">
<SimpleLanguageToggle/>
</div>
</div>
<LanguageContent language="typescript">
<CodeGroup exampleTitle="Install the SDK" title="Install the SDK">
```bash {{ title: 'npm' }}
npm i langbase
```
```bash {{ title: 'pnpm' }}
pnpm i langbase
```
```bash {{ title: 'yarn' }}
yarn add langbase
```
</CodeGroup>
</LanguageContent>
<LanguageContent language="python">
<CodeGroup exampleTitle="Install the SDK" title="Install the SDK">
```bash {{ title: 'pip' }}
pip install langbase python-dotenv
```
</CodeGroup>
</LanguageContent>
### Environment variables
```bash {{ title: '.env file' }}
LANGBASE_API_KEY="<USER/ORG-API-KEY>"
OPENAI_API_KEY="<YOUR-OPENAI-KEY>"
```
### `langbase.images.generate()` examples
<LanguageContent language="typescript">
<CodeGroup exampleTitle="langbase.images.generate()" title="langbase.images.generate()">
```ts {{ title: 'OpenAI DALL-E' }}
import { Langbase } from 'langbase';
const langbase = new Langbase({
apiKey: process.env.LANGBASE_API_KEY!,
});
async function main() {
const result = await langbase.images.generate({
prompt: "A futuristic cityscape with flying cars and neon lights",
model: "openai:gpt-image-1",
size: "1024x1024",
apiKey: process.env.OPENAI_API_KEY!
});
console.log('Image URL:', result.choices[0].message.images[0].image_url.url);
}
main();
```
```ts {{ title: 'Together AI Flux' }}
import { Langbase } from 'langbase';
const langbase = new Langbase({
apiKey: process.env.LANGBASE_API_KEY!,
});
async function main() {
const result = await langbase.images.generate({
prompt: "A serene mountain landscape at sunset",
model: "together:black-forest-labs/FLUX.1-schnell-Free",
width: 1024,
height: 1024,
n: 1,
apiKey: process.env.TOGETHER_API_KEY!
});
console.log('Image URL:', result.choices[0].message.images[0].image_url.url);
}
main();
```
```ts {{ title: 'Google Imagen' }}
import { Langbase } from 'langbase';
const langbase = new Langbase({
apiKey: process.env.LANGBASE_API_KEY!,
});
async function main() {
const result = await langbase.images.generate({
prompt: "A peaceful zen garden with cherry blossoms",
model: "google:gemini-2.5-flash-image-preview",
apiKey: process.env.GOOGLE_API_KEY!
});
console.log('Image URL:', result.choices[0].message.images[0].image_url.url);
}
main();
```
```ts {{ title: 'Multiple Images' }}
import { Langbase } from 'langbase';
const langbase = new Langbase({
apiKey: process.env.LANGBASE_API_KEY!,
});
async function main() {
const result = await langbase.images.generate({
prompt: "A modern minimalist logo for a tech startup",
model: "together:black-forest-labs/FLUX.1-schnell-Free",
width: 1024,
height: 1024,
n: 3,
apiKey: process.env.TOGETHER_API_KEY!
});
result.choices[0].message.images.forEach((image, index) => {
console.log(`Image ${index + 1}:`, image.image_url.url);
});
}
main();
```
</CodeGroup>
</LanguageContent>
<LanguageContent language="python">
<CodeGroup exampleTitle="images.generate()" title="images.generate()">
```python {{ title: 'OpenAI DALL-E' }}
import os
from dotenv import load_dotenv
from langbase import Langbase
load_dotenv()
langbase = Langbase(api_key=os.environ.get("LANGBASE_API_KEY"))
def main():
result = langbase.images.generate(
prompt="A futuristic cityscape with flying cars and neon lights",
model="openai:gpt-image-1",
size="1024x1024",
api_key=os.environ.get("OPENAI_API_KEY")
)
print('Image URL:', result['choices'][0]['message']['images'][0]['image_url']['url'])
if __name__ == "__main__":
main()
```
```python {{ title: 'Together AI Flux' }}
import os
from dotenv import load_dotenv
from langbase import Langbase
load_dotenv()
langbase = Langbase(api_key=os.environ.get("LANGBASE_API_KEY"))
def main():
result = langbase.images.generate(
prompt="A serene mountain landscape at sunset",
model="together:black-forest-labs/FLUX.1-schnell-Free",
width=1024,
height=1024,
n=1,
api_key=os.environ.get("TOGETHER_API_KEY")
)
print('Image URL:', result['choices'][0]['message']['images'][0]['image_url']['url'])
if __name__ == "__main__":
main()
```
```python {{ title: 'Google Imagen' }}
import os
from dotenv import load_dotenv
from langbase import Langbase
load_dotenv()
langbase = Langbase(api_key=os.environ.get("LANGBASE_API_KEY"))
def main():
result = langbase.images.generate(
prompt="A peaceful zen garden with cherry blossoms",
model="google:gemini-2.5-flash-image-preview",
api_key=os.environ.get("GOOGLE_API_KEY")
)
print('Image URL:', result['choices'][0]['message']['images'][0]['image_url']['url'])
if __name__ == "__main__":
main()
```
```python {{ title: 'Multiple Images' }}
import os
from dotenv import load_dotenv
from langbase import Langbase
load_dotenv()
langbase = Langbase(api_key=os.environ.get("LANGBASE_API_KEY"))
def main():
result = langbase.images.generate(
prompt="A modern minimalist logo for a tech startup",
model="together:black-forest-labs/FLUX.1-schnell-Free",
width=1024,
height=1024,
n=3,
api_key=os.environ.get("TOGETHER_API_KEY")
)
for index, image in enumerate(result['choices'][0]['message']['images']):
print(f"Image {index + 1}:", image['image_url']['url'])
if __name__ == "__main__":
main()
```
</CodeGroup>
</LanguageContent>
</Col>
</Row>
---
<Row>
<Col>
## Response
<LanguageContent language="typescript">
Response of `langbase.images.generate()` is a `Promise<ImageGenerationResponse>`.
```ts {{title: 'ImageGenerationResponse Type'}}
interface ImageGenerationResponse {
id: string;
provider: string;
model: string;
object: string;
created: number;
choices: Array<{
logprobs: null;
finish_reason: string;
native_finish_reason: string;
index: number;
message: {
role: string;
content: string | null;
images: Array<{
type: string;
image_url: {
url: string;
};
index: number;
}>;
};
}>;
usage: {
prompt_tokens: number;
completion_tokens: number;
total_tokens: number;
prompt_tokens_details: {
cached_tokens: number;
};
completion_tokens_details: {
reasoning_tokens: number;
image_tokens: number;
};
};
}
```
</LanguageContent>
<LanguageContent language="python">
Response of `langbase.images.generate()` is a `dict` with the following structure:
```python {{title: 'ImageGenerationResponse Type'}}
{
'id': str,
'provider': str,
'model': str,
'object': str,
'created': int,
'choices': [{
'logprobs': None,
'finish_reason': str,
'native_finish_reason': str,
'index': int,
'message': {
'role': str,
'content': str | None,
'images': [{
'type': str,
'image_url': {
'url': str
},
'index': int
}]
}
}],
'usage': {
'prompt_tokens': int,
'completion_tokens': int,
'total_tokens': int,
'prompt_tokens_details': {
'cached_tokens': int
},
'completion_tokens_details': {
'reasoning_tokens': int,
'image_tokens': int
}
}
}
```
</LanguageContent>
<Properties>
<Property name="id" type="string">
Unique identifier for the image generation request.
</Property>
<Property name="provider" type="string">
The provider used for image generation (e.g., "openai", "together", "google").
</Property>
<Property name="model" type="string">
The model used for image generation.
</Property>
<Property name="object" type="string">
The object type, typically "chat.completion".
</Property>
<Property name="created" type="number">
Unix timestamp of when the image was generated.
</Property>
<LanguageContent language="typescript">
<Property name="choices" type="Array<Choice>">
Array of generated image results. Each choice contains the generated images in the `message.images` array.
<Sub name="logprobs" type="null">
Log probabilities (not used for image generation).
</Sub>
<Sub name="finish_reason" type="string">
The reason the generation completed. Typically "stop" for successful completions.
</Sub>
<Sub name="native_finish_reason" type="string">
The provider's native finish reason code.
</Sub>
<Sub name="index" type="number">
The index of this choice in the choices array.
</Sub>
<Sub name="message" type="Message">
The message object containing the generated images.
<Sub name="role" type="string">
The role of the message author, typically "assistant".
</Sub>
<Sub name="content" type="string | null">
Text content of the message, typically null for image generations.
</Sub>
<Sub name="images" type="Array<Image>">
Array of generated image objects.
<Sub name="type" type="string">
The type of image content, typically "image_url".
</Sub>
<Sub name="image_url" type="ImageURL">
Object containing the image URL.
<Sub name="url" type="string">
The URL of the generated image. This URL can be accessed to view or download the image.
</Sub>
</Sub>
<Sub name="index" type="number">
The index of this image in the images array.
</Sub>
</Sub>
</Sub>
</Property>
</LanguageContent>
<LanguageContent language="python">
<Property name="choices" type="list[dict]">
Array of generated image results. Each choice contains the generated images in the `message.images` array.
<Sub name="logprobs" type="None">
Log probabilities (not used for image generation).
</Sub>
<Sub name="finish_reason" type="str">
The reason the generation completed. Typically "stop" for successful completions.
</Sub>
<Sub name="native_finish_reason" type="str">
The provider's native finish reason code.
</Sub>
<Sub name="index" type="int">
The index of this choice in the choices array.
</Sub>
<Sub name="message" type="dict">
The message object containing the generated images.
<Sub name="role" type="str">
The role of the message author, typically "assistant".
</Sub>
<Sub name="content" type="str | None">
Text content of the message, typically None for image generations.
</Sub>
<Sub name="images" type="list[dict]">
Array of generated image objects.
<Sub name="type" type="str">
The type of image content, typically "image_url".
</Sub>
<Sub name="image_url" type="dict">
Dictionary containing the image URL.
<Sub name="url" type="str">
The URL of the generated image. This URL can be accessed to view or download the image.
</Sub>
</Sub>
<Sub name="index" type="int">
The index of this image in the images array.
</Sub>
</Sub>
</Sub>
</Property>
</LanguageContent>
<LanguageContent language="typescript">
<Property name="usage" type="Usage">
Token usage statistics for the request.
<Sub name="prompt_tokens" type="number">
Number of tokens in the prompt.
</Sub>
<Sub name="completion_tokens" type="number">
Number of tokens in the completion (typically 0 for image generation).
</Sub>
<Sub name="total_tokens" type="number">
Total tokens used (prompt_tokens + completion_tokens).
</Sub>
<Sub name="prompt_tokens_details" type="PromptTokensDetails">
Detailed breakdown of prompt tokens.
<Sub name="cached_tokens" type="number">
Number of cached tokens used from the prompt.
</Sub>
</Sub>
<Sub name="completion_tokens_details" type="CompletionTokensDetails">
Detailed breakdown of completion tokens.
<Sub name="reasoning_tokens" type="number">
Number of tokens used for reasoning (typically 0 for image generation).
</Sub>
<Sub name="image_tokens" type="number">
Number of tokens attributed to image generation.
</Sub>
</Sub>
</Property>
</LanguageContent>
<LanguageContent language="python">
<Property name="usage" type="dict">
Token usage statistics for the request.
<Sub name="prompt_tokens" type="int">
Number of tokens in the prompt.
</Sub>
<Sub name="completion_tokens" type="int">
Number of tokens in the completion (typically 0 for image generation).
</Sub>
<Sub name="total_tokens" type="int">
Total tokens used (prompt_tokens + completion_tokens).
</Sub>
<Sub name="prompt_tokens_details" type="dict">
Detailed breakdown of prompt tokens.
<Sub name="cached_tokens" type="int">
Number of cached tokens used from the prompt.
</Sub>
</Sub>
<Sub name="completion_tokens_details" type="dict">
Detailed breakdown of completion tokens.
<Sub name="reasoning_tokens" type="int">
Number of tokens used for reasoning (typically 0 for image generation).
</Sub>
<Sub name="image_tokens" type="int">
Number of tokens attributed to image generation.
</Sub>
</Sub>
</Property>
</LanguageContent>
</Properties>
</Col>
<Col sticky>
```json {{ title: 'ImageGenerationResponse Example' }}
{
"id": "chatcmpl-xxx",
"provider": "openai",
"model": "gpt-image-1",
"object": "chat.completion",
"created": 1234567890,
"choices": [
{
"index": 0,
"message": {
"role": "assistant",
"content": null,
"images": [
{
"type": "image_url",
"image_url": {
"url": "https://oaidalleapiprodscus.blob.core.windows.net/..."
},
"index": 0
}
]
},
"finish_reason": "stop"
}
],
"usage": {
"prompt_tokens": 15,
"completion_tokens": 0,
"total_tokens": 15
}
}
```
</Col>
</Row>
</LanguageProvider>
---
</content>
</doc>
<doc>
<metadata>
<title>Embed <span className="text-sm font-mono text-muted-foreground/70 ml-2">langbase.embed()</span></title>
<url>https://langbase.com/docs/sdk/embed/</url>
</metadata>
<content>
import { generateMetadata } from '@/lib/generate-metadata';
import { LanguageProvider, SimpleLanguageToggle, LanguageContent } from '@/components/LanguageToggle';
# Embed <span className="text-sm font-mono text-muted-foreground/70 ml-2">langbase.embed()</span>
<LanguageProvider defaultLanguage='typescript'>
Embed, an AI Primitive by Langbase, allows you to convert text into vector embeddings. This is particularly useful for semantic search, text similarity comparisons, and other NLP tasks.
Embedding text into vectors enables you to perform complex queries and analyses that go beyond simple keyword matching. It allows you to capture the semantic meaning of the text, making it easier to find relevant information based on context rather than just keywords.
You can use the `embed()` function to generate vector embeddings for text chunks. This is particularly useful for semantic search, text similarity comparisons, and other NLP tasks.
---
## Generate a User/Org API key
You will need to generate an API key to authenticate your requests. For more information, visit the [User/Org API key documentation](/api-reference/api-keys).
<Spoiler title="Get your Langbase API key: User or Org">
You can generate API keys from the [Langbase Studio](https://studio.langbase.com) by following these steps:
1. Switch to your user or org account.
2. From the sidebar, click on the `API keys`.
3. From here you can create a new API key or manage existing ones.
For more details, follow the [Langbase API keys](/api-reference/api-keys) documentation.
</Spoiler>
<Note sub="Embedding Models API Keys">
Please add the [LLM API keys](/features/keysets) for the embedding models you want to use in your API key settings.
</Note>
---
<div className="flex justify-between items-end">
<h3 className="text-2xl w-full">API reference</h3>
<div className="flex md:hidden items-end mb-1">
<SimpleLanguageToggle/>
</div>
</div>
## `langbase.embed(options)`
<Row>
<Col>
Generate embeddings by running the `langbase.embed()` function.
<LanguageContent language="typescript">
<CodeGroup exampleTitle="langbase.embed()" title="Function Signature">
```ts {{ title: 'index.ts' }}
langbase.embed(options);
// with types
langbase.embed(options: EmbedOptions);
```
</CodeGroup>
</LanguageContent>
<LanguageContent language="python">
<CodeGroup exampleTitle="embed()" title="Function Signature">
```python {{ title: 'main.py' }}
langbase.embed(**options)
```
</CodeGroup>
</LanguageContent>
## options
<Properties>
<Property name="options" type="EmbedOptions">
<LanguageContent language="typescript">
```bash {{title: 'EmbedOptions Object'}}
chunks: string[];
embeddingModel?: EmbeddingModels;
```
</LanguageContent>
<LanguageContent language="python">
```bash {{title: 'EmbedOptions Object'}}
chunks: List[str]
embedding_model?: EmbeddingModels
```
</LanguageContent>
*Following are the properties of the options object.*
</Property>
</Properties>
---
<LanguageContent language="typescript">
### chunks
<Properties>
<Property name="chunks" type="string[]" required="true">
An array of text chunks to generate embeddings for.
</Property>
</Properties>
</LanguageContent>
<LanguageContent language="python">
### chunks
<Properties>
<Property name="chunks" type="List[str]" required="true">
An array of text chunks to generate embeddings for.
</Property>
</Properties>
</LanguageContent>
<LanguageContent language="typescript">
### embeddingModel
<Properties>
<Property name="embeddingModel" type="EmbeddingModels">
Available options for the embedding model are:
- `openai:text-embedding-3-large`
- `cohere:embed-v4.0`
- `cohere:embed-multilingual-v3.0`
- `cohere:embed-multilingual-light-v3.0`
- `google:text-embedding-004`
```ts {{title: 'EmbeddingModels Type'}}
type EmbeddingModels =
"openai:text-embedding-3-large" |
"cohere:embed-v4.0" |
"cohere:embed-multilingual-v3.0" |
"cohere:embed-multilingual-light-v3.0" |
"google:text-embedding-004";
```
</Property>
</Properties>
</LanguageContent>
<LanguageContent language="python">
### embedding_model
<Properties>
<Property name="embedding_model" type="EmbeddingModels">
The embedding model to use. Available options:
- `openai:text-embedding-3-large`
- `cohere:embed-v4.0`
- `cohere:embed-multilingual-v3.0`
- `cohere:embed-multilingual-light-v3.0`
- `google:text-embedding-004`
```python {{title: 'EmbeddingModels Type'}}
EmbeddingModels = Literal[
"openai:text-embedding-3-large",
"cohere:embed-v4.0",
"cohere:embed-multilingual-v3.0",
"cohere:embed-multilingual-light-v3.0",
"google:text-embedding-004"
]
```
</Property>
</Properties>
</LanguageContent>
</Col>
<Col>
<div className="flex justify-between items-end">
<h3 className="text-2xl w-full">Usage example</h3>
<div className="hidden md:flex items-end mb-2">
<SimpleLanguageToggle/>
</div>
</div>
<LanguageContent language="typescript">
<CodeGroup exampleTitle="Install the SDK" title="Install the SDK">
```bash {{ title: 'npm' }}
npm i langbase
```
```bash {{ title: 'pnpm' }}
pnpm i langbase
```
```bash {{ title: 'yarn' }}
yarn add langbase
```
</CodeGroup>
</LanguageContent>
<LanguageContent language="python">
<CodeGroup exampleTitle="Install the SDK" title="Install the SDK">
```bash {{ title: 'pip' }}
pip install langbase python-dotenv
```
</CodeGroup>
</LanguageContent>
### Environment variables
```bash {{ title: '.env file' }}
LANGBASE_API_KEY="<USER/ORG-API-KEY>"
```
### `langbase.embed()` examples
<LanguageContent language="typescript">
<CodeGroup exampleTitle="langbase.embed()" title="langbase.embed()">
```ts {{ title: 'Basic' }}
import { Langbase } from 'langbase';
const langbase = new Langbase({
apiKey: process.env.LANGBASE_API_KEY!,
});
async function main() {
const embeddings = await langbase.embed({
chunks: [
"The quick brown fox",
"jumps over the lazy dog"
]
});
console.log('Embeddings:', embeddings);
}
main();
```
```ts {{ title: 'Custom Model' }}
import { Langbase } from 'langbase';
const langbase = new Langbase({
apiKey: process.env.LANGBASE_API_KEY!,
});
async function main() {
const embeddings = await langbase.embed({
chunks: [
"Hello, world!",
"Bonjour, monde!",
"¡Hola, mundo!"
],
embeddingModel: "cohere:embed-multilingual-v3.0"
});
console.log('Multilingual embeddings:', embeddings);
}
main();
```
</CodeGroup>
</LanguageContent>
<LanguageContent language="python">
<CodeGroup exampleTitle="embed()" title="embed()">
```python {{ title: 'Basic' }}
import json
import os
from dotenv import load_dotenv
from langbase import Langbase
load_dotenv()
# Configure the Langbase client with your API key
langbase = Langbase(api_key=os.environ.get("LANGBASE_API_KEY"))
def main():
response = langbase.embed(
chunks=[
"Langbase is the most powerful serverless platform for building AI agents with memory. Build, scale, and evaluate AI agents with semantic memory (RAG) and world-class developer experience. We process billions of AI messages/tokens daily. Built for every developer, not just AI/ML experts."
],
embedding_model="openai:text-embedding-3-large",
)
print(json.dumps(response, indent=2))
if __name__ == "__main__":
main()
```
```python {{ title: 'Custom Model' }}
import json
import os
from dotenv import load_dotenv
from langbase import Langbase
load_dotenv()
# Cconfigure the Langbase client with your API key
langbase = Langbase(api_key=os.environ.get("LANGBASE_API_KEY"))
def main():
response = langbase.embed(
chunks=[
"Langbase is the most powerful serverless platform for building AI agents with memory. Build, scale, and evaluate AI agents with semantic memory (RAG) and world-class developer experience.",
"We process billions of AI messages/tokens daily. Built for every developer, not just AI/ML experts.",
],
embedding_model="openai:text-embedding-3-large",
)
print(json.dumps(response, indent=2))
if __name__ == "__main__":
main()
```
</CodeGroup>
</LanguageContent>
</Col>
</Row>
---
<Row>
<Col>
## Response
<LanguageContent language="typescript">
Response of `langbase.embed()` is a `Promise<number[][]>`.
```ts {{title: 'EmbedResponse Type'}}
type EmbedResponse = number[][];
```
</LanguageContent>
<LanguageContent language="python">
Response of `langbase.embed()` is a `List[List[float]]`.
```python {{title: 'EmbedResponse Type'}}
EmbedResponse = List[List[float]]
```
</LanguageContent>
<Properties>
<LanguageContent language="typescript">
<Property name="response" type="number[][]">
A 2D array where each inner array represents the embedding vector for the corresponding input chunk.
</Property>
</LanguageContent>
<LanguageContent language="python">
<Property name="response" type="List[List[float]]">
A 2D array where each inner array represents the embedding vector for the corresponding input chunk.
</Property>
</LanguageContent>
</Properties>
</Col>
<Col sticky>
```json {{ title: 'EmbedResponse Example' }}
[
[-0.023, 0.128, -0.194, ...],
[0.067, -0.022, 0.289, ...],
]
```
</Col>
</Row>
</LanguageProvider>
---
</content>
</doc>
<doc>
<metadata>
<title>Deprecated SDK methods</title>
<url>https://langbase.com/docs/sdk/deprecated/</url>
</metadata>
<content>
import { generateMetadata } from '@/lib/generate-metadata';
# Deprecated SDK methods
Deprecated SDK methods are no longer supported and should not be used. Below is a list of deprecated SDK methods. Click on the endpoint to view detailed information about it.
---
### Pipe
Below is the list of deprecated Pipe SDK methods.
- [Generate text](/sdk/deprecated/generate-text)
- [Stream text](/sdk/deprecated/stream-text)
Please refer to the [Pipe SDK](/sdk/pipe) for the latest methods.
---
</content>
</doc>
<doc>
<metadata>
<title>Chunker <span className="text-sm font-mono text-muted-foreground/70 ml-2">langbase.chunker()</span></title>
<url>https://langbase.com/docs/sdk/chunker/</url>
</metadata>
<content>
import { generateMetadata } from '@/lib/generate-metadata';
import { LanguageProvider, SimpleLanguageToggle, LanguageContent } from '@/components/LanguageToggle';
# Chunker <span className="text-sm font-mono text-muted-foreground/70 ml-2">langbase.chunker()</span>
<LanguageProvider defaultLanguage='typescript'>
Chunker, an AI Primitive by Langbase, allows you to split text into smaller, manageable pieces. This is especially useful for RAG pipelines or when you need to work with only specific sections of a document.
You can use the `chunker()` function to split your content into smaller chunks. This is especially useful for RAG pipelines or when you need to work with only specific sections of a document.
---
## Generate a User/Org API key
You will need to generate an API key to authenticate your requests. For more information, visit the [User/Org API key documentation](/api-reference/api-keys).
<Spoiler title="Get your Langbase API key: User or Org">
You can generate API keys from the [Langbase Studio](https://studio.langbase.com) by following these steps:
1. Switch to your user or org account.
2. From the sidebar, click on the `API keys`.
3. From here you can create a new API key or manage existing ones.
For more details, follow the [Langbase API keys](/api-reference/api-keys) documentation.
</Spoiler>
---
## API reference
<div className="md:hidden block flex justify-end -mt-12 ml-24">
<SimpleLanguageToggle />
</div>
## `langbase.chunker(options)`
<Row>
<Col>
Split content into chunks by running `langbase.chunker()` function.
<LanguageContent language="typescript">
<CodeGroup exampleTitle="langbase.chunker()" title="Function Signature">
```ts {{ title: 'index.ts' }}
langbase.chunker(options);
// with types
langbase.chunker(options: ChunkerOptions);
```
</CodeGroup>
</LanguageContent>
<LanguageContent language="python">
<CodeGroup exampleTitle="chunker()" title="Function Signature">
```python {{ title: 'main.py' }}
langbase.chunker(**options)
```
</CodeGroup>
</LanguageContent>
## options
<Properties>
<Property name="options" type="ChunkerOptions">
<LanguageContent language="typescript">
```bash {{title: 'ChunkerOptions Object'}}
content: string;
chunkMaxLength?: number;
chunkOverlap?: number;
```
</LanguageContent>
<LanguageContent language="python">
```bash {{title: 'ChunkerOptions Object'}}
content: string
chunk_max_length?: number
chunk_overlap?: number
```
</LanguageContent>
*Following are the properties of the options object.*
</Property>
</Properties>
---
### content
<Properties>
<Property name="content" type="string" required="true">
The content of the document to be chunked.
</Property>
</Properties>
---
<LanguageContent language="typescript">
### chunkMaxLength
<Properties>
<Property name="chunkMaxLength" type="string">
The maximum length for each document chunk. Must be between `1024` and `30000` characters.
Default: `1024`
</Property>
</Properties>
</LanguageContent>
<LanguageContent language="python">
### chunk_max_length
<Properties>
<Property name="chunk_max_length" type="string">
The maximum length for each document chunk. Must be between `1024` and `30000` characters.
Default: `1024`
</Property>
</Properties>
</LanguageContent>
---
<LanguageContent language="typescript">
### chunkOverlap
<Properties>
<Property name="chunkOverlap" type="string">
The number of characters to overlap between chunks. Must be greater than or equal to `256` and less than chunkMaxLength.
Default: `256`
</Property>
</Properties>
</LanguageContent>
<LanguageContent language="python">
### chunk_overlap
<Properties>
<Property name="chunk_overlap" type="string">
The number of characters to overlap between chunks. Must be greater than or equal to `256` and less than chunkMaxLength.
Default: `256`
</Property>
</Properties>
</LanguageContent>
</Col>
<Col>
<div className="flex justify-between items-center">
<h3 className="text-2xl w-full">Usage example</h3>
<div className="hidden md:block">
<SimpleLanguageToggle/>
</div>
</div>
<LanguageContent language="typescript">
<CodeGroup exampleTitle="Install the SDK" title="Install the SDK">
```bash {{ title: 'npm' }}
npm i langbase
```
```bash {{ title: 'pnpm' }}
pnpm i langbase
```
```bash {{ title: 'yarn' }}
yarn add langbase
```
</CodeGroup>
</LanguageContent>
<LanguageContent language="python">
<CodeGroup exampleTitle="Install the SDK" title="Install the SDK">
```bash {{ title: 'pip' }}
pip install langbase python-dotenv
```
</CodeGroup>
</LanguageContent>
### Environment variables
```bash {{ title: '.env file' }}
LANGBASE_API_KEY="<USER/ORG-API-KEY>"
```
### `langbase.chunker()` examples
<LanguageContent language="typescript">
<CodeGroup exampleTitle="langbase.chunker()" title="langbase.chunker()">
```ts {{ title: 'Basic' }}
import { Langbase } from 'langbase';
const langbase = new Langbase({
apiKey: process.env.LANGBASE_API_KEY!,
});
async function main() {
const content = `Langbase is the most powerful serverless AI platform for building AI agents with memory. Build, deploy, and scale AI agents with tools and memory (RAG). Simple AI primitives with a world-class developer experience without using any frameworks.`;
const chunks = await langbase.chunker({
content,
chunkMaxLength: 1024,
chunkOverlap: 256
});
console.log('Chunks:', chunks);
}
main();
```
</CodeGroup>
</LanguageContent>
<LanguageContent language="python">
<CodeGroup exampleTitle="chunker()" title="chunker()">
```python {{ title: 'chunker.py' }}
import json
import os
import pathlib
from dotenv import load_dotenv
from langbase import Langbase
load_dotenv()
# Get API key from environment variable
langbase_api_key = os.getenv("LANGBASE_API_KEY")
# Initialize the client
langbase = Langbase(api_key=langbase_api_key)
def main():
"""
Chunks text content using Langbase.
"""
try:
# Get the path to the document
document_path = pathlib.Path(__file__).parent / "composable-ai.md"
# Read the file
with open(document_path, "r", encoding="utf-8") as file:
document_content = file.read()
# Chunk the content
chunks = langbase.chunker(
content=document_content, chunk_max_length=1024, chunk_overlap=256
)
print(json.dumps(chunks, indent=2))
except Exception as e:
print(f"Error chunking content: {e}")
if __name__ == "__main__":
main()
```
</CodeGroup>
</LanguageContent>
</Col>
</Row>
---
<Row>
<Col>
## Response
<LanguageContent language="typescript">
The response of `langbase.chunker()` function is a `Promise` that resolves to an array of string.
```bash {{title: 'ChunkerResponse Type'}}
type ChunkerResponse = string[];
```
</LanguageContent>
<LanguageContent language="python">
The response of `langbase.chunker()` function returns a list of strings.
```bash {{title: 'ChunkerResponse Type'}}
ChunkerResponse = List[str]
```
</LanguageContent>
<LanguageContent language="typescript">
<Properties>
<Property name="response" type="string[]">
Array of text chunks created from the input document.
</Property>
</Properties>
</LanguageContent>
<LanguageContent language="python">
<Properties>
<Property name="response" type="List[str]">
Array of text chunks created from the input document.
</Property>
</Properties>
</LanguageContent>
</Col>
<Col sticky>
```json {{ title: 'ChunkerResponse Example' }}
[
"Langbase is the most powerful serverless AI platform for building AI agents with memory. Build, deploy, and scale AI agents with tools and memory (RAG). Simple AI primitives with a world-class developer experience without using any frameworks."
]
```
</Col>
</Row>
</LanguageProvider>
---
</content>
</doc>
<doc>
<metadata>
<title>Reset Your Password</title>
<url>https://langbase.com/docs/platform-docs/reset-your-password/</url>
</metadata>
<content>
import { generateMetadata } from '@/lib/generate-metadata';
# Reset Your Password
---
## Step #1 Go to profile settings
Login to your account on [Langbase][lb].
1. Navigate to your profile `Settings` page.
<Img
caption="Go to profile settings"
light="https://raw.githubusercontent.com/LangbaseInc/docs-images/refs/heads/main/reset-your-password/go%20to%20profile%20settings%20-%20Light.jpg"
dark="https://raw.githubusercontent.com/LangbaseInc/docs-images/refs/heads/main/reset-your-password/go%20to%20profile%20settings%20-%20Dark.jpg"
/>
---
## Step #2 Change your password
Scroll down to the `Reset Password` section.
1. Enter a new password in the box under `New Password`.
2. Click on `Set Password` to confirm your new password.
<Img
caption="Reset you password"
light="https://raw.githubusercontent.com/LangbaseInc/docs-images/refs/heads/main/reset-your-password/Reset%20Password%20-%20Light.jpg"
dark="https://raw.githubusercontent.com/LangbaseInc/docs-images/refs/heads/main/reset-your-password/Reset%20Password%20-%20Dark.jpg"
/>
-----
[lb]: https://langbase.com
</content>
</doc>
<doc>
<metadata>
<title>Edit User Profile</title>
<url>https://langbase.com/docs/platform-docs/edit-user-profile/</url>
</metadata>
<content>
import { generateMetadata } from '@/lib/generate-metadata';
# Edit User Profile
---
## Step #1 Go to profile settings
Login to your account on [Langbase][lb].
1. Navigate to your profile `Settings` page.
<Img
caption="Go to profile settings"
light="https://raw.githubusercontent.com/LangbaseInc/docs-images/refs/heads/main/edit-user-profile/go%20to%20profile%20settings%20-%20Light.jpg"
dark="https://raw.githubusercontent.com/LangbaseInc/docs-images/refs/heads/main/edit-user-profile/go%20to%20profile%20settings%20-%20Dark.jpg"
/>
---
## Step #2 Edit your profile
1. Click on `Change Profile Picture` to browse a profile picture from your PC.
2. Type a name for your profile in the box under `Name`
3. Type a `-` delimited username for your profile in the box under `Username`
4. Type a short bio for your profile in the box under `Bio`
<Note>The image max size should be 1MB and in PNG or JPG format.</Note>
<Img
caption="Edit your profile"
light="https://raw.githubusercontent.com/LangbaseInc/docs-images/refs/heads/main/edit-user-profile/Edit%20your%20profile%20-%20Light.jpg"
dark="https://raw.githubusercontent.com/LangbaseInc/docs-images/refs/heads/main/edit-user-profile/Edit%20your%20profile%20-%20Dark.jpg"
/>
---
## Step #3 Save your changes
1. Click on `Save Changes` to save your edits or click on `Reset` to reset them and start over.
<Img
caption="Save your changes"
light="https://raw.githubusercontent.com/LangbaseInc/docs-images/refs/heads/main/edit-user-profile/save%20your%20changes%20-%20Light.jpg"
dark="https://raw.githubusercontent.com/LangbaseInc/docs-images/refs/heads/main/edit-user-profile/save%20your%20changes%20-%20Dark.jpg"
/>
-----
[lb]: https://langbase.com
</content>
</doc>
<doc>
<metadata>
<title>Billing</title>
<url>https://langbase.com/docs/platform-docs/billing/</url>
</metadata>
<content>
import { generateMetadata } from '@/lib/generate-metadata';
# Billing
You can upgrade to `Pro` or `Enterprise` package on the `Billing` page of Langbase.
---
## Upgrade organization
---
## Step #1 Go to organization billing page
Login to your account on [Langbase][lb].
1. Navigate to your organization profile page.
2. Click on the `Billing` button at the top right corner.
<Img
caption="Organization billing page"
light="https://raw.githubusercontent.com/LangbaseInc/docs-images/refs/heads/main/billing/Organization%20Billing%20Page%20-%20Light.jpg"
dark="https://raw.githubusercontent.com/LangbaseInc/docs-images/refs/heads/main/billing/Organization%20Billing%20Page%20-%20Dark.jpg"
/>
---
## Step #2 Review current billing status
1. `Your Subscription` section displays your current subscription plan, term and status details.
2. `Your Usage` section shows the summary of your usage on Langbase. This includes total number of pipes, total requests and memory usage.
<Img
caption="Current billing status"
light="https://raw.githubusercontent.com/LangbaseInc/docs-images/refs/heads/main/billing/Current%20Billing%20Status%20-%20Light.jpg"
dark="https://raw.githubusercontent.com/LangbaseInc/docs-images/refs/heads/main/billing/Current%20Billing%20Status%20-%20Dark.jpg"
/>
---
## Step #3 Upgrade to Pro or Enterprise
Under the `Plans` section, compare and explore different subscription plans.
1. Click on the `Subscribe ` or `Let’s Talk` button and follow the prompts to upgrade your organization.
<Img
caption="Upgrade to Pro or Enterprise"
light="https://raw.githubusercontent.com/LangbaseInc/docs-images/refs/heads/main/billing/upgrade%20to%20pro%20or%20enterprise%20-%20Light.jpg"
dark="https://raw.githubusercontent.com/LangbaseInc/docs-images/refs/heads/main/billing/upgrade%20to%20pro%20or%20enterprise%20-%20Dark.jpg"
/>
-----
## Upgrade user profile
---
## Step #1 Go to your billing page
Login to your account on [Langbase][lb].
1. Navigate to your profile `Billing` page.
<Img
caption="User billing page"
light="https://raw.githubusercontent.com/LangbaseInc/docs-images/refs/heads/main/billing/user%20billing%20page%20-%20Light.jpg"
dark="https://raw.githubusercontent.com/LangbaseInc/docs-images/refs/heads/main/billing/user%20billing%20page%20-%20Dark.jpg"
/>
---
## Step #2 Review current billing status
1. `Your Subscription` section displays your current subscription plan, term and status details.
2. `Your Usage` section shows the summary of your usage on Langbase. This includes total number of pipes, total requests and memory usage.
<Img
caption="Current billing status"
light="https://raw.githubusercontent.com/LangbaseInc/docs-images/refs/heads/main/billing/Current%20Billing%20Status%20-%20Light.jpg"
dark="https://raw.githubusercontent.com/LangbaseInc/docs-images/refs/heads/main/billing/Current%20Billing%20Status%20-%20Dark.jpg"
/>
---
## Step #3 Upgrade to Pro or Enterprise
Under the `Plans` section, compare and explore different subscription plans.
1. Click on the `Subscribe ` or `Let’s Talk` button and follow the prompts to upgrade your profile.
<Img
caption="Upgrade to Pro or Enterprise"
light="https://raw.githubusercontent.com/LangbaseInc/docs-images/refs/heads/main/billing/upgrade%20to%20pro%20or%20enterprise%20-%20Light.jpg"
dark="https://raw.githubusercontent.com/LangbaseInc/docs-images/refs/heads/main/billing/upgrade%20to%20pro%20or%20enterprise%20-%20Dark.jpg"
/>
-----
[lb]: https://langbase.com
</content>
</doc>
<doc>
<metadata>
<title>What is a Pipe? (AI Agent)</title>
<url>https://langbase.com/docs/pipe/quickstart/</url>
</metadata>
<content>
import { generateMetadata } from '@/lib/generate-metadata';
<LanguageProvider defaultLanguage='typescript'>
# What is a Pipe? (AI Agent)
AI Agents can understand context and take meaningful actions. They can be used to automate tasks, research and analyze information, or help users with their queries.
Pipe is an AI agent available as a serverless API. You write the logic, Langbase handles the logistics. It's the easiest way to build, deploy, and scale AI agents without having to manage or update any infrastructure.
<CTAButtons
primary={{ href: '/sdk/pipe', text: 'Start with Langbase SDK' }}
secondary={{ href: '/examples/agent-architectures', text: 'Reference Agent architectures' }}
/>
---
<Img
light="/docs/pipe/pipe.png"
dark="/docs/pipe/pipe.png"
alt="What is a Pipe"
caption="A Pipe Agent: Connect any LLM model to any data"
/>
Langbase Augmented LLM (Pipe Agent) is the fundamental component of an agentic system. It is a Large Language Model (LLM) enhanced with augmentations such as retrieval, tools, and memory. Our current models can actively utilize these capabilities—generating their own search queries, selecting appropriate tools, and determining what information to retain using memory.
> Ever found yourself amazed by what ChatGPT can do and wished you could integrate similar AI features into your own apps? That's exactly what Pipe is designed for. It’s like ChatGPT, but simple (simplest API), powerful (works with 250+ LLM models), and developer-ready (comes with a suite of dev-friendly features available as an API).
---
## Quickstart: Build an AI Agent to Generate Titles
### Let's build your first AI pipe in a minute.
---
In this quickstart guide, you will:
- **Create** and use a Pipe agent on Langbase.
- **Use** an LLM model like GPT, Llama, Mistral, etc.
- **Build** your pipe agent with configuration and meta settings.
- **Design** a prompt with system, safety, and few-shot messages.
- **Experiment** with your AI pipe in playground (Langbase AI Studio).
- **Observe** real-time performance, usage, and per million request predictions.
- **Deploy** your AI features seamlessly using the Pipe API (global, highly available, and scalable).
---
## Let's get started
There are two ways to follow this guide:
- [Langbase SDK](/sdk) - TypeScript SDK to interact with Langbase APIs. (code)
- [Langbase AI Studio](https://studio.langbase.com) - AI Studio to build, deploy, and collaborate on AI agents. (build)
Click on one of the buttons below to choose your preferred method.
<ContentTabs>
<ContentTab title="#1: Use Langbase SDK (Code)">
---
## Step #1: Generate Langbase API key
Every request you send to Langbase needs an [API key](/api-reference/api-keys). This guide assumes you already have one. In case, you do not have an API key, please check the instructions below.
<Spoiler title="Get your Langbase API key: User or Org">
You can generate API keys from the [Langbase Studio](https://studio.langbase.com) by following these steps:
1. Switch to your user or org account.
2. From the sidebar, click on the `API keys`.
3. From here you can create a new API key or manage existing ones.
For more details follow the [Langbase API keys](/api-reference/api-keys) documentation.
</Spoiler>
---
## Step #2: Add LLM API keys
If you have set up LLM API keys in your profile, the Pipe will automatically use them. If not, navigate to [LLM API keys](https://langbase.com/settings/keys#keyset) page and add keys for different providers like OpenAI, TogetherAI, Anthropic, etc.
<Spoiler title="Add LLM API keys to your account">
You can add LLM API keys in your account using [Langbase Studio](https://studio.langbase.com) by following these steps:
1. Switch to your user or org account.
2. From the sidebar, click on the `API keys` and scroll down to the LLM API keys section.
3. From here you can add LLM API keys for different providers like OpenAI, TogetherAI, Anthropic, etc.
</Spoiler>
---
## Step #3: Setup your project [lang]
Create a new directory for your project and navigate to it.
<CodeGroup exampleTitle="Project setup" title="Project setup">
```bash
mkdir ai-support-agent && cd ai-support-agent
```
</CodeGroup>
### Initialize the project
<LanguageContent language="typescript">
Create a new Node.js project.
<CodeGroup exampleTitle="Initialize project" title="Initialize project">
```bash {{ title: 'npm' }}
npm init -y
```
```bash {{ title: 'pnpm' }}
pnpm init
```
```bash {{ title: 'yarn' }}
yarn init -y
```
</CodeGroup>
</LanguageContent>
<LanguageContent language="python">
Now let's create a new virtual environment and activate it.
<CodeGroup exampleTitle="Initialize project" title="Initialize project">
```bash {{ title: 'macOS/Linux' }}
python -m venv .venv && source .venv/bin/activate
```
```bash {{ title: 'Windows' }}
python -m venv .venv && .venv\Scripts\activate
```
</CodeGroup>
</LanguageContent>
### Install dependencies
You will use the [Langbase SDK](/sdk) to connect to the AI agent pipes and `dotenv` to manage environment variables. So, let's install these dependencies.
<LanguageContent language="typescript">
<CodeGroup exampleTitle="Install dependencies" title="Install dependencies">
```bash {{ title: 'npm' }}
npm i langbase dotenv
```
```bash {{ title: 'pnpm' }}
pnpm add langbase dotenv
```
```bash {{ title: 'yarn' }}
yarn add langbase dotenv
```
</CodeGroup>
</LanguageContent>
<LanguageContent language="python">
<CodeGroup exampleTitle="Install dependencies" title="Install dependencies">
```bash {{ title: 'pip' }}
pip install langbase python-dotenv
```
</CodeGroup>
</LanguageContent>
### Create an env file
Create a `.env` file in the root of your project and add the following environment variables:
```bash {{ title: '.env' }}
LANGBASE_API_KEY=xxxxxxxxx
```
Replace `xxxxxxxxx` with your Langbase API key.
---
## Step #4: Create a new pipe agent
<LanguageContent language="typescript">
Create a new file named `create-pipe.ts` and add the following code to create a new pipe agent using Langbase [`Pipe create`](/sdk/pipe/create) API:
<CodeGroup exampleTitle="Create pipe agent" title="create-pipe.ts">
```ts {{ title: 'TypeScript' }}
import 'dotenv/config';
import { Langbase } from 'langbase';
const langbase = new Langbase({
apiKey: process.env.LANGBASE_API_KEY!,
});
async function main() {
const supportAgent = await langbase.pipes.create({
name: `ai-support-agent`,
description: `An AI agent to support users with their queries.`,
messages: [
{
role: `system`,
content: `You're a helpful AI assistant.`,
},
],
});
console.log('Support agent:', supportAgent);
}
main();
```
</CodeGroup>
Let's create the pipe agent by running the above file:
<CodeGroup exampleTitle="Create pipe" title="Create pipe">
```bash {{ title: 'npm' }}
npx tsx create-pipe.ts
```
```bash {{ title: 'pnpm' }}
pnpm dlx tsx create-pipe.ts
```
</CodeGroup>
</LanguageContent>
<LanguageContent language="python">
Create a new file named `create-pipe.py` and add the following code to create a new pipe agent using Langbase [`Pipe create`](/sdk/pipe/create) API:
<CodeGroup exampleTitle="Create pipe agent" title="create-pipe.py">
```py {{ title: 'Python' }}
import os
import json
from langbase import Langbase
from dotenv import load_dotenv
load_dotenv()
langbase = Langbase(api_key=os.getenv('LANGBASE_API_KEY'))
def main():
support_agent = langbase.pipes.create(
name='ai-support-agent',
description='An AI pipe agent that supports users with their queries.',
messages=[{
'role': 'system',
'content': 'You're a helpful AI assistant.',
}],
upsert=True
)
print(json.dumps(support_agent, indent=2))
if __name__ == "__main__":
main()
```
</CodeGroup>
Let's create the pipe agent by running the above file:
<CodeGroup exampleTitle="Create pipe" title="Create pipe">
```bash {{ title: 'pip' }}
python create-pipe.py
```
</CodeGroup>
</LanguageContent>
This will create a new pipe agent named `ai-support-agent`.
---
## Step #5: Run AI support agent
Now that you have created the pipe agent, it's time to run it and generate completions.
<LanguageContent language="typescript">
Create a new file named `run-pipe.ts` and add the following code to run the AI support agent:
<CodeGroup exampleTitle="Run AI support agent" title="run-pipe.ts">
```ts {{ title: 'TypeScript' }}
import 'dotenv/config';
import { Langbase, getRunner } from 'langbase';
const langbase = new Langbase({
apiKey: process.env.LANGBASE_API_KEY!,
});
async function main() {
const { stream } = await langbase.pipes.run({
name: `ai-support-agent`,
stream: true,
messages: [
{
role: `user`,
content: `Hello`,
},
],
});
const runner = getRunner(stream);
runner.on('content', content => {
process.stdout.write(content);
});
}
main();
```
</CodeGroup>
You are using the `stream` option to get real-time completions from the AI model. Now let's run the above file to see the AI generate completions for the user message:
```bash
npx tsx run-pipe.ts
```
</LanguageContent>
<LanguageContent language="python">
Create a new file named `run-pipe.py` and add the following code to run the AI support agent:
<CodeGroup exampleTitle="Run AI support agent" title="run-pipe.py">
```py {{ title: 'Python' }}
import os
import asyncio
from langbase import Langbase, get_runner
from dotenv import load_dotenv
load_dotenv()
langbase = Langbase(api_key=os.getenv('LANGBASE_API_KEY'))
def main():
# Get readable stream
response = langbase.pipes.run(
stream=True,
name='ai-support-agent',
messages=[
{
'role': 'user',
'content': 'Hello'
}
]
)
runner = get_runner(response)
print('Stream started \n\n')
# Use text_generator() to stream content
for content in runner.text_generator():
print(content, end="", flush=True)
print("\n\nStream ended!") # Add a newline after first response
if __name__ == '__main__':
main()
```
</CodeGroup>
You are using the `stream` option to get real-time completions from the AI model. Now let's run the above file to see the AI generate completions for the user message:
```bash
python run-pipe.py
```
</LanguageContent>
You should see a sample AI response:
``` {{ title: 'LLM generation' }}
How can I assist you today?
```
---
## Step #6: Design a prompt
Now that you have written the basic code it's time to design your prompt.
---
### What is a Prompt?
Prompt is the input you provide to the AI model to generate the output.
Typically, a prompt starts a chat thread with a system message, then alternates between user and assistant messages. **Prompt design is important.** At Langbase, we have a few key components to help you design a prompt:
---
### Prompt: System Instructions
A system `message` in prompt acts as the set of instructions for the AI model.
1. It sets the initial context and helps the model understand your intent.
2. Now let's add a system instruction message. You can add this: `You're a helpful AI assistant. You will assist users with their queries about {{company}}. Always ensure that you provide accurate and to the point information.`
<LanguageContent language="typescript">
Let's create a new file named `update-pipe.ts` and add the following code to update the pipe agent with the system instruction message:
<CodeGroup exampleTitle="Update pipe agent" title="update-pipe.ts">
```ts {{ title: 'TypeScript' }}
import 'dotenv/config';
import { Langbase } from 'langbase';
const langbase = new Langbase({
apiKey: process.env.LANGBASE_API_KEY!,
});
async function main() {
const supportAgent = await langbase.pipes.update({
name: `ai-support-agent`,
description: `An AI agent to support users with their queries.`,
messages: [
{
role: `system`,
content: `You're a helpful AI assistant.
You will assist users with their queries about {{company}}.
Always ensure that you provide accurate and to the point information.`,
},
],
});
console.log('Support agent:', supportAgent);
}
main();
```
</CodeGroup>
</LanguageContent>
<LanguageContent language="python">
Create a new file named `update-pipe.py` and add the following code to update the pipe agent with the system instruction message:
<CodeGroup exampleTitle="Update pipe agent" title="update-pipe.py">
```py {{ title: 'Python' }}
import os
import json
from langbase import Langbase
from dotenv import load_dotenv
load_dotenv()
langbase = Langbase(api_key=os.getenv('LANGBASE_API_KEY'))
def main():
response = langbase.pipes.update(
name='ai-support-agent',
description='An AI pipe agent that supports users with their queries.',
messages=[{
'role': 'system',
'content': """You're a helpful AI assistant.
You will assist users with their queries about {{company}}.
Always ensure that you provide accurate and to the point information."""
}],
)
print(json.dumps(response, indent=2))
if __name__ == '__main__':
main()
```
</CodeGroup>
</LanguageContent>
### Prompt: User Message
1. Now let's add a user message. You can create a new object in the `messages` array with `role` as `user`.
1. You can add this: `How to request payment API?`
<LanguageContent language="typescript">
<CodeGroup exampleTitle="Update pipe agent" title="update-pipe.ts">
```ts {{ title: 'TypeScript' }}
import 'dotenv/config';
import { Langbase } from 'langbase';
const langbase = new Langbase({
apiKey: process.env.LANGBASE_API_KEY!,
});
async function main() {
const supportAgent = await langbase.pipes.update({
name: `ai-support-agent`,
description: `An AI agent to support users with their queries.`,
messages: [
{
role: `system`,
content: `You're a helpful AI assistant.
You will assist users with their queries about {{company}}.
Always ensure that you provide accurate and to the point information.`,
},
{
role: `user`,
content: `How to request payment API?`,
},
],
});
console.log('Support agent:', supportAgent);
}
main();
```
</CodeGroup>
</LanguageContent>
<LanguageContent language="python">
<CodeGroup exampleTitle="Update pipe agent" title="update-pipe.py">
```py {{ title: 'Python' }}
import os
import json
from langbase import Langbase
from dotenv import load_dotenv
load_dotenv()
langbase = Langbase(api_key=os.getenv('LANGBASE_API_KEY'))
def main():
response = langbase.pipes.update(
name='ai-support-agent',
description='An AI pipe agent that supports users with their queries.',
messages=[{
'role': 'system',
'content': """You're a helpful AI assistant.
You will assist users with their queries about {{company}}.
Always ensure that you provide accurate and to the point information."""
},
{
'role': 'user',
'content': 'How to request payment API?'
}
],
)
print(json.dumps(response, indent=2))
if __name__ == '__main__':
main()
```
</CodeGroup>
</LanguageContent>
### Prompt: Variables
1. Any text written between double curly brackets `{{}}` becomes a variable.
2. Variable values are passed separately. Since you added a `{{company}}` variable, you can pass its value as `ACME`.
✨ Variables allow you to use the same pipe to generate completion based on different values.
<LanguageContent language="typescript">
<CodeGroup exampleTitle="Create a pipe" title="create-pipe.ts">
```ts {{ title: 'TypeScript' }}
import 'dotenv/config';
import { Langbase } from 'langbase';
const langbase = new Langbase({
apiKey: process.env.LANGBASE_API_KEY!,
});
async function main() {
const supportAgent = await langbase.pipes.update({
name: `ai-support-agent`,
description: `An AI agent to support users with their queries.`,
messages: [
{
role: `system`,
content: `You're a helpful AI assistant.
You will assist users with their queries about {{company}}.
Always ensure that you provide accurate and to the point information.`,
}
],
variables: {
company: `ACME`,
},
});
console.log('Support agent:', supportAgent);
}
main();
```
</CodeGroup>
Now run the above file to update `ai-support-agent` using the following command:
```bash
npx tsx update-pipe.ts
```
</LanguageContent>
<LanguageContent language="python">
<CodeGroup exampleTitle="Update pipe agent" title="update-pipe.py">
```py {{ title: 'Python' }}
import os
import json
from langbase import Langbase
from dotenv import load_dotenv
load_dotenv()
langbase = Langbase(api_key=os.getenv('LANGBASE_API_KEY'))
def main():
response = langbase.pipes.update(
name='ai-support-agent',
description='An AI pipe agent that supports users with their queries.',
messages=[{
'role': 'system',
'content': """You're a helpful AI assistant.
You will assist users with their queries about {{company}}.
Always ensure that you provide accurate and to the point information."""
}
],
variables={
'company': 'ACME'
}
)
print(json.dumps(response, indent=2))
if __name__ == '__main__':
main()
```
</CodeGroup>
Now run the above file to update `ai-support-agent` using the following command:
```bash
python update-pipe.py
```
</LanguageContent>
---
## Step #7: Run AI support agent
<LanguageContent language="typescript">
Let's run the AI support agent again with the a user message. Go ahead and update the `run-pipe.ts` file with the following code:
<CodeGroup exampleTitle="Run AI support agent" title="run-pipe.ts">
```ts {{ title: 'TypeScript' }}
import 'dotenv/config';
import { Langbase, getRunner } from 'langbase';
const langbase = new Langbase({
apiKey: process.env.LANGBASE_API_KEY!,
});
async function main() {
const { stream } = await langbase.pipes.run({
name: `ai-support-agent`,
stream: true,
messages: [
{
role: `user`,
content: `How to request payment API?`,
},
],
});
const runner = getRunner(stream);
runner.on('content', content => {
process.stdout.write(content);
});
}
main();
```
</CodeGroup>
```bash
npx tsx run-pipe.ts
```
</LanguageContent>
<LanguageContent language="python">
Let's run the AI support agent again with the a user message. Go ahead and update the `run-pipe.py` file with the following code:
<CodeGroup exampleTitle="Run AI support agent" title="run-pipe.py">
```py {{ title: 'Python' }}
import os
import asyncio
from langbase import Langbase, get_runner
from dotenv import load_dotenv
load_dotenv()
langbase = Langbase(api_key=os.getenv('LANGBASE_API_KEY'))
def main():
# Get readable stream
response = langbase.pipes.run(
stream=True,
name='ai-support-agent',
messages=[
{
'role': 'user',
'content': 'How to request payment API?'
}
]
)
runner = get_runner(response)
print('Stream started \n\n')
# Use text_generator() to stream content
for content in runner.text_generator():
print(content, end="", flush=True)
print("\n\nStream ended!") # Add a newline after first response
if __name__ == '__main__':
main()
```
</CodeGroup>
```bash
python run-pipe.py
```
</LanguageContent>
You should see a sample AI response:
```md {{ title: 'LLM generation' }}
To request a payment API from ACME, you typically need to follow these steps:
1. **Create an Account**: Sign up for an account on the ACME platform if you haven't already.
2. **Access Developer Documentation**: Visit the ACME developer portal or documentation section. This is where you'll find detailed information about the payment API, including endpoints, authentication, and usage examples.
3. **API Key Generation**: Look for a section in the developer portal where you can generate an API key. This key is essential for authenticating your requests.
4. **Review API Specifications**: Familiarize yourself with the API specifications, including the required parameters, request methods (GET, POST, etc.), and response formats.
5. **Make a Request**: Use your preferred programming language or tool (like Postman, cURL, etc.) to make API requests. Ensure you include your API key in the request headers.
6. **Test in Sandbox**: If available, use the sandbox environment to test your integration before going live.
7. **Contact Support**: If you have any specific questions or need assistance, contact ACME's support team through their support channels.
Make sure to follow any specific guidelines or requirements outlined in the ACME API documentation.
```
</ContentTab>
<ContentTab title="#2: Use Langbase AI Studio: (Build)">
---
## Step #1: Create a Pipe
To get started with Langbase, you'll need to [create a free personal account on Langbase.com][signup] and verify your email address. _Done? Cool, cool!_
0. When logged in, you can always go to [`pipe.new`][pn] to create a new Pipe.
1. Give your Pipe a name. Let’s call it `AI support agent`.
2. Click on the `[Create Pipe]` button. And just like that, you have created your first Pipe.
<Note title="Start with a fork">
You can also fork the [`AI support agent`][opp] pipe we'll be creating in
this guide by clicking on the `Fork` button. Forking a pipe is a great way
to start experimenting with it.
</Note>
<Img
caption="Creating a new Pipe"
light="https://raw.githubusercontent.com/LangbaseInc/docs-images/refs/heads/main/guides/build-performant-rag/create-pipe-light.jpg"
dark="https://raw.githubusercontent.com/LangbaseInc/docs-images/refs/heads/main/guides/build-performant-rag/create-pipe-dark.jpg"
/>
---
## Step #2: Using an LLM model
If you have set up LLM API keys in your profile, the Pipe will automatically use them. If not, just hit the LLM API Keys button or head over to Settings to add Pipe-level LLM API keys.
Let's add an LLM provider API key now.
1. Click on the LLM keys button. It will open a side panel.
2. Select Pipe level keys. Choose any LLM. For example, you can use `OpenAI` (for GPT) or `Together` (for Llama, Mistral, etc.) or any other [supported model](https://langbase.com/docs/supported-models-and-providers) on ⌘ Langbase.
3. Click on OpenAI `[ADD KEY]` button, add your LLM API key. Inside each key modal, you'll find a link `Get a new key from here` click it to create a new API key on any API provider's website.
<Img
caption="Add an LLM API Key"
light="https://raw.githubusercontent.com/LangbaseInc/docs-images/refs/heads/main/pipe/quickstart/updated/llm-keys-light.jpg"
dark="https://raw.githubusercontent.com/LangbaseInc/docs-images/refs/heads/main/pipe/quickstart/updated/llm-keys-dark.jpg"
/>
<Warn title="Known issue with OpenAI Key">
OpenAI expects you to add credits to your account to use their API. And
sometimes it can take up to an hour or so for your OpenAI keys to work. It's
an OpenAI issue which they're working on to fix.
</Warn>
---
## Step #3: Build your Pipe: Configure LLM model
Let's start building our pipe. Go back to the `Pipe` tab.
1. Click on the `gpt-4o-mini` button to select and configure the LLM model for your Pipe.
2. By default OpenAI `gpt-4o-mini` is selected. You can also pick any `Llama` or `Mistral` model.
3. Choose one of the pre-configured [presets](/features/model-presets) for your model.
4. You can also modify any of the model params. Learn more with the <InformationCircleIcon className="h-3 w-3 text-muted-foreground/80 inline self-center m-0" /> icon, next to param name.
<Img
caption="Build your pipe: Configuiring the LLM model"
light="https://raw.githubusercontent.com/LangbaseInc/docs-images/refs/heads/main/pipe/quickstart/updated/model-light.jpg"
dark="https://raw.githubusercontent.com/LangbaseInc/docs-images/refs/heads/main/pipe/quickstart/updated/model-dark.jpg"
/>
---
## Step #4: Build your Pipe: Configure the Pipe's Meta
Use the Meta section to configure how your `AI support agent` Pipe should work.
1. You can set the output format of the Pipe to JSON.
2. Moderation mode can be turned on to filter out inappropriate content as a requirement by OpenAI.
3. You can turn the streaming mode on and off.
4. Turn off storing messages (input prompt and generated completion) for sensitive data like emails.
<Img
caption="Build your pipe: Configuiring the Pipe meta settings"
light="https://raw.githubusercontent.com/LangbaseInc/docs-images/refs/heads/main/pipe/quickstart/updated/meta-light.jpg"
dark="https://raw.githubusercontent.com/LangbaseInc/docs-images/refs/heads/main/pipe/quickstart/updated/meta-dark.jpg"
/>
---
## Step #5: Design a Prompt
Now that you have your LLM model and Pipe meta configured, it's time to design your prompt.
---
### What is a Prompt?
Prompt is the input you provide to the AI model to generate the output.
Typically, a prompt starts a chat thread with a system message, then alternates between user and assistant messages. **Prompt design is important.** At Langbase, we have a few key components to help you design a prompt:
---
### Prompt: System Instructions
A system `message` in prompt acts as the set of instructions for the AI model.
1. It sets the initial context and helps the model understand your intent.
2. Now let's add a system instruction message. You can add this: `You're a helpful AI assistant. You will assist users with their queries about {{company}}. Always ensure that you provide accurate and to the point information.`
<Img
caption="Prompt design: System Instructions"
light="https://raw.githubusercontent.com/LangbaseInc/docs-images/refs/heads/main/pipe/quickstart/updated/system-prompt-light.jpg"
dark="https://raw.githubusercontent.com/LangbaseInc/docs-images/refs/heads/main/pipe/quickstart/updated/system-prompt-dark.jpg"
/>
### Prompt: User Message
1. Now let's add a user message. Click on the `USER` button to add a new message.
2. You can add this: `How to request payment API?`
<Img
caption="Prompt design: Adding a user message"
light="https://raw.githubusercontent.com/LangbaseInc/docs-images/refs/heads/main/pipe/quickstart/updated/user-prompt-light.jpg"
dark="https://raw.githubusercontent.com/LangbaseInc/docs-images/refs/heads/main/pipe/quickstart/updated/user-prompt-dark.jpg"
/>
---
### Prompt: Variables
1. Any text written between double curly brackets `{{}}` becomes a variable.
2. Variables section will display all your variable keys and values.
3. Since you added a variable `{{company}}` notice it appear in variables.
4. Now assessing the company variable value as `ACME`. This pipe will now replace `{{company}}` with its value in all messages.
✨ Variables allow you to use the same pipe with different data.
👏 Congrats, you've created your first AI assistant to generate creative blog titles.
<Img
caption="Prompt design: Adding Variables"
light="https://raw.githubusercontent.com/LangbaseInc/docs-images/refs/heads/main/pipe/quickstart/updated/variables-light.jpg"
dark="https://raw.githubusercontent.com/LangbaseInc/docs-images/refs/heads/main/pipe/quickstart/updated/variables-dark.jpg"
/>
---
### Prompt as Code
We're not writing code here, but if you were to write this prompt as code, it would look like this:
1. **Prompt** is a `messages` array. Inside it are `message` objects.
2. **Each `message` object** typically consists of two properties:
1. `role` either "system", "user", or "assistant".
2. `content` that you're sending or expecting to be generated from the AI LLM.
```js
// Prompt example:
{
messages: [
{ role: 'system', content: 'You are a helpful assistant.' },
{ role: 'user', content: 'How to request payment API?' },
{ role: 'assistant', content: 'Sure, here you go … …' }
];
}
```
---
## Step #6: AI Studio: Playground & Experimentation
Now that you have your Pipe ready, it's time to run and experiment with it in the Langbase AI Studio.
<Note>
Langbase provides the developer experience and infrastructure to build,
collaborate, and deploy secure, composable AI apps. Our mission is to make
AI accessible to everyone, not just AI/ML experts. **Langbase is free for
anyone to [get started][signup]**.
</Note>
<Img
caption="Running your Pipe in Langbase AI Studio"
light="https://raw.githubusercontent.com/LangbaseInc/docs-images/refs/heads/main/pipe/quickstart/updated/run-pipe-light.jpg"
dark="https://raw.githubusercontent.com/LangbaseInc/docs-images/refs/heads/main/pipe/quickstart/updated/run-pipe-dark.jpg"
/>
Langbase is your AI Studio: Our dashboard is your AI playground to build, collaborate, and deploy AI. It allows you to experiment with your pipes in real-time, with real data, store messages, version your prompts, and truly helps you take your idea from building prototypes to deployed in production (with predictions on usage, cost, and effectiveness). Langbase is a complete developers platform for AI.
- ⌘ **Collaborate**: Invite all team members to collaborate on the pipe. Build AI together.
- ⌘ **Developers & Stackholders** All your R&D team, engineering, product, GTM (marketing, sales), and even stackholders can collaborate on the same pipe. It's like a Google Doc x GitHub for AI. That's what makes it so powerful.
---
## Step #7: Save and Deploy
Pipes can be saved as a sandbox or deployed to production.
1. ⌘ **Deploy to Production**: Make your changes available on the API (global, highly available, and scalable).
2. ⌘ **Sandbox versions**: You can save your changes without deploying them to production.
3. ⌘ **Preview versions**: Running your pipe with unsaved changes will create a new preview version.
4. ⌘ **Version History**: You can use the version selector on top left to go back to any deployed or sandbox version.
---
### Pipe: Sandbox version
1. When you make changes, a `Draft fork of v1` current version is created but not saved.
2. Press `Save as Sandbox` button to save your changes as a sandbox version.
<Img
caption="Save your Pipe as a Sandbox version"
light="https://raw.githubusercontent.com/LangbaseInc/docs-images/refs/heads/main/pipe/quickstart/updated/draft-light.jpg"
dark="https://raw.githubusercontent.com/LangbaseInc/docs-images/refs/heads/main/pipe/quickstart/updated/draft-dark.jpg"
/>
---
### Pipe: Deploy to production
1. You can deploy any sandbox version or draft fork to production.
2. Once you're ready, press the `Deploy to Production` button to make your changes available on the API.
✨ Woohoo! You've created and deployed your first AI pipe in production.
<Img
caption="Deploy pipe to production"
light="https://raw.githubusercontent.com/LangbaseInc/docs-images/refs/heads/main/pipe/quickstart/updated/sandbox-light.jpg"
dark="https://raw.githubusercontent.com/LangbaseInc/docs-images/refs/heads/main/pipe/quickstart/updated/sandbox-dark.jpg"
/>
<Img
caption="Deployed production version of your Pipe"
light="https://raw.githubusercontent.com/LangbaseInc/docs-images/refs/heads/main/pipe/quickstart/updated/production-light.jpg"
dark="https://raw.githubusercontent.com/LangbaseInc/docs-images/refs/heads/main/pipe/quickstart/updated/production-dark.jpg"
/>
---
## Step #8: Pipe API
Now that you have deployed your AI support agent Pipe, you can use it in your apps, websites, or literally anywhere you want.
1. Go to the `API` tab.
2. Retrieve your API base URL and API key.
3. Make sure to never use your API key on client-side code. Always use it on server-side code. Your API key is like a password, keep it safe. If you think it's compromised, you can always regenerate a new one.
<Img
caption="Pipe API and API Key: Use your Pipe in your apps"
light="https://raw.githubusercontent.com/LangbaseInc/docs-images/refs/heads/main/pipe/quickstart/updated/api-light.jpg"
dark="https://raw.githubusercontent.com/LangbaseInc/docs-images/refs/heads/main/pipe/quickstart/updated/api-dark.jpg"
/>
---
Using the API key and base URL, you can now make requests to your Pipe.
```shell
curl https://api.langbase.com/v1/pipes/run \
-H 'Content-Type: application/json' \
-H 'Authorization: Bearer <PIPE-API-KEY>' \
-d '{
"messages": [{
"role": "user",
"content": "How to request payment API?"
}],
"stream": true
}'
```
---
You can also send new values to the variables in your prompt.
```shell
curl 'https://api.langbase.com/v1/pipes/run' \
-H 'Content-Type: application/json' \
-H 'Authorization: Bearer <PIPE-API-KEY>' \
-d '{
"messages": [{
"role": "user",
"content": "How to request payment API?"
}],
"variables": [{
"name": "company",
"value": "XYZ"
}],
"stream": true
}'
```
---
> On the `API` tab, you can also find interactive API components to test your pipe in real-time.
---
## Step #9: Usage
1. In the Pipe tab, scroll down and expand the `Runs` section.
2. Click on any row of the runs to see detailed logs.
3. Here you can see detailed logs of all your pipe runs including each request cost cost, tokens, latency, etc.
<Img
caption="Pipe API and API Key: Use your Pipe in your apps"
light="https://raw.githubusercontent.com/LangbaseInc/docs-images/refs/heads/main/pipe/quickstart/updated/run-light.jpg"
dark="https://raw.githubusercontent.com/LangbaseInc/docs-images/refs/heads/main/pipe/quickstart/updated/run-dark.jpg"
/>
For overall Pipe stats, navigate to the `Usage` tab.
1. Here you can see the total number of requests, cost, and
2. You can also check our AI prediction engine, predicting cost per million requests to your pipe.
3. Finally, you can see the real-time run of your pipe in the `Runs` section again.
<Img
caption="Pipe Usage and Cost Prediction"
light="https://raw.githubusercontent.com/LangbaseInc/docs-images/refs/heads/main/pipe/quickstart/updated/usage-light.jpg"
dark="https://raw.githubusercontent.com/LangbaseInc/docs-images/refs/heads/main/pipe/quickstart/updated/usage-dark.jpg"
/>
</ContentTab>
</ContentTabs>
---
✨ **Congrats, you have created your first AI pipe**. We're excited to see what you build with it.
---
## Next Steps
Feel free to experiment with different LLM models, prompts, and configurations.
- Next up, use the [API Reference](/api-reference/pipe) to learn more about pipe's API.
- You can also check out 20+ pipe features from the left sidebar.
- Join our [Discord community](https://langbase.com/discord) for feedback, requests, and support.
Share your feedback and suggestions with us. Post on [𝕏 (Twitter)][x], [LinkedIn][li], or [email us][email].
We're here to help you turn your ideas into AI.
Let's go!
---
[signup]: https://langbase.fyi/awesome
[pn]: https://pipe.new/
[x]: https://twitter.com/LangbaseInc
[li]: https://www.linkedin.com/company/langbase/
[email]: mailto:support@langbase.com?subject=Pipe-Quickstart&body=Ref:%20https://langbase.com/docs/pipe/quickstart
[opp]: https://langbase.com/langbase/ai-support-agent
</LanguageProvider>
</content>
</doc>
<doc>
<metadata>
<title>Pipe Features</title>
<url>https://langbase.com/docs/pipe/features/</url>
</metadata>
<content>
import { generateMetadata } from '@/lib/generate-metadata';
# Pipe Features
Explore the comprehensive list of features offered by Langbase Pipes. Dive into more details on their pages.
### API and Integration
- [Generations](/features/generate)
- [Chat Generations](/features/chat)
- [API](/features/api)
### Prompt Engineering and Response Control
- [Prompts](/features/prompt)
- [Variables](/features/variables)
- [Few Shot Training](/features/few-shot-training)
- [Safety](/features/safety)
- [Stream](/features/stream)
### Advanced Features
- [Keysets](/features/keysets)
- [Experiments](/features/experiments)
- [Pipe Versions](/features/versions)
- [Fork Pipes](/features/fork)
- [JSON Mode](/features/json-mode)
- [Messages Storage](/features/store-messages)
- [Moderation](/features/moderation)
- [Pipe Examples](/features/examples)
- [Model Presets](/features/model-presets)
- [Readme](/features/readme)
### Analytics and Monitoring
- [Usage](/features/usage)
- [Logs](/features/logs)
</content>
</doc>
<doc>
<metadata>
<title>FAQ</title>
<url>https://langbase.com/docs/pipe/faqs/</url>
</metadata>
<content>
import { generateMetadata } from '@/lib/generate-metadata';
# FAQ
Let's take a look at some frequently asked questions about Pipe.
---
## What is a Pipe?
Pipe is a high-level layer to Large Language Models (LLMs) that creates a personalized AI assistant for your queries. It can leverage any LLM models, tools, and knowledge with your datasets to assist with your queries.
---
## What is a System Prompt Instruction?
Initial setup or instruction for the LLM that configures or instructs the LLM on how to behave.
---
## What is a User Prompt?
A text input that a user provides to an LLM to which the model responds.
---
## What is an AI Prompt?
The LLM's generated output in response to a user prompt.
---
## How to run Playground in Pipe?
Assuming the Pipe API keys are configured:
1. Select any LLM model. By default OpenAI `gpt-4o-mini` is selected.
2. If the Pipe is of type `generate`, simply run it.
3. If it is a `chat` pipe, write hello in Playground and run the Pipe.
---
## Can I add readme to a pipe?
Yes, you can add readme to any Pipe.
When you create a Pipe, it already contains a readme. Go all the way down in a Pipe. You will find a readme there. Simply edit it.
---
## Can I run experiments on a chat Pipe?
No, only `generate` type Pipes can run experiments.
---
## Where can I find the Pipe API key?
Navigate to the API tab in the Pipe navbar. Here you will find Pipe API secret.
---
## Does each Pipe have its own API key?
Yes, every Pipe you create on Langbase contains its unique API key.
---
## Pipe Playground is not running. How can I fix it?
- Check if you have configured the LLM API key for your selected model.
- Try providing a user prompt if you are not providing it already.
---
</content>
</doc>
<doc>
<metadata>
<title>Limits</title>
<url>https://langbase.com/docs/pipe/limits/</url>
</metadata>
<content>
import { generateMetadata } from '@/lib/generate-metadata';
# Limits
Beta phase limits on Langbase Pipes.
- Free tier: 1,000 Pipe runs - requests per month
- Pro tier: $20/mo, 50M tokens, 20K Pipe runs (requests), then $2 per 1000 requests (max 1K tokens per request)
## Rate Limits
- Free: 1 request per second
- Pro: 10 requests per second (custom enterprise packages available up to 1K requests per second)
<Warn>
Langbase is in the public beta stage right now. These limits and pricing are
subject to change without notice. Please bear with us as we improve and get
ready for a stable release and massive scale. Already processing tens of
billions of AI tokens every month, you're in good hands. Feedback welcomed.
</Warn>
---
</content>
</doc>
<doc>
<metadata>
<title>Pipe Examples</title>
<url>https://langbase.com/docs/pipe/examples/</url>
</metadata>
<content>
import { generateMetadata } from '@/lib/generate-metadata';
# Pipe Examples
Examples of Apps built using [Pipe](/pipe) and its features like generate, chat, stream, moderate, and JSON.
---
## AI Tech Guide Writer
This example uses a simple [tech guide writer](https://langbase.com/langbase/tech-guide-writer) Pipe. It uses the Pipe `generate` API to generate guides on the provided topic. You can also define max words and sentences per paragrah.
Since the app uses a [Pipe](/pipe), we can easily **switch** LLM models without changing the code. Right now, it is using the `gemma-7b-it` model from Groq.
[Try out](https://ai-tech-guide-writer.langbase.dev/) the example and take a look at the [source code](https://github.com/LangbaseInc/langbase/tree/main/examples/tech-guide-writer) to see how easy it is to build an app using Pipe.
<CTAButtons
example
primary={{ href: 'https://langbase.com/langbase/tech-guide-writer', text: '⌘ Pipe Playground' }}
secondary={{ href: 'https://langbase.com/langbase/tech-guide-writer/fork', text: 'Fork pipe' }}
/>
<Img
caption="AI Tech Guide Writer Example"
src="https://raw.githubusercontent.com/LangbaseInc/docs-images/main/pipe/examples/ai-tech-guide-writer.jpg"
/>
---
## AI Chatbot
This example uses a [chatbot](https://langbase.com/examples/ai-chatbot) Pipe on Langbase to create an efficient, streaming-enabled chatbot for any use-case. It uses the Pipe `chat` API.
Since the app uses a [Pipe](/pipe), we can easily **switch** to any LLM model from the extensive list of [providers](/supported-models-and-providers) on Langbase. You can customize the prompt of the pipe, and the chatbot will respond accordingly.
[Try out](https://ai-chatbot.langbase.dev/) the example and take a look at the [source code](https://github.com/LangbaseInc/langbase/tree/main/examples/ai-chatbot) to see how easy it is to build an app using Pipe.
<CTAButtons
example
primary={{ href: 'https://langbase.com/examples/ai-chatbot', text: '⌘ Pipe Playground' }}
secondary={{ href: 'https://langbase.com/examples/ai-chatbot/fork', text: 'Fork pipe' }}
/>
<Img
caption="AI Chatbot built using Langbase Pipe"
src="https://github.com/LangbaseInc/langbase-examples/raw/main/examples/ai-chatbot/public/chatbot.jpg"
/>
---
## ASCII Software Architect
This example uses a [chatbot](https://langbase.com/examples/ascii-software-architect) Pipe on Langbase to create ASCII Software Architect, which generates ASCII UML Class diagrams for code comprehension, design documentation, collaborative planning, and legacy system analysis. It uses the Pipe `chat` API.
Since the app uses a [Pipe](/pipe), we can easily **switch** to any LLM model from the extensive list of [providers](/supported-models-and-providers) on Langbase. You can customize the prompt of the pipe, and the chatbot will respond accordingly.
[Try out](https://ascii-software-architect.langbase.dev/) the example and take a look at the [source code](https://github.com/LangbaseInc/langbase/tree/main/examples/ascii-software-architect) to see how easy it is to build an app using Pipe and Chat UI. To use this chatbot, you can select one of the suggestions presented in the menu. See conversation tips to get the best results out of this chatbot.
<CTAButtons
example
primary={{ href: 'https://langbase.com/examples/ascii-software-architect', text: '⌘ Pipe Playground' }}
secondary={{ href: 'https://langbase.com/examples/ascii-software-architect/fork', text: 'Fork pipe' }}
/>
<Img
caption="ASCII Software Architect chatbot built using Langbase Pipe"
src="https://raw.githubusercontent.com/LangbaseInc/docs-images/main/examples/ascii-software-architect/ascii-software-architect-chatbot.png"
/>
---
## Expert Proofreader
This example uses a [chatbot](https://langbase.com/examples/expert-proofreader) Pipe on Langbase to create Expert Proofreader, refining language, ensuring style consistency, correcting grammar, and enhancing clarity while preserving accuracy. It uses the Pipe `chat` API.
Since the app uses a [Pipe](/pipe), we can easily **switch** to any LLM model from the extensive list of [providers](/supported-models-and-providers) on Langbase. You can customize the prompt of the pipe, and the chatbot will respond accordingly.
[Try out](https://expert-proofreader.langbase.dev/) the example and take a look at the [source code](https://github.com/LangbaseInc/langbase/tree/main/examples/expert-proofreader) to see how easy it is to build an app using Pipe and Chat UI. To use the Expert Proofreader chatbot, you can select one of the suggestions presented in the menu. See conversation tips to get the best results.
<CTAButtons
example
primary={{ href: 'https://langbase.com/examples/expert-proofreader', text: '⌘ Pipe Playground' }}
secondary={{ href: 'https://langbase.com/examples/expert-proofreader/fork', text: 'Fork pipe' }}
/>
<Img
caption="Expert Proofreader AI Assistant built using Langbase Pipe"
src="https://raw.githubusercontent.com/LangbaseInc/docs-images/main/examples/expert-proofreader/expert-proofreader-chatbot.png"
/>
---
## JavaScript Tutor
This example uses a [chatbot](https://langbase.com/examples/js-tutor) Pipe on Langbase to create JavaScript Tutor, offering interactive lessons, progress tracking, quizzes, and the ability to skip levels for targeted learning. It uses the Pipe `chat` API.
Since the app uses a [Pipe](/pipe), we can easily **switch** to any LLM model from the extensive list of [providers](/supported-models-and-providers) on Langbase. You can customize the prompt of the pipe, and the chatbot will respond accordingly.
[Try out](https://js-tutor.langbase.dev/) the example and take a look at the [source code](https://github.com/LangbaseInc/langbase/tree/main/examples/js-tutor) to see how easy it is to build an app using Pipe. To use this chatbot, select the suggestion presented in the menu. See conversation tips for the best results.
<CTAButtons
example
primary={{ href: 'https://langbase.com/examples/js-tutor', text: '⌘ Pipe Playground' }}
secondary={{ href: 'https://langbase.com/examples/js-tutor/fork', text: 'Fork pipe' }}
/>
<Img
caption="JavaScript Tutor Chatbot built using Langbase Pipe"
src="https://raw.githubusercontent.com/LangbaseInc/docs-images/main/examples/js_tutor/js-tutor-chatbot.png"
/>
---
## English CEFR Level Assessment Bot
This example uses a [chatbot](https://langbase.com/examples/cefr-level-assessment-bot) Pipe on Langbase to create English CEFR Level Assessment Bot, an AI Assistant that assess your english language skills based on interactive skill assessment test (comprehension and writing). It uses the Pipe `chat` API.
Since the app uses a [Pipe](/pipe), we can easily **switch** to any LLM model from the extensive list of [providers](/supported-models-and-providers) on Langbase. You can customize the prompt of the pipe, and the chatbot will respond accordingly.
[Try out](https://cefr-level-assessment-bot.langbase.dev/) the example and take a look at the [source code](https://github.com/LangbaseInc/langbase/tree/main/examples/cefr-level-assessment-bot) to see how easy it is to build an app using Pipe and Chat UI. To use English CEFR Level Assessment Bot,
interact with the chatbot by answering questions. At the end of the interactive conversation/test, you can receive a rough assessment of your english proficiency from the English CEFR Level Assessment chatbot.
<CTAButtons
example
primary={{ href: 'https://langbase.com/examples/cefr-level-assessment-bot', text: '⌘ Pipe Playground' }}
secondary={{ href: 'https://langbase.com/examples/cefr-level-assessment-bot/fork', text: 'Fork pipe' }}
/>
<Img
caption="English CEFR Level Assessment Bot built using Langbase Pipe"
src="https://raw.githubusercontent.com/LangbaseInc/docs-images/main/examples/cefr-level-assessment-bot/cefr-level-assessment-bot.png"
/>
---
## AI Master Chef
This example uses a [chatbot](https://langbase.com/examples/ai-master-chef) Pipe on Langbase to create AI MasterChef, your ultimate culinary assistant, designed to inspire home cooks, aspiring chefs, and food enthusiasts alike. It uses the Pipe `chat` API.
Since the app uses a [Pipe](/pipe), we can easily **switch** to any LLM model from the extensive list of [providers](/supported-models-and-providers) on Langbase. You can customize the prompt of the pipe, and the chatbot will respond accordingly.
[Try out](https://ai-master-chef.langbase.dev/) the example and take a look at the [source code](https://github.com/LangbaseInc/langbase/tree/main/examples/ai-master-chef) to see how easy it is to build an app using Pipe and Chat UI. To use AI Master Chef
you can use the following text as an example:
```
You: Hello
AI Master Chef: ...
You: I have rice and chicken help me cook something delicious today
```
<CTAButtons
example
primary={{ href: 'https://langbase.com/examples/ai-master-chef', text: '⌘ Pipe Playground' }}
secondary={{ href: 'https://langbase.com/examples/ai-master-chef/fork', text: 'Fork pipe' }}
/>
<Img
caption="AI MasterChef Chatbot built using Langbase Pipe"
src="https://raw.githubusercontent.com/LangbaseInc/docs-images/main/examples/ai-master-chef/ai-master-chef.png"
/>
---
## AI Drug Assistant
This example uses a [chatbot](https://langbase.com/examples/ai-drug-assistant) Pipe on Langbase to create AI Drug Assistant, provides you with comprehensive details on medications, including main ingredients, pharmacological principles, efficacy, indications, dosage, and administration. It uses the Pipe `chat` API.
Since the app uses a [Pipe](/pipe), we can easily **switch** to any LLM model from the extensive list of [providers](/supported-models-and-providers) on Langbase. You can customize the prompt of the pipe, and the chatbot will respond accordingly.
[Try out](https://ai-drug-assistant.langbase.dev/) the example and take a look at the [source code](https://github.com/LangbaseInc/langbase/tree/main/examples/ai-drug-assistant) to see how easy it is to build an app using Pipe and Chat UI. To use AI Drug Assistant
you can use you the following text as an example:
```
You: Hello
AI Drug Assistant: ...
You: Explain how to properly store and administer insulin, including potential interactions with other medications
```
<CTAButtons
example
primary={{ href: 'https://langbase.com/examples/ai-master-chef', text: '⌘ Pipe Playground' }}
secondary={{ href: 'https://langbase.com/examples/ai-master-chef/fork', text: 'Fork pipe' }}
/>
<Img
caption="AI Drug Assistant built using Langbase Pipe"
src="https://raw.githubusercontent.com/LangbaseInc/docs-images/main/examples/ai-drug-assistant/ai-drug-assistant.png"
/>
---
## Excel Master Chatbot
This example uses a [chatbot](https://langbase.com/examples/excel-master) Pipe on Langbase to create Excel Master, providing assistance with Excel tasks including requirement analysis, formula generation, component explanation, implementation guidance, and troubleshooting. It uses the Pipe `chat` API.
Since the app uses a [Pipe](/pipe), we can easily **switch** to any LLM model from the extensive list of [providers](/supported-models-and-providers) on Langbase. You can customize the prompt of the pipe, and the chatbot will respond accordingly.
[Try out](https://excel-master.langbase.dev/) the example and take a look at the [source code](https://github.com/LangbaseInc/langbase/tree/main/examples/excel-master) to see how easy it is to build an app using Pipe and Chat UI. To use the Excel Master chatbot, you can select one of the suggestions presented in the menu.
<CTAButtons
example
primary={{ href: 'https://langbase.com/examples/excel-master', text: '⌘ Pipe Playground' }}
secondary={{ href: 'https://langbase.com/examples/excel-master/fork', text: 'Fork pipe' }}
/>
<Img
caption="Excel Master chatbot built using Langbase Pipe"
src="https://raw.githubusercontent.com/LangbaseInc/docs-images/main/examples/excel-master/excel-master-chatbot.png"
/>
---
## Pseudocode Generator Chatbot
This example uses a [chatbot](https://langbase.com/examples/pseudocode-generator) Pipe on Langbase to create Pseudocode Generator chatbot, offering features like requirement analysis, structured pseudocode generation, data structure explanation, step-by-step comments, time complexity analysis, and reasoning behind the algorithm. It uses the Pipe `chat` API.
Since the app uses a [Pipe](/pipe), we can easily **switch** to any LLM model from the extensive list of [providers](/supported-models-and-providers) on Langbase. You can customize the prompt of the pipe, and the chatbot will respond accordingly.
[Try out](https://pseudocode-generator.langbase.dev/) the example and take a look at the [source code](https://github.com/LangbaseInc/langbase/tree/main/examples/pseudocode-generator) to see how easy it is to build an app using Pipe and Chat UI. To use the Pseudocode Generator, you can select one of the suggestions presented in the menu.
<CTAButtons
example
primary={{ href: 'https://langbase.com/examples/pseudocode-generator', text: '⌘ Pipe Playground' }}
secondary={{ href: 'https://langbase.com/examples/pseudocode-generator/fork', text: 'Fork pipe' }}
/>
<Img
caption="Pseudocode Generator chatbot built using Langbase Pipe"
src="https://raw.githubusercontent.com/LangbaseInc/docs-images/main/examples/pseudocode-generation/pseudocode-generator-chatbot.png"
/>
---
## Product Review Generator Chatbot
This example uses a [chatbot](https://langbase.com/examples/product-review-generator) Pipe on Langbase to create Product Review Generator, featuring review crafting, user satisfaction assessment, targeted inquiry, balanced overviews, and consumer insight to generate concise and helpful product reviews based on user feedback. It uses the Pipe `chat` API.
Since the app uses a [Pipe](/pipe), we can easily **switch** to any LLM model from the extensive list of [providers](/supported-models-and-providers) on Langbase. You can customize the prompt of the pipe, and the chatbot will respond accordingly.
[Try out](https://product-review-generator.langbase.dev/) the example and take a look at the [source code](https://github.com/LangbaseInc/langbase/tree/main/examples/product-review-generator) to see how easy it is to build an app using Pipe and Chat UI. To use this chatbot, you can select one of the suggestions presented in the menu. See conversation tips to get the best results.
<CTAButtons
example
primary={{ href: 'https://langbase.com/examples/product-review-generator', text: '⌘ Pipe Playground' }}
secondary={{ href: 'https://langbase.com/examples/product-review-generator/fork', text: 'Fork pipe' }}
/>
<Img
caption="Product Review Generator chatbot built using Langbase Pipe"
src="https://raw.githubusercontent.com/LangbaseInc/docs-images/main/examples/product-review-generator/product-review-generator-chatbot.png"
/>
---
## Dev Screener Chatbot
This example uses a [chatbot](https://langbase.com/examples/dev-screener) Pipe on Langbase to create Dev Screener, which enhances the candidate experience through personalized interviews and optimizes the talent pool by systematically evaluating and categorizing applicants for efficient HR decision-making. It uses the Pipe `chat` API.
Since the app uses a [Pipe](/pipe), we can easily **switch** to any LLM model from the extensive list of [providers](/supported-models-and-providers) on Langbase. You can customize the prompt of the pipe, and the chatbot will respond accordingly.
[Try out](https://dev-screener.langbase.dev/) the example and take a look at the [source code](https://github.com/LangbaseInc/langbase/tree/main/examples/dev-screener) to see how easy it is to build an app using Pipe and Chat UI. To use this chatbot, select a suggestion from the menu to start a guided conversation. See the conversation tips to get the best results.
<CTAButtons
example
primary={{ href: 'https://langbase.com/examples/dev-screener', text: '⌘ Pipe Playground' }}
secondary={{ href: 'https://langbase.com/examples/dev-screener/fork', text: 'Fork pipe' }}
/>
<Img
caption="Dev Screener (HR support chatbot for initial screening) built using Langbase Pipe"
src="https://raw.githubusercontent.com/LangbaseInc/docs-images/main/examples/dev-screener/dev-screener-chatbot.png"
/>
---
## API Security Consultant Chatbot based on OWASP 2023
This example uses a [chatbot](https://langbase.com/examples/api-sec-consultant) Pipe on Langbase to create API Security Consultant, which guides users through a comprehensive OWASP 2023-based API security assessment via a structured MCQ process that evaluates vulnerabilities, educates developers, and ensures compliance. It uses the Pipe `chat` API.
Since the app uses a [Pipe](/pipe), we can easily **switch** to any LLM model from the extensive list of [providers](/supported-models-and-providers) on Langbase. You can customize the prompt of the pipe, and the chatbot will respond accordingly.
[Try out](https://api-sec-consultant.langbase.dev/) the example and take a look at the [source code](https://github.com/LangbaseInc/langbase/tree/main/examples/api-sec-consultant) to see how easy it is to build an app using Pipe and Chat UI. To use this Chatbot, select a suggestion from the menu to start a guided conversation. See conversation tips to get the best.
<CTAButtons
example
primary={{ href: 'https://langbase.com/examples/api-sec-consultant', text: '⌘ Pipe Playground' }}
secondary={{ href: 'https://langbase.com/examples/api-sec-consultant/fork', text: 'Fork pipe' }}
/>
<Img
caption="API Security Consultant chatbot built using Langbase Pipe"
src="https://raw.githubusercontent.com/LangbaseInc/docs-images/main/examples/api-sec-consultant/api-sec-consultant-chatbot.png"
/>
---
</content>
</doc>
<doc>
<metadata>
<title>Concepts</title>
<url>https://langbase.com/docs/pipe/concepts/</url>
</metadata>
<content>
import { generateMetadata } from '@/lib/generate-metadata';
# Concepts
Pipe is the fastest way to turn ideas into AI. Pipe is like an AI feature. It is a high-level layer to Large Language Models (LLMs) that creates a personalized AI assistant for your queries.
Let's understand the key concepts of Pipe:
---
## Meta
The Pipe meta defines its configuration. It contains the following information:
### Type
The type of Pipe, i.e., `generate` or `chat`. The type of Pipe determines the behavior of the Pipe. For example:
- Generate Pipe is designed to [generate](/features/generate) LLM completions.
- Chat Pipe is designed to create a [conversational](/features/chat) AI agent.
### Stream mode
Handles whether the Pipe should [stream](/features/stream) the response or not. If enabled, the Pipe will stream the response in real-time.
### Store messages
Pipe can store both prompts and their completions if the [Store messages](/features/store-messages) in Pipe meta is enabled on. Otherwise, only [system prompts](/features/prompt) and [few-shot messages](/features/few-shot-training) will be saved. No completions, final prompts or variables will be retained to ensure privacy.
### Moderate
Available only for OpenAI models. [Moderation](/features/moderation) endpoint by OpenAI identifies harmful content. If enabled, Langbase blocks flagged requests automatically.
### JSON
Enforces the completion to be in [JSON format](/features/json-mode). If enabled, the completion will be in JSON format.
---
## Variables
Any text written between `{{}}` in your prompt instructions acts as a [variable](/features/variables) to which you can assign different values using the variable section. Variables will appear once you add them using `{{variableName}}`.
On runtime, these [variable](/features/variables) will dynamically populate with the assigned values during execution
---
## Safety
Define AI [safety](/features/safety) prompt for any LLM inside a Pipe. For instance, do not answer questions outside of the given context.
One of its use cases can be to ensure the LLM does not provide any sensitive information in its response from the provided context.
---
## Experiments
They help you learn how your latest Pipe config will affect LLM response by running it against your previous `generate` requests.
One example of [Experiments](/features/experiments) can be changing Pipe's LLM model to `gemma-7b-it` from `gpt-4-turbo-preview` to check how the response will look like.
---
## Few-shot training
It helps AI LLM pick up and apply knowledge from just a handful of examples.
Pipe lets you define multiple user and AI assistant prompts and completion pairs that can be used to [few-shot train](/features/few-shot-training) any LLM.
---
## Pipe level keysets
Pipe LLM keyset is specific to each individual pipe. When selected, the Pipe doesn't use the user/org LLM API keys but instead use the Pipe level [keyset](/features/keysets) added to it in its settings.
---
</content>
</doc>
<doc>
<metadata>
<title>Page</title>
<url>https://langbase.com/docs/parser/platform/</url>
</metadata>
<content>
import { generateMetadata } from '@/lib/generate-metadata';
## Platform
Limits and pricing for Parser primitive on the Langbase Platform are as follows:
1. **[Limits](/parser/platform/limits)**: Rate and usage limits.
2. **[Pricing](/parser/platform/pricing)**: Pricing details for the Parser primitive.
</content>
</doc>
<doc>
<metadata>
<title>Quickstart: Build efficient RAG with Langbase</title>
<url>https://langbase.com/docs/memory/quickstart/</url>
</metadata>
<content>
import { generateMetadata } from '@/lib/generate-metadata';
<LanguageProvider defaultLanguage='typescript'>
# Quickstart: Build efficient RAG with Langbase
### A step-by-step guide to building a RAG solution with Langbase
---
In this guide, you will learn how to build a highly scalable RAG powered AI support agent. You will:
- Create an **AI Memory agent** that will contain FAQ data.
- Create an **AI support agent** pipe configured with `gpt-4o-mini` model.
- **Connect** the AI Memory agent to the AI support agent pipe to create a RAG solution
---
## Let's get started
There are two ways to follow this guide:
- [SDK](/sdk) - TypeScript SDK to create and run pipes, memory, and more.
- [Studio](https://studio.langbase.com) - Web-based AI Studio.
---
<ContentTabs>
<ContentTab title="Using SDK">
---
## Step #1: Generate Langbase API key
Every request you send to Langbase needs an [API key](/api-reference/api-keys). This guide assumes you already have one. In case, you do not have an API key, please check the instructions below.
<Spoiler title="Get your Langbase API key: User or Org">
You can generate API keys from the [Langbase Studio](https://studio.langbase.com) by following these steps:
1. Switch to your user or org account.
2. From the sidebar, click on the `API keys`.
3. From here you can create a new API key or manage existing ones.
For more details, follow the [Langbase API keys](/api-reference/api-keys) documentation.
</Spoiler>
---
## Step #2: Add LLM API keys
If you have set up LLM API keys in your profile, the Pipe will automatically use them. If not, navigate to [LLM API keys](https://langbase.com/settings/keys#keyset) page and add keys for different providers like OpenAI, TogetherAI, Anthropic, etc.
<Spoiler title="Add LLM API keys to your account">
You can add LLM API keys in your account using [Langbase Studio](https://studio.langbase.com) by following these steps:
1. Switch to your user or org account.
2. From the sidebar, click on the `API keys` and scroll down to the LLM API keys section.
3. From here you can add LLM API keys for different providers like OpenAI, TogetherAI, Anthropic, etc.
</Spoiler>
---
## Step #3: Setup your project [lang]
Create a new directory for your project and navigate to it.
<CodeGroup exampleTitle="Project setup" title="Project setup">
```bash
mkdir ai-support-agent && cd ai-support-agent
```
</CodeGroup>
### Initialize the project
<LanguageContent language="typescript">
Create a new Node.js project.
<CodeGroup exampleTitle="Initialize project" title="Initialize project">
```bash {{ title: 'npm' }}
npm init -y
```
```bash {{ title: 'pnpm' }}
pnpm init
```
```bash {{ title: 'yarn' }}
yarn init -y
```
</CodeGroup>
</LanguageContent>
<LanguageContent language="python">
Now let's create a new virtual environment and activate it.
<CodeGroup exampleTitle="Initialize project" title="Initialize project">
```bash {{ title: 'macOS/Linux' }}
python -m venv .venv && source .venv/bin/activate
```
```bash {{ title: 'Windows' }}
python -m venv .venv && .venv\Scripts\activate
```
</CodeGroup>
</LanguageContent>
### Install dependencies
You will use the [Langbase SDK](/sdk) to connect to the AI agent pipes and `dotenv` to manage environment variables. So, let's install these dependencies.
<LanguageContent language="typescript">
<CodeGroup exampleTitle="Install dependencies" title="Install dependencies">
```bash {{ title: 'npm' }}
npm i langbase dotenv
```
```bash {{ title: 'pnpm' }}
pnpm add langbase dotenv
```
```bash {{ title: 'yarn' }}
yarn add langbase dotenv
```
</CodeGroup>
</LanguageContent>
<LanguageContent language="python">
<CodeGroup exampleTitle="Install dependencies" title="Install dependencies">
```bash
pip install langbase python-dotenv
```
</CodeGroup>
</LanguageContent>
### Create an env file
Create a `.env` file in the root of your project and add the following environment variables:
```bash {{ title: '.env' }}
LANGBASE_API_KEY=xxxxxxxxx
```
Replace `xxxxxxxxx` with your Langbase API key.
---
## Step #4: Create an AI Memory agent
<LanguageContent language="typescript">
To create an AI Memory agent, you will use the [Langbase SDK](/sdk) to create a new Memory. Create a new file `create-memory.ts` and add the following code:
<CodeGroup exampleTitle="Create an AI Memory" title="create-memory.ts">
```ts
import 'dotenv/config';
import { Langbase } from 'langbase';
const langbase = new Langbase({
apiKey: process.env.LANGBASE_API_KEY!,
});
async function main() {
const memory = await langbase.memories.create({
name: 'support-memory-agent',
description: 'Support chatbot memory agent',
});
console.log('Memory:', memory);
}
main();
```
</CodeGroup>
</LanguageContent>
<LanguageContent language="python">
To create an AI Memory agent, you will use the [Langbase SDK](/sdk) to create a new Memory. Create a new file `create-memory.py` and add the following code:
<CodeGroup exampleTitle="Create an AI Memory" title="create-memory.py">
```python
import json
import os
from dotenv import load_dotenv
from langbase import Langbase
def main():
load_dotenv()
# Get API key from environment variable
langbase_api_key = os.getenv("LANGBASE_API_KEY")
# Initialize the client
langbase = Langbase(api_key=langbase_api_key)
response = langbase.memories.create(
name="support-memory-agent",
description="Support chatbot memory agent"
)
print(json.dumps(response, indent=2))
if __name__ == "__main__":
main()
```
</CodeGroup>
</LanguageContent>
Now run the following command in your terminal to create an AI Memory agent:
<LanguageContent language="typescript">
```bash {{ title: 'Create an AI Memory agent' }}
npx tsx create-memory.ts
```
</LanguageContent>
---
## Step #5: Upload FAQs data
You will use the [`langbase.memories.upload()`](/sdk/memory/document-upload) function to upload content to the memory agent. Let's upload FAQs to the memory agent.
<LanguageContent language='typescript'>
Create a new file `upload-doc.ts` and add the following code:
<CodeGroup exampleTitle="Upload document in memory" title="upload-doc.ts">
```ts
import 'dotenv/config';
import { Langbase } from 'langbase';
const langbase = new Langbase({
apiKey: process.env.LANGBASE_API_KEY!,
});
async function main(content: string) {
// Create a Blob object with the FAQs content
const documentBlob = new Blob([content], { type: 'text/plain' });
// Create a File object from the Blob object
const document = new File([documentBlob], 'langbase-faqs.txt', { type: 'text/plain' });
// Upload the document to the memory agent
const response = await langbase.memories.documents.upload({
document,
memoryName: 'support-memory-agent',
contentType: 'text/plain',
documentName: 'langbase-faqs.txt',
});
console.log('Document uploaded:', response);
}
// FAQs content
const langbaseFAQs = `
How to reset password?
Step 1: Access Profile Settings
1. Log in to your Langbase account.
2. Navigate to the [Profile Settings page](https://langbase.com/settings/profile)
Step 2: Change Your Password
1. Scroll to the Reset Password section.
2. Enter your new password in the New Password box.
3. Click Set Password to confirm the change.
How to edit user profile?
Step 1: Access Profile Settings
1. Log in to your Langbase account.
2. Navigate to the Profile Settings page.
Step 2: Edit Your Profile
1. Click on Change Profile Picture to upload an image from
your computer.
• Note: The image should be in PNG or JPG format and must
not exceed 1MB in size.
2. Enter a name for your profile in the Name field.
3. Create a username for your profile using a hyphen-separated
format in the Username field.
4. Write a short bio in the Bio field.
Step 3: Save Your Changes
1. Click Save Changes to apply your edits.
How to upgrade organization plan?
Step 1: Access the Organization Billing Page
1. Log in to your Langbase account.
2. Navigate to your Organization Profile page.
3. Click the Billing button in the top-right corner.
Step 2: Review Current Billing Status
1. In the Subscription section, view your current plan, term,
and status details.
2. The Usage section summarizes your organization's activity,
including the total number of pipes, requests, and memory usage.
Step 3: Upgrade to Pro or Enterprise
1. Go to the Plans section to compare and explore available
subscription options.
2. Click Subscribe or Let's Talk and follow the prompts to
complete the upgrade.
`;
main(langbaseFAQs);
```
</CodeGroup>
You can also import a file using `fs` module and pass it as a value to `document`.
Let's run the script to upload the FAQs data to the memory agent:
```bash {{ title: 'Upload document to memory agent' }}
npx tsx upload-doc.ts
```
</LanguageContent>
<LanguageContent language='python'>
Create a new file `upload-doc.py` and add the following code:
<CodeGroup exampleTitle="Upload document in memory" title="upload-doc.py">
```python
import os
from dotenv import load_dotenv
from langbase import Langbase
load_dotenv()
# FAQs content
langbaseFAQs = """How to reset password?
Step 1: Access Profile Settings
1. Log in to your Langbase account.
2. Navigate to the [Profile Settings page](https://langbase.com/settings/profile)
Step 2: Change Your Password
1. Scroll to the Reset Password section.
2. Enter your new password in the New Password box.
3. Click Set Password to confirm the change.
How to edit user profile?
Step 1: Access Profile Settings
1. Log in to your Langbase account.
2. Navigate to the Profile Settings page.
Step 2: Edit Your Profile
1. Click on Change Profile Picture to upload an image from
your computer.
• Note: The image should be in PNG or JPG format and must
not exceed 1MB in size.
2. Enter a name for your profile in the Name field.
3. Create a username for your profile using a hyphen-separated
format in the Username field.
4. Write a short bio in the Bio field.
Step 3: Save Your Changes
1. Click Save Changes to apply your edits.
How to upgrade organization plan?
Step 1: Access the Organization Billing Page
1. Log in to your Langbase account.
2. Navigate to your Organization Profile page.
3. Click the Billing button in the top-right corner.
Step 2: Review Current Billing Status
1. In the Subscription section, view your current plan, term,
and status details.
2. The Usage section summarizes your organization's activity,
including the total number of pipes, requests, and memory usage.
Step 3: Upgrade to Pro or Enterprise
1. Go to the Plans section to compare and explore available
subscription options.
2. Click Subscribe or Let's Talk and follow the prompts to
complete the upgrade."""
def main():
langbase_api_key = os.getenv("LANGBASE_API_KEY")
langbase = Langbase(api_key=langbase_api_key)
memory_name = "support-memory-agent"
try:
response = langbase.memories.documents.upload(
memory_name=memory_name,
document_name="langbase-faqs.txt",
document=langbaseFAQs.encode("utf-8"),
content_type="text/plain"
)
print("Document uploaded successfully!")
print(f"Status: {response.status_code}")
except Exception as e:
print(f"Error uploading documents: {e}")
if __name__ == "__main__":
main()
```
</CodeGroup>
Let's run the script to upload the FAQs data to the memory agent:
```bash {{ title: 'Upload document to memory agent' }}
python upload-doc.py
```
</LanguageContent>
---
## Step #6: Retrieval testing of FAQs data
Let's do a retrieval test to check if the FAQs data was uploaded successfully. You will use the [`langbase.memories.retrieve()`](/sdk/memory/retrieve) function to list the documents in the memory agent.
<LanguageContent language='typescript'>
Create a new file `retrieval.ts` and add the following code:
<CodeGroup exampleTitle="Retrieval testing" title="retrieval.ts">
```ts
import 'dotenv/config';
import { Langbase } from 'langbase';
const langbase = new Langbase({
apiKey: process.env.LANGBASE_API_KEY!,
});
async function main() {
const chunks = await langbase.memories.retrieve({
memory: [{name: 'support-memory-agent'}],
query: 'How to reset password?',
topK: 1
});
console.log('Memory chunks:', chunks);
}
main();
```
</CodeGroup>
Run the script to test the retrieval of FAQs data:
```bash {{ title: 'Retrieve data from Memory' }}
npx tsx retrieval.ts
```
</LanguageContent>
<LanguageContent language='python'>
Create a new file `retrieval.py` and add the following code:
<CodeGroup exampleTitle="Retrieval testing" title="retrieval.py">
```python
import os
from langbase import Langbase
from dotenv import load_dotenv
load_dotenv()
langbase = Langbase(api_key=os.getenv('LANGBASE_API_KEY'))
def main():
response = langbase.memories.retrieve(
memory=[{'name': 'support-memory-agent'}],
query='How to reset password?',
top_k=1
)
print(response)
if __name__ == '__main__':
main()
```
</CodeGroup>
Run the script to test the retrieval of FAQs data:
```bash {{ title: 'Retrieve data from Memory' }}
python retrieval.py
```
</LanguageContent>
This will print the memory chunks containing the FAQs data on the console.
```md {{ title: 'Retrieval output' }}
[
{
{
"text": "How to reset password?
Step 1: Access Profile Settings
1. Log in to your Langbase account.
2. Navigate to the [Profile Settings page](https://langbase.com/settings/profile)
Step 2: Change Your Password
1. Scroll to the Reset Password section.
2. Enter your new password in the New Password box.
3. Click Set Password to confirm the change.
How to edit user profile?
Step 1: Access Profile Settings
1. Log in to your Langbase account.
2. Navigate to the Profile Settings page.
Step 2: Edit Your Profile
1. Click on Change Profile Picture to upload an image from your computer.
Note: The image should be in PNG or JPG format and must not exceed 1MB in size.
2. Enter a name for your profile in the Name field.
3. Create a username for your profile using a hyphen-separated format in the
Username field.
4. Write a short bio in the Bio field.
Step 3: Save Your Changes
1. Click Save Changes to apply your edits.
How to upgrade organization plan?",
"similarity": 0.5440677404403687,
"meta": {
"documentName": "langbase-faqs.txt"
}
}
]
```
---
## Step #7: Create an AI support agent pipe
You need to create an AI support agent pipe. It will use the `gpt-4o-mini` model and the AI memory you created earlier to answer user queries.
<LanguageContent language='typescript'>
Create a new file `create-pipe.ts` and add the following code:
<CodeGroup exampleTitle="Create a pipe" title="create-pipe.ts">
```ts
import 'dotenv/config';
import { Langbase } from 'langbase';
const langbase = new Langbase({
apiKey: process.env.LANGBASE_API_KEY!,
});
async function main() {
const supportAgent = await langbase.pipes.create({
name: `ai-support-agent`,
description: `An AI agent to support users with their queries.`,
messages: [
{
role: `system`,
content: `You're a helpful AI assistant. You will assist
users with their queries about Langbase. Always ensure
that you provide accurate and to the point information.`,
},
],
memory: [{ name: 'support-memory-agent' }],
upsert: true
});
console.log('Support agent:', supportAgent);
}
main();
```
</CodeGroup>
You have defined a system prompt and linked the memory agent to the pipe by specifying the memory agent's name while creating the pipe. Run the script to create the AI support agent pipe:
```bash {{ title: 'Create an AI support agent pipe' }}
npx tsx create-pipe.ts
```
</LanguageContent>
<LanguageContent language='python'>
Create a new file `create-pipe.py` and add the following code:
<CodeGroup exampleTitle="Create a pipe" title="create-pipe.py">
```python
import os
import json
from langbase import Langbase
from dotenv import load_dotenv
load_dotenv()
langbase = Langbase(api_key=os.getenv('LANGBASE_API_KEY'))
def main():
response = langbase.pipes.create(
name='ai-support-agent',
description='An AI pipe agent that supports users with their queries',
messages=[{
'role': 'system',
'content': 'You are a helpful assistant that helps users with their queries',
}],
memory=[{'name': 'support-memory-agent'}],
upsert=True
)
print(json.dumps(response, indent=2))
if __name__ == "__main__":
main()
```
</CodeGroup>
Run the script to create the AI support agent pipe:
```bash {{ title: 'Create an AI support agent pipe' }}
python create-pipe.py
```
</LanguageContent>
---
## Step #8: Run the AI support agent pipe
Now that you have created the AI support agent pipe, let's run it to test the agent. You will use the [`langbase.pipes.run()`](/sdk/pipe/run) function to run the pipe.
<LanguageContent language='typescript'>
Create a new file `run-pipe.ts` and add the following code:
<CodeGroup exampleTitle="Run AI support agent" title="run-pipe.ts">
```ts
import 'dotenv/config';
import { Langbase, getRunner } from 'langbase';
const langbase = new Langbase({
apiKey: process.env.LANGBASE_API_KEY!,
});
async function main() {
const { stream } = await langbase.pipes.run({
name: `ai-support-agent`,
stream: true,
messages: [
{
role: `user`,
content: `How to reset password?`,
},
],
});
const runner = getRunner(stream);
runner.on('content', content => {
process.stdout.write(content);
});
}
main();
```
</CodeGroup>
You are using the `stream` option to get real-time completions from the AI model. Now let's run the above file to see the AI generate completions for the user message:
```bash {{ title: 'Run the AI support agent pipe' }}
npx tsx run-pipe.ts
```
</LanguageContent>
<LanguageContent language='python'>
Create a new file `run-pipe.py` and add the following code:
<CodeGroup exampleTitle="Run AI support agent" title="run-pipe.py">
```python
import os
from langbase import Langbase, get_runner
import json
from dotenv import load_dotenv
load_dotenv()
langbase = Langbase(api_key=os.getenv('LANGBASE_API_KEY'))
def main():
response = langbase.pipes.run(
stream=True,
name='ai-support-agent',
messages=[
{
'role': 'user',
'content': 'How to reset password?',
}
]
)
runner = get_runner(response)
print('Stream started \n\n')
# Use text_generator() to stream content
for content in runner.text_generator():
print(content, end="", flush=True)
print("\n\nStream ended!") # Add a newline after first response
if __name__ == '__main__':
main()
```
</CodeGroup>
You are using the `stream` option to get real-time completions from the AI model. Now let's run the above file to see the AI generate completions for the user message:
```bash {{ title: 'Run the AI support agent pipe' }}
python run-pipe.py
```
</LanguageContent>
The AI support agent will **generate a response** to the user query using OpenAI `gpt-4o-mini` model based on the **FAQs data** uploaded to the memory agent.
```md {{ title: 'LLM generation' }}
To reset your password on Langbase, follow these steps:
Step 1: Access Profile Settings
1. Log in to your Langbase account.
2. Navigate to the [Profile Settings page](https://langbase.com/settings/profile).
Step 2: Change Your Password
1. Scroll to the Reset Password section.
2. Enter your new password in the New Password box.
3. Click Set Password to confirm the change.
```
You can also ask other questions like:
- How to edit user profile?
- How to upgrade organization plan?
And the AI support agent will generate responses based on the FAQs data uploaded to the memory agent.
</ContentTab>
<ContentTab title="Using Studio">
---
## Step #1: Create an AI memory agent
To get started with Langbase, you'll need to [create a free personal account on Langbase.com](https://langbase.com/signup) and verify your email address.
1. When logged in, click on Memory in the sidebar and then click on `[Add New]`
2. Give your memory a name. Let’s call it `support-memory-agent`.
3. Click on the `[Create Memory]` button.
<Img
caption="Creating a new memory agent"
dark="https://raw.githubusercontent.com/LangbaseInc/docs-images/refs/heads/main/guides/build-performant-rag/create-support-agent-dark.jpg"
light="https://raw.githubusercontent.com/LangbaseInc/docs-images/refs/heads/main/guides/build-performant-rag/create-support-agent-light.jpg"
/>
---
## Step #2: Upload FAQs data
Let's upload a sample FAQs document to the memory agent. You can upload any sample FAQs file you have or you can download the sample FAQs document by clicking the button below.
<DownloadSampleDoc />
0. Click on the memory agent you created earlier.
1. Click on the upload area or drag & drop documents to upload them to the memory.
2. Click “Refresh” to fetch latest status.
<Img
caption="Upload FAQs document to memory agent"
light="https://raw.githubusercontent.com/LangbaseInc/docs-images/refs/heads/main/guides/build-performant-rag/upload-doc-light.jpg"
dark="https://raw.githubusercontent.com/LangbaseInc/docs-images/refs/heads/main/guides/build-performant-rag/upload-doc-dark.jpg"
/>
---
## Step #3: Create an AI support agent pipe
Now, let's create an AI support agent pipe. You will use the `gpt-4o-mini` model and the AI memory you created earlier to answer user queries.
1. Click on Pipes in the sidebar and then click on `[Add New]`.
2. Give your pipe a name. Let’s call it `ai-support-agent`.
3. Click on the `[Create Pipe]` button.
<Img
caption="Create an AI support agent pipe"
light="https://raw.githubusercontent.com/LangbaseInc/docs-images/refs/heads/main/guides/build-performant-rag/create-pipe-light.jpg"
dark="https://raw.githubusercontent.com/LangbaseInc/docs-images/refs/heads/main/guides/build-performant-rag/create-pipe-dark.jpg"
/>
---
## Step #4: Update system prompt
A system message in prompt acts as the set of instructions for the AI model. Let's update the system prompt for the AI support agent pipe with: `You're a helpful AI assistant. You will assist users with their queries about Langbase. Always ensure that you provide accurate and to the point information.`
<Img
caption="Update system prompt"
light="https://raw.githubusercontent.com/LangbaseInc/docs-images/refs/heads/main/guides/build-performant-rag/system-prompt-light.jpg"
dark="https://raw.githubusercontent.com/LangbaseInc/docs-images/refs/heads/main/guides/build-performant-rag/system-prompt-dark.jpg"
/>
---
## Step #5: Connect memory agent to the pipe
You need to link the memory agent to the pipe. This will allow the AI model to use the FAQs data uploaded to the memory agent to answer user queries.
All you need to do is to click on "Memory" button and select the memory agents you want to attach to the Pipe. It will take care of the rest.
<Img
caption="Connect memory agent to the pipe"
light="https://raw.githubusercontent.com/LangbaseInc/docs-images/refs/heads/main/guides/build-performant-rag/connect-memory-light.jpg"
dark="https://raw.githubusercontent.com/LangbaseInc/docs-images/refs/heads/main/guides/build-performant-rag/connect-memory-dark.jpg"
/>
---
## Step #6: Deploy the AI support agent pipe
Now that you have created the AI support agent pipe, let's deploy it to test the agent. Click on the `[Deploy to Production]` button to deploy the pipe.
<Img
caption="Deploy to AI support agent pipe"
light="https://raw.githubusercontent.com/LangbaseInc/docs-images/refs/heads/main/guides/build-performant-rag/deploy-prod-light.jpg"
dark="https://raw.githubusercontent.com/LangbaseInc/docs-images/refs/heads/main/guides/build-performant-rag/deploy-prod-dark.jpg"
/>
---
## Step #7: Run the AI support agent pipe
Now that you have created the AI support agent pipe, let's test it inside Pipe playground. You can ask a question around resetting password to see if the AI generates a response based on the FAQs data uploaded to the memory agent.
<Img
caption="Run the AI support agent pipe"
light="https://raw.githubusercontent.com/LangbaseInc/docs-images/refs/heads/main/guides/build-performant-rag/run-pipe-light.jpg"
dark="https://raw.githubusercontent.com/LangbaseInc/docs-images/refs/heads/main/guides/build-performant-rag/run-pipe-dark.jpg"
/>
The AI support agent will **generate a response** to the user query using OpenAI `gpt-4o-mini` model based on the **FAQs data** uploaded to the memory agent.
```{{ title: 'LLM generation' }}
To reset your password on Langbase, follow these steps:
Step 1: Access Profile Settings
1. Log in to your Langbase account.
2. Navigate to the [Profile Settings page](https://langbase.com/settings/profile).
Step 2: Change Your Password
1. Scroll to the Reset Password section.
2. Enter your new password in the New Password box.
3. Click Set Password to confirm the change.
```
You can also ask other questions like:
- How to edit user profile?
- How to upgrade organization plan?
And the AI support agent will generate responses based on the FAQs data uploaded to the memory agent.
</ContentTab>
</ContentTabs>
---
✨ That's it! You have successfully created an **AI support agent** that uses **AI Memory** (RAG) to answer user queries. You can now integrate this agent into your application to provide instant support to your users.
---
## Next Steps
- Explore [SDK](/sdk) & [API reference](/api-reference) to learn more about Langbase APIs.
- Join our [Discord community](https://langbase.com/discord) for feedback, requests, and support.
---
</LanguageProvider>
</content>
</doc>
<doc>
<metadata>
<title>FAQs</title>
<url>https://langbase.com/docs/memory/faqs/</url>
</metadata>
<content>
import { generateMetadata } from '@/lib/generate-metadata';
# FAQs
Let's take a look at some frequently asked questions about Memory.
---
## What is a Memory?
Memory allows you to store, organize, and retrieve information. It can be used to build powerful Retrieval Augmented Generation (RAG) based AI agents that can use your data to assist with your queries.
---
## What is a Retrieval Augmented Generation (RAG) system?
RAG is an AI assistant that uses a combination of a large language model (LLM) and your data (Memory) to provide more accurate and relevant responses to user queries.
---
## Where is RAG used?
LLMs are powerful at understanding text but they can't store information. Memory is used to store and organize your information. RAG uses LLMs on your information to provide more accurate and relevant responses. It makes it ideal for building AI agents personalized to your data.
---
## Why I should store information in Memory instead of feeding LLMs directly?
Querying LLMs directly can be expensive, and slow. Not to mention, they have a limited context window, which limits the amount of information they can process. Memory allows you to store and organize your information in a way that is optimized for retrieval. Only relevant piece of information is retrieved from memory in an RAG system and passed to the LLM for generating a response.
---
## Which file formats are supported for importing data into Memory?
Currently, we support `.txt`, `.pdf`, `.md`, `.csv`, and all the major plaincoding files.
---
## How can I import data from unsupported file formats?
You can convert your data into a supported format before importing it into Memory. There are many online tools available to convert files into different formats. We are continuously working on adding support for more file formats. If you have a specific file format you would like us to support, please let us know and we will prioritize it.
---
## How do the chunking parameters affect the performance of RAG?
A chunk is a piece of information given to the LLM. The size of these chunks affects how well RAG performs. During retrieval, the query is converted into a vector, and a search returns only the relevant chunks. If chunks are too small, they might not have enough information to be useful. If they are too large, they might include irrelevant information. You can adjust the chunk size based on your needs to optimize RAG's performance.
---
## Can I attach multiple Memory Sets to a single Pipe?
Yes, you can attach multiple Memory Sets to a single Pipe.
---
## What is the maximum file size that can be imported into Memory?
The maximum file size that can be imported into Memory is 10MB.
---
## Is there an API available for Memory?
Yes, [Langbase Memory API](/api-reference/memory) provides you with programmatic access to managing memories in your Langbase account. Since documents are stored in memories, you can also manage documents using the Memory API.
---
</content>
</doc>
<doc>
<metadata>
<title>Concepts</title>
<url>https://langbase.com/docs/memory/concepts/</url>
</metadata>
<content>
import { generateMetadata } from '@/lib/generate-metadata';
# Concepts
Using memory is fastest way to use your knowledge data with a Pipe to build a RAG system.
Let's understand the key concepts of Memory to successfully build a RAG system:
---
## RAG Prompt
When a memory is attached to a Pipe, by default a RAG prompt appears which is fed to LLM to utilize the memory. The default prompt works fine in most cases, but you can customize the prompt based on your use case.
<Img
caption="RAG Prompt"
alt="RAG Prompt"
light="/docs/memorysets/concepts/rag-prompt-light.jpg"
dark="/docs/memorysets/concepts/rag-prompt-dark.jpg"
/>
## Document Processing
Once the document is uploaded, it is submitted to a queue for processing. The status is reflected in the memory page. You can "Refresh" the status to get the latest status of the document on the memory page. Below are the possible status of the document:
- **Queued**: Document is in the queue waiting to be processed
- **Processing**: Document is being processed
- **Ready**: Document is ready to be used
- **Failed**: Document processing failed due to some error
_If the document processing fails or takes too long, you can re-upload the document to process it again. In case of failure, the error message can be seen by hovering over the "Failed" status. If the issue persists, please contact support._
Following are the steps involved in document processing:
1. **Chunking**: The document is split into chunks. Each piece contains a certain piece of information. During the retrieval, only the relevant chunk is fed to LLM to generate the response.
2. **Embedding**: Each chunk is converted into an embedding. Embeddings are used to find similar pieces of information during retrieval.
3. **Indexing**: Embeddings are stored in vector store and indexed for faster retrieval.
<Warn title="Known Issue with Document Processing">
Documents with only selectable text are supported. The document processing
may fail otherwise. Small and simple documents are recommended for better
results.
</Warn>
### Enabled
The Enabled/Disabled toggle button will include/exclude the document from the memory when the memory is used in a Pipe.
---
## Chunking
Before embedding the document, it is split into chunks and each chunk is then embedded. The chunking parameters can be adjusted to control the number of chunks generated from the document. The chunking parameters are:
1. **Chunk Max Length**: The maximum number of characters per chunk. The chunk size can range from `1024` to `30000` characters. _We recommend a small chunk size so vector representation can capture distinctive information in each piece_.
2. **Chunks Overlap**: The number of characters by which the chunks overlap. The minimum overlap is `256` characters. It helps in tracking chunk boundaries and managing document flow.
The default chunking parameters are set to **Chunk Max Length: 10000** and **Chunks Overlap: 2048**. Chunking settings can be adjusted based on the document size and the use case.
To change the chunking settings, click on the document name on the memory. The document details page will open where you can adjust the chunking parameters. Below is how you can adjust the chunking parameters:
1. Change the `Chunk Max Length` and `Chunks Overlap` values and click on the `Draft changes` button. This will only preview the chunks: _it will not embed and save the changes_.
2. If you are satisfied with the preview, click on the `Update Embeddings` button to save the changes. The document will be submitted for re-processing with the new chunking parameters. Embeddings can be only updated once the chunks are drafted.
<Img
caption="Adjusting Chunking Parameters"
alt="Adjusting Chunking Parameters"
light="/docs/memorysets/concepts/chunking-light.jpg"
dark="/docs/memorysets/concepts/chunking-dark.jpg"
/>
During the chunking, another parameter called `Separator` is used to split the document into chunks. By default `["\n\n", "\n"]` are used as separators to split the document into chunks based on paragraphs and lines. So, if a separator is found in the document, the document is split into chunks at that point as it takes precedence over the chunking parameters. _Soon, you will be able to customize the separator based on your document structure._
---
## Embeddings
Embeddings are the vector representation of the document. All documents in a memory are converted into embeddings. These embeddings are used to find similar documents during retrieval testing.
By default, OpenAI's latest embedding model `text-embedding-3-large` with `256` dimensions is used to generate embeddings.
> Embeddings are a way to represent text in a way that captures the meaning of the text. The embeddings are generated in such a way that similar texts have similar embeddings. This allows us to find similar texts by comparing their embeddings.
---
## Retrieval Testing
Retrieval testing is a way to test which parts of the document will be retrieved and passed on to LLM for a given prompt. It helps in debugging the document chunking parameters for your use case. If the retrieval testing is not showing the expected results, you can adjust the chunking parameters and re-run the retrieval test.
Below are the steps to run retrieval testing:
1. In a memory, click on Retrieval Testing tab.
2. Enter a prompt in the input box and click on the `Find Similar Chunks` button.
<Img
caption="Retrieval Testing"
alt="Retrieval Testing"
light="/docs/memorysets/concepts/retrieval-testing-light.jpg"
dark="/docs/memorysets/concepts/retrieval-testing-dark.jpg"
/>
</content>
</doc>
<doc>
<metadata>
<title>How to use Langbase Remote MCP server</title>
<url>https://langbase.com/docs/mcp-servers/remote-mcp-server/</url>
</metadata>
<content>
import { generateMetadata } from '@/lib/generate-metadata';
# How to use Langbase Remote MCP server
### Interact with Pipes and Memory Agents seamlessly with Langbase MCP Server
---
## What is Model Context Protocol (MCP)?
Model Context Protocol (MCP) is an open protocol that standardizes how applications connect and share data, tools, and other resources with Large Language Models (LLMs).
## Langbase Remote MCP Server
Langbase provides a fully compliant Remote MCP server at [mcp.langbase.com/sse](https://mcp.langbase.com/sse), supporting seamless authentication via the official Remote MCP [specification](https://modelcontextprotocol.io/specification/2025-03-26/basic/authorization).
You can do the following with the Langbase Remote MCP server:
| Tool | Description |
| --- | --- |
| create-pipe-agent | Creates a new pipe agent |
| run-pipe-agent | Runs a pipe agent |
| list-pipe-agents | Lists all existing pipe agents |
| update-pipe-agent | Updates an existing pipe agent |
| create-memory | Creates a new memory |
| list-memories | Lists all existing memories |
| upload-document-memory | Uploads documents to memory |
| retrieve-memory | Retrieves similar chunks from memory |
| list-memory-documents | Lists documents from memory |
| delete-memory | Delete a memory |
<Vid
light="/docs/guides/langbase-mcp-server/langbase-mcp-claude-demo.mp4"
dark="/docs/guides/langbase-mcp-server/langbase-mcp-claude-demo.mp4"
caption="Langbase Remote MCP Server Demo"
/>
---
## Setup the Langbase Remote MCP Server
We will setup the Langbase Remote MCP Server on any of the IDEs below and Claude Desktop.
<ContentTabs>
<ContentTab title="Cursor">
1. Open Cursor settings
2. Navigate to the Tools and Integrations
3. Click on the `+` button to add a New MCP Server
4. Paste the following configuration in the `mcp.json` file:
<CodeGroup title="mcp.json" exampleTitle="mcp.json">
```bash
{
"mcpServers": {
"Langbase MCP Server": {
"command": "npx",
"args": [
"-y",
"mcp-remote",
"https://mcp.langbase.com/sse"
]
}
}
}
```
</CodeGroup>
</ContentTab>
<ContentTab title="Windsurf">
1. Navigate to Windsurf - Settings > Advanced Settings
2. You will find the option to Add Server
3. Click “Add custom server +”
4. Paste the following configuration in the `mcp_config.json` file:
<CodeGroup title="mcp_config.json" exampleTitle="mcp_config.json">
```bash
{
"mcpServers": {
"Langbase MCP Server": {
"command": "npx",
"args": [
"-y",
"mcp-remote",
"https://mcp.langbase.com/sse"
]
}
}
}
```
</CodeGroup>
</ContentTab>
<ContentTab title="Claude Desktop">
1. Open Claude Desktop File Menu
2. Navigate to the settings
3. Go to Developer Tab
4. Click on the Edit Config button
5. Paste the following configuration:
<CodeGroup title="claude_desktop_config.json" exampleTitle="claude_desktop_config.json">
```bash
{
"mcpServers": {
"Langbase MCP Server": {
"command": "npx",
"args": [
"-y",
"mcp-remote",
"https://mcp.langbase.com/sse"
]
}
}
}
```
</CodeGroup>
</ContentTab>
</ContentTabs>
<Note sub="Info" >
You may need to restart the IDE or Claude Desktop for the MCP server to take effect.
</Note>
## Examples
Now that you have set up the MCP server, here are some example queries you can try:
<CodeGroup title="Example queries" exampleTitle="Example querie">
```md
Give me an overview of all the Pipes and Memory Agents
```
</CodeGroup>
<Img
light="/docs/guides/langbase-mcp-server/prompt-1.png"
dark="/docs/guides/langbase-mcp-server/prompt-1.png"
alt="Give me an overview of all the Pipes and Memory Agents"
caption="Give me an overview of all the Pipes and Memory Agents"
/>
<CodeGroup title="Example queries" exampleTitle="Example querie">
```md
Create an AI Support agent pipe that uses my docs as memory for autonomous AutoRAG
```
</CodeGroup>
<Img
light="/docs/guides/langbase-mcp-server/prompt-2.png"
dark="/docs/guides/langbase-mcp-server/prompt-2.png"
alt="Create an AI Support agent pipe that uses my docs as memory for autonomous AutoRAG"
caption="Create an AI Support agent pipe that uses my docs as memory for autonomous AutoRAG"
/>
<CodeGroup title="Example queries" exampleTitle="Example querie">
```md
Upload this document to memory named 'langbase-info'
```
</CodeGroup>
<Img
light="/docs/guides/langbase-mcp-server/prompt-3.png"
dark="/docs/guides/langbase-mcp-server/prompt-3.png"
alt="Upload this document to memory named 'langbase-info'"
caption="Upload this document to memory named 'langbase-info'"
/>
---
## Next Steps
- Check out [examples](/sdk/examples) of what you can build using Langbase MCP server.
- Join our [Discord community](https://langbase.com/discord) for feedback, requests, and support.
---
</content>
</doc>
<doc>
<metadata>
<title>Popular MCP Servers with Command.new</title>
<url>https://langbase.com/docs/mcp-servers/popular-mcp-servers/</url>
</metadata>
<content>
import { generateMetadata } from '@/lib/generate-metadata';
# Popular MCP Servers with Command.new
Explore popular MCP servers like Cloudflare, Intercom, and Deepwiki that can be integrated with Command.new to enhance your AI agents with web browsing, customer support data access, and GitHub repository interactions.
---
## Supported MCP Servers
| MCP Server | Description | URL |
| --- | --- | --- |
| [Slack](#slack-mcp-server) | Slack MCP server | <InlineCopy content="https://slack.mcp.langbase.com/sse" /> |
| [Intercom](#intercom-mcp-server) | Intercom MCP server | <InlineCopy content="https://mcp.intercom.com/sse" /> |
| [Deepwiki](#deepwiki-mcp-server) | Deepwiki MCP server | <InlineCopy content="https://mcp.deepwiki.com/sse" /> |
| [Cloudflare Browser Rendering](#cloudflare-browser-rendering-mcp-server) | Browser Rendering MCP server | <InlineCopy content="https://browser.mcp.cloudflare.com/sse" /> |
---
## Slack MCP Server
Langbase provides a remote [Slack MCP server](https://slack.mcp.langbase.com) that lets you interact with your Slack workspace using a variety of specialized tools.
| Tool | Description |
| --- | --- |
| slack_get_users | List workspace users with basic profile information. |
| slack_add_reaction | Add emoji reactions to messages. |
| slack_list_channels | List all the channels in the workspace. |
| slack_post_message | Send a new message to a Slack channel. |
| slack_reply_to_thread | Reply to a specific message thread. |
| slack_get_user_profile | Get detailed profile information for a specific user. |
| slack_get_thread_replies | Retrieve all replies in a message thread.
| slack_get_channel_history | Retrieve recent messages from a channel. |
## Authentication
You can create a Slack Bot Token from the Slack API.
<Spoiler title="Get your Slack Bot Token">
You have to create a **Slack App** by following these steps:
1. Go to [Your Apps](https://api.slack.com/apps) in Slack API
2. Click on `Create New App` button it will open a popup
3. Select `From scratch` in the popup
4. Name your app and choose your workspace
5. Go to the `OAuth & Permissions` page and add the required scopes listed below
6. Install the App to your Slack workspace
7. Obtain the `Bot User OAuth Token` from the `OAuth Tokens` section
8. Invite the Bot to your Slack channels where you want it to interact
### OAuth & Permissions
In the **Bot Token Scopes** section, enable these required permissions:
- `app_mentions:read` - Allow reading mentions of your bot
- `assistant:write` - Enable writing assistant responses
- `chat:write` - Allow sending messages
- `im:history` - Access direct message history
- `im:read` - View direct messages
- `im:write` - Send direct messages
- `channels:history` - Access channel message history
- `channels:read` - Read channel information
- `reactions:write` - Add and edit emoji reactions
- `users:read` - View people in workspace
</Spoiler>
---
## Cloudflare Browser Rendering MCP Server
Cloudflare provides a remote [Browser Rendering MCP server](https://github.com/cloudflare/mcp-server-cloudflare/tree/main/apps/browser-rendering) that allows you to get the HTML content, Markdown content, and screenshot of any webpage.
| Tool | Description |
| --- | --- |
| get_url_html_content | Retrieves the HTML content of the specified URL. |
| get_url_markdown | Fetches the webpage content and converts it into Markdown format. |
| get_url_screenshot | Captures a screenshot of the webpage. Optionally, specify the viewport size. |
## Authentication
You need to have a Cloudflare account to use the Cloudflare Browser Rendering MCP server.
<Spoiler title="Get your Cloudflare Browser Rendering API key">
You can generate API keys from the [Cloudflare dashboard](https://dash.cloudflare.com/profile/api-tokens) by following these steps:
1. Go to Cloudflare Dashboard
2. Create an API token with the following permissions:
<Img src="/docs/mcp-servers/popular-mcp-servers/cloudflare-api-key-permission.png" alt="Cloudflare API Token" />
</Spoiler>
---
## Intercom MCP Server
Intercom provides a remote [MCP server](https://developers.intercom.com/docs/guides/mcp) that enables users to interact with their data like conversations, contacts, etc., through various specialized tools.
| Tool | Description |
| --- | --- |
| fetch | Retrieve detailed information for specific resources. |
| search | Universal search tool for finding conversations and contacts. |
| get_contact | Get contact information including custom attributes, location data, and activity timestamps. |
| get_conversation | Retrieve a single conversation by ID with details including all conversation parts and metadata. |
| search_contacts | Search contacts by IDs, name, email, phone, custom attributes, etc. with flexible matching options. |
| search_conversations | Search conversations by specific IDs with advanced filtering options.
## Authentication
You need to have a Intercom account to use the Intercom MCP server.
<Spoiler title="Get your Intercom API key">
You can generate API keys for Intercom by following these steps:
1. Go to [Intercom Authentication page](https://developers.intercom.com/docs/build-an-integration/learn-more/authentication#how-to-get-your-access-token)
2. Check the required permissions in the [Intercom Required Scopes docs](https://developers.intercom.com/docs/guides/mcp#required-scopes)
3. Follow the steps to generate an API key
</Spoiler>
---
## Deepwiki MCP Server
Deepwiki provides a remote [Deepwiki MCP server](https://deepwiki.com/) that enables users to interact with and retrieve GitHub repositories through various specialized tools.
| Tool | Description |
| --- | --- |
| ask_question | Ask any question about a GitHub repository. |
| read_wiki_contents | Retrieve the contents of a specific documentation topic for a specified GitHub repository. |
| read_wiki_structure | Obtain a list of documentation topics for a specified GitHub repository. |
<Note sub="Info" >
The Deepwiki MCP server can be used without an API key for public repositories. However, accessing private repositories requires a Deepwiki API key.
</Note>
---
## Production ready agents
Get started quickly by forking these pre-built, production-ready agents:
### 1. URL Agent
An agent that lets you have conversations with URLs through natural language.
<CTAButtons
primary={{ href: 'https://command.new/examples/url-agent', text: 'Fork this Agent' }}
/>
<Img src="/docs/mcp-servers/popular-mcp-servers/url-agent.jpg" alt="URL Agent" />
### 2. GitHub QnA Agent
An agent that lets you ask questions and get answers about any GitHub repository.
<CTAButtons
primary={{ href: 'https://command.new/examples/github-qna-agent', text: 'Fork this Agent' }}
/>
<Img src="/docs/mcp-servers/popular-mcp-servers/deepwiki-agent.jpg" alt="Github QnA Agent" />
---
### Next Steps
- Explore [Langbase’s Remote MCP Server](/mcp-servers/remote-mcp-server) for memory and pipe agent tools.
- Join our [Discord community](https://langbase.com/discord) for feedback, requests, and support.
---
</content>
</doc>
<doc>
<metadata>
<title>How to setup Langbase Docs MCP Server?</title>
<url>https://langbase.com/docs/mcp-servers/docs-mcp-server/</url>
</metadata>
<content>
import { generateMetadata } from '@/lib/generate-metadata';
# How to setup Langbase Docs MCP Server?
### A step by step guide on how you can setup the Langbase Docs MCP Server
---
## What is Model Context Protocol (MCP)?
Model Context Protocol (MCP) is an open protocol that standardizes how applications provide context to LLMs. It provides a standardized way to connect AI models to different data sources and tools.
## Langbase Docs MCP Server
The Langbase Docs MCP server allows IDEs like Cursor, Windsurf, etc., to access Langbase documentation. It provides LLMs with up-to-date context about Langbase APIs, SDK, and other resources present in the docs, enabling LLMs to deliver **accurate** and **relevant** answers to your Langbase-related queries.
<Img
light="/docs/guides/docs-mcp-server/cursor-mcp-server.png"
dark="/docs/guides/docs-mcp-server/cursor-mcp-server.png"
alt="Langbase Docs MCP Server"
caption="Langbase Docs MCP Server"
/>
---
## Setup the Langbase MCP Server
We will setup the MCP Server on any of the IDEs below and Claude Desktop.
<ContentTabs>
<ContentTab title="Cursor">
1. Open Cursor settings
2. Navigate to the MCP settings
3. Click on the `+` button to add a new global MCP server
4. Paste the following configuration in the `mcp.json` file:
<CodeGroup title="mcp.json" exampleTitle="mcp.json">
```bash
{
"mcpServers": {
"Langbase Docs Server": {
"command": "npx",
"args": ["@langbase/cli@latest","docs-mcp-server"]
}
}
}
```
</CodeGroup>
</ContentTab>
<ContentTab title="Windsurf">
1. Navigate to Windsurf - Settings > Advanced Settings
2. You will find the option to Add Server
3. Click “Add custom server +”
4. Paste the following configuration in the `mcp_config.json` file:
<CodeGroup title="mcp_config.json" exampleTitle="mcp_config.json">
```bash
{
"mcpServers": {
"Langbase Docs Server": {
"command": "npx",
"args": ["@langbase/cli@latest", "docs-mcp-server"]
}
}
}
```
</CodeGroup>
</ContentTab>
<ContentTab title="Claude Desktop">
1. Open Claude Desktop File Menu
2. Navigate to the settings
3. Go to Developer Tab
4. Click on the Edit Config button
5. Paste the following configuration:
<CodeGroup title="claude_desktop_config.json" exampleTitle="claude_desktop_config.json">
```bash
{
"mcpServers": {
"Langbase Docs Server": {
"command": "npx",
"args": ["@langbase/cli@latest", "docs-mcp-server"]
}
}
}
```
</CodeGroup>
</ContentTab>
</ContentTabs>
<Note sub="Info" >
You may need to restart the IDE or Claude Desktop for the MCP server to take effect.
</Note>
Now that you have set up the MCP server, here are some example queries you can try:
<CodeGroup title="Example queries" exampleTitle="Example queries">
```md
How to create a pipe agent named 'summary-agent'?
How to add memory to my summary-agent?
```
</CodeGroup>
You can also ask about:
- How to update existing pipe agents
- How to use new AI primitives
- Different agent architectures
---
## Next Steps
- Build something cool with Langbase [APIs](/api-reference) and [SDK](/sdk).
- Join our [Discord community](https://langbase.com/discord) for feedback, requests, and support.
---
</content>
</doc>
<doc>
<metadata>
<title>Top P (Nucleus Sampling)</title>
<url>https://langbase.com/docs/llm-parameters/top-p/</url>
</metadata>
<content>
import { generateMetadata } from '@/lib/generate-metadata';
# Top P (Nucleus Sampling)
Top P, also known as nucleus sampling, is a decoding parameter that limits the model's choices to the smallest possible set of tokens whose cumulative probability exceeds a threshold P. It helps balance creativity and coherence in the model's responses.
## How does it work
Instead of picking from a fixed number of top tokens (like Top K), Top P dynamically selects a set of tokens based on their probabilities. For example, if top_p = 0.9, the model will only sample from the most likely tokens whose combined probability adds up to 90%. This set can vary in size at each step of generation.
## When to use Top P
- When you want more flexibility than Top K allows
- When aiming for natural-sounding, diverse outputs without sacrificing quality
- When generating creative content, like stories, brainstorms, or casual dialogue
## How to use Top P
1. A common top_p value is between 0.8 and 0.95
2. Include it as the top_p parameter in your API call
3. Use temperature along with it for more nuanced control
4. Test different values. Higher values give more randomness; lower ones increase focus
## Tips
- `top_p = 1.0` disables nucleus sampling entirely (i.e., all tokens are considered)
- Lower top_p values can limit hallucinations but may sound dull or repetitive
- For most natural outputs, top_p of 0.9 combined with temperature of 0.7-0.9 is a good starting point
- Use in combination with Top K cautiously. If both are set, they work together to restrict token sampling even further
</content>
</doc>
<doc>
<metadata>
<title>Top K</title>
<url>https://langbase.com/docs/llm-parameters/top-k/</url>
</metadata>
<content>
import { generateMetadata } from '@/lib/generate-metadata';
# Top K
Top K is a sampling parameter that limits the model to choosing the next token from only the top K most likely options, rather than considering the full vocabulary. It controls how "focused" or "random" the model's outputs can be.
## How does it work
At each step of generation, the model calculates a probability distribution over all possible next tokens. Top K filters this list down to the K highest-probability tokens, and then samples from just those. A lower K makes the output more deterministic; a higher K allows more variety.
## When to use Top K
- When you want to reduce randomness while still allowing some creativity
- When outputs need to be coherent and consistent, such as in summarization or formal tone
- When combined with temperature, to better control variability in open-ended generation
## How to use Top K
1. A common top_k value is between 20 and 100
2. Pass it as the top_k parameter in your model call (if supported)
3. Optionally tune in combination with temperature or top_p for better balance
4. Monitor outputs if results feel too repetitive, try increasing K or adjusting other sampling parameters
## Tips
- A Top K of 1 means the model always picks the highest-probability token (greedy decoding)
- Top K and Top P are often used together, you don't have to choose one or the other
- Increasing K without adjusting temperature can lead to nonsensical or unfocused outputs
</content>
</doc>
<doc>
<metadata>
<title>Temperature</title>
<url>https://langbase.com/docs/llm-parameters/temperature/</url>
</metadata>
<content>
import { generateMetadata } from '@/lib/generate-metadata';
# Temperature
Temperature controls the randomness of the model's output. It determines how likely the model is to pick less probable tokens during generation. Lower temperature makes responses more focused and predictable; higher values make them more creative and diverse.
## How does it work
When generating text, the model assigns probabilities to each possible next token. The temperature value adjusts how sharply those probabilities are weighted. A low temperature makes the model choose high-probability tokens more often. A high temperature flattens the distribution, making it more likely to sample lower-probability tokens.
## When to use temperature
- Use low temperature (0–0.3) for tasks that need accuracy or consistency (e.g., code, summaries, factual answers)
- Use medium temperature (0.5–0.7) for balanced output, coherent but slightly varied
- Use high temperature (0.8–1.0) for creative or exploratory tasks like storytelling, brainstorming, or poetry
## How to use temperature
1. Choose a value between 0 and 1. Lower value results in focused outputs, higher value results in more creative, random outputs
2. Add temperature to your API call
3. Combine with top_p or top_k for better control over randomness
4. Experiment with different values for your specific use case
## Tips
- A temperature of 0 makes the output fully deterministic
- Creative outputs generally benefit from a temperature between 0.7 and 0.9
- For production systems that need reliability, use lower values
- Temperature does not affect the prompt, it only influences how the model generates completions
</content>
</doc>
<doc>
<metadata>
<title>Stop Sequence</title>
<url>https://langbase.com/docs/llm-parameters/stop-sequence/</url>
</metadata>
<content>
import { generateMetadata } from '@/lib/generate-metadata';
# Stop Sequence
A stop sequence tells the model when to stop generating text. It acts like a cutoff signal when the model sees a specific string in its output, it immediately stops responding, even if it hasn't hit the max_tokens limit.
## How does it work
You provide one or more strings as stop sequences (e.g., `["\nHuman:", "<END>"]`). As the model generates tokens, it checks whether the latest text matches any of these sequences. If it does, generation stops, and the output is returned up to that point.
## When to use stop sequence
- When building chatbots or multi-turn dialogues where you want to stop before the next user prompt appears
- When using function-like patterns in prompts (e.g., Q: and A: pairs)
- When you need to cut off extra explanation or formatting
- When you want to extract clean data, especially when paired with structured prompts
## How to use stop sequence
1. Define your stop strings. E.g., `["\nUser:", "###"]`
2. Add them to your API call as `stop: ["<your_string>"]`
3. Make sure the stop sequence doesn't appear too early unless intentional
4. Test different formats especially if you're working with structured outputs or custom prompt patterns
## Tips
- You can use multiple stop sequences at once (up to 4 in OpenAI models)
- Stop sequences are case-sensitive and match exactly, watch for whitespace
- Useful when the model keeps going too long or starts repeating itself
- Works well with streaming if you want to cut off text live as it comes in
</content>
</doc>
<doc>
<metadata>
<title>Seed</title>
<url>https://langbase.com/docs/llm-parameters/seed/</url>
</metadata>
<content>
import { generateMetadata } from '@/lib/generate-metadata';
# Seed
The seed parameter sets a fixed starting point for the model's random number generator. It allows you to get repeatable results from the same prompt and parameters. Useful for testing, debugging, or consistency.
## How does it work
LLMs use randomness when sampling tokens, especially when temperature or top-p are above zero. By setting a seed (an integer), you lock the randomness so that each time you run the same prompt with the same seed and settings, you'll get the same output. Change the seed, and you'll get a different variation.
## When to use seed
- When you want consistent outputs for testing or demos
- When debugging prompt behavior and need reproducible results
- When generating multiple variations by looping through different seeds
- When building applications where repeatability is important (e.g. story generation, data augmentation)
## How to use seed
1. Choose a number. E.g., `seed: 42`
2. Add seed to your API call
3. Run the same prompt multiple times. You'll get the same output if all parameters match
4. Vary the seed to generate alternate outputs while keeping the same prompt
## Tips
- Requires temperature > 0, otherwise the output is always deterministic
- Changing any other parameter (e.g. top_p or prompt wording) will change the result, even with the same seed
- Great for A/B testing different prompt variations
- Not supported in all models, check documentation to confirm
</content>
</doc>
<doc>
<metadata>
<title>Presence Penalty</title>
<url>https://langbase.com/docs/llm-parameters/presence-penalty/</url>
</metadata>
<content>
import { generateMetadata } from '@/lib/generate-metadata';
# Presence Penalty
Presence penalty is a parameter that reduces the likelihood of the model repeating tokens it has already mentioned. It encourages the model to introduce new topics or ideas, rather than sticking to the same concepts.
## How does it work
During generation, the model keeps track of which tokens have already appeared. When a presence penalty is applied, the probability of repeating those tokens is lowered. This nudges the model to explore other directions or vocabulary.
## When to use presence penalty
- When the model repeats phrases or facts too often
- When you want more diverse or creative outputs
- When generating brainstorms, ideas, or lists
- When encouraging the model to move forward instead of circling back
## How to use presence penalty
1. Set a value between -2.0 and 2.0. Most commonly between 0.5 and 1.5
2. Add presence_penalty to your API call
3. Test with different types of prompts. Especially open-ended or creative ones
4. Adjust based on how much repetition you're seeing
## Tips
- Higher values result in more novelty, but can reduce coherence
- Combine with frequency penalty for finer control over repetition (presence looks at whether something has appeared; frequency looks at how often)
- Use with temperature > 0 to let the model explore a wider range of outputs
- Not ideal for factual or structured tasks, may push the model off-topic
</content>
</doc>
<doc>
<metadata>
<title>Max Tokens</title>
<url>https://langbase.com/docs/llm-parameters/max-tokens/</url>
</metadata>
<content>
import { generateMetadata } from '@/lib/generate-metadata';
# Max Tokens
Max tokens controls the maximum number of tokens the model is allowed to generate in its response. It puts a hard limit on the length of the output, helping you manage response size, latency, and cost.
## How does it work
Tokens are the basic units of text the model processes, roughly chunks of words or characters. When you set max_tokens, you're telling the model how many tokens it can generate after your input. If the response hits this limit, it stops even if the thought or sentence isn't complete.
## When to use max_tokens
- When you want to control output length
- When you're working with limited context window and need to save space
- When building summarizers, previews, or short-form content
- When you want to limit costs or latency in high-volume applications
## How to use max_tokens
1. Estimate your desired output length. E.g., 100 tokens ≈ 75 words
2. Set max_tokens in your API call. E.g., `max_tokens: 300`
3. Balance it with your prompt length. Total tokens (prompt + completion) must fit within the model's context window
4. Test and adjust. If responses feel too short or cut off, increase the limit
## Tips
- Use higher values for creative writing or long-form generation
- Use lower values for brief responses, like titles or summaries
- Always account for both prompt and completion length when working near the model's max context size
- If a response gets cut off mid-sentence, the max_tokens limit was likely too low, try increasing it
</content>
</doc>
<doc>
<metadata>
<title>Logprobs</title>
<url>https://langbase.com/docs/llm-parameters/logprobs/</url>
</metadata>
<content>
import { generateMetadata } from '@/lib/generate-metadata';
# Logprobs
Logprobs stands for logarithmic probabilities. It tells you how confident the model is about each token it generates. When enabled, the model returns a list of possible next tokens along with their probabilities (in log scale).
## How does it work
For each generated token, the model calculates the likelihood of every possible token in its vocabulary. When logprobs is enabled, it returns the top N most likely tokens (e.g., top 5) and their log-scaled probabilities. You can use this data to understand why the model chose a certain word or how close it was to choosing something else.
## When to use logprobs
- When you want to analyze model behavior or confidence
- When doing token-level debugging or prompt evaluation
- When building interactive UIs, autocomplete, or token visualization tools
- When you want to log or audit what the model "almost said"
## How to use logprobs
1. Set logprobs to an integer in your API call
2. The response will include the top 5 alternatives and their log probabilities for each token
3. Convert logprobs to probabilities if needed (e.g., `probability = e^(logprob)`)
4. Visualize, log, or analyze the data for each token
## Tips
- The higher the logprob, the more confident the model is (closer to 0 is better; values are negative)
- Use this to detect low-confidence answers, or see if your prompt leads to uncertainty
- Combine with `echo: true` if you want to see logprobs for both prompt and completion
- Not all APIs expose logprobs in chat mode, check if your model supports it
</content>
</doc>
<doc>
<metadata>
<title>JSON Mode</title>
<url>https://langbase.com/docs/llm-parameters/json-mode/</url>
</metadata>
<content>
import { generateMetadata } from '@/lib/generate-metadata';
# JSON Mode
JSON mode forces the model to respond strictly in valid JSON format, without any extra text, explanations, or markdown. It ensures that the output is clean, machine-readable, and ready for parsing. Ideal for structured workflows and automation.
## How does it work
When enabled, JSON mode constrains the model's output generation so that it only returns valid JSON. The model won't include comments, natural language descriptions, or any formatting outside of the JSON structure. This improves reliability and reduces the need for post-processing or regex-based parsing.
## When to use JSON mode
- When you need guaranteed machine-readable output
- When integrating with code, APIs, or tools that expect clean JSON
- When working with structured outputs, function calling, or tool use
- When building systems where output validation is critical
## How to use JSON mode
1. Enable JSON mode. In supported models (like OpenAI GPT-4 Turbo), set `response_format: "json"` in the API call
2. Prompt the model to return a specific structure. For example: Return your response in this format: `{"summary": string, "action_items": string[] }`
3. Parse the response. Since JSON mode guarantees well-formed JSON, you can safely use JSON.parse() in your application
4. Handle parsing errors. While rare in JSON mode, still validate the output if your application depends on strict schemas
## Tips
- JSON mode helps avoid formatting errors caused by markdown or extra natural language
- Pair with temperature = 0 for the most deterministic and consistent output
- Use in combination with structured output prompts to create API-ready responses
- Only available in certain models. Check the documentation for compatibility
</content>
</doc>
<doc>
<metadata>
<title>Frequency Penalty</title>
<url>https://langbase.com/docs/llm-parameters/frequency-penalty/</url>
</metadata>
<content>
import { generateMetadata } from '@/lib/generate-metadata';
# Frequency Penalty
Frequency penalty reduces the chance that the model will repeat the same tokens multiple times. It helps discourage overused words or phrases in the generated output.
## How does it work
As the model generates tokens, it tracks how many times each token has already appeared. The more frequently a token appears, the more its probability is penalized. This encourages the model to vary its wording rather than reuse the same terms repeatedly.
## When to use frequency penalty
- When the model repeats words or phrases too often
- When you want cleaner, less redundant output
- When generating lists, paragraphs, or creative writing
- When improving the readability of longer completions
## How to use frequency penalty
1. Set a value between -2.0 and 2.0. Most common values range from 0.5 to 1.5
2. Add frequency_penalty to your API call
3. Test the output. Increase the penalty if repetition remains
4. Adjust in combination with other parameters like temperature or presence_penalty
## Tips
- Higher values reduce repetition but may impact coherence if set too high
- Presence penalty penalizes whether a token has appeared at all; frequency penalty is based on how many times it appears
- Use in chatbots, content generation, and summaries where repeated language is common
- Can be especially helpful when the model gets stuck repeating similar phrases
</content>
</doc>
<doc>
<metadata>
<title>Integrations: Configure Langbase with Next.js</title>
<url>https://langbase.com/docs/integrations/nextjs/</url>
</metadata>
<content>
import { generateMetadata } from '@/lib/generate-metadata';
# Integrations: Configure Langbase with Next.js
### Let's integrate an AI title generator pipe agent into a Next.js app.
---
In this integration guide, you will:
- **Set up** a Next.js app.
- **Integrate** [Langbase SDK](/sdk) into your app via API route and Server Actions.
- **Generate** title ideas for your next blog using Pipe.
---
## Step #0: Create a Next.js Application
To build the agent, we need to have a Next.js starter app. If you don't have one, you can create a new app using the following command:
<CodeGroup exampleTitle="Initialize project" title="Initialize project">
```bash {{ title: 'npm' }}
npx create-next-app@latest generate-titles
```
```bash {{ title: 'pnpm' }}
pnpm create-next-app@latest generate-titles
```
```bash {{ title: 'yarn' }}
yarn create-next-app@latest generate-titles
```
</CodeGroup>
This will create a new Next.js application in the `generate-titles` directory. Navigate to the directory and start the development server:
<CodeGroup exampleTitle="Initialize project" title="Initialize project">
```bash {{ title: 'npm' }}
cd generate-titles && npm run dev
```
```bash {{ title: 'pnpm' }}
cd generate-titles && pnpm run dev
```
```bash {{ title: 'yarn' }}
cd generate-titles && yarn run dev
```
</CodeGroup>
## Step #1: Install Langbase SDK
Install the Langbase SDK in this project using npm or pnpm.
<CodeGroup exampleTitle="Install Langbase SDK" title="Install Langbase SDK">
```bash {{ title: 'npm' }}
npm install langbase
```
```bash {{ title: 'pnpm' }}
pnpm add langbase
```
```bash {{ title: 'yarn' }}
yarn add langbase
```
</CodeGroup>
## Step #2: Get Langbase API Key
Every request you send to Langbase needs an [API key](/api-reference/api-keys). This guide assumes you already have one. In case, you do not have an API key, please check the instructions below.
<Spoiler title="Get your Langbase API key: User or Org">
You can generate API keys from the [Langbase Studio](https://studio.langbase.com) by following these steps:
1. Switch to your user or org account.
2. From the sidebar, click on the `API keys`.
3. From here you can create a new API key or manage existing ones.
For more details, follow the [Langbase API keys](/api-reference/api-keys) documentation.
</Spoiler>
Create an `.env` file in the root of your project and add your Langbase API key.
```bash {{ title: '.env' }}
LANGBASE_API_KEY=xxxxxxxxx
```
Replace xxxxxxxxx with your Langbase API key.
## Step #3: Add LLM API keys
If you have set up LLM API keys in your profile, the Pipe will automatically use them. If not, navigate to [LLM API keys](https://langbase.com/settings/keys#keyset) page and add keys for different providers like OpenAI, TogetherAI, Anthropic, etc.
<Spoiler title="Add LLM API keys to your account">
You can add LLM API keys in your account using [Langbase Studio](https://studio.langbase.com) by following these steps:
1. Switch to your user or org account.
2. From the sidebar, click on the `API keys` and scroll down to the LLM API keys section.
3. From here you can add LLM API keys for different providers like OpenAI, TogetherAI, Anthropic, etc.
</Spoiler>
## Step #4: Fork the AI title generator agent pipe
Go ahead and fork the AI title generator [agent](https://langbase.com/langbase/ai-title-generator) pipe in Langbase Studio. This agent generates 5 different titles on a given topic.
## Step #5: Run the AI title generator agent
Let's learn how to use the Langbase SDK both on a serverless Next.js API route and a server action. Click on one of the buttons below to choose your preferred method.
<ContentTabs>
<ContentTab title="#1: Use API Route">
Let's create an API Route to generate titles using the Langbase SDK.
<CodeGroup title="api/run-agent/route.ts" >
```ts
import { Langbase } from 'langbase';
export async function POST(req: Request) {
try {
// Get request body from the client.
const body = await req.json();
const variables = body.variables;
const messages = body.messages;
const shouldStream = body.stream;
const langbase = new Langbase({
apiKey: process.env.LANGBASE_API_KEY!
});
// STREAM
if (shouldStream) {
const { stream } = await langbase.pipes.run({
stream: true,
messages,
variables,
name: 'ai-title-generator'
});
return new Response(stream, { status: 200 });
}
// NOT STREAM
const { completion } = await langbase.pipes.run({
stream: false,
messages,
variables,
name: 'ai-title-generator'
});
return Response.json(completion);
} catch (error: any) {
console.error('Uncaught API Error:', error);
return new Response(JSON.stringify(error), { status: 500 });
}
}
```
</CodeGroup>
Let's take a look at the code above:
1. Create a new file `api/run-agent/route.ts` in the `app` directory of your Next.js app.
2. Write a function called `POST` that uses Langbase Pipe to generate titles.
3. Get the variables, messages, and stream from the request body.
4. Based on the stream value, call the `langbase.pipes.run` method with `stream: true` or `stream: false`.
5. Return the response from the API route.
## Step 6: Call the API Route
Go ahead and add the following code to the `app/page.tsx` file to call the API route.
<CodeExamples className="grid-cols-2">
<CodeGroup exampleTitle="stream-off" title="Response on client side without streaming" label="app/page.tsx" id="default">
```tsx
'use client';
import { useState } from 'react';
import { getRunner } from 'langbase';
export default function Home() {
const [topic, setTopic] = useState('');
const [completion, setCompletion] = useState<string>('');
const [loading, setLoading] = useState(false);
const handleGenerateCompletion = async () => {
setLoading(true);
try {
const response = await fetch('/api/run-agent', {
method: 'POST',
headers: {
'Content-Type': 'application/json'
},
body: JSON.stringify({
stream: false,
messages: [{ role: 'user', content: topic }],
variables: { topic: topic },
})
})
const completionData = await response.json();
const parsedData = JSON.parse(completionData);
setCompletion(JSON.stringify(parsedData));
} catch (error) {
console.error('Error generating completion:', error);
} finally {
setLoading(false);
}
};
return (
<main className="flex min-h-screen flex-col items-center justify-between p-24">
<div className="flex flex-col items-center">
<h1 className="text-4xl font-bold">
Generate Text Completions
</h1>
<p className="mt-4 text-lg">
Enter a topic and click the button to generate titles using
LLM
</p>
<input
type="text"
placeholder="Enter a topic"
className="mt-4 rounded-lg border border-gray-300 p-2 text-sm"
value={topic}
onChange={e => setTopic(e.target.value)}
/>
<button
className="mt-4 rounded-lg bg-blue-500 p-2 text-white"
onClick={handleGenerateCompletion}
>
Generate titles
</button>
{loading && <p className="mt-4">Loading...</p>}
{completion && (
<div className="mt-4 w-full max-w-md">
<h2 className="text-xl font-semibold mb-2">Generated Titles:</h2>
<ul className="space-y-2">
{completion}
</ul>
</div>
)}
</div>
</main>
);
}
```
</CodeGroup>
<CodeGroup exampleTitle="Stream-on" title="Response on client side with streaming" label="app/page.tsx" id="streaming">
```tsx {{ title: 'app/page.tsx' }}
'use client';
import { useState } from 'react';
import { getRunner } from 'langbase';
export default function Home() {
const [topic, setTopic] = useState('');
const [completion, setCompletion] = useState<string>('');
const [loading, setLoading] = useState(false);
const handleGenerateCompletion = async () => {
setLoading(true);
try {
const response = await fetch('/api/run-agent', {
method: 'POST',
headers: {
'Content-Type': 'application/json'
},
body: JSON.stringify({
stream: true,
messages: [{ role: 'user', content: topic }],
variables: { topic: topic },
})
});
if (!response.ok) {
const error = await response.json();
console.error('Error generating completion:', error);
return;
}
if (response.body) {
const runner = getRunner(response.body);
for await (const chunk of runner) {
const content = chunk?.choices[0]?.delta?.content || '';
content && setCompletion(prev => prev + content);
}
}
} catch (error) {
console.error('Error generating completion:', error);
} finally {
setLoading(false);
}
};
return (
<main className="flex min-h-screen flex-col items-center justify-between p-24">
<div className="flex flex-col items-center">
<h1 className="text-4xl font-bold">
Generate Text Completions
</h1>
<p className="mt-4 text-lg">
Enter a topic and click the button to generate titles using
LLM
</p>
<input
type="text"
placeholder="Enter a topic"
className="mt-4 rounded-lg border border-gray-300 p-2 text-sm"
value={topic}
onChange={e => setTopic(e.target.value)}
/>
<button
className="mt-4 rounded-lg bg-blue-500 p-2 text-white"
onClick={handleGenerateCompletion}
>
Generate titles
</button>
{loading && <p className="mt-4">Loading...</p>}
{completion && (
<div className="mt-4 w-full max-w-md">
<h2 className="mb-2 text-xl font-semibold">
Generated Titles:
</h2>
<ul className="space-y-2">{completion}</ul>
</div>
)}
</div>
</main>
);
}
```
</CodeGroup>
</CodeExamples>
Let's break down the code above:
1. Create states for `topic`, `completion`, and `loading`.
2. Create a function called `handleGenerateCompletion` that calls the API route.
3. Use the `fetch` API to call the API route and pass the `topic` variable in the request body.
4. If the `stream` is `true`, use the `getRunner` method to get the stream and update the `completion` state with the generated titles.
5. If the `stream` is `false`, parse the response and update the `completion` state with the generated titles.
6. Display the generated titles in a list format.
</ContentTab>
<ContentTab title="#2: Use Server Action">
Let's create a Server Action to generate titles using the Langbase SDK. Create a new file `actions.ts` in the `app` directory and add the following code:
<CodeExamples className="grid-cols-2">
<CodeGroup exampleTitle="stream-off" title="Server Action for Title Generation without streaming" label="app/actions.ts" id="default">
```tsx
'use server';
import {Langbase} from 'langbase';
const response = await langbase.pipes.run({
stream: false,
name: 'ai-title-generator',
variables: {topic: topic},
messages: [{role: 'user', content: topic}],
});
return response.completion;
} catch (error: any) {
console.error('Uncaught API Error:', error);
throw new Error('Failed to generate title.');
}
};
```
</CodeGroup>
<CodeGroup exampleTitle="Stream-on" title="Server Action for Title Generation with streaming" label="app/actions.ts" id="streaming">
```tsx
'use server';
import {Langbase} from 'langbase';
const streamResponse = await langbase.pipes.run({
stream: true,
name: 'ai-title-generator',
variables: {topic: topic},
messages: [{role: 'user', content: topic}],
});
return streamResponse;
} catch (error: any) {
console.error('Uncaught API Error:', error);
throw new Error('Failed to generate title.');
}
};
```
</CodeGroup>
</CodeExamples>
Let's break down the code above:
1. Import the `Langbase` class from the `langbase` package.
2. Create a function called `runAiTitleGeneratorAgent` that takes a `topic` as an argument.
3. Inside the function, create a new instance of `Langbase` with the API key.
4. Call the `langbase.pipes.run` method with the `stream` option set to `true` or `false`, depending on whether you want to use streaming or not.
5. Return the response from the `langbase.pipes.run` method.
6. If an error occurs, log the error and throw a new error.
## Step 6: Call the Server Action
Now that we have created the Server Action, we can call it from the client side. Let's add the following code to the `app/page.tsx` file to call the Server Action.
<CodeExamples className="grid-cols-2">
<CodeGroup exampleTitle="stream-off" title="Response on client side without streaming" label="app/page.tsx" id="default">
```tsx {{ title: 'app/page.tsx' }}
'use client';
import { useState } from 'react';
import { runAiTitleGeneratorAgent } from './actions';
export default function Home() {
const [topic, setTopic] = useState('');
const [completion, setCompletion] = useState('');
const [loading, setLoading] = useState(false);
const handleRunAiTitleGeneratorAgent = async () => {
setLoading(true);
const completion = await runAiTitleGeneratorAgent({topic: topic});
setCompletion(completion);
setLoading(false);
};
return (
<main className="flex min-h-screen flex-col items-center justify-between p-24">
<div className="flex flex-col items-center">
<h1 className="text-4xl font-bold">
Generate Text Completions
</h1>
<p className="mt-4 text-lg">
Enter a topic and click the button to generate titles using
LLM
</p>
<input
type="text"
placeholder="Enter a topic"
className="mt-4 rounded-lg border border-gray-300 p-2 text-sm"
value={topic}
onChange={e => setTopic(e.target.value)}
/>
<button
className="mt-4 rounded-lg bg-blue-500 p-2 text-white"
onClick={handleRunAiTitleGeneratorAgent}
>
Generate titles
</button>
{loading && <p className="mt-4">Loading...</p>}
{completion && (
<p className="mt-4">
<strong>Completion:</strong> {completion}
</p>
)}
</div>
</main>
);
}
```
</CodeGroup>
<CodeGroup exampleTitle="Stream-on" title="Response on client side with streaming" label="app/page.tsx" id="streaming">
```tsx {{ title: 'app/page.tsx' }}
'use client';
import { useState } from 'react';
import { runAiTitleGeneratorAgent } from './actions';
import { getRunner } from 'langbase';
export default function Home() {
const [topic, setTopic] = useState('');
const [completion, setCompletion] = useState('');
const [loading, setLoading] = useState(false);
const handleRunAiTitleGeneratorAgent = async () => {
setLoading(true);
const response = await runAiTitleGeneratorAgent({
topic: topic,
});
if (response.stream) {
const stream = getRunner(response.stream);
for await (const chunk of stream) {
const content = chunk?.choices[0]?.delta?.content;
content && setCompletion(prev => prev + content);
}
}
};
return (
<main className="flex min-h-screen flex-col items-center justify-between p-24">
<div className="flex flex-col items-center">
<h1 className="text-4xl font-bold">
Generate Text Completions
</h1>
<p className="mt-4 text-lg">
Enter a topic and click the button to generate titles using
LLM
</p>
<input
type="text"
placeholder="Enter a topic"
className="mt-4 rounded-lg border border-gray-300 p-2 text-sm"
value={topic}
onChange={e => setTopic(e.target.value)}
/>
<button
className="mt-4 rounded-lg bg-blue-500 p-2 text-white"
onClick={handleRunAiTitleGeneratorAgent}
>
Generate titles
</button>
{loading && <p className="mt-4">Loading...</p>}
{completion && (
<p className="mt-4">
<strong>Completion:</strong> {completion}
</p>
)}
</div>
</main>
);
}
```
</CodeGroup>
</CodeExamples>
Let's break down the code above:
1. Import the `runAiTitleGeneratorAgent` function from the `actions.ts` file.
2. Create states for `topic`, `completion`, and `loading`.
3. Create a function called `handleRunAiTitleGeneratorAgent` that calls the Server Action.
4. Call the `runAiTitleGeneratorAgent` function and pass the `topic` variable.
5. If the `stream` is `true`, use the `getRunner` method to get the stream and update the `completion` state with the generated titles.
6. If the `stream` is `false`, parse the response and update the `completion` state with the generated titles.
7. Display the generated titles in a list format.
</ContentTab>
</ContentTabs>
## Step #7: Run the Next.js App
To run the Next.js app, execute the following command:
<CodeGroup exampleTitle="Run the Next.js app" title="Run the Next.js app">
```bash {{ title: 'npm' }}
npm run dev
```
```bash {{ title: 'pnpm' }}
pnpm run dev
```
```bash {{ title: 'yarn' }}
yarn run dev
```
</CodeGroup>
Open your browser and navigate to `http://localhost:3000`. You should see the app running with an input field to enter a topic, a button to generate titles, and a paragraph to display the generated titles.
Give it a try by entering a topic and clicking the `Generate titles` button.
Here are the example AI generated title for the topic `Large Language Models`:
```md
1. "Unlocking the Power of Large Language Models"
2. "The Future of AI: Large Language Models Explained"
3. "Large Language Models: Transforming Communication"
4. "Understanding Large Language Models in AI"
5. "The Impact of Large Language Models on Society"
```
---
## Next Steps
- Build something cool with Langbase [APIs](/api-reference) and [SDK](/sdk).
- Join our [Discord community](https://langbase.com/discord) for feedback, requests, and support.
---
</content>
</doc>
<doc>
<metadata>
<title>Integrations: Langbase with n8n Workflows</title>
<url>https://langbase.com/docs/integrations/n8n/</url>
</metadata>
<content>
import { generateMetadata } from '@/lib/generate-metadata';
# Integrations: Langbase with n8n Workflows
### Let's take a look at how to integrate Langbase Pipe into your n8n workflows.
---
In this integration guide, you will:
- Learn how to set up **Langbase Pipe** in your n8n workflow.
- Understand how to **configure** the HTTP Request node to communicate with Langbase Pipe.
- **Extract and manipulate** the response from Langbase Pipe using n8n's data transformation features.
---
## Step #1: Get the Pipe run cURL request
To get started with integrating Langbase Pipe into your n8n workflow, follow these steps:
1. Navigate to [Langbase Studio](https://studio.langbase.com).
2. Create a new Pipe agent or select an existing one. You can also fork this [AI Support agent](https://langbase.com/examples/ai-support-agent) pipe.
<Img
light="/docs/integrations/n8n/pipe.jpg"
dark="/docs/integrations/n8n/pipe.jpg"
alt="Langbase Pipe"
caption="Langbase Pipe"
/>
3. Navigate to the API tab in your Langbase Pipe to access its API endpoint and API key.
<Img
light="/docs/integrations/n8n/pipe-api-section.jpg"
dark="/docs/integrations/n8n/pipe-api-section.jpg"
alt="Langbase Pipe API Section"
caption="Langbase Pipe API Section"
/>
4. Scroll to the **Run the Pipe (simple)** section.
5. Click on the **STREAM-OFF** tab.
6. Copy the Pipe run **cURL** request.
<Img
light="/docs/integrations/n8n/pipe-curl-req.jpg"
dark="/docs/integrations/n8n/pipe-curl-req.jpg"
alt="Langbase Pipe cURL Request"
caption="Langbase Pipe cURL Request"
/>
## Step #2: Configure HTTP Request Node in n8n
1. Open your n8n workspace and navigate to your workflow.
2. Add a new node by clicking the **+** icon.
3. Select HTTP Request node from the Core section.
4. This node will handle the API communication with Langbase.
<Img
light="/docs/integrations/n8n/n8n-workflow.jpg"
dark="/docs/integrations/n8n/n8n-workflow.jpg"
alt="n8n workflow"
caption="n8n workflow"
/>
## Step #3: Import Pipe run cURL request
1. Click on the `Import cURL` button. A **popup** will appear on your screen.
2. Paste the Pipe run cURL request you copied earlier into the popup.
3. Click on `Execute Step` button.
4. You will see the response in the `OUTPUT` section.
<Img
light="/docs/integrations/n8n/n8n-workflow-http.jpg"
dark="/docs/integrations/n8n/n8n-workflow-http.jpg"
alt="n8n workflow HTTP Request"
caption="n8n workflow HTTP Request"
/>
## Step #4: Create a new data transformation node
1. Add another new node to your workflow.
2. Navigate to **Data transformation** section.
3. Select `Edit Fields (Set)` to extract specific response.
<Img
light="/docs/integrations/n8n/n8n-edit-field.jpg"
dark="/docs/integrations/n8n/n8n-edit-field.jpg"
alt="n8n workflow Edit Fields (Set)"
caption="n8n workflow Edit Field"
/>
## Step #5: Extract and manipulate the response
You can consume the response from the Langbase Pipe in your n8n workflow by extracting the `completion` field from the response.
1. Drag the `completion` field in the **Field to Set** input field.
2. Execute the transformation by clicking `Execute Step`.
3. Now you can see the response in the **OUTPUT** section.
<Img
light="/docs/integrations/n8n/n8n-response.jpg"
dark="/docs/integrations/n8n/n8n-response.jpg"
alt="n8n workflow response"
caption="n8n workflow response"
/>
<Img
light="/docs/integrations/n8n/n8n-output.png"
dark="/docs/integrations/n8n/n8n-output.png"
alt="n8n workflow Output"
caption="n8n workflow Output"
/>
<Note sub="Info">
See our [API Reference](/api-reference) for more API endpoints and cURL
requests.
</Note>
---
## Next Steps
- Build something cool with Langbase [APIs](/api-reference) and [SDK](/sdk).
- Join our [Discord community](https://langbase.com/discord) for feedback, requests, and support.
---
</content>
</doc>
<doc>
<metadata>
<title>Integrations: Langbase with Composio Tools</title>
<url>https://langbase.com/docs/integrations/composio/</url>
</metadata>
<content>
import { generateMetadata } from '@/lib/generate-metadata';
import { ExplainationBlock } from '@/components/explaination-block';
<LanguageProvider defaultLanguage='typescript'>
# Integrations: Langbase with Composio Tools
### Let's take a look at how to integrate Langbase with Composio Tools.
---
In this integration guide, you will:
- Learn how to connect your **Langbase Pipe Agents** with Composio tools.
- Composio give you access to lots of real-world tools.
- Build agents that can execute tools from Slack, GitHub, Gmail, Linear, Notion, etc.
---
## What is Composio?
Think of [Composio](https://docs.composio.dev/docs/welcome) as the universal adapter for tools. It standardizes tools into simple function calls that your agents can understand.
- Pre-built tools for every major service
- Authentication handled automatically
Let's take a look at how to integrate Langbase with Composio Tools.
---
## Prerequisites
You'll need:
1. **Langbase account** - [Sign up here](https://langbase.com)
2. **Composio account** - [Get your API key](https://composio.dev)
3. **Node.js 18+** or **Python 3.8+**
---
## Step #1: Setup[lang]
### Install the SDKs
<LanguageContent language="typescript">
<CodeGroup exampleTitle="Install dependencies" title="Install dependencies">
```bash {{ title: 'npm' }}
npm install langbase @composio/core dotenv
```
```bash {{ title: 'pnpm' }}
pnpm add langbase @composio/core dotenv
```
```bash {{ title: 'yarn' }}
yarn add langbase @composio/core dotenv
```
</CodeGroup>
</LanguageContent>
<LanguageContent language="python">
<CodeGroup exampleTitle="Install dependencies" title="Install dependencies">
```bash
pip install langbase composio python-dotenv
```
</CodeGroup>
</LanguageContent>
### Environment setup
Create a `.env` file with your API keys:
<CodeGroup exampleTitle="Environment setup" title=".env">
```bash {{ title: '.env' }}
COMPOSIO_API_KEY="your_composio_api_key_here"
LANGBASE_API_KEY="your_langbase_api_key_here"
OPENAI_API_KEY="your_openai_api_key_here"
USER_ID="your_user_id_here"
ACCOUNT_ID="your_account_id_here"
```
</CodeGroup>
## Step #3: Connect Slack to Composio
To connect Slack to Composio and enable tool access for your agent, follow these steps:
1. Go to the [Composio dashboard](https://platform.composio.dev/).
2. In the navbar, click on `All Toolkits` button.
3. Search for Slack, open it.
4. Inside the Slack toolkit, click `Add to Project` button.
5. Pick your authentication method OAuth2 or Bearer Token.
6. After authentication click `Connect Account` button.
7. Enter the `External User ID` you want to associate with this Slack connection.
8. Enter the `Token` this is the Slack token `xoxb-...`.
9. Once connected, your account will show up under connected accounts.
10. After connecting, copy the generated **Account ID** (e.g., `ca_xxxxxxxx`).
For a deeper walkthrough, check the [Composio tools authentication docs](https://docs.composio.dev/docs/authenticating-tools).
<Info>
Store your `USER_ID` and `ACCOUNT_ID` in environment variables for easy, secure access in your code.
</Info>
## Step #3: Create a Langbase Pipe with Composio Tools
We'll create a Langbase Pipe that can use Slack tools through Composio.
### Create the pipe
<LanguageContent language="typescript">
<CodeGroup exampleTitle="Create Slack agent" title="create-slack-agent.ts">
```ts {{ title: 'TypeScript' }}
import 'dotenv/config';
import { Langbase, Tools } from 'langbase';
import { Composio } from '@composio/core';
async function main() {
const langbase = new Langbase({
apiKey: process.env.LANGBASE_API_KEY!,
});
const composio = new Composio({
apiKey: process.env.COMPOSIO_API_KEY!
});
const userId = process.env.USER_ID!;
const accountId = process.env.ACCOUNT_ID!;
const tools = await composio.tools.get(userId, {
toolkits: ['slack'],
});
const rawTools = extractRawTools(tools);
const langbaseTools: Tools[] = rawTools
.filter(isValidFunctionTool)
.map(tool => ({
type: 'function' as const,
function: {
name: tool.function.name,
description: tool.function.description,
parameters: tool.function.parameters,
},
}));
await langbase.pipes.create({
name: 'slack-agent',
description: 'AI agent that can interact with Slack Workspaces',
model: 'openai:gpt-5-mini-2025-08-07',
tools: langbaseTools,
messages: [{
role: 'system',
content: `You are a helpful Slack assistant. You can execute the available tools to help users with Slack tasks.
Here are some things you can do:
- Send messages to channels or users
- Create and manage channels
- Look up user or channel information
- Automate reminders and notifications
- And more!
Always use the available tools to assist users with their Slack workspace needs.
If you are unsure, ask clarifying questions or suggest helpful actions.`,
}],
upsert: true
});
}
main();
// Robustly extract tools and validate structure for production readiness
function extractRawTools(tools: unknown): unknown[] {
if (Array.isArray(tools)) {
return tools;
}
if (tools && typeof tools === 'object' && 'tools' in tools && Array.isArray((tools as any).tools)) {
return (tools as { tools: unknown[] }).tools;
}
return [];
}
function isValidFunctionTool(
tool: unknown
): tool is { type: 'function'; function: { name: string; description?: string; parameters?: Record<string, unknown> } } {
if (
typeof tool !== 'object' ||
tool === null ||
(tool as any).type !== 'function' ||
typeof (tool as any).function !== 'object' ||
(tool as any).function === null ||
typeof (tool as any).function.name !== 'string'
) {
return false;
}
// Optionally, add more validation for parameters/description if needed
return true;
}
```
</CodeGroup>
</LanguageContent>
<LanguageContent language="python">
<CodeGroup exampleTitle="Create Slack agent" title="create-slack-agent.py">
```python
import os
from typing import Any, Dict, List
from dotenv import load_dotenv
from langbase import Langbase
from composio import Composio
def main() -> None:
load_dotenv()
langbase_api_key = os.getenv("LANGBASE_API_KEY")
composio_api_key = os.getenv("COMPOSIO_API_KEY")
user_id = os.getenv("USER_ID")
account_id = os.getenv("ACCOUNT_ID")
missing_env = [
name
for name, value in {
"LANGBASE_API_KEY": langbase_api_key,
"COMPOSIO_API_KEY": composio_api_key,
"USER_ID": user_id,
"ACCOUNT_ID": account_id,
}.items()
if not value
]
if missing_env:
raise RuntimeError(
"Missing required environment variables: " + ", ".join(missing_env)
)
langbase = Langbase(api_key=langbase_api_key)
composio = Composio(api_key=composio_api_key)
raw_tools = extract_raw_tools(
composio.tools.get(user_id=user_id, toolkits=["slack"])
)
langbase_tools: List[FunctionTool] = [
{
"type": "function",
"function": {
"name": tool["function"]["name"],
"description": tool["function"].get("description"),
"parameters": tool["function"].get("parameters"),
},
}
for tool in raw_tools
if is_valid_function_tool(tool)
]
if not langbase_tools:
print("No compatible Composio tools found for toolkit 'slack'.")
return
langbase.pipes.create(
name="slack-agent",
description="AI agent that can interact with Slack Workspaces",
model="openai:gpt-5-mini",
tools=langbase_tools,
messages=[
{
"role": "system",
"content": (
"You are a helpful Slack assistant. You can execute the available tools "
"to help users with Slack tasks.\n"
"Here are some things you can do:\n"
"- Send messages to channels or users\n"
"- Create and manage channels\n"
"- Look up user or channel information\n"
"- Automate reminders and notifications\n"
"- And more!\n"
"Always use the available tools to assist users with their Slack workspace "
"needs. If you are unsure, ask clarifying questions or suggest helpful actions."
),
}
],
upsert=True,
)
print("✅ Langbase pipe 'slack-agent' created or updated successfully.")
def extract_raw_tools(tools: Any) -> List[Any]:
if isinstance(tools, list):
return tools
if isinstance(tools, dict):
nested_tools = tools.get("tools")
if isinstance(nested_tools, list):
return nested_tools
return []
def is_valid_function_tool(tool: Any) -> bool:
if not isinstance(tool, dict):
return False
if tool.get("type") != "function":
return False
function = tool.get("function")
if not isinstance(function, dict):
return False
name = function.get("name")
if not isinstance(name, str) or not name:
return False
return True
if __name__ == "__main__":
main()
```
</CodeGroup>
</LanguageContent>
## Step #4: Slack Agent with Composio Tools
Now the fun part. Let's run your Slack agent and see it in action.
<ExplainationBlock explanation={`
This code demonstrates how to orchestrate a Slack agent end-to-end with Langbase pipes and Composio's Slack toolkit:
1. Bootstraps Langbase and Composio clients using the API keys provided in your environment.
2. Fetches your Slack-ready tool definitions from Composio and reshapes them into Langbase-compatible function tools.
3. Runs the pipe with a sample user request, captures any tool calls, executes them through Composio, and feeds the results back into the conversation.
4. Prints the final agent response so you can verify the Slack action landed as expected.`} />
<LanguageContent language="typescript">
<CodeGroup exampleTitle="Run your Slack agent" title="run-agent.ts">
```ts {{ title: 'TypeScript' }}
import 'dotenv/config';
import { getToolsFromRun, Langbase, type Tools } from 'langbase';
import { Composio } from '@composio/core';
async function main() {
const langbase = new Langbase({
apiKey: process.env.LANGBASE_API_KEY!,
});
// 1. Initialize Composio.
const composio = new Composio({
apiKey: process.env.COMPOSIO_API_KEY!
});
const userId = process.env.USER_ID!;
const account_id = process.env.ACCOUNT_ID!;
const tools = await composio.tools.get(userId, {
toolkits: ['slack'],
});
const rawTools = extractRawTools(tools);
const langbaseTools: Tools[] = rawTools
.filter(isValidFunctionTool)
.map(tool => ({
type: 'function' as const,
function: {
name: tool.function.name,
description: tool.function.description,
parameters: tool.function.parameters,
},
}));
// You can uncomment this to create the pipe agent and change any parameters
// await createSlackAgent();
const response = await langbase.pipes.run({
name: 'slack-agent',
messages: [{
role: 'user',
content: 'Send hello in #social'
}],
stream: false,
tools: langbaseTools
});
const toolCalls = await getToolsFromRun(response);
const hasToolCalls = toolCalls.length > 0;
const threadId = response.threadId;
if (hasToolCalls) {
// Process each tool call
const toolResultPromises = toolCalls.map(async (toolCall): Promise<any> => {
const toolName = toolCall.function.name;
const toolParameters = JSON.parse(toolCall.function.arguments);
const toolResponse = await composio.tools.execute(toolName, {
userId: userId,
arguments: toolParameters,
connectedAccountId: account_id
});
return {
role: 'tool',
tool_call_id: toolCall.id,
content: JSON.stringify(toolResponse.data),
};
});
// Wait for all tool calls to complete
const toolResults = await Promise.all(toolResultPromises);
// Call the agent pipe again with the updated messages
const finalResponse = await langbase.pipes.run({
threadId,
stream: false,
name: 'slack-agent',
messages: toolResults,
tools: langbaseTools,
});
console.log('Final response:', finalResponse.completion);
}
async function createSlackAgent(){
await langbase.pipes.create({
name: 'slack-agent',
description: 'AI agent that can interact with Slack Workspaces',
model: 'openai:gpt-5-mini-2025-08-07',
tools: langbaseTools,
messages: [{
role: 'system',
content: `You are a helpful Slack assistant. You can execute the available tools to help users with Slack tasks.
Here are some things you can do:
- Send messages to channels or users
- Create and manage channels
- Look up user or channel information
- Automate reminders and notifications
- And more!
Always use the available tools to assist users with their Slack workspace needs.
If you are unsure, ask clarifying questions or suggest helpful actions.`,
}],
upsert: true
});
}
}
main();
// Robustly extract tools and validate structure for production readiness
function extractRawTools(tools: unknown): unknown[] {
if (Array.isArray(tools)) {
return tools;
}
if (tools && typeof tools === 'object' && 'tools' in tools && Array.isArray((tools as any).tools)) {
return (tools as { tools: unknown[] }).tools;
}
return [];
}
function isValidFunctionTool(
tool: unknown
): tool is { type: 'function'; function: { name: string; description?: string; parameters?: Record<string, unknown> } } {
if (
typeof tool !== 'object' ||
tool === null ||
(tool as any).type !== 'function' ||
typeof (tool as any).function !== 'object' ||
(tool as any).function === null ||
typeof (tool as any).function.name !== 'string'
) {
return false;
}
// Optionally, add more validation for parameters/description if needed
return true;
}
```
</CodeGroup>
</LanguageContent>
<LanguageContent language="python">
<CodeGroup exampleTitle="Run your Slack agent" title="run-agent.py">
```python {{ title: 'Python' }}
import json
import os
from typing import Any, Dict, List, Optional
from dotenv import load_dotenv
from langbase import Langbase, get_tools_from_run
from composio import Composio
def main() -> None:
load_dotenv()
langbase_api_key = os.getenv("LANGBASE_API_KEY")
composio_api_key = os.getenv("COMPOSIO_API_KEY")
user_id = os.getenv("USER_ID")
account_id = os.getenv("ACCOUNT_ID")
missing_env = [
name
for name, value in {
"LANGBASE_API_KEY": langbase_api_key,
"COMPOSIO_API_KEY": composio_api_key,
"USER_ID": user_id,
"ACCOUNT_ID": account_id,
}.items()
if not value
]
if missing_env:
raise RuntimeError(
"Missing required environment variables: " + ", ".join(missing_env)
)
langbase = Langbase(api_key=langbase_api_key)
composio = Composio(api_key=composio_api_key)
raw_tools = extract_raw_tools(
composio.tools.get(user_id=user_id, toolkits=["slack"])
)
langbase_tools: List[FunctionTool] = [
{
"type": "function",
"function": {
"name": tool["function"]["name"],
"description": tool["function"].get("description"),
"parameters": tool["function"].get("parameters"),
},
}
for tool in raw_tools
if is_valid_function_tool(tool)
]
if not langbase_tools:
print("No compatible Composio tools found for toolkit 'slack'.")
return
# You can uncomment this to create the pipe agent and change any parameters
# create_slack_agent(langbase, langbase_tools)
response = langbase.pipes.run(
name="slack-agent",
messages=[{"role": "user", "content": "Send hello in #social"}],
stream=False,
tools=langbase_tools,
)
tool_calls = get_tools_from_run(response)
thread_id = extract_thread_id(response)
if not tool_calls:
print("Agent response:", response.get("completion"))
return
if not thread_id:
print("No thread_id returned from initial run; cannot continue tool loop.")
return
assistant_message = extract_assistant_message(response)
tool_results = []
for tool_call in tool_calls:
function = tool_call.get("function") or {}
tool_name = function.get("name")
raw_arguments = function.get("arguments", "{}")
if not tool_name:
print("Skipping tool call without a function name.")
continue
try:
parsed_arguments = json.loads(raw_arguments)
except json.JSONDecodeError as exc:
print(f"Failed to parse arguments for tool '{tool_name}': {exc}")
continue
try:
tool_response = composio.tools.execute(
tool_name,
user_id=user_id,
arguments=parsed_arguments,
connected_account_id=account_id,
)
except Exception as exc:
print(f"Error executing tool '{tool_name}': {exc}")
continue
tool_call_id = tool_call.get("id")
if not tool_call_id:
print(f"Skipping tool call '{tool_name}' without an id.")
continue
tool_results.append(
{
"role": "tool",
"tool_call_id": tool_call_id,
"content": format_tool_response(tool_response),
}
)
if not tool_results:
print("No tool results available to send back to the agent.")
return
follow_up_messages: List[Dict[str, Any]] = []
if assistant_message:
follow_up_messages.append(assistant_message)
follow_up_messages.extend(tool_results)
final_response = langbase.pipes.run(
thread_id=thread_id,
stream=False,
name="slack-agent",
messages=follow_up_messages,
tools=langbase_tools,
)
print("Final response:", final_response.get("completion"))
def create_slack_agent(langbase: Langbase, tools: List[FunctionTool]) -> None:
langbase.pipes.create(
name="slack-agent",
description="AI agent that can interact with Slack Workspaces",
model="openai:gpt-5-mini-2025-08-07",
tools=tools,
messages=[
{
"role": "system",
"content": (
"You are a helpful Slack assistant. You can execute the available tools "
"to help users with Slack tasks.\n"
"Here are some things you can do:\n"
"- Send messages to channels or users\n"
"- Create and manage channels\n"
"- Look up user or channel information\n"
"- Automate reminders and notifications\n"
"- And more!\n"
"Always use the available tools to assist users with their Slack workspace needs. "
"If you are unsure, ask clarifying questions or suggest helpful actions."
),
}
],
upsert=True,
)
def extract_raw_tools(tools: Any) -> List[Any]:
if isinstance(tools, list):
return tools
if isinstance(tools, dict):
nested_tools = tools.get("tools")
if isinstance(nested_tools, list):
return nested_tools
return []
def is_valid_function_tool(tool: Any) -> bool:
if not isinstance(tool, dict):
return False
if tool.get("type") != "function":
return False
function = tool.get("function")
if not isinstance(function, dict):
return False
name = function.get("name")
if not isinstance(name, str) or not name:
return False
return True
def format_tool_response(tool_response: Any) -> str:
if isinstance(tool_response, dict):
data = tool_response.get("data", tool_response)
else:
data = getattr(tool_response, "data", tool_response)
try:
return json.dumps(data)
except TypeError:
return str(data)
def extract_thread_id(response: Dict[str, Any]) -> Optional[str]:
for key in ("thread_id", "threadId", "threadID"):
value = response.get(key)
if isinstance(value, str) and value:
return value
thread = response.get("thread")
if isinstance(thread, dict):
for key in ("id", "thread_id", "threadId"):
value = thread.get(key)
if isinstance(value, str) and value:
return value
return None
def extract_assistant_message(response: Dict[str, Any]) -> Optional[Dict[str, Any]]:
try:
choices = response.get("choices", [])
if not choices:
return None
message = choices[0].get("message")
if not isinstance(message, dict):
return None
tool_calls = message.get("tool_calls")
if isinstance(tool_calls, list) and tool_calls:
return {
"role": "assistant",
"content": message.get("content", ""),
"tool_calls": tool_calls,
}
except (KeyError, TypeError):
return None
return None
if __name__ == "__main__":
main()
```
</CodeGroup>
</LanguageContent>
---
## Advanced Usage
### Using Langbase Memory to Retrieve Information and Send to Slack
You can combine Langbase's memory retrieval with your Slack agent to build more context-aware agents. For example, you might want to fetch a notes from memory, then send a summary or reminder to a Slack channel.
Here's a TypeScript example that demonstrates this workflow:
<ExplainationBlock
explanation={`
This example shows how to build a seamless workflow that retrieves information from Langbase memory and sends it to a Slack channel using Composio tools.
1. Ensure your Langbase memory exists and contains your document.
2. Initialize Composio and fetch the Slack tools for your user.
3. Convert the Composio tools to the Langbase format.
4. Use Langbase to run an agent pipe that can access both memory and Slack tools.
5. Retrieve the information from the memory.
6. When the agent decides to use a tool (like sending a Slack message), handle the tool call and send the result back to the agent.
`}
/>
<LanguageContent language="typescript">
<CodeGroup exampleTitle="Retrieve from memory and send to Slack" title="memory-to-slack.ts">
```ts {{ title: 'TypeScript' }}
import { Composio } from '@composio/core';
import 'dotenv/config';
import {getToolsFromRun, Langbase, Tools} from 'langbase';
const langbase = new Langbase({
apiKey: process.env.LANGBASE_API_KEY!,
});
async function main() {
const isMemoryExists = await langbase.memories.list().then((memories) => memories.find((memory) => memory.name === 'notes-slack'));
if (!isMemoryExists) {
// 1. Create the memory
await langbase.memories.create({
name: 'notes-slack',
embedding_model: 'openai:text-embedding-3-large'
});
// 2. Upload the document to the memory
await langbase.memories.documents.upload({
document: Buffer.from('Langbase is the most powerful serverless AI cloud for building and deploying AI agents.
Build, deploy, and scale serverless AI agents with tools and memory (RAG). Simple AI primitives no bloated frameworks, all with a world-class developer experience without using any frameworks.
'),
memoryName: 'notes-slack',
documentName: 'notes.txt',
contentType: 'text/plain',
});
}
// 3. Initialize Composio.
const composio = new Composio({
apiKey: process.env.COMPOSIO_API_KEY!
});
const userId = process.env.USER_ID!;
const account_id = process.env.ACCOUNT_ID!;
// 4. Get the tools from Composio
const tools = await composio.tools.get(userId, {
toolkits: ['slack'],
});
const rawTools = extractRawTools(tools);
// 5. Convert the tools to Langbase format
const langbaseTools: Tools[] = rawTools
.filter(isValidFunctionTool)
.map(tool => ({
type: 'function' as const,
function: {
name: tool.function.name,
description: tool.function.description,
parameters: tool.function.parameters,
},
}));
const memory = await langbase.memories.retrieve({
memory: [{name: 'notes-slack'}],
query: 'What is Langbase?',
});
console.log(memory);
// 6. Run the agent pipe
const response = await langbase.pipes.run({
name: 'slack-agent',
messages: [{
role: 'user',
content: `Send a message in #social with the summary of the notes : ${memory[0].text}`
}],
stream: false,
tools: langbaseTools
});
const toolCalls = await getToolsFromRun(response);
const hasToolCalls = toolCalls.length > 0;
const threadId = response.threadId;
if (hasToolCalls) {
// Process each tool call
const toolResultPromises = toolCalls.map(async (toolCall): Promise<any> => {
const toolName = toolCall.function.name;
const toolParameters = JSON.parse(toolCall.function.arguments);
const toolResponse = await composio.tools.execute(toolName, {
userId: userId,
arguments: toolParameters,
connectedAccountId: account_id
});
return {
role: 'tool',
tool_call_id: toolCall.id,
content: JSON.stringify(toolResponse.data),
};
});
// Wait for all tool calls to complete
const toolResults = await Promise.all(toolResultPromises);
// Call the agent pipe again with the updated messages
const finalResponse = await langbase.pipes.run({
threadId,
stream: false,
name: 'slack-agent',
messages: toolResults,
tools: langbaseTools,
});
console.log('Final response:', finalResponse.completion);
}
}
main();
function isValidFunctionTool(
tool: unknown
): tool is { type: 'function'; function: { name: string; description?: string; parameters?: Record<string, unknown> } } {
if (
typeof tool !== 'object' ||
tool === null ||
(tool as any).type !== 'function' ||
typeof (tool as any).function !== 'object' ||
(tool as any).function === null ||
typeof (tool as any).function.name !== 'string'
) {
return false;
}
// Optionally, add more validation for parameters/description if needed
return true;
}
function extractRawTools(tools: unknown): unknown[] {
if (Array.isArray(tools)) {
return tools;
}
if (tools && typeof tools === 'object' && 'tools' in tools && Array.isArray((tools as any).tools)) {
return (tools as { tools: unknown[] }).tools;
}
return [];
}
```
</CodeGroup>
</LanguageContent>
<LanguageContent language="python">
<CodeGroup exampleTitle="Retrieve from memory and send to Slack" title="memory-to-slack.py">
```python {{ title: 'Python' }}
import json
import os
from typing import Any, Dict, List, Optional
from dotenv import load_dotenv
from langbase import Langbase, get_tools_from_run
from composio import Composio
FunctionTool = Dict[str, Any]
MEMORY_NAME = "notes-slack"
MEMORY_DOCUMENT_NAME = "notes.txt"
MEMORY_QUERY = "What is Langbase?"
def main():
load_dotenv()
langbase_api_key = os.getenv("LANGBASE_API_KEY")
composio_api_key = os.getenv("COMPOSIO_API_KEY")
user_id = os.getenv("USER_ID")
account_id = os.getenv("ACCOUNT_ID")
missing_env = [
name
for name, value in {
"LANGBASE_API_KEY": langbase_api_key,
"COMPOSIO_API_KEY": composio_api_key,
"USER_ID": user_id,
"ACCOUNT_ID": account_id,
}.items()
if not value
]
if missing_env:
raise RuntimeError(
"Missing required environment variables: " + ", ".join(missing_env)
)
langbase = Langbase(api_key=langbase_api_key)
ensure_memory_exists(langbase)
composio = Composio(api_key=composio_api_key)
raw_tools = extract_raw_tools(
composio.tools.get(user_id=user_id, toolkits=["slack"])
)
langbase_tools = [
{
"type": "function",
"function": {
"name": tool["function"]["name"],
"description": tool["function"].get("description"),
"parameters": tool["function"].get("parameters"),
},
}
for tool in raw_tools
if is_valid_function_tool(tool)
]
if not langbase_tools:
print("No compatible Composio tools found for toolkit 'slack'.")
return
memory_entries = retrieve_memory(langbase)
memory_text = memory_entries[0].get("text") if memory_entries else ""
message_content = (
"Send a message in #social with the summary of the notes : "
f"{memory_text or 'No notes available.'}"
)
print("Initial agent prompt:", message_content)
response = langbase.pipes.run(
name="slack-agent",
messages=[{"role": "user", "content": message_content}],
stream=False,
tools=langbase_tools,
)
tool_calls = get_tools_from_run(response)
thread_id = extract_thread_id(response)
assistant_message = extract_assistant_message(response)
if not tool_calls:
print("Agent response:", response.get("completion"))
return
if not thread_id:
print("No thread_id returned from initial run; cannot continue tool loop.")
return
if not assistant_message:
print(
"No assistant message with tool calls found; cannot send tool responses back."
)
return
tool_results = []
for tool_call in tool_calls:
function = tool_call.get("function") or {}
tool_name = function.get("name")
raw_arguments = function.get("arguments", "{}")
if not tool_name:
print("Skipping tool call without a function name.")
continue
try:
parsed_arguments = json.loads(raw_arguments)
except json.JSONDecodeError as exc:
print(f"Failed to parse arguments for tool '{tool_name}': {exc}")
continue
try:
tool_response = composio.tools.execute(
tool_name,
user_id=user_id,
arguments=parsed_arguments,
connected_account_id=account_id,
)
except Exception as exc:
print(f"Error executing tool '{tool_name}': {exc}")
continue
tool_call_id = tool_call.get("id")
if not tool_call_id:
print(f"Skipping tool call '{tool_name}' without an id.")
continue
tool_results.append(
{
"role": "tool",
"tool_call_id": tool_call_id,
"content": format_tool_response(tool_response),
}
)
if not tool_results:
print("No tool results available to send back to the agent.")
return
follow_up_messages: List[Dict[str, Any]] = [assistant_message]
follow_up_messages.extend(tool_results)
final_response = langbase.pipes.run(
thread_id=thread_id,
stream=False,
name="slack-agent",
messages=follow_up_messages,
tools=langbase_tools,
)
print("Final response:", final_response.get("completion"))
def ensure_memory_exists(langbase: Langbase) -> None:
try:
memories = langbase.memories.list()
except Exception as exc:
raise RuntimeError(f"Failed to list memories: {exc}") from exc
if any(memory.get("name") == MEMORY_NAME for memory in memories):
return
langbase.memories.create(
name=MEMORY_NAME,
embedding_model="openai:text-embedding-3-large",
)
langbase.memories.documents.upload(
memory_name=MEMORY_NAME,
document_name=MEMORY_DOCUMENT_NAME,
document=b"Langbase is the most powerful serverless AI cloud for building and deploying AI agents.
Build, deploy, and scale serverless AI agents with tools and memory (RAG). Simple AI primitives no bloated frameworks, all with a world-class developer experience without using any frameworks.
",
content_type="text/plain",
)
def retrieve_memory(langbase: Langbase) -> List[Dict[str, Any]]:
try:
memory_entries = langbase.memories.retrieve(
query=MEMORY_QUERY,
memory=[{"name": MEMORY_NAME}],
)
except Exception as exc:
print(f"Failed to retrieve memory '{MEMORY_NAME}': {exc}")
return []
print("Retrieved memory entries:", memory_entries)
return memory_entries
def extract_raw_tools(tools: Any) -> List[Any]:
if isinstance(tools, list):
return tools
if isinstance(tools, dict):
nested_tools = tools.get("tools")
if isinstance(nested_tools, list):
return nested_tools
return []
def is_valid_function_tool(tool: Any) -> bool:
if not isinstance(tool, dict):
return False
if tool.get("type") != "function":
return False
function = tool.get("function")
if not isinstance(function, dict):
return False
name = function.get("name")
return isinstance(name, str) and bool(name)
def format_tool_response(tool_response: Any) -> str:
if isinstance(tool_response, dict):
data = tool_response.get("data", tool_response)
else:
data = getattr(tool_response, "data", tool_response)
try:
return json.dumps(data)
except TypeError:
return str(data)
def extract_thread_id(response: Dict[str, Any]) -> Optional[str]:
for key in ("thread_id", "threadId", "threadID"):
value = response.get(key)
if isinstance(value, str) and value:
return value
thread = response.get("thread")
if isinstance(thread, dict):
for key in ("id", "thread_id", "threadId"):
value = thread.get(key)
if isinstance(value, str) and value:
return value
return None
def extract_assistant_message(response: Dict[str, Any]) -> Optional[Dict[str, Any]]:
try:
choices = response.get("choices", [])
if not choices:
return None
message = choices[0].get("message")
if not isinstance(message, dict):
return None
tool_calls = message.get("tool_calls")
if isinstance(tool_calls, list) and tool_calls:
return {
"role": "assistant",
"content": message.get("content", ""),
"tool_calls": tool_calls,
}
except (KeyError, TypeError):
return None
return None
if __name__ == "__main__":
main()
```
</CodeGroup>
</LanguageContent>
---
## Next Steps
- Build something cool with Langbase [APIs](/api-reference) and [SDK](/sdk).
- Join our [Discord community](https://langbase.com/discord) for feedback, requests, and support.
---
</LanguageProvider>
</content>
</doc>
<doc>
<metadata>
<title>Integrations: Azure OpenAI</title>
<url>https://langbase.com/docs/integrations/azure-openai/</url>
</metadata>
<content>
import { generateMetadata } from '@/lib/generate-metadata';
# Integrations: Azure OpenAI
### Learn how to use Azure OpenAI Models in Langbase
---
Azure OpenAI provides custom deployments of OpenAI models for enhanced security, regional compliance, and control. Langbase fully supports Azure OpenAI models, making integration seamless.
Follow this step-by-step guide to use Azure OpenAI models in Langbase.
---
## Step #1: Create an Azure OpenAI Resource
If you have set up and deployed an Azure OpenAI model, you can skip to Step 3.
Login and create an [Azure OpenAI resource here](https://portal.azure.com/?microsoft%5Fazure%5Fmarketplace%5FItemHideKey=microsoft%5Fopenai%5Ftip#create/Microsoft.CognitiveServicesOpenAI).
## Step #2: Deploy a Model in your Azure OpenAI Resource
Once you have created an Azure OpenAI resource, deploy a model within it.
Go to your [Azure OpenAI resource](https://ai.azure.com/), navigate to **Deployments** and click on **Deploy model**.
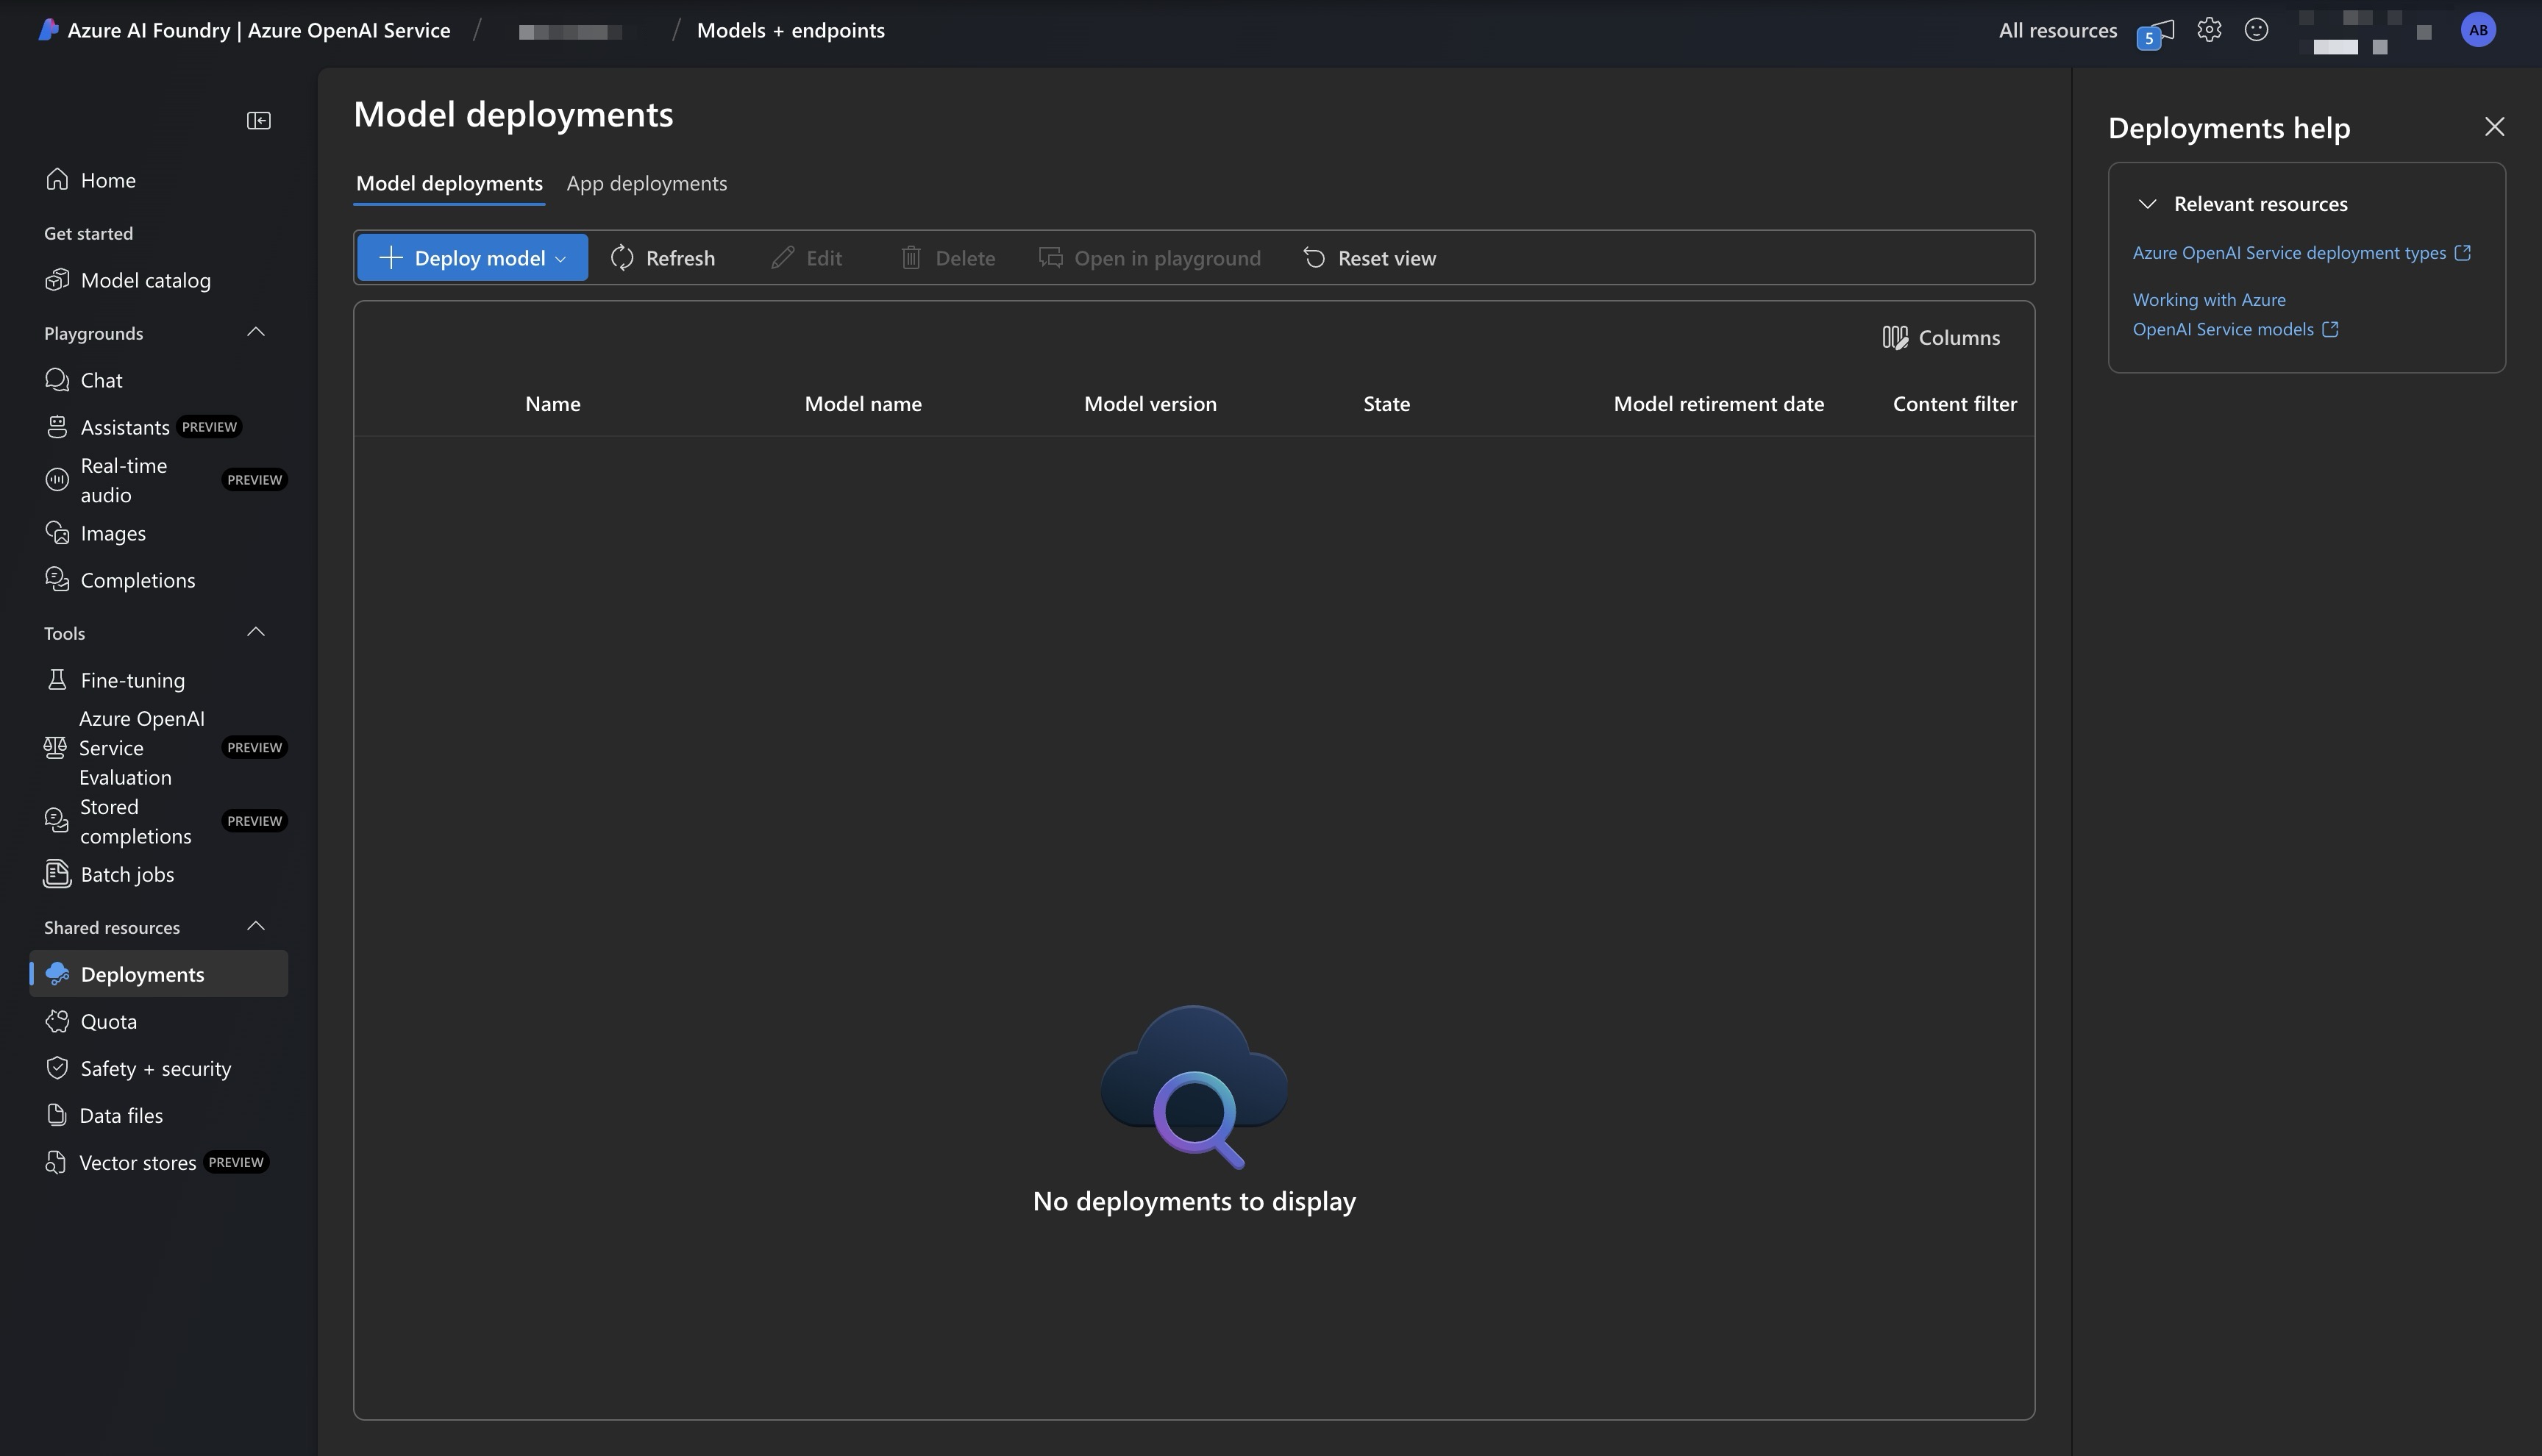
Select the model you want to deploy, follow the deployment instructions, and complete the process.
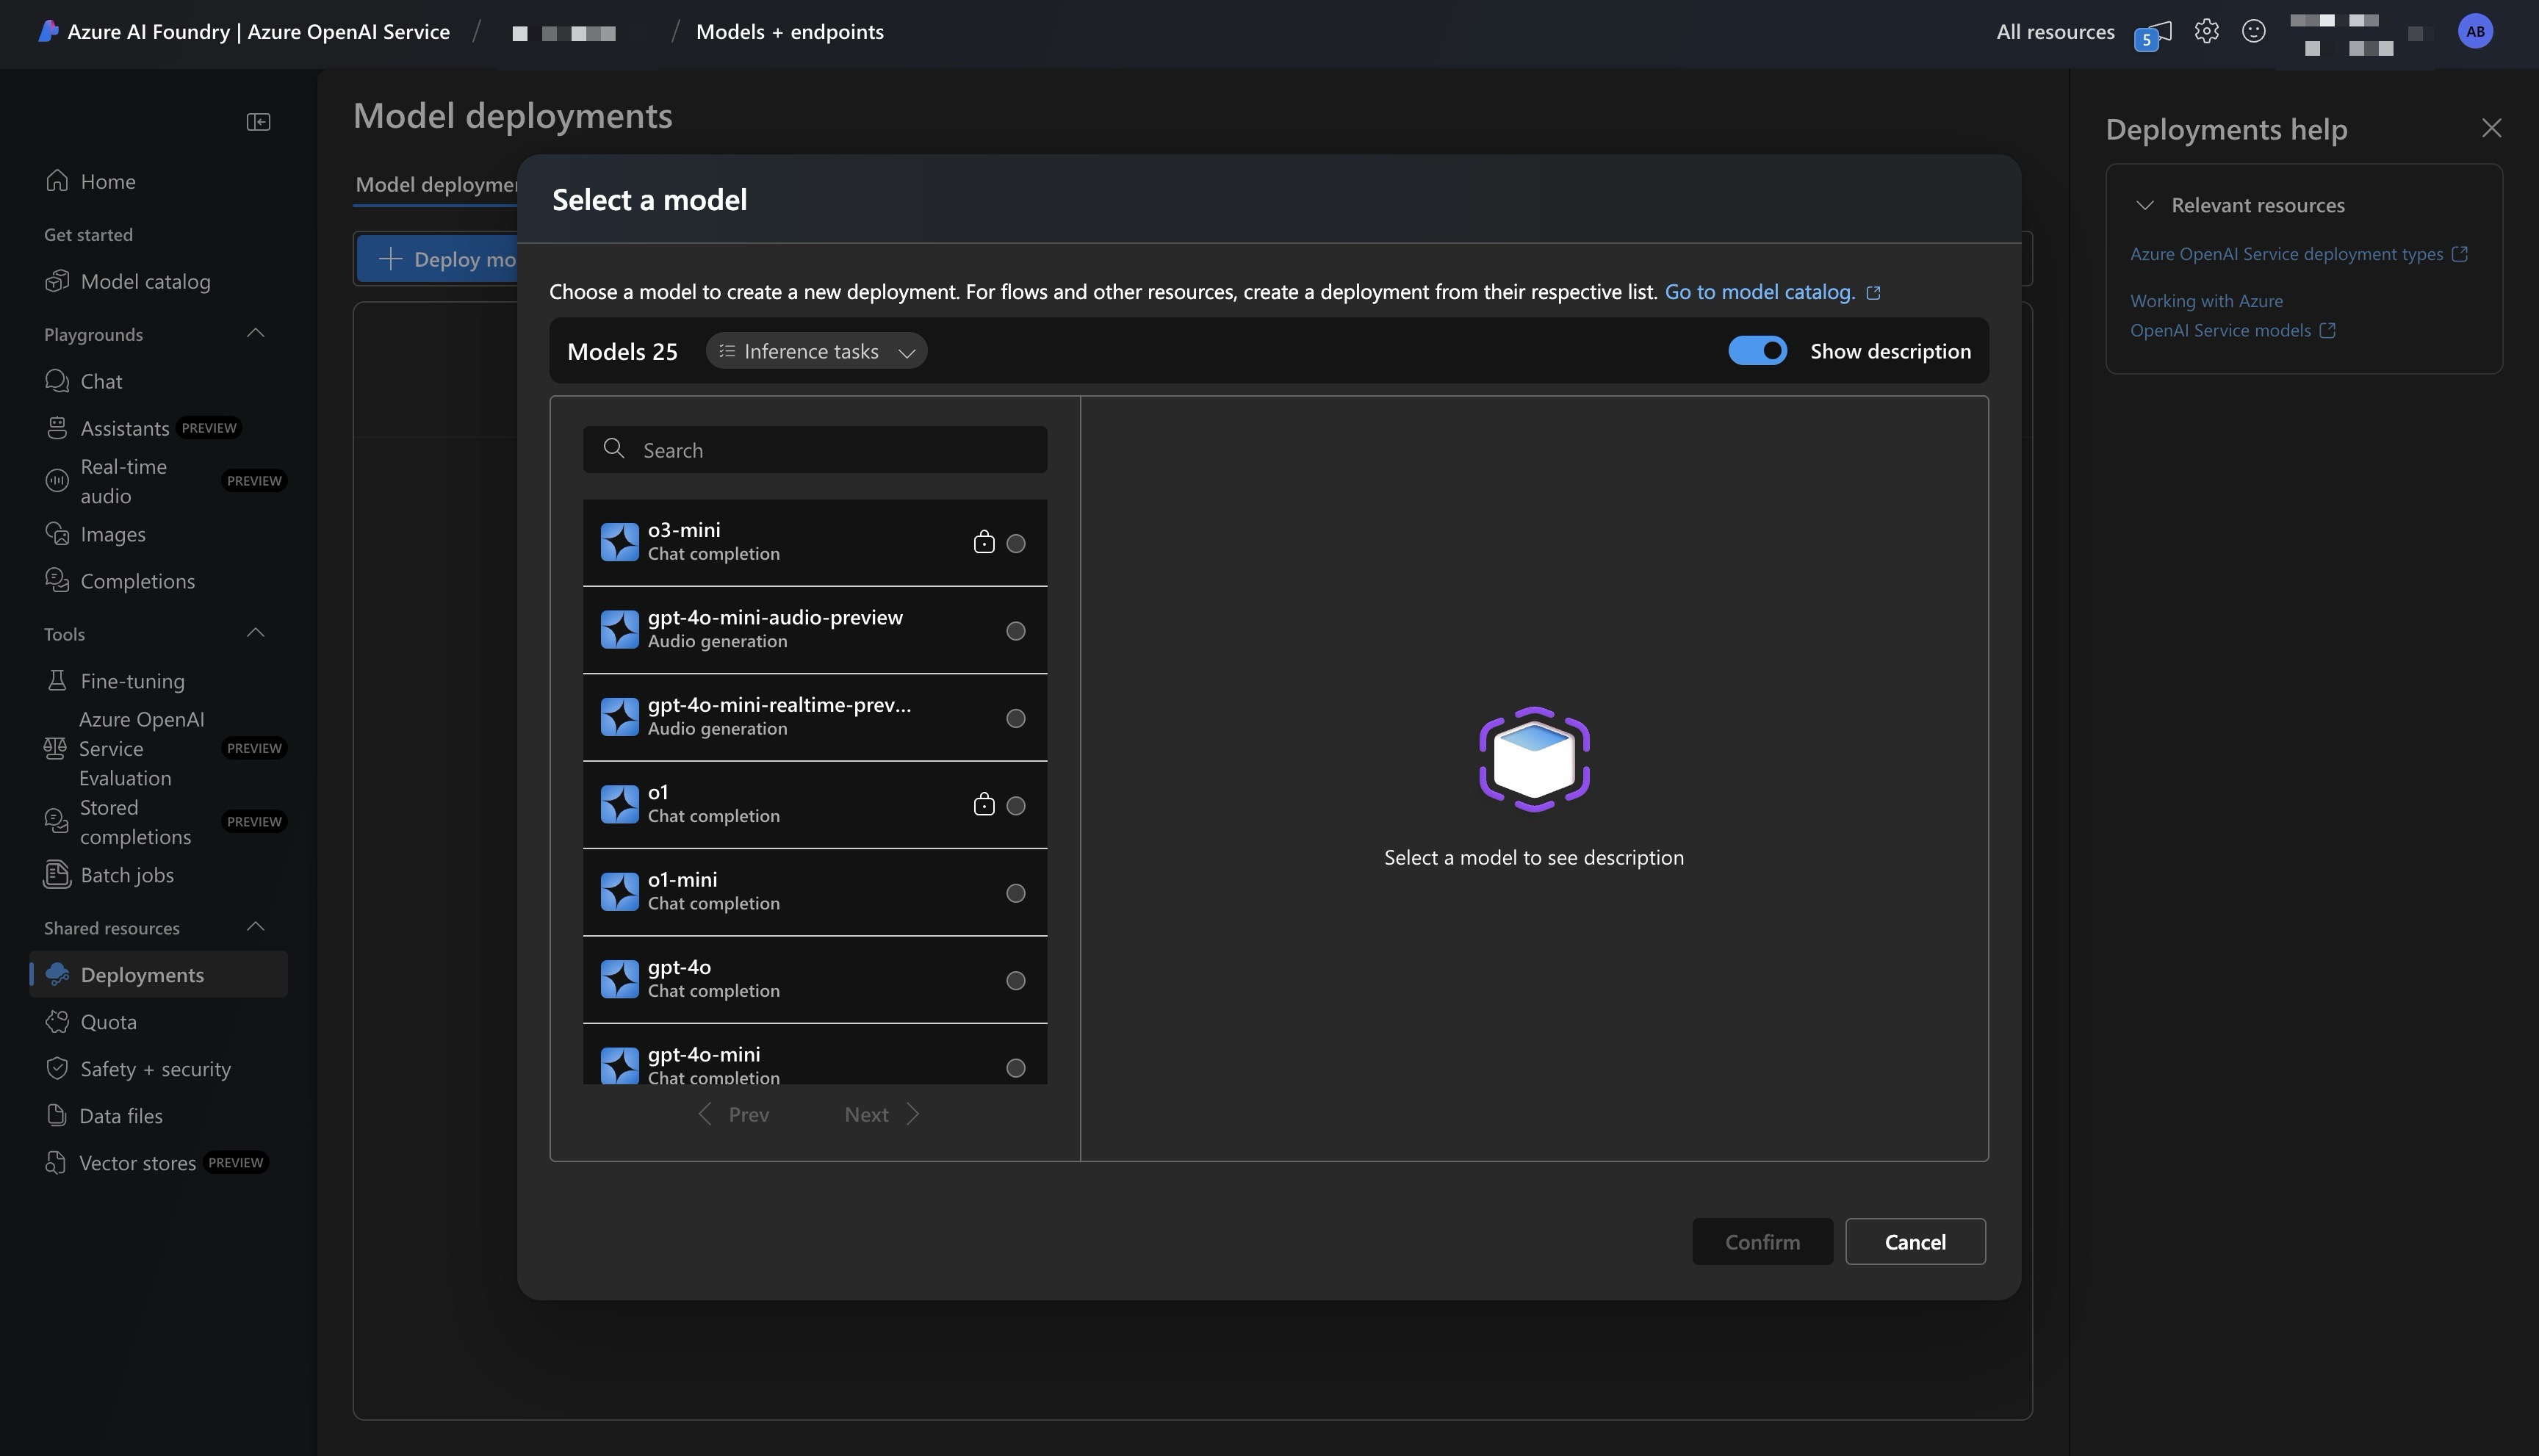
## Step #3: Get your Azure OpenAI credentials
Go to [ai.azure.com](https://ai.azure.com/), navigate to your **Deployments**. Click on the deployed model you want to use in Langbase.
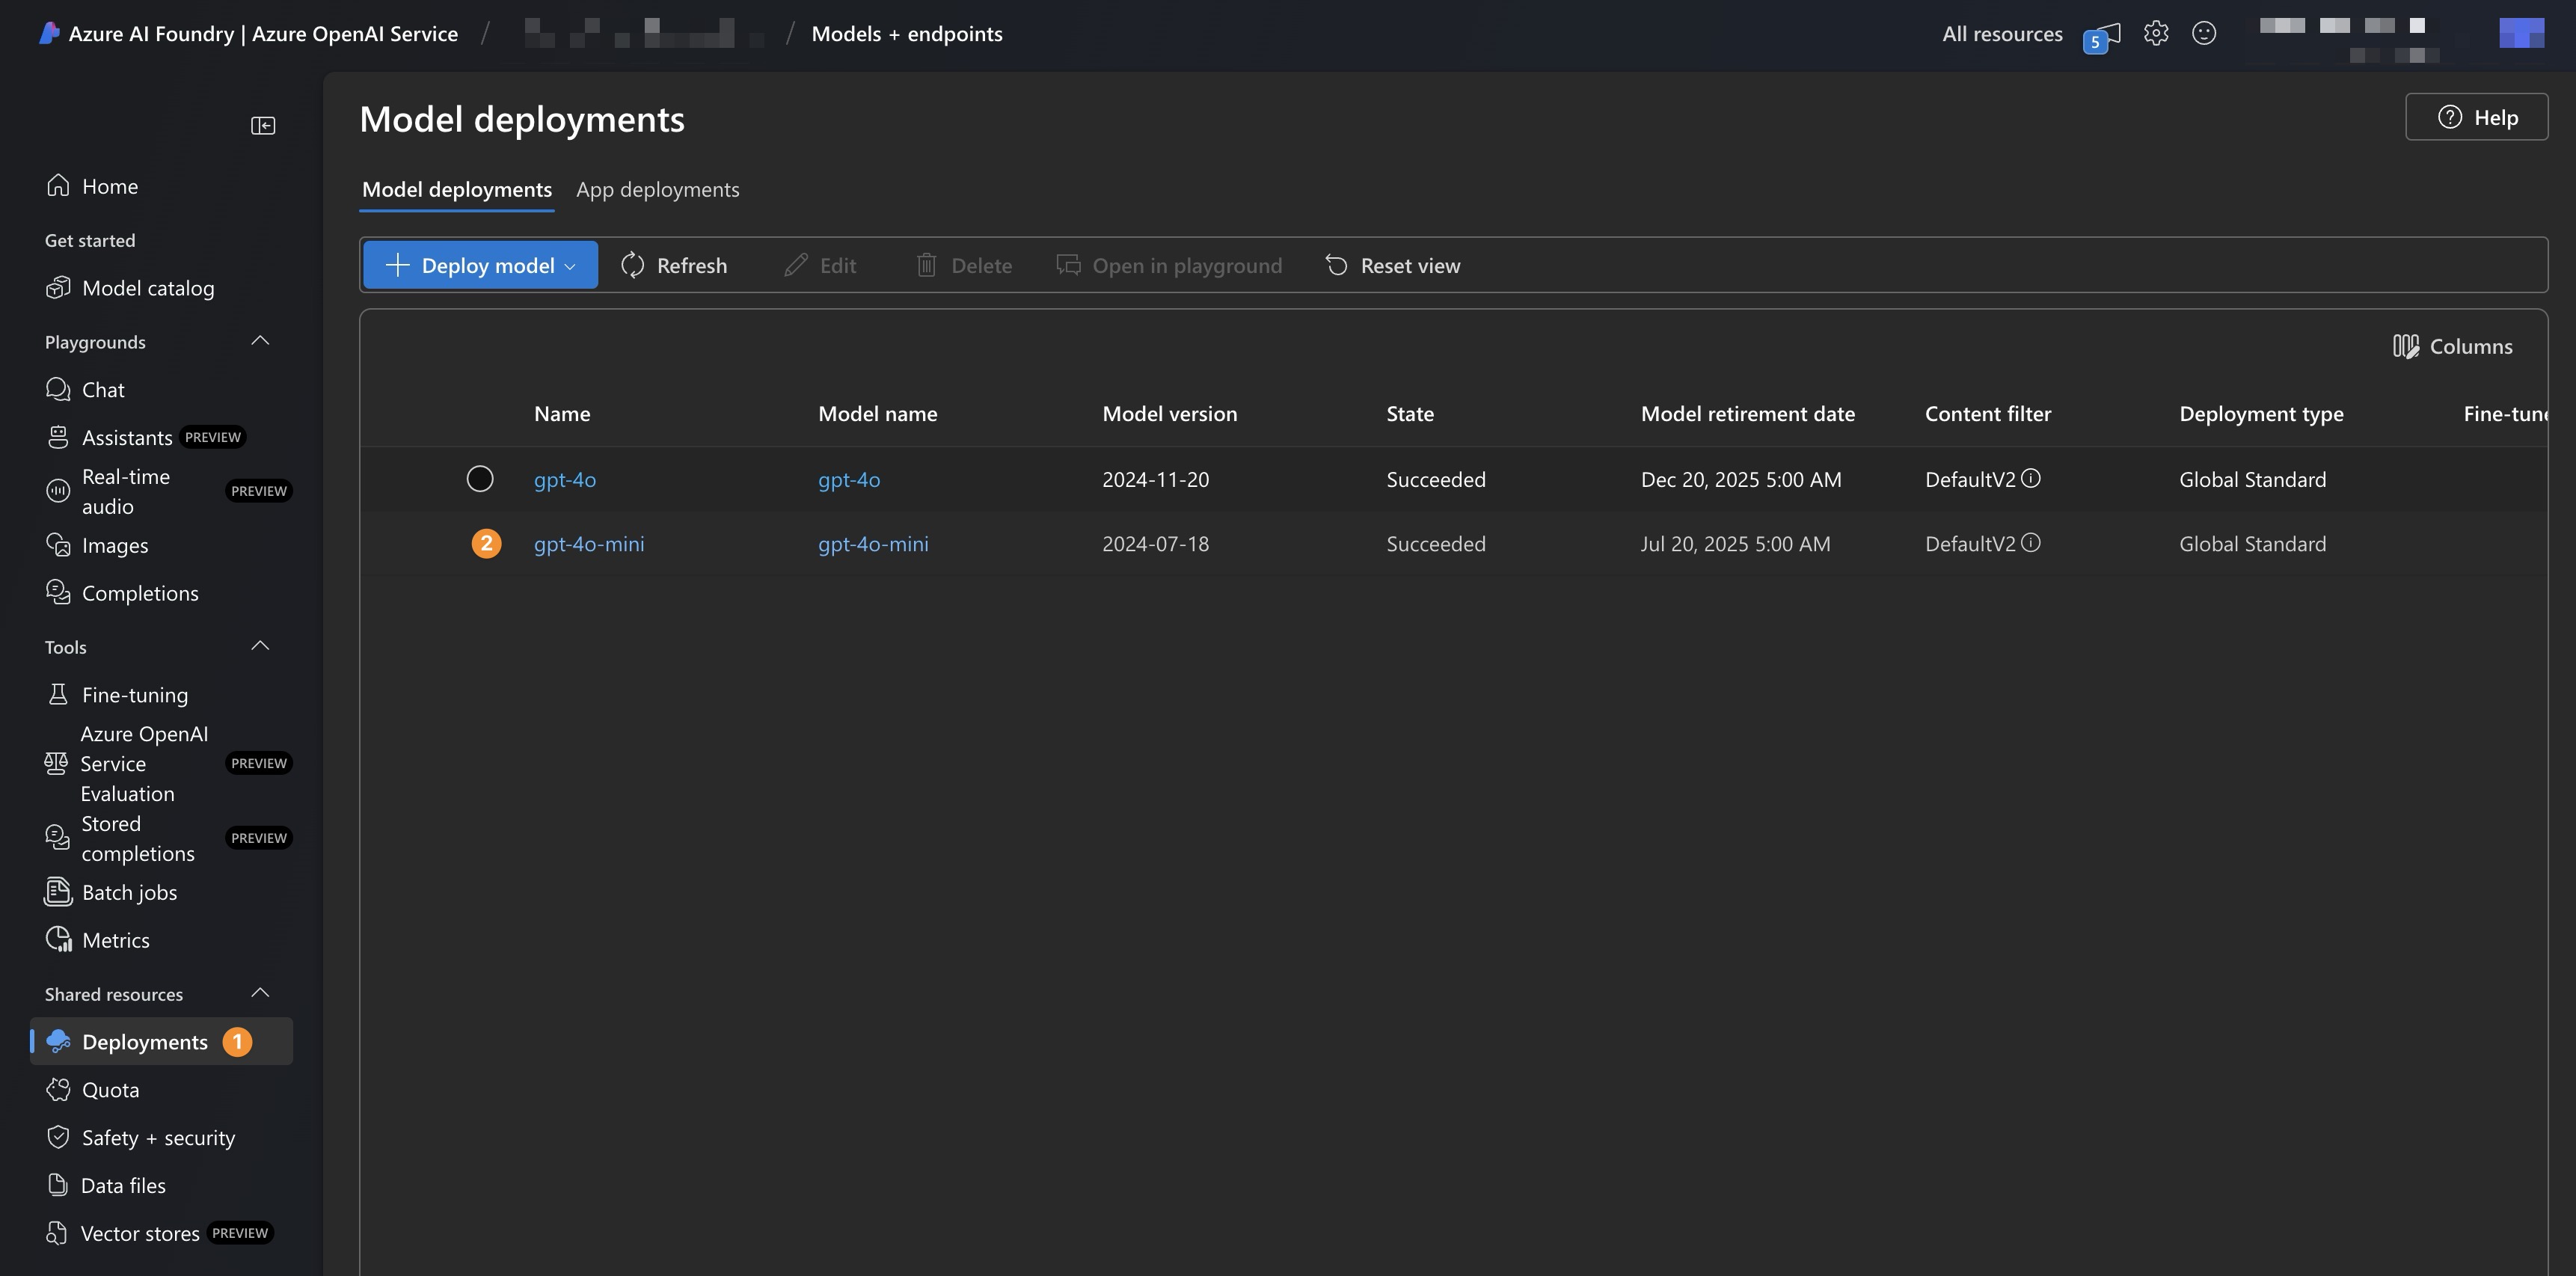
Inside the deployed model page, copy your **Key**, then click **Open in playground**.
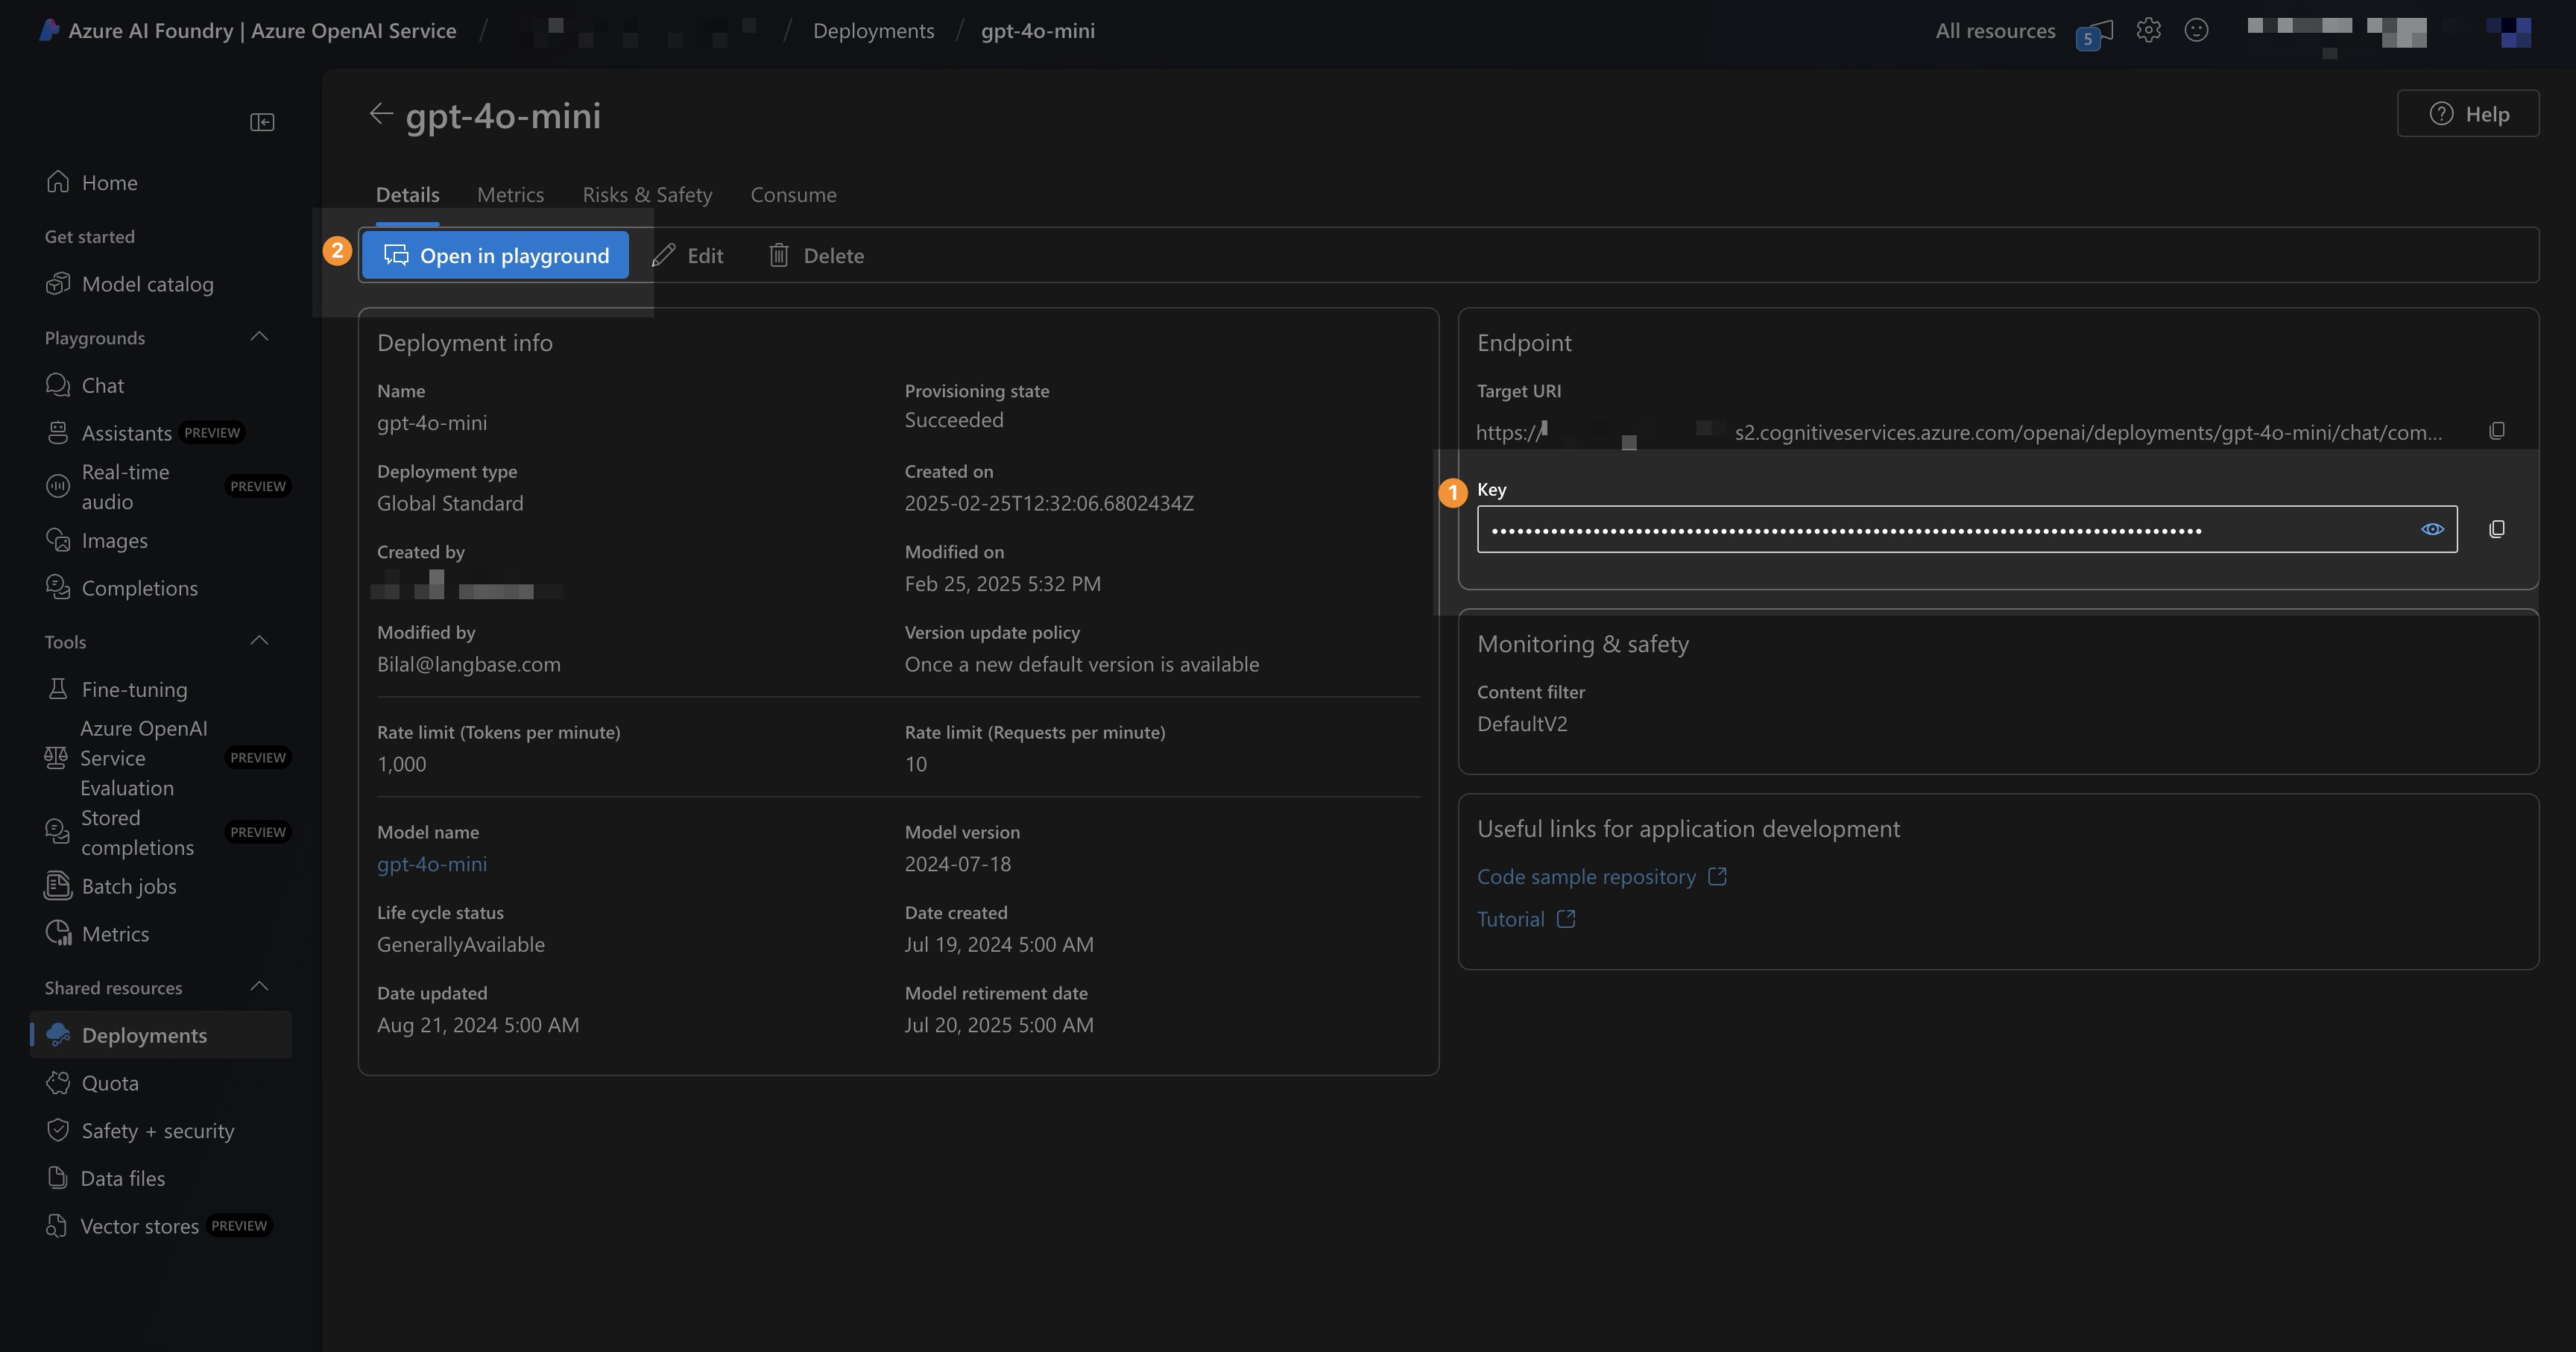
In the playground, click **View Code**, select **Key Authentication** and copy the following three as shown in the screenshot below:
1. API version
2. Resource name
3. Deployment name
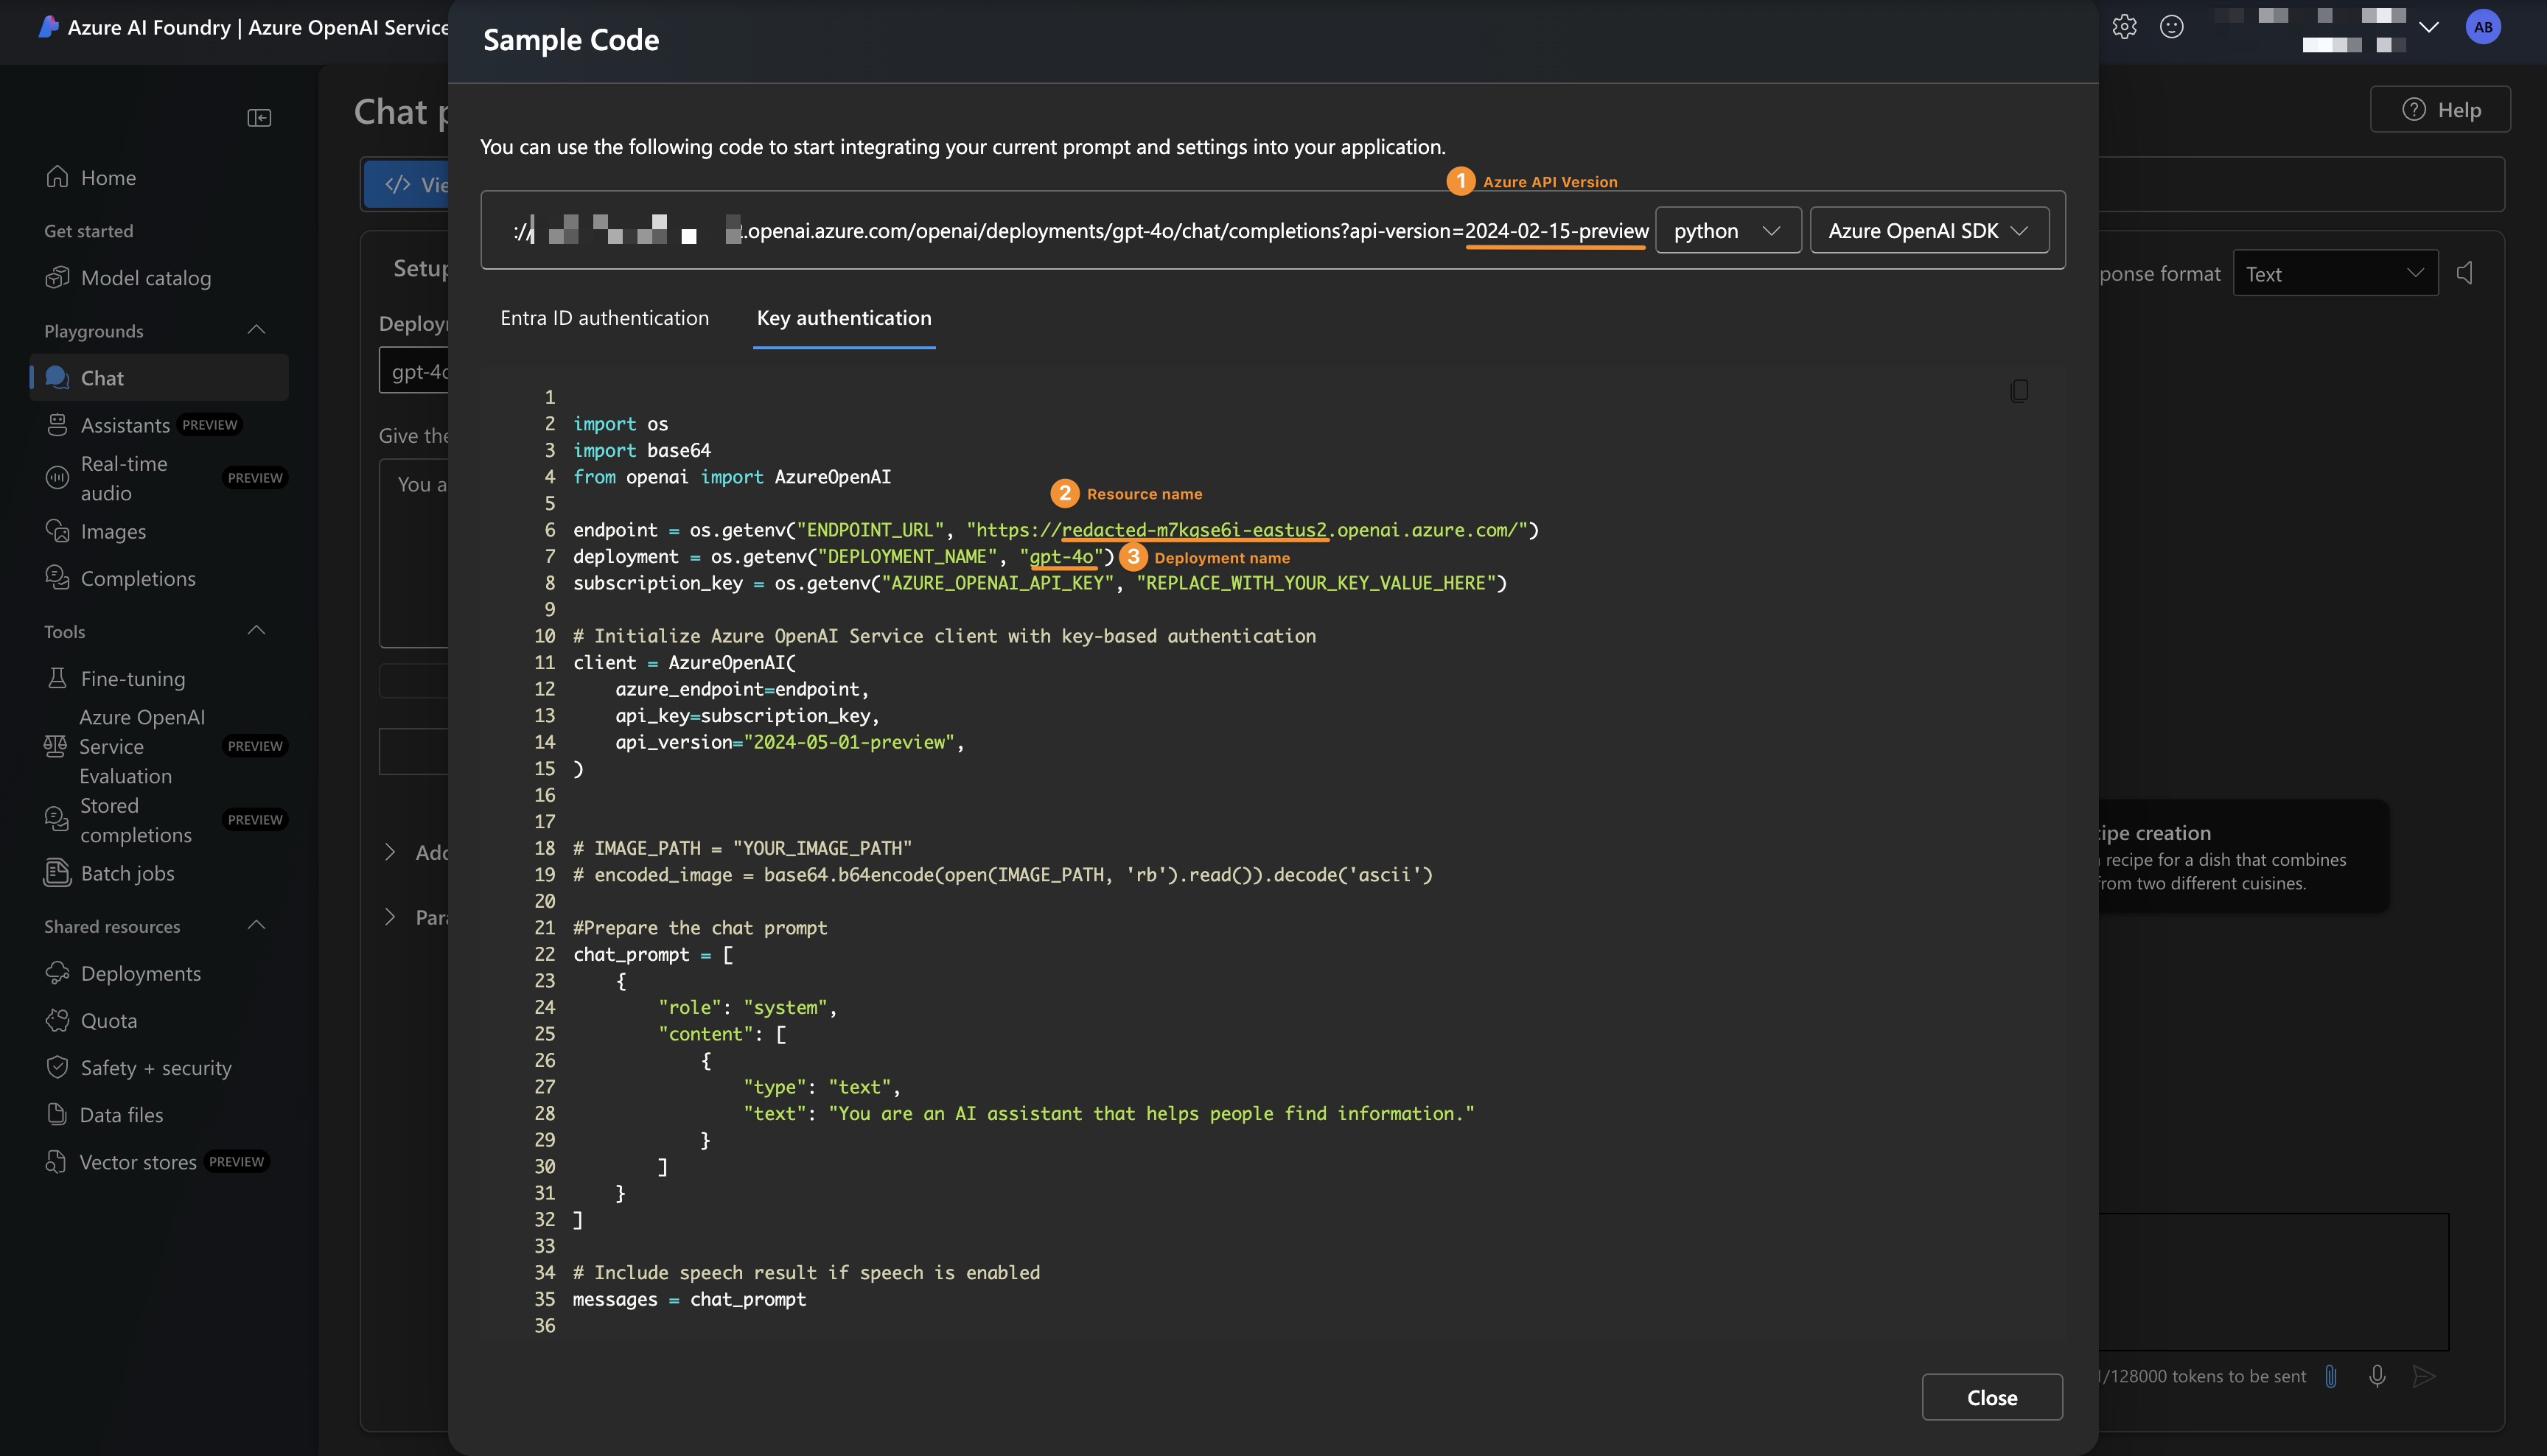
## Step #4: Configure Azure OpenAI in Langbase
In [Langbase Studio](https://studio.langbase.com), navigate to **Settings** > **LLM API Keys** from the sidebar. Select **Azure OpenAI**, then enter the Azure OpenAI credentials you copied in Step 3:
- **API Key**: Your Azure OpenAI Key
- **Resource Name**: Your Azure OpenAI Resource Name
- **API Version**: Your Azure OpenAI API Version
- **Deployment Name**: Your Azure OpenAI Deployment Name
- **Model Name**: The OpenAI Model Name (often the same as Deployment Name)
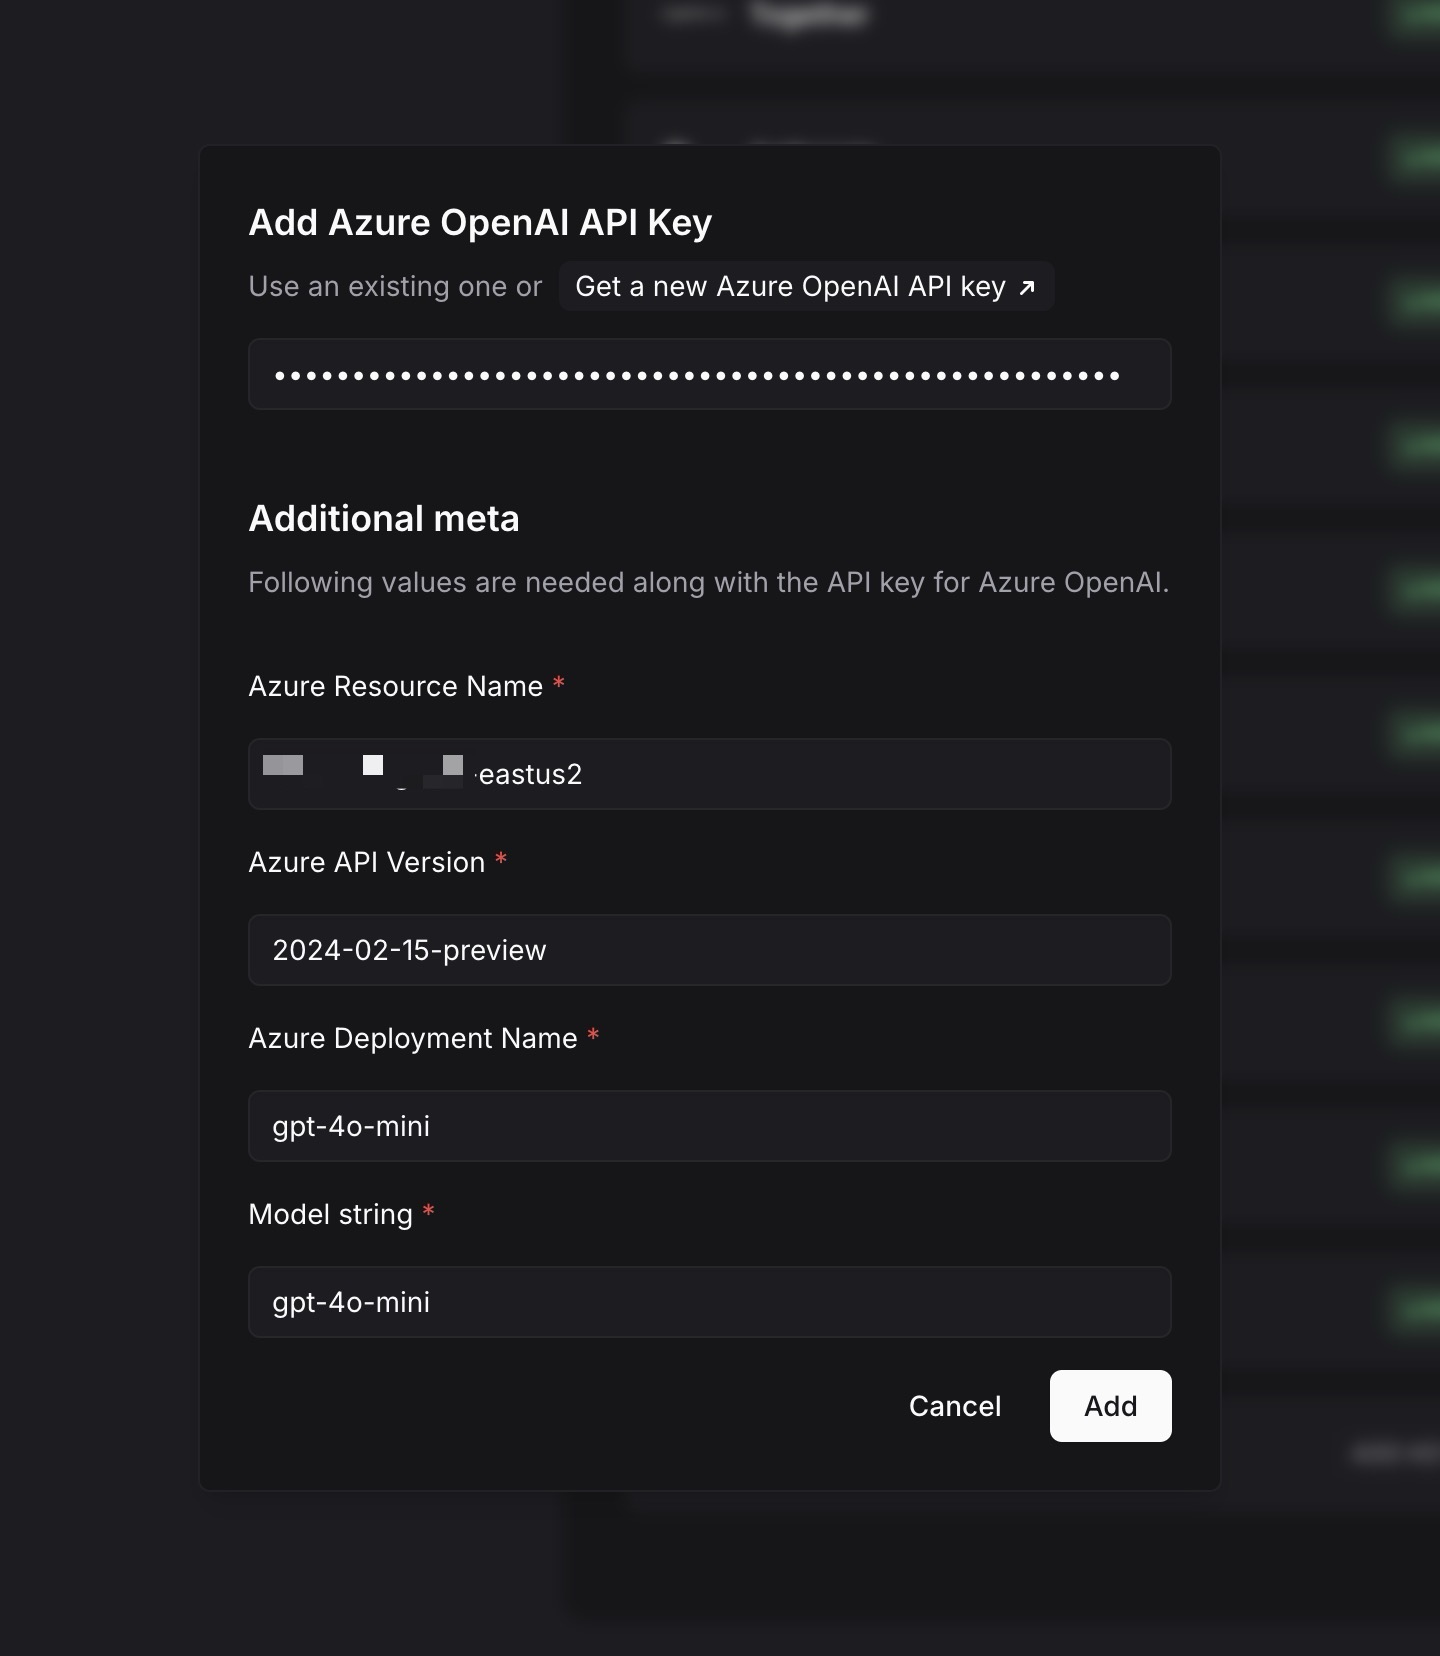
Click **Add** to save the configuration. Your credentials will be encrypted and stored securely.
You are all set to use Azure OpenAI models in Langbase. Go to **[Pipes](https://studio.langbase.com)**, create a new pipe, select an Azure OpenAI model, and start using it in Langbase.
</content>
</doc>
<doc>
<metadata>
<title>Guide: How to use Vision</title>
<url>https://langbase.com/docs/guides/vision/</url>
</metadata>
<content>
import { generateMetadata } from '@/lib/generate-metadata';
# Guide: How to use Vision
### A step-by-step guide to using Vision capabilities from a Vision model using Langbase Pipes.
---
In this guide, we will learn how to send an image to a **Vision** model in a Langbase Pipe and get it to answer questions about it.
### What is Vision?
LLM models with vision capabilities can take images as input, understand them, and generate text-based answers about them. Vision models can be used to answer questions about images, generate captions, or provide descriptions of visual content. Vision is also used for OCR tasks, like image classification, and object detection.
| **LLM Type** | **Input** | **Output** |
|-------------------------------|--------------|------------|
| Unimodal without Vision | Text | Text |
| Multimodal with Vision | Text + Image | Text |
Let's say we send the following image to a Vision model and ask it to describe the image.
<Img
caption="Image example for Vision"
src="https://upload.wikimedia.org/wikipedia/commons/b/b5/Iridescent.green.sweat.bee1.jpg"
/>
The Vision model will process the image and generate a text-based response like this.
```
The image depicts an iridescent green sweat bee, likely of the genus Agapostemon or Augochlorini.
In the image, the bee is perched on a flower, likely foraging for nectar or pollen, which is a common behavior for these pollinators.
```
---
## How to use Vision in Langbase Pipes?
Vision is supported in Langbase Pipes across different LLM providers, including OpenAI, Anthropic, Google, and more. Using Vision in Langbase Pipes is simple. You can send images in the API request and get text answers about them.
## Sending Images to Pipe for Vision
First, select a Vision model that supports image input in your [Langbase Pipe](/pipe). You can choose from a variety of Vision models from different LLM providers. For example, OpenAI's `gpt-4o` or Anthropic's `claude-3.5-sonnet`.
The Pipe Run API matches the [OpenAI spec](https://platform.openai.com/docs/guides/vision) for Vision requests. When running the pipe, provide the image in a message inside the `messages` array.
Here is what your messages will look like for vision requests:
```ts
// Pipe Run API
"messages": [
{
"role": "user",
"content": [
{
"type": "text",
"text": "What is in this image?"
}
{
"type": "image_url",
"image_url": {
"url": "data:image/png;base64,iVBOR...xyz" // base64 encoded image
}
}
]
}
]
```
In the above example, we are sending an image URL (base64 encoded image) as input to the vision model pipe, which will process the image and give a text response.
Follow the [Run Pipe API spec](/api-reference/pipe/run) for detailed request types.
### Image Input Guidelines for Vision
Here are some considerations when using vision in Langbase Pipes:
1. **Message Format**
- Images can be passed in `user` role messages.
- Message `content` must be an array of content parts (for text and images) in vision requests. While in text-only requests, the message `content` is a string.
2. **Image URL**
- The `image_url` field is used to pass the image URL, which can be:
1. **Base64 encoded images**: Supported by all providers.
2. **Public URLs** Supported only by OpenAI.
3. **Provider-specific limits**
- Different LLM providers may impose varying restrictions on image size, format, and the number of images per request.
- Refer to the specific provider’s documentation for precise limits.
- Langbase imposes no additional restrictions.
4. **Image Quality Settings** (OpenAI only)
- OpenAI models support an optional detail field in the image_url object for controlling image quality.
- The `detail` field can be set to `low`, `medium`, or `high` to control the quality of the image sent to the model.
## Examples
Here are some example Pipe Run requests utilizing Vision models in Langbase Pipes.
### Example 1: Sending a Base64 Image
Here is an example of sending a base64 image in a Pipe Run API request.
```bash
curl https://api.langbase.com/v1/pipes/run \
-H 'Content-Type: application/json' \
-H 'Authorization: Bearer <YOUR_PIPE_API_KEY>' \
-d '{
"stream": false,
"messages": [
{
"role": "user",
"content": [
{
"type": "text",
"text": "Describe this image."
},
{
"type": "image_url",
"image_url": {
{/* An example image of colorful squares */}
"url": "data:image/png;base64,iVBORw0KGgoAAAANSUhEUgAAAgAAAAIACAIAAAB7GkOtAAANG0lEQVR4nOzXf6/fdX3G8XPaLziBQmu7TSitVWGtdC5S6IEKnvFjskUZcgQqwqwiMEm2cIaigktBWDvYJtDqiuKZM2v5Fea6QIHCRiKCoxsQB7TUShyQTAu2heCQdutq6624EpLr8bgB1+vzxyd55j04b/03h5JOPuAd0f2j/uSc6P7Qsuz8se88O7q/e/vq6P49V8+J7q+e9p3o/r2TpkX3X9i7Nrq/9OvZ/39i9RHR/bEzt0T3l+3ZF91/cseq6P6CHz8e3Z8UXQfgTUsAAEoJAEApAQAoJQAApQQAoJQAAJQSAIBSAgBQSgAASgkAQCkBACglAAClBACglAAAlBIAgFICAFBKAABKCQBAKQEAKCUAAKUEAKCUAACUEgCAUgIAUEoAAEoJAEApAQAoJQAApQQAoJQAAJQaXvu2j2QPXLIxur95cF92//Fro/tzjn80ur/kU9ui+2MPjUf3z967K7q/9dMrovsXXbQ3uv/i8Mei+7/2t4dH9+8e/Ul0/43BZdH98z53XXT/1I98I7rvBQBQSgAASgkAQCkBACglAAClBACglAAAlBIAgFICAFBKAABKCQBAKQEAKCUAAKUEAKCUAACUEgCAUgIAUEoAAEoJAEApAQAoJQAApQQAoJQAAJQSAIBSAgBQSgAASgkAQCkBACglAAClBACglAAAlBqemDwSPXD9utXR/RWH/DK6v+x9z0T3L9z6oej+f3zoiOj+ziXD0f25v39ndH/lv22K7j87eXF0/5OvL43uv+34+6P72z6xI7p/4Jefju6P7fjj6P4V586N7nsBAJQSAIBSAgBQSgAASgkAQCkBACglAAClBACglAAAlBIAgFICAFBKAABKCQBAKQEAKCUAAKUEAKCUAACUEgCAUgIAUEoAAEoJAEApAQAoJQAApQQAoJQAAJQSAIBSAgBQSgAASgkAQCkBACglAAClBrcd8InogSOefm90/5rTT43u773zsej+Ly7eL7q/9qL50f3H/vKV6P6D9/4iuv+BY/eP7m9e+HJ0f/mRo9H9Jyc/EN0/c3BzdH/R1uei+zd9bFV0//nlT0X3vQAASgkAQCkBACglAAClBACglAAAlBIAgFICAFBKAABKCQBAKQEAKCUAAKUEAKCUAACUEgCAUgIAUEoAAEoJAEApAQAoJQAApQQAoJQAAJQSAIBSAgBQSgAASgkAQCkBACglAAClBACglAAAlBIAgFKDZy59LnpgYsui6P4P79wY3V86463R/bkzDozuzzvp0uj+9GPPi+5vP3lDdP/fP3NNdH/8/qui+/9/6rej+5fP/PPo/iGbzorun/7JNdH9+TMuiO4fPWUkuu8FAFBKAABKCQBAKQEAKCUAAKUEAKCUAACUEgCAUgIAUEoAAEoJAEApAQAoJQAApQQAoJQAAJQSAIBSAgBQSgAASgkAQCkBACglAAClBACglAAAlBIAgFICAFBKAABKCQBAKQEAKCUAAKUEAKCUAACUGj708yujB+Ycd090/5/uOy66/7unzI/uH/ntf4nu/9acQXT//ZdPju5/5a5Z0f3D5o1E93cfuSq6v3PnW6P7n7lv/+j+4iXTovvD886P7t/wV4dE96dOvTK67wUAUEoAAEoJAEApAQAoJQAApQQAoJQAAJQSAIBSAgBQSgAASgkAQCkBACglAAClBACglAAAlBIAgFICAFBKAABKCQBAKQEAKCUAAKUEAKCUAACUEgCAUgIAUEoAAEoJAEApAQAoJQAApQQAoJQAAJQarH9pYfTAB6c8G92/+JBF0f0nvrczuv+FxS9E92+4Ynt0f8X4hdH9524aRPdnzJmI7r8x+vbo/o5FH47un7FkbXT/R4euie5vmbwsun/70B9E9ydtuz67H10H4E1LAABKCQBAKQEAKCUAAKUEAKCUAACUEgCAUgIAUEoAAEoJAEApAQAoJQAApQQAoJQAAJQSAIBSAgBQSgAASgkAQCkBACglAAClBACglAAAlBIAgFICAFBKAABKCQBAKQEAKCUAAKUEAKCUAACUGpx7zsLogZ/+64bo/lf/Ojo/NLpnT3R/xWEHRfePmPn16P7Eoj+M7n93+i3R/ZOPOTy6Pzb+8+j+jQ//OLo/Pn1WdP+R7+2K7q9Y/Zbs/pKp0f0bN74W3fcCACglAAClBACglAAAlBIAgFICAFBKAABKCQBAKQEAKCUAAKUEAKCUAACUEgCAUgIAUEoAAEoJAEApAQAoJQAApQQAoJQAAJQSAIBSAgBQSgAASgkAQCkBACglAAClBACglAAAlBIAgFICAFBKAABKDTZtvyN6YO633hXdf37TzOj+I9ftju5PPDAa3X/Ha7Oi+zOnnR/dv/X+W6P7f3f1yuj+lSufj+7ffPj06P69+90W3V+zeVV0//CRhdH9i6ceFN1fe/lL0X0vAIBSAgBQSgAASgkAQCkBACglAAClBACglAAAlBIAgFICAFBKAABKCQBAKQEAKCUAAKUEAKCUAACUEgCAUgIAUEoAAEoJAEApAQAoJQAApQQAoJQAAJQSAIBSAgBQSgAASgkAQCkBACglAAClBACg1GD5yNXRAyNjs6L7//w/S6P7t7zySHR/zcJV0f3bLv7t6P5n3/mz6P7Qhoei86dvOz66v3j9tOj+TesfiO7Pu/vA6P66G++I7j946Ibo/p+9uCC6P+dP90X3vQAASgkAQCkBACglAAClBACglAAAlBIAgFICAFBKAABKCQBAKQEAKCUAAKUEAKCUAACUEgCAUgIAUEoAAEoJAEApAQAoJQAApQQAoJQAAJQSAIBSAgBQSgAASgkAQCkBACglAAClBACglAAAlBIAgFKDr95+T/TAN67fFd1fevtT0f3//uZvRvfXPfq/0f2Dfv0r0f1pn50a3R97eF90/0s7Ph3d/+6e46P7z7zwcHT/zC9NRPefmHRLdP/7+16I7s9e8Gp0/4t7/z667wUAUEoAAEoJAEApAQAoJQAApQQAoJQAAJQSAIBSAgBQSgAASgkAQCkBACglAAClBACglAAAlBIAgFICAFBKAABKCQBAKQEAKCUAAKUEAKCUAACUEgCAUgIAUEoAAEoJAEApAQAoJQAApQQAoJQAAJQanHLc16IHTrvooej+/ifNi+5veerh6P61G0+L7q/88rTo/uMHL43uXzr9H6L7P3jwhOj+y0edFd1/9ZIPRPe/OP890f0Z678V3R9M2h3dX7fp/6L7S8d3Rfe9AABKCQBAKQEAKCUAAKUEAKCUAACUEgCAUgIAUEoAAEoJAEApAQAoJQAApQQAoJQAAJQSAIBSAgBQSgAASgkAQCkBACglAAClBACglAAAlBIAgFICAFBKAABKCQBAKQEAKCUAAKUEAKCUAACUEgCAUoNXZ/1X9MB3DtgW3X/kmjOj+0M3r43Oz7/ijOj+lC0nRfff+L0l0f35Z9wZ3Z+7LPv9nz9qanT/lKHXo/uPHvxcdH/0xEuj+2M/+350/7DPrYvuz96yX3TfCwCglAAAlBIAgFICAFBKAABKCQBAKQEAKCUAAKUEAKCUAACUEgCAUgIAUEoAAEoJAEApAQAoJQAApQQAoJQAAJQSAIBSAgBQSgAASgkAQCkBACglAAClBACglAAAlBIAgFICAFBKAABKCQBAKQEAKDV86D9+PHrgRzP/Jrr/tR8uiO5fcv6J0f1Xzr4ruv/Mihej+wfOWB3d3zCYEd0/98ILovu/3Jr9f04fGonuz3vfydH98dm3R/eP+fAPovsbX3tXdP/oyzZE970AAEoJAEApAQAoJQAApQQAoJQAAJQSAIBSAgBQSgAASgkAQCkBACglAAClBACglAAAlBIAgFICAFBKAABKCQBAKQEAKCUAAKUEAKCUAACUEgCAUgIAUEoAAEoJAEApAQAoJQAApQQAoJQAAJQSAIBSw49NnBs98PpdT0f3T7j1/uj+HVedEt0/+P1vj+5fufiy6P67H/1odP+A0dHo/uyjj4zunzjp59H9hdfeGN2fe9q7o/tzNr83uv87//l4dH/BDddF9zdOfym67wUAUEoAAEoJAEApAQAoJQAApQQAoJQAAJQSAIBSAgBQSgAASgkAQCkBACglAAClBACglAAAlBIAgFICAFBKAABKCQBAKQEAKCUAAKUEAKCUAACUEgCAUgIAUEoAAEoJAEApAQAoJQAApQQAoJQAAJQaPuaEj0cP/MaUs6L7L1/9luj+R1+6N7r/RxufiO5/6tmfRPff89Nd0f3xzcuj+3c/eU50/4NXzY7uj21dGd3fdOJIdP8LV6yJ7u/Y/4Ho/vIpx0T3/+LaC6L7XgAApQQAoJQAAJQSAIBSAgBQSgAASgkAQCkBACglAAClBACglAAAlBIAgFICAFBKAABKCQBAKQEAKCUAAKUEAKCUAACUEgCAUgIAUEoAAEoJAEApAQAoJQAApQQAoJQAAJQSAIBSAgBQSgAASgkAQKlfBQAA//+DUW1hSVkpbAAAAABJRU5ErkJggg=="
}
}
]
}
]
}'
```
### Example 2: Sending Image as a Public Image URL (supported by OpenAI only)
Public image URLs are only supported by OpenAI, so make sure you are using an OpenAI model.
```bash
curl https://api.langbase.com/v1/pipes/run \
-H 'Content-Type: application/json' \
-H 'Authorization: Bearer <YOUR_PIPE_API_KEY>' \
-d '{
"stream": false,
"messages": [
{
"role": "user",
"content": [
{
"type": "text",
"text": "Describe this image."
},
{
"type": "image_url",
"image_url": {
"url": "https://upload.wikimedia.org/wikipedia/commons/b/b5/Iridescent.green.sweat.bee1.jpg"
}
}
]
}
]
}'
```
### Example 3: Sending multiple images
You can also send multiple images attached to the same message.
```bash
curl https://api.langbase.com/v1/pipes/run \
-H 'Content-Type: application/json' \
-H 'Authorization: Bearer <YOUR_PIPE_API_KEY>' \
-d '{
"stream": false,
"messages": [
{
"role": "user",
"content": [
{
"type": "text",
"text": "How are these images different?"
},
{
"type": "image_url",
"image_url": {
"url": "<image_1_base64>"
}
},
{
"type": "image_url",
"image_url": {
"url": "<image_2_base64>"
}
}
]
}
]
}'
```
Replace `<image_1_base64>` and `<image_2_base64>` with the base64 encoded images you want to send.
### Example 4: Sending multiple images in conversation turns (chat)
You can also send multiple images in different messages across conversation turns.
Let's say you start the conversation with the first image:
```bash
curl https://api.langbase.com/v1/pipes/run \
-H 'Content-Type: application/json' \
-H 'Authorization: Bearer <YOUR_PIPE_API_KEY>' \
-d '{
"stream": false,
"messages": [
{
"role": "user",
"content": [
{
"type": "text",
"text": "Describe this image."
},
{
"type": "image_url",
"image_url": {
"url": "<image_1_base64>"
}
}
]
}
]
}'
```
Then, in the next turn, you can send the second image:
```bash
curl https://api.langbase.com/v1/pipes/run \
-H 'Content-Type: application/json' \
-H 'Authorization: Bearer <YOUR_PIPE_API_KEY>' \
-d '{
"stream": false,
"thread_id": "<thread_id>",
"messages": [
{
"role": "user",
"content": [
{
"type": "text",
"text": "Is this image different from the previous one?"
},
{
"type": "image_url",
"image_url": {
"url": "<image_2_base64>"
}
}
]
}
]
}'
```
By including the `thread_id` returned from the first request, in the second request, your Langbase Pipe automatically continues the conversation from the previous turn.
## FAQs
- Make sure to use the correct Vision model that supports image input.
- Langbase currently supports Vision models from OpenAI, Anthropic and Google. More providers will be supported soon.
- Vision support is live on Langbase API. Vision in Studio playground is coming soon.
- Langbase currently does not store images sent to Vision models.
---
</content>
</doc>
<doc>
<metadata>
<title>Build an AI Video Wisdom Extraction Tool</title>
<url>https://langbase.com/docs/guides/video-wisdom-extractor/</url>
</metadata>
<content>
import { generateMetadata } from '@/lib/generate-metadata';
# Build an AI Video Wisdom Extraction Tool
### A step-by-step guide to build an AI Video Wisdom Extraction Tool using Langbase SDK.
---
In this guide, we will build an AI Video Wisdom Extraction Tool using the Langbase SDK. This tool will:
- Extract wisdom from a YouTube video
- Answer questions related to the video content
- Generate a summary of the video
- List main ideas and key points
- Extract quotes and key phrases
- Provide a list of references and resources
- Highlight the wow moments in the video
- Write Tweets from the video content
<CTAButtons
example
className="my-8"
primary={{
href: 'https://videowisdom.langbase.dev/',
text: 'Live demo'
}}
secondary={{
href: 'https://github.com/LangbaseInc/langbase/tree/main/examples/video-wisdom',
text: 'Source code'
}}
/>
![VideoWisdom][cover]
---
We will create a basic Next.js application that will use the [Langbase SDK](/sdk/overview) to connect to the AI Pipes and stream the final response back to the user.
Let's get started!
## Step #0: Create a Next.js Application
To build the agent, we need to have a Next.js starter application. If you don't have one, you can create a new Next.js application using the following command:
```bash
npx create-next-app@latest video-wisdom
# or with pnpm
pnpx create-next-app@latest video-wisdom
```
This will create a new Next.js application in the `video-wisdom` directory. Navigate to the directory and start the development server:
```bash
cd video-wisdom
npm run dev
# or with pnpm
pnpm run dev
```
## Step #1: Install Langbase SDK
Install the Langbase SDK in this project using npm or pnpm.
```bash
npm install langbase
# or with pnpm
pnpm add langbase
```
## Step #2: Fork the AI pipes
Fork the following AI Pipes in ⌘ Langbase dashboard. These Pipes will power the Video Wisdom Extraction Tool:
- [YouTube Videos Q/A Pipe][chatPipe] - Answers questions related to the video content.
- [Summarize YouTube Video Pipe][summarize] - Generates a summary of the video.
- [Main Ideas Extractor Pipe][getMainIdeas] - Lists main ideas and key points.
- [List Interesting Facts Pipe][listInterestingFacts] - Extracts interesting facts from the video.
- [Wow Moments Extractor Pipe][wowMomentsExtractor] - Highlights the wow moments in the video.
- [Video Tweets Extractor Pipe][videoTweetsExtractor] - Writes Tweets from the video content.
- [Video Recommendations Extractor Pipe][videoRecommendations] - Provides a list of references and resources from the video.
- [List Quotes from Video Pipe][listQuotes] - Extracts quotes and key phrases from the video.
When you fork a Pipe, navigate to the [API](/features/api) tab located in the Pipe's navbar. There, you'll find API keys specific to each Pipe, which are essential for making calls to the Pipes using the Langbase SDK.
Create a `.env.local` file in the root directory of your project and add the following environment variables:
```bash
# Replace `LB_SUMMARIZE_PIPE_KEY` with your API from the forked Summary Pipe
LB_SUMMARIZE_PIPE_KEY=""
# Replace `LB_GENERATE_PIPE_KEY` with your API from the forked YouTube Videos Q/A Pipe
LB_GENERATE_PIPE_KEY=""
# Replace `LB_MAIN_IDEAS_PIPE_KEY` with your API from the forked Main Ideas Extractor Pipe
LB_MAIN_IDEAS_PIPE_KEY=""
# Replace `LB_FACTS_PIPE_KEY` with your API from the forked List Interesting Facts Pipe
LB_FACTS_PIPE_KEY=""
# Replace `LB_WOW_PIPE_KEY` with your API from the forked Wow Moments Extractor Pipe
LB_WOW_PIPE_KEY=""
# Replace `LB_TWEETS_PIPE_KEY` with your API from the forked Video Tweets Extractor Pipe
LB_TWEETS_PIPE_KEY=""
# Replace `LB_RECOMMENDATION_PIPE_KEY` with your API from the forked Video Recommendations Extractor Pipe
LB_RECOMMENDATION_PIPE_KEY=""
# Replace `LB_QUOTES_PIPE_KEY` with your API from the forked List Quotes from Video Pipe
LB_QUOTES_PIPE_KEY=""
```
## Step #3: Create Wisdom Extraction API Route
Create a new file `app/api/langbase/wisdom/route.ts`. This API route will call the Langbase AI Pipes to extract wisdom from the YouTube video.
First, we define the `GenerationType` enum and the `getEnvVar` function to get the environment variable based on the type of the Pipe we want to call. We will specify the type of the Pipe in the request body from the UI. This function will return the environment variable based on the type.
```ts
// Enum for type.
enum GenerationType {
Generate = 'generate',
Summarize = 'summarize',
Quotes = 'quotes',
Recommendation = 'recommendation',
MainIdeas = 'mainIdeas',
Facts = 'facts',
Wow = 'wow',
Tweets = 'tweets'
}
// Get the environment variable based on type.
const getEnvVar = (type: GenerationType) => {
switch (type) {
case GenerationType.Generate:
return process.env.LB_GENERATE_PIPE_KEY;
case GenerationType.Summarize:
return process.env.LB_SUMMARIZE_PIPE_KEY;
case GenerationType.Quotes:
return process.env.LB_QUOTES_PIPE_KEY;
case GenerationType.Recommendation:
return process.env.LB_RECOMMENDATION_PIPE_KEY;
case GenerationType.MainIdeas:
return process.env.LB_MAIN_IDEAS_PIPE_KEY;
case GenerationType.Facts:
return process.env.LB_FACTS_PIPE_KEY;
case GenerationType.Wow:
return process.env.LB_WOW_PIPE_KEY;
case GenerationType.Tweets:
return process.env.LB_TWEETS_PIPE_KEY;
default:
return null;
}
};
```
We also define the `RequestBody` type and the `requestBodySchema` schema for the request body of the API route.
```ts
import z from 'zod'; // For schema validation
// Schema for request body
const requestBodySchema = z.object({
prompt: z.string(),
transcript: z.string().trim().min(1),
type: z.enum([
GenerationType.Generate,
GenerationType.Summarize,
GenerationType.Quotes,
GenerationType.Recommendation,
GenerationType.MainIdeas,
GenerationType.Facts,
GenerationType.Wow,
GenerationType.Tweets
])
});
// Type for request body
type RequestBody = z.infer<typeof requestBodySchema>;
```
Add the route code to the `app/api/langbase/wisdom/route.ts` file:
```ts
/**
* This API route calls the Langbase AI Pipes to extract wisdom from the YouTube video.
*
* @param {NextRequest} req - The request object.
* @returns {Response} The response object streaming the final response back to the frontend.
*/
export async function POST(req: NextRequest) {
try {
// Extract the prompt from the request body
const reqBody: RequestBody = await req.json();
const parsedReqBody = requestBodySchema.safeParse(reqBody);
// If the request body is not valid
if (!parsedReqBody.success || !parsedReqBody.data) {
throw new Error(parsedReqBody.error.message);
}
// Extract the prompt from the request body
const { prompt, transcript, type } = parsedReqBody.data;
// Get the environment variable based on type.
const pipeKey = getEnvVar(type);
// If the Pipe API key is not found, throw an error.
if (!pipeKey) {
throw new Error('Pipe API key not found');
}
// Generate the response and stream from Langbase Pipe.
return await generateResponse({ prompt, transcript, pipeKey });
} catch (error: any) {
return new Response(error.message, { status: 500 });
}
}
/**
* Generates a response by initiating a Pipe, constructing the input for the stream,
* generating a stream by asking a question, and returning the stream in a readable stream format.
* @param {Object} options - The options for generating the response.
* @param {string} options.transcript - The transcript to be used as user input or variable value.
* @param {string} options.prompt - The prompt to be used as user input or variable value.
* @param {string} options.pipeKey - The API key for the Pipe.
* @returns {Response} The response stream in a readable stream format.
*/
async function generateResponse({
transcript,
prompt,
pipeKey
}: {
transcript: string;
prompt: string;
pipeKey: string;
}) {
// 1. Initiate the Pipe.
const pipe = new Pipe({
apiKey: pipeKey
});
// 2. Construct the input for the stream
// 2a. If we have a prompt, we pass 'transcript' as a variable.
// This is useful when we want to use the transcript as a variable in the prompt.
// Used with the question answers Pipe.
// 2b. Otherwise, we pass 'transcript' as user input.
let streamInput: StreamOptions;
if (!prompt) {
streamInput = {
messages: [{ role: 'user', content: transcript }]
};
} else {
streamInput = {
messages: [{ role: 'user', content: prompt }],
variables: { transcript: transcript }
};
}
// 2. Generate a stream by asking a question
const { stream } = await pipe.streamText(streamInput);
// 3. Done, return the stream in a readable stream format.
return new Response(stream.toReadableStream());
}
```
Here is a quick explanation of what's happening in the code above:
- We extract the prompt, transcript, and type from the request body.
- We get the environment variables based on the type of the Pipe we want to call.
- We initiate the Pipe with the API key using the Langbase SDK.
- We construct the input for the stream. If we have a prompt, we pass the transcript as a variable. Otherwise, we pass the transcript as user input.
- We generate a stream by asking a question using the Langbase SDK.
- We return the stream in a readable stream format.
---
That's it! You have successfully created an AI Video Wisdom Extraction Tool using the Langbase SDK. You can connect the API routes to the frontend and start extracting wisdom from YouTube videos.
<Note sub="Complete code" >
You can find the complete code for the VideWisdom app in the [GitHub repository][gh].
</Note>
---
## Live demo
You can try out the live demo of the VideoWisdom [here][demo].
![VideoWisdom Tool][cover]
---
[demo]: https://videowisdom.langbase.dev/
[lb]: https://langbase.com
[summarize]: https://langbase.com/examples/youtube-video-summarizer
[chatPipe]: https://langbase.com/examples/you-tube-videos-qn-a
[getMainIdeas]: https://langbase.com/examples/youtube-video-main-ideas-extractor
[videoTweetsExtractor]: https://langbase.com/examples/youtube-video-tweets-extractor
[wowMomentsExtractor]: https://langbase.com/examples/youtube-video-wow-moments
[listInterestingFacts]: https://langbase.com/examples/youtube-video-interesting-facts-extractor
[videoRecommendations]: https://langbase.com/examples/youtube-video-recommendations-extractor
[listQuotes]: https://langbase.com/examples/youtube-video-quotes-extractor
[gh]: https://github.com/LangbaseInc/langbase-examples/tree/main/examples/video-wisdom
[cover]: https://github.com/user-attachments/assets/e78e53bf-e61b-4ea5-a6b9-4c4c2c81a56a
[download]: https://download-directory.github.io/?url=https://github.com/LangbaseInc/langbase-examples/tree/main/examples/video-wisdom
[signup]: https://langbase.fyi/io
[qs]: https://langbase.com/docs/pipe/quickstart
[docs]: https://langbase.com/docs
[xsa]: https://x.com/SaqibAmeen
[local]: http://localhost:3000
[mit]: https://img.shields.io/badge/license-MIT-blue.svg?style=for-the-badge&color=%23000000
</content>
</doc>
<doc>
<metadata>
<title>Guide: How to use Structured Outputs in Langbase</title>
<url>https://langbase.com/docs/guides/structured-outputs/</url>
</metadata>
<content>
import { generateMetadata } from '@/lib/generate-metadata';
# Guide: How to use Structured Outputs in Langbase
### A step-by-step guide to use Structured Outputs in Langbase.
---
## What are Structured Outputs?
Structured Outputs is a feature that guarantees responses from language models adhere strictly to your supplied JSON schema. It eliminates the need for ad-hoc validation and reduces the risk of missing or malformed fields by enforcing a schema.
This is particularly useful for applications—like data extraction, generative UI and chain of thoughts where you expect the model's output to be parsed according to a specific structure.
Some benefits include:
- **Reliable Type-Safety**: The model's output is automatically validated against your schema. It ensures that the output is always in the expected format, reducing the need for manual validation.
- **Explicit Refusals**: If the model refuses to perform a request, the error or refusal is returned in a standardized format.
- **Simpler Prompting**: You don't need to include extensive instructions to enforce a particular output format.
---
## Using Structured Outputs in Langbase Pipes
In this guide, we will use Langbase SDK to create a Langbase pipe that uses Structured Outputs.
## Step #1: Define the JSON Schema
First, you need to define the JSON schema that describes the expected output format. In TypeScript, you can use the `zod` library to define the schema.
Here is an example of a simple schema that enforces the LLM to do Chain of Thought reasoning for a given math query and return the final answer:
```ts
import { z } from 'zod';
import { zodToJsonSchema } from 'zod-to-json-schema';
const MathReasoningSchema = z.object({
steps: z.array(
z.object({
explanation: z.string(),
output: z.string(),
}),
),
final_answer: z.string(),
});
// Convert the Zod schema to JSON Schema format
const jsonSchema = zodToJsonSchema(MathReasoningSchema, { target: 'openAi' });
```
## Step #2: Create the Pipe
Now, we can create a Langbase pipe using the `createPipe` method from the Langbase SDK. We will pass the JSON schema to this pipe, and the pipe will enforce the model's output to match this schema.
```ts
import 'dotenv/config';
import { Langbase } from 'langbase';
import { z } from 'zod';
import { zodToJsonSchema } from 'zod-to-json-schema';
const langbase = new Langbase({
apiKey: process.env.LANGBASE_API_KEY!,
});
const MathReasoningSchema = z.object({
steps: z.array(
z.object({
explanation: z.string(),
output: z.string(),
}),
),
final_answer: z.string(),
});
// Convert the Zod schema to JSON Schema format
const jsonSchema = zodToJsonSchema(MathReasoningSchema, { target: 'openAi' });
async function createMathTutorPipe() {
const pipe = await langbase.pipes.create({
name: 'math-tutor',
model: 'openai:gpt-4o',
messages: [
{
role: 'system',
content:
'You are a helpful math tutor. Guide the user through the solution step by step.',
},
],
json: true,
response_format: {
type: 'json_schema',
json_schema: {
name: 'math_reasoning',
schema: jsonSchema,
},
},
});
console.log('✅ Math Tutor pipe created:', pipe);
}
createMathTutorPipe();
```
## Step #3: Run the Pipe and Validate Output
Once you have created the pipe, you can run it with a math query. The model will respond according to the defined JSON schema. You can validate it with your original Zod schema. This confirms that the output adheres to your structured format.
```ts
async function runMathTutorPipe(question: string) {
const { completion } = await langbase.pipes.run({
name: 'math-tutor',
messages: [{ role: 'user', content: question }],
stream: false,
});
// Parse and validate the response using the original Zod schema
const solution = MathReasoningSchema.parse(JSON.parse(completion));
console.log('✅ Structured Output Response:', solution);
}
runMathTutorPipe('How can I solve 8x + 22 = -23?');
```
### What happens here:
- The pipe is executed with a math problem from the user.
- The output is parsed from JSON and validated using MathReasoningSchema.
- Any deviation from the expected format will be caught during the Zod validation process, giving you reliable, type-safe structured outputs.
Here is the JSON response we get from our Structured Outputs pipe:
```json
{
"steps": [
{
"explanation": "We start with the original equation.",
"output": "8x + 22 = -23"
},
{
"explanation": "Subtract 22 from both sides to isolate the term with x.",
"output": "8x + 22 - 22 = -23 - 22"
},
{
"explanation": "Simplify both sides of the equation after subtraction.",
"output": "8x = -45"
},
{
"explanation": "Divide both sides by 8 to solve for x.",
"output": "8x/8 = -45/8"
},
{
"explanation": "Simplify the right side to find the value of x.",
"output": "x = -45 / 8"
}
],
"final_answer": "x = -45 / 8"
}
```
You can find the full code for this example [here](https://github.com/LangbaseInc/langbase-sdk/blob/main/examples/nodejs/pipes/pipe.structured.outputs.ts).
By following this guide, you've leveraged Langbase to build an AI agent that responds with reliable, structured output according to your use case. Join our [Discord community](https://langbase.com/discord) to share your builds and get support while innovating with Langbase.
</content>
</doc>
<doc>
<metadata>
<title>Guide: Run a Pipe using user/org API keys</title>
<url>https://langbase.com/docs/guides/run-pipe-user-org-api-keys/</url>
</metadata>
<content>
import { generateMetadata } from '@/lib/generate-metadata';
# Guide: Run a Pipe using user/org API keys
### A step-by-step guide to run a pipe using user/org API keys.
---
In this guide, we will learn how to run a pipe using user/org keys. We will pass user/org API keys as auth token inside /run endpoint and pass the name of the pipe we want to run.
Let's get started!
---
## Step #1: Generate a User/Org API key
You will need to generate an API key to authenticate your requests. For more information, visit the [User/Org API key documentation](/api-reference/api-keys).
<Spoiler title="Get your Langbase API key: User or Org">
You can generate API keys from the [Langbase Studio](https://studio.langbase.com) by following these steps:
1. Switch to your user or org account.
2. From the sidebar, click on the `API keys`.
3. From here, you can create a new API key or manage existing ones.
For more details, follow the [Langbase API keys](/api-reference/api-keys) documentation.
</Spoiler>
---
## Step #2: Run a pipe with user/org API keys
Lastly, instead of pipe API key, we will pass user/org API key as auth token inside /run endpoint. We will also pass the name of the pipe we want to run.
<CodeGroup exampleTitle="Run pipe with user/org API keys" title="Run pipe with user/org API keys" tag="POST" label="/v1/pipes/run" id="default">
```bash {{ title: 'cURL' }}
curl https://api.langbase.com/v1/pipes/run \
-H 'Content-Type: application/json' \
-H 'Authorization: Bearer <USER/ORG_API_KEY>' \
-d '{
"messages": [
{
"role": "user",
"content": "Hello!"
}
],
"name": "<PIPE_NAME>"
}'
```
```js {{ title: 'Node.js' }}
async function generateCompletion() {
const url = 'https://api.langbase.com/v1/pipes/run'
const apiKey = '<USER/ORG_API_KEY>'
const data = {
messages: [{ role: 'user', content: 'Hello!' }, name: '<PIPE_NAME>' ],
}
const response = await fetch(url, {
method: 'POST',
headers: {
'Content-Type': 'application/json',
Authorization: `Bearer ${apiKey}`,
},
body: JSON.stringify(data),
})
const res = await response.json();
const completion = res.completion;
return completion;
}
```
```python
import requests
import json
def generate_completion():
url = 'https://api.langbase.com/v1/pipes/run'
api_key = '<USER/ORG_API_KEY>'
body_data = {
"messages": [
{"role": "user", "content": "Hello!"}
],
"name": "<PIPE_NAME>"
}
headers = {
'Content-Type': 'application/json',
'Authorization': f'Bearer {api_key}'
}
response = requests.post(url, headers=headers, data=json.dumps(body_data))
res = response.json()
completion = res['completion']
return completion
```
</CodeGroup>
---
</content>
</doc>
<doc>
<metadata>
<title>Guide: Add AI to your docs</title>
<url>https://langbase.com/docs/guides/setup-docs-agent/</url>
</metadata>
<content>
import { generateMetadata } from '@/lib/generate-metadata';
# Guide: Add AI to your docs
### A step-by-step guide to add AI in your docs using Langbase.
---
In this series of guides, we will learn how to add AI in your docs using Langbase. We will create an AI memory, an AI agent, and setup a chatbot to interact with the AI agent.
1. [Create an AI Memory](/guides/setup-docs-agent/create-memory)
2. [Create an AI Agent](/guides/setup-docs-agent/create-agent)
3. [Set up a Chatbot](/guides/setup-docs-agent/setup-chatbot)
---
## Prerequisites: Generate Langbase API Key
We will use BaseAI and Langbase SDK in this guide. To work with both, you need to generate an API key. Visit [User/Org API key documentation](/api-reference/api-keys) page to learn more.
<Spoiler title="Get your Langbase API key: User or Org">
You can generate API keys from the [Langbase Studio](https://studio.langbase.com) by following these steps:
1. Switch to your user or org account.
2. From the sidebar, click on the `API keys`.
3. From here, you can create a new API key or manage existing ones.
For more details, follow the [Langbase API keys](/api-reference/api-keys) documentation.
</Spoiler>
---
## Next steps
Time to build. Check out the first guide to create an AI memory using BaseAI.
<CTAButtons
primary={{ href: '/guides/setup-docs-agent/create-memory', text: '⌘ Create AI memory', sub:'(using BaseAI)' }}
secondary={{ href: '/memory', text: 'Learn about memory' }}
/>
---
</content>
</doc>
<doc>
<metadata>
<title>Guide: Build a Composable RAG Chatbot on your Docs</title>
<url>https://langbase.com/docs/guides/rag-on-docs/</url>
</metadata>
<content>
import { generateMetadata } from '@/lib/generate-metadata';
# Guide: Build a Composable RAG Chatbot on your Docs
### A step-by-step guide to creating a RAG chatbot on your documentation files using Langbase Pipes and Memory.
---
In this guide, we will create a **RAG Chatbot** on your **documentation files** and synchronize your documentation files with Langbase. This will enable you to:
- Build an AI question-answer chatbot on your documentation.
- Effortlessly upload and manage your documentation files as embeddings in Langbase Memory.
- Ensure very low hallucination in the responses due to the refined Pipe + Memory RAG system.
- Keep the RAG chatbot updated with the latest changes in your documentation.
<CTAButtons
example
className="my-8"
primary={{
href: 'https://ask-react-query-docs.langbase.dev/',
text: 'Live demo'
}}
secondary={{
href: 'https://github.com/LangbaseInc/langbase-examples/tree/main/examples/ask-docs-rag',
text: 'Source code'
}}
/>
<Img
light="/docs/guides/rag-on-docs/ask-my-docs.jpg"
dark="/docs/guides/rag-on-docs/ask-my-docs.jpg"
alt="Ask My Docs RAG Live Demo – Built on React Query Docs"
caption="Ask My Docs RAG Live Demo – Built on React Query Docs"
/>
---
We'll use [BaseAI](https://baseai.dev/) for creating the RAG pipe and memory. BaseAI will handle the memory and synchronize your GitHub documentation with Langbase to build a powerful chatbot on your docs.
<CTAButtons
example
className="my-8"
primary={{
href: 'https://baseai.dev',
text: 'BaseAI – open-source and local first AI framework built for developers'
}}
secondary={{
href: 'https://baseai.dev/learn',
text: 'Learn BaseAI'
}}
/>
## What we will build
To build a RAG agent on documentation files, we'll cover the following:
1. **Embed your documentation:** Convert your documentation files into embeddings using Langbase Memory, which will serve as the agent's core knowledge base.
2. **Create a RAG pipe:** Create a Langbase Pipe that taps into these memory embeddings to answer user queries accurately.
3. **Sync documentation updates:** Set up sync for your memory embeddings with BaseAI so your agent always reflects the latest documentation.
4. **Build a chatbot web app:** Connect the agent to a chatbot web app to interact with your documentation.
The RAG agent will help users answer questions by leveraging memory from embedded documentation files.
Let's dive in!
## Prerequisites
* **Node.js and npm:** Ensure you have Node.js and npm installed on your system.
* **Langbase Account:** Sign up at [https://langbase.com](https://langbase.com).
* **Repository with Documentation:** A GitHub repository with your documentation files is required. BaseAI uses git commits to synchronize with your documentation changes.
---
## Step #0: Create a Memory in your Documentation Repository
Navigate to the root of your documentation repository and create a new memory using BaseAI. Run the following command:
```bash
npx baseai@latest memory
```
This command will setup BaseAI and start the memory creation process by asking for name and description of the memory. Let's call it `docs`.
Follow the steps below to complete the memory creation from your documentation repository.
## Step #1: Allow Memory to Track Git Repository
It will prompt you if you want to create a memory from the current project git repository. Select `yes`.
```
Do you want to create memory from current project git repository? (yes/no) yes
```
## Step #2: Provide Path to your Documentation Files
Next, it will ask you which directory or subdirectory you want to use for the memory. You can select the current directory or any subdirectory.
```
Enter the path to the directory to track (relative to current directory):
```
Provide the path relative to the root of the project directory that you want to use for the memory. E.g., `src/content/docs`, to use the docs directory in the `src/content` directory.
If you want to use the current directory, just press enter.
## Step #3: Specify File Extensions
Next, it will ask you which files extensions you want to track. Since we are creating a memory for docs, you can provide a comma-separated list of file extensions like `.mdx,.md` to track markdown files.
Alternatively, you can provide `*` to track all files.
```
Enter file extensions to track (use * for all, or comma-separated list, e.g., .md,.mdx): .md,.mdx
```
That's it, the memory setup is complete. It will create a setup file at `baseai/memory/chat-with-docs` in your current directory that tracks the git repository directory and file extensions you provided.
## Step #4: Deploy the Memory
The memory setup is ready and we can now create embeddings of the memory. With BaseAI, we can create embeddings by:
1. Deploying the memory to the Langbase cloud
2. Locally creating embeddings through Ollama
For best performance and results, we will deploy the memory to Langbase cloud. This will also enable us to use it in a chatbot web app.
Commit all the changes in your repository to git and run the following command to deploy the `docs` memory. Replace `docs` with the name of your memory if you used a different name.
```bash
npx baseai@latest deploy -m docs
```
When deploying the first time, it will ask you to login to your Langbase account and authenticate. Follow [these instructions to authenticate quickly](https://baseai.dev/docs/deployment/authentication).
It will then deploy all the required files the memory to Langbase cloud, and create their embeddings. Your memory is ready.
Next time, whenever your documentation changes, you can run the above command again and BaseAI will update the memory with the latest changes.
## Step #5: Create a Pipe and Connect Memory
Now, we will create a pipe that will use this memory to create a RAG agent. We will call this pipe `chat-with-docs`. Run the command below to create the pipe.
In addition to the pipe name and description, it will ask you to select the memory to use. Select the `docs` memory you created in the previous steps.
```bash
npx baseai@latest pipe
```
It will create the pipe in your current directory under `baseai/pipes/chat-with-docs.ts`. It prints the path in the terminal. You can open the file and see the details. Here is how it looks like:
```ts
// baseai/pipes/chat-with-docs.ts
import {PipeI} from '@baseai/core';
import docsMemory from '../memory/chat-with-docs';
const buildPipe = (): PipeI => ({
apiKey: process.env.LANGBASE_API_KEY!, // Replace with your API key https://langbase.com/docs/api-reference/api-keys
name: 'chat-with-docs',
description: '',
status: 'private',
model: 'openai:gpt-4o-mini',
stream: true,
json: false,
store: true,
moderate: true,
top_p: 1,
max_tokens: 1000,
temperature: 0.7,
presence_penalty: 1,
frequency_penalty: 1,
stop: [],
tool_choice: 'auto',
parallel_tool_calls: false,
messages: [
{role: 'system', content: `You are an Ask Docs agent. Provide precise and accurate information or guidance based on document content, ensuring clarity and relevance in your responses. You are tasked with providing precise and accurate information or guidance based on document content, ensuring clarity and relevance in your responses.
# Output Format
- Provide a concise paragraph or series of bullet points summarizing the relevant information
- Ensure that each response is directly related to the query while maintaining clarity
- Use plain language and avoid jargon unless it is specified within the query or document.
# Notes
- Prioritize accurate citations from the document when necessary.
- If the document or section is not available, acknowledge the limitation and offer guidance on potential next steps to acquire the needed information.`},
{
role: 'system',
name: 'rag',
content:
"Below is some CONTEXT for you to answer the questions. ONLY answer from the CONTEXT. CONTEXT consists of multiple information chunks. Each chunk has a source mentioned at the end.\n\nFor each piece of response you provide, cite the source in brackets like so: [1].\n\nAt the end of the answer, always list each source with its corresponding number and provide the document name. like so [1] Filename.doc.\n\nIf you don't know the answer, just say that you don't know. Ask for more context and better questions if needed.",
},
],
variables: [],
memory: [docsMemory()], // Connected docs memory
tools: [],
});
export default buildPipe;
```
Feel free to use the prompts and settings above or customize them to your needs. Deploy the pipe to Langbase when you are ready to use it:
```bash
npx baseai@latest deploy
```
Your chat with docs RAG Agent is ready!
## Step #6: Use Your RAG Agent
You can try out your RAG pipe in the Langbase Studio playground. Navigate to [Langbase Studio](https://studio.langbase.com) and open your `chat-with-docs` pipe. Ask questions about your documentation and see the answers.
Here is how it looks like for our RAG pipe we created for Langbase documentation:
<Img
light="/docs/guides/rag-on-docs/rag-playground-light.jpg"
dark="/docs/guides/rag-on-docs/rag-playground-dark.jpg"
alt="Testing Langbase Docs RAG Pipe in layground"
caption="Testing Langbase Docs RAG Pipe in playground"
/>
As you can see, it accurately answers queries by retreiving relevant chunks and sending them to the LLM i.e., Retrieval-Augmented Generation (RAG).
## Step #7: Integrate in a Chatbot Web App
You can integrate your pipe anywhere using the Langbase API. Here are a few ideas:
- **Chatbot Web App**
Use our [Next.js Ask Docs app example](https://github.com/LangbaseInc/langbase-examples/tree/main/examples/ask-docs-rag) and integrate your pipe to create a chatbot webapp.
- **Discord/Slack Bot**
Use our [Discord bot example](https://github.com/LangbaseInc/langbase/tree/main/examples/ai-discord-bot), integrate your pipe and offer an Ask Docs Bot to your Discord server members for querying your docs directly.
- **CLI**
Build a CLI tool that uses your pipe to answer questions from your documentation.
For this guide, let's build a Chatbot Web App using our Chat with Docs RAG agent.
## Step #8: Build a Chatbot Web App for your Docs RAG
Clone the [Ask My Docs Example](https://github.com/LangbaseInc/langbase-examples/tree/main/examples/ask-docs-rag) project to get started. The example app contains a single page with complete chatbot UI for your chatbot usecase.
Run this command to clone the example project:
```bash
npx degit LangbaseInc/langbase-examples/examples/ask-docs-rag
cd ask-docs-rag
```
Install the dependencies:
```bash
npm install
```
## Step #9: Add your Pipe API key
Copy the `.env.example` file, rename to `.env` and add your pipe API key:
```bash
LANGBASE_PIPE_API_KEY=
```
To get your pipe API key, navigate to your `chat-with-docs` pipe on Langbase dashboard, open the API tab and copy the **API key**. Paste it in the `.env` file.
## Step #10: Run the Chatbot
Run the project using the following command:
```bash
npm run dev
```
Voila! Your chatbot web app is ready. It is that easy. Navigate to its link (usually on [http://localhost:3000](http://localhost:3000)). You can now ask questions about your documentation and get answers from your RAG pipe in this app.
## Live Demo
You can see the live demo of this project [here](https://ask-react-query-docs.langbase.dev/), which we built for React Query Docs. Ask any questions about React Query and see the RAG chatbot in action.
<Img
light="/docs/guides/rag-on-docs/ask-my-docs.jpg"
dark="/docs/guides/rag-on-docs/ask-my-docs.jpg"
alt="Ask My Docs RAG Demo – Built on React Query Docs"
caption="Ask My Docs RAG Live Demo – Built on React Query Docs"
/>
---
By following this guide, you've leveraged Langbase and BaseAI to effortlessly build an automated and powerful RAG Agent on top of your documentation. The good thing is, it is highly composable and you customize it or even connect it to another pipe for improving the agent's quality.
Join our [Discord community](https://langbase.com/discord) and share what you build and ask for support while building with Langbase.
</content>
</doc>
<doc>
<metadata>
<title>Guide: Retrieval Augmented Generation (RAG)</title>
<url>https://langbase.com/docs/guides/rag/</url>
</metadata>
<content>
import { generateMetadata } from '@/lib/generate-metadata';
# Guide: Retrieval Augmented Generation (RAG)
### A step-by-step guide to implement RAG using Langbase Pipes and Memory.
---
In this guide, we will build a RAG application that allows users to ask questions from their documents. We call it Documents QnA RAG App. You can use it to ask questions from documents you uploaded to Langbase Memory.
---
First, we will create a Langbase memory, upload data to it, and then connect it to a pipe. We will then create a Next.js application that uses Langbase SDK to use the pipe to generate responses.
Let's get started!
## Step #1: Create a Memory
In the Langbase dashboard, navigate to the Memory section, create a new memory and name it `rag-wikipedia`. You can also add a description to the memory.
<Img
light="/docs/guides/rag/create-memory-light.jpg"
dark="/docs/guides/rag/create-memory-dark.jpg"
alt="⌘ Langbase create memory"
caption="⌘ Langbase create memory"
/>
## Step #2: Upload RAG Data
Upload the data to the memory you created. You can upload any data for your RAG. For this example, we uploaded a PDF file of the Wikipedia page of [Claude](https://en.wikipedia.org/wiki/Claude_(language_model)).
You can either drag and drop the file or click on the upload button to select the file. Once uploaded, wait a few minutes to let Langbase process the data. Langbase takes care of chunking, embedding, and indexing the data for you.
Click on the Refresh button to see the latest status. Once you see the status as `Ready`, you can move to the next step.
<Img
light="/docs/guides/rag/upload-doc-light.jpg"
dark="/docs/guides/rag/upload-doc-dark.jpg"
alt="Uplaod data to Langbase memory"
caption="Uplaod data to Langbase memory"
/>
### Create Memory and Upload Data using Langbase Memory API
Alternatively, we can use the [Langbase Memory API](/api-reference/memory) to create and upload the data as well.
<details>
<summary>Create memory and upload data using Langbase Memory API</summary>
<>
### Create a Memory
```js
async function createNewMemory() {
const url = 'https://api.langbase.com/v1/memory';
const apiKey = '<YOUR_API_KEY>';
const memory = {
name: "rag-wikipedia",
description: "This memory contains content of AhmadAwais.com homepage",
};
const response = await fetch(url, {
method: 'POST',
headers: {
'Content-Type': 'application/json',
Authorization: `Bearer ${apiKey}`,
},
body: JSON.stringify(memory),
});
const newMemory = await response.json();
return newMemory;
}
```
You will get a response with the newly created memory object:
```js
{
"name": "rag-wikipedia",
"description": "This memory contains content of AhmadAwais.com homepage",
"owner_login": "langbase",
"url": "https://langbase.com/memorysets/langbase/rag-wikipedia"
}
```
---
### Upload Data
Uploading data is a two-step process. First, we get a signed URL to upload the data. Then, we upload the data to the signed URL. Let's see how to get a signed URL:
```js
async function getSignedUploadUrl() {
const url = 'https://api.langbase.com/v1/memory/documents';
const apiKey = '<YOUR_API_KEY>';
const newDoc = {
memoryName: 'rag-wikipedia',
ownerLogin: 'langbase',
fileName: 'ahmadawais-homepage.pdf',
};
const response = await fetch(url, {
method: 'POST',
headers: {
'Content-Type': 'application/json',
Authorization: `Bearer ${apiKey}`,
},
body: JSON.stringify(newDoc),
});
const res = await response.json();
return res;
}
```
Response will contain the signed URL; something like this:
```js
{
"signedUrl": "https://b.langbase.com/..."
}
```
Now that we have the signed URL, we can upload the data to it:
```js
const fs = require("fs");
async function uploadDocument(signedUrl, filePath) {
const file = fs.readFileSync(filePath);
const response = await fetch(signedUrl, {
method: 'PUT',
headers: {
'Content-Type': 'application/pdf',
},
body: file,
});
return response;
}
```
You should get a response with status `200` if the upload is successful. You can upload many types of files as well. Check out [Memory API](/api-reference/memory) for more details.
</>
</details>
---
## Step #4: Create a Pipe
In your Langbase dashboard, create a new pipe and name it `rag-wikipedia`. You can also add a description to the pipe.
<Img
light="/docs/guides/rag/create-pipe-light.jpg"
dark="/docs/guides/rag/create-pipe-dark.jpg"
alt="⌘ Langbase create pipe"
caption="⌘ Langbase create pipe"
/>
## Step #5: Connect Memory to Pipe
Open the newly created pipe and click on the `Memory` button. From the dropdown, select the memory you created in the previous step and that's it.
<Img
light="/docs/guides/rag/attach-memory-light.jpg"
dark="/docs/guides/rag/attach-memory-dark.jpg"
alt="⌘ Langbase connect memory to pipe"
caption="⌘ Langbase connect memory to pipe"
/>
---
Now that we have created a memory, uploaded data to it, and connected it to a pipe, we can create a Next.js application that uses Langbase SDK to generate responses.
## Step #6: Clone the Starter Project
Clone the [RAG Starter Project](https://github.com/LangbaseInc/langbase-examples/tree/main/starters/documents-qna-rag) to get started. The app contains a single page with a form to ask a question about documents. This project uses:
1. [Langbase SDK](/sdk)
2. [Langbase Pipe](/pipe)
3. [Langbase Memory](/memory)
4. Next.js
5. Tailwind CSS
---
## Step #7: Install Dependencies and Langbase SDK
Install the dependencies using the following command:
```bash
npm install
```
Install the Langbase SDK using the following command:
```bash
npm install langbase
```
---
## Step #8:
Create a route `app/api/generate/route.ts` and add the following code:
```ts
import { Pipe } from 'langbase';
import { NextRequest } from 'next/server';
/**
* Generate response and stream from Langbase Pipe.
*
* @param req
* @returns
*/
export async function POST(req: NextRequest) {
try {
if (!process.env.LANGBASE_PIPE_API_KEY) {
throw new Error(
'Please set LANGBASE_PIPE_API_KEY in your environment variables.'
);
}
const { prompt } = await req.json();
// 1. Initiate the Pipe.
const pipe = new Pipe({
apiKey: process.env.LANGBASE_PIPE_API_KEY
});
// 2. Generate a stream by asking a question
const stream = await pipe.streamText({
messages: [{ role: 'user', content: prompt }]
});
// 3. Done, return the stream in a readable stream format.
return new Response(stream.toReadableStream());
} catch (error: any) {
return new Response(error.message, { status: 500 });
}
}
```
## Step #9:
Go to `starters/documents-qna-rag/components/langbase/docs-qna.tsx` and add following import:
```tsx
import { fromReadableStream } from 'langbase';
```
Add the following code in `DocsQnA` component after the states declaration:
```tsx
const handleSubmit = async (e: React.FormEvent) => {
// Prevent form submission
e.preventDefault();
// Prevent empty prompt or loading state
if (!prompt.trim() || loading) return;
// Change loading state
setLoading(true);
setCompletion('');
setError('');
try {
// Fetch response from the server
const response = await fetch('/api/generate', {
method: 'POST',
body: JSON.stringify({ prompt }),
headers: { 'Content-Type': 'text/plain' },
});
// If response is not successful, throw an error
if (response.status !== 200) {
const errorData = await response.text();
throw new Error(errorData);
}
// Parse response stream
if (response.body) {
// Stream the response body
const stream = fromReadableStream(response.body);
// Iterate over the stream
for await (const chunk of stream) {
const content = chunk?.choices[0]?.delta?.content;
content && setCompletion(prev => prev + content);
}
}
} catch (error: any) {
setError(error.message);
} finally {
setLoading(false);
}
};
```
Replace the following piece of code in `DocsQnA` component:
```tsx
onSubmit={(e) => {
e.preventDefault();
}}
```
With the following code:
```tsx
onSubmit={handleSubmit}
```
## Step #10:
Create a copy of `.env.local.example` and rename it to `.env.local`. Add the [API key of the pipe](/features/api) that we created in step #4 to the `.env.local` file:
```bash
# !! SERVER SIDE ONLY !!
# Pipes.
LANGBASE_PIPE_API_KEY="YOUR_PIPE_API_KEY"
```
## Step #11:
Run the project using the following command:
```bash
npm run dev
```
Your app should be running on [http://localhost:3000](http://localhost:3000). You can now ask questions from the documents you uploaded to the memory.
🎉 That's it! You have successfully implemented a RAG application. It is a Next.js application, you can deploy it to any platform of your choice, like Vercel, Netlify, or Cloudflare.
## Live Demo
You can see the live demo of this project [here](https://documents-qna-rag.langbase.dev/).
<Img
light="https://github.com/user-attachments/assets/b1ee5e56-1e86-4cc8-825f-ad4e78208c2d"
dark="https://github.com/user-attachments/assets/b1ee5e56-1e86-4cc8-825f-ad4e78208c2d"
alt="Documents QnA RAG"
caption="Documents QnA RAG"
/>
---
Further resources:
- Complete code on [GitHub](https://github.com/LangbaseInc/langbase-examples/tree/main/examples/documents-qna-rag).
- Pipe used in this example on [Langbase Pipes](https://langbase.com/examples/rag-wikipedia).
---
</content>
</doc>
<doc>
<metadata>
<title>Guide: How to insert text into Memory</title>
<url>https://langbase.com/docs/guides/memory-upload/</url>
</metadata>
<content>
import { generateMetadata } from '@/lib/generate-metadata';
# Guide: How to insert text into Memory
### A step-by-step guide to insert raw text into Memory using the Langbase SDK.
---
In this guide, we will learn how to insert raw text into Memory using the Langbase SDK. This way you can turn your text into a file and store it in Memory for RAG.
---
## Step #0: Get API Key
You will need to generate an API key to authenticate your requests. For more information, visit the [User/Org API key documentation](/api-reference/api-keys).
## Step #1: Install Langbase SDK
Run the following command to install the Langbase SDK:
<CodeGroup exampleTitle="Install the SDK" title="Install the SDK">
```bash {{ title: 'npm' }}
npm i langbase
```
```bash {{ title: 'pnpm' }}
pnpm add langbase
```
```bash {{ title: 'yarn' }}
yarn add langbase
```
</CodeGroup>
## Step #2: Add Langbase API Key
Add your Langbase API key to the `.env` file:
```bash
LANGBASE_API_KEY=YOUR_API_KEY
```
## Step #3: Create a Memory
We will use [`langbase.memories.create()`](/sdk/memory/create) function to create a new memory. This memory will store the text file.
```js
import {Langbase} from 'langbase';
const langbase = new Langbase({
apiKey: process.env.LANGBASE_API_KEY!
});
await langbase.memories.create({
name: 'text-based-memory',
description: 'This memory contains documents created from text'
});
```
Response will contain the newly created memory object; for example:
```js
{
name: 'text-based-memory',
description: 'This memory contains documents created from text',
owner_login: 'langbase',
url: 'https://langbase.com/memorysets/langbase/text-based-memory'
}
```
---
## Step #4: Upload the text
Now that we have the memory, we can use it to upload text to the memory. We will use [`langbase.memories.documents.upload()`](/sdk/memory/document-upload) function to upload the text as a document to the memory.
```js
import {Langbase} from 'langbase';
const langbase = new Langbase({
apiKey: process.env.LANGBASE_API_KEY!,
});
const text = "Hello, World!";
const document = new Blob([text], { type: "text/plain" });
await langbase.memories.documents.upload({
memoryName: 'text-based-memory',
contentType: 'text/plain',
documentName: 'doc-from-text.txt',
document: document,
});
```
That's it! You have successfully created a document from text and uploaded it to Memory using the Langbase SDK.
You can see the text as a document using the UI or using [`langbase.memories.documents.list()`](/sdk/memory/document-list) function from Langbase SDK. Let's list the documents in the memory to see the uploaded document.
```js
import {Langbase} from 'langbase';
const langbase = new Langbase({
apiKey: process.env.LANGBASE_API_KEY!,
});
const memoryDocumentsList = await langbase.memories.documents.list({
memoryName: 'text-based-memory'
});
console.log(memoryDocumentsList);
```
We will get a response with the list of documents in the memory.
```js
[
{
"name": "doc-from-text.txt",
"status": "completed",
"status_message": null,
"metadata": {
"size": 13,
"type": "text/plain"
},
"enabled": true,
"chunk_size": 10000,
"chunk_overlap": 2048,
"owner_login": "saqib"
}
]
```
We can see the uploaded file `doc-from-text.txt` in the memory. You can now use this file in your RAG chatbot or any other application that uses Langbase Memory.
---
</content>
</doc>
<doc>
<metadata>
<title>Guide: How to replace a document in Memory</title>
<url>https://langbase.com/docs/guides/memory-document-replace/</url>
</metadata>
<content>
import { generateMetadata } from '@/lib/generate-metadata';
# Guide: How to replace a document in Memory
### A step-by-step guide to replace an existing document in Memory using the Langbase API.
---
In this guide, we will learn how to replace an existing document in Memory using the Langbase API. This is useful when you need to update the content of a file that is already stored in a memory.
---
## Prerequisites: Generate Langbase API Key
We will use BaseAI and Langbase SDK in this guide. To work with both, you need to generate an API key. Visit [User/Org API key documentation](/api-reference/api-keys) page to learn more.
<Spoiler title="Get your Langbase API key: User or Org">
You can generate API keys from the [Langbase Studio](https://studio.langbase.com) by following these steps:
1. Switch to your user or org account.
2. From the sidebar, click on the `API keys`.
3. From here, you can create a new API key or manage existing ones.
For more details, follow the [Langbase API keys](/api-reference/api-keys) documentation.
</Spoiler>
---
## Step #1: Create a Signed URL for Replacement
We'll use the `upload` endpoint of the Memory API to create a signed URL for replacing the document. This process is similar to uploading a new document, but we'll use the same filename as the existing document.
```js
async function getSignedReplaceUrl() {
const url = 'https://api.langbase.com/v1/memory/documents';
const apiKey = '<YOUR_API_KEY>';
const replaceDoc = {
memoryName: 'your-memory-name',
ownerLogin: 'your-username',
fileName: 'existing-document-name.pdf', // Use the name of the existing document
};
const response = await fetch(url, {
method: 'POST',
headers: {
'Content-Type': 'application/json',
Authorization: `Bearer ${apiKey}`,
},
body: JSON.stringify(replaceDoc),
});
const res = await response.json();
return res;
}
```
The response will contain the signed URL, which looks like this:
```js
{
"signedUrl": "https://b.langbase.com/..."
}
```
## Step #2: Upload the Replacement Document
Now that we have the signed URL, we can use it to upload the replacement document. We'll use the `PUT` method to upload the new file, overwriting the existing document.
```js
const fs = require('fs');
async function replaceDocument(signedUrl, filePath) {
const file = fs.readFileSync(filePath);
const response = await fetch(signedUrl, {
method: 'PUT',
headers: {
'Content-Type': 'application/pdf', // Adjust based on your file type
},
body: file,
});
return response;
}
```
## Step #3: Verify the Replacement
After replacing the document, you can verify that the update was successful by listing the documents in the memory again.
```js
async function listMemoryDocuments() {
const url = 'https://api.langbase.com/v1/memory/{memoryName}/documents';
const apiKey = '<YOUR_API_KEY>';
const response = await fetch(url, {
method: 'GET',
headers: {
'Content-Type': 'application/json',
Authorization: `Bearer ${apiKey}`
},
});
const memoryDocumentsList = await response.json();
return memoryDocumentsList;
}
```
The response will show the updated document with the same name but potentially different metadata:
```js
[
{
"name": "existing-document-name.pdf",
"status": "completed",
"status_message": null,
"metadata": {
"size": 1048576, // This might be different
"type": "application/pdf"
},
"enabled": true,
"chunk_size": 10000,
"chunk_overlap": 2048,
"owner_login": "your-username"
}
]
```
---
That's it! You have successfully replaced an existing document in Memory using the Langbase API. The document retains its original name, but its content has been updated. This process allows you to keep your Memory up-to-date without creating duplicate entries.
Remember that replacing a document will trigger a re-processing of the content, including re-chunking and re-embedding. This ensures that your RAG system uses the most current information when responding to queries.
</content>
</doc>
<doc>
<metadata>
<title>Guide: Build an AI Discord Bot</title>
<url>https://langbase.com/docs/guides/discord-bot/</url>
</metadata>
<content>
import { generateMetadata } from '@/lib/generate-metadata';
# Guide: Build an AI Discord Bot
### A step-by-step guide to building an AI Discord bot using Langbase Pipes.
---
Want to add an AI-powered chatbot to your Discord server? This comprehensive guide walks you through the process of building an AI Discord Bot using Langbase Pipes. You'll be able to create a bot that interacts with users, answers questions, and provides a more engaging Discord experience.
Let's get started!
## Example Bot
We built a bot named **Ask Langbase Docs**, a Discord bot that can answer any questions about Langbase documentation. It is currently available on the Langbase Discord server. You can ask any question about Langbase documentation using the `/ask` command, and the bot will respond with the answer.
Here is a preview of the bot in action:
<Img
light="/docs/guides/ai-discord-bot/ask-langbase-bot.gif"
dark="/docs/guides/ai-discord-bot/ask-langbase-bot.gif"
alt="Ask Langbase Docs bot in action"
caption="Ask Langbase Docs bot in action"
/>
## Prerequisites
Here's what you need:
* **Node.js and npm:** Make sure you have Node.js (version 18 or higher) and npm installed.
* **Langbase Account:** If you don't have one already, sign up for free at [https://langbase.com](https://langbase.com).
* **Discord Account and Server:** You'll need a Discord account and a server where you can add and test your bot.
* **Discord Developer Portal Access:** You'll be creating a Discord application and bot, so access to the [Discord Developer Portal](https://discord.com/developers/applications) is required.
* **Cloudflare Account:** We'll be using Cloudflare Workers for hosting the bot.
## Step #1: Set Up Your Discord Application
1. **Create a Discord Application:**
- Go to the [Discord Developer Portal](https://discord.com/developers/applications).
- Click "New Application" and give it a name (e.g., "My Langbase Bot").
2. **Add a Bot:**
- Navigate to the "Bot" section in the left-hand menu.
- Click "Add Bot" and confirm to create a bot user for your application.
3. **Bot Permissions:**
- In the "Bot" settings, under "Privileged Gateway Intents," enable the "Server Members Intent." This is important for the bot to identify users on your server.
4. **Copy Important Credentials:**
- Note down your application's **Client ID** and **Client Secret** – you'll need these later.
## Step #2: Set Up Your Discord Server
1. **Create a Discord Server:**
- If you don't have a server already, create one for testing your bot.
2. **Invite the Bot to Your Server:**
- Back in the Discord Developer Portal, in your application's settings, go to the "OAuth2" section.
- In the "Scopes" section, select "bot".
- Under "Bot Permissions", select the following:
- **Text Permissions:** Send Messages, Read Message History
- **Presence Permissions:** Connect
- Copy the generated invite link and use it to add the bot to your Discord server.
## Step #3: Create Your Langbase Pipe
Now, let's create the Langbase Pipe that will power the AI capabilities of your Discord bot:
1. **Create a New Pipe:**
- Log in to your Langbase account.
- Go to the "Pipes" section and click "Create Pipe."
- Give your pipe a name (e.g., "My Discord Bot Pipe").
2. **Configure Your Pipe:**
- You can choose a pre-built template from Langbase's library or customize your own. Choose the template that best suits your Discord bot's purpose. For our example, we are using a `Question Answering` template that uses a Langbase RAG Pipe to answer questions about Langbase.
3. **Get Your Pipe API Key:**
- Once your pipe is created, navigate to the pipe's settings and locate the **API key**. Copy this key – you'll need it to allow your Discord bot to communicate with Langbase.
## Step #4: Set up Your Code Editor
1. **Clone the Example Repository:**
- Open your terminal or command prompt.
- Clone the example repository provided by Langbase:
```bash
git clone https://github.com/LangbaseInc/langbase-examples.git
cd langbase-examples/examples/ai-discord-bot
```
2. **Install Dependencies:**
- Install the project dependencies using npm:
```bash
npm install
```
## Step #5: Configure Your Bot
1. **Rename `.dev.vars`:**
- Rename the `example.dev.vars` file to `.dev.vars`.
- **Important:** Add `.dev.vars` to your `.gitignore` file. This file will contain sensitive information that should not be publicly exposed.
2. **Environment Variables:**
- Open the `.dev.vars` file and fill in the following placeholders with your Discord and Langbase credentials:
```bash
DISCORD_TOKEN='YOUR_DISCORD_BOT_TOKEN'
DISCORD_PUBLIC_KEY='YOUR_DISCORD_APPLICATION_PUBLIC_KEY'
DISCORD_APPLICATION_ID='YOUR_DISCORD_APPLICATION_ID'
DISCORD_GUILD_ID='YOUR_DISCORD_GUILD_ID'
LANGBASE_PIPE_KEY='YOUR_LANGBASE_PIPE_API_KEY'
```
- **Where to find these values:**
- **`DISCORD_TOKEN`**: Discord Developer Portal > Your Application > Bot > Token (click "Reset Token" to generate a new one)
- **`DISCORD_PUBLIC_KEY`**: Discord Developer Portal > Your Application > General Information > Public Key
- **`DISCORD_APPLICATION_ID`**: Discord Developer Portal > Your Application > General Information > Application ID
- **`DISCORD_GUILD_ID`**: In Discord, right-click your server > Server Settings > Advanced > Enable Developer Mode. Now, right-click your server again > Copy ID.
- **`LANGBASE_PIPE_KEY`**: From the Langbase Pipe you created in Step 3.
## Step #6: Define Your Bot's Commands
In this example, we're creating a slash command, `/ask`, which will allow users to interact with our bot.
1. **Command Registration:**
- To make the command usable, you need to register it. For testing, it's easiest to register it specifically for your server (guild):
```bash
npm run register:guild
```
- Replace placeholders with your actual credentials.
2. **Understanding the Command Code:**
- Open the `src/server.ts` file. This file contains the core logic for handling interactions with your bot.
- The key part is the code that handles the `/ask` command:
```
// ... inside the fetch request handler in server.ts
if (command === 'ask') {
const pipe = new Pipe(LANGBASE_PIPE_KEY)
const question = input
const response = await pipe.generateText({
messages: [{ role: 'user', content: question }],
})
return new Response(JSON.stringify({
type: 4,
data: { content: response.generations[0].text },
}))
}
// ... rest of the code
```
- Explanation:
- This code intercepts the `/ask` command, retrieves the user's input (their question), sends it to your Langbase Pipe, gets the AI-generated response, and formats it to send back to the Discord user.
## Step #7: Run Locally with ngrok
1. **Start Your Bot:**
```bash
npm run dev
```
This will start your bot locally.
2. **Set Up ngrok:**
- Open a new terminal window and run:
```bash
npm run ngrok
```
- ngrok creates a public URL that forwards requests to your local development server. Copy the HTTPS URL provided by ngrok (e.g., `https://8098-24-22-245-250.ngrok.io`).
3. **Update Discord with ngrok URL:**
- Go back to the Discord Developer Portal > Your Application > Settings > Bot.
- Under "Interactions Endpoint URL," paste your ngrok HTTPS URL.
- **Important:** Click "Save" to apply the changes.
4. **Test Your Bot:**
- On your Discord server, type the `/ask` command followed by a question. Your bot should respond with an answer powered by Langbase!
## Step #8: Deploy to Cloudflare Workers
To make your bot publicly accessible, deploy it to Cloudflare Workers:
1. **Cloudflare Worker Setup:**
- Follow the instructions in the [Cloudflare Workers documentation](https://developers.cloudflare.com/workers/get-started/create-a-worker/) to create a new worker.
2. **Publish Your Code:**
- From your project's root directory, run:
```bash
npm run publish
```
3. **Set Environment Variables on Cloudflare:**
- In your Cloudflare Worker's settings, go to the "Settings" tab and then "Variables."
- Add the environment variables (`DISCORD_TOKEN`, etc.) you defined in your `.dev.vars` file as secrets in your Cloudflare Worker settings.
4. **Point Discord to Cloudflare Worker:**
- In the Discord Developer Portal, update the "Interactions Endpoint URL" for your bot to point to your Cloudflare Worker's URL.
## You Did It!
Congratulations! You have a working AI Discord bot powered by Langbase. Now, start exploring more advanced features, customizations, and integrations. Join the [Langbase Discord community](https://langbase.com/discord) for support and to share your creations.
*/}
</content>
</doc>
<doc>
<metadata>
<title>Build a composable AI Devin</title>
<url>https://langbase.com/docs/guides/build-composable-ai-devin/</url>
</metadata>
<content>
import { generateMetadata } from '@/lib/generate-metadata';
# Build a composable AI Devin
### A step-by-step guide to build an AI coding agent using Langbase SDK.
---
In this guide, you will build an AI coding agent, **CodeAlchemist** aka **Devin**, that uses multiple pipe agents to:
- Analyze the user prompt to identify if it's related to coding, database architecture, or a random prompt.
- ReAct based architecture that decides whether to call code pipe agent or database pipe agent.
- Generate raw React code for code query.
- Generate optimized SQL for database query.
<CTAButtons
example
className="my-8"
primary={{
href: 'https://code-alchemist.langbase.dev',
text: 'Live demo'
}}
secondary={{
href: 'https://github.com/LangbaseInc/langbase-examples/tree/main/examples/code-alchemist',
text: 'Source code'
}}
/>
![CodeAlchemist aka Devin][cover]
---
You will create a basic Next.js application that will use the [Langbase SDK](/sdk) to connect to the pipe agents and stream the final response back to user.
Let's get started!
---
## Step #0: Setup your project
Let's quickly set up the project.
### Initialize the project
To build the agent, you need to have a Next.js starter application. If you don't have one, you can create a new Next.js application using the following command:
<CodeGroup exampleTitle="Initialize project" title="Initialize project">
```bash {{ title: 'npm' }}
npx create-next-app@latest code-alchemist
```
```bash {{ title: 'pnpm' }}
pnpm dlx create-next-app@latest code-alchemist
```
```bash {{ title: 'yarm' }}
yarn create next-app code-alchemist
```
</CodeGroup>
This will create a new Next.js application in the `code-alchemist` directory. Navigate to the directory and start the development server:
<CodeGroup exampleTitle="Run dev server" title="Run dev server">
```bash {{ title: 'npm' }}
npm run dev
```
```bash {{ title: 'pnpm' }}
pnpm run dev
```
```bash {{ title: 'yarm' }}
yarn dev
```
</CodeGroup>
### Install dependencies
Install the Langbase SDK in this project using npm or pnpm.
<CodeGroup exampleTitle="Run dev server" title="Run dev server">
```bash {{ title: 'npm' }}
npm install langbase
```
```bash {{ title: 'pnpm' }}
pnpm add langbase
```
```bash {{ title: 'yarm' }}
yarn add langbase
```
</CodeGroup>
## Step #1: Get Langbase API Key
Every request you send to Langbase needs an [API key](/api-reference/api-keys). This guide assumes you already have one. In case, you do not have an API key, please check the instructions below.
<Spoiler title="Get your Langbase API key: User or Org">
You can generate API keys from the [Langbase Studio](https://studio.langbase.com) by following these steps:
1. Switch to your user or org account.
2. From the sidebar, click on the `API keys`.
3. From here you can create a new API key or manage existing ones.
For more details, follow the [Langbase API keys](/api-reference/api-keys) documentation.
</Spoiler>
Create an `.env` file in the root of your project and add your Langbase API key.
```bash {{ title: '.env' }}
LANGBASE_API_KEY=xxxxxxxxx
```
Replace xxxxxxxxx with your Langbase API key.
## Step #2: Fork agent pipes
Fork the following agent pipes in Langbase Studio. These agent pipes will power CodeAlchemist:
- [**Code Alchemist**][code-alchemist]: Decision maker pipe agent. Analyze user prompt and decide which pipe agent to call.
- [**React Copilot**][react-copilot]: Generates a single React component for a given user prompt.
- [**Database Architect**][database-architect]: Generates optimized SQL for a query or entire database schema
## Step #3: Create a Generate API Route
Create a new file `app/api/generate/route.ts`. This API route will generate the AI response for the user prompt. Please add the following code:
<CodeGroup exampleTitle="API route" title="API route">
```ts {{ title: 'app/api/generate/route.ts' }}
import { runCodeGenerationAgent } from '@/utils/run-agents';
import { validateRequestBody } from '@/utils/validate-request-body';
/**
* Handles the POST request for the specified route.
*
* @param req - The request object.
* @returns A response object.
*/
export async function POST(req: Request) {
try {
const { prompt, error } = await validateRequestBody(req);
if (error || !prompt) {
return new Response(JSON.stringify(error), { status: 400 });
}
const { stream, pipe } = await runCodeGenerationAgent(prompt);
if (stream) {
return new Response(stream, {
headers: {
pipe
}
});
}
return new Response(JSON.stringify({ error: 'No stream' }), {
status: 500
});
} catch (error: any) {
console.error('Uncaught API Error:', error.message);
return new Response(JSON.stringify(error.message), { status: 500 });
}
}
```
</CodeGroup>
Here is a quick explanation of what's happening in the code above:
- Import `runCodeGenerationAgent` function from `run-agents.ts` file.
- Import `validateRequestBody` function from `validate-request-body.ts` file.
- Define the `POST` function that handles the POST request made to the `/api/generate` endpoint.
- Validate the request body using the `validateRequestBody` [function](https://github.com/LangbaseInc/langbase-examples/blob/main/examples/code-alchemist/utils/validate-request-body.ts).
- Call the `runCodeGenerationAgent` function with the user prompt.
- Return the response stream and pipe name.
You can find all these functions in the [utils](https://github.com/LangbaseInc/langbase-examples/tree/main/examples/code-alchemist/utils) directory of the CodeAlchemist [source code](https://github.com/LangbaseInc/langbase-examples/tree/main/examples/code-alchemist).
## Step #4: Decision Maker Pipe
You are building a **ReAct based architecture** which means the sytem first reason over the info it has and then decide to act.
The [Code Alchemist][code-alchemist] agent pipe is a **decision-making** agent. It contains two tool calls, `runPairProgrammer` and `runDatabaseArchitect`, which are called depending on the user's query.
<CTAButtons
example
className="my-8"
primary={{
href: 'https://langbase.com/examples/code-alchemist',
text: '⌘ Pipe Playground'
}}
secondary={{
href: 'https://langbase.com/examples/code-alchemist/fork',
text: 'Fork pipe'
}}
/>
Create a new file `app/utils/run-agents.ts`. This file will contain the logic to call all the pipe agents and stream the final response back to the user. Please add the following code:
<CodeGroup exampleTitle="run-agents.ts" title="run-agents.ts">
```ts {{ title: 'app/utils/run-agents.ts' }}
import 'server-only';
import { Langbase, getToolsFromRunStream } from 'langbase';
const langbase = new Langbase({
apiKey: process.env.LANGBASE_API_KEY!
});
/**
* Runs a code generation agent with the provided prompt.
*
* @param prompt - The input prompt for code generation
* @returns A promise that resolves to an object containing:
* - pipe: The name of the pipe used for generation
* - stream: The output stream containing the generated content
*
* @remarks
* This function processes the prompt through a langbase pipe and handles potential tool calls.
* If tool calls are detected, it delegates to the appropriate PipeAgent.
* Otherwise, it returns the direct output from the code-alchemist pipe.
*/
export async function runCodeGenerationAgent(prompt: string) {
const {stream} = await langbase.pipes.run({
stream: true,
name: 'code-alchemist',
messages: [{ role: 'user', content: prompt }],
})
const [streamForCompletion, streamForReturn] = stream.tee();
const toolCalls = await getToolsFromRunStream(streamForCompletion);
const hasToolCalls = toolCalls.length > 0;
if(hasToolCalls) {
const toolCall = toolCalls[0];
const toolName = toolCall.function.name;
const response = await PipeAgents[toolName](prompt);
return {
pipe: response.pipe,
stream: response.stream
};
} else {
return {
pipe: 'code-alchemist',
stream: streamForReturn
}
}
}
type PipeAgentsT = Record<string, (prompt: string) => Promise<{
stream: ReadableStream<any>,
pipe: string
}>>;
export const PipeAgents: PipeAgentsT = {
runPairProgrammer: runPairProgrammerAgent,
runDatabaseArchitect: runDatabaseArchitectAgent
};
async function runPairProgrammerAgent(prompt: string) {}
async function runDatabaseArchitectAgent(prompt: string) {}
```
</CodeGroup>
Let's go through the above code.
- Import `Langbase` and `getToolsFromRunStream` from the Langbase SDK.
- Initialize the Langbase SDK with the API key.
- Define the `runCodeGenerationAgent` function that sends the prompt through the `code-alchemist` agent.
- Inside `runCodeGenerationAgent`, get the tools from the stream using the `getToolsFromRunStream` function.
- Check if there are any tool calls in the stream.
- If there are tool calls, call the appropriate pipe agent. In this example, only one pipe agent will be called by the decision-making agent.
- If there are no tool calls, return the direct output from the `code-alchemist` pipe.
## Step #5: React Copilot Pipe
The [React Copilot][react-copilot] is a **code generation** pipe agent. It takes the user prompt and generates a React component based on it. It also writes clear and concise comments and use Tailwind CSS classes for styling.
<CTAButtons
example
className="my-8"
primary={{
href: 'https://langbase.com/examples/react-copilot',
text: '⌘ Pipe Playground'
}}
secondary={{
href: 'https://langbase.com/examples/react-copilot/fork',
text: 'Fork pipe'
}}
/>
You have already defined `runPairProgrammerAgent` in the previous step. Let's write its implementation. Add the following code to the `run-agents.ts` file:
<CodeGroup exampleTitle="runPairProgrammerAgent function code" title="runPairProgrammerAgent function code">
```ts {{ title: 'app/utils/run-agents.ts' }}
/**
* Executes a pair programmer agent with React-specific configuration.
*
* @param prompt - The user input prompt to be processed by the agent
* @returns {Promise<{stream: ReadableStream, pipe: string}>} An object containing:
* - stream: A ReadableStream of the agent's response
* - pipe: The name of the pipe being used ('react-copilot')
*
* @example
* const result = await runPairProgrammerAgent("Create a React button component");
* // Use the returned stream to process the agent's response
*/
async function runPairProgrammerAgent(prompt: string) {
const { stream } = await langbase.pipes.run({
stream: true,
name: 'react-copilot',
messages: [{ role: 'user', content: prompt }],
variables: {
framework: 'React',
}
});
return {
stream,
pipe: 'react-copilot'
};
}
```
</CodeGroup>
Let's break down the above code:
- Called `react-copilot` pipe agent with the user prompt and `React` as a variable.
- Returned the stream and pipe as `react-copilot`.
## Step #6: Database Architect Pipe
The [Database Architect][database-architect] pipe agent generates SQL queries. It takes the user prompt and generates either SQL query or whole database schema. It automatically incorporate partitioning strategies if necessary and also indexing options to optimize query performance.
<CTAButtons
example
className="my-8"
primary={{
href: 'https://langbase.com/examples/database-architect',
text: '⌘ Pipe Playground'
}}
secondary={{
href: 'https://langbase.com/examples/database-architect/fork',
text: 'Fork pipe'
}}
/>
You have already defined `runDatabaseArchitectAgent` in the step 4. Let's write its implementation. Add the following code to the `run-agents.ts` file:
<CodeGroup exampleTitle="runDatabaseArchitectAgent function code" title="runDatabaseArchitectAgent function code">
```ts {{ title: 'app/utils/run-agents.ts' }}
/**
* Executes the Database Architect Agent with the given prompt.
*
* @param prompt - The input prompt string to be processed by the database architect agent
* @returns An object containing:
* - stream: The output stream from the agent
* - pipe: The name of the pipe used ('database-architect')
* @async
*/
async function runDatabaseArchitectAgent(prompt: string) {
const {stream} = await langbase.pipes.run({
stream: true,
name: 'database-architect',
messages: [{ role: 'user', content: prompt }]
})
return {
stream,
pipe: 'database-architect'
};
}
```
</CodeGroup>
Here is a quick explanation of what's happening in the code above:
- Call the `database-architect` pipe agent with the user prompt.
- Return the stream and pipe as `database-architect`.
## Step #7: Build the CodeAlchmemist
Now that you have all the pipes in place, you can call the `/api/generate` endpoint to either generate a React component or SQL query based on the user prompt.
You will write a custom React hook `useLangbase` that will call the `/api/generate` endpoint with the user prompt and handle the response stream.
<CodeGroup exampleTitle="use-langbase.ts hook" title="use-langbase.ts hook">
```ts {{ title: 'hooks/use-langbase.ts' }}
import { getRunner } from 'langbase';
import { FormEvent, useState } from 'react';
const useLangbase = () => {
const [loading, setLoading] = useState(false);
const [completion, setCompletion] = useState('');
const [hasFinishedRun, setHasFinishedRun] = useState(false);
/**
* Executes the Code Alchemist agent with the provided prompt and handles the response stream.
*
* @param {Object} params - The parameters for running the Code Alchemist agent
* @param {FormEvent<HTMLFormElement>} [params.e] - Optional form event to prevent default behavior
* @param {string} params.prompt - The prompt to send to the Code Alchemist agent
* @param {string} [params.originalPrompt] - Optional original prompt text
*
* @throws {Error} When the API request fails or returns an error response
*
* @returns {Promise<void>}
*/
async function runCodeAlchemistAgent({
e,
prompt,
}: {
prompt: string;
e?: FormEvent<HTMLFormElement>;
}) {
e && e.preventDefault();
// if the prompt is empty, return
if (!prompt.trim()) {
console.info('Please enter a prompt first.');
return;
}
try {
setLoading(true);
setHasFinishedRun(false);
// make a POST request to the API endpoint to call AI pipes
const response = await fetch('/api/generate', {
method: 'POST',
headers: {
'Content-Type': 'application/json'
},
body: JSON.stringify({ prompt })
});
// if the response is not ok, throw an error
if (!response.ok) {
const error = await response.json();
console.error(error);
return;
}
// get the response body as a stream
if (response.body) {
const runner = getRunner(response.body);
// const stream = fromReadableStream(response.body);
runner.on('content', (content) => {
content && setCompletion(prev => prev + content);
});
}
} catch (error) {
console.error('Something went wrong. Please try again later.');
} finally {
setLoading(false);
setHasFinishedRun(true);
}
}
return {
loading,
completion,
hasFinishedRun,
runCodeAlchemistAgent
};
};
export default useLangbase;
```
</CodeGroup>
Here's what you have done in this step:
- Create a custom React hook `useLangbase` that will call the `/api/generate` endpoint with the user prompt.
- Use the `getRunner` function from the Langbase SDK to get the response body as a stream.
- Listen for the `content` event on the runner and update the `completion` state with the generated content.
<Note sub="Complete code" >
You can find the complete code for the CodeAlchemist app in the [GitHub repository][gh].
</Note>
---
## Live demo
You can try out the live demo of the CodeAlchemist [here][demo].
![CodeAlchemist - ][cover]
---
## Next Steps
- Build something cool with Langbase [APIs](/api-reference) and [SDK](/sdk).
- Join our [Discord community](https://langbase.com/discord) for feedback, requests, and support.
---
[demo]: https://code-alchemist.langbase.dev
[lb]: https://langbase.com
[code-alchemist]: https://langbase.com/examples/code-alchemist
[react-copilot]: https://langbase.com/examples/react-copilot
[database-architect]: https://langbase.com/examples/database-architect
[gh]: https://github.com/LangbaseInc/langbase-examples/tree/main/examples/code-alchemist
[cover]: https://raw.githubusercontent.com/LangbaseInc/docs-images/main/examples/code-alchemist/demo.jpg
[download]: https://download-directory.github.io/?url=https://github.com/LangbaseInc/langbase-examples/tree/main/examples/code-alchemist
[signup]: https://langbase.fyi/io
[qs]: https://langbase.com/docs/pipe/quickstart
[docs]: https://langbase.com/docs
[xsi]: https://x.com/MSaaddev
[local]: http://localhost:3000
[mit]: https://img.shields.io/badge/license-MIT-blue.svg?style=for-the-badge&color=%23000000
[fork]: https://img.shields.io/badge/FORK%20ON-%E2%8C%98%20Langbase-000000.svg?style=for-the-badge&logo=%E2%8C%98%20Langbase&logoColor=000000
</content>
</doc>
<doc>
<metadata>
<title>Guide: How to Branch AI Conversations</title>
<url>https://langbase.com/docs/guides/branch-conversations/</url>
</metadata>
<content>
import { generateMetadata } from '@/lib/generate-metadata';
# Guide: How to Branch AI Conversations
### A step-by-step guide to branch AI conversations using the Langbase SDK.
---
When conversations with LLMs get long, they often become messy. Mixing multiple topics in a single thread leads to context rot, and low response quality. The solution is to branch conversations.
By branching conversations, you can:
- Prevent context drift between different discussion paths
- Reduce token usage by avoiding repeated long histories
- Explore in parallel without polluting the main thread
- Merge insights back when ready
Branching is context engineering in action. With Langbase, it takes just a few lines of code.
In this guide, you will learn how to branch conversations.
<CTAButtons
example
className="my-8"
primary={{
href: 'https://github.com/LangbaseInc/langbase-sdk/blob/main/examples/nodejs/threads/threads.branch.ts',
text: 'Source code (Node.js)'
}}
/>
---
### Install dependencies
Start by installing [Langbase SDK](/sdk).
<CodeGroup exampleTitle="Install dependencies" title="Install dependencies">
```bash {{ title: 'npm' }}
npm i langbase dotenv
```
```bash {{ title: 'pnpm' }}
pnpm add langbase dotenv
```
```bash {{ title: 'yarn' }}
yarn add langbase dotenv
```
</CodeGroup>
Set up by importing necessary packages:
<CodeGroup exampleTitle="Initial setup" title="Initial setup">
```ts
import dotenv from 'dotenv';
import { Langbase, ThreadMessage } from 'langbase';
dotenv.config();
const langbase = new Langbase({
apiKey: process.env.LANGBASE_API_KEY!,
});
```
</CodeGroup>
## Step #1: Get Langbase API Key
Every request you send to Langbase needs an [API key](/api-reference/api-keys). This guide assumes you already have one. In case, you do not have an API key, please check the instructions below.
<Spoiler title="Get your Langbase API key: User or Org">
You can generate API keys from the [Langbase Studio](https://studio.langbase.com) by following these steps:
1. Switch to your user or org account.
2. From the sidebar, click on the `API keys`.
3. From here, you can create a new API key or manage existing ones.
For more details, follow the [Langbase API keys](/api-reference/api-keys) documentation.
</Spoiler>
Create an `.env` file in the root of your project and add your Langbase API key.
```bash {{ title: '.env' }}
LANGBASE_API_KEY=xxxxxxxxx
```
Replace xxxxxxxxx with your Langbase API key.
## Step #2: Create the Initial Conversation
Start a conversation about choosing a React state management library.
<CodeGroup exampleTitle="Create initial conversation" title="index.ts">
```ts
// Helper to create initial conversation
async function createConversation() {
const thread = await langbase.threads.create({
messages: [
{
role: 'user',
content: 'I need to add state management to my React app',
},
{
role: 'assistant',
content: 'I can help you with state management in React. How complex is your app \
and what are your main requirements?',
},
{
role: 'user',
content: "It's a medium-sized app with user data, API calls, and real-time updates",
},
{
role: 'assistant',
content: 'For your needs, you could use Redux for its mature ecosystem, or Zustand \
for a simpler, more modern approach. Which direction interests you?',
},
],
});
return thread.id;
}
```
</CodeGroup>
---
## Step #3: Branch the Conversation
Fork the conversation at a decision point and create a new branch.
<CodeGroup exampleTitle="Branch conversation" title="index.ts">
```ts
async function branchThread(threadId: string, branchAt: number) {
const messages = await langbase.threads.messages.list({ threadId });
const messagesToKeep = messages.slice(0, branchAt);
const branch = await langbase.threads.create({
messages: messagesToKeep as ThreadMessage[],
metadata: {
parent: threadId,
branchedAt: branchAt.toString(),
},
});
return branch.id;
}
```
</CodeGroup>
---
## Step #4: Continue Each Branch
Now continue the original with Redux, and the branch with Zustand.
<CodeGroup exampleTitle="Continue branches" title="index.ts">
```ts
async function main() {
// Create original conversation
const originalId = await createConversation();
// Branch at decision point (after state management options presented)
const branchId = await branchThread(originalId, 4);
// Continue original thread with Redux
await langbase.threads.append({
threadId: originalId,
messages: [
{role: 'user', content: "Let's go with Redux"},
{
role: 'assistant',
content: 'Great choice for a robust solution! Redux with Redux Toolkit makes it \
much easier. Let me show you the setup...',
},
],
});
// Branch explores Zustand
await langbase.threads.append({
threadId: branchId,
messages: [
{role: 'user', content: 'Tell me about Zustand'},
{
role: 'assistant',
content: "Zustand is lightweight and simple! It's only 2KB and doesn't need \
providers. Here's how to get started...",
},
],
});
console.log('Original thread:', await langbase.threads.messages.list({threadId: originalId}));
console.log('Branched thread:', await langbase.threads.messages.list({threadId: branchId}));
}
main();
```
</CodeGroup>
---
## Step #5: Run the Example
Run your branching conversation example:
<CodeGroup exampleTitle="Run project" title="Run project">
```bash {{ title: 'npx' }}
npx tsx index.ts
```
</CodeGroup>
You should see two independent threads logged:
- **Original** → continues with Redux
- **Branch** → explores Zustand
Choosing between two state management libraries is just an example. You can apply the concept to any number of topics. Think of branching like Git for conversations:
- **Fork** at decision points
- **Explore** in parallel without polluting context
- **Merge** or summarize back to main when ready
This makes AI interactions modular, adaptive, and efficient.
## Next Steps
- Build something cool with Langbase [APIs](/api-reference) and [SDK](/sdk).
- Join our [Discord community](https://langbase.com/discord) for feedback, requests, and support.
- Build a [composable RAG chatbot](/guides/rag-on-docs) on your company docs
- We use threads to manage conversations and context. Learn more about [threads primitive](/threads)
---
</content>
</doc>
<doc>
<metadata>
<title>Guide: Build a composable AI email agent</title>
<url>https://langbase.com/docs/guides/ai-email-agent/</url>
</metadata>
<content>
import { generateMetadata } from '@/lib/generate-metadata';
# Guide: Build a composable AI email agent
### A step-by-step guide to build an AI email agent using the Langbase SDK.
---
In this guide, you will build an AI email agent that uses multiple Langbase agent pipes to:
- **Summarize** an email
- **Analyze** sentiment of the email
- **Decide** whether the email needs a response or not
- **Pick** the tone of the response email
- **Generate** a response email
<CTAButtons
example
className="my-8"
primary={{
href: 'https://ai-email-agent.langbase.dev',
text: 'Live demo'
}}
secondary={{
href: 'https://github.com/LangbaseInc/langbase-examples/tree/main/examples/email-agent-node',
text: 'Source code (Node.js)'
}}
others={
[
{
href: 'https://github.com/LangbaseInc/langbase-examples/tree/main/examples/ai-email-agent',
text: 'Source code (Next.js)'
},
{
href: 'https://github.com/LangbaseInc/langbase-examples/tree/main/examples/email-agent-python',
text: 'Source code (Python)'
}
]
}
/>
---
You will build a basic Node.js application that will use the [Langbase SDK]((/sdk)) to connect to the AI agent pipes and generate responses using **parallelization** and **prompt-chaining** agent architectures.
<DesktopOnly>
## Flow reference architecture
There are two flows in the email agent, i.e., **User Email Flow** and **Spam Email Flow**.
The **User Email Flow** is a normal email flow where the user sends an email, and the AI agent analyzes the email sentiment, summarizes the email content, decides the email needs a response, picks the tone of the response email, and generates the response email.
The **Spam Email Flow** is a spam email flow where the AI agent analyzes the email sentiment, summarizes the email content, and decides that the email does not need a response.
**Click on the flow to see the detailed steps.**
<Flows />
</DesktopOnly>
Let's get started!
---
## Step #0: Setup your project
Create a new directory for your project and navigate to it.
<CodeGroup exampleTitle="Project setup" title="Project setup">
```bash
mkdir ai-email-agent && cd ai-email-agent
```
</CodeGroup>
### Initialize the project
Initialize Node.js project and create an `index.ts` file.
<CodeGroup exampleTitle="Initialize project" title="Initialize project">
```bash {{ title: 'npm' }}
npm init -y && touch index.ts && touch agents.ts
```
```bash {{ title: 'pnpm' }}
pnpm init && touch index.ts && touch agents.ts
```
```bash {{ title: 'yarn' }}
yarn init -y && touch index.ts && touch agents.ts
```
</CodeGroup>
### Install dependencies
You will use the [Langbase SDK](/sdk) to connect to the AI agent pipes and `dotenv` to manage environment variables. So, let's install these dependencies.
<CodeGroup exampleTitle="Install dependencies" title="Install dependencies">
```bash {{ title: 'npm' }}
npm i langbase dotenv
```
```bash {{ title: 'pnpm' }}
pnpm add langbase dotenv
```
```bash {{ title: 'yarn' }}
yarn add langbase dotenv
```
</CodeGroup>
## Step #1: Get Langbase API Key
Every request you send to Langbase needs an [API key](/api-reference/api-keys). This guide assumes you already have one. In case, you do not have an API key, please check the instructions below.
<Spoiler title="Get your Langbase API key: User or Org">
You can generate API keys from the [Langbase Studio](https://studio.langbase.com) by following these steps:
1. Switch to your user or org account.
2. From the sidebar, click on the `API keys`.
3. From here you can create a new API key or manage existing ones.
For more details follow the [Langbase API keys](/api-reference/api-keys) documentation.
</Spoiler>
Create an `.env` file in the root of your project and add your Langbase API key.
```bash {{ title: '.env' }}
LANGBASE_API_KEY=xxxxxxxxx
```
Replace xxxxxxxxx with your Langbase API key.
## Step #2: Fork the AI agent pipes
Fork the following agent pipes needed for the AI email agent in Langbase dashboard:
1. [Email Sentiment][email-sentiment] → An agent pipe to analyze the sentiment of the incoming email
2. [Summarizer][summarizer] → Summarizes the content of the email and make it less wordy for you
3. [Decision Maker][decision-maker] → Decides if the email needs a response, the category and priority of the response
4. [Pick Email Writer][pick-email-writer] → An AI agent pipe that picks the tone for writing the response of the email
5. [Email Writer][email-writer] → An agent pipe that will write a response email
## Step #3: Sentiment Analysis
In our first step, you will **analyze** the **email sentiment** using the Langbase AI agent pipe. Go ahead and add the following code to your `agents.ts` file:
<CodeGroup exampleTitle="Email sentiment agent" title="Email sentiment agent">
```ts {{ title: 'agents.ts' }}
import { Langbase } from 'langbase';
import 'dotenv/config'
const langbase = new Langbase({ apiKey: process.env.LANGBASE_API_KEY! });
// Sentiment analysis
const completion = JSON.parse(response.completion);
return completion.sentiment;
};
```
</CodeGroup>
Let's take a look at what is happening in this code:
- Initialize the [Langbase SDK](/sdk) with the API key from the environment variables.
- Define `emailSentimentAgent` function that takes an email and returns its **sentiment analysis**.
- Set the `json` parameter to `true` to get the response in JSON format.
- Set the `stream` parameter to `false` because the content generation will be processed internally.
<Note sub="AI user experience" classNameDescription="gap-0 mt-3">
Stream the response:
- When it's displayed **directly** to users in the UI.
- This creates a **better user experience** by showing the AI's response being generated in real-time.
Do not stream:
- When the AI response is being **processed internally** (e.g., for data analysis, content moderation, or generating metadata).
- Set stream to false in these cases since real-time display isn't needed.
</Note>
## Step #4: Summarize Email
Now let's write a function in the same `agents.ts` file to **summarize** the email content.
<CodeGroup exampleTitle="Email summary agent" title="Email summary agent">
```ts {{ title: 'agents.ts' }}
// Summarize email
const completion = JSON.parse(response.completion);
return completion.summary;
};
```
</CodeGroup>
Let's break down the above code:
- Define a function `emailSummaryAgent` that takes an email and returns its **summarized content**.
- Set the `json` parameter to `true` to get the response in JSON format.
- Set the `stream` parameter to `false` because the content generation will be processed internally.
## Step #5: Decision Maker
You are building a **ReAct based architecture** which means the sytem first reason our the info it has and then decide to act.
In this example, results of the email sentiment and summary are passed to the decision-making agent pipe to **decide** whether to respond to the email or not.

Go ahead and add the following code to your `agents.ts` file:
<CodeGroup exampleTitle="Should respond to email agent" title="Should respond to email agent">
```ts {{ title: 'agents.ts' }}
// Determine if a response is needed
const completion = JSON.parse(response.completion);
return completion.respond;
};
```
</CodeGroup>
Let's go through the above code.
- Define a function `shouldRespondToEmailAgent` that takes the summarized content and sentiment of the email and returns a decision.
- Set the `json` parameter to `true` to get the response in JSON format.
- Set the `stream` parameter to `false` because the content generation will be processed internally.
## Step #6: Pick Email Writer
In cases where the email needs a response, you will use the **Pick Email Writer** agent pipe to pick the tone of the email response.
<CodeGroup exampleTitle="Pick email writer agent" title="Pick email writer agent">
```ts {{ title: 'agents.ts' }}
// Pick an email writer
const completion = JSON.parse(response.completion);
return completion.tone;
};
```
</CodeGroup>
Here's what you have done in this step:
- Created a function `pickEmailWriterAgent` that uses the **summarized email** and **sentiment** to pick one of the following tones for response:
- Professional
- Formal
- Informal
- Casual
- Friendly
- Set the `json` parameter to `true` to get the response in JSON format.
- Set the `stream` parameter to `false` because the content generation will be processed internally.
## Step #7: Write Email Response
Finally, you will use the **Email Writer** agent pipe to generate the response email based on the tone picked in the previous step.
<CodeGroup exampleTitle="Write email response agent" title="Write email response agent">
```ts {{ title: 'agents.ts' }}
// Generate an email reply
return stream;
};
```
</CodeGroup>
Let's take a look at the above code:
- Created a function `emailResponseAgent` that takes the **tone** and **summarized email** and returns the **response email**.
- Set the `stream` parameter to `true` to get the response in stream format as you will be writing the response to the console.
## Step #8: Final composable mult-agent workflow
Now that you have all these agents, you can combine these in multi agent workflow so they can help us
1. **analyze** the email
2. **summarize** the email
3. **decide** if it needs a response
4. **pick** the tone of the response
5. **generate** the response email if needed.
In `index.ts` file, let's import all our agents and define a `workflow` that to run with user email and spam email.
<CodeGroup exampleTitle="Agent workflow" title="Agent workflow">
```ts {{ title: 'index.ts' }}
import { getRunner } from 'langbase';
import {
emailResponseAgent,
emailSentimentAgent,
emailSummaryAgent,
pickEmailWriterAgent,
shouldRespondToEmailAgent,
} from './agents';
import { stdout } from 'process';
const workflow = async (emailContent: string) => {
console.log('Email:', emailContent);
// parallelly run the agent pipes
const [emailSentiment, emailSummary] = await Promise.all([
emailSentimentAgent(emailContent),
emailSummaryAgent(emailContent),
]);
console.log('Sentiment:', emailSentiment);
console.log('Summary:', emailSummary);
const respond = await shouldRespondToEmailAgent(emailSummary, emailSentiment);
console.log('Respond:', respond);
if (!respond) {
return 'No response needed for this email.';
}
const writer = await pickEmailWriterAgent(emailSummary, emailSentiment);
console.log('Writer:', writer);
const emailStream = await emailResponseAgent(writer, emailSummary);
const runner = getRunner(emailStream);
runner.on('content', (content: string) => {
stdout.write(content);
});
};
const userEmail = `I'm really disappointed with the service I received yesterday. The product was faulty and customer support was unhelpful.`;
const spamEmail = `Congratulations! You have been selected as the winner of a $100 million lottery!`;
workflow(userEmail);
```
```ts {{title: './agents.ts'}}
import { Langbase } from 'langbase';
import 'dotenv/config'
const langbase = new Langbase({ apiKey: process.env.LANGBASE_API_KEY! });
// Sentiment analysis
const completion = JSON.parse(response.completion);
return completion.sentiment;
};
// Summarize email
const completion = JSON.parse(response.completion);
return completion.summary;
};
// Determine if a response is needed
const completion = JSON.parse(response.completion);
return completion.respond;
};
// Pick an email writer
const completion = JSON.parse(response.completion);
return completion.tone;
};
// Generate an email reply
return stream;
};
```
</CodeGroup>
Here's what you have done in this step:
- Define a `workflow` function that takes an email content and runs the email sentiment, summary, decision-making, email writer, and email response agents.
- You have used the `getRunner` function to get the stream of the email response and write it to the console.
- You have also defined the `emailSentimentAgent`, `emailSummaryAgent`, `shouldRespondToEmailAgent`, `pickEmailWriterAgent`, and `emailResponseAgent` functions to run the respective agents.
## Step #9: Run the workflow
Run the email agent workflow by running the following command in terminal:
<CodeGroup exampleTitle="Initialize project" title="Initialize project">
```bash {{ title: 'npx' }}
npx tsx index.ts
```
```bash {{ title: 'pnpm' }}
pnpm dlx tsx index.ts
```
</CodeGroup>
You should see the following output in the console:
```md {{ title: 'Email Agent output' }}
Email: I'm really disappointed with the service I received yesterday. The product was faulty and customer support was unhelpful.
Sentiment: frustrated
Summary: Disappointed with faulty product and unhelpful customer support.
Respond: true
Writer: formal
Subject: Re: Concern Regarding Faulty Product and Support Experience
Dear [User's Name],
Thank you for reaching out to us regarding your experience with our product and customer support. I sincerely apologize for the inconvenience you've encountered.
We strive to provide high-quality products and exceptional service, and it is disappointing to hear that we did not meet those standards in your case. Please rest assured that your feedback is taken seriously, and we are committed to resolving this matter promptly.
To assist you further, could you please provide details about the specific issues you're facing? This will enable us to address your concerns more effectively.
Thank you for bringing this to our attention, and I look forward to assisting you.
Best regards,
[Your Name]
[Your Position]
[Company Name]
[Contact Information]
```
This is how you can build an AI email agent using Langbase agent pipes.
---
## Next Steps
- Build something cool with Langbase [APIs](/api-reference) and [SDK](/sdk).
- Join our [Discord community](https://langbase.com/discord) for feedback, requests, and support.
---
[cover]: https://raw.githubusercontent.com/LangbaseInc/docs-images/main/examples/ai-email-agent/ai-email-agent.jpg
[email-agent]: https://ai-email-agent.langbase.dev/
[gh-repo]: https://github.com/LangbaseInc/langbase-examples/blob/main/examples/email-agent-node
[local]: http://localhost:3000
[email-sentiment]: https://langbase.com/examples/email-sentiment
[summarizer]: https://langbase.com/examples/summarizer
[decision-maker]: https://langbase.com/examples/decision-maker
[pick-email-writer]: https://langbase.com/examples/pick-email-writer
[email-writer]: https://langbase.com/examples/email-writer
</content>
</doc>
<doc>
<metadata>
<title>Versions</title>
<url>https://langbase.com/docs/features/versions/</url>
</metadata>
<content>
import { generateMetadata } from '@/lib/generate-metadata';
# Versions
Versions in Pipe let you see how its config has changed over time. You can go back and forth between different versions, without having to change the Pipe config every time. There are four types of Pipe versions.
---
## 1. Production
As the name suggests, it is the Pipe config that is deployed on production. If your Pipe has multiple versions, the version deployed on production will be the one that the Pipe API will use.
<Img
caption="Production version of a Pipe"
light="https://raw.githubusercontent.com/LangbaseInc/docs-images/main/features/production-version-light.jpg"
dark="https://raw.githubusercontent.com/LangbaseInc/docs-images/main/features/production-version-dark.jpg"
/>
---
## 2. Draft Fork
When you start updating your Pipe configuration, such as system prompts, metadata, variables, etc., a Draft fork version is created. This draft is based on the currently selected version. So if the selected version is at v9, the new draft will be called Draft Fork of v9.
<Img
caption="Draft Fork version of a Pipe"
light="https://raw.githubusercontent.com/LangbaseInc/docs-images/main/features/draft-version-light.jpg"
dark="https://raw.githubusercontent.com/LangbaseInc/docs-images/main/features/draft-version-dark.jpg"
/>
---
## 3. Preview
When you run a Pipe that is on a Draft fork version, a Preview version gets created. This version helps you track your pipe usage so later, you can check the model, params, and prompt/completion pair or convert it into a Sandbox version.
<Img
caption="Preview version of a Pipe"
light="https://raw.githubusercontent.com/LangbaseInc/docs-images/main/features/preview-version-light.jpg"
dark="https://raw.githubusercontent.com/LangbaseInc/docs-images/main/features/preview-version-dark.jpg"
/>
---
## 4. Sandbox
Changing Pipe config makes a Draft Fork version. Instead of deploying this Draft Fork version to Production, you can save it as a Sandbox version. You can get back to this Sandbox version later if you want without having to manually change all the Pipe config.
<Img
caption="Sandbox version of a Pipe"
light="https://raw.githubusercontent.com/LangbaseInc/docs-images/main/features/sandbox-version-light.jpg"
dark="https://raw.githubusercontent.com/LangbaseInc/docs-images/main/features/sandbox-version-dark.jpg"
/>
---
## Compare Version Diff
Compare versions helps you to see what changed between the current production version and any of the previous Pipe versions. It’s similar to the VS Code source control editor.
<Img
caption="Compare deployed Pipe version with any previous version"
light="https://raw.githubusercontent.com/LangbaseInc/docs-images/main/features/compare-pipe-version-light.jpg"
dark="https://raw.githubusercontent.com/LangbaseInc/docs-images/main/features/compare-pipe-version-dark.jpg"
/>
---
</content>
</doc>
<doc>
<metadata>
<title>Variables</title>
<url>https://langbase.com/docs/features/variables/</url>
</metadata>
<content>
import { generateMetadata } from '@/lib/generate-metadata';
# Variables
Pipes have built-in support for variables to handle dynamic prompts. Any text written between `{{}}` in your prompt instructions acts as a variable to which you can assign different values using the variable section inside a Pipe. Variables will appear once you add them using `{{variableName}}`.
<Img
caption="Configuring variables inside a Pipe"
light="https://raw.githubusercontent.com/LangbaseInc/docs-images/main/features/variables-light.jpg"
dark="https://raw.githubusercontent.com/LangbaseInc/docs-images/main/features/variables-dark.jpg"
/>
Variables empower you to build applications where you can get their value from your external or internal users. Based on these variable values, you can generate completion using the Pipe API.
---
## How to use Variables
Follow this quick guide to learn how to use Variables inside a Pipe.
---
## Step #1: Create a Variable
Variables are created using `{{variableName}}` syntax. Navigate to any of your Langbase Pipes and anywhere in system, user or assistant prompt instructions, write a variable name using the syntax.
An example of a **system prompt** with a **variable**:
```
You are helpful AI assistant that creates creative blog {{titles}}.
```
<Img
caption="Create a variable inside a Pipe"
light="https://raw.githubusercontent.com/LangbaseInc/docs-images/main/features/create-variable-light.jpg"
dark="https://raw.githubusercontent.com/LangbaseInc/docs-images/main/features/create-variable-dark.jpg"
/>
## Step #2: Assign a Value
Inside the Pipe, there is a **Variable** section on the left where you can assign a value to the variable you created.
Let's give the value **AI applications** to the variable `{{titles}}`.
<Img
caption="Configuring variables inside a Pipe"
light="https://raw.githubusercontent.com/LangbaseInc/docs-images/main/features/variable-value-light.jpg"
dark="https://raw.githubusercontent.com/LangbaseInc/docs-images/main/features/variable-value-dark.jpg"
/>
---
</content>
</doc>
<doc>
<metadata>
<title>Usage</title>
<url>https://langbase.com/docs/features/usage/</url>
</metadata>
<content>
import { generateMetadata } from '@/lib/generate-metadata';
# Usage
Pipe's usage feature provides insights into how it's being utilized. Along with detailed logs of every Pipe request, this feature includes data on the total cost incurred by these requests, the total number of tokens used across all requests, their overall usage, and the average response time.
<Img
caption="View detailed usage insights inside a Pipe"
light="https://raw.githubusercontent.com/LangbaseInc/docs-images/main/features/usage-light.jpg"
dark="https://raw.githubusercontent.com/LangbaseInc/docs-images/main/features/usage-dark.jpg"
/>
---
## Usage Prediction
The Pipe also offers insights on the estimated cost of running it a million times with the selected LLM. This cost prediction provides an estimate to the user and can help them optimize the Pipe for the cost.
<Img
caption="Get cost prediction for running a million requests inside a Pipe"
light="https://raw.githubusercontent.com/LangbaseInc/docs-images/main/features/usage-prediction-light.jpg"
dark="https://raw.githubusercontent.com/LangbaseInc/docs-images/main/features/usage-prediction-dark.jpg"
/>
---
</content>
</doc>
<doc>
<metadata>
<title>What is tool calling?</title>
<url>https://langbase.com/docs/features/tool-calling/</url>
</metadata>
<content>
import { generateMetadata } from '@/lib/generate-metadata';
# What is tool calling?
LLM tool calling allows a language model (like GPT) to use external tools (functions inside your codebase) to **perform** tasks it can't handle alone.
Instead of just generating text, the model can **respond with a tool call** (name of the function to call with parameters) that triggers a function in your code.
You can use tool calling to get the model to do things like fetch live information, run code for complex calculations, call another get some data from a database, call another pipe, or interact with other systems.
## How does it work?
Langbase offers tool calling with multiple providers ([view complete list](/supported-models-and-providers#tool-support)) to provide more flexibility and control over the conversation. You can use this feature to call tools in your code and pass the results back to the model.
1. **Describe the tool**: You can describe a tool in your Pipe by providing the tool name, description, and arguments. You can also specify the data type of the arguments and if they are required or optional. These tools are then passed to the model.
2. **User prompt**: You sent a user prompt that requires data that the tool can provide. The model will generate a JSON object with tool name and its arguments.
3. **Call the tool**: You can use this JSON object to call the tool in your code.
4. **Pass the result**: You can pass the result back to the model to continue the conversation.
---
## Tool definition schema
Tool calling feature requires you to add a tool definition schema in your Pipe. This tool definition is passed to the model. The model then generates a JSON object with the tool name and its arguments based on the user prompt.
<Note title="name key is required">
The tool definition schema must contain `name` key inside `function` that is the name of the tool. You can also provide a description of the tool, the parameters it accepts, and their data types among other key/value pairs.
</Note>
Here is an example of a valid tool definition schema:
```json
{
"type": "function",
"function": {
"name": "get_current_weather",
"description": "Get the current weather of a given location",
"parameters": {
"type": "object",
"required": [
"location"
],
"properties": {
"unit": {
"enum": [
"celsius",
"fahrenheit"
],
"type": "string"
},
"location": {
"type": "string",
"description": "The city and state, e.g. San Francisco, CA"
}
}
}
}
}
```
---
## Prerequisites: Generate Langbase API Key
We will use Langbase SDK in this guide. To work with it, you need to generate an API key. Visit [User/Org API key documentation](/api-reference/api-keys) page to learn more.
---
## How to make tool calls in Pipes using Langbase SDK
Follow this quick guide to learn how to make tool calls in Pipes using Langbase SDK.
## Step #0: Create a Pipe
Create a [new](https://pipe.new) Pipe or open an existing Pipe in your Langbase account. Alternatively, you can fork this [`tool-calling-example`](https://langbase.com/examples/tool-calling-example) pipe and skip to step 2.
## Step #1: Add a tool to the Pipe
Let's add a tool to get the current weather of a given location. Click on the `Add` button in the Tools section to add a new tool.
<Img
caption="Add a tool to the Pipe"
light="https://raw.githubusercontent.com/LangbaseInc/docs-images/main/features/function-calling-light.jpg"
dark="https://raw.githubusercontent.com/LangbaseInc/docs-images/main/features/function-calling-dark.jpg"
/>
This will open a modal where you can define the tool. The tool we are defining will take two arguments:
1. location
2. unit.
The `location` argument is required and the `unit` argument is optional.
The tool definition will look something like the following.
```json
{
"type": "function",
"function": {
"name": "get_current_weather",
"description": "Get the current weather of a given location",
"parameters": {
"type": "object",
"required": [
"location"
],
"properties": {
"unit": {
"enum": [
"celsius",
"fahrenheit"
],
"type": "string"
},
"location": {
"type": "string",
"description": "The city and state, e.g. San Francisco, CA"
}
}
}
}
}
```
Go ahead and deploy the Pipe to production.
<Note title="Playground is disabled">
If a Pipe has tools, the playground will be disabled. You can only test
tool calling with our `run` API or SDK.
</Note>
## Step #2: Install dependencies
We will use Langbase SDK to run the pipe. We will also use `dotenv` to load env variables from a `.env` file.
<CodeGroup exampleTitle="Install the SDK" title="Install the SDK">
```bash {{ title: 'npm' }}
npm i langbase dotenv
```
```bash {{ title: 'pnpm' }}
pnpm i langbase dotenv
```
```bash {{ title: 'yarn' }}
yarn add langbase dotenv
```
</CodeGroup>
## Step #3: Add env variables
Create a `.env` file in the root of your project and add the following environment variables.
```bash
LANGBASE_API_KEY="<USER/ORG-API-KEY>"
```
Replace `<USER/ORG-API-KEY>` with your Langbase API key.
## Step #4: Run pipe with user prompt to make a tool call
Now let's create an `index.js` file where we will define `get_current_weather` function and also run the pipe with a user prompt that will trigger the tool call.
```js
import 'dotenv/config';
import { Langbase, getToolsFromStream, getRunner } from 'langbase';
const langbase = new Langbase({
apiKey: process.env.LANGBASE_API_KEY, // https://langbase.com/docs/api-reference/api-keys
});
function get_current_weather() {
return "It's 70 degrees and sunny in SF.";
}
const tools = {
get_current_weather,
};
async function main() {
const messages = [
{
role: 'user',
content: 'Whats the weather like in SF?',
},
];
const { stream: initialStream, threadId } = await langbase.pipes.run({
messages,
stream: true,
name: 'tool-calling-example', // name of the pipe to run
});
}
main();
```
Replace `tool-calling-example` with your pipe name if it has a different name.
Here is what we did so far:
1. **Initialized** the Langbase SDK with the API key.
2. **Defined** a `get_current_weather` function that returns the current weather of San Francisco.
3. **Created** a `tools` object that contains the `get_current_weather` function.
4. **Wrote** a `main` function that **runs** the Pipe using **SDK** with a user prompt that triggers the tool call.
Because the user prompt requires the current weather of San Francisco, the model will respond with a tool call like the following:
```json
{
"role": "assistant",
"content": null,
"tool_calls": [
{
"id": "call_u28sPmmCAWkop0OdgDYDJ9OG",
"type": "function",
"function": {
"name": "get_current_weather",
"arguments": "{\"location\": \"San Francisco\"}"
}
}
]
}
```
## Step #5: Check for tool calls
We will still check if we received any tool calls from the model. If the model has called a tool, we will **call the functions** specified in the tool call and send the **tool results** back to model using Langbase SDK.
```js
import 'dotenv/config';
import { Langbase, getToolsFromStream, getRunner } from 'langbase';
const langbase = new Langbase({
apiKey: process.env.LANGBASE_API_KEY, // https://langbase.com/docs/api-reference/api-keys
});
function get_current_weather() {
return "It's 70 degrees and sunny in SF.";
}
const tools = {
get_current_weather,
};
async function main() {
const messages = [
{
role: 'user',
content: 'Whats the weather like in SF?',
},
];
const { stream: initialStream, threadId } = await langbase.pipes.run({
messages,
name: 'tool-calling-example', // name of the pipe to run
stream: true,
});
const [streamForToolCalls, streamForResponse] = initialStream.tee();
const toolCalls = await getToolsFromStream(streamForToolCalls);
const hasToolCalls = toolCalls.length > 0;
if (hasToolCalls) {
const messages = [];
// call all the functions in the toolCalls array
toolCalls.forEach(async toolCall => {
const toolName = toolCall.function.name;
const toolParameters = JSON.parse(toolCall.function.arguments);
const toolFunction = tools[toolName];
const toolResult = toolFunction(toolParameters);
messages.push({
tool_call_id: toolCall.id, // required: id of the tool call
role: 'tool', // required: role of the message
name: toolName, // required: name of the tool
content: toolResult, // required: response of the tool
});
});
const { stream: chatStream } = await langbase.pipes.run({
messages,
name: 'tool-calling-example', // name of the pipe to run
threadId: threadId,
stream: true,
});
const runner = getRunner(chatStream);
runner.on('content', content => {
process.stdout.write(content);
});
} else {
// no tool calls, handle the response stream
}
}
main();
```
Lastly, here is what we did:
1. **Cloned** the initial stream to use it later for tool calls check.
2. Used `getToolsFromStream` SDK function to **get** tool calls from the stream if any.
3. **Checked** if there are any tool calls.
4. In case there are tool calls, we **called** the functions specified in the tool call.
5. We then sent the **tool results** in a messages array to the model using Langbase SDK.
6. We also sent the `threadId` in the request to the pipe to **continue** the conversation.
## Step #6: Run the code
Let's run the code using the following command:
```bash
node index.js
```
You should see the following output printed on your terminal:
```
The weather in San Francisco is 70 degrees Celsius and sunny.
```
And that's it! You have successfully made a tool call using pipes & Langbase SDK.
---
## Next Steps
- Build something cool with Langbase.
- Join our [Discord community](https://langbase.com/discord) for feedback, requests, and support.
---
</content>
</doc>
<doc>
<metadata>
<title>Structured Outputs</title>
<url>https://langbase.com/docs/features/structured-outputs/</url>
</metadata>
<content>
import { generateMetadata } from '@/lib/generate-metadata';
# Structured Outputs
Structured Outputs is a feature that guarantees responses from language models adhere strictly to your supplied JSON schema. Langbase supports Structured Outputs in pipe and agent primitives. You can read our API reference for [pipes](/api-reference/pipe) and [agents](/api-reference/agent).
Structured Outputs offer benefits such as:
- **Boost reliability**: By enforcing schema, the chances of runtime errors are reduced.
- **Eliminate post-processing**: Responses are already shaped exactly as you expect, no need for manual parsing.
- **Explicit refusals**: If the model can’t fulfill a request, it returns a clear, standardized error or refusal—making handling edge cases easier and safer.
Learn [how to use Structured Outputs](https://langbase.com/docs/guides/structured-outputs) in Langbase.
---
</content>
</doc>
<doc>
<metadata>
<title>Stream</title>
<url>https://langbase.com/docs/features/stream/</url>
</metadata>
<content>
import { generateMetadata } from '@/lib/generate-metadata';
# Stream
Pipes support streaming LLM responses for all of its supported LLM models on both its API and Langbase dashboard.
Streaming can be enabled or disabled inside a Pipe if required.
<Img
caption="Toggle response streaming inside a Pipe"
light="https://raw.githubusercontent.com/LangbaseInc/docs-images/main/features/stream-light.jpg"
dark="https://raw.githubusercontent.com/LangbaseInc/docs-images/main/features/stream-dark.jpg"
/>
## Streaming Response
When streaming is enabled, the API will return a streaming response in [OpenAI SSE format](https://platform.openai.com/docs/api-reference/streaming). The response will be a series of JSON objects, each representing a chunk of the completion. To implement streaming, you will need to parse the response and display the chunks as they arrive.
Parsing the stream is non-trivial, and you may want to use a library to help with this. Any library that helps with OpenAI streaming will work with Langbase Pipe's streaming responses. You can also check our [Chatbot Example code](https://github.com/LangbaseInc/langbase-examples/tree/main/examples/ai-chatbot) to implement streaming in your app.
Here is what a streaming response looks like.
<CodeGroup exampleTitle="Streaming response" title="Streaming response" >
```txt {{ title: 'Example response' }}
{"id":"chatcmpl-9gDTI1K8XnBBhGou2ZnF7wQRU3M7r","object":"chat.completion.chunk","created":1719848588,"model":"gpt-3.5-turbo-0125","system_fingerprint":null,"choices":[{"index":0,"delta":{"role":"assistant","content":""},"logprobs":null,"finish_reason":null}]}
{"id":"chatcmpl-9gDTI1K8XnBBhGou2ZnF7wQRU3M7r","object":"chat.completion.chunk","created":1719848588,"model":"gpt-3.5-turbo-0125","system_fingerprint":null,"choices":[{"index":0,"delta":{"content":"Hello"},"logprobs":null,"finish_reason":null}]}
{"id":"chatcmpl-9gDTI1K8XnBBhGou2ZnF7wQRU3M7r","object":"chat.completion.chunk","created":1719848588,"model":"gpt-3.5-turbo-0125","system_fingerprint":null,"choices":[{"index":0,"delta":{"content":"!"},"logprobs":null,"finish_reason":null}]}
{"id":"chatcmpl-9gDTI1K8XnBBhGou2ZnF7wQRU3M7r","object":"chat.completion.chunk","created":1719848588,"model":"gpt-3.5-turbo-0125","system_fingerprint":null,"choices":[{"index":0,"delta":{"content":" How"},"logprobs":null,"finish_reason":null}]}
{"id":"chatcmpl-9gDTI1K8XnBBhGou2ZnF7wQRU3M7r","object":"chat.completion.chunk","created":1719848588,"model":"gpt-3.5-turbo-0125","system_fingerprint":null,"choices":[{"index":0,"delta":{"content":" can"},"logprobs":null,"finish_reason":null}]}
{"id":"chatcmpl-9gDTI1K8XnBBhGou2ZnF7wQRU3M7r","object":"chat.completion.chunk","created":1719848588,"model":"gpt-3.5-turbo-0125","system_fingerprint":null,"choices":[{"index":0,"delta":{"content":" I"},"logprobs":null,"finish_reason":null}]}
{"id":"chatcmpl-9gDTI1K8XnBBhGou2ZnF7wQRU3M7r","object":"chat.completion.chunk","created":1719848588,"model":"gpt-3.5-turbo-0125","system_fingerprint":null,"choices":[{"index":0,"delta":{"content":" assist"},"logprobs":null,"finish_reason":null}]}
{"id":"chatcmpl-9gDTI1K8XnBBhGou2ZnF7wQRU3M7r","object":"chat.completion.chunk","created":1719848588,"model":"gpt-3.5-turbo-0125","system_fingerprint":null,"choices":[{"index":0,"delta":{"content":" you"},"logprobs":null,"finish_reason":null}]}
{"id":"chatcmpl-9gDTI1K8XnBBhGou2ZnF7wQRU3M7r","object":"chat.completion.chunk","created":1719848588,"model":"gpt-3.5-turbo-0125","system_fingerprint":null,"choices":[{"index":0,"delta":{"content":" today"},"logprobs":null,"finish_reason":null}]}
{"id":"chatcmpl-9gDTI1K8XnBBhGou2ZnF7wQRU3M7r","object":"chat.completion.chunk","created":1719848588,"model":"gpt-3.5-turbo-0125","system_fingerprint":null,"choices":[{"index":0,"delta":{"content":"?"},"logprobs":null,"finish_reason":null}]}
{"id":"chatcmpl-9gDTI1K8XnBBhGou2ZnF7wQRU3M7r","object":"chat.completion.chunk","created":1719848588,"model":"gpt-3.5-turbo-0125","system_fingerprint":null,"choices":[{"index":0,"delta":{},"logprobs":null,"finish_reason":"stop"}]}
```
```json {{ title: 'Example chunk' }}
{
"id":"chatcmpl-9gDTI1K8XnBBhGou2ZnF7wQRU3M7r",
"object":"chat.completion.chunk",
"created":1719848588,
"model":"gpt-3.5-turbo-0125",
"system_fingerprint":null,
"choices":[
{
"index":0,
"delta":{
"content":"Hello"
},
"logprobs":null,
"finish_reason":null
}
]
}
```
</CodeGroup>
---
</content>
</doc>
<doc>
<metadata>
<title>Store Messages</title>
<url>https://langbase.com/docs/features/store-messages/</url>
</metadata>
<content>
import { generateMetadata } from '@/lib/generate-metadata';
# Store Messages
Pipe can store both prompts and their completions if the Store messages in Pipe meta is enabled. Otherwise, only system prompts and few-shot messages will be saved. No completions, final prompts or variables will be retained to ensure privacy.
---
## How to enable/disable message storage?
Follow this quick guide to learn how to enable or disable storage of your messages in Langbase.
---
## Step #1: Toggle the store message option
Navigate to your Langbase pipe. In the **Meta** section find the **Store messages** option. Toggle the switch to enable or disable message storage.
<Img
caption="Store messages option in Pipe"
light="https://raw.githubusercontent.com/LangbaseInc/docs-images/main/features/store-messages-1-light.jpg"
dark="https://raw.githubusercontent.com/LangbaseInc/docs-images/main/features/store-messages-1-dark.jpg"
/>
Here is what your logs will look like if the Pipe does not store messages.
<Img
caption="Logs without storing messages in Pipe"
light="https://raw.githubusercontent.com/LangbaseInc/docs-images/main/features/not-store-messages-light.jpg"
dark="https://raw.githubusercontent.com/LangbaseInc/docs-images/main/features/not-store-messages-dark.jpg"
/>
Your logs will look like this if Pipe stores messages.
<Img
caption="Logs with storing messages in Pipe"
light="https://raw.githubusercontent.com/LangbaseInc/docs-images/main/features/store-messages-light.jpg"
dark="https://raw.githubusercontent.com/LangbaseInc/docs-images/main/features/store-messages-dark.jpg"
/>
---
</content>
</doc>
<doc>
<metadata>
<title>Safety</title>
<url>https://langbase.com/docs/features/safety/</url>
</metadata>
<content>
import { generateMetadata } from '@/lib/generate-metadata';
# Safety
Define AI safety prompt for any LLM inside a Pipe. For instance, do not answer questions outside of the given context.
One of its use cases can be to ensure the LLM does not provide any sensitive information in its response from the provided context.
<Img
caption="Define Safety instructions inside a Pipe"
light="https://raw.githubusercontent.com/LangbaseInc/docs-images/main/features/safety-light.jpg"
dark="https://raw.githubusercontent.com/LangbaseInc/docs-images/main/features/safety-dark.jpg"
/>
---
## How to define Safety instructions
Following is a quick guide on how to define Safety instructions inside a Pipe.
---
## Step #1: Write Safety prompt
Navigate to any of your Pipes on Langbase. Click once on Safety text area to add a safety prompt.
<Img
caption="Write Safety prompt"
light="https://raw.githubusercontent.com/LangbaseInc/docs-images/main/features/safety-light.jpg"
dark="https://raw.githubusercontent.com/LangbaseInc/docs-images/main/features/safety-dark.jpg"
/>
---
## Step #2: Deploy the Pipe
Once you have added the safety prompt, click on the **Deploy to Production** button to deploy the Pipe.
<Img
caption="Deploy the Pipe"
light="https://raw.githubusercontent.com/LangbaseInc/docs-images/main/features/deploy-to-production-light.jpg"
dark="https://raw.githubusercontent.com/LangbaseInc/docs-images/main/features/deploy-to-production-dark.jpg"
/>
That's it! Now the LLM inside the Pipe will follow the safety instructions you have defined.
---
</content>
</doc>
<doc>
<metadata>
<title>Rerank</title>
<url>https://langbase.com/docs/features/rerank/</url>
</metadata>
<content>
import { generateMetadata } from '@/lib/generate-metadata';
# Rerank
Our custom rerank models reorder search results based on relevance, delivering more accurate and meaningful rankings.
We train our models on carefully curated, high-quality datasets to outperform industry standards. For enterprise customers, we take it a step further—training rerank models on your own data for even better relevance tailored to your needs.
Want to improve your search relevance? Let’s discuss a custom rerank model for your use case.
<CTAButtons
primary={{ href: 'mailto:sales@langbase.com?subject=Rerank%20Model%20Request', text: 'Contact Us' }}
/>
</content>
</doc>
<doc>
<metadata>
<title>Readme</title>
<url>https://langbase.com/docs/features/readme/</url>
</metadata>
<content>
import { generateMetadata } from '@/lib/generate-metadata';
# Readme
Pipe contains a readme at the very bottom that you can edit to include any documentation relevant to it. The readme editor supports markdown so you can format your text or add images through a remote URL.
<Img
caption="Add a readme to your Pipe"
light="https://raw.githubusercontent.com/LangbaseInc/docs-images/main/features/readme-light.jpg"
dark="https://raw.githubusercontent.com/LangbaseInc/docs-images/main/features/readme-dark.jpg"
/>
</content>
</doc>
<doc>
<metadata>
<title>Prompt Optimization</title>
<url>https://langbase.com/docs/features/prompt-optimization/</url>
</metadata>
<content>
import { generateMetadata } from '@/lib/generate-metadata';
# Prompt Optimization
Our advanced prompt optimizer models refine and enhance prompts to deliver more accurate, high-quality outputs. Whether you’re generating text, retrieving information, or running complex AI workflows, our models help you get the best possible results.
For enterprises, we offer custom-trained prompt optimizers tailored to your specific data and use cases—ensuring even greater accuracy and relevance for your business needs.
Ready to optimize your prompts? Let’s talk!
<CTAButtons
primary={{ href: 'mailto:sales@langbase.com?subject=Prompt%20Optimizer%20Inquiry', text: 'Contact Us' }}
/>
</content>
</doc>
<doc>
<metadata>
<title>Prompt</title>
<url>https://langbase.com/docs/features/prompt/</url>
</metadata>
<content>
import { generateMetadata } from '@/lib/generate-metadata';
# Prompt
A prompt sets the context and guidelines for both the LLM and the user, shaping the conversation and responses. Pipe can contain system, user, and AI assistant prompts.
---
## 1. System Prompt
A system prompt sets the context, instructions, and guidelines for a language model before it receives questions or tasks. It helps define the model's role, personality, tone, and other details to improve its responses to user input.
---
## 2. User Prompt
A user prompt is a text input that a user provides to an LLM to which the model responds. Lastly, AI assistant prompt is the LLM's generated output in response to a user prompt.
---
## 3. AI Assistant Prompt
An AI assistant prompt is the LLM's generated output in response to a user prompt. It is the response that the LLM generates based on the user's input.
All of these prompts are present inside a Pipe and can also be customized. These prompts can use [variables](/features/variables) that make them dynamic.
---
## How to use System, User & AI assistant prompts
Follow this quick guide to learn how to use System, User & AI assistant prompts.
---
## Step #1: System Prompt
Navigate to any of your Langbase Pipes and click on the **System Prompt Instructions** text area to write a system prompt.
```
You are helpful AI assistant that creates creative blog titles.
```
<Img
caption="System Prompt Instructions inside a Pipe"
light="https://raw.githubusercontent.com/LangbaseInc/docs-images/main/features/system-prompt-light.jpg"
dark="https://raw.githubusercontent.com/LangbaseInc/docs-images/main/features/system-prompt-dark.jpg"
/>
## Step #2: User Prompt
Click on **User** button in front of **Add Message By** to write a user prompt.
<Img
caption="Create a user prompt inside a Pipe"
light="https://raw.githubusercontent.com/LangbaseInc/docs-images/main/features/create-user-prompt-light.jpg"
dark="https://raw.githubusercontent.com/LangbaseInc/docs-images/main/features/create-user-prompt-dark.jpg"
/>
It will open a text area with role **User**. Write a user prompt in this text area.
```
Can you suggest a creative blog title for my blog post?
```
<Img
caption="User Prompt Instructions inside a Pipe"
light="https://raw.githubusercontent.com/LangbaseInc/docs-images/main/features/user-prompt-light.jpg"
dark="https://raw.githubusercontent.com/LangbaseInc/docs-images/main/features/user-prompt-dark.jpg"
/>
---
## Step #3: AI Assistant Prompt
Click on **AI Assistant** button in front of **Add Message By** to write an AI assistant prompt.
<Img
caption="Create an AI assistant prompt inside a Pipe"
light="https://raw.githubusercontent.com/LangbaseInc/docs-images/main/features/create-assistant-prompt-light.jpg"
dark="https://raw.githubusercontent.com/LangbaseInc/docs-images/main/features/create-assistant-prompt-dark.jpg"
/>
It will open a text area with role **AI Assistant**. Write an AI assistant prompt in this text area.
```
"Unleashing the Power of AI: Exploring Innovative Applications"
```
<Img
caption="AI Assistant Prompt Instructions inside a Pipe"
light="https://raw.githubusercontent.com/LangbaseInc/docs-images/main/features/assistant-prompt-light.jpg"
dark="https://raw.githubusercontent.com/LangbaseInc/docs-images/main/features/assistant-prompt-dark.jpg"
/>
---
</content>
</doc>
<doc>
<metadata>
<title>Parser</title>
<url>https://langbase.com/docs/features/parser/</url>
</metadata>
<content>
import { generateMetadata } from '@/lib/generate-metadata';
# Parser
Parser is a Langbase AI primitive that allows you to extract text content from various document formats. This is particularly useful when you need to process documents before using them in your AI applications.
Parser can handle a variety of formats, including PDFs, CSVs, and more. By converting these documents into plain text, you can easily analyze, search, or manipulate the content as needed.
Parser can be helpful in scenarios where you need to:
- **Extract text from documents:** Parser can read and extract text from various document formats, including PDFs, CSVs, DOCX, and HTML.
- **Enable full-text search:** By converting documents into plain text, you can perform full-text searches and indexing on the content.
- **Automate content analysis:** Parser can help automate the process of analyzing and processing documents, reducing manual effort.
- **Create complex AI Agents:** Parser integrates seamlessly with other Langbase primitives and can be used inside [Agent Workflows](/workflow) to create AI Agents that process and analyze documents.
Learn [how to use the Parser primitive](/parser) in Langbase.
---
</content>
</doc>
<doc>
<metadata>
<title>Organizations</title>
<url>https://langbase.com/docs/features/organizations/</url>
</metadata>
<content>
import { generateMetadata } from '@/lib/generate-metadata';
# Organizations
Langbase supports organizations, fostering collaboration among users within a shared workspace. You can easily establish your organization and invite all your team members in it for collaboration. All the organization members get seamless access to all pipes within the organization.
<Note>
To get started with Langbase, you'll need to [create a free personal account
on Langbase.com][signup] and verify your email address.
</Note>
Some of the organization features include:
- Create organizations and invite members.
- Create unlimited pipes within the organization.
- View and edit any pipe within the organization.
- Organization-based billing.
- Organization level keys.
Here is how you can create an organization on Langbase to make the most of these features.
---
## Step #1: Create an organization
In the Langbase dashboard, click on your user panel to access the organization settings. Click on the Create organization button in the dropdown.
<Img
caption="Create an organization in Langbase"
light="https://raw.githubusercontent.com/LangbaseInc/docs-images/main/features/create-org-light.jpg"
dark="https://raw.githubusercontent.com/LangbaseInc/docs-images/main/features/create-org-dark.jpg"
/>
You should see a New Organization dialog. Fill in your organization details like name and description, and confirm the creation.
<Img
caption="Provide organization details in Langbase"
light="https://raw.githubusercontent.com/LangbaseInc/docs-images/main/features/new-org-light.jpg"
dark="https://raw.githubusercontent.com/LangbaseInc/docs-images/main/features/new-org-dark.jpg"
/>
Once created, you will be redirected to your org’s dashboard. This is where you will access your org’s pipes, settings as well as billing information.
<Img
caption="Organization dashboard in Langbase"
light="https://raw.githubusercontent.com/LangbaseInc/docs-images/main/features/org-dashboard-light.jpg"
dark="https://raw.githubusercontent.com/LangbaseInc/docs-images/main/features/org-dashboard-dark.jpg"
/>
---
## Step #2: Invite members to your organization
Within your organization's dashboard, navigate to its settings.
In your org settings, scroll down to the members section. Here you will be able to manage the current members of your organization, their roles, and invite new members.
To invite a new member, please ensure that the member is signed up on langbase. Then, enter their username or email address to add them.
<Img
caption="Add members to your organization in Langbase"
light="https://raw.githubusercontent.com/LangbaseInc/docs-images/main/features/adding-members-light.jpg"
dark="https://raw.githubusercontent.com/LangbaseInc/docs-images/main/features/adding-members-dark.jpg"
/>
They will be added to your organization.
---
## Step #3: Collaborate
Your team will be able to collaborate in your organization using the following features:
- **Access Pipes:** All members can access and run any pipe in the organization.
- **Create Pipes:** All members can create new pipes in the organization.
- **Edit Pipes:** All members can edit any pipe within the organization, facilitating collaborative prompt engineering, testing, evaluation and refinement.
- **Organization keysets:** Enable organization-wide keysets to effortlessly integrate keys from your LLM Providers. For instance, by setting up keysets for OpenAI, Anthropic, and Together at the organization level, all members can seamlessly utilize them without the need for individual configuration.
- **Organization billing:** Manage your organization’s billing information and subscription plans from the organization settings.
- **Admin Control:** Organization admins can manage their organization’s settings, including members, billing, and other configurations. Pipes created by the admins are automatically shared with all members, but only admins can access the pipe's settings.
[signup]: https://langbase.fyi/awesome
</content>
</doc>
<doc>
<metadata>
<title>Open Pipes</title>
<url>https://langbase.com/docs/features/open-pipes/</url>
</metadata>
<content>
import { generateMetadata } from '@/lib/generate-metadata';
# Open Pipes
Langbase now allows users to create and share Open pipes, making it easier to collaborate and share your work. Both user and organization Pipes can be made public, enabling you to share them with anyone.
<Img
caption="Open Pipes"
light="https://raw.githubusercontent.com/LangbaseInc/docs-images/main/features/public-pipes-light.jpg"
dark="https://raw.githubusercontent.com/LangbaseInc/docs-images/main/features/public-pipes-dark.jpg"
/>
## Pipe Privacy
When creating a new pipe, you now have the option to set its privacy in the Privacy section, allowing you to choose between making your pipe open or private to other users.
### Public
Anyone with the link can view and fork your pipe to their account. Open pipes are visible to anyone through search engines (Google, Bing, etc.), and all information about the pipe, except for sensitive data, is visible to everyone.
### Private
Only you or your organization members can access the pipe. Private pipes cannot be shared with others and are visible only to you or your organization members.
### Features of Open Pipes
- Visibility: Anyone can view the pipe.
- Forking: Anyone can fork the pipe to their account.
- Metrics: Anyone can view the total number of runs, tokens, and contributors.
- Information: Anyone can view the pipe's description and tags.
### Pipe Sensitive Data
Sensitive data remains private and includes:
- Pipe API keys (or LLM API keys)
- Pipe runs and messages
- Pipe logs and settings
- Pipe cost and billing information
- Runnable playground of a pipe
### Managing Existing Pipes
All existing pipes are private by default. You can change the privacy settings for each pipe from the pipe settings, making it open or private as needed.
## Sharing Profiles
You can share both your personal profile and your organization profile. Only open pipes will be visible to others.
## Public Profile
Your public profile includes:
- Profile Picture: Upload a profile picture to make your profile more personal.
- Bio: Share a little bit about yourself with the Langbase community.
- Public Pipes: All the public pipes you've created are listed on your profile
### Example
Check out our first public pipe: [AI Title Generator](https://langbase.com/langbase/ai-title-generator)
## Public Runs
Public Runs allows you to share live demonstrations of your pipes without incurring any LLM API costs. Demonstrations are streamed directly from Langbase.
### Using Public Runs
- Once your Pipe is public. You can use Public Runs as a feature
- In your Pipes window, scroll down and go to the "Runs" section.
- Choose one of the runs you have conducted from your experimentation list.
- Scroll down in the selected run's details and click on the "Save as completion" button.
<Img
caption="Save Public Run Compilation"
light="https://raw.githubusercontent.com/LangbaseInc/docs-images/main/features/public-compilation-light.jpg"
dark="https://raw.githubusercontent.com/LangbaseInc/docs-images/main/features/public-compilation-dark.jpg"
/>
### Sharing your Public Pipes
After saving the run as a completion, share your Pipe URL with others to showcase a live demonstration streamed from Langbase.
## FAQs
### What is a public pipe?
A public pipe or an open pipe is a pipe that is visible to anyone with the link or through search engine (Google, Bing, etc.). Anyone can view the pipe and fork it to their account. Except for the sensitive data, all the information about the pipe is visible to everyone.
### What about my existing pipes?
All your existing pipes are private by default. You can change the privacy settings for each pipe from the pipe settings.
### Can I share my profile?
Yes, you can share your profile with anyone. Only your public pipes will be visible to others.
### Can I share my org profile?
Yes, you can share your org profile with anyone. Only your org's public pipes will be visible to others.
### Can I share my private pipe?
No, only public pipes can be shared with others. Private pipes are visible only to you or your org members.
### Can I make my private pipe public?
Yes, you can change the privacy settings of your private pipe to public from the pipe settings. Or vice versa.
### What's included in the Public Profile?
- Profile Picture: You can upload a profile picture to make your profile more personal.
- Bio: Share a little bit about yourself with the Langbase community.
- Public Pipes: All the public Pipes you've created are listed on your profile.
More public profile improvements on the roadmap are coming soon.
---
</content>
</doc>
<doc>
<metadata>
<title>Moderation</title>
<url>https://langbase.com/docs/features/moderation/</url>
</metadata>
<content>
import { generateMetadata } from '@/lib/generate-metadata';
# Moderation
Moderation is a feature that the Pipe offers for all the OpenAI models. By default it is turned on, but in case it is turned off, Pipe will not call the OpenAI moderation endpoint to identify harmful content.
<Img
caption="Toggle OpenAI LLM moderation inside a Pipe"
light="https://raw.githubusercontent.com/LangbaseInc/docs-images/main/features/moderate-light.jpg"
dark="https://raw.githubusercontent.com/LangbaseInc/docs-images/main/features/moderate-dark.jpg"
/>
---
</content>
</doc>
<doc>
<metadata>
<title>Model Presets</title>
<url>https://langbase.com/docs/features/model-presets/</url>
</metadata>
<content>
import { generateMetadata } from '@/lib/generate-metadata';
# Model Presets
When configuring a model in a Langbase pipe, you have the option to fine-tune its response parameters. These parameters, such as temperature, max-tokens, frequency penalty, presence penalty, and top p, directly influence the model's response.
However, these parameters can be confusing. To get started quickly, you can select a model preset. These presets include:
- **Precise**: Tuned for precise and accurate responses.
- **Balanced**: Strikes a balance between accuracy and creativity.
- **Creative**: Prioritizes creativity and diversity in the generated responses.
- **Custom**: Allows you to manually configure the response parameters.
You can select the preset that fits your use case.
---
## How to use Model Presets?
Follow this quick guide to learn how to use model presets in Langbase.
---
## Step #1: Select a Model
Navigate to your Langbase pipe and click open the model selector. You will see a list of models available in Langbase. Select a model to configure.
## Step #2: Choose a Preset
After selecting a model, you will see the model presets below. Choose the preset that best suits your use case. You can choose from Precise, Balanced, Creative.
If you want to manually configure the response parameters, you can change any parameter and the preset will change to Custom.
<Img
caption="Model Presets for LLM models"
light="https://raw.githubusercontent.com/LangbaseInc/docs-images/main/features/model-presets-light.jpg"
dark="https://raw.githubusercontent.com/LangbaseInc/docs-images/main/features/model-presets-dark.jpg"
/>
Once satisfied with the preset, close the model dialog and save the pipe.
<Note>
Every model behaves differently after changing these parameters. We have
created these presets after thorough research but feel free to try custom
settings of your own if the response is not ideal.
</Note>
</content>
</doc>
<doc>
<metadata>
<title>Logs</title>
<url>https://langbase.com/docs/features/logs/</url>
</metadata>
<content>
import { generateMetadata } from '@/lib/generate-metadata';
# Logs
Every Pipe request translates into a detailed log that is present inside the `Usage` tab. The log contains the following information:
- **Pipe Version**: The Pipe version that made the request. Read more about versions [here](https://langbase.com/docs/features/versions).
- **Type**: The type of the Pipe, i.e., [Generate](https://langbase.com/docs/features/generate) & [Chat](https://langbase.com/docs/features/chat).
- **Model**: The LLM used in the request.
- **Prompt tokens**: The total number of prompt tokens that user sent to LLM.
- **Completion tokens**: The total number of tokens returned in the completion by the LLM.
- **Total Tokens**: Sum of Prompt and Completion tokens.
- **Prompt cost**: LLM cost for processing the sent prompt
- **Completion Cost**: LLM cost for generating the completion
- **Total Cost**: Sum of Prompt and Completion cost.
- **Cached**: Whether the request was cached or not.
<Img
caption="View detailed logs for every run inside a Pipe"
light="https://raw.githubusercontent.com/LangbaseInc/docs-images/main/features/logs-light.jpg"
dark="https://raw.githubusercontent.com/LangbaseInc/docs-images/main/features/logs-dark.jpg"
/>
---
## How to view Pipe logs
Following is a quick guide on how to view detailed logs for every run inside a Pipe.
---
## Step #1: Navigate to Usage tab
Navigate to the `Usage` tab inside any of your Pipes on Langbase.
<Img
caption="Usage tab inside a Pipe"
light="https://raw.githubusercontent.com/LangbaseInc/docs-images/main/features/usage-tab-light.jpg"
dark="https://raw.githubusercontent.com/LangbaseInc/docs-images/main/features/usage-tab-dark.jpg"
/>
---
## Step #2: Select a log
Click on any of the logs to view detailed information about that run.
<Img
caption="Usage tab inside a Pipe"
light="https://raw.githubusercontent.com/LangbaseInc/docs-images/main/features/usage-logs-light.jpg"
dark="https://raw.githubusercontent.com/LangbaseInc/docs-images/main/features/usage-logs-dark.jpg"
/>
---
</content>
</doc>
<doc>
<metadata>
<title>Keysets</title>
<url>https://langbase.com/docs/features/keysets/</url>
</metadata>
<content>
import { generateMetadata } from '@/lib/generate-metadata';
# Keysets
Langbase offers multiple LLM models through different providers like OpenAI, TogetherAI, Groq, Google, etc. Each Pipe can be configured with any of the supported LLM models.
Since each LLM provider has its unique API key, you can add these keysets to your profile/org settings and every Pipe will use those LLM keys by default.
If needed, you can specify a different LLM keyset for individual Pipes by adding a custom keyset directly in the Pipe's settings.
Keysets allow you to seamlessly transition between various LLM models within your pipe without needing to add the API key again, provided that model provider key is already present in your keyset. Langbase has three types of keysets:
1. Pipe Keysets
2. User Keysets
3. Organization Keysets
---
## Pipe Keysets
Pipe level LLM API keyset can be set for each pipe individually inside the pipe settings. This keyset carries the highest priority. You can use Pipe Keysets to override the user/organization LLM API keysets.
To add a pipe keyset, navigate to your **Pipe > Settings**. In the **LLM API Keysets** section, select **Pipe level keys** and add your keys.
<Img
caption="Pipe Level LLM Keyset"
light="https://raw.githubusercontent.com/LangbaseInc/docs-images/main/features/pipe-keysets-light.jpg"
dark="https://raw.githubusercontent.com/LangbaseInc/docs-images/main/features/pipe-keysets-dark.jpg"
/>
---
## User Keysets
User level LLM API keysets are configurable in your profile settings. For user accounts, they are the default keyset used for all pipes unless you have set a pipe keyset for a specific pipe.
To add a user keyset, switch to your user profile and click on API keys from the sidebar. Scroll down to the LLM API keys section and add the keys there. Alternatively, you can select **User level keys** inside any pipe's settings and click **Configure Keysets**.
Here, add your keys for all the providers you need.
<Img
caption="User Level LLM Keyset"
light="https://raw.githubusercontent.com/LangbaseInc/docs-images/refs/heads/main/docs/api-keys/profile/5-light.jpg"
dark="https://raw.githubusercontent.com/LangbaseInc/docs-images/refs/heads/main/docs/api-keys/profile/5-dark.jpg"
/>
---
## Organization Keysets
Organizations use organization-level keysets, which are configurable in your organization’s settings. They are similar to user keysets, but for an organization. For orgs, they are the default keysets for all pipes unless you have set a pipe-level keyset in a specific pipe.
To add an org keyset, switch to your org and click on API keys from the sidebar. Scroll down to the LLM API keys section and add the keys there. Alternatively, you can select **Org level keys** inside any pipe's settings in your organization and click **Configure Keysets**.
Here, add your keys for all the providers you need.
<Img
caption="Organization Level LLM Keyset"
light="https://raw.githubusercontent.com/LangbaseInc/docs-images/refs/heads/main/docs/api-keys/org/5-light.jpg"
dark="https://raw.githubusercontent.com/LangbaseInc/docs-images/refs/heads/main/docs/api-keys/org/5-dark.jpg"
/>
</content>
</doc>
<doc>
<metadata>
<title>JSON Mode</title>
<url>https://langbase.com/docs/features/json-mode/</url>
</metadata>
<content>
import { generateMetadata } from '@/lib/generate-metadata';
# JSON Mode
<div className="mt-6 text-xl leading-8">
JSON mode instructs the LLM to give output in JSON and asks it to conform to
a provided schema in the prompt. To activate JSON mode, you need to select a
model that supports it.
</div>
---
## Supported Models
Currently, the following models support JSON mode.
### OpenAI
- `gpt-5.1-2025-11-13`
- `gpt-5-2025-08-07`
- `gpt-5-nano-2025-08-07`
- `gpt-5-mini-2025-08-07`
- `gpt-5-chat-latest`
- `gpt-oss-120b`
- `gpt-oss-20b`
- `o3-mini`
- `gpt-4.1`
- `gpt-4.1-mini`
- `gpt-4.1-nano`
- `chatgpt-4o-latest`
- `gpt-4.5-preview`
- `o3-mini`
- `gpt-4o`
- `gpt-4o-mini`
- `gpt-4o-2024-11-20`
- `gpt-4o-2024-08-06`
- `gpt-4-turbo`
- `gpt-4-turbo-preview`
- `gpt-4-0125-preview`
- `gpt-3-0125-preview`
- `gpt-3.5-turbo`
- `gpt-3.5-turbo-0125`
- `gpt-3.5-turbo-1106`
### Google
- `gemini-2.5-pro-preview-06-05`
- `gemini-2.5-pro-preview-05-20`
- `gemini-2.5-pro-preview-05-06`
- `gemini-2.0-flash`
- `gemini-2.0-flash-lite`
- `gemini-1.5-pro`
- `gemini-1.5-flash`
- `gemini-1.5-flash-8b`
### Claude
- `claude-3.7-sonnet:thinking`
### Together
- `mistralai/magistral-medium-2506:thinking`
- `Mistral-7B-Instruct-v0.1`
- `Mixtral-8x7B-Instruct-v0.1`
### Deepseek
- `deepseek-chat-v3.1`,
- `deepseek-chat-v3.1:thinking`
- `deepseek-chat-v3-0324:free`
- `deepseek-chat-v3-0324`
- `deepseek-chat`
## Azure
- `azureopenai:o3-mini`
- `azureopenai:gpt-4.5-preview`
- `azureopenai:o1-mini`
- `azureopenai:gpt-4o`
- `azureopenai:gpt-4o-mini`
---
## Use JSON Mode in your Pipe
To use JSON mode, ensure that you have selected a model that supports it. You should see a JSON mode toggle in the Pipe IDE. Turn the toggle ON to activate JSON mode.
<Img
caption="Toggle JSON mode inside a Pipe"
light="https://raw.githubusercontent.com/LangbaseInc/docs-images/main/features/json-mode-light.jpg"
dark="https://raw.githubusercontent.com/LangbaseInc/docs-images/main/features/json-mode-dark.jpg"
/>
Additionaly, you can also provide a schema in the system prompt or messages to further optimize the output.
### Alternative
If you are using a model that does not support JSON mode, try asking the model to produce an output in JSON and providing the schema in your prompt. The LLM will try to conform to the schema as much as possible.
---
</content>
</doc>
<doc>
<metadata>
<title>Generate</title>
<url>https://langbase.com/docs/features/generate/</url>
</metadata>
<content>
import { generateMetadata } from '@/lib/generate-metadata';
# Generate
Generate is a Pipe type that is designed to generate LLM completions. It's not intended for chat use-cases. Since it is still a Pipe, it has all the Pipe features like streaming, logs, versions, safety, etc.
Experiments is a Pipe feature that is only available for Generate Pipes. Read more about Experiments [here](/features/experiments).
---
## How to create a Generate Pipe
Follow this quick guide to learn how to create a Generate Pipe.
---
## Step #1: Create a new Pipe
Navigate to the **Pipes** tab from the sidebar and click on the **Add New** button.
Alternatively, you can visit [pipe.new](https://pipe.new) to create a new Pipe.
<Img
caption="Add New button on Pipes page"
light="https://raw.githubusercontent.com/LangbaseInc/docs-images/main/features/pipe-light.jpg"
dark="https://raw.githubusercontent.com/LangbaseInc/docs-images/main/features/pipe-dark.jpg"
/>
---
## Step #2: Select Pipe type
By default, the Pipe type is set to **Generate**. Give your Pipe a name and click on the **Create Pipe** button.
<Img
caption="Create a new Generate Pipe"
light="https://raw.githubusercontent.com/LangbaseInc/docs-images/main/features/create-generate-pipe-light.jpg"
dark="https://raw.githubusercontent.com/LangbaseInc/docs-images/main/features/create-generate-pipe-dark.jpg"
/>
This will create a new Generate Pipe with the default settings.
<Img
caption="Generate Pipe"
light="https://raw.githubusercontent.com/LangbaseInc/docs-images/main/features/generate-feature-light.jpg"
dark="https://raw.githubusercontent.com/LangbaseInc/docs-images/main/features/generate-feature-dark.jpg"
/>
---
</content>
</doc>
<doc>
<metadata>
<title>Fork</title>
<url>https://langbase.com/docs/features/fork/</url>
</metadata>
<content>
import { generateMetadata } from '@/lib/generate-metadata';
# Fork
Fork allows you to duplicate a pipe. Once duplicated, you can rename, modify, and manage the new pipe independently from the original. You can fork any pipe in your account or within any of your organizations.
Much like GitHub fork, forking a pipe is useful for various scenarios, such as:
- **Experimentation:** Safely test changes or new ideas on a copy without affecting the original pipe.
- **Customization:** Quickly customize any pipe with a fork. Like changing meta, LLMs, or instructions.
- **Collaboration:** Share a modified version of the pipe with team members or across different departments while keeping the original intact.
---
## How to fork a pipe?
Follow this quick guide to learn how to fork a pipe in Langbase.
---
## Step #1: Open and fork the pipe
Navigate to your Langbase pipe and click on the **Fork** button located at the top right corner of the pipe editor.
<Img
caption="Forking a pipe inside Langbase"
light="https://raw.githubusercontent.com/LangbaseInc/docs-images/main/features/fork-1-light.jpg"
dark="https://raw.githubusercontent.com/LangbaseInc/docs-images/main/features/fork-1-dark.jpg"
/>
## Step #2: Enter details of the forked pipe
First, select the owner of the forked pipe, which can be you or any of your organizations. Then, you can change the name and description the forked pipe. Click on the **Fork** button to complete the fork.
<Img
caption="Details of the forked pipe"
light="https://raw.githubusercontent.com/LangbaseInc/docs-images/main/features/fork-2-light.jpg"
dark="https://raw.githubusercontent.com/LangbaseInc/docs-images/main/features/fork-2-dark.jpg"
/>
## Step #3: Customize and use the forked pipe
Once forked, you will be navigated to the new forked pipe. You can now modify, run, or save it as per your requirements.
---
</content>
</doc>
<doc>
<metadata>
<title>Few-shot Learning</title>
<url>https://langbase.com/docs/features/few-shot/</url>
</metadata>
<content>
import { generateMetadata } from '@/lib/generate-metadata';
# Few-shot Learning
Few-shot learning helps AI LLMs pick up and apply knowledge from just a handful of examples. It involves using multiple sets of prompts between the user and the AI assistant that we internally send to LLM with every API request.
Pipe enables developers to define multiple user and AI assistant prompts and completion pairs that can be used to few-shot train any LLM.
<Img
caption="Few-shot messages inside a Pipe"
light="https://raw.githubusercontent.com/LangbaseInc/docs-images/main/features/few-shot-messages-light.jpg"
dark="https://raw.githubusercontent.com/LangbaseInc/docs-images/main/features/few-shot-messages-dark.jpg"
/>
---
## How to do Few-shot Learning
Following is a quick guide on how to do few-shot learning inside a Pipe.
---
## Step #1: Create user and AI assistant prompts
Navigate to any of your Pipes on Langbase. Click once on User and then on AI Assistant besides **Add Message By**. It will create two text areas, one for the user prompt and the other for the AI assistant prompt.
<Img
caption="Create user and AI assistant prompts"
light="https://raw.githubusercontent.com/LangbaseInc/docs-images/main/features/create-few-shot-text-areas-light.jpg"
dark="https://raw.githubusercontent.com/LangbaseInc/docs-images/main/features/create-few-shot-text-areas-dark.jpg"
/>
---
## Step #2: Add completions
Add completions for both user and AI assistant prompts.
<Img
caption="Add completions for user and AI assistant prompts"
light="https://raw.githubusercontent.com/LangbaseInc/docs-images/main/features/few-shot-learning-prompts-light.jpg"
dark="https://raw.githubusercontent.com/LangbaseInc/docs-images/main/features/few-shot-learning-prompts-dark.jpg"
/>
These completions will be used by LLM to learn and generate responses based on the incoming user prompts.
---
</content>
</doc>
<doc>
<metadata>
<title>Experiments</title>
<url>https://langbase.com/docs/features/experiments/</url>
</metadata>
<content>
import { generateMetadata } from '@/lib/generate-metadata';
# Experiments
Experiments help you learn how your latest Pipe config will affect LLM response by running it against your previous five `generate` requests. They are only available for `Generate` Pipes.
Experiments contains a `Previous Completions` column that are results of your past five runs.
When you run the Experiments, Pipe executes the most recent Pipe configuration against the last `generate` request prompts and shows the outcomes in the `New Completions` column.
One example can be changing Pipe’s LLM model to `gemma-7b-it` from `gpt-4-turbo-preview` to check how the response will look like.
<Img
caption="Run experiments to see how your latest Pipe config will affect LLM response"
light="https://raw.githubusercontent.com/LangbaseInc/docs-images/main/features/experiments-light.jpg"
dark="https://raw.githubusercontent.com/LangbaseInc/docs-images/main/features/experiments-dark.jpg"
/>
</content>
</doc>
<doc>
<metadata>
<title>Examples</title>
<url>https://langbase.com/docs/features/examples/</url>
</metadata>
<content>
import { generateMetadata } from '@/lib/generate-metadata';
# Examples
Every Langbase pipe comes with multiple ready-to-use examples to quickly setup the Pipe without needing much assistance from the user. These examples aim to quickly get you started with building your first Pipe.
These examples include:
- `Learn: Few Shot Prompting`: This is an onboarding example to get you started with few shot prompting.
- `Using Variables`: This example demonstrates how to use variables in a pipe.
- `Less Wordy GPT`: A less wordy prompt example in a pipe. Great for chat purposes.
- `Prompt Builder`: An advanced pipe example using few-shot prompts and variables to build better prompts.
---
## How to use Pipe Examples?
Follow this quick guide to learn how to use pipe examples in Langbase.
---
## Step #1: Select an Example
Navigate to your Langbase pipe and click open the examples selector. You will see a list of examples available in Langbase. Let's select the **Few Shot Prompting** example.
<Img
caption="Pipe Examples"
light="https://raw.githubusercontent.com/LangbaseInc/docs-images/main/features/few-shot-1-light.jpg"
dark="https://raw.githubusercontent.com/LangbaseInc/docs-images/main/features/few-shot-1-dark.jpg"
/>
## Step #2: Configure the Example
Selecting the example will add the example's prompts and other parameters in your pipe. You can see the few shot prompts added in the pipe.
<Img
caption="Few Shot Example in Pipe"
light="https://raw.githubusercontent.com/LangbaseInc/docs-images/main/features/few-shot-2-light.jpg"
dark="https://raw.githubusercontent.com/LangbaseInc/docs-images/main/features/few-shot-2-dark.jpg"
/>
Now, you can modify the example as per your requirements, Run or Save the pipe.
</content>
</doc>
<doc>
<metadata>
<title>Chat</title>
<url>https://langbase.com/docs/features/chat/</url>
</metadata>
<content>
import { generateMetadata } from '@/lib/generate-metadata';
# Chat
Chat is another Pipe type that is intended for generating chat-like completions. It can be used to build chat-bots, another chatgpt, etc.
In every Chat Pipe, you'll find an extra `Chat` link in the Pipe navbar. Clicking on this takes you to a page with a start chatting CTA. This action opens up Langbase Chat UI, tailored uniquely for each Pipe, meaning chat threads will vary from one Chat Pipe to another.
---
## How to create a Chat Pipe
Follow this quick guide to learn how to create a Chat Pipe.
---
## Step #1: Create a new Pipe
Navigate to the **Pipes** tab from the sidebar and click on the **Add New** button.
Alternatively, you can visit [pipe.new](https://pipe.new) to create a new Pipe.
<Img
caption="Add New button on Pipes page"
light="https://raw.githubusercontent.com/LangbaseInc/docs-images/main/features/pipe-light.jpg"
dark="https://raw.githubusercontent.com/LangbaseInc/docs-images/main/features/pipe-dark.jpg"
/>
---
## Step #2: Select Pipe type
By default, the Pipe type is set to **Generate**. Change the Pipe type to **Chat**.
Give your Pipe a name and click on the **Create Pipe** button.
<Img
caption="Create a new Chat Pipe"
light="https://raw.githubusercontent.com/LangbaseInc/docs-images/main/features/create-chat-pipe-light.jpg"
dark="https://raw.githubusercontent.com/LangbaseInc/docs-images/main/features/create-chat-pipe-dark.jpg"
/>
This will create a new Chat Pipe with the default settings.
<Img
caption="Chat Pipe"
light="https://raw.githubusercontent.com/LangbaseInc/docs-images/main/features/chat-feature-light.jpg"
dark="https://raw.githubusercontent.com/LangbaseInc/docs-images/main/features/chat-feature-dark.jpg"
/>
## Step #3: LangUI for Chat Pipe
LangUI helps you Build & Deploy your own ChatGPT with any LLM and any Data for RAG.
One-click deploy LangUI to Langbase, a ChatGPT-style, open-source chat assistant pipe, to create a chatbot with any LLM and give it access to any data for RAG. LangUI helps you Build & Deploy your own ChatGPT with any LLM and any Data for RAG.
Click on the **Chat** link in the Pipe navbar to open the LangUI for your chat Pipe.
Now you have your own custom ChatGPT style chatbot.
<Img
caption="LangUI for Chat Pipe"
light="https://raw.githubusercontent.com/LangbaseInc/docs-images/main/features/langui.jpg"
dark="https://raw.githubusercontent.com/LangbaseInc/docs-images/main/features/langui.jpg"
/>
---
</content>
</doc>
<doc>
<metadata>
<title>Langbase API</title>
<url>https://langbase.com/docs/features/api/</url>
</metadata>
<content>
import { generateMetadata } from '@/lib/generate-metadata';
# Langbase API
Langbase is a serverless AI developer platform, offering robust APIs for pipes and memory to build composable Large Language Models (LLM) AI agents.
Pipe and Memory APIs enable developers to build AI agents and features that can perform various tasks, such as generating text, embeddings, similar chunks building RAG, and more.
<Img
caption="Pipe API key and base URL inside a Pipe"
light="https://raw.githubusercontent.com/LangbaseInc/docs-images/main/features/pipe-api-light.jpg"
dark="https://raw.githubusercontent.com/LangbaseInc/docs-images/main/features/pipe-api-dark.jpg"
/>
---
Langbase offers the following APIs:
## Pipe API
Pipes are the core building blocks of Langbase, and they can be used to create various AI agents for different use cases. Pipes can be used to generate text, chat with users, and more. The Pipe API allows you to create, update, and delete pipes. The API also provides endpoints to run the AI Pipe for chat and generation.
Learn [more](/api-reference/pipe) in Pipe API reference.
---
## Memory API
Memory is a managed search engine as an API for developers. Imagine an all in one serverless RAG (Retrieval-Augmented Generation) with — vector store, file storage, attribution data, parsing + chunking, and semantic similarity search engine.
The Memory API allows you to manage the memory of your Langbase account. You can use the Memory API to create, list, and update. The API also provides endpoints to upload documents, list them, and retry generating embeddings for documents.
Learn [more](/api-reference/memory) in Memory API reference.
---
</content>
</doc>
<doc>
<metadata>
<title>Explained: Retrieval Augmented Generation (RAG)</title>
<url>https://langbase.com/docs/explained/rag/</url>
</metadata>
<content>
import { generateMetadata } from '@/lib/generate-metadata';
# Explained: Retrieval Augmented Generation (RAG)
### A step-by-step explanation to understand how RAG works
---
In this guide, we will learn:
1. What is Retrieval Augmented Generation (RAG)?
2. How does RAG work?
---
## What is Retrieval Augmented Generation (RAG)?
Large language models (LLMs) are trained on vast amounts of data and have impressive generation capabilities. However, they lack context and cannot provide answers based on specific knowledge or facts. RAG is a way to provide additional context to LLM to generate more relevant responses. Let us try to understand this with an example:
```js
** System Prompt **
You are a helpful AI assistant.
** User **
Where was I born?
** LLM **
I am sorry, I do not have that information.
```
Now, let's see how RAG can help in this situation.
```js
** System Prompt **
You are a helpful AI assistant. Use the context provided below to generate a response.
Context: User was born in New York, USA.
** User **
Where was I born?
** LLM **
You were born in New York, USA.
```
This is a simple example of how, in RAG, we can provide additional context to LLMs to generate more relevant responses. It can be extended to provide context from a large database of personal data, facts, or any other information.
Let's dive deep into how RAG works.
---
## Step #0: Vector store
We cannot feed all of the information to the LLMs as is; they have limited context windows and can easily hallucinate. We need to provide the LLMs with a way to access the only relevant information when needed. This is where the vector store comes in.
---
### Vectors and Embeddings
Vectors are a way to represent data using numbers used in machine learning, a powerful way to represent and manipulate data. In the context of RAG, we take the data and generate embeddings (vectors) for each piece of data. The core idea of embeddings is that semantically closer data points are closer in the vector space.
A typical vector embedding for a piece of data might look like this:
```py
[-0.2, 0.5, 0.1, -0.3, 0.7, 0.2, -0.1, 0.4, 0.3, ...]
```
The length of a vector array is called its dimension. Higher dimensions allow the vector to store more information. Think of each number in the vector as representing a different feature of the data. For example, to describe a fruit, features like color, taste, and shape can each be represented as a number in the vector.
The choice and representation of these features form the art of creating embeddings. Effective embeddings capture the essence of the data compactly, ensuring that semantically similar data points have similar embeddings.
For instance, "apple" and "orange" are closer in the vector space than "apple" and "car" because they are semantically similar. They will appear closer in the vector space. Look at the image below to visualize this concept.
<Img
light="/docs/guides/rag/vectorspace.png"
dark="/docs/guides/rag/vectorspace.png"
alt="Embeddings Vector Space"
caption="Embeddings Vector Space"
/>
It can represent any kind of data, such as text, images, and audio. We embed this data into vectors and store them in a vector database. The goal is to store relevant information in the vector database and provide LLMs with a way to access it, known as retrieval. We will explore how to do this in the next steps.
<Img
light="/docs/guides/rag/memory.png"
dark="/docs/guides/rag/memory.png"
alt="⌘ Langbase Memory store"
caption="⌘ Langbase Memory store"
/>
You get the idea, right? Don't worry if you don't, we will see how to do this in the next steps. Langbase takes care of all the heavy lifting for you with its [memory sets](/memory).
---
### Chunking
Files can be of any size. We cannot possibly capture the essence of the entire file in a single vector. We need to break down the file into smaller chunks and generate embeddings for each chunk. This process is called chunking.
For instance, consider a book: we can break it down into chapters, paragraphs, and topics, generating embeddings for each chunk. Each piece of information is represented by a vector, and similar pieces of information will have similar embeddings, thus being close in vector space.
This way, when we need to access information, we can retrieve only the relevant pieces instead of the entire file. Each piece has text and its associated embeddings. Together, these form a memory set, as shown below.
<Img
light="/docs/guides/rag/memory-complete.png"
dark="/docs/guides/rag/memory-complete.png"
alt="⌘ Langbase Memory work flow"
caption="⌘ Langbase Memory work flow"
/>
---
## Step #1: Retrieval
Now that we have the embeddings stored in the vector store, we can retrieve the relevant information when needed. This is called retrieval. When a user inputs a query, we do the following:
1. Generate embeddings for the query.
2. Retrieve the relevant embeddings from the vector store.
We generate embeddings for the query and compare them with the data embeddings in the vector store. By retrieving the closest, semantically similar embeddings, we can then access the associated text. This provides the relevant information to the LLMs.
---
## Step #2: Agumentation
Now that we have the relevant information, we can augment the system prompt with this information and give instructions to the LLMs to generate a response based on this information. This is called augmentation. It is then passed to the LLMs to generate text based on this information.
---
## Step #3: Generation
Generation is the final step where we provide the LLMs with the user input and the augmented information. The LLMs can now generate text based on this information. The generated text is more relevant and meaningful as it has the context of the relevant information.
Putting it all together, we have the following workflow:
1. User inputs a query.
2. Retrieve the relevant information from the vector store.
3. Augment the system prompt with this information.
4. Generate text based on the augmented prompt.
<Img
light="/docs/guides/rag/rag.png"
dark="/docs/guides/rag/rag.png"
alt="⌘ Langbase RAG workflow"
caption="⌘ Langbase RAG workflow"
/>
---
Langbase offers powerful primitives like [Pipe](/pipe) and [Memory](/memory) to help you ship AI features and RAG applications in minutes. Check out our detailed guide on [RAG](/guides/rag) to ship your first RAG application today!
---
</content>
</doc>
<doc>
<metadata>
<title>Workflow Example</title>
<url>https://langbase.com/docs/examples/workflow/</url>
</metadata>
<content>
import { ExampleAccordion } from '@/components/mdx/example-card';
import { generateMetadata } from '@/lib/generate-metadata';
# Workflow Example
Here are some examples of how to use the Langbase Workflow functionality. These examples are designed to help you get started with workflow using Langbase.
<ExampleAccordion type="Workflow" />
---
</content>
</doc>
<doc>
<metadata>
<title>Tools Examples</title>
<url>https://langbase.com/docs/examples/tools/</url>
</metadata>
<content>
import { ExampleAccordion } from '@/components/mdx/example-card';
import { generateMetadata } from '@/lib/generate-metadata';
# Tools Examples
Here are some examples of how to use the Langbase Tools. These examples are designed to help you get started with tools using Langbase.
<ExampleAccordion type="Tools" />
---
</content>
</doc>
<doc>
<metadata>
<title>Threads Examples</title>
<url>https://langbase.com/docs/examples/threads/</url>
</metadata>
<content>
import { ExampleAccordion } from '@/components/mdx/example-card';
import { generateMetadata } from '@/lib/generate-metadata';
# Threads Examples
Here are some examples of how to use the Langbase Threads. These examples are designed to help you get started with threads using Langbase.
<ExampleAccordion type="Threads" />
---
</content>
</doc>
<doc>
<metadata>
<title>Pipe Agent Examples</title>
<url>https://langbase.com/docs/examples/pipe-agent/</url>
</metadata>
<content>
import { ExampleAccordion } from '@/components/mdx/example-card';
import { generateMetadata } from '@/lib/generate-metadata';
# Pipe Agent Examples
Here are some examples of how to use the Langbase Pipe Agent. These examples are designed to help you get started with the Langbase Pipe Agent.
<ExampleAccordion type="Pipe Agent" />
---
</content>
</doc>
<doc>
<metadata>
<title>Next.js Examples</title>
<url>https://langbase.com/docs/examples/nextjs/</url>
</metadata>
<content>
import { ExampleAccordion } from '@/components/mdx/example-card';
import { generateMetadata } from '@/lib/generate-metadata';
# Next.js Examples
Here are some examples of how to use the Langbase with Next.js. These examples are designed to help you get started with the Langbase in Next.js.
<ExampleAccordion type="Next.js" />
---
</content>
</doc>
<doc>
<metadata>
<title>Parser Example</title>
<url>https://langbase.com/docs/examples/parser/</url>
</metadata>
<content>
import { generateMetadata } from '@/lib/generate-metadata';
import { ExampleAccordion } from '@/components/mdx/example-card';
# Parser Example
Here are some examples of how to use the Langbase parser functionality. These examples are designed to help you get started with parsing documents using Langbase.
<ExampleAccordion type="Parser" />
---
</content>
</doc>
<doc>
<metadata>
<title>Memory Examples</title>
<url>https://langbase.com/docs/examples/memory/</url>
</metadata>
<content>
import { ExampleAccordion } from '@/components/mdx/example-card';
import { generateMetadata } from '@/lib/generate-metadata';
# Memory Examples
Here are some examples of how to use the Langbase Memory. These examples are designed to help you get started with memory using Langbase.
<ExampleAccordion type="Memory" />
---
</content>
</doc>
<doc>
<metadata>
<title>Use internet search with AI Agent</title>
<url>https://langbase.com/docs/examples/internet-research-tool/</url>
</metadata>
<content>
import { generateMetadata } from '@/lib/generate-metadata';
# Use internet search with AI Agent
---
In this guide, you will:
- **Create a pipe**: Create an AI agent pipe using Langbase SDK.
- **Define a tool**: Define a `searchInternet` tool function.
- **Run the AI Agent**: Execute the pipe to search the web using the tool function.
---
## Pre-requisites
- **Langbase API Key**: A [Langbase API key](/api-reference/api-keys) to authenticate your requests with Langbase.
- **Exa API Key**: An [Exa API key](https://dashboard.exa.ai/api-keys) to authenticate your requests with Exa.
---
## Step #0: Set up your project
<CodeGroup exampleTitle="Project setup" title="Project setup">
```bash
mkdir ai-search-agent && cd ai-search-agent
```
</CodeGroup>
### Initialize the project
<CodeGroup exampleTitle="Initialize project" title="Initialize project">
```bash {{ title: 'npm' }}
npm init -y
```
```bash {{ title: 'pnpm' }}
pnpm init
```
```bash {{ title: 'yarn' }}
yarn init -y
```
</CodeGroup>
### Install dependencies
<CodeGroup exampleTitle="Install dependencies" title="Install dependencies">
```bash {{ title: 'npm' }}
npm i langbase exa-js dotenv
```
```bash {{ title: 'pnpm' }}
pnpm add langbase exa-js dotenv
```
```bash {{ title: 'yarn' }}
yarn add langbase exa-js dotenv
```
</CodeGroup>
### Install dev dependencies
<CodeGroup exampleTitle="Install dev dependencies" title="Install dev dependencies">
```bash {{ title: 'npm' }}
npm i -D @types/node
```
```bash {{ title: 'pnpm' }}
pnpm add -D @types/node
```
```bash {{ title: 'yarn' }}
yarn add -D @types/node
```
</CodeGroup>
### Create a `.env` file
Create a `.env` file in the root of your project and add the following environment variables:
```bash
LANGBASE_API_KEY="YOUR_API_KEY"
EXA_API_KEY="YOUR_EXA_API_KEY"
```
Replace `YOUR_API_KEY` and `YOUR_EXA_API_KEY` with your Langbase and Exa API keys, respectively.
---
## Step #1: Create a new pipe
Create a new file named `create-pipe.ts` and add the following code to create a new pipe using [`langbase.pipes.create`](/sdk/pipe/create) function from Langbase SDK:
<CodeGroup exampleTitle="Create a pipe" title="create-pipe.ts">
```js
import 'dotenv/config';
import { Langbase } from 'langbase';
const langbase = new Langbase({
apiKey: process.env.LANGBASE_API_KEY!,
});
(async () => {
// Create a pipe
await langbase.pipes.create({
name: `internet-research-agent`,
description: `An AI search agent powered by Langbase and Exa`,
messages: [{
role: `system`,
content: `You are a research assistant. Your job is to take a query, search for relevant content on the web using the provided domain, and then answer users' questions.`,
}],
});
})();
```
</CodeGroup>
---
## Step #2: Add Exa to the pipe
In this step, we will add Exa to our pipe as a tool in `create-pipe.ts` file:
<CodeGroup exampleTitle="Create a pipe" title="create-pipe.ts">
```js
import 'dotenv/config';
import { Langbase } from 'langbase';
const langbase = new Langbase({
apiKey: process.env.LANGBASE_API_KEY!,
});
(async () => {
// Exa as a tool
const exa = {
type: `function`,
function: {
name: `searchInternet`,
description: `Tool for running semantic search using the provided domain on the web using Exa API`,
parameters: {
type: `object`,
required: [`query`, `domain`],
properties: {
query: {
type: `string`,
description: `The search query to find relevant content`,
},
domain: {
type: `string`,
description: `Domain to search content from`,
},
numResults: {
type: `integer`,
description: `Number of results to return (default: 5)`,
minimum: 1,
maximum: 20,
},
useAutoprompt: {
type: `boolean`,
description: `Type of search to perform (default: neural)`,
default: false,
},
},
},
},
};
// Create a pipe
await langbase.pipes.create({
name: `internet-research-agent`,
description: `An AI search agent powered by Langbase and Exa`,
messages: [{
role: `system`,
content: `You are a research assistant. Your job is take a query, search for relevant content on the web using the provided domain, and then answer user's questions.`,
}],
tools: [exa],
});
})();
```
</CodeGroup>
Now run the above file to create `internet-research-agent` pipe using the following command:
```bash
npx tsx create-pipe.ts
```
---
## Step #3: Integrate Exa with the pipe
Create a new `exa.ts` file to define the `searchInternet` tool function. The LLM model will use this function to execute a web search using Exa SDK.
<CodeGroup exampleTitle="Create a pipe with Exa" title="exa.ts">
```js
import 'dotenv/config';
import Exa from 'exa-js';
// Exa search parameters
interface ExaSearchParams {
query: string;
domain: string;
numResults?: number;
useAutoprompt?: boolean;
}
// Exa search result
interface SearchResult {
title: string | null;
url: string;
text: string;
publishedDate?: string;
highlights?: string[];
}
export async function searchInternet({
query,
domain,
numResults,
useAutoprompt,
}: ExaSearchParams) {
try {
const exa = new Exa(process.env.EXA_API_KEY);
const searchResponse = await exa.searchAndContents(query, {
text: true,
highlight: true,
type: `keyword`,
includeDomains: [domain],
numResults: numResults || 5,
useAutoprompt: useAutoprompt || false,
});
// Transform search results into a formatted string for LLM
const content = searchResponse.results.map(
(result: SearchResult, index: number) => {
// 1. Title
let formattedResult = `${index + 1}. ${result.title}\n`;
// 2. URL
formattedResult += `URL: ${result.url}\n`;
// 3. Published date
if (result.publishedDate) {
formattedResult += `Published: ${result.publishedDate}\n`;
}
// 4. Content and highlights
formattedResult += `Content: ${result.text}\n`;
if (result.highlights?.length) {
formattedResult += `Relevant excerpts:\n`;
result.highlights.forEach((highlight) => {
formattedResult += `- ${highlight.trim()}\n`;
});
}
// 5. Return the formatted result
return formattedResult;
}
);
return content.join(`\n\n`);
} catch (error: any) {
console.error(`Error performing search:`, error.message);
return `Error performing search: ${error.message}`;
}
}
```
</CodeGroup>
---
## Step #4: Run the pipe
Finally, let's create `ai-search-agent.ts` file and add the following code to run `internet-research-agent` pipe:
<CodeGroup exampleTitle="Run the pipe" title="ai-search-agent.ts">
```js
import {
Langbase,
Message,
Runner,
getRunner,
getToolsFromStream
} from 'langbase';
import { searchInternet } from './exa';
const langbase = new Langbase({
apiKey: process.env.LANGBASE_API_KEY!
});
const tools = {
searchInternet
};
(async () => {
// Run the pipe
const { stream, threadId } = await langbase.pipes.run({
name: `internet-research-agent`,
stream: true,
messages: [{
role: `user`,
content: `Explain the concept of Pipes from Langbase.com`
}]
});
const toolCalls = await getToolsFromStream(stream);
const hasToolCalls = toolCalls.length > 0;
let runner: Runner;
if (hasToolCalls) {
const messages: Message[] = [];
// Call all the functions in the tool_calls array
for (const toolCall of toolCalls) {
const toolName = toolCall.function.name;
const toolParameters = JSON.parse(toolCall.function.arguments);
const toolFunction = tools[toolName];
// Execute the function
const toolResult = await toolFunction(toolParameters);
messages.push({
tool_call_id: toolCall.id, // Required: id of the tool call
role: `tool`, // Required: role of the message
name: toolName, // Required: name of the tool
content: toolResult // Required: response of the tool
});
}
const { stream: newStream } = await langbase.pipes.run({
messages,
threadId: threadId!,
name: `internet-research-agent`,
stream: true
});
runner = getRunner(newStream);
} else {
runner = getRunner(stream);
}
runner.on(`content`, content => {
process.stdout.write(content);
});
})();
```
</CodeGroup>
Once done, let's run our AI search agent:
```bash
npx tsx ai-search-agent.ts
```
Here is a sample LLM response:
```markdown
The concept of "Pipes" from Langbase.com revolves around creating custom-built AI agents that serve as APIs. These Pipes allow developers to build AI features and applications quickly, without needing to manage servers or infrastructure. Here are the key aspects of Pipes:
1. **Definition**: Pipes function as a high-level layer on top of Large Language Models (LLMs), enabling the creation of personalized AI assistants tailored to specific queries and prompts.
2. **Core Components**:
- **Prompt**: Involves prompt engineering and orchestration.
- **Instructions**: Provides instruction training using few-shot learning, personas, and character definitions.
- **Personalization**: Integrates knowledge bases and variables while managing safety to mitigate hallucinations in responses.
- **Engine**: Supports experiments and evaluations, allowing for API engine integration and governance.
3. **Streaming and Storage**: Pipes can stream responses in real-time and can store messages (prompts and completions) if configured to do so. This feature ensures privacy by limiting the storage of certain messages.
4. **Safety Features**: Includes moderation capabilities for harmful content, particularly for OpenAI models, and defines safety prompts to restrict LLM responses to relevant contexts.
5. **Variables**: Pipes support dynamic prompts using variables, which can be defined and populated during execution, enhancing the flexibility and interactivity of AI responses.
6. **Open Pipes**: Langbase allows users to create "Open Pipes" that can be shared publicly. These pipes can be forked by other users, promoting collaboration and community engagement.
7. **API Integration**: Pipes can connect any LLM to various datasets and workflows, enabling developers to create tailored applications efficiently.
The overall goal of Pipes is to simplify the process of building and deploying AI applications by providing a robust framework that handles various aspects of AI interaction and customization. For more detailed information, you can refer to the official documentation on Langbase's website.
```
---
## Next Steps
- Build something cool with Langbase.
- Join our [Discord community](https://langbase.com/discord) for feedback, requests, and support.
---
</content>
</doc>
<doc>
<metadata>
<title>Images Examples</title>
<url>https://langbase.com/docs/examples/images/</url>
</metadata>
<content>
import { ExampleAccordion } from '@/components/mdx/example-card';
import { generateMetadata } from '@/lib/generate-metadata';
# Images Examples
Here are some examples of how to use the Langbase Images API to generate AI images. These examples demonstrate how to work with different image generation providers like OpenAI, Together AI, Google, and OpenRouter.
<ExampleAccordion type="Images" />
---
</content>
</doc>
<doc>
<metadata>
<title>Embed Example</title>
<url>https://langbase.com/docs/examples/embed/</url>
</metadata>
<content>
import { ExampleAccordion } from '@/components/mdx/example-card';
import { generateMetadata } from '@/lib/generate-metadata';
# Embed Example
Here are some examples of how to use the Langbase to generate embeddings for a given text. These examples are designed to help you get started with embedding documents using Langbase.
<ExampleAccordion type="Embed" />
---
</content>
</doc>
<doc>
<metadata>
<title>Chunker Example</title>
<url>https://langbase.com/docs/examples/chunker/</url>
</metadata>
<content>
import { ExampleAccordion } from '@/components/mdx/example-card';
import { generateMetadata } from '@/lib/generate-metadata';
# Chunker Example
Here are some examples of how to use the Langbase chunker functionality. These examples are designed to help you get started with chunking documents using Langbase.
<ExampleAccordion type="Chunker" />
---
</content>
</doc>
<doc>
<metadata>
<title>Build RAG AI Agents with TypeScript</title>
<url>https://langbase.com/docs/examples/build-agentic-rag/</url>
</metadata>
<content>
import { generateMetadata } from '@/lib/generate-metadata';
# Build RAG AI Agents with TypeScript
### A step-by-step guide to building an agentic RAG system with TypeScript using Langbase SDK.
---
In this guide, you will build an agentic RAG system. You will:
- Create an agentic AI memory
- Use custom embedding models
- Add documents to AI memory
- Perform RAG retrieval against a query
- Generate comprehensive responses using LLMs
---
You will build a basic Node.js app in TypeScript that uses the Langbase SDK to create an agentic RAG system.
Let's get started.
---
## Step #0: Setup your project
Create a new directory for your project and navigate to it.
<CodeGroup exampleTitle="Project setup" title="Project setup">
```bash
mkdir agentic-rag && cd agentic-rag
```
</CodeGroup>
### Initialize the project
Initialize Node.js project and create different TypeScript files.
<CodeGroup exampleTitle="Initialize project" title="Initialize project">
```bash {{ title: 'npm' }}
npm init -y && touch index.ts agents.ts create-memory.ts upload-docs.ts create-pipe.ts
```
```bash {{ title: 'pnpm' }}
pnpm init && touch index.ts agents.ts create-memory.ts upload-docs.ts create-pipe.ts
```
```bash {{ title: 'yarn' }}
yarn init -y && touch index.ts agents.ts create-memory.ts upload-docs.ts create-pipe.ts
```
</CodeGroup>
### Install dependencies
You will use the [Langbase SDK](/sdk) to create memory agents and `dotenv` to manage environment variables. So, let's install these dependencies.
<CodeGroup exampleTitle="Install dependencies" title="Install dependencies">
```bash {{ title: 'npm' }}
npm i langbase dotenv
```
```bash {{ title: 'pnpm' }}
pnpm add langbase dotenv
```
```bash {{ title: 'yarn' }}
yarn add langbase dotenv
```
</CodeGroup>
## Step #1: Get Langbase API Key
Every request you send to Langbase needs an [API key](/api-reference/api-keys). This guide assumes you already have one. In case, you do not have an API key, please check the instructions below.
<Spoiler title="Get your Langbase API key: User or Org">
You can generate API keys from the [Langbase Studio](https://studio.langbase.com) by following these steps:
1. Switch to your user or org account.
2. From the sidebar, click on the `API keys`.
3. From here you can create a new API key or manage existing ones.
For more details follow the [Langbase API keys](/api-reference/api-keys) documentation.
</Spoiler>
Create an `.env` file in the root of your project and add your Langbase API key.
```bash {{ title: '.env' }}
LANGBASE_API_KEY=xxxxxxxxx
```
Replace xxxxxxxxx with your Langbase API key.
## Step #3: Add LLM API keys
If you have set up LLM API keys in your profile, the AI memory and agent pipe will automatically use them. Otherwise navigate to [LLM API keys](https://langbase.com/settings/keys#keyset) page and add keys for different providers like OpenAI, Anthropic, etc.
<Spoiler title="Add LLM API keys to your account">
You can add LLM API keys in your account using [Langbase Studio](https://studio.langbase.com) by following these steps:
1. Switch to your user or org account.
2. From the sidebar, click on the `API keys` and scroll down to the LLM API keys section.
3. From here you can add LLM API keys for different providers like OpenAI, TogetherAI, Anthropic, etc.
</Spoiler>
## Step #4: Create an agentic AI memory
In this step, you will create an AI memory using the Langbase SDK. Go ahead and add the following code to the `create-memory.ts` file.
<CodeGroup exampleTitle="Email sentiment agent" title="Email sentiment agent">
```ts {{ title: 'create-memory.ts' }}
import 'dotenv/config';
import {Langbase} from 'langbase';
const langbase = new Langbase({
apiKey: process.env.LANGBASE_API_KEY!,
});
async function main() {
const memory = await langbase.memories.create({
name: 'knowledge-base',
description: 'An AI memory for agentic memory workshop',
embedding_model: 'openai:text-embedding-3-large'
});
console.log('AI Memory:', memory);
}
main();
```
</CodeGroup>
Let's take a look at what is happening in this code:
- Import the `dotenv` package to load environment variables.
- Import the `Langbase` class from the `langbase` package.
- Create a new instance of the `Langbase` class with your API key.
- Use the `memories.create` method to create a new AI memory.
- Set the name and description of the memory.
- Use the `openai:text-embedding-3-large` model for embedding.
- Log the created memory to the console.
Let's create the agentic memory by running the `create-memory.ts` file.
<CodeGroup exampleTitle="Create agentic memory" title="Create agentic memory">
```bash {{ title: 'npm' }}
npx tsx create-memory.ts
```
```bash {{ title: 'pnpm' }}
pnpm dlx tsx create-memory.ts
```
</CodeGroup>
This will create an AI memory and log the memory details to the console.
## Step #5: Add documents to AI memory
In this step, you will add documents to the AI memory you created in the previous step. Click on the following buttons to download sample documents.
Once the sample docs are downloaded, create a `docs` directory in your project and move the downloaded documents to this directory.
<DownloadSampleDoc
href="/docs/agent-architectures.txt"
btnText="Download agentic architecture"
secondary={{
href: "/docs/langbase-faq.txt",
btnText: "Download Langbase FAQs"
}}
/>
Now go ahead and add the following code to the `upload-docs.ts` file.
<CodeGroup exampleTitle="Upload documents" title="Upload documents">
```ts {{ title: 'upload-docs.ts' }}
import 'dotenv/config';
import { Langbase } from 'langbase';
import { readFile } from 'fs/promises';
import path from 'path';
const langbase = new Langbase({
apiKey: process.env.LANGBASE_API_KEY!,
});
async function main() {
const cwd = process.cwd();
const memoryName = 'knowledge-base';
// Upload agent architecture document
const agentArchitecture = await readFile(path.join(cwd, 'docs', 'agent-architectures.txt'));
const agentResult = await langbase.memories.documents.upload({
memoryName,
contentType: 'text/plain',
documentName: 'agent-architectures.txt',
document: agentArchitecture,
meta: { category: 'Examples', topic: 'Agent architecture' },
});
console.log(agentResult.ok ? '✓ Agent doc uploaded' : '✗ Agent doc failed');
// Upload FAQ document
const langbaseFaq = await readFile(path.join(cwd, 'docs', 'langbase-faq.txt'));
const faqResult = await langbase.memories.documents.upload({
memoryName,
contentType: 'text/plain',
documentName: 'langbase-faq.txt',
document: langbaseFaq,
meta: { category: 'Support', topic: 'Langbase FAQs' },
});
console.log(faqResult.ok ? '✓ FAQ doc uploaded' : '✗ FAQ doc failed');
}
main();
```
</CodeGroup>
Let's break down the above code:
- Import the `readFile` function from the `fs/promises` module to read files asynchronously.
- Import the `path` module to work with file paths.
- Use the `memories.documents.upload` method to upload documents to the AI memory.
- Log the result of the document upload to the console.
- Upload the `agent-architectures.txt` and `langbase-faq.txt` documents to the AI memory.
Run the `upload-docs.ts` file to upload the documents to the AI memory.
<CodeGroup exampleTitle="Upload documents" title="Upload documents">
```bash {{ title: 'npm' }}
npx tsx upload-docs.ts
```
```bash {{ title: 'pnpm' }}
pnpm dlx tsx upload-docs.ts
```
</CodeGroup>
This will upload the documents to the AI memory.
## Step #6: Perform RAG retrieval
In this step, you will perform RAG retrieval against a query. Add the following code to the `agents.ts` file.
<CodeGroup exampleTitle="RAG retrieval" title="RAG retrieval">
```ts {{ title: 'agents.ts' }}
import 'dotenv/config';
import { Langbase } from 'langbase';
const langbase = new Langbase({
apiKey: process.env.LANGBASE_API_KEY!,
});
export async function runMemoryAgent(query: string) {
const chunks = await langbase.memories.retrieve({
query,
topK: 4,
memory: [
{
name: 'knowledge-base',
},
],
});
return chunks;
}
```
</CodeGroup>
Let's break down the above code:
- Import the `Langbase` class from the `langbase` package.
- Create a function `runMemoryAgent` that takes a query as input.
- Use the `memories.retrieve` method to perform RAG retrieval against the query.
- Retrieve top 4 chunks from the agentic AI memory.
- Return the retrieved chunks.
Now let's add the following code to the `index.ts` file to run the memory agent.
<CodeGroup exampleTitle="Run memory agent" title="Run memory agent">
```ts {{ title: 'index.ts' }}
import { runMemoryAgent } from './agents';
async function main() {
const chunks = await runMemoryAgent('What is agent parallelization?');
console.log('Memory chunk:', chunks);
}
main();
```
</CodeGroup>
Now run the `index.ts` file to perform RAG retrieval against the query.
<CodeGroup exampleTitle="Run memory agent" title="Run memory agent">
```bash {{ title: 'npm' }}
npx tsx index.ts
```
```bash {{ title: 'pnpm' }}
pnpm dlx tsx index.ts
```
</CodeGroup>
You will see the retrieved memory chunks in the console.
```js {{ title: 'Memory agent output' }}
[
{
text: '---\n' +
'\n' +
'## Agent Parallelization\n' +
'\n' +
'Parallelization runs multiple LLM tasks at the same time to improve speed or accuracy. It works by splitting a task into independent parts (sectioning) or generating multiple responses for comparison (voting).\n' +
'\n' +
'Voting is a parallelization method where multiple LLM calls generate different responses for the same task. The best result is selected based on agreement, predefined rules, or quality evaluation, improving accuracy and reliability.\n' +
'\n' +
"`This code implements an email analysis system that processes incoming emails through multiple parallel AI agents to determine if and how they should be handled. Here's the breakdown:",
similarity: 0.7146744132041931,
meta: {
docName: 'agent-architectures.txt',
documentName: 'agent-architectures.txt',
category: 'Examples',
topic: 'Agent architecture'
}
},
{
text: 'async function main(inputText: string) {\n' +
'\ttry {\n' +
'\t\t// Create pipes first\n' +
'\t\tawait createPipes();\n' +
'\n' +
'\t\t// Step A: Determine which agent to route to\n' +
'\t\tconst route = await routerAgent(inputText);\n' +
"\t\tconsole.log('Router decision:', route);\n" +
'\n' +
'\t\t// Step B: Call the appropriate agent\n' +
'\t\tconst agent = agentConfigs[route.agent];\n' +
'\n' +
'\t\tconst response = await langbase.pipes.run({\n' +
'\t\t\tstream: false,\n' +
'\t\t\tname: agent.name,\n' +
'\t\t\tmessages: [\n' +
"\t\t\t\t{ role: 'user', content: `${agent.prompt} ${inputText}` }\n" +
'\t\t\t]\n' +
'\t\t});\n' +
'\n' +
'\t\t// Final output\n' +
'\t\tconsole.log(\n' +
'\t\t\t`Agent: ${agent.name} \\n\\n Response: ${response.completion}`\n' +
'\t\t);\n' +
'\t} catch (error) {\n' +
"\t\tconsole.error('Error in main workflow:', error);\n" +
'\t}\n' +
'}\n' +
'\n' +
'// Example usage:\n' +
"const inputText = 'Why days are shorter in winter?';\n" +
'\n' +
'main(inputText);\n' +
'```\n' +
'\n' +
'\n' +
'---\n' +
'\n' +
'## Agent Parallelization\n' +
'\n' +
'Parallelization runs multiple LLM tasks at the same time to improve speed or accuracy. It works by splitting a task into independent parts (sectioning) or generating multiple responses for comparison (voting).',
similarity: 0.5911030173301697,
meta: {
docName: 'agent-architectures.txt',
documentName: 'agent-architectures.txt',
category: 'Examples',
topic: 'Agent architecture'
}
},
{
text: "`This code implements a sophisticated task orchestration system with dynamic subtask generation and parallel processing. Here's how it works:\n" +
'\n' +
'1. Orchestrator Agent (Planning Phase):\n' +
' - Takes a complex task as input\n' +
' - Analyzes the task and breaks it down into smaller, manageable subtasks\n' +
' - Returns both an analysis and a list of subtasks in JSON format\n' +
'\n' +
'2. Worker Agents (Execution Phase):\n' +
' - Multiple workers run in parallel using Promise.all()\n' +
' - Each worker gets:\n' +
' - The original task for context\n' +
' - Their specific subtask to complete\n' +
' - All workers use Gemini 2.0 Flash model\n' +
'\n' +
'3. Synthesizer Agent (Integration Phase):\n' +
' - Takes all the worker outputs\n' +
' - Combines them into a cohesive final result\n' +
' - Ensures the pieces flow together naturally',
similarity: 0.5393730401992798,
meta: {
docName: 'agent-architectures.txt',
documentName: 'agent-architectures.txt',
category: 'Examples',
topic: 'Agent architecture'
}
},
{
text: "`This code implements an email analysis system that processes incoming emails through multiple parallel AI agents to determine if and how they should be handled. Here's the breakdown:\n" +
'\n' +
'1. Three Specialized Agents running in parallel:\n' +
' - Sentiment Analysis Agent: Determines if the email tone is positive, negative, or neutral\n' +
' - Summary Agent: Creates a concise summary of the email content\n' +
' - Decision Maker Agent: Takes the outputs from the other agents and decides:\n' +
' - If the email needs a response\n' +
" - Whether it's spam\n" +
' - Priority level (low, medium, high, urgent)\n' +
'\n' +
'2. The workflow:\n' +
' - Takes an email input\n' +
' - Runs sentiment analysis and summary generation in parallel using Promise.all()\n' +
' - Feeds those results to the decision maker agent\n' +
' - Outputs a final decision object with response requirements\n' +
'\n' +
'3. All agents use Gemini 2.0 Flash model and are structured to return parsed JSON responses',
similarity: 0.49115753173828125,
meta: {
docName: 'agent-architectures.txt',
documentName: 'agent-architectures.txt',
category: 'Examples',
topic: 'Agent architecture'
}
}
]
```
## Step #7: Create support pipe agent
In this step, you will create a support agent using the Langbase SDK. Go ahead and add the following code to the `create-pipe.ts` file.
<CodeGroup exampleTitle="Create pipe agent" title="Create pipe agent">
```ts {{ title: 'create-pipe.ts' }}
import 'dotenv/config';
import { Langbase } from 'langbase';
const langbase = new Langbase({
apiKey: process.env.LANGBASE_API_KEY!,
});
async function main() {
const supportAgent = await langbase.pipes.create({
name: `ai-support-agent`,
description: `An AI agent to support users with their queries.`,
messages: [
{
role: `system`,
content: `You're a helpful AI assistant.
You will assist users with their queries.
Always ensure that you provide accurate and to the point information.`,
},
],
});
console.log('Support agent:', supportAgent);
}
main();
```
</CodeGroup>
Let's go through the above code:
- Initialize the Langbase SDK with your API key.
- Use the `pipes.create` method to create a new pipe agent.
- Log the created pipe agent to the console.
Now run the `create-pipe.ts` file to create the pipe agent.
<CodeGroup exampleTitle="Create pipe agent" title="Create pipe agent">
```bash {{ title: 'npm' }}
npx tsx create-pipe.ts
```
```bash {{ title: 'pnpm' }}
pnpm dlx tsx create-pipe.ts
```
</CodeGroup>
This will create a support agent and log the agent details to the console.
## Step #8: Generate RAG responses
In this step, you will generate comprehensive responses using LLMs. Add the following code to the `agents.ts` file.
<CodeGroup exampleTitle="Generate responses" title="Generate responses">
```ts {{ title: 'agents.ts' }}
import 'dotenv/config';
import { Langbase, MemoryRetrieveResponse } from 'langbase';
const langbase = new Langbase({
apiKey: process.env.LANGBASE_API_KEY!,
});
export async function runAiSupportAgent({
chunks,
query,
}: {
chunks: MemoryRetrieveResponse[];
query: string;
}) {
const systemPrompt = await getSystemPrompt(chunks);
const { completion } = await langbase.pipes.run({
stream: false,
name: 'ai-support-agent',
messages: [
{
role: 'system',
content: systemPrompt,
},
{
role: 'user',
content: query,
},
],
});
return completion;
}
async function getSystemPrompt(chunks: MemoryRetrieveResponse[]) {
let chunksText = '';
for (const chunk of chunks) {
chunksText += chunk.text + '\n';
}
const systemPrompt = `
You're a helpful AI assistant.
You will assist users with their queries.
Always ensure that you provide accurate and to the point information.
Below is some CONTEXT for you to answer the questions. ONLY answer from the CONTEXT. CONTEXT consists of multiple information chunks. Each chunk has a source mentioned at the end.
For each piece of response you provide, cite the source in brackets like so: [1].
At the end of the answer, always list each source with its corresponding number and provide the document name. like so [1] Filename.doc. If there is a URL, make it hyperlink on the name.
If you don't know the answer, say so. Ask for more context if needed.
${chunksText}`;
return systemPrompt;
}
export async function runMemoryAgent(query: string) {
const chunks = await langbase.memories.retrieve({
query,
topK: 4,
memory: [
{
name: 'knowledge-base',
},
],
});
return chunks;
}
```
</CodeGroup>
Let's break down the above code:
- Create a function `runAiSupportAgent` that takes chunks and query as input.
- Use the `pipes.run` method to generate responses using the LLM.
- Create a function `getSystemPrompt` to generate a system prompt for the LLM.
- Combine the retrieved chunks to create a system prompt.
- Return the generated completion.
Lets run the support agent with AI memory chunks. Add the following code to the `index.ts` file.
<CodeGroup exampleTitle="Run support agent" title="Run support agent">
```ts {{ title: 'index.ts' }}
import { runMemoryAgent, runAiSupportAgent } from './agents';
async function main() {
const query = 'What is agent parallelization?';
const chunks = await runMemoryAgent(query);
const completion = await runAiSupportAgent({
chunks,
query,
});
console.log('Completion:', completion);
}
main();
```
</CodeGroup>
Let's run the `index.ts` file to generate responses using the LLM.
<CodeGroup exampleTitle="Run support agent" title="Run support agent">
```bash {{ title: 'npm' }}
npx tsx index.ts
```
```bash {{ title: 'pnpm' }}
pnpm dlx tsx index.ts
```
</CodeGroup>
You will see the generated completion in the console.
```md {{ title: 'Support agent output' }}
Completion: Agent parallelization is a process that runs multiple LLM (Language Model) tasks simultaneously to enhance speed or accuracy. This technique can be implemented in two main ways:
1. **Sectioning**: A task is divided into independent parts that can be processed concurrently.
2. **Voting**: Multiple LLM calls generate different responses for the same task, and the best result is selected based on agreement, predefined rules, or quality evaluation. This approach improves accuracy and reliability by comparing various outputs.
In practice, agent parallelization involves orchestrating multiple specialized agents to handle different aspects of a task, allowing for efficient processing and improved outcomes.
If you need more detailed examples or further clarification, feel free to ask!
```
This is how you can build an agentic RAG system with TypeScript using the Langbase SDK.
---
## Next Steps
- Build something cool with Langbase [APIs](/api-reference) and [SDK](/sdk).
- Join our [Discord community](https://langbase.com/discord) for feedback, requests, and support.
---
</content>
</doc>
<doc>
<metadata>
<title>Build AI Email Agents: Composable Multi-agent</title>
<url>https://langbase.com/docs/examples/ai-email-agent/</url>
</metadata>
<content>
import { generateMetadata } from '@/lib/generate-metadata';
# Build AI Email Agents: Composable Multi-agent
### A step-by-step guide to build a composable multi agent architecture using Langbase SDK.
---
In this guide, you will build an AI email agent that uses multiple Langbase agent pipes to:
- **Summarize** an email
- **Analyze** sentiment of the email
- **Decide** whether the email needs a response or not
- **Pick** the tone of the response email
- **Generate** a response email
<CTAButtons
example
className="my-8"
primary={{
href: 'https://ai-email-agent.langbase.dev',
text: 'Live demo'
}}
secondary={{
href: 'https://github.com/LangbaseInc/langbase-examples/tree/main/examples/email-agent-node',
text: 'Source code (Node.js)'
}}
others={
[
{
href: 'https://github.com/LangbaseInc/langbase-examples/tree/main/examples/ai-email-agent',
text: 'Source code (Next.js)'
},
{
href: 'https://github.com/LangbaseInc/langbase-examples/tree/main/examples/email-agent-python',
text: 'Source code (Python)'
}
]
}
/>
---
You will build a basic Node.js application that will use the [Langbase SDK](/sdk) to connect to the AI agent pipes and generate responses using **parallelization** and **prompt-chaining** agent architectures.
<DesktopOnly>
## Flow reference architecture
There are two flows in the email agent, i.e., **User Email Flow** and **Spam Email Flow**.
The **User Email Flow** is a normal email flow where the user sends an email, and the AI agent analyzes the email sentiment, summarizes the email content, decides the email needs a response, picks the tone of the response email, and generates the response email.
The **Spam Email Flow** is a spam email flow where the AI agent analyzes the email sentiment, summarizes the email content, and decides that the email does not need a response.
**Demo workflow: Click [Send spam email] or [Send valid email] to see how it works:**
<Flows />
</DesktopOnly>
Let's get started!
---
## Step #0: Setup your project
Create a new directory for your project and navigate to it.
<CodeGroup exampleTitle="Project setup" title="Project setup">
```bash
mkdir ai-email-agent && cd ai-email-agent
```
</CodeGroup>
### Initialize the project
Initialize Node.js project and create an `index.ts` file.
<CodeGroup exampleTitle="Initialize project" title="Initialize project">
```bash {{ title: 'npm' }}
npm init -y && touch index.ts && touch agents.ts
```
```bash {{ title: 'pnpm' }}
pnpm init && touch index.ts && touch agents.ts
```
```bash {{ title: 'yarn' }}
yarn init -y && touch index.ts && touch agents.ts
```
</CodeGroup>
### Install dependencies
You will use the [Langbase SDK](/sdk) to connect to the AI agent pipes and `dotenv` to manage environment variables. So, let's install these dependencies.
<CodeGroup exampleTitle="Install dependencies" title="Install dependencies">
```bash {{ title: 'npm' }}
npm i langbase dotenv
```
```bash {{ title: 'pnpm' }}
pnpm add langbase dotenv
```
```bash {{ title: 'yarn' }}
yarn add langbase dotenv
```
</CodeGroup>
## Step #1: Get Langbase API Key
Every request you send to Langbase needs an [API key](/api-reference/api-keys). This guide assumes you already have one. In case, you do not have an API key, please check the instructions below.
<Spoiler title="Get your Langbase API key: User or Org">
You can generate API keys from the [Langbase Studio](https://studio.langbase.com) by following these steps:
1. Switch to your user or org account.
2. From the sidebar, click on the `API keys`.
3. From here you can create a new API key or manage existing ones.
For more details, follow the [Langbase API keys](/api-reference/api-keys) documentation.
</Spoiler>
Create an `.env` file in the root of your project and add your Langbase API key.
```bash {{ title: '.env' }}
LANGBASE_API_KEY=xxxxxxxxx
```
Replace xxxxxxxxx with your Langbase API key.
## Step #3: Add LLM API keys
If you have set up LLM API keys in your profile, the Pipe will automatically use them. If not, navigate to [LLM API keys](https://langbase.com/settings/keys#keyset) page and add keys for different providers like OpenAI, TogetherAI, Anthropic, etc.
<Spoiler title="Add LLM API keys to your account">
You can add LLM API keys in your account using [Langbase Studio](https://studio.langbase.com) by following these steps:
1. Switch to your user or org account.
2. From the sidebar, click on the `API keys` and scroll down to the LLM API keys section.
3. From here you can add LLM API keys for different providers like OpenAI, TogetherAI, Anthropic, etc.
</Spoiler>
## Step #4: Fork the AI agent pipes
Fork the following agent pipes needed for the AI email agent in Langbase dashboard:
1. [Email Sentiment][email-sentiment] → An agent pipe to analyze the sentiment of the incoming email
2. [Summarizer][summarizer] → Summarizes the content of the email and makes it less wordy for you
3. [Decision Maker][decision-maker] → Decides if the email needs a response, the category and priority of the response
4. [Pick Email Writer][pick-email-writer] → An AI agent pipe that picks the tone for writing the response to the email
5. [Email Writer][email-writer] → An agent pipe that will write a response email
## Step #4: Sentiment Analysis
In our first step, you will **analyze** the **email sentiment** using the Langbase AI agent pipe. Go ahead and add the following code to your `agents.ts` file:
<CodeGroup exampleTitle="Email sentiment agent" title="Email sentiment agent">
```ts {{ title: 'agents.ts' }}
import { Langbase } from 'langbase';
import 'dotenv/config'
const langbase = new Langbase({ apiKey: process.env.LANGBASE_API_KEY! });
// Sentiment analysis
const completion = JSON.parse(response.completion);
return completion.sentiment;
};
```
</CodeGroup>
Let's take a look at what is happening in this code:
- Initialize the [Langbase SDK](/sdk) with the API key from the environment variables.
- Define `emailSentimentAgent` function that takes an email and returns its **sentiment analysis**.
- Set the `json` parameter to `true` to get the response in JSON format.
- Set the `stream` parameter to `false` because the content generation will be processed internally.
<Note sub="AI user experience" classNameDescription="gap-0 mt-3">
Stream the response:
- When it's displayed **directly** to users in the UI.
- This creates a **better user experience** by showing the AI's response being generated in real-time.
Do not stream:
- When the AI response is being **processed internally** (e.g., for data analysis, content moderation, or generating metadata).
- Set stream to false in these cases since real-time display isn't needed.
</Note>
## Step #5: Summarize Email
Now let's write a function in the same `agents.ts` file to **summarize** the email content.
<CodeGroup exampleTitle="Email summary agent" title="Email summary agent">
```ts {{ title: 'agents.ts' }}
// Summarize email
const completion = JSON.parse(response.completion);
return completion.summary;
};
```
</CodeGroup>
Let's break down the above code:
- Define a function `emailSummaryAgent` that takes an email and returns its **summarized content**.
- Set the `json` parameter to `true` to get the response in JSON format.
- Set the `stream` parameter to `false` because the content generation will be processed internally.
## Step #6: Decision Maker
You are building a **ReAct based architecture** which means the sytem first reason over the info it has and then decide to act.
In this example, results of the email sentiment and summary are passed to the decision-making agent pipe to **decide** whether to respond to the email or not.

Go ahead and add the following code to your `agents.ts` file:
<CodeGroup exampleTitle="Should respond to email agent" title="Should respond to email agent">
```ts {{ title: 'agents.ts' }}
// Determine if a response is needed
const completion = JSON.parse(response.completion);
return completion.respond;
};
```
</CodeGroup>
Let's go through the above code.
- Define a function `shouldRespondToEmailAgent` that takes the summarized content and sentiment of the email and returns a decision.
- Set the `json` parameter to `true` to get the response in JSON format.
- Set the `stream` parameter to `false` because the content generation will be processed internally.
## Step #7: Pick Email Writer
In cases where the email needs a response, you will use the **Pick Email Writer** agent pipe to pick the tone of the email response.
<CodeGroup exampleTitle="Pick email writer agent" title="Pick email writer agent">
```ts {{ title: 'agents.ts' }}
// Pick an email writer
const completion = JSON.parse(response.completion);
return completion.tone;
};
```
</CodeGroup>
Here's what you have done in this step:
- Created a function `pickEmailWriterAgent` that uses the **summarized email** and **sentiment** to pick one of the following tones for response:
- Professional
- Formal
- Informal
- Casual
- Friendly
- Set the `json` parameter to `true` to get the response in JSON format.
- Set the `stream` parameter to `false` because the content generation will be processed internally.
## Step #8: Write Email Response
Finally, you will use the **Email Writer** agent pipe to generate the response email based on the tone picked in the previous step.
<CodeGroup exampleTitle="Write email response agent" title="Write email response agent">
```ts {{ title: 'agents.ts' }}
// Generate an email reply
return stream;
};
```
</CodeGroup>
Let's take a look at the above code:
- Created a function `emailResponseAgent` that takes the **tone** and **summarized email** and returns the **response email**.
- Set the `stream` parameter to `true` to get the response in stream format as you will be writing the response to the console.
## Step #9: Final composable multi-agent workflow
Now that you have all these agents, you can combine these in multi agent workflow so they can help us
1. **analyze** the email
2. **summarize** the email
3. **decide** if it needs a response
4. **pick** the tone of the response
5. **generate** the response email if needed.
In `index.ts` file, let's import all our agents and define a `workflow` that to run with user email and spam email.
<CodeGroup exampleTitle="Agent workflow" title="Agent workflow">
```ts {{ title: 'index.ts' }}
import { getRunner } from 'langbase';
import {
emailResponseAgent,
emailSentimentAgent,
emailSummaryAgent,
pickEmailWriterAgent,
shouldRespondToEmailAgent,
} from './agents';
import { stdout } from 'process';
const workflow = async (emailContent: string) => {
console.log('Email:', emailContent);
// parallelly run the agent pipes
const [emailSentiment, emailSummary] = await Promise.all([
emailSentimentAgent(emailContent),
emailSummaryAgent(emailContent),
]);
console.log('Sentiment:', emailSentiment);
console.log('Summary:', emailSummary);
const respond = await shouldRespondToEmailAgent(emailSummary, emailSentiment);
console.log('Respond:', respond);
if (!respond) {
return 'No response needed for this email.';
}
const writer = await pickEmailWriterAgent(emailSummary, emailSentiment);
console.log('Writer:', writer);
const emailStream = await emailResponseAgent(writer, emailSummary);
const runner = getRunner(emailStream);
runner.on('content', (content: string) => {
stdout.write(content);
});
};
const userEmail = `I'm really disappointed with the service I received yesterday. The product was faulty and customer support was unhelpful.`;
const spamEmail = `Congratulations! You have been selected as the winner of a $100 million lottery!`;
workflow(userEmail);
```
```ts {{title: './agents.ts'}}
import { Langbase } from 'langbase';
import 'dotenv/config'
const langbase = new Langbase({ apiKey: process.env.LANGBASE_API_KEY! });
// Sentiment analysis
const completion = JSON.parse(response.completion);
return completion.sentiment;
};
// Summarize email
const completion = JSON.parse(response.completion);
return completion.summary;
};
// Determine if a response is needed
const completion = JSON.parse(response.completion);
return completion.respond;
};
// Pick an email writer
const completion = JSON.parse(response.completion);
return completion.tone;
};
// Generate an email reply
return stream;
};
```
</CodeGroup>
Here's what you have done in this step:
- Define a `workflow` function that takes an email content and runs the email sentiment, summary, decision-making, email writer, and email response agents.
- You have used the `getRunner` function to get the stream of the email response and write it to the console.
- You have also defined the `emailSentimentAgent`, `emailSummaryAgent`, `shouldRespondToEmailAgent`, `pickEmailWriterAgent`, and `emailResponseAgent` functions to run the respective agents.
## Step #10: Run the workflow
Run the email agent workflow by running the following command in terminal:
<CodeGroup exampleTitle="Initialize project" title="Initialize project">
```bash {{ title: 'npx' }}
npx tsx index.ts
```
```bash {{ title: 'pnpm' }}
pnpm dlx tsx index.ts
```
</CodeGroup>
You should see the following output in the console:
```md {{ title: 'Email Agent output' }}
Email: I'm really disappointed with the service I received yesterday. The product was faulty and customer support was unhelpful.
Sentiment: frustrated
Summary: Disappointed with faulty product and unhelpful customer support.
Respond: true
Writer: formal
Subject: Re: Concern Regarding Faulty Product and Support Experience
Dear [User's Name],
Thank you for reaching out to us regarding your experience with our product and customer support. I sincerely apologize for the inconvenience you've encountered.
We strive to provide high-quality products and exceptional service, and it is disappointing to hear that we did not meet those standards in your case. Please rest assured that your feedback is taken seriously, and we are committed to resolving this matter promptly.
To assist you further, could you please provide details about the specific issues you're facing? This will enable us to address your concerns more effectively.
Thank you for bringing this to our attention, and I look forward to assisting you.
Best regards,
[Your Name]
[Your Position]
[Company Name]
[Contact Information]
```
This is how you can build an AI email agent using Langbase agent pipes.
---
## Next Steps
- Build something cool with Langbase [APIs](/api-reference) and [SDK](/sdk).
- Join our [Discord community](https://langbase.com/discord) for feedback, requests, and support.
---
[cover]: https://raw.githubusercontent.com/LangbaseInc/docs-images/main/examples/ai-email-agent/ai-email-agent.jpg
[email-agent]: https://ai-email-agent.langbase.dev/
[gh-repo]: https://github.com/LangbaseInc/langbase-examples/blob/main/examples/email-agent-node
[local]: http://localhost:3000
[email-sentiment]: https://langbase.com/examples/email-sentiment
[summarizer]: https://langbase.com/examples/summarizer
[decision-maker]: https://langbase.com/examples/decision-maker
[pick-email-writer]: https://langbase.com/examples/pick-email-writer
[email-writer]: https://langbase.com/examples/email-writer
</content>
</doc>
<doc>
<metadata>
<title>Agent Architectures</title>
<url>https://langbase.com/docs/examples/agent-architectures/</url>
</metadata>
<content>
import { generateMetadata } from '@/lib/generate-metadata';
import { LanguageProvider, SimpleLanguageToggle, LanguageContent } from '@/components/LanguageToggle';
<LanguageProvider defaultLanguage='typescript'>
# Agent Architectures
At Langbase, we believe you don't need a framework. Build AI agents without any frameworks.
We’ll cover several different agent architectures that leverage Langbase to build, deploy, and scale autonomous agents. Define how your agents use LLMs, tools, memory, and durable workflows to process inputs, make decisions, and achieve goals.
---
### Reference agent architectures
1. [Augmented LLM](#augmented-llm-pipe-agent)
2. [Prompt chaining](#prompt-chaining-and-composition)
3. [Agentic Routing](#agent-routing)
4. [Agent Parallelization](#agent-parallelization)
5. [Orchestration workers](#agentic-orchestration-workers)
6. [Evaluator-optimizer](#evaluator-optimizer)
7. [Augmented LLM with Tools](#augmented-llm-with-tools)
9. [Memory Agent](#memory-agent)
---
## Augmented LLM (Pipe Agent)
<AgentDiagram
src="/docs/architecture/pipe.png"
caption="Pipe architecture"
/>
Langbase Augmented LLM (Pipe Agent) is the fundamental component of an agentic system. It is a Large Language Model (LLM) enhanced with augmentations such as retrieval, tools, and memory. Our current models can actively utilize these capabilities—generating their own search queries, selecting appropriate tools, and determining what information to retain using memory.
<RunAgent api="/docs/api/pipe-summary"
title="Augmented LLM Example"
explanation={`This is a very simple and straightforward implementation of a text summarization agent using Langbase. Here's the breakdown:
1. Agent Setup:
- Creates a basic pipe agent named "Summary Agent"
- Configures it with a single system message that defines its role as a text summarizer
2. Execution:
- Takes a piece of text about the Langbase platform as input
- Processes it through the agent
- Returns a summarized version in the completion
What makes this interesting is its simplicity - it's a basic example of how to create and use a Langbase agent for a single, focused task. This could serve as a starting point for more complex implementations.`}
>
<LanguageContent language="typescript">
```ts
import dotenv from 'dotenv';
import { Langbase } from 'langbase';
dotenv.config();
const langbase = new Langbase({
apiKey: process.env.LANGBASE_API_KEY!,
});
async function main() {
// Create a pipe agent
const summaryAgent = await langbase.pipes.create({
name: "summary-agent",
model: "google:gemini-2.5-flash",
messages: [
{
role: "system",
content: 'You are a helpful assistant that summarizes text.'
}
]
});
// Run the pipe agent
const inputText = `Langbase is the most powerful serverless platform for building AI agents
with memory. Build, scale, and evaluate AI agents with semantic memory (RAG) and
world-class developer experience. We process billions of AI message tokens daily.
Built for every developer, not just AI/ML experts. Compared to complex AI frameworks,
Langbase is simple, serverless, and the first composable AI platform`;
const { completion } = await langbase.pipes.run({
name: summaryAgent.name,
stream: false,
messages: [
{
role: "user",
content: inputText,
}
],
});
console.log(completion);
}
main();
```
</LanguageContent>
<LanguageContent language="python">
```python
import os
from langbase import Langbase
from dotenv import load_dotenv
load_dotenv()
langbase = Langbase(api_key=os.getenv('LANGBASE_API_KEY'))
def main():
# Create a pipe agent
summary_agent = langbase.pipes.create(
name="summary-agent",
model="google:gemini-2.5-flash",
messages=[
{
"role": "system",
"content": "You are a helpful assistant that summarizes text."
}
],
upsert=True,
)
# Run the pipe agent
input_text = """Langbase is the most powerful serverless platform for building AI agents
with memory. Build, scale, and evaluate AI agents with semantic memory (RAG) and
world-class developer experience. We process billions of AI messages tokens daily.
Built for every developer, not just AI/ML experts. Compared to complex AI frameworks,
Langbase is simple, serverless, and the first composable AI platform"""
response = langbase.pipes.run(
name=summary_agent["name"],
stream=False,
messages=[
{
"role": "user",
"content": input_text,
}
],
)
print(response["completion"])
if __name__ == '__main__':
main()
```
</LanguageContent>
</RunAgent>
---
## Prompt chaining and composition
<AgentDiagram
src="/docs/architecture/prompt-chaining.png"
caption="Prompt chaining architecture"
/>
Prompt chaining splits a task into steps, with each LLM call using the previous step's result. It improves accuracy by simplifying each step, making it ideal for structured tasks like content generation and verification.
<RunAgent
api="/docs/api/prompt-chaining"
title="Prompt Chaining Example"
explanation={`This code implements a sequential product marketing content pipeline that transforms a raw product description into polished marketing copy through three stages:\n\n1. First Stage (Summary Agent):\n - Takes a raw product description\n - Condenses it into two concise sentences\n - Has a quality gate that checks if the summary is detailed enough (at least 10 words)\n\n2. Second Stage (Features Agent):\n - Takes the summary from stage 1\n - Extracts and formats key product features as bullet points\n\n3. Final Stage (Marketing Copy Agent):\n - Takes the bullet points from stage 2\n - Generates refined marketing copy for the product\n\nAll stages use the Gemini 2.5 Flash model through the Langbase SDK. The example shows it being used with a smartwatch product description.\n\nWhat makes this interesting is its pipeline approach - each stage builds upon the output of the previous stage, with a quality check after the summary stage to ensure the pipeline maintains high standards.`}
>
<LanguageContent language="typescript">
```ts {{ title: 'prompt-chaining.ts' }}
import dotenv from 'dotenv';
import { Langbase } from 'langbase';
dotenv.config();
const langbase = new Langbase({
apiKey: process.env.LANGBASE_API_KEY!
});
async function main(inputText: string) {
// Prompt chaining steps
const steps = [
{
name: 'summary-agent',
model: 'google:gemini-2.5-flash',
description:
'summarize the product description into two concise sentences',
prompt: `Please summarize the following product description into two concise
sentences:\n`
},
{
name: 'features-agent',
model: 'google:gemini-2.5-flash',
description: 'extract key product features as bullet points',
prompt: `Based on the following summary, list the key product features as
bullet points:\n`
},
{
name: 'marketing-copy-agent',
model: 'google:gemini-2.5-flash',
description:
'generate a polished marketing copy using the bullet points',
prompt: `Using the following bullet points of product features, generate a
compelling and refined marketing copy for the product, be precise:\n`
}
];
// Create the pipe agents
await Promise.all(
steps.map(step =>
langbase.pipes.create({
name: step.name,
model: step.model,
messages: [
{
role: 'system',
content: `You are a helpful assistant that can ${step.description}.`
}
]
})
)
);
// Initialize the data with the raw input.
let data = inputText;
try {
// Process each step in the workflow sequentially.
for (const step of steps) {
// Call the LLM for the current step.
const response = await langbase.pipes.run({
stream: false,
name: step.name,
messages: [{ role: 'user', content: `${step.prompt} ${data}` }]
});
data = response.completion;
console.log(`Step: ${step.name} \n\n Response: ${data}`);
// Gate on summary agent output to ensure it is not too brief.
// If the summary is less than 10 words, throw an error to stop the workflow.
if (step.name === 'summary-agent' && data.split(' ').length < 10) {
throw new Error(
'Gate triggered for summary agent. The summary is too brief. Exiting workflow.'
);
return;
}
}
} catch (error) {
console.error('Error in main workflow:', error);
}
// The final refined marketing copy
console.log('Final Refined Product Marketing Copy:', data);
}
const inputText = `Our new smartwatch is a versatile device featuring a high-resolution display,
long-lasting battery life, fitness tracking, and smartphone connectivity. It's designed for
everyday use and is water-resistant. With cutting-edge sensors and a sleek design, it's
perfect for tech-savvy individuals.`;
main(inputText);
```
</LanguageContent>
<LanguageContent language="python">
```python {{ title: 'prompt-chaining.py' }}
import os
from langbase import Langbase
from dotenv import load_dotenv
load_dotenv()
langbase = Langbase(api_key=os.getenv('LANGBASE_API_KEY'))
def main(input_text):
# Prompt chaining steps
steps = [
{
"name": "summary-agent",
"model": "google:gemini-2.5-flash",
"description": "summarize the product description into two concise sentences",
"prompt": "Please summarize the following product description into two concise sentences:\n"
},
{
"name": "features-agent",
"model": "google:gemini-2.5-flash",
"description": "extract key product features as bullet points",
"prompt": "Based on the following summary, list the key product features as bullet points:\n"
},
{
"name": "marketing-copy-agent",
"model": "google:gemini-2.5-flash",
"description": "generate a polished marketing copy using the bullet points",
"prompt": "Using the following bullet points of product features, generate a compelling and refined marketing copy for the product, be precise:\n"
}
]
# Create the pipe agents
for step in steps:
try:
langbase.pipes.create(
name=step["name"],
model=step["model"],
upsert=True,
messages=[
{
"role": "system",
"content": f"You are a helpful assistant that can {step['description']}."
}
]
)
except Exception as e:
print(f"Error creating pipe {step['name']}: {e}")
# Initialize the data with the raw input
data = input_text
try:
# Process each step in the workflow sequentially
for step in steps:
# Call the LLM for the current step
response = langbase.pipes.run(
stream=False,
name=step["name"],
messages=[{
"role": "user",
"content": f"{step['prompt']} {data}"
}]
)
data = response["completion"]
print(f"Step: {step['name']} \n\n Response: {data}")
# Gate on summary agent output to ensure it is not too brief
# If summary is less than 10 words, throw an error to stop the workflow
if step["name"] == "summary-agent" and len(data.split()) < 10:
raise Exception(
"Gate triggered for summary agent. Summary is too brief. Exiting workflow."
)
except Exception as error:
print(f"Error in main workflow: {error}")
return
# The final refined marketing copy
print("Final Refined Product Marketing Copy:", data)
if __name__ == '__main__':
input_text = """Our new smartwatch is a versatile device featuring a high-resolution display,
long-lasting battery life,fitness tracking, and smartphone connectivity. It's designed for
everyday use and is water-resistant. With cutting-edge sensors and a sleek design, it's
perfect for tech-savvy individuals."""
main(input_text)
```
</LanguageContent>
</RunAgent>
---
## Agent Routing
<AgentDiagram
src="/docs/architecture/routing.png"
caption="Routing architecture"
/>
Routing classifies inputs and directs them to specialized LLMs for better accuracy. It helps optimize performance by handling different tasks separately, like sorting queries or assigning models based on complexity.
<RunAgent api="/docs/api/routing"
title="Routing Example"
explanation={`This example implements a multi-agent system that routes user queries to specialized AI agents based on the type of task. Here's what it does:
1. Sets up a routing system using the Langbase SDK
2. The main components are:
- A router agent that decides which specialized agent should handle the input
- Three specialized agents for different tasks:
- Summary agent: For text summarization
- Reasoning agent: For analysis and explanation
- Coding agent: For providing code solutions
3. The workflow is:
- User provides input text
- Router agent (using Gemini 2.5 Flash) determines which specialized agent should handle it
- The request is then forwarded to the appropriate specialized agent
- Each specialized agent uses a different AI model:
- Summary: Gemini 2.5 Flash
- Reasoning: Deepseek LLaMA 70B
- Coding: Claude 3.5
4. The example shows it being used with the input "Why are days shorter in winter?" which would likely be routed to the reasoning agent.
This is essentially an AI task dispatcher that ensures queries are handled by the most appropriate specialized model.`}
>
<LanguageContent language="typescript">
```ts {{ title: 'routing.ts' }}
import dotenv from 'dotenv';
import { Langbase } from 'langbase';
dotenv.config();
// Initialize Langbase with your API key
const langbase = new Langbase({
apiKey: process.env.LANGBASE_API_KEY!
});
// Specialized agents configurations
const agentConfigs = {
router: {
name: 'router-agent',
model: 'google:gemini-2.5-flash',
prompt: `You are a router agent. Your job is to read the user's request and decide
which specialized agent is best suited to handle it.
Below are the agents you can route to:
- summary: Summarizes the text
- reasoning: Analyzes and provides reasoning for the text
- coding: Provides a coding solution for the text
Only respond with valid JSON that includes a single field "agent" whose value must
be one of ["summary", "reasoning", "coding"] based on the user's request.
For example: {"agent":"summary"}.
No additional text or explanation—just the JSON.
`
},
summary: {
name: 'summary-agent',
model: 'google:gemini-2.5-flash',
prompt: 'Summarize the following text:\n'
},
reasoning: {
name: 'reasoning-agent',
model: 'groq:deepseek-r1-distill-llama-70b',
prompt: 'Analyze and provide reasoning for:\n'
},
coding: {
name: 'coding-agent',
model: 'anthropic:claude-3-5-sonnet-latest',
prompt: 'Provide a coding solution for:\n'
}
};
// Create the router and specialized agent pipes
async function createPipes() {
// Create router and all specialized agent
await Promise.all(
Object.entries(agentConfigs).map(([key, config]) =>
langbase.pipes.create({
name: config.name,
model: config.model,
messages: [
{
role: 'system',
content: config.prompt
}
]
})
)
);
}
// Router agent
async function routerAgent(inputText: string) {
const response = await langbase.pipes.run({
stream: false,
name: 'router-agent',
messages: [
{
role: 'user',
content: inputText
}
]
});
// The router's response should look like: {"agent":"summary"} or {"agent":"reasoning"} or {"agent":"coding"}
// We parse the completion to extract the agent value
return JSON.parse(response.completion);
}
async function main(inputText: string) {
try {
// Create pipes first
await createPipes();
// Step A: Determine which agent to route to
const route = await routerAgent(inputText);
console.log('Router decision:', route);
// Step B: Call the appropriate agent
const agent = agentConfigs[route.agent];
const response = await langbase.pipes.run({
stream: false,
name: agent.name,
messages: [
{ role: 'user', content: `${agent.prompt} ${inputText}` }
]
});
// Final output
console.log(
`Agent: ${agent.name} \n\n Response: ${response.completion}`
);
} catch (error) {
console.error('Error in main workflow:', error);
}
}
// Example usage:
const inputText = 'Why days are shorter in winter?';
main(inputText);
```
</LanguageContent>
<LanguageContent language="python">
```python {{ title: 'routing.py' }}
import os
import json
from langbase import Langbase
from dotenv import load_dotenv
load_dotenv()
# Initialize Langbase with your API key
langbase = Langbase(api_key=os.getenv('LANGBASE_API_KEY'))
# Specialized agents configurations
agent_configs = {
"router": {
"name": "router-agent-a",
"model": "google:gemini-2.5-flash",
"prompt": """You are a router agent. Your job is to read the user's request and decide
which specialized agent is best suited to handle it.
Below are the agents you can route to:
- summary: Summarizes the text
- reasoning: Analyzes and provides reasoning for the text
- coding: Provides a coding solution for the text
Only respond with valid JSON that includes a single field "agent" whose value must
be one of ["summary", "reasoning", "coding"] based on the user's request.
For example: {"agent":"summary"}.
No additional text or explanation—just the JSON.
"""
},
"summary": {
"name": "summary-agent",
"model": "google:gemini-2.5-flash",
"prompt": "Summarize the following text:\n"
},
"reasoning": {
"name": "reasoning-agent",
"model": "google:gemini-2.5-flash",
"prompt": "Analyze and provide reasoning for:\n"
},
"coding": {
"name": "coding-agent",
"model": "anthropic:claude-3-5-sonnet-latest",
"prompt": "Provide a coding solution for:\n"
}
}
def create_pipes():
"""Create the router and specialized agent pipes."""
# Create router and all specialized agents
for key, config in agent_configs.items():
try:
langbase.pipes.create(
name=config["name"],
model=config["model"],
upsert=True,
messages=[
{
"role": "system",
"content": config["prompt"]
}
]
)
print(f"✅ Created pipe: {config['name']}")
except Exception as e:
print(f"❌ Error creating pipe {config['name']}: {e}")
def router_agent(input_text):
"""Router agent to determine which specialized agent to use."""
response = langbase.pipes.run(
stream=False,
name="router-agent-a",
messages=[
{
"role": "user",
"content": input_text
}
]
)
# The router's response should look like: {"agent":"summary"} or {"agent":"reasoning"} or {"agent":"coding"}
# We parse the completion to extract the agent value
completion = response["completion"]
# Handle JSON wrapped in markdown code blocks
if "```json" in completion:
# Extract JSON from markdown code block
start = completion.find("```json") + 7
end = completion.find("```", start)
json_str = completion[start:end].strip()
return json.loads(json_str)
elif "```" in completion:
# Extract JSON from generic code block
start = completion.find("```") + 3
end = completion.find("```", start)
json_str = completion[start:end].strip()
return json.loads(json_str)
else:
# Try direct JSON parsing
try:
return json.loads(completion.strip())
except json.JSONDecodeError:
# Fallback to reasoning if parsing fails
return {"agent": "reasoning"}
def main(input_text):
try:
# Create pipes first
create_pipes()
# Step A: Determine which agent to route to
route = router_agent(input_text)
print("Router decision:", route)
# Step B: Call the appropriate agent
agent = agent_configs[route["agent"]]
response = langbase.pipes.run(
stream=False,
name=agent["name"],
messages=[
{
"role": "user",
"content": f"{agent['prompt']} {input_text}"
}
]
)
# Final output
print(f"Agent: {agent['name']} \n\n Response: {response['completion']}")
except Exception as error:
print(f"Error in main workflow: {error}")
if __name__ == '__main__':
# Example usage:
input_text = "Why days are shorter in winter?"
main(input_text)
```
</LanguageContent>
</RunAgent>
---
## Agent Parallelization
<AgentDiagram
src="/docs/architecture/parallelization.png"
caption="Parallelization architecture"
/>
Parallelization runs multiple LLM tasks at the same time to improve speed or accuracy. It works by splitting a task into independent parts (sectioning) or generating multiple responses for comparison (voting).
Voting is a parallelization method where multiple LLM calls generate different responses for the same task. The best result is selected based on agreement, predefined rules, or quality evaluation, improving accuracy and reliability.
<RunAgent api="/docs/api/parallelization"
title="Parallelization Example"
explanation={`This code implements an email analysis system that processes incoming emails through multiple parallel AI agents to determine if and how they should be handled. Here's the breakdown:
1. Three Specialized Agents running in parallel:
- Sentiment Analysis Agent: Determines if the email tone is positive, negative, or neutral
- Summary Agent: Creates a concise summary of the email content
- Decision Maker Agent: Takes the outputs from the other agents and decides:
- If the email needs a response
- Whether it's spam
- Priority level (low, medium, high, urgent)
2. The workflow:
- Takes an email input
- Runs sentiment analysis and summary generation in parallel using Promise.all()
- Feeds those results to the decision maker agent
- Outputs a final decision object with response requirements
3. All agents use OpenAI GPT-4.1 mini model and are structured to return parsed JSON responses
The example shows it being used with a complaint email about a faulty product and poor customer service, which would likely be categorized as high priority and requiring a response.
What makes this interesting is its parallel processing approach for efficiency and the structured decision-making pipeline that helps automate email triage.`}
>
<LanguageContent language="typescript">
```ts {{ title: 'parallelization.ts' }}
import { Langbase } from 'langbase';
import dotenv from 'dotenv';
dotenv.config();
const langbase = new Langbase({
apiKey: process.env.LANGBASE_API_KEY!
});
// Agent configurations
const agentConfigs = {
sentiment: {
name: 'email-sentiment',
model: 'openai:gpt-4.1-mini',
prompt: `
You are a helpful assistant that can analyze the sentiment of the email.
Only respond with the sentiment, either "positive", "negative" or "neutral".
Do not include any markdown formatting, code blocks, or backticks in your response.
The response should be a raw JSON object that can be directly parsed.
Example response:
{
"sentiment": "positive"
}
`
},
summary: {
name: 'email-summary',
model: 'openai:gpt-4.1-mini',
prompt: `
You are a helpful assistant that can summarize the email.
Only respond with the summary.
Do not include any markdown formatting, code blocks, or backticks in your response.
The response should be a raw JSON object that can be directly parsed.
Example response:
{
"summary": "The email is about a product that is not working."
}
`
},
decisionMaker: {
name: 'email-decision-maker',
model: 'openai:gpt-4.1-mini',
prompt: `
You are a decision maker that analyzes and decides if the given email requires
a response or not.
Make sure to check if the email is spam or not. If the email is spam, then it
does not need a response.
If it requires a response, based on the email urgency, decide on the response
date. Also, define the response priority.
Use the following keys and values accordingly
- respond: true or false
- category: spam or not spam
- priority: low, medium, high, urgent
Do not include any markdown formatting, code blocks, or backticks in your response.
The response should be a raw JSON object that can be directly parsed.
`
}
};
// Create all pipes
async function createPipes() {
await Promise.all(
Object.entries(agentConfigs).map(([key, config]) =>
langbase.pipes.create({
name: config.name,
model: config.model,
json: true,
messages: [
{
role: 'system',
content: config.prompt
}
]
})
)
);
}
async function main(emailInput: string) {
try {
// Create pipes first
await createPipes();
// Sentiment analysis
const emailSentimentAgent = async (email: string) => {
const response = await langbase.pipes.run({
name: agentConfigs.sentiment.name,
stream: false,
messages: [
{
role: 'user',
content: email
}
]
});
return JSON.parse(response.completion).sentiment;
};
// Summarize email
const emailSummaryAgent = async (email: string) => {
const response = await langbase.pipes.run({
name: agentConfigs.summary.name,
stream: false,
messages: [
{
role: 'user',
content: email
}
]
});
return JSON.parse(response.completion).summary;
};
// Determine if a response is needed
const emailDecisionMakerAgent = async (
summary: string,
sentiment: string
) => {
const response = await langbase.pipes.run({
name: agentConfigs.decisionMaker.name,
stream: false,
messages: [
{
role: 'user',
content: `Email summary: ${summary}\nEmail sentiment: ${sentiment}`
}
]
});
return JSON.parse(response.completion);
};
// Parallelize the requests
const [emailSentiment, emailSummary] = await Promise.all([
emailSentimentAgent(emailInput),
emailSummaryAgent(emailInput)
]);
console.log('Email Sentiment:', emailSentiment);
console.log('Email Summary:', emailSummary);
// aggregator based on the results
const emailDecision = await emailDecisionMakerAgent(
emailSummary,
emailSentiment
);
console.log('should respond:', emailDecision.respond);
console.log('category:', emailDecision.category);
console.log('priority:', emailDecision.priority);
return emailDecision;
} catch (error) {
console.error('Error in main workflow:', error);
}
}
const email = `
Hi John,
I'm really disappointed with the service I received yesterday. The product
was faulty, and customer support was unhelpful. How can I apply for a refund?
Thanks,
`;
main(email);
```
</LanguageContent>
<LanguageContent language="python">
```python {{ title: 'parallelization.py' }}
import os
import json
import asyncio
from langbase import Langbase
from dotenv import load_dotenv
load_dotenv()
langbase = Langbase(api_key=os.getenv('LANGBASE_API_KEY'))
# Agent configurations
agent_configs = {
"sentiment": {
"name": "email-sentiment-a",
"model": "openai:gpt-4o-mini",
"prompt": """
You are a helpful assistant that can analyze the sentiment of the email.
Only respond with the sentiment, either "positive", "negative" or "neutral".
Do not include any markdown formatting, code blocks, or backticks in your response.
The response should be a raw JSON object that can be directly parsed.
Example response:
{
"sentiment": "positive"
}
"""
},
"summary": {
"name": "email-summary-a",
"model": "openai:gpt-4o-mini",
"prompt": """
You are a helpful assistant that can summarize the email.
Only respond with the summary.
Do not include any markdown formatting, code blocks, or backticks in your response.
The response should be a raw JSON object that can be directly parsed.
Example response:
{
"summary": "The email is about a product that is not working."
}
"""
},
"decision_maker": {
"name": "email-decision-maker-a",
"model": "openai:gpt-4o-mini",
"prompt": """
You are a decision maker that analyzes and decides if the given email requires
a response or not.
Make sure to check if the email is spam or not. If the email is spam, then it
does not need a response.
If it requires a response, based on the email urgency, decide the response
date. Also define the response priority.
Use following keys and values accordingly
- respond: true or false
- category: spam or not spam
- priority: low, medium, high, urgent
Do not include any markdown formatting, code blocks, or backticks in your response.
The response should be a raw JSON object that can be directly parsed.
"""
}
}
def create_pipes():
"""Create all pipes."""
for key, config in agent_configs.items():
try:
langbase.pipes.create(
name=config["name"],
model=config["model"],
json=True,
upsert=True,
messages=[
{
"role": "system",
"content": config["prompt"]
}
]
)
print(f"✅ Created pipe: {config['name']}")
except Exception as e:
print(f"❌ Error creating pipe {config['name']}: {e}")
def email_sentiment_agent(email):
"""Analyze email sentiment."""
response = langbase.pipes.run(
name=agent_configs["sentiment"]["name"],
stream=False,
messages=[
{
"role": "user",
"content": email
}
]
)
try:
return json.loads(response["completion"])["sentiment"]
except (json.JSONDecodeError, KeyError):
return "neutral" # fallback
def email_summary_agent(email):
"""Summarize email."""
response = langbase.pipes.run(
name=agent_configs["summary"]["name"],
stream=False,
messages=[
{
"role": "user",
"content": email
}
]
)
try:
return json.loads(response["completion"])["summary"]
except (json.JSONDecodeError, KeyError):
return "Unable to summarize" # fallback
def email_decision_maker_agent(summary, sentiment):
"""Determine if a response is needed."""
response = langbase.pipes.run(
name=agent_configs["decision_maker"]["name"],
stream=False,
messages=[
{
"role": "user",
"content": f"Email summary: {summary}\nEmail sentiment: {sentiment}"
}
]
)
try:
return json.loads(response["completion"])
except json.JSONDecodeError:
return {"respond": True, "category": "not spam", "priority": "medium"} # fallback
def main(email_input):
try:
# Create pipes first
create_pipes()
# Process sentiment and summary in parallel (simulated with sequential calls)
print("🔍 Analyzing email sentiment and summary...")
email_sentiment = email_sentiment_agent(email_input)
email_summary = email_summary_agent(email_input)
print(f"Email Sentiment: {email_sentiment}")
print(f"Email Summary: {email_summary}")
# Aggregator based on the results
email_decision = email_decision_maker_agent(email_summary, email_sentiment)
print(f"Should respond: {email_decision.get('respond', 'unknown')}")
print(f"Category: {email_decision.get('category', 'unknown')}")
print(f"Priority: {email_decision.get('priority', 'unknown')}")
return email_decision
except Exception as error:
print(f"Error in main workflow: {error}")
if __name__ == '__main__':
email = """
Hi John,
I'm really disappointed with the service I received yesterday. The product
was faulty and customer support was unhelpful. How can I apply for a refund?
Thanks,
"""
main(email)
```
</LanguageContent>
</RunAgent>
---
## Agentic Orchestration-workers
<AgentDiagram
src="/docs/architecture/orchestration.png"
caption="Orchestration-workers architecture"
/>
The orchestrator-workers workflow has a main LLM (orchestrator) that breaks a task into smaller parts and assigns them to worker LLMs. The orchestrator then gathers their results to complete the task, making it useful for complex and unpredictable jobs.
<RunAgent api="/docs/api/orchestration"
title="Orchestration-workers Example"
explanation={`This code implements a sophisticated task orchestration system with dynamic subtask generation and parallel processing. Here's how it works:
1. Orchestrator Agent (Planning Phase):
- Takes a complex task as input
- Analyzes the task and breaks it down into smaller, manageable subtasks
- Returns both an analysis and a list of subtasks in JSON format
2. Worker Agents (Execution Phase):
- Multiple workers run in parallel using Promise.all()
- Each worker gets:
- The original task for context
- Their specific subtask to complete
- All workers use Gemini 2.5 Flash model
3. Synthesizer Agent (Integration Phase):
- Takes all the worker outputs
- Combines them into a cohesive final result
- Ensures the pieces flow together naturally
The example shows it being used to create a blog post about remote work, where it might:
- Break down the task into sections (productivity, work-life balance, environmental impact)
- Process each section in parallel
- Combine them into a cohesive blog post
What makes this interesting is its hierarchical approach to task management - using AI to both plan and execute tasks, while maintaining context throughout the process.`}
>
<LanguageContent language="typescript">
```ts {{ title: 'orchestration-worker.ts' }}
import dotenv from 'dotenv';
import { Langbase } from 'langbase';
dotenv.config();
const langbase = new Langbase({
apiKey: process.env.LANGBASE_API_KEY!
});
// Agent configurations
const agentConfigs = {
orchestrator: {
name: 'orchestrator',
model: 'google:gemini-2.5-flash',
prompt: `
You are an orchestrator agent. Analyze the user's task and break it into
smaller and distinct subtasks. Return your response in JSON format with:
- An analysis of the task extracted from the task. No extra steps like
proofreading, summarizing, etc.
- A list of subtasks, each with a "description" (what needs to be done).
Do not include any markdown formatting, code blocks, or backticks in your response.
The response should be a raw JSON object that can be directly parsed.
Example response:
{
"analysis": "The task is to describe the benefits and drawbacks of electric cars",
"subtasks": [
{ "description": "Write about the benefits of electric cars." },
{ "description": "Write about the drawbacks of electric cars." }
]
}
`
},
worker: {
name: 'worker-agent',
model: 'google:gemini-2.5-flash',
prompt: `
You are a worker agent working on a specific part of a larger task.
You are given a subtask and you need to complete it.
You are given the original task and the subtask.
You need to complete the subtask.
`
},
synthesizer: {
name: 'synthesizer-agent',
model: 'google:gemini-2.5-flash',
prompt: `You are an expert synthesizer agent. Combine the following results into a
cohesive final output.`
}
};
// Create all pipes
async function createPipes() {
await Promise.all(
Object.entries(agentConfigs).map(([key, config]) =>
langbase.pipes.create({
name: config.name,
model: config.model,
messages: [
{
role: 'system',
content: config.prompt
}
]
})
)
);
}
// Main orchestration workflow
async function orchestratorAgent(task: string) {
try {
// Create pipes first
await createPipes();
// Step 1: Use the orchestrator LLM to break down the task
const orchestrationResults = await langbase.pipes.run({
stream: false,
name: agentConfigs.orchestrator.name,
messages: [
{
role: 'user',
content: `Task: ${task}`
}
]
});
// Parse the orchestrator's JSON response
const { analysis, subtasks } = JSON.parse(
orchestrationResults.completion
);
console.log('Task Analysis:', analysis);
console.log('Generated Subtasks:', subtasks);
// Step 2: Process each subtask in parallel using worker LLMs
const workerAgentsResults = await Promise.all(
subtasks.map(async subtask => {
const workerAgentResult = await langbase.pipes.run({
stream: false,
name: agentConfigs.worker.name,
messages: [
{
role: 'user',
content: `
The original task is:
"${task}"
Your specific subtask is:
"${subtask.description}"
Provide a concise response for this subtask. Only respond with the
response for the subtask.
`
}
]
});
return { subtask, result: workerAgentResult.completion };
})
);
// Step 3: Synthesize all results into a final output
const synthesizerAgentInput = workerAgentsResults
.map(
workerResponse =>
`Subtask Description: ${workerResponse.subtask.description}\n
Result:\n${workerResponse.result}`
)
.join('\n\n');
const synthesizerAgentResult = await langbase.pipes.run({
stream: false,
name: agentConfigs.synthesizer.name,
messages: [
{
role: 'user',
content: `Combine the following results into a complete solution:\n
${synthesizerAgentInput}`
}
]
});
console.log(
'Final Synthesized Output:\n',
synthesizerAgentResult.completion
);
return synthesizerAgentResult.completion;
} catch (error) {
console.error('Error in orchestration workflow:', error);
throw error;
}
}
// Example usage
async function main() {
const task = `
Write a blog post about the benefits of remote work.
Include sections on productivity, work-life balance, and environmental impact.
`;
await orchestratorAgent(task);
}
main();
```
</LanguageContent>
<LanguageContent language="python">
```python {{ title: 'orchestration-worker.py' }}
import os
import json
from langbase import Langbase
from dotenv import load_dotenv
load_dotenv()
langbase = Langbase(api_key=os.getenv('LANGBASE_API_KEY'))
# Agent configurations
agent_configs = {
"orchestrator": {
"name": "orchestrator-aa",
"model": "openai:gpt-4o-mini",
"prompt": """
You are an orchestrator agent. Analyze the user's task and break it into
smaller and distinct subtasks. Return your response in JSON format with:
- An analysis of the task extracted from the task. No extra steps like
proofreading, summarizing, etc.
- A list of subtasks, each with a "description" (what needs to be done).
Do not include any markdown formatting, code blocks, or backticks in your response.
The response should be a raw JSON object that can be directly parsed.
Example response:
{
"analysis": "The task is to describe benefits and drawbacks of electric cars",
"subtasks": [
{ "description": "Write about the benefits of electric cars." },
{ "description": "Write about the drawbacks of electric cars." }
]
}
"""
},
"worker": {
"name": "worker-agent-aa",
"model": "openai:gpt-4o-mini",
"prompt": """
You are a worker agent working on a specific part of a larger task.
You are given a subtask and you need to complete it.
You are given the original task and the subtask.
You need to complete the subtask.
"""
},
"synthesizer": {
"name": "synthesizer-agent-aa",
"model": "openai:gpt-4o-mini",
"prompt": """You are an expert synthesizer agent. Combine the following results into a
cohesive final output."""
}
}
def create_pipes():
"""Create all pipes."""
for key, config in agent_configs.items():
try:
langbase.pipes.create(
name=config["name"],
model=config["model"],
json=True,
upsert=True,
messages=[
{
"role": "system",
"content": config["prompt"]
}
]
)
print(f"✅ Created pipe: {config['name']}")
except Exception as e:
print(f"❌ Error creating pipe {config['name']}: {e}")
def orchestrator_agent(task):
"""Main orchestration workflow."""
try:
# Create pipes first
create_pipes()
# Step 1: Use the orchestrator LLM to break down the task
orchestration_results = langbase.pipes.run(
stream=False,
name=agent_configs["orchestrator"]["name"],
messages=[
{
"role": "user",
"content": f"Task: {task}"
}
]
)
# Parse the orchestrator's JSON response
try:
orchestration_data = json.loads(orchestration_results["completion"])
analysis = orchestration_data["analysis"]
subtasks = orchestration_data["subtasks"]
except (json.JSONDecodeError, KeyError):
print("❌ Failed to parse orchestrator response, using fallback")
analysis = "Task breakdown analysis"
subtasks = [{"description": task}] # fallback to original task
print("Task Analysis:", analysis)
print("Generated Subtasks:", subtasks)
# Step 2: Process each subtask sequentially using worker LLMs
worker_agents_results = []
for subtask in subtasks:
worker_agent_result = langbase.pipes.run(
stream=False,
name=agent_configs["worker"]["name"],
messages=[
{
"role": "user",
"content": f"""
The original task is:
"{task}"
Your specific subtask is:
"{subtask['description']}"
Provide a concise response for this subtask. Only respond with the
response for the subtask.
"""
}
]
)
worker_agents_results.append({
"subtask": subtask,
"result": worker_agent_result["completion"]
})
# Step 3: Synthesize all results into a final output
synthesizer_agent_input = "\n\n".join([
f"Subtask Description: {worker_response['subtask']['description']}\n"
f"Result:\n{worker_response['result']}"
for worker_response in worker_agents_results
])
synthesizer_agent_result = langbase.pipes.run(
stream=False,
name=agent_configs["synthesizer"]["name"],
messages=[
{
"role": "user",
"content": f"Combine the following results into a complete solution:\n{synthesizer_agent_input}"
}
]
)
print("Final Synthesized Output:\n", synthesizer_agent_result["completion"])
return synthesizer_agent_result["completion"]
except Exception as error:
print(f"Error in orchestration workflow: {error}")
raise error
def main():
task = """
Write a blog post about the benefits of remote work.
Include sections on productivity, work-life balance, and environmental impact.
"""
orchestrator_agent(task)
if __name__ == '__main__':
main()
```
</LanguageContent>
</RunAgent>
---
## Evaluator-optimizer
<AgentDiagram
src="/docs/architecture/evaluator.png"
caption="Evaluator-optimizer architecture"
/>
The evaluator-optimizer workflow uses one LLM to generate a response and another to review and improve it. This cycle repeats until the result meets the desired quality, making it useful for tasks that benefit from iterative refinement.
<RunAgent
api="/docs/api/evaluator"
title="Evaluator-Optimizer Example"
explanation={`This code implements an iterative refinement system with a feedback loop between two AI agents to optimize content. Here's how it works:
1. Generator Agent:
- Creates or refines product descriptions
- Takes into account the original task and any previous feedback
- Uses each iteration to improve the content
2. Evaluator Agent:
- Reviews the generated content
- Either accepts it with "ACCEPTED" or provides specific feedback
- Acts as a quality control gate
3. Feedback Loop Process:
- Limited to 5 iterations to prevent infinite loops
- In each iteration:
- Generator creates/refines content based on feedback
- Evaluator reviews and either accepts or provides new feedback
- Loop continues until either:
- Evaluator says "ACCEPTED"
- Max iterations (5) are reached
The example shows it being used to create a product description for an eco-friendly water bottle, where it would iteratively refine the description until it meets quality standards.
What makes this interesting is its self-improving approach - using AI to both generate and evaluate content, creating a system that can progressively refine its output based on structured feedback.`}
>
<LanguageContent language="typescript">
```ts {{ title: 'evaluator-optimizer.ts' }}
import dotenv from 'dotenv';
import { Langbase } from 'langbase';
dotenv.config();
const langbase = new Langbase({
apiKey: process.env.LANGBASE_API_KEY!
});
// Agent configurations
const agentConfigs = {
generator: {
name: 'generator-agent',
model: 'google:gemini-2.5-flash',
prompt: `
You are a skilled assistant tasked with creating or improving a product description.
Your goal is to produce a concise, engaging, and informative description based on
the task and feedback provided.
`
},
evaluator: {
name: 'evaluator-agent',
model: 'google:gemini-2.5-flash',
prompt: `
You are an evaluator agent tasked with reviewing a product description.
If the description matches the requirements and needs no further changes, respond just with "ACCEPTED" and nothing else.
ONLY suggest changes if it is not ACCEPTED.
If not accepted, provide constructive feedback on how to improve it based on the original task requirements.
`
}
};
// Create all pipes
async function createPipes() {
await Promise.all(
Object.entries(agentConfigs).map(([key, config]) =>
langbase.pipes.create({
name: config.name,
model: config.model,
messages: [
{
role: 'system',
content: config.prompt
}
]
})
)
);
}
// Main evaluator-optimizer workflow
async function evaluatorOptimizerWorkflow(task: string) {
try {
// Create pipes first
await createPipes();
let solution = ''; // The solution being refined
let feedback = ''; // Feedback from the evaluator
let iteration = 0;
const maxIterations = 5; // Limit to prevent infinite loops
while (iteration < maxIterations) {
console.log(`\n--- Iteration ${iteration + 1} ---`);
// Step 1: Generator creates or refines the solution
const generatorResponse = await langbase.pipes.run({
stream: false,
name: agentConfigs.generator.name,
messages: [
{
role: 'user',
content: `
Task: ${task}
Previous Feedback (if any): ${feedback}
Create or refine the product description accordingly.
`
}
]
});
solution = generatorResponse.completion;
console.log('Generated Solution:', solution);
// Step 2: Evaluator provides feedback
const evaluatorResponse = await langbase.pipes.run({
stream: false,
name: agentConfigs.evaluator.name,
messages: [
{
role: 'user',
content: `
Original requirements:
"${task}"
Current description:
"${solution}"
Please evaluate it and provide feedback or indicate if it is acceptable.
`
}
]
});
feedback = evaluatorResponse.completion.trim();
console.log('Evaluator Feedback:', feedback);
// Step 3: Check if the solution is accepted
if (feedback.toUpperCase() === 'ACCEPTED') {
console.log('\nFinal Solution Accepted:', solution);
return solution;
}
iteration++;
}
console.log('\nMax iterations reached. Final Solution:', solution);
return solution;
} catch (error) {
console.error('Error in evaluator-optimizer workflow:', error);
throw error;
}
}
// Example usage
async function main() {
const task = `
Write a product description for an eco-friendly water bottle.
The target audience is environmentally conscious millennials.
Key features include: plastic-free materials, insulated design,
and a lifetime warranty.
`;
await evaluatorOptimizerWorkflow(task);
}
main();
```
</LanguageContent>
<LanguageContent language="python">
```python {{ title: 'evaluator-optimizer.py' }}
import os
from langbase import Langbase
from dotenv import load_dotenv
load_dotenv()
langbase = Langbase(api_key=os.getenv('LANGBASE_API_KEY'))
# Agent configurations
agent_configs = {
"generator": {
"name": "generator-agent-aa",
"model": "openai:gpt-4o-mini",
"prompt": """
You are a skilled assistant tasked with creating or improving a product description.
Your goal is to produce a concise, engaging, and informative description based on
the task and feedback provided.
"""
},
"evaluator": {
"name": "evaluator-agent-aa",
"model": "openai:gpt-4o-mini",
"prompt": """
You are an evaluator agent tasked with reviewing a product description.
If the description matches the requirements and needs no further changes, respond just with "ACCEPTED" and nothing else.
ONLY suggest changes if it is not ACCEPTED.
If not accepted, provide constructive feedback on how to improve it based on the original task requirements.
"""
}
}
def create_pipes():
"""Create all pipes."""
for key, config in agent_configs.items():
try:
langbase.pipes.create(
name=config["name"],
model=config["model"],
upsert=True,
messages=[
{
"role": "system",
"content": config["prompt"]
}
]
)
print(f"✅ Created pipe: {config['name']}")
except Exception as e:
print(f"❌ Error creating pipe {config['name']}: {e}")
def evaluator_optimizer_workflow(task):
"""Main evaluator-optimizer workflow."""
try:
# Create pipes first
create_pipes()
solution = "" # The solution being refined
feedback = "" # Feedback from the evaluator
iteration = 0
max_iterations = 5 # Limit to prevent infinite loops
while iteration < max_iterations:
print(f"\n--- Iteration {iteration + 1} ---")
# Step 1: Generator creates or refines the solution
generator_response = langbase.pipes.run(
stream=False,
name=agent_configs["generator"]["name"],
messages=[
{
"role": "user",
"content": f"""
Task: {task}
Previous Feedback (if any): {feedback}
Create or refine the product description accordingly.
"""
}
]
)
solution = generator_response["completion"]
print("Generated Solution:", solution)
# Step 2: Evaluator provides feedback
evaluator_response = langbase.pipes.run(
stream=False,
name=agent_configs["evaluator"]["name"],
messages=[
{
"role": "user",
"content": f"""
Original requirements:
"{task}"
Current description:
"{solution}"
Please evaluate it and provide feedback or indicate if it is acceptable.
"""
}
]
)
feedback = evaluator_response["completion"].strip()
print("Evaluator Feedback:", feedback)
# Step 3: Check if solution is accepted
if feedback.upper() == "ACCEPTED":
print("\nFinal Solution Accepted:", solution)
return solution
iteration += 1
print("\nMax iterations reached. Final Solution:", solution)
return solution
except Exception as error:
print(f"Error in evaluator-optimizer workflow: {error}")
raise error
def main():
task = """
Write a product description for an eco-friendly water bottle.
The target audience is environmentally conscious millennials.
Key features include: plastic-free materials, insulated design,
and a lifetime warranty.
"""
evaluator_optimizer_workflow(task)
if __name__ == '__main__':
main()
```
</LanguageContent>
</RunAgent>
---
## Augmented LLM with Tools
<AgentDiagram
src="/docs/architecture/pipe-tools.jpg"
caption="Pipe architecture"
/>
Langbase pipe agent is the fundamental component of an agentic system. It is a Large Language Model (LLM) enhanced with augmentations such as retrieval, tools, and memory. Our current models can actively utilize these capabilities—generating their own search queries, selecting appropriate tools, and determining what information to retain using memory.
<RunAgent api="/docs/api/pipe"
title="Pipe Example"
explanation={`This code demonstrates how to create an AI agent that can interact with external tools, specifically a weather service. Here's the breakdown:
1. Agent Setup:
- Creates a specialized weather pipe agent
- Configures it with a system message defining its role for weather queries
2. Tool Definition and Implementation:
- Defines a weather tool schema with:
- Required parameters (location)
- Optional parameters (temperature unit: Celsius/Fahrenheit)
- Implements a simple mock weather function that returns hardcoded weather data
3. Execution Flow:
- Takes a user query about the weather
- Processes it through the AI agent
- If the agent decides to use tools:
1. Extracts tool calls from the response
2. Executes each requested tool function
3. Sends tool results back to the agent
4. Gets final response incorporating tool data
- If no tools needed:
- Returns direct completion from the agent
4. Threading Support:
- Maintains conversation context through threadId
- Allows for multi-turn interactions with the agent
What makes this interesting is its handling of tool calls - it creates a complete loop where the AI can request information from external tools and incorporate that data into its responses.`}
>
<LanguageContent language="typescript">
```ts
import dotenv from 'dotenv';
import { Langbase, getToolsFromRun, Message, Tools } from "langbase";
dotenv.config();
const langbase = new Langbase({
apiKey: process.env.LANGBASE_API_KEY!,
});
async function main() {
// Create a pipe agent
const weatherPipeAgent = await langbase.pipes.create({
name: "langbase-weather-pipe-agent",
model: "google:gemini-2.5-flash",
messages: [
{
role: "system",
content: 'You are a helpful assistant that can get the weather of a given location.',
}
]
});
// Define a weather tool
const weatherTool = {
"type": "function",
"function": {
"name": "get_current_weather",
"description": "Get the current weather of a given location",
"parameters": {
"type": "object",
"required": [
"location"
],
"properties": {
"unit": {
"enum": [
"celsius",
"fahrenheit"
],
"type": "string"
},
"location": {
"type": "string",
"description": "The city and state, e.g., San Francisco, CA"
}
}
}
}
}
function get_current_weather() {
return "It's 70 degrees and sunny in SF.";
}
const tools = {
get_current_weather,
};
// Run the pipe agent with the tool
const response = await langbase.pipes.run({
name: weatherPipeAgent.name,
messages: [
{
role: "user",
content: 'What is the weather in San Francisco?',
}
],
tools: [weatherTool],
stream: false,
});
const toolsFromRun = await getToolsFromRun(response);
const hasToolCalls = toolsFromRun.length > 0;
if (hasToolCalls) {
const messages: Message[] = [];
// call all the functions in the toolCalls array
toolsFromRun.forEach(async toolCall => {
const toolName = toolCall.function.name;
const toolParameters = JSON.parse(toolCall.function.arguments);
const toolFunction = tools[toolName];
const toolResult = toolFunction(toolParameters); // Call the tool function with the tool parameters
messages.push({
tool_call_id: toolCall.id,
role: 'tool',
name: toolName,
content: toolResult,
});
});
const { completion } = await langbase.pipes.run({
messages,
name: weatherPipeAgent.name,
threadId: response.threadId,
stream: false,
});
console.log(completion);
} else {
// No tool calls, just return the completion
console.log(response.completion);
}
}
main();
```
</LanguageContent>
<LanguageContent language="python">
```python
import os
import json
from langbase import Langbase
from dotenv import load_dotenv
load_dotenv()
langbase = Langbase(api_key=os.getenv('LANGBASE_API_KEY'))
def main():
# Create a pipe agent
weather_pipe_agent = langbase.pipes.create(
name="langbase-weather-pipe-agent",
model="openai:gpt-4o-mini",
upsert=True,
messages=[
{
"role": "system",
"content": "You are a helpful assistant that can get the weather of a given location.",
}
],
stream=False,
)
# Define a weather tool
weather_tool = {
"type": "function",
"function": {
"name": "get_current_weather",
"description": "Get the current weather of a given location",
"parameters": {
"type": "object",
"required": ["location"],
"properties": {
"unit": {
"enum": ["celsius", "fahrenheit"],
"type": "string"
},
"location": {
"type": "string",
"description": "The city and state, e.g. San Francisco, CA"
}
}
}
}
}
def get_current_weather(params=None):
return "It's 70 degrees and sunny in SF."
tools = {
"get_current_weather": get_current_weather,
}
# Run the pipe agent with the tool
response = langbase.pipes.run(
name=weather_pipe_agent["name"],
messages=[
{
"role": "user",
"content": "What is the weather in San Francisco?",
}
],
tools=[weather_tool]
)
# Extract tool calls from response
tool_calls = get_tools_from_run(response)
has_tool_calls = len(tool_calls) > 0
if has_tool_calls:
print(f"🔧 Found {len(tool_calls)} tool call(s)")
# Get the assistant message with tool calls from the response
assistant_message = response['choices'][0]['message']
tool_results = []
# Call all the functions in the tool_calls array
for i, tool_call in enumerate(tool_calls, 1):
tool_name = tool_call["function"]["name"]
tool_parameters = json.loads(tool_call["function"]["arguments"])
tool_function = tools[tool_name]
print(f"\n📞 Tool Call #{i}:")
print(f" Function: {tool_name}")
print(f" Parameters: {tool_parameters}")
# Call the tool function with the tool parameters
tool_result = tool_function(tool_parameters)
print(f" Result: {tool_result}")
tool_results.append({
"tool_call_id": tool_call["id"],
"role": "tool",
"name": tool_name,
"content": tool_result,
})
# Prepare the complete conversation: original user message + assistant message with tool_calls + tool results
messages_with_tools = [
{
"role": "user",
"content": "What is the weather in San Francisco?"
},
assistant_message, # This contains the tool_calls
*tool_results # Add all tool results
]
# Run the pipe again with complete conversation history
print(f"\n🤖 Getting final response assert {len(tool_results)} tool result(s)...")
final_response = langbase.pipes.run(
messages=messages_with_tools,
name=weather_pipe_agent["name"],
thread_id=response["threadId"],
stream=False,
)
print(f"\n🌤️ Final Answer: {final_response['completion']}")
else:
# No tool calls, just return the completion
print(response["completion"])
def get_tools_from_run(response):
"""Extract tool calls from the response."""
# Handle different possible response structures
if "choices" in response and len(response["choices"]) > 0:
message = response["choices"][0].get("message", {})
return message.get("tool_calls", [])
return []
if __name__ == '__main__':
main()
```
</LanguageContent>
</RunAgent>
## Memory Agent
<AgentDiagram
src="/docs/architecture/memory.jpg"
caption="Memory Agent Architecture"
height={1600}
width={1600}
/>
Langbase [memory agents](https://langbase.com/docs/memory) represent the next frontier in semantic retrieval-augmented generation (RAG) as a serverless and infinitely scalable API designed for developers. 30-50x less expensive than the competition, with industry-leading accuracy in advanced agentic routing, retrieval, and more.
<RunAgent api="/docs/api/memory"
title="Memory Agent Example"
explanation={`
This code implements a Retrieval-Augmented Generation (RAG) system using Langbase. It creates an AI assistant that can answer questions about company policies by referencing an employee handbook. Here's the breakdown:
1. Memory Creation:
- Establishes a dedicated memory storage space named "employee-handbook-memory"
- This serves as the knowledge base for the AI assistant
2. Document Acquisition:
- Downloads an employee handbook from a GitHub repository
- Saves it locally as a text file for processing
3. Knowledge Ingestion:
- Uploads the handbook to the previously created memory
- The document is now available for the AI to reference when answering questions
4. AI Assistant Setup:
- Creates a specialized pipe named "employee-handbook-pipe"
- Links it to the memory containing the employee handbook
- Enables the AI to retrieve relevant information when answering questions
5. Question Answering:
- Asks a specific question about remote work policies
- The AI searches the handbook in memory for relevant information
- Returns an answer based on the actual company policies documented in the handbook
This demonstrates a practical application of RAG - enhancing an AI assistant with specific knowledge from documents, allowing it to provide accurate, document-grounded responses rather than generating answers from its general training.`}
>
<LanguageContent language="typescript">
<CodeGroup title="Memory Agent Example" exampleTitle="Memory Agent Example">
```ts {{ title: 'index.ts' }}
import { Langbase } from "langbase";
import dotenv from "dotenv";
import downloadFile from "./download-file";
dotenv.config();
const langbase = new Langbase({
apiKey: process.env.LANGBASE_API_KEY!,
});
async function main() {
// Step 1: Create a memory
const memory = await langbase.memories.create({
name: "employee-handbook-memory",
description: "Memory for employee handbook",
});
console.log("Memory created:", memory.name);
// Step 2: Download the employee handbook file
const fileUrl =
"https://raw.githubusercontent.com/LangbaseInc/langbase-examples/main/assets/employee-handbook.txt";
const fileName = "employee-handbook.txt";
const fileContent = await downloadFile(fileUrl);
// Step 3: Upload the employee handbook to memory
await langbase.memories.documents.upload({
memoryName: memory.name,
contentType: "text/plain",
documentName: fileName,
document: fileContent,
});
console.log("Employee handbook uploaded to memory");
// Step 4: Create a pipe
const pipe = await langbase.pipes.create({
name: "employee-handbook-pipe",
model: "google:gemini-2.5-flash",
description: "Pipe for querying employee handbook",
memory: [{ name: "employee-handbook-memory" }],
});
console.log("Pipe created:", pipe.name);
// Step 5: Ask a question
const question = "What is the company policy on remote work?";
const { completion } = await langbase.pipes.run({
name: "employee-handbook-pipe",
messages: [{ role: "user", content: question }],
stream: false,
});
console.log("Question:", question);
console.log("Answer:", completion);
}
main().catch(console.error);
```
```ts {{ title: 'download-file.ts' }}
import * as https from "https";
const downloadFile = async (fileUrl: string): Promise<Buffer> => {
return new Promise<Buffer>((resolve, reject) => {
https.get(fileUrl, (response) => {
// Check for redirect or error status codes
if (response.statusCode && (response.statusCode < 200 || response.statusCode >= 300)) {
reject(new Error(`Failed to download: ${response.statusCode}`));
return;
}
const chunks: Buffer[] = [];
response.on("data", (chunk) => {
chunks.push(chunk);
});
response.on("end", () => {
const fileBuffer = Buffer.concat(chunks);
console.log(`File downloaded successfully (${fileBuffer.length} bytes)`);
resolve(fileBuffer);
});
}).on("error", (err) => {
console.error("Error downloading file:", err);
reject(err);
});
});
};
export default downloadFile;
```
</CodeGroup>
</LanguageContent>
<LanguageContent language="python">
<CodeGroup title="Memory Agent Example" exampleTitle="Memory Agent Example">
```python {{ title: 'index.py' }}
import os
import requests
from langbase import Langbase
from dotenv import load_dotenv
load_dotenv()
langbase = Langbase(api_key=os.getenv('LANGBASE_API_KEY'))
def download_file(url):
"""Download file content from URL."""
try:
print(f"📥 Downloading from: {url}")
response = requests.get(url)
response.raise_for_status()
return response.content
except requests.RequestException as e:
print(f"❌ Error downloading file: {e}")
return None
def main():
print("📚 Creating employee handbook memory...")
# Step 1: Create a memory
memory = langbase.memories.create(
name="employee-handbook-memory",
description="Memory for employee handbook",
)
print(f"✅ Memory created: {memory['name']}")
# Step 2: Download the employee handbook file
file_url = "https://raw.githubusercontent.com/LangbaseInc/langbase-examples/main/assets/employee-handbook.txt"
file_name = "employee-handbook.txt"
file_content = download_file(file_url)
if not file_content:
print("❌ Failed to download file")
return
print(f"✅ Downloaded {len(file_content)} bytes")
# Step 3: Upload the employee handbook to memory
print("📤 Uploading employee handbook to memory...")
langbase.memories.documents.upload(
memory_name=memory["name"],
content_type="text/plain",
document_name=file_name,
document=file_content,
)
print("✅ Employee handbook uploaded to memory")
# Step 4: Create a pipe
print("🔧 Creating pipe with memory...")
pipe = langbase.pipes.create(
name="employee-handbook-pipe",
model="google:gemini-2.5-flash",
description="Pipe for querying employee handbook",
memory=[{"name": "employee-handbook-memory"}],
upsert=True
)
print(f"✅ Pipe created: {pipe['name']}")
# Step 5: Ask a question
question = "What is the company policy on remote work?"
print(f"\n❓ Question: {question}")
print("🤔 Querying employee handbook...")
response = langbase.pipes.run(
name="employee-handbook-pipe",
messages=[{"role": "user", "content": question}],
stream=False,
)
print(f"\n💡 Answer: {response['completion']}")
if __name__ == '__main__':
main()
```
```python {{ title: 'download-file.py' }}
import requests
from typing import Optional
def download_file(file_url: str) -> Optional[bytes]:
try:
response = requests.get(file_url, stream=True)
# Check for redirect or error status codes
if response.status_code < 200 or response.status_code >= 300:
raise Exception(f"Failed to download: {response.status_code}")
chunks = []
# Download in chunks (similar to Node.js streaming)
for chunk in response.iter_content(chunk_size=8192):
if chunk: # Filter out keep-alive chunks
chunks.append(chunk)
# Concatenate all chunks
file_buffer = b''.join(chunks)
print(f"File downloaded successfully ({len(file_buffer)} bytes)")
return file_buffer
except requests.RequestException as err:
print(f"Error downloading file: {err}")
raise err
except Exception as err:
print(f"Error downloading file: {err}")
raise err
if __name__ == "__main__":
# Example usage
url = "https://raw.githubusercontent.com/LangbaseInc/langbase-examples/main/assets/employee-handbook.txt"
content = download_file(url)
if content:
print(f"Downloaded {len(content)} bytes")
```
</CodeGroup>
</LanguageContent>
</RunAgent>
</LanguageProvider>
---
</content>
</doc>
<doc>
<metadata>
<title>Agent Run Examples</title>
<url>https://langbase.com/docs/examples/agent/</url>
</metadata>
<content>
import { ExampleAccordion } from '@/components/mdx/example-card';
import { generateMetadata } from '@/lib/generate-metadata';
# Agent Run Examples
Here are some examples of how to use the Langbase Agent Primitive. These examples are designed to help you get started with the Langbase runtime agent `agent.run()`.
<ExampleAccordion type="Agent" />
---
</content>
</doc>
<doc>
<metadata>
<title>Page</title>
<url>https://langbase.com/docs/embed/platform/</url>
</metadata>
<content>
import { generateMetadata } from '@/lib/generate-metadata';
## Platform
Limits and pricing for Embed primitive on the Langbase Platform are as follows:
1. **[Limits](/embed/platform/limits)**: Rate and usage limits.
2. **[Pricing](/embed/platform/pricing])**: Pricing details for the Agent primitive.
</content>
</doc>
<doc>
<metadata>
<title>Command Limits</title>
<url>https://langbase.com/docs/command/limits/</url>
</metadata>
<content>
import { generateMetadata } from '@/lib/generate-metadata';
# Command Limits
In order to ensure stability, speed, and prevent misuse, we have set certain limits on how much a user or organization can use [Command](https://Command.new).
The following limits are enforced on Command based on your subscribed plan.
---
## Message Limits
Message limits are enforced every time Command is prompted to create agents.
Following are the monthly messsage credit limits on Command:
| Plan | Message Credits |
|------------|---------------------------------------------------|
| Hobby | 20 |
| Pro | Based on credits selected `100/200/500/1000/4000` |
| Teams | Based on credits selected `100/200/500/1000/4000` |
| Enterprise | [Contact Us][contact-us] |
<Note title="What is a message credit and how is it counted in message limits?">
Each time you prompt Command, it intelligently sends 1–3 messages to create your agent, its UI, workflow, and more. Every message generated from your prompt is counted as one message credit.
**Example 1**
You send the first prompt to Command to create an Agent. It results in 3 messages to create the agent, its UI, flow, and more. We count it as 3 messages.
**Example 2**
You send a regeneration request in Agent app. It results in 1 message to create the agent. We count it as 1 message.
</Note>
---
## Deployment Limits
Deployment limits are enforced every time you deploy an agent on Command.
Following are the monthly deployment limits on Command:
| Plan | Deployments |
|------------|---------------------------------------------------|
| Hobby | 10 |
| Pro | Based on credits selected `100/200/500/1000/4000` |
| Teams | Based on credits selected `100/200/500/1000/4000` |
| Enterprise | [Contact Us][contact-us] |
---
## Deployed Agent Limits
Agents built with Command are deployed on Langbase. As such, there are some platform limits. These are followed by both the agent and agent app, regardless of the pricing plan.
Following are the deployed agent limits on Command:
| Type of Limit | Limit |
|----------------|---------------------------------------------------|
| CPU time | 10 ms |
| Workflow Code | JavaScript Runtime |
**CPU Time**: This refers to the execution time of your agent's code.
**Workflow Code**: This refers to the code that the platform can execute. Agents can only run JavaScript functions and libraries.
---
### About Limits
- If you exceed the usage limit, you will receive an error message indicating that you have exceeded your monthly message limit. You can either wait until the next month for the limit to reset or upgrade your plan to increase your limits.
- Usage limits are applied on a per-user or per-organization basis. For organizations, all runs made by the organization are collectively restricted within a single limit window.
[contact-us]: mailto:support@langbase.com
---
</content>
</doc>
<doc>
<metadata>
<title>Build Context-Aware Serverless AI Agents with Langbase</title>
<url>https://langbase.com/docs/courses/build-serverless-ai-agents-with-langbase/</url>
</metadata>
<content>
import { generateMetadata } from '@/lib/generate-metadata';
# Build Context-Aware Serverless AI Agents with Langbase
A hands-on free video course that doesn’t just talk about what AI agents are, but shows how to actually build, deploy, and scale with Langbase.
<CTAButtons
primary={{ href: 'https://scrimba.com/build-serverless-ai-agents-with-langbase-c0cg73hgmh', text: 'Build Context-Aware Serverless AI Agents with Langbase' }}
secondary={{ href: 'https://scrimba.com/build-serverless-ai-agents-with-langbase-c0cg73hgmh/~03uk', text: 'Start Lesson #1' }}
/>
In this course you’ll learn the following:
- How to build serverless AI agents using Langbase Pipes, Memory, Workflows, etc.
- How to make agents context-aware and connect them to real data
- How to deploy scalable, production-grade agents — without frameworks
## Course Chapters
1. [Intro to Building Serverless AI Agents](https://scrimba.com/build-serverless-ai-agents-with-langbase-c0cg73hgmh/~03uk)
2. [Core Concepts](https://scrimba.com/build-serverless-ai-agents-with-langbase-c0cg73hgmh/~06cd)
3. [Setting Up Environment Variables](https://scrimba.com/build-serverless-ai-agents-with-langbase-c0cg73hgmh/~0g5)
4. [Create a Memory with Langbase SDK](https://scrimba.com/build-serverless-ai-agents-with-langbase-c0cg73hgmh/~0235)
5. [Upload Documents to AI Memory](https://scrimba.com/build-serverless-ai-agents-with-langbase-c0cg73hgmh/~0xlj)
6. [Memory Agents on Langbase](https://scrimba.com/build-serverless-ai-agents-with-langbase-c0cg73hgmh/~02nq)
7. [Perform RAG Retrieval](https://scrimba.com/build-serverless-ai-agents-with-langbase-c0cg73hgmh/~02pb)
8. [Create an AI Agent Pipe](https://scrimba.com/build-serverless-ai-agents-with-langbase-c0cg73hgmh/~0xmz)
9. [Generate RAG Responses](https://scrimba.com/build-serverless-ai-agents-with-langbase-c0cg73hgmh/~05qr)
10. [AI Primitives for Context Engineering](https://scrimba.com/build-serverless-ai-agents-with-langbase-c0cg73hgmh/~03xq)
11. [Vibe Coding AI Agents with Command.new](https://scrimba.com/build-serverless-ai-agents-with-langbase-c0cg73hgmh/~02lf)
</content>
</doc>
<doc>
<metadata>
<title>Page</title>
<url>https://langbase.com/docs/chunker/platform/</url>
</metadata>
<content>
import { generateMetadata } from '@/lib/generate-metadata';
## Platform
Limits and pricing for Chunker primitive on the Langbase Platform are as follows:
1. **[Limits](/chunker/platform/limits)**: Rate and usage limits.
2. **[Pricing](/chunker/platform/pricing)**: Pricing details for the Chunker primitive.
</content>
</doc>
<doc>
<metadata>
<title>Tools API <span className="text-xl font-mono text-muted-foreground/70">v1</span></title>
<url>https://langbase.com/docs/api-reference/tools/</url>
</metadata>
<content>
import { generateMetadata } from '@/lib/generate-metadata';
# Tools API <span className="text-xl font-mono text-muted-foreground/70">v1</span>
The Tools API is a collection of endpoints that allow you to interact with various services.
- [Crawl](/api-reference/tools/crawl)
- [Web Search](/api-reference/tools/web-search)
---
</content>
</doc>
<doc>
<metadata>
<title>Threads API <span className="text-xl font-mono text-muted-foreground/70">v1</span></title>
<url>https://langbase.com/docs/api-reference/threads/</url>
</metadata>
<content>
import { generateMetadata } from '@/lib/generate-metadata';
# Threads API <span className="text-xl font-mono text-muted-foreground/70">v1</span>
Use the Threads API to manage conversation threads. Threads help you organize and maintain conversation history, making it easier to build conversational applications.
- [Create Thread](/api-reference/threads/create)
- [Update Thread](/api-reference/threads/update)
- [Get Thread](/api-reference/threads/get)
- [Delete Thread](/api-reference/threads/delete)
- [Append Messages](/api-reference/threads/append-messages)
- [List Messages](/api-reference/threads/list-messages)
---
</content>
</doc>
<doc>
<metadata>
<title>Pipe API</title>
<url>https://langbase.com/docs/api-reference/pipe/</url>
</metadata>
<content>
import { generateMetadata } from '@/lib/generate-metadata';
# Pipe API
Use the Pipe API to manage the pipes in your Langbase account. Create, update, list, and run AI Pipes
- [Run pipe](/api-reference/pipe/run) <span className="text-xs font-mono text-muted-foreground/70" >(NEW)</span>
- [Create pipe](/api-reference/pipe/create)
- [Update pipe](/api-reference/pipe/update)
- [List pipes](/api-reference/pipe/list)
- [Deprecated endpoints](/api-reference/deprecated)
---
</content>
</doc>
<doc>
<metadata>
<title>Parser API <span className="text-xl font-mono text-muted-foreground/70">v1</span></title>
<url>https://langbase.com/docs/api-reference/parser/</url>
</metadata>
<content>
import { generateMetadata } from '@/lib/generate-metadata';
# Parser API <span className="text-xl font-mono text-muted-foreground/70">v1</span>
The `parser` API endpoint allows you to extract text content from various document formats. This is particularly useful when you need to process documents before using them in your AI applications.
---
## Limitations
- Maximum file size: **10 MB**
- Supported file formats:
- Text files (`.txt`)
- Markdown (`.md`)
- PDF documents (`.pdf`)
- CSV files (`.csv`)
- Excel spreadsheets (`.xlsx`, `.xls`)
- Common programming language files (`.js`, `.py`, `.java`, etc.)
---
## Generate a User/Org API key
You will need to generate an API key to authenticate your requests. For more information, visit the [User/Org API key documentation](/api-reference/api-keys).
<Spoiler title="Get your Langbase API key: User or Org">
You can generate API keys from the [Langbase Studio](https://studio.langbase.com) by following these steps:
1. Switch to your user or org account.
2. From the sidebar, click on the `API keys`.
3. From here you can create a new API key or manage existing ones.
For more details, follow the [Langbase API keys](/api-reference/api-keys) documentation.
</Spoiler>
---
## Parse documents {{ tag: 'POST', label: '/v1/parser' }}
<Row>
<Col>
Parse documents by sending them to the parser API endpoint.
### Headers
<Properties>
<Property name="Content-Type" type="string" required="true">
Request content type. Needs to be `multipart/form-data`.
</Property>
<Property name="Authorization" type="string" required="true">
Replace `<YOUR_API_KEY>` with your user/org API key.
</Property>
</Properties>
---
### Request Body
<Properties>
<Property name="document" type="File" required="true">
The input document to be parsed. Must be one of the supported file formats and under **10 MB** in size.
</Property>
<Property name="documentName" type="string" required="true">
The name of the document including its extension (e.g., `document.pdf`).
</Property>
<Property name="contentType" type="string" required="true">
The MIME type of the document. Supported MIME types based on file format:
- Text file: `text/plain`
- Markdown: `text/markdown`
- PDF documents: `application/pdf`
- CSV files: `text/csv`
- Excel spreadsheets:
- `application/vnd.openxmlformats-officedocument.spreadsheetml.sheet`
- `application/vnd.ms-excel`
- Programming language files: `text/plain`
</Property>
</Properties>
</Col>
<Col sticky>
## Usage example
<CodeGroup exampleTitle="Install the SDK" title="Install the SDK">
```bash {{ title: 'npm' }}
npm i langbase
```
```bash {{ title: 'pnpm' }}
pnpm i langbase
```
```bash {{ title: 'yarn' }}
yarn add langbase
```
</CodeGroup>
### Environment variables
```bash {{ title: '.env file' }}
LANGBASE_API_KEY="<YOUR_API_KEY>"
```
### Parse a document
<div className="mb-8"/>
<CodeGroup exampleTitle="Parse document" title="Parse document" tag="POST" label="/v1/parser">
```bash {{ title: 'cURL' }}
curl https://api.langbase.com/v1/parser \
-X POST \
-H 'Authorization: Bearer <YOUR_API_KEY>' \
-F 'document=@/path/to/document.pdf' \
-F 'documentName=document.pdf' \
-F 'contentType=application/pdf'
```
```ts {{ title: 'Node.js' }}
import { Langbase } from 'langbase';
const langbase = new Langbase({
apiKey: process.env.LANGBASE_API_KEY!,
});
async function main() {
const document = new File(['Your document content'], 'document.txt', {
type: 'text/plain'
});
const result = await langbase.parser({
document: document,
documentName: 'document.txt',
contentType: 'text/plain'
});
console.log('Parsed content:', result);
}
main();
```
```python
import requests
def parse_document():
url = 'https://api.langbase.com/v1/parser'
api_key = '<YOUR_API_KEY>'
headers = {
'Authorization': f'Bearer {api_key}'
}
with open('document.pdf', 'rb') as f:
files = {
'document': f,
}
data = {
'documentName': 'document.pdf',
'contentType': 'application/pdf'
}
response = requests.post(
url,
headers=headers,
files=files,
data=data
)
parsed_content = response.json()
return parsed_content
```
</CodeGroup>
</Col>
</Row>
---
<Row>
<Col>
### Response
<Properties>
<Property name="Response" type="ParserResponse">
The response is a JSON object with the following structure:
```ts {{title: 'Parser API Response'}}
interface ParserResponse {
documentName: string;
content: string;
}
```
</Property>
<Property name="documentName" type="string">
The name of the parsed document.
</Property>
<Property name="content" type="string">
The extracted text content from the document.
</Property>
</Properties>
</Col>
<Col sticky>
```json {{ title: 'API Response' }}
{
"documentName": "document.pdf",
"content": "Extracted text content from the document..."
}
```
</Col>
</Row>
---
</content>
</doc>
<doc>
<metadata>
<title>Migration Guide from Langbase beta API to v1</title>
<url>https://langbase.com/docs/api-reference/migrate-to-api-v1/</url>
</metadata>
<content>
import { generateMetadata } from '@/lib/generate-metadata';
# Migration Guide from Langbase beta API to v1
---
This guide will help you migrate from the Langbase `beta` API to the `v1` API. The new API introduces simplified request endpoints and a streamlined body structure.
---
<Warn sub="Deprecation Notice">
The `beta` version of the API has been deprecated and will remain supported until **February 28, 2025**. We strongly encourage all users to migrate to the new `v1` API.
</Warn>
---
## Major Changes
1. **API base URL**: A new API base URL has been introduced for `v1` API endpoints.
- `https://api.langbase.com/v1`
2. **Deprecated Endpoints**: The `generate` and `chat` endpoints have been deprecated and replaced by the `run` endpoint.
3. **Unified endpoints**: Several user/org specific endpoints have been unified for better consistency.
4. **Request body**: The structure of the request body for some endpoints has been simplified.
---
## API Endpoint Changes
Here are the key changes in the `v1` API endpoints:
**`beta` endpoint** | **`v1` endpoint** | Description |
-----------------|-----------------|-----------------|
`/beta/org/:org/pipes` | `/v1/pipes` | Create/List pipes |
`/beta/user/pipes` | `/v1/pipes` | Create/List pipes |
`/beta/pipes/:ownerLogin/:pipeName` | `/v1/pipes/:pipeName` | Update pipe |
`/beta/pipes/run` | `/v1/pipes/run` | Run pipe |
`/beta/generate` | `/v1/pipes/run` | Generate (now unified) |
`/beta/chat` | `/v1/pipes/run` | Chat (now unified) |
`/beta/org/:org/memorysets` | `/v1/memory` | Create/List memory |
`/beta/user/memorysets` | `/v1/memory` | Create/List memory |
`/beta/memorysets/:owner/:memoryName` | `/v1/memory/:memoryName` | Delete memory |
`/beta/memory/retrieve` | `/v1/memory/retrieve` | Retrieve memory |
`/beta/memorysets/:owner/:memoryName/documents` | `/v1/memory/:memoryName/documents` | List documents |
`/beta/user/memorysets/documents` | `/v1/memory/:memoryName/documents` | Upload document |
`/beta/org/:org/memorysets/documents` | `/v1/memory/:memoryName/documents` | Upload document |
`/beta/memorysets/:owner/`<br />`documents/embeddings/retry` | `/v1/memory/:memoryName/documents/`<br />`:documentName/embeddings/retry` | Retry embeddings |
---
## Authentication
The authentication process remains the same for the `v1` API. You can use the same API key to authenticate your requests.
---
## Run Pipe
Here are the code examples to migrate from the `beta` to `v1` API for running a pipe.
<CodeGroup exampleTitle="Run Pipe" title="Run Pipe">
```js {{ title: 'v1 API' }}
async function runPipe() {
const url = 'https://api.langbase.com/v1/pipes/run';
const apiKey = '<YOUR_API_KEY>'; // Replace with your user/org API key
const data = {
messages: [ { role: 'user', content: 'Hello!' } ],
};
const response = await fetch(url, {
method: 'POST',
headers: {
'Content-Type': 'application/json',
Authorization: `Bearer ${apiKey}`,
},
body: JSON.stringify(data),
});
const result = await response.json();
return result;
}
```
```js {{ title: 'beta API (deprecated)' }}
async function runPipe() {
const url = 'https://api.langbase.com/beta/pipes/run'; // Unified endpoint
// const url = 'https://api.langbase.com/beta/generate'; // Deprecated
// const url = 'https://api.langbase.com/beta/chat'; // Deprecated
const apiKey = '<YOUR_API_KEY>'; // Replace with your user/org API key
const data = {
messages: [ { role: 'user', content: 'Hello!' } ],
};
const response = await fetch(url, {
method: 'POST',
headers: {
'Content-Type': 'application/json',
Authorization: `Bearer ${apiKey}`,
},
body: JSON.stringify(data),
});
const result = await response.json();
return result;
}
```
</CodeGroup>
**Key Changes:**
- The `generate` and `chat` endpoints have been deprecated and replaced by the `run` endpoint.
---
## Create Pipe
Here are the code examples to migrate from the `beta` to `v1` API for creating a pipe.
<CodeGroup exampleTitle="Create Pipe" title="Create Pipe">
```js {{ title: 'v1 API' }}
async function createNewPipe() {
const url = 'https://api.langbase.com/v1/pipes';
const apiKey = '<YOUR_API_KEY>'; // Replace with your user/org API key
const pipe = {
name: 'ai-agent',
upsert: true,
description: 'This is a test ai-agent pipe',
status: 'public',
model: 'openai:gpt-4o-mini',
stream: true,
json: true,
store: false,
moderate: true,
top_p: 1,
max_tokens: 1000,
temperature: 0.7,
presence_penalty: 1,
frequency_penalty: 1,
stop: [],
tool_choice: 'auto',
parallel_tool_calls: false,
messages: [
{
role: 'system',
content: "You're a helpful AI assistant."
},
{
role: 'system',
content: "Don't ignore these instructions",
name: 'safety'
}
],
variables: [],
tools: [],
memory: [],
};
const response = await fetch(url, {
method: 'POST',
headers: {
'Content-Type': 'application/json',
Authorization: `Bearer ${apiKey}`,
},
body: JSON.stringify(pipe),
});
const newPipe = await response.json();
return newPipe;
}
```
```js {{ title: 'beta API (deprecated)' }}
async function createNewPipe() {
const url = `https://api.langbase.com/beta/org/${org}/pipes`; // Org endpoint
// const url = `https://api.langbase.com/beta/user/pipes`; // User endpoint
const apiKey = '<YOUR_API_KEY>'; // Replace with your user/org API key
const pipe = {
name: 'ai-agent',
description: 'This is a test ai-agent pipe',
status: 'public',
type: 'chat',
config: {
meta: {
stream: true,
json: false,
store: true,
moderate: false,
},
model: {
name: 'gpt-4o-mini',
provider: 'OpenAI',
params: {
max_tokens: 1000,
temperature: 0.7,
top_p: 1,
frequency_penalty: 1,
presence_penalty: 1,
stop: [],
},
tool_choice: 'required',
parallel_tool_calls: false
},
prompt: {
opening: 'Welcome to Langbase. Prompt away!',
system: 'You are a helpful AI assistant.',
messages: [],
variables: [],
},
tools: [],
memorysets: []
}
};
const response = await fetch(url, {
method: 'POST',
headers: {
'Content-Type': 'application/json',
Authorization: `Bearer ${apiKey}`,
},
body: JSON.stringify(pipe),
});
const newPipe = await response.json();
return newPipe;
}
```
</CodeGroup>
**Key Changes:**
- The new `upsert` property allows you to update a pipe if it already exists.
- Default: `false`
- The `model` property now accepts a model string in the `provider:model_id` format.
- Default: `openai:gpt-4o-mini`
- You can find the [list of supported models](https://langbase.com/docs/supported-models-and-providers) in the API documentation. Use the copy button to copy/paste the model string for the request body.
- The `config` object has been replaced by individual properties in the `v1` API.
- The `memorysets` property has been replaced by `memory` property.
- The `prompt` object has been replaced by `messages` array.
---
## Update Pipe
Here are the code examples to migrate from the `beta` to `v1` API for updating a pipe.
<CodeGroup exampleTitle="Update Pipe" title="Update Pipe">
```js {{ title: 'v1 API' }}
async function updatePipe() {
const url = `https://api.langbase.com/v1/pipes/${pipeName}`;
const apiKey = '<YOUR_API_KEY>'; // Replace with your user/org API key
const pipe = {
name: 'ai-agent',
description: 'This is a test ai-agent pipe',
status: 'public',
model: 'openai:gpt-4o-mini',
stream: true,
json: true,
store: false,
moderate: true,
top_p: 1,
max_tokens: 1000,
temperature: 0.7,
presence_penalty: 1,
frequency_penalty: 1,
stop: [],
tool_choice: 'auto',
parallel_tool_calls: false,
messages: [
{
role: 'system',
content: "You're a helpful AI assistant."
},
{
role: 'system',
content: "Don't ignore these instructions",
name: 'safety'
}
],
variables: [],
tools: [],
memory: [],
};
const response = await fetch(url, {
method: 'POST',
headers: {
'Content-Type': 'application/json',
Authorization: `Bearer ${apiKey}`,
},
body: JSON.stringify(pipe),
});
const updatedPipe = await response.json();
return updatedPipe;
}
```
```js {{ title: 'beta API (deprecated)' }}
async function updatePipe() {
const url = `https://api.langbase.com/beta/pipes/${ownerLogin}/${pipeName}`;
const apiKey = '<YOUR_API_KEY>'; // Replace with your user/org API key
const pipe = {
name: 'ai-agent',
description: 'This is a test ai-agent pipe',
status: 'public',
type: 'chat',
config: {
meta: {
stream: true,
json: false,
store: true,
moderate: false,
},
model: {
name: 'gpt-4o-mini',
provider: 'OpenAI',
params: {
max_tokens: 1000,
temperature: 0.7,
top_p: 1,
frequency_penalty: 1,
presence_penalty: 1,
stop: [],
},
tool_choice: 'required',
parallel_tool_calls: false
},
prompt: {
opening: 'Welcome to Langbase. Prompt away!',
system: 'You are a helpful AI assistant.',
messages: [],
variables: [],
},
tools: [],
memorysets: []
}
};
const response = await fetch(url, {
method: 'POST',
headers: {
'Content-Type': 'application/json',
Authorization: `Bearer ${apiKey}`,
},
body: JSON.stringify(pipe),
});
const updatedPipe = await response.json();
return updatedPipe;
}
```
</CodeGroup>
**Key Changes:**
- The `ownerLogin` has been removed from the `v1` update pipe API endpoint.
- The `model` property now accepts a model string in the `provider:model_id` format.
- Default: `openai:gpt-4o-mini`
- You can find the [list of supported models](https://langbase.com/docs/supported-models-and-providers) in the API documentation. Use the copy button to copy/paste the model string for the request body.
- The `config` object has been replaced by individual properties in the `v1` API.
- The `memorysets` property has been replaced by `memory` property.
- The `prompt` object has been replaced by `messages` array.
---
## List Pipes
Here are the code examples to migrate from the `beta` to `v1` API for listing pipes.
<CodeGroup exampleTitle="List Pipes" title="List Pipes">
```js {{ title: 'v1 API' }}
async function listPipes() {
const url = 'https://api.langbase.com/v1/pipes';
const apiKey = '<YOUR_API_KEY>'; // Replace with your user/org API key
const response = await fetch(url, {
method: 'GET',
headers: {
'Content-Type': 'application/json',
Authorization: `Bearer ${apiKey}`,
},
});
const pipes = await response.json();
return pipes;
}
```
```js {{ title: 'beta API (deprecated)' }}
async function listPipes() {
const url = `https://api.langbase.com/beta/org/${org}/pipes`; // Org endpoint
// const url = `https://api.langbase.com/beta/user/pipes`; // User endpoint
const apiKey = '<YOUR_API_KEY>'; // Replace with your user/org API key
const response = await fetch(url, {
method: 'GET',
headers: {
'Content-Type': 'application/json',
Authorization: `Bearer ${apiKey}`,
},
});
const pipes = await response.json();
return pipes;
}
```
</CodeGroup>
**Key Changes:**
- The user/org endpoints have been unified in the `v1` list pipes API endpoint.
---
## List Memory
Here are the code examples to migrate from the `beta` to `v1` API for listing memory.
<CodeGroup exampleTitle="List Memory" title="List Memory">
```js {{ title: 'v1 API' }}
async function listMemory() {
const url = 'https://api.langbase.com/v1/memory';
const apiKey = '<YOUR_API_KEY>'; // Replace with your user/org API key
const response = await fetch(url, {
method: 'GET',
headers: {
'Content-Type': 'application/json',
Authorization: `Bearer ${apiKey}`,
},
});
const memory = await response.json();
return memory;
}
```
```js {{ title: 'beta API (deprecated)' }}
async function listMemory() {
const url = `https://api.langbase.com/beta/org/${org}/memorysets`; // Org endpoint
// const url = `https://api.langbase.com/beta/user/memorysets`; // User endpoint
const apiKey = '<YOUR_API_KEY>'; // Replace with your user/org API key
const response = await fetch(url, {
method: 'GET',
headers: {
'Content-Type': 'application/json',
Authorization: `Bearer ${apiKey}`,
},
});
const memory = await response.json();
return memory;
}
```
</CodeGroup>
**Key Changes:**
- The user/org endpoints have been unified in the `v1` list memory API endpoint.
---
## Create Memory
Here are the code examples to migrate from the `beta` to `v1` API for creating memory.
<CodeGroup exampleTitle="Create Memory" title="Create Memory">
```js {{ title: 'v1 API' }}
async function createMemory() {
const url = 'https://api.langbase.com/v1/memory';
const apiKey = '<YOUR_API_KEY>'; // Replace with your user/org API key
const memory = {
name: 'memory-agent',
description: 'This is a memory for ai-agent',
};
const response = await fetch(url, {
method: 'POST',
headers: {
'Content-Type': 'application/json',
Authorization: `Bearer ${apiKey}`,
},
body: JSON.stringify(memory),
});
const newMemory = await response.json();
return newMemory;
}
```
```js {{ title: 'beta API (deprecated)' }}
async function createMemory() {
const url = `https://api.langbase.com/beta/org/${org}/memorysets`; // Org endpoint
// const url = `https://api.langbase.com/beta/user/memorysets`; // User endpoint
const apiKey = '<YOUR_API_KEY>'; // Replace with your user/org API key
const memory = {
name: 'memory-agent',
description: 'This is a memory for ai-agent',
};
const response = await fetch(url, {
method: 'POST',
headers: {
'Content-Type': 'application/json',
Authorization: `Bearer ${apiKey}`,
},
body: JSON.stringify(memory),
});
const newMemory = await response.json();
return newMemory;
}
```
</CodeGroup>
**Key Changes:**
- The user/org endpoints have been unified in the `v1` create memory API endpoint.
---
## Delete Memory
Here are the code examples to migrate from the `beta` to `v1` API for deleting memory.
<CodeGroup exampleTitle="Delete Memory" title="Delete Memory">
```js {{ title: 'v1 API' }}
async function deleteMemory() {
const url = `https://api.langbase.com/v1/memory/${memoryName}`;
const apiKey = '<YOUR_API_KEY>'; // Replace with your user/org API key
const response = await fetch(url, {
method: 'DELETE',
headers: {
'Content-Type': 'application/json',
Authorization: `Bearer ${apiKey}`,
},
});
const result = await response.json();
return result;
}
```
```js {{ title: 'beta API (deprecated)' }}
async function deleteMemory() {
const url = `https://api.langbase.com/beta/memorysets/${ownerLogin}/${memoryName}`;
const apiKey = '<YOUR_API_KEY>'; // Replace with your user/org API key
const response = await fetch(url, {
method: 'DELETE',
headers: {
'Content-Type': 'application/json',
Authorization: `Bearer ${apiKey}`,
},
});
const result = await response.json();
return result;
}
```
</CodeGroup>
**Key Changes:**
- The `ownerLogin` has been removed from the `v1` delete memory API endpoint.
---
## Retrieve Memory
Here are the code examples to migrate from the `beta` to `v1` API for retrieving memory.
<CodeGroup exampleTitle="Retrieve Memory" title="Retrieve Memory">
```js {{ title: 'v1 API' }}
async function retrieveMemory() {
const url = 'https://api.langbase.com/v1/memory/retrieve';
const apiKey = '<YOUR_API_KEY>'; // Replace with your user/org API key
const data = {
query: 'your query here',
memory: [
{ name: 'memory1' },
{ name: 'memory2' }
]
};
const response = await fetch(url, {
method: 'POST',
headers: {
'Content-Type': 'application/json',
Authorization: `Bearer ${apiKey}`,
},
body: JSON.stringify(data),
});
const result = await response.json();
return result;
}
```
```js {{ title: 'beta API (deprecated)' }}
async function retrieveMemory() {
const url = 'https://api.langbase.com/beta/memory/retrieve';
const apiKey = '<YOUR_API_KEY>'; // Replace with your user/org API key
const data = {
ownerLogin: '<ownerLogin>',
query: 'your query here',
memory: [
{ name: 'memory1' },
{ name: 'memory2' }
]
};
const response = await fetch(url, {
method: 'POST',
headers: {
'Content-Type': 'application/json',
Authorization: `Bearer ${apiKey}`,
},
body: JSON.stringify(data),
});
const result = await response.json();
return result;
}
```
</CodeGroup>
**Key Changes:**
- The `ownerLogin` property has been removed from the `v1` retrieve memory API request body.
---
## List Memory Documents
Here are the code examples to migrate from the `beta` to `v1` API for listing memory documents.
<CodeGroup exampleTitle="List Memory Documents" title="List Memory Documents">
```js {{ title: 'v1 API' }}
async function listMemoryDocuments() {
const url = `https://api.langbase.com/v1/memory/${memoryName}/documents`;
const apiKey = '<YOUR_API_KEY>'; // Replace with your user/org API key
const response = await fetch(url, {
method: 'GET',
headers: {
'Content-Type': 'application/json',
Authorization: `Bearer ${apiKey}`,
},
});
const documents = await response.json();
return documents;
}
```
```js {{ title: 'beta API (deprecated)' }}
async function listMemoryDocuments() {
const url = `https://api.langbase.com/beta/memorysets/${ownerLogin}/${memoryName}/documents`;
const apiKey = '<YOUR_API_KEY>'; // Replace with your user/org API key
const response = await fetch(url, {
method: 'GET',
headers: {
'Content-Type': 'application/json',
Authorization: `Bearer ${apiKey}`,
},
});
const documents = await response.json();
return documents;
}
```
</CodeGroup>
**Key Changes:**
- The user/org endpoints have been unified in the `v1` list memory documents API endpoint.
- The `ownerLogin` has been removed from the `v1` list memory documents API endpoint.
---
## Upload Memory Document
Here are the code examples to migrate from the `beta` to `v1` API for uploading memory documents.
<CodeGroup exampleTitle="Upload Memory Document" title="Upload Memory Document">
```js {{ title: 'v1 API' }}
async function uploadMemoryDocument() {
const url = `https://api.langbase.com/v1/memory/${memoryName}/documents`;
const apiKey = '<YOUR_API_KEY>'; // Replace with your user/org API key
const data = {
memoryName: 'memory-agent',
fileName: 'file.pdf',
};
const response = await fetch(url, {
method: 'POST',
headers: {
'Content-Type': 'application/json',
Authorization: `Bearer ${apiKey}`,
},
body: JSON.stringify(data),
});
const result = await response.json();
return result;
}
```
```js {{ title: 'beta API (deprecated)' }}
async function uploadMemoryDocument() {
const url = `https://api.langbase.com/beta/org/${org}/memorysets/documents`; // Org endpoint
// const url = `https://api.langbase.com/beta/user/memorysets/documents`; // User endpoint
const apiKey = '<YOUR_API_KEY>'; // Replace with your user/org API key
const data = {
memoryName: 'memory-agent',
ownerLogin: '<ownerLogin>',
fileName: 'file.pdf',
};
const response = await fetch(url, {
method: 'POST',
headers: {
'Content-Type': 'application/json',
Authorization: `Bearer ${apiKey}`,
},
body: JSON.stringify(data),
});
const result = await response.json();
return result;
}
```
</CodeGroup>
**Key Changes:**
- The user/org endpoints have been unified in the `v1` upload memory document API endpoint.
- The `ownerLogin` has been removed from the `v1` upload memory document API request body.
---
## Retry Memory Document Embeddings
Here are the code examples to migrate from the `beta` to `v1` API for retrying memory document embeddings.
<CodeGroup exampleTitle="Retry embeddings" title="Retry embeddings">
```js {{ title: 'v1 API' }}
async function retryMemoryDocumentEmbeddings() {
const url = `https://api.langbase.com/v1/memory/${memoryName}/documents/${documentName}/embeddings/retry`;
const apiKey = '<YOUR_API_KEY>'; // Replace with your user/org API key
const response = await fetch(url, {
method: 'GET',
headers: {
'Content-Type': 'application/json',
Authorization: `Bearer ${apiKey}`,
},
});
const result = await response.json();
return result;
}
```
```js {{ title: 'beta API (deprecated)' }}
async function retryMemoryDocumentEmbeddings() {
const url = `https://api.langbase.com/beta/memorysets/${owner}/documents/embeddings/retry`;
const apiKey = '<YOUR_API_KEY>'; // Replace with your user/org API key
const response = await fetch(url, {
method: 'GET',
headers: {
'Content-Type': 'application/json',
Authorization: `Bearer ${apiKey}`,
},
});
const result = await response.json();
return result;
}
```
</CodeGroup>
**Key Changes:**
- The `owner` has been replaced by `memoryName` and `documentName` in the `v1` retry memory document embeddings API endpoint.
---
</content>
</doc>
<doc>
<metadata>
<title>Page</title>
<url>https://langbase.com/docs/api-reference/limits/</url>
</metadata>
<content>
import { generateMetadata } from '@/lib/generate-metadata';
## Limits
In order to ensure stability, speed, and prevent misuse, we have set certain limits on how much a user or organization can use the Langbase API. These limits are subject to change and may vary based on your subscription plan.
We have two types of limits:
1. **[Rate Limits](/api-reference/limits/rate-limits)**: The number of requests you can make in a given time period.
2. **[Usage Limits](/api-reference/limits/usage-limits)**: The number of requests you can make per month, based on your subscription plan.
For more information on the limits, please refer to the individual pages corresponding to each limit.
</content>
</doc>
<doc>
<metadata>
<title>Memory API</title>
<url>https://langbase.com/docs/api-reference/memory/</url>
</metadata>
<content>
import { generateMetadata } from '@/lib/generate-metadata';
# Memory API
Langbase Memory API provides you with a programmatic access to managing memories in your Langbase account. Since documents are stored in memories, you can also manage documents using the Memory API.
---
## Memory
- [List memory](/api-reference/memory/list) — List all memories in your account
- [Create memory](/api-reference/memory/create) — Create a new memory
- [Delete memory](/api-reference/memory/delete) — Delete a memory
- [Retrieve memory](/api-reference/memory/retrieve) — Similarity search for a given query
---
## Documents
- [List documents](/api-reference/memory/document-list) — List all documents in a memory
- [Delete document](/api-reference/memory/document-delete) — Delete a document
- [Upload document](/api-reference/memory/document-upload) — Upload a document
- [Embeddings Retry](/api-reference/memory/document-embeddings-retry) — Retry generating embeddings for a document
---
</content>
</doc>
<doc>
<metadata>
<title>Images API <span className="text-xl font-mono text-muted-foreground/70">v1</span></title>
<url>https://langbase.com/docs/api-reference/images/</url>
</metadata>
<content>
import { generateMetadata } from '@/lib/generate-metadata';
# Images API <span className="text-xl font-mono text-muted-foreground/70">v1</span>
The `images` API endpoint allows you to generate AI images using various models from different providers like OpenAI, Together AI, Google, and OpenRouter. Generate stunning visuals from text prompts with a unified API interface.
---
## Generate a User/Org API key
You will need to generate an API key to authenticate your requests. For more information, visit the [User/Org API key documentation](/api-reference/api-keys).
<Spoiler title="Get your Langbase API key: User or Org">
You can generate API keys from the [Langbase Studio](https://studio.langbase.com) by following these steps:
1. Switch to your user or org account.
2. From the sidebar, click on the `API keys`.
3. From here you can create a new API key or manage existing ones.
For more details, follow the [Langbase API keys](/api-reference/api-keys) documentation.
</Spoiler>
<Note sub="LLM API Keys Required">
You'll need to add the [LLM API keys](/features/keysets) for the image generation providers you want to use. The API key should be passed in the `LB-LLM-Key` header.
</Note>
---
## Generate images {{ tag: 'POST', label: '/v1/images' }}
<Row>
<Col>
Generate AI images by sending a text prompt to the images API endpoint.
### Headers
<Properties>
<Property name="Content-Type" type="string" required="true">
Request content type. Needs to be `application/json`.
</Property>
<Property name="Authorization" type="string" required="true">
Replace `<YOUR_API_KEY>` with your user/org API key.
</Property>
<Property name="LB-LLM-Key" type="string" required="true">
Your LLM provider API key (OpenAI, Together AI, Google, etc.).
</Property>
</Properties>
---
### Request Body
<Properties>
<Property name="prompt" type="string" required="true">
A text description of the image you want to generate. Be descriptive for best results.
</Property>
<Property name="model" type="string" required="true">
The image generation model to use. Format: `provider:model-name`
Examples:
- `openai:gpt-image-1`
- `together:black-forest-labs/FLUX.1-schnell-Free`
- `google:gemini-2.5-flash-image-preview`
- `openrouter:google/gemini-2.5-flash-image-preview`
</Property>
<Property name="width" type="number">
The width of the generated image in pixels. Default varies by model.
Common values: `1024`, `1792`, `512`
</Property>
<Property name="height" type="number">
The height of the generated image in pixels. Default varies by model.
Common values: `1024`, `1792`, `512`
</Property>
<Property name="n" type="number">
The number of images to generate.
Default: `1`
</Property>
<Property name="steps" type="number">
Number of inference steps (for models that support it).
Higher values may produce better quality but take longer.
</Property>
<Property name="image_url" type="string">
Base image URL for image-to-image generation (if supported by the model).
</Property>
</Properties>
</Col>
<Col sticky>
## Usage example
<CodeGroup exampleTitle="Install the SDK" title="Install the SDK">
```bash {{ title: 'npm' }}
npm i langbase
```
```bash {{ title: 'pnpm' }}
pnpm i langbase
```
```bash {{ title: 'yarn' }}
yarn add langbase
```
</CodeGroup>
### Environment variables
```bash {{ title: '.env file' }}
LANGBASE_API_KEY="<YOUR_API_KEY>"
OPENAI_API_KEY="<YOUR_OPENAI_KEY>"
```
### Generate an image
<div className="mb-8"/>
<CodeGroup exampleTitle="Generate Image" title="Generate Image" tag="POST" label="/v1/images">
```bash {{ title: 'cURL' }}
curl https://api.langbase.com/v1/images \
-X POST \
-H 'Authorization: Bearer <YOUR_API_KEY>' \
-H 'LB-LLM-Key: <YOUR_OPENAI_KEY>' \
-H 'Content-Type: application/json' \
-d '{
"prompt": "A futuristic cityscape with flying cars and neon lights",
"model": "openai:gpt-image-1",
"size": "1024x1024"
}'
```
```ts {{ title: 'Node.js' }}
import { Langbase } from 'langbase';
const langbase = new Langbase({
apiKey: process.env.LANGBASE_API_KEY!,
});
async function main() {
const result = await langbase.images.generate({
prompt: "A futuristic cityscape with flying cars and neon lights",
model: "openai:gpt-image-1",
size: "1024x1024",
apiKey: process.env.OPENAI_API_KEY!
});
console.log('Image URL:', result.choices[0].message.images[0].image_url.url);
}
main();
```
```python
import requests
import json
import os
def generate_image():
url = 'https://api.langbase.com/v1/images'
langbase_key = os.getenv('LANGBASE_API_KEY')
openai_key = os.getenv('OPENAI_API_KEY')
headers = {
'Authorization': f'Bearer {langbase_key}',
'LB-LLM-Key': openai_key,
'Content-Type': 'application/json'
}
data = {
'prompt': 'A futuristic cityscape with flying cars and neon lights',
'model': 'openai:gpt-image-1',
'size': "1024x1024"
}
response = requests.post(
url,
headers=headers,
data=json.dumps(data)
)
result = response.json()
image_url = result['choices'][0]['message']['images'][0]['image_url']['url']
return image_url
```
</CodeGroup>
</Col>
</Row>
---
<Row>
<Col>
### Response
Response of the endpoint is a `ImageGenerationResponse` object.
```ts {{title: 'ImageGenerationResponse Object'}}
interface ImageGenerationResponse {
id: string;
provider: string;
model: string;
object: string;
created: number;
choices: Choice[];
usage: Usage;
}
```
<Properties>
<Property name="id" type="string">
Unique identifier for the image generation request.
</Property>
<Property name="provider" type="string">
The provider used for image generation (e.g., "openai", "together", "google").
</Property>
<Property name="model" type="string">
The model used for image generation.
</Property>
<Property name="object" type="string">
Object type, typically "chat.completion".
</Property>
<Property name="created" type="number">
Unix timestamp of when the image was created.
</Property>
<Property name="choices" type="Choice[]">
Array of generated image results. Can contain more than one element if `n` is greater than 1.
```ts {{title: 'Choice Object'}}
interface Choice {
logprobs: null;
finish_reason: string;
native_finish_reason: string;
index: number;
message: Message;
}
```
<Sub name="logprobs" type="null">
Log probabilities (not used for image generation).
</Sub>
<Sub name="finish_reason" type="string">
The reason the generation completed. Typically "stop" for successful completions.
</Sub>
<Sub name="native_finish_reason" type="string">
The provider's native finish reason code.
</Sub>
<Sub name="index" type="number">
The index of this choice in the choices array.
</Sub>
<Sub name="message" type="Message">
The message object containing the generated images.
```ts {{title: 'Message Object'}}
interface Message {
role: string;
content: string | null;
images: Image[];
}
```
<Sub name="role" type="string">
The role of the message author, typically "assistant".
</Sub>
<Sub name="content" type="string | null">
Text content of the message, typically null for image generations.
</Sub>
<Sub name="images" type="Image[]">
Array of generated image objects.
```ts {{title: 'Image Object'}}
interface Image {
type: string;
image_url: ImageURL;
index: number;
}
```
<Sub name="type" type="string">
The type of image content, typically "image_url".
</Sub>
<Sub name="image_url" type="ImageURL">
Object containing the image URL.
```ts {{title: 'ImageURL Object'}}
interface ImageURL {
url: string;
}
```
<Sub name="url" type="string">
The URL of the generated image. This URL can be accessed to view or download the image.
</Sub>
</Sub>
<Sub name="index" type="number">
The index of this image in the images array.
</Sub>
</Sub>
</Sub>
</Property>
<Property name="usage" type="Usage">
Token usage statistics for the request.
```ts {{title: 'Usage Object'}}
interface Usage {
prompt_tokens: number;
completion_tokens: number;
total_tokens: number;
prompt_tokens_details: PromptTokensDetails;
completion_tokens_details: CompletionTokensDetails;
}
```
<Sub name="prompt_tokens" type="number">
Number of tokens in the prompt.
</Sub>
<Sub name="completion_tokens" type="number">
Number of tokens in the completion (typically 0 for image generation).
</Sub>
<Sub name="total_tokens" type="number">
Total tokens used (prompt_tokens + completion_tokens).
</Sub>
<Sub name="prompt_tokens_details" type="PromptTokensDetails">
Detailed breakdown of prompt tokens.
```ts {{title: 'PromptTokensDetails Object'}}
interface PromptTokensDetails {
cached_tokens: number;
}
```
<Sub name="cached_tokens" type="number">
Number of cached tokens used from the prompt.
</Sub>
</Sub>
<Sub name="completion_tokens_details" type="CompletionTokensDetails">
Detailed breakdown of completion tokens.
```ts {{title: 'CompletionTokensDetails Object'}}
interface CompletionTokensDetails {
reasoning_tokens: number;
image_tokens: number;
}
```
<Sub name="reasoning_tokens" type="number">
Number of tokens used for reasoning (typically 0 for image generation).
</Sub>
<Sub name="image_tokens" type="number">
Number of tokens attributed to image generation.
</Sub>
</Sub>
</Property>
</Properties>
</Col>
<Col sticky>
```json {{ title: 'API Response' }}
{
"id": "chatcmpl-xxx",
"provider": "openai",
"model": "gpt-image-1",
"object": "chat.completion",
"created": 1234567890,
"choices": [
{
"logprobs": null,
"finish_reason": "stop",
"native_finish_reason": "stop",
"index": 0,
"message": {
"role": "assistant",
"content": null,
"images": [
{
"type": "image_url",
"image_url": {
"url": "https://oaidalleapiprodscus.blob.core.windows.net/..."
},
"index": 0
}
]
}
}
],
"usage": {
"prompt_tokens": 15,
"completion_tokens": 0,
"total_tokens": 15,
"prompt_tokens_details": {
"cached_tokens": 0
},
"completion_tokens_details": {
"reasoning_tokens": 0,
"image_tokens": 1
}
}
}
```
</Col>
</Row>
---
</content>
</doc>
<doc>
<metadata>
<title>Error Codes</title>
<url>https://langbase.com/docs/api-reference/errors/</url>
</metadata>
<content>
import { generateMetadata } from '@/lib/generate-metadata';
# Error Codes
Your requests to Langbase may fail due to various reasons. These errors can originate from either Langbase itself or the LLM (Language Model) provider.
Below is a list of potential error codes to help you understand the issue. Please refer to the individual pages corresponding to the error code you encounter for detailed information and resolution steps.
- [Forbidden (403)](/api-reference/errors/forbidden)
- [Not found (404)](/api-reference/errors/not_found)
- [Conflict (409)](/api-reference/errors/conflict)
- [Bad request (400)](/api-reference/errors/bad_request)
- [Unauthorized (401)](/api-reference/errors/unauthorized)
- [Usage exceeded (403)](/api-reference/errors/usage_exceeded)
- [Precondition failed (412)](/api-reference/errors/precondition_failed)
- [Internal Server Error (500)](/api-reference/errors/internal_server_error)
- [Insufficient permissions (403)](/api-reference/errors/insufficient_permissions)
<Note>
If you encounter an error not listed here, please reach out to our support
team for assistance.
</Note>
---
</content>
</doc>
<doc>
<metadata>
<title>Embed API <span className="text-xl font-mono text-muted-foreground/70">v1</span></title>
<url>https://langbase.com/docs/api-reference/embed/</url>
</metadata>
<content>
import { generateMetadata } from '@/lib/generate-metadata';
# Embed API <span className="text-xl font-mono text-muted-foreground/70">v1</span>
The `embed` API endpoint allows you to generate vector embeddings for text chunks. This is particularly useful for semantic search, text similarity comparisons, and other NLP tasks.
---
## Limitations
- Maximum number of chunks per request: **100**
- Maximum length per chunk: **8192 characters**
- Available embedding models:
- `openai:text-embedding-3-large`
- `cohere:embed-v4.0`
- `cohere:embed-multilingual-v3.0`
- `cohere:embed-multilingual-light-v3.0`
- `google:text-embedding-004`
---
## Generate a User/Org API key
You will need to generate an API key to authenticate your requests. For more information, visit the [User/Org API key documentation](/api-reference/api-keys).
<Spoiler title="Get your Langbase API key: User or Org">
You can generate API keys from the [Langbase Studio](https://studio.langbase.com) by following these steps:
1. Switch to your user or org account.
2. From the sidebar, click on the `API keys`.
3. From here you can create a new API key or manage existing ones.
For more details, follow the [Langbase API keys](/api-reference/api-keys) documentation.
</Spoiler>
<Note sub="Embedding Models API Keys">
Please add the [LLM API keys](/features/keysets) for the embedding models you want to use in your API key settings.
</Note>
---
## Generate embeddings {{ tag: 'POST', label: '/v1/embed' }}
<Row>
<Col>
Generate vector embeddings for text chunks by sending them to the embed API endpoint.
### Headers
<Properties>
<Property name="Content-Type" type="string" required="true">
Request content type. Needs to be `application/json`.
</Property>
<Property name="Authorization" type="string" required="true">
Replace `<YOUR_API_KEY>` with your user/org API key.
</Property>
</Properties>
---
### Request Body
<Properties>
<Property name="chunks" type="string[]" required="true">
An array of text chunks to generate embeddings for. Maximum 100 chunks per request, with each chunk limited to 8192 characters.
</Property>
<Property name="embeddingModel" type="string">
The embedding model to use. Available options:
- `openai:text-embedding-3-large`
- `cohere:embed-multilingual-v3.0`
- `cohere:embed-multilingual-light-v3.0`
- `google:text-embedding-004`
Default: `openai:text-embedding-3-large`
</Property>
</Properties>
</Col>
<Col sticky>
## Usage example
<CodeGroup exampleTitle="Install the SDK" title="Install the SDK">
```bash {{ title: 'npm' }}
npm i langbase
```
```bash {{ title: 'pnpm' }}
pnpm i langbase
```
```bash {{ title: 'yarn' }}
yarn add langbase
```
</CodeGroup>
### Environment variables
```bash {{ title: '.env file' }}
LANGBASE_API_KEY="<YOUR_API_KEY>"
```
### Generate embeddings
<div className="mb-8"/>
<CodeGroup exampleTitle="Embedding" title="Embedding" tag="POST" label="/v1/embed">
```bash {{ title: 'cURL' }}
curl https://api.langbase.com/v1/embed \
-X POST \
-H 'Authorization: Bearer <YOUR_API_KEY>' \
-H 'Content-Type: application/json' \
-d '{
"chunks": [
"The quick brown fox",
"jumps over the lazy dog"
],
"embeddingModel": "openai:text-embedding-3-large"
}'
```
```ts {{ title: 'Node.js' }}
import { Langbase } from 'langbase';
const langbase = new Langbase({
apiKey: process.env.LANGBASE_API_KEY!,
});
async function main() {
const embeddings = await langbase.embed({
chunks: [
"The quick brown fox",
"jumps over the lazy dog"
]
});
console.log('Embeddings:', embeddings);
}
main();
```
```python
import requests
import json
def generate_embeddings():
url = 'https://api.langbase.com/v1/embed'
api_key = '<YOUR_API_KEY>'
headers = {
'Authorization': f'Bearer {api_key}',
'Content-Type': 'application/json'
}
data = {
'chunks': [
"The quick brown fox",
"jumps over the lazy dog"
],
'embeddingModel': 'openai:text-embedding-3-large'
}
response = requests.post(
url,
headers=headers,
data=json.dumps(data)
)
embeddings = response.json()
return embeddings
```
```ts {{ title: 'Custom Model' }}
import { Langbase } from 'langbase';
const langbase = new Langbase({
apiKey: process.env.LANGBASE_API_KEY!,
});
async function main() {
const embeddings = await langbase.embed({
chunks: [
"Hello, world!",
"Bonjour, monde!",
"¡Hola, mundo!"
],
embeddingModel: "cohere:embed-multilingual-v3.0"
});
console.log('Multilingual embeddings:', embeddings);
}
main();
```
</CodeGroup>
</Col>
</Row>
---
<Row>
<Col>
### Response
<Properties>
<Property name="Response" type="number[][]">
The response is a 2D array where each inner array represents the embedding vector for the corresponding input chunk.
```ts {{title: 'Embed API Response'}}
type EmbedResponse = number[][];
```
</Property>
</Properties>
</Col>
<Col sticky>
```json {{ title: 'API Response' }}
[
[-0.023, 0.128, -0.194, ...],
[0.067, -0.022, 0.289, ...],
]
```
</Col>
</Row>
---
</content>
</doc>
<doc>
<metadata>
<title>Deprecated API</title>
<url>https://langbase.com/docs/api-reference/deprecated/</url>
</metadata>
<content>
import { generateMetadata } from '@/lib/generate-metadata';
# Deprecated API
Deprecated API endpoints are no longer supported and should not be used. Below is a list of deprecated API endpoints. Click on the endpoint to view detailed information about it.
---
### Pipe API
Below is the list of deprecated Pipe API endpoints.
- [Run (beta)](/api-reference/deprecated/pipe-run)
- [Generate (beta)](/api-reference/deprecated/pipe-generate)
- [Chat (beta)](/api-reference/deprecated/pipe-chat)
- [Create (beta)](/api-reference/deprecated/pipe-create)
- [Update (beta)](/api-reference/deprecated/pipe-update)
- [List (beta)](/api-reference/deprecated/pipe-list)
Please refer to the [Pipe API](/api-reference/pipe) for the latest endpoints.
---
### Memory API
Below is the list of deprecated Memory API endpoints.
- [List (beta)](/api-reference/deprecated/memory-list)
- [Create (beta)](/api-reference/deprecated/memory-create)
- [Delete (beta)](/api-reference/deprecated/memory-delete)
- [Retrieve (beta)](/api-reference/deprecated/memory-retrieve)
Please refer to the [Memory API](/api-reference/memory) for the latest endpoints.
---
### Documents API
Below is the list of deprecated Documents API endpoints.
- [List (beta)](/api-reference/deprecated/document-list)
- [Upload (beta)](/api-reference/deprecated/document-upload)
- [Embeddings Retry (beta)](/api-reference/deprecated/document-embeddings-retry)
Please refer to the [Documents API](/api-reference/memory#document) for the latest endpoints.
---
</content>
</doc>
<doc>
<metadata>
<title>Chunker API <span className="text-xl font-mono text-muted-foreground/70">v1</span></title>
<url>https://langbase.com/docs/api-reference/chunker/</url>
</metadata>
<content>
import { generateMetadata } from '@/lib/generate-metadata';
# Chunker API <span className="text-xl font-mono text-muted-foreground/70">v1</span>
The `chunker` API endpoint allows you to split your content into smaller chunks. This is particularly useful when you want to use document chunks in a RAG pipeline or just use specific parts of a document for your tasks.
---
## Generate a User/Org API key
You will need to generate an API key to authenticate your requests. For more information, visit the [User/Org API key documentation](/api-reference/api-keys).
<Spoiler title="Get your Langbase API key: User or Org">
You can generate API keys from the [Langbase Studio](https://studio.langbase.com) by following these steps:
1. Switch to your user or org account.
2. From the sidebar, click on the `API keys`.
3. From here you can create a new API key or manage existing ones.
For more details, follow the [Langbase API keys](/api-reference/api-keys) documentation.
</Spoiler>
---
## Chunk content {{ tag: 'POST', label: '/v1/chunker' }}
<Row>
<Col>
Split content into chunks by sending them to chunk API endpoint.
### Headers
<Properties>
<Property name="Content-Type" type="string" required="true">
Request content type. Needs to be `application/json`.
</Property>
<Property name="Authorization" type="string" required="true">
Replace `<YOUR_API_KEY>` with your user/org API key.
</Property>
</Properties>
---
### Request Body
<Properties>
<Property name="content" type="string" required="true">
The content of the document to be chunked.
</Property>
<Property name="chunkMaxLength" type="number">
The maximum length for each document chunk. Must be between `1024` and `30000` characters.
Default: `1024`
</Property>
<Property name="chunkOverlap" type="number">
The number of characters to overlap between chunks. Must be greater than or equal to `256` and less than chunkMaxLength.
Default: `256`
</Property>
</Properties>
</Col>
<Col sticky>
## Usage example
<CodeGroup exampleTitle="Install the SDK" title="Install the SDK">
```bash {{ title: 'npm' }}
npm i langbase
```
```bash {{ title: 'pnpm' }}
pnpm i langbase
```
```bash {{ title: 'yarn' }}
yarn add langbase
```
</CodeGroup>
### Environment variables
```bash {{ title: '.env file' }}
LANGBASE_API_KEY="<YOUR_API_KEY>"
```
### Chunk content
<div className="mb-8"/>
<CodeGroup exampleTitle="Chunk content" title="Chunk content" tag="POST" label="/v1/chunker">
```bash {{ title: 'cURL' }}
curl https://api.langbase.com/v1/chunker \
-X POST \
-H 'Authorization: Bearer <YOUR_API_KEY>' \
-H 'Content-Type: application/json' \
-d '{
"content": "Langbase is the most powerful serverless AI platform for building AI agents with memory. Build, deploy, and scale AI agents with tools and memory (RAG). Simple AI primitives with a world-class developer experience without using any frameworks.",
"chunkMaxLength": 1024,
"chunkOverlap": 256
}'
```
```ts {{ title: 'Node.js' }}
import { Langbase } from 'langbase';
const langbase = new Langbase({
apiKey: process.env.LANGBASE_API_KEY!,
});
async function main() {
const content = `Langbase is the most powerful serverless AI platform for building AI agents with memory. Build, deploy, and scale AI agents with tools and memory (RAG). Simple AI primitives with a world-class developer experience without using any frameworks.`;
const chunks = await langbase.chunker({
content,
chunkMaxLength: 1024,
chunkOverlap: 256
});
console.log('Chunks:', chunks);
}
main();
```
```python
import requests
def chunk_document():
url = 'https://api.langbase.com/v1/chunker'
api_key = 'YOUR_API_KEY'
headers = {
'Authorization': f'Bearer {api_key}',
'Content-Type': 'application/json',
}
data = {
'content': 'Langbase is the most powerful serverless AI platform for building AI agents with memory. Build, deploy, and scale AI agents with tools and memory (RAG). Simple AI primitives with a world-class developer experience without using any frameworks.',
'chunkMaxLength': '1024',
'chunkOverlap': '256'
}
response = requests.post(
url,
headers=headers,
data=data
)
chunks = response.json()
return chunks
```
</CodeGroup>
</Col>
</Row>
---
<Row>
<Col>
### Response
<Properties>
<Property name="Response" type="string[]">
The response is an array of chunks created from the content.
```ts {{title: 'Chunker API Response'}}
type ChunkerResponse = string[];
```
</Property>
</Properties>
</Col>
<Col sticky>
```json {{ title: 'API Response' }}
[
"Langbase is the most powerful serverless AI platform for building AI agents with memory. Build, deploy, and scale AI agents with tools and memory (RAG). Simple AI primitives with a world-class developer experience without using any frameworks."
]
```
</Col>
</Row>
---
</content>
</doc>
<doc>
<metadata>
<title>Langbase API Keys for users and organizations</title>
<url>https://langbase.com/docs/api-reference/api-keys/</url>
</metadata>
<content>
import { generateMetadata } from '@/lib/generate-metadata';
# Langbase API Keys for users and organizations
The Langbase API uses API keys for authentication. You can create API keys at a user or org account level.
---
### Table of contents
- [Get your Langbase API key](#get-your-langbase-api-key)
- [Org API Key](#org-api-key)
- [User API Key](#user-api-key)
---
## Get your Langbase API key
You can generate API keys from the [Langbase Studio](https://studio.langbase.com) by following these steps:
1. Switch to your user or org account.
2. From the sidebar, click on the `API keys`.
3. From here you can create a new API key or manage existing ones.
For more details read the docs below.
<Info sub="Important" >
<strong>Treat your API keys like passwords. Keep them secret — use only on the server side.</strong>
Remember to keep your API key secret! Your Langbase API key is server side only. Never share it or expose it in client-side code like browsers or apps. For production requests, route them through your own backend server where you can securely load your API key from an environment variable or key management service.
</Info>
---
All API requests should include your API key in an Authorization HTTP header as follows:
```bash
Authorization: Bearer LANGBASE_API_KEY
```
With Langbase SDK, you can set your API key as follows:
```js
import {Langbase} from 'langbase';
const langbase = new Langbase({
apiKey: process.env.LANGBASE_API_KEY
});
```
---
## Org API Key
Get an API key for your organization on Langbase.
## Step #1 Go to API keys page
Login to your account on [Langbase](https://langbase.com/).
1. Navigate to your organization profile page.
2. Click on the `API keys` from the sidebar.
<Img
caption="API keys in sidebar"
light="https://raw.githubusercontent.com/LangbaseInc/docs-images/refs/heads/main/docs/api-keys/org/1-light.jpg"
dark="https://raw.githubusercontent.com/LangbaseInc/docs-images/refs/heads/main/docs/api-keys/org/1-dark.jpg"
/>
---
## Step #2 Org API Keys section
1. In the `Org API Keys` section, click on the `Generate API Key` button.
<Img
caption="Org API Keys Section"
light="https://raw.githubusercontent.com/LangbaseInc/docs-images/refs/heads/main/docs/api-keys/org/2-light.jpg"
dark="https://raw.githubusercontent.com/LangbaseInc/docs-images/refs/heads/main/docs/api-keys/org/2-dark.jpg"
/>
---
## Step #3 Generate a new API key
1. Give your org API key a name. Let's call it `Production API Key`.
2. Let's give the API key a description.
3. Click on `Generate API Key` button to generate the API key.
<Img
caption="Generate a new API Key"
light="https://raw.githubusercontent.com/LangbaseInc/docs-images/refs/heads/main/docs/api-keys/org/3-light.jpg"
dark="https://raw.githubusercontent.com/LangbaseInc/docs-images/refs/heads/main/docs/api-keys/org/3-dark.jpg"
/>
---
## Step #4 Copy the API Key
1. Use the `Copy` button to copy your org API key.
2. Click on the `Done` button to close the modal.
<Warn>
<strong>Make sure to copy your org API key now. You will not be able to view it another time.</strong>
</Warn>
<Img
caption="Copy the API Key"
light="https://raw.githubusercontent.com/LangbaseInc/docs-images/refs/heads/main/docs/api-keys/org/4-light.jpg"
dark="https://raw.githubusercontent.com/LangbaseInc/docs-images/refs/heads/main/docs/api-keys/org/4-dark.jpg"
/>
---
## User API Key
Get an API key for your user account on Langbase.
## Step #1 Go to API keys page
Login to your account on [Langbase](https://langbase.com/).
1. Navigate to your profile page.
2. Click on the `API keys` from the sidebar.
<Img
caption="API keys in sidebar"
light="https://raw.githubusercontent.com/LangbaseInc/docs-images/refs/heads/main/docs/api-keys/profile/1-light.jpg"
dark="https://raw.githubusercontent.com/LangbaseInc/docs-images/refs/heads/main/docs/api-keys/profile/1-dark.jpg"
/>
---
## Step #2 User API Keys section
1. In the `User API Keys` section, click on the `Generate API Key` button.
<Img
caption="User API Keys Section"
light="https://raw.githubusercontent.com/LangbaseInc/docs-images/refs/heads/main/docs/api-keys/profile/2-light.jpg"
dark="https://raw.githubusercontent.com/LangbaseInc/docs-images/refs/heads/main/docs/api-keys/profile/2-dark.jpg"
/>
---
## Step #3 Generate a new API key
1. Give your user API key a name. Let's call it `Production API Key`.
2. Let's give the API key a description.
3. Click on `Generate API Key` button to generate the API key.
<Img
caption="Generate a new API Key"
light="https://raw.githubusercontent.com/LangbaseInc/docs-images/refs/heads/main/docs/api-keys/profile/3-light.jpg"
dark="https://raw.githubusercontent.com/LangbaseInc/docs-images/refs/heads/main/docs/api-keys/profile/3-dark.jpg"
/>
---
## Step #4 Copy the API Key
1. Use the `Copy` button to copy your user API key.
2. Click on the `Done` button to close the modal.
<Warn>
<strong>Make sure to copy your user API key now. You will not be able to view it another time.</strong>
</Warn>
<Img
caption="Copy the API Key"
light="https://raw.githubusercontent.com/LangbaseInc/docs-images/refs/heads/main/docs/api-keys/profile/4-light.jpg"
dark="https://raw.githubusercontent.com/LangbaseInc/docs-images/refs/heads/main/docs/api-keys/profile/4-dark.jpg"
/>
---
✨ Congrats, you have created your first API key. We're excited to see what you build with it.
---
</content>
</doc>
<doc>
<metadata>
<title>Agent Run API</title>
<url>https://langbase.com/docs/api-reference/agent/</url>
</metadata>
<content>
import { generateMetadata } from '@/lib/generate-metadata';
# Agent Run API
You can use the Agent Run endpoint as runtime LLM agent. You can specify all parameters at runtime and get the response from the agent.
Agent uses our unified LLM API to provide a consistent interface for interacting with 100+ LLMs across all the top LLM providers. See the list of [supported models and providers here](/supported-models-and-providers).
---
## Generate a User/Org API key
You will need to generate an API key to authenticate your requests. For more information, visit the [User/Org API key documentation](/api-reference/api-keys).
<Spoiler title="Get your Langbase API key: User or Org">
You can generate API keys from the [Langbase Studio](https://studio.langbase.com) by following these steps:
1. Switch to your user or org account.
2. From the sidebar, click on the `API keys`.
3. From here you can create a new API key or manage existing ones.
For more details, follow the [Langbase API keys](/api-reference/api-keys) documentation.
</Spoiler>
---
## Run an Agent {{ tag: 'POST', label: '/v1/agent/run' }}
<Row>
<Col>
Run the Agent by sending the required data with the request.
## Headers
<Properties>
<Property name="Content-Type" type="string" required="true">
Request content type. Needs to be `application/json`
</Property>
<Property name="Authorization" type="string" required="true">
Replace `<YOUR_API_KEY>` with your user/org API key.
</Property>
<Property name="LB-LLM-Key" type="string">
LLM API key for the LLM being used in the request.
</Property>
</Properties>
---
## options
<Properties>
<Property name="options" type="AgentRunOptions">
```ts {{title: 'AgentRunOptions Object'}}
interface AgentRunOptions {
model: string;
input: string | Array<InputMessage>;
instructions?: string;
stream?: boolean;
tools?: Tool[];
tool_choice?: 'auto' | 'required' | ToolChoice;
parallel_tool_calls?: boolean;
reasoning_effort?: 'none' | 'low' | 'medium' | 'high';
mcp_servers?: McpServerSchema[];
top_p?: number;
max_tokens?: number;
temperature?: number;
presence_penalty?: number;
frequency_penalty?: number;
stop?: string[];
customModelParams?: Record<string, any>;
}
```
*Following are the properties of the options object.*
</Property>
</Properties>
---
### model
<Properties>
<Property name="model" type="string" required="true">
LLM model. Combination of model provider and model id, like `openai:gpt-4o-mini`
Format: `provider:model_id`
You can copy the ID of a model from the list of [supported LLM models](/supported-models-and-providers) at Langbase.
</Property>
</Properties>
---
### input
<Properties>
<Property name="input" type="String | Array<InputMessage>" required="true">
A string (for simple text queries) or an array of input messages.
When using a string, it will be treated as a single user message. Use it for simple queries. For example:
```ts {{title: 'String Input Example'}}
langbase.agent.run({
input: 'What is an AI Agent?',
...
});
```
When using an array of input messages `InputMessage[]`. Each input message should include the following properties:
```ts {{title: 'Input Message Object'}}
interface InputMessage {
role: 'user' | 'assistant' | 'system'| 'tool';
content: string | ContentType[] | null;
name?: string;
tool_call_id?: string;
}
```
```ts {{title: 'Array Input Messages Example'}}
langbase.agent.run({
input: [
{
role: 'user',
content: 'What is an AI Agent?',
},
],
...
});
```
---
<Properties>
<Property name="role" type="'user' | 'assistant' | 'system'| 'tool'">
The role of the author of this message.
</Property>
<Property name="content" type="string | ContentType[] | null">
The content of the message.
1. `String` For text generation, it's a plain string.
2. `Null` or `undefined` Tool call messages can have no content.
3. `ContentType[]` Array used in vision and audio models, where content consists of structured parts (e.g., text, image URLs).
```js {{ title: 'ContentType Object' }}
interface ContentType {
type: string;
text?: string | undefined;
image_url?:
| {
url: string;
detail?: string | undefined;
}
| undefined;
};
```
</Property>
<Property name="name" type="string">
The name of the tool called by LLM
</Property>
<Property name="tool_call_id" type="string">
The id of the tool called by LLM
</Property>
</Properties>
</Property>
</Properties>
---
### instructions
<Properties>
<Property name="instructions" type="string">
Used to give high level instructions to the model about the task it should perform, including tone, goals, and examples of correct responses.
This is equivalent to a system/developer role message at the top of LLM's context.
</Property>
</Properties>
---
### stream
<Properties>
<Property name="stream" type="boolean">
Whether to stream the response or not. If `true`, the response will be streamed.
</Property>
</Properties>
---
### tools
<Properties>
<Property name="tools" type="Array<Tools>">
A list of tools the model may call.
```ts {{title: 'Tools Object'}}
interface ToolsOptions {
type: 'function';
function: FunctionOptions
}
```
<Properties>
<Property name="type" type="'function'">
The type of the tool. Currently, only `function` is supported.
</Property>
<Property name="function" type="FunctionOptions">
The function that the model may call.
```ts {{title: 'FunctionOptions Object'}}
export interface FunctionOptions {
name: string;
description?: string;
parameters?: Record<string, unknown>
}
```
<Property name="name" type="string">
The name of the function to call.
</Property>
<Property name="description" type="string">
The description of the function.
</Property>
<Property name="parameters" type="Record<string, unknown>">
The parameters of the function.
</Property>
</Property>
</Properties>
</Property>
</Properties>
---
### tool_choice
<Properties>
<Property name="tool_choice" type="'auto' | 'required' | ToolChoice">
Tool usage configuration.
<Properties>
<Property name="'auto'" type="string">
Model decides when to use tools.
</Property>
<Property name="'required'" type="string">
Model must use specified tools.
</Property>
<Property name="ToolChoice" type="object">
Forces use of a specific function.
```ts {{title: 'ToolChoice Object'}}
interface ToolChoice {
type: 'function';
function: {
name: string;
};
}
```
</Property>
</Properties>
</Property>
</Properties>
---
### parallel_tool_calls
<Properties>
<Property name="parallel_tool_calls" type="boolean">
Call multiple tools in parallel, allowing the effects and results of these function calls to be resolved in parallel.
</Property>
</Properties>
---
### reasoning_effort
<Properties>
<Property name="reasoning_effort" type="'none' | 'low' | 'medium' | 'high'">
How much reasoning the model should apply before answering, for models that support reasoning effort.
OpenAI GPT-5.4 and newer models only support tool calls when the reasoning effort is `none`. Langbase sets it to `none` automatically when the run includes tools; set it explicitly to control the behavior yourself.
</Property>
</Properties>
---
### mcp_servers
<Properties>
<Property name="mcp_servers" type="McpServerSchema[]">
An SSE type MCP servers array
```js {{ title: 'McpServerSchema Object' }}
interface McpServerSchema {
name: string;
type: 'url';
url: string;
authorization_token?: string;
tool_configuration?: {
allowed_tools?: string[];
enabled?: boolean;
};
custom_headers?: Record<string, string>;
}
```
</Property>
<Property name="name" type="string">
The name of the MCP server.
</Property>
<Property name="type" type="'url'">
Type of the MCP server.
</Property>
<Property name="url" type="string">
The URL of the MCP server.
</Property>
<Property name="authorization_token" type="string">
The authorization token is for MCP servers that require OAuth authentication, you’ll need to obtain an access token. Please note that we do not store this token.
</Property>
<Property name="tool_configuration" type="object">
Tool configuration for the MCP server have the following properties:
1. `allowed_tools` - Specify the tool names that the MCP server is permitted to use.
2. `enabled` - Whether to enable tools from this server.
</Property>
<Property name="custom_headers" type="Record<string, string>">
Custom headers are additional headers for MCP servers if required.
</Property>
</Properties>
---
### temperature
<Properties>
<Property name="temperature" type="number">
What sampling temperature to use, between 0 and 2. Higher values like 0.8 will make the output more random. Lower values like 0.2 will make it more focused and deterministic.
Default: `0.7`
</Property>
</Properties>
---
### top_p
<Properties>
<Property name="top_p" type="number">
An alternative to sampling with temperature, called nucleus sampling, where the model considers the results of the tokens with top_p probability mass. So 0.1 means only the tokens comprising the top 10% probability mass are considered.
Default: `1`
</Property>
</Properties>
---
### max_tokens
<Properties>
<Property name="max_tokens" type="number">
Maximum number of tokens in the response message returned.
Default: `1000`
</Property>
</Properties>
---
### presence_penalty
<Properties>
<Property name="presence_penalty" type="number">
Penalizes a word based on its occurrence in the input text.
Default: `0`
</Property>
</Properties>
---
### frequency_penalty
<Properties>
<Property name="frequency_penalty" type="number">
Penalizes a word based on how frequently it appears in the training data.
Default: `0`
</Property>
</Properties>
---
### stop
<Properties>
<Property name="stop" type="string[]">
Up to 4 sequences where the API will stop generating further tokens.
</Property>
</Properties>
---
### customModelParams
<Properties>
<Property name="customModelParams" type="Record<string, any>">
Additional parameters to pass to the model as key-value pairs. These parameters are passed on to the model as-is.
```ts {{title: 'CustomModelParams Object'}}
interface CustomModelParams {
[key: string]: any;
}
```
Example:
```ts
{
"logprobs": true,
"service_tier": "auto",
}
```
</Property>
</Properties>
</Col>
<Col>
## Usage example
<CodeGroup exampleTitle="Install the SDK" title="Install the SDK">
```bash {{ title: 'npm' }}
npm i langbase
```
```bash {{ title: 'pnpm' }}
pnpm i langbase
```
```bash {{ title: 'yarn' }}
yarn add langbase
```
</CodeGroup>
### Run an agent
<div className="mb-8"/>
<CodeExamples>
<CodeGroup exampleTitle="stream-off" title="Basic request without streaming" tag="POST" label="/v1/agent/run" id="default">
```bash {{ title: 'cURL' }}
curl https://api.langbase.com/v1/agent/run \
-H 'Content-Type: application/json' \
-H 'Authorization: Bearer <YOUR_API_KEY>' \
-H 'LB-LLM-API-KEY: <LLM_API_KEY>' \
-d '{
"input": [
{
"role": "user",
"content": "Hello!"
}
]
}'
```
```js {{ title: 'Node.js' }}
import {Langbase} from 'langbase';
const langbase = new Langbase({
apiKey: process.env.YOUR_API_KEY!,
});
async function main() {
const {output} = await langbase.agent.run({
model: 'openai:gpt-4o-mini',
instructions: 'You are a helpful AI Agent.',
input: 'Who is an AI Engineer?',
apiKey: process.env.LLM_API_KEY!, // Replace with the LLM API key.
stream: false,
});
console.log('Agent response:', output);
}
main();
```
```python
import requests
import json
def generate_completion():
url = 'https://api.langbase.com/v1/agent/run'
api_key = '<YOUR_API_KEY>'
llm_api_key = '<LLM_API_KEY>'
body_data = {
"input": [
{"role": "user", "content": "Hello!"}
],
"stream": False
}
headers = {
'Content-Type': 'application/json',
'Authorization': f'Bearer {api_key}',
'LB-LLM-API-KEY': llm_api_key
}
response = requests.post(url, headers=headers, data=json.dumps(body_data))
res = response.json()
completion = res['completion']
return completion
```
</CodeGroup>
<CodeGroup exampleTitle="Streaming" title="Basic request with stream on" tag="POST" label="/v1/agent/run" id="streaming">
```js {{ title: 'Node.js' }}
import {getRunner, Langbase} from 'langbase';
const langbase = new Langbase({
apiKey: process.env.YOUR_API_KEY!,
});
async function main() {
const {stream, rawResponse} = await langbase.agent.run({
model: 'openai:gpt-4o-mini',
instructions: 'You are a helpful AI Agent.',
input: 'Who is an AI Engineer?',
apiKey: process.env.LLM_API_KEY!,
stream: true,
});
// Convert the stream to a stream runner.
const runner = getRunner(stream);
runner.on('connect', () => {
console.log('Stream started.\n');
});
runner.on('content', content => {
process.stdout.write(content);
});
runner.on('end', () => {
console.log('\nStream ended.');
});
runner.on('error', error => {
console.error('Error:', error);
});
}
main();
```
```python
import requests
import json
def main():
url = 'https://api.langbase.com/v1/agent/run'
api_key = '<YOUR_API_KEY>' # TODO: Replace with your Langbase user/org API key.
llm_api_key = '<LLM_API_KEY>' # TODO: Replace with your LLM API key.
data = {
"input": [{"role": "user", "content": "Hello!"}],
"stream": True
}
headers = {
"Content-Type": "application/json",
"Authorization": f"Bearer {api_key}",
'LB-LLM-API-KEY': llm_api_key
}
response = requests.post(url, headers=headers, data=json.dumps(data))
if not response.ok:
print(response.json())
return
for line in response.iter_lines():
if line:
try:
decoded_line = line.decode('utf-8')
if decoded_line.startswith('data: '):
json_str = decoded_line[6:]
if json_str.strip() and json_str != '[DONE]':
data = json.loads(json_str)
if data['choices'] and len(data['choices']) > 0:
delta = data['choices'][0].get('delta', {})
if 'content' in delta and delta['content']:
print(delta['content'], end='', flush=True)
except json.JSONDecodeError:
print("Failed to parse JSON") # Debug JSON parsing
continue
except Exception as e:
print(f"Error processing line: {e}")
if __name__ == "__main__":
main()
```
```bash {{ title: 'cURL' }}
curl https://api.langbase.com/v1/agent/run \
-H 'Content-Type: application/json' \
-H 'Authorization: Bearer <YOUR_API_KEY>' \
-H 'LB-LLM-API-KEY: <LLM_API_KEY>' \
-d '{
"input": [
{
"role": "user",
"content": "Hello!"
}
],
"stream": true
}'
```
</CodeGroup>
<CodeGroup
exampleTitle="Tool Calling"
title="Run API with tool calling"
tag="POST"
label="/v1/agent/run"
id="tool-calling"
>
```js {{ title: 'Node.js' }}
import { Langbase } from 'langbase';
const langbase = new Langbase({
apiKey: process.env.YOUR_API_KEY!,
});
async function main() {
const tools = [
{
type: 'function',
function: {
name: 'get_current_weather',
description: 'Get the current weather in a given location',
parameters: {
type: 'object',
properties: {
location: {
type: 'string',
description: 'The city and state, e.g. San Francisco, CA',
},
unit: { type: 'string', enum: ['celsius', 'fahrenheit'] },
},
required: ['location'],
},
},
},
];
const response = await langbase.agent.run({
model: 'openai:gpt-4o-mini',
input: 'What is the weather like in SF today?',
tools: tools,
tool_choice: 'auto',
apiKey: process.env.LLM_API_KEY!,
stream: false,
});
console.log(response);
}
main();
```
```python
import requests
import json
import os
def get_weather_info():
url = 'https://api.langbase.com/v1/agent/run'
api_key = '<YOUR_API_KEY>'
llm_api_key = '<LLM_API_KEY>'
body_data = {
"stream": False,
"input": [
{"role": "user", "content": "What's the weather in SF"}
],
"tools": [
{
"type": "function",
"function": {
"name": "get_current_weather",
"description": "Get the current weather of a given location",
"parameters": {
"type": "object",
"required": ["location"],
"properties": {
"unit": {
"enum": ["celsius", "fahrenheit"],
"type": "string"
},
"location": {
"type": "string",
"description": "The city and state, e.g. San Francisco, CA"
}
}
}
}
}
]
}
headers = {
'Content-Type': 'application/json',
'Authorization': f'Bearer {api_key}',
'LB-LLM-API-KEY': llm_api_key
}
response = requests.post(url, headers=headers, data=json.dumps(body_data))
res = response.json()
return res
```
```bash {{ title: 'cURL' }}
curl https://api.langbase.com/v1/agent/run \
-H 'Content-Type: application/json' \
-H "Authorization: Bearer <YOUR_API_KEY>" \
-H 'LB-LLM-API-KEY: <LLM_API_KEY>' \
-d '{
"input": [
{
"role": "user",
"content": "What\'s the weather in SF"
}
],
"stream": false,
"tools": [
{
"type": "function",
"function": {
"name": "get_current_weather",
"description": "Get the current weather of a given location",
"parameters": {
"type": "object",
"required": ["location"],
"properties": {
"unit": {
"enum": ["celsius", "fahrenheit"],
"type": "string"
},
"location": {
"type": "string",
"description": "The city and state, e.g. San Francisco, CA"
}
}
}
}
}
]
}'
```
</CodeGroup>
</CodeExamples>
</Col>
</Row>
---
<Row>
<Col>
## Response
Response of `langbase.agent.run()` is a `Promise<AgentRunResponse | AgentRunResponseStream>` object.
### RunResponse Object
```ts {{title: 'AgentRunResponse Object'}}
interface RunResponse {
output: string | null;
id: string;
object: string;
created: number;
model: string;
choices: ChoiceGenerate[];
usage: Usage;
system_fingerprint: string | null;
rawResponse?: {
headers: Record<string, string>;
};
}
```
<Properties>
<Property name="output" type="string">
The generated text response (also called completion) from the agent. It can be a string or null if the model called a tool.
</Property>
<Property name="id" type="string">
The ID of the raw response.
</Property>
<Property name="object" type="string">
The object type name of the response.
</Property>
<Property name="created" type="number">
The timestamp of the response creation.
</Property>
<Property name="model" type="string">
The model used to generate the response.
</Property>
<Property name="choices" type="ChoiceGenerate[]">
A list of chat completion choices. Can contain more than one elements if n is greater than 1.
```ts {{title: 'Choice Object for langbase.agent.run() with stream off'}}
interface ChoiceGenerate {
index: number;
message: Message;
logprobs: boolean | null;
finish_reason: string;
}
```
</Property>
<Sub name="index" type="number">
The index of the choice in the list of choices.
</Sub>
<Sub name="message" type="Message">
A messages array including `role` and `content` params.
```ts {{title: 'Message Object'}}
interface Message {
role: 'user' | 'assistant' | 'system'| 'tool';
content: string | null;
tool_calls?: ToolCall[];
}
```
<Sub name="role" type="'user' | 'assistant' | 'system'| 'tool'">
The role of the author of this message.
</Sub>
<Sub name="content" type="string | null">
The contents of the chunk message. Null if a tool is called.
</Sub>
<Sub name="tool_calls" type="Array<ToolCall>">
The array of the tools called by the agent
```ts {{title: 'ToolCall Object'}}
interface ToolCall {
id: string;
type: 'function';
function: Function;
}
```
<Sub name="id" type="string">
The ID of the tool call.
</Sub>
<Sub name="type" type="'function'">
The type of the tool. Currently, only `function` is supported.
</Sub>
<Sub name="function" type="Function">
The function that the model called.
```ts {{title: 'Function Object'}}
export interface Function {
name: string;
arguments: string;
}
```
<Sub name="name" type="string">
The name of the function to call.
</Sub>
<Sub name="arguments" type="string">
The arguments to call the function with, as generated by the model in JSON format.
</Sub>
</Sub>
</Sub>
</Sub>
<Sub name="logprobs" type="boolean or null">
Log probability information for the choice. Whether to return log probabilities of the output tokens or not. If true, returns the log probabilities of each output token returned in the `content` of `message`.
</Sub>
<Sub name="finish_reason" type="string">
The reason the model stopped generating tokens. This will be `stop` if the model hit a natural stop point or a provided stop sequence, length if the maximum number of tokens specified in the request was reached, `content_filter` if content was omitted due to a flag from our content filters, `tool_calls` if the model called a tool, or `function_call` (deprecated) if the model called a function. It could also be `eos` end of sequence and depends on the type of LLM, you can check their docs.
</Sub>
<Property name="usage" type="Usage">
The usage object including the following properties.
```ts {{title: 'Usage Object'}}
interface Usage {
prompt_tokens: number;
completion_tokens: number;
total_tokens: number;
}
```
<Sub name="prompt_tokens" type="number">
The number of tokens in the prompt (input).
</Sub>
<Sub name="completion_tokens" type="number">
The number of tokens in the completion (output).
</Sub>
<Sub name="total_tokens" type="number">
The total number of tokens.
</Sub>
</Property>
<Property name="system_fingerprint" type="string">
This fingerprint represents the backend configuration that the model runs with.
</Property>
<Property name="rawResponse" type="Object">
The different headers of the response.
</Property>
</Properties>
---
### RunResponseStream Object
Response of `langbase.agent.run()` with `stream: true` is a `Promise<AgentRunResponseStream>`.
```ts {{title: 'AgentRunResponseStream Object'}}
interface RunResponseStream {
stream: ReadableStream<any>;
rawResponse?: {
headers: Record<string, string>;
};
}
```
<Properties>
<Property name="rawResponse" type="Object">
The different headers of the response.
</Property>
<Property name="stream" type="ReadableStream">
Stream is an object with a streamed sequence of StreamChunk objects.
```ts {{title: 'StreamResponse Object'}}
type StreamResponse = ReadableStream<StreamChunk>;
```
### StreamChunk
<Property name="StreamChunk" type="StreamChunk">
Represents a streamed chunk of a completion response returned by model, based on the provided input.
```js {{title: 'StreamChunk Object'}}
interface StreamChunk {
id: string;
object: string;
created: number;
model: string;
choices: ChoiceStream[];
}
```
A `StreamChunk` object has the following properties.
<Properties>
<Property name="id" type="string">
The ID of the response.
</Property>
<Property name="object" type="string">
The object type name of the response.
</Property>
<Property name="created" type="number">
The timestamp of the response creation.
</Property>
<Property name="model" type="string">
The model used to generate the response.
</Property>
<Property name="choices" type="ChoiceStream[]">
A list of chat completion choices. Can contain more than one elements if n is greater than 1.
```js {{title: 'Choice Object for langbase.agent.run() with stream true'}}
interface ChoiceStream {
index: number;
delta: Delta;
logprobs: boolean | null;
finish_reason: string;
}
```
</Property>
<Sub name="index" type="number">
The index of the choice in the list of choices.
</Sub>
<Sub name="delta" type="Delta">
A chat completion delta generated by streamed model responses.
```js {{title: 'Delta Object'}}
interface Delta {
role?: Role;
content?: string | null;
tool_calls?: ToolCall[];
}
```
<Sub name="role" type="'user' | 'assistant' | 'system'| 'tool'">
The role of the author of this message.
</Sub>
<Sub name="content" type="string | null">
The contents of the chunk message. Null if a tool is called.
</Sub>
<Sub name="tool_calls" type="Array<ToolCall>">
The array of the tools called by LLM
```js {{title: 'ToolCall Object'}}
interface ToolCall {
id: string;
type: 'function';
function: Function;
}
```
<Sub name="id" type="string">
The ID of the tool call.
</Sub>
<Sub name="type" type="'function'">
The type of the tool. Currently, only `function` is supported.
</Sub>
<Sub name="function" type="Function">
The function that the model called.
```js {{title: 'Function Object'}}
export interface Function {
name: string;
arguments: string;
}
```
<Sub name="name" type="string">
The name of the function to call.
</Sub>
<Sub name="arguments" type="string">
The arguments to call the function with, as generated by the model in JSON format.
</Sub>
</Sub>
</Sub>
</Sub>
<Sub name="logprobs" type="boolean or null">
Log probability information for the choice. Whether to return log probabilities of the output tokens or not. If true, returns the log probabilities of each output token returned in the `content` of `message`.
</Sub>
<Sub name="finish_reason" type="string">
The reason the model stopped generating tokens. This will be `stop` if the model hit a natural stop point or a provided stop sequence, length if the maximum number of tokens specified in the request was reached, `content_filter` if content was omitted due to a flag from our content filters, `tool_calls` if the model called a tool, or `function_call` (deprecated) if the model called a function. It could also be `eos` end of sequence and depends on the type of LLM, you can check their docs.
</Sub>
</Properties>
</Property>
</Property>
</Properties>
</Col>
<Col sticky>
```json {{ title: 'RunResponse type of langbase.agent.run()' }}
{
"output": "AI Engineer is a person who designs, builds, and maintains AI systems.",
"id": "chatcmpl-123",
"object": "chat.completion",
"created": 1720131129,
"model": "gpt-4o-mini",
"choices": [
{
"index": 0,
"message": {
"role": "assistant",
"content": "AI Engineer is a person who designs, builds, and maintains AI systems."
},
"logprobs": null,
"finish_reason": "stop"
}
],
"usage": {
"prompt_tokens": 28,
"completion_tokens": 36,
"total_tokens": 64
},
"system_fingerprint": "fp_123"
}
```
```js {{ title: 'RunResponseStream of langbase.agent.run() with stream true' }}
{
"stream": StreamResponse // example of streamed chunks below.
}
```
```json {{ title: 'StreamResponse has stream chunks' }}
// A stream chunk looks like this …
{
"id": "chatcmpl-123",
"object": "chat.completion.chunk",
"created": 1719848588,
"model": "gpt-4o-mini",
"system_fingerprint": "fp_44709d6fcb",
"choices": [{
"index": 0,
"delta": { "content": "Hi" },
"logprobs": null,
"finish_reason": null
}]
}
// More chunks as they come in...
{"id":"chatcmpl-123","object":"chat.completion.chunk","created":1719848588,"model":"gpt-4o-mini","system_fingerprint":"fp_44709d6fcb","choices":[{"index":0,"delta":{"content":"there"},"logprobs":null,"finish_reason":null}]}
…
{"id":"chatcmpl-123","object":"chat.completion.chunk","created":1719848588,"model":"gpt-4o-mini","system_fingerprint":"fp_44709d6fcb","choices":[{"index":0,"delta":{},"logprobs":null,"finish_reason":"stop"}]}
```
</Col>
</Row>
---
</content>
</doc>
<doc>
<metadata>
<title>Page</title>
<url>https://langbase.com/docs/agent/platform/</url>
</metadata>
<content>
import { generateMetadata } from '@/lib/generate-metadata';
## Platform
Limits and pricing for Agent primitive on the Langbase Platform are as follows:
1. **[Limits](agent/platform/limits)**: Rate and usage limits.
2. **[Pricing](agent/platform/pricing)**: Pricing details for the Agent primitive.
</content>
</doc>
<doc>
<metadata>
<title>Pricing for Threads Primitive</title>
<url>https://langbase.com/docs/threads/platform/pricing/</url>
</metadata>
<content>
import { generateMetadata } from '@/lib/generate-metadata';
# Pricing for Threads Primitive
`Create` and `Update` requests to the Threads primitive are counted as **Runs** against your subscription plan. Runs are counted against the content of messages in the Threads primitive.
The content of the message is counted as the number of tokens in the message. For example, if a message has 1000 tokens, it counts as 1 run. If a message has 1500 tokens, it counts as 2 runs. `Get`, `Delete`, and `List` requests are not charged.
| Plan | Runs | Overage |
|------------|----------|----------|
| Hobby | 500 | - |
| Enterprise | [Contact Us][contact-us] | [Contact Us][contact-us] |
<Note title="What is a run?">
Each run is an API request which can have at the max 1,000 tokens in it which is equivalent to almost 750 words (an article). If your API request has, for instance, 1500 tokens in it, it will count as 2 runs.
</Note>
### Free Users
- **Limit**: 500 runs per month.
- **Overage**: No overage.
### Enterprise Users
There are no hard limits for Enterprise. Billing is based solely on the number of runs during each billing period.
If you have questions about your usage or need assistance, please don't hesitate to [contact us](mailto:support@langbase.com).
---
[contact-us]: mailto:support@langbase.com
</content>
</doc>
<doc>
<metadata>
<title>Limits for Threads Primitive</title>
<url>https://langbase.com/docs/threads/platform/limits/</url>
</metadata>
<content>
import { generateMetadata } from '@/lib/generate-metadata';
# Limits for Threads Primitive
The following Rate and Usage Limits apply for the Threads primitive:
### Rate Limits
Threads primitive requests follow our standard rate limits. See the [Rate Limits](/api-reference/limits/rate-limits) page for more details.
### Usage Limits
`Create` and `Update` requests to the Threads primitive are counted as **Runs** against your subscription plan. See the [Run Usage Limits](/api-reference/limits/usage-limits) page for more details. `Get`, `Delete`, and `List` requests have no usage limits.
</content>
</doc>
<doc>
<metadata>
<title>Web Search <span className="text-sm font-mono text-muted-foreground/70 ml-2">langbase.tools.webSearch()</span></title>
<url>https://langbase.com/docs/sdk/tools/web-search/</url>
</metadata>
<content>
import { LanguageProvider, SimpleLanguageToggle, LanguageContent } from '@/components/LanguageToggle';
import { generateMetadata } from '@/lib/generate-metadata';
# Web Search <span className="text-sm font-mono text-muted-foreground/70 ml-2">langbase.tools.webSearch()</span>
<LanguageProvider defaultLanguage='typescript'>
You can use the `tools.webSearch()` function to search the web for relevant information. This functionality is powered by [Exa](https://exa.ai), and you'll need to obtain an API key from them to use this feature.
---
## Pre-requisites
1. **Langbase API Key**: Generate your API key from the [User/Org API key documentation](/api-reference/api-keys).
2. **Exa API Key**: Sign up at [Exa Dashboard](https://dashboard.exa.ai/api-keys) to get your web search API key.
<Spoiler title="Get your Langbase API key: User or Org">
You can generate API keys from the [Langbase Studio](https://studio.langbase.com) by following these steps:
1. Switch to your user or org account.
2. From the sidebar, click on the `API keys`.
3. From here you can create a new API key or manage existing ones.
For more details, follow the [Langbase API keys](/api-reference/api-keys) documentation.
</Spoiler>
---
<div className="flex justify-between items-end">
<h3 className="text-2xl w-full">API reference</h3>
<div className="flex md:hidden items-end mb-1">
<SimpleLanguageToggle/>
</div>
</div>
## `langbase.tools.webSearch(options)`
<Row>
<Col>
Search the web by running the `langbase.tools.webSearch()` function.
<LanguageContent language="typescript">
<CodeGroup exampleTitle="langbase.tools.webSearch()" title="Function Signature">
```ts {{ title: 'index.ts' }}
langbase.tools.webSearch(options);
// with types
langbase.tools.webSearch(options: ToolWebSearchOptions);
```
</CodeGroup>
</LanguageContent>
<LanguageContent language="python">
<CodeGroup exampleTitle="web_search()" title="Function Signature">
```python {{ title: 'main.py' }}
langbase.tools.webSearch(**options)
```
</CodeGroup>
</LanguageContent>
## options
<Properties>
<Property name="options" type="ToolWebSearchOptions">
<LanguageContent language="typescript">
```bash {{title: 'ToolWebSearchOptions Object'}}
query: string;
service: 'exa';
apiKey: string;
totalResults?: number;
domains?: string[];
```
</LanguageContent>
<LanguageContent language="python">
```bash {{title: 'ToolWebSearchOptions Object'}}
query: string
service: 'exa'
api_key: string
total_results?: number
domains?: List[string]
```
</LanguageContent>
*Following are the properties of the options object.*
</Property>
</Properties>
---
### query
<Properties>
<Property name="query" type="string" required="true">
The search query to execute.
</Property>
</Properties>
---
### service
<Properties>
<Property name="service" type="string" required="true">
Currently only supports `'exa'` as the search service provider.
</Property>
</Properties>
---
<LanguageContent language="typescript">
### apiKey
<Properties>
<Property name="apiKey" type="string" required="true">
Your Exa API key – get one from the [Exa Dashboard](https://dashboard.exa.ai/api-keys).
</Property>
</Properties>
</LanguageContent>
<LanguageContent language="python">
### api_key
<Properties>
<Property name="api_key" type="string" required="true">
Your Exa API key – get one from the [Exa Dashboard](https://dashboard.exa.ai/api-keys).
</Property>
</Properties>
</LanguageContent>
---
<LanguageContent language="typescript">
### totalResults
<Properties>
<Property name="totalResults" type="number">
The maximum number of results to return from the search.
</Property>
</Properties>
</LanguageContent>
<LanguageContent language="python">
### total_results
<Properties>
<Property name="total_results" type="number">
The maximum number of results to return from the search.
</Property>
</Properties>
</LanguageContent>
---
<LanguageContent language="typescript">
### domains
<Properties>
<Property name="domains" type="string[]">
Optional array of domains to restrict the search to.
</Property>
</Properties>
</LanguageContent>
<LanguageContent language="python">
### domains
<Properties>
<Property name="domains" type="List[string]">
Optional array of domains to restrict the search to.
</Property>
</Properties>
</LanguageContent>
</Col>
<Col>
<div className="flex justify-between items-end">
<h3 className="text-2xl w-full">Usage example</h3>
<div className="hidden md:flex items-end mb-2">
<SimpleLanguageToggle/>
</div>
</div>
<LanguageContent language="typescript">
<CodeGroup exampleTitle="Install the SDK" title="Install the SDK">
```bash {{ title: 'npm' }}
npm i langbase
```
```bash {{ title: 'pnpm' }}
pnpm i langbase
```
```bash {{ title: 'yarn' }}
yarn add langbase
```
</CodeGroup>
</LanguageContent>
<LanguageContent language="python">
<CodeGroup exampleTitle="Install the SDK" title="Install the SDK">
```bash {{ title: 'pip' }}
pip install langbase python-dotenv
```
</CodeGroup>
</LanguageContent>
### Environment variables
```bash {{ title: '.env file' }}
LANGBASE_API_KEY="<USER/ORG-API-KEY>"
EXA_API_KEY="<EXA-API-KEY>"
```
### `langbase.tools.webSearch()` examples
<LanguageContent language="typescript">
<CodeGroup exampleTitle="langbase.tools.webSearch()" title="langbase.tools.webSearch()">
```ts {{ title: 'Basic' }}
import { Langbase } from 'langbase';
const langbase = new Langbase({
apiKey: process.env.LANGBASE_API_KEY!,
});
async function main() {
const results = await langbase.tools.webSearch({
query: 'What is Langbase?',
service: 'exa',
apiKey: process.env.EXA_API_KEY!,
totalResults: 2
});
console.log('Search results:', results);
}
main();
```
```ts {{ title: 'Domain-Specific Search' }}
import { Langbase } from 'langbase';
const langbase = new Langbase({
apiKey: process.env.LANGBASE_API_KEY!,
});
async function main() {
const results = await langbase.tools.webSearch({
query: 'What is Langbase?',
service: 'exa',
apiKey: process.env.EXA_API_KEY!,
totalResults: 2,
domains: ['https://langbase.com']
});
console.log('Domain-specific results:', results);
}
main();
```
</CodeGroup>
</LanguageContent>
<LanguageContent language="python">
<CodeGroup exampleTitle="Perform a web search" title="Perform a web search">
```python {{ title: 'Basic' }}
import json
import os
from dotenv import load_dotenv
from langbase import Langbase
def main():
load_dotenv()
langbase_api_key = os.getenv("LANGBASE_API_KEY")
search_api_key = os.getenv("EXA_API_KEY")
langbase = Langbase(api_key=langbase_api_key)
try:
search_results = langbase.tools.web_search(
query='What is Langbase?',
service="exa",
total_results=2,
api_key=search_api_key,
)
print(json.dumps(search_results, indent=2))
except Exception as e:
print(f"Error performing web search: {e}")
if __name__ == "__main__":
main()
```
```python {{ title: 'Domain-Specific Search' }}
import json
import os
from dotenv import load_dotenv
from langbase import Langbase
def main():
load_dotenv()
# Get API key from environment variable
langbase_api_key = os.getenv("LANGBASE_API_KEY")
# Initialize the client
search_api_key = os.getenv("EXA_API_KEY")
# Initialize the client
langbase = Langbase(api_key=langbase_api_key)
# Configure the search request
search_query = "latest advancements in quantum computing 2025"
# Optional: restrict to specific domains
domains = ["arxiv.org", "nature.com", "science.org"]
# Perform the web search
try:
search_results = langbase.tools.web_search(
query=search_query,
service="exa", # The search service to use
total_results=5, # Number of results to return
domains=domains, # Optional: restrict to specific domains
api_key=search_api_key, # Optional: provider-specific API key
)
print(json.dumps(search_results, indent=2))
except Exception as e:
print(f"Error performing web search: {e}")
if __name__ == "__main__":
main()
```
</CodeGroup>
</LanguageContent>
</Col>
</Row>
---
<Row>
<Col>
## Response
<Properties>
<Property name="ToolWebSearchResponse[]" type="Array<object>">
An array of web search result objects returned by the `langbase.tools.webSearch()` function.
```ts {{title: 'ToolWebSearchResponse Type'}}
url: string;
content: string;
```
<Properties>
<Property name="url" type="string">
The URL of the search result.
</Property>
<Property name="content" type="string">
The extracted content from the search result.
</Property>
</Properties>
</Property>
</Properties>
</Col>
<Col sticky>
```json {{ title: 'ToolWebSearchResponse Example' }}
[
{
"url": "https://langbase.com/docs/introduction",
"content": "Langbase is a powerful AI development platform..."
},
{
"url": "https://langbase.com/docs/getting-started",
"content": "Get started with Langbase by installing our SDK..."
}
]
```
</Col>
</Row>
</LanguageProvider>
---
</content>
</doc>
<doc>
<metadata>
<title>Crawler <span className="text-sm font-mono text-muted-foreground/70 ml-2">langbase.tools.crawl()</span></title>
<url>https://langbase.com/docs/sdk/tools/crawl/</url>
</metadata>
<content>
import { LanguageProvider, SimpleLanguageToggle, LanguageContent } from '@/components/LanguageToggle';
import { generateMetadata } from '@/lib/generate-metadata';
# Crawler <span className="text-sm font-mono text-muted-foreground/70 ml-2">langbase.tools.crawl()</span>
<LanguageProvider defaultLanguage='typescript'>
You can use the `tools.crawl()` function to extract content from web pages. This is particularly useful when you need to gather information from websites for your AI applications.
The crawling functionality is powered by the following services:
- [Spider.cloud](https://spider.cloud)
- [Firecrawl](https://firecrawl.dev)
---
## Pre-requisites
1. **Langbase API Key**: Generate your API key from the [User/Org API key documentation](/api-reference/api-keys).
2. **Crawl API Key**: Sign up at [Spider.cloud](https://spider.cloud) OR [Firecrawl](https://firecrawl.dev) to get your crawl API key.
<Spoiler title="Get your Langbase API key: User or Org">
You can generate API keys from the [Langbase Studio](https://studio.langbase.com) by following these steps:
1. Switch to your user or org account.
2. From the sidebar, click on the `API keys`.
3. From here you can create a new API key or manage existing ones.
For more details, follow the [Langbase API keys](/api-reference/api-keys) documentation.
</Spoiler>
---
<div className="flex justify-between items-end">
<h3 className="text-2xl w-full">API reference</h3>
<div className="flex md:hidden items-end mb-1">
<SimpleLanguageToggle/>
</div>
</div>
## `langbase.tools.crawl(options)`
<Row>
<Col>
Crawl web pages by running the `langbase.tools.crawl()` function.
<LanguageContent language="typescript">
<CodeGroup exampleTitle="langbase.tools.crawl()" title="Function Signature">
```ts {{ title: 'index.ts' }}
langbase.tools.crawl(options);
// with types
langbase.tools.crawl(options: ToolCrawlOptions);
```
</CodeGroup>
</LanguageContent>
<LanguageContent language="python">
<CodeGroup exampleTitle="crawl()" title="Function Signature">
```python {{ title: 'main.py' }}
langbase.tools.crawl(**options)
```
</CodeGroup>
</LanguageContent>
## options
<LanguageContent language="typescript">
<Properties>
<Property name="options" type="ToolCrawlOptions">
<LanguageContent language="typescript">
```bash {{title: 'ToolCrawlOptions Object'}}
url: string[];
apiKey: string;
maxPages?: number;
service?: 'spider' | 'firecrawl';
```
</LanguageContent>
*Following are the properties of the options object.*
</Property>
</Properties>
</LanguageContent>
<LanguageContent language="python">
<Properties>
<Property name="options" type="ToolCrawlOptions">
<LanguageContent language="python">
```bash {{title: 'ToolCrawlOptions Object'}}
url: string[]
api_key: string
max_pages?: number
service?: 'spider' | 'firecrawl'
```
</LanguageContent>
*Following are the properties of the options object.*
</Property>
</Properties>
</LanguageContent>
---
### url
<Properties>
<Property name="url" type="string[]" required="true">
An array of URLs to crawl. Each URL should be a valid web address.
</Property>
</Properties>
---
<LanguageContent language="typescript">
### apiKey
<Properties>
<Property name="apiKey" type="string" required="true">
Your Spider.cloud API key – get one from [Spider.cloud](https://spider.cloud).
</Property>
</Properties>
</LanguageContent>
<LanguageContent language="python">
### api_key
<Properties>
<Property name="api_key" type="string" required="true">
Your Spider.cloud API key – get one from [Spider.cloud](https://spider.cloud).
</Property>
</Properties>
</LanguageContent>
---
<LanguageContent language="typescript">
### maxPages
<Properties>
<Property name="maxPages" type="number">
Maximum number of pages to crawl. Limits crawl depth.
</Property>
</Properties>
</LanguageContent>
<LanguageContent language="python">
### max_pages
<Properties>
<Property name="max_pages" type="number">
Maximum number of pages to crawl. Limits crawl depth.
</Property>
</Properties>
</LanguageContent>
---
### service
<Properties>
<Property name="service" type="string">
The crawling service to use. Options are `spider` or `firecrawl`. Default is `spider`.
</Property>
</Properties>
</Col>
<Col>
<div className="flex justify-between items-end">
<h3 className="text-2xl w-full">Usage example</h3>
<div className="hidden md:flex items-end mb-2">
<SimpleLanguageToggle/>
</div>
</div>
<LanguageContent language="typescript">
<CodeGroup exampleTitle="Install the SDK" title="Install the SDK">
```bash {{ title: 'npm' }}
npm i langbase
```
```bash {{ title: 'pnpm' }}
pnpm i langbase
```
```bash {{ title: 'yarn' }}
yarn add langbase
```
</CodeGroup>
</LanguageContent>
<LanguageContent language="python">
<CodeGroup exampleTitle="Install the SDK" title="Install the SDK">
```bash {{ title: 'pip' }}
pip install langbase python-dotenv
```
</CodeGroup>
</LanguageContent>
### Environment variables
```bash {{ title: '.env file' }}
LANGBASE_API_KEY="<USER/ORG-API-KEY>"
CRAWL_KEY="<CRAWL-API-KEY>"
```
### `langbase.tools.crawl()` examples
<LanguageContent language="typescript">
<CodeGroup exampleTitle="langbase.tools.crawl()" title="langbase.tools.crawl()">
```ts {{ title: 'Basic' }}
import { Langbase } from 'langbase';
const langbase = new Langbase({
apiKey: process.env.LANGBASE_API_KEY!,
});
async function main() {
const results = await langbase.tools.crawl({
url: ['https://example.com'],
apiKey: process.env.CRAWL_KEY!,
maxPages: 5
});
console.log('Crawled content:', results);
}
main();
```
```ts {{ title: 'Firecrawl' }}
import { Langbase } from 'langbase';
const langbase = new Langbase({
apiKey: process.env.LANGBASE_API_KEY!,
});
async function main() {
const results = await langbase.tools.crawl({
url: ['https://example.com'],
apiKey: process.env.CRAWL_KEY!,
maxPages: 5,
service: 'firecrawl' // Use Firecrawl service
});
console.log('Crawled content:', results);
}
main();
```
```ts {{ title: 'Multiple URLs' }}
import { Langbase } from 'langbase';
const langbase = new Langbase({
apiKey: process.env.LANGBASE_API_KEY!,
});
async function main() {
const results = await langbase.tools.crawl({
url: [
'https://example.com/page1',
'https://example.com/page2',
'https://example.com/page3'
],
apiKey: process.env.CRAWL_KEY!, // Spider.cloud API key
maxPages: 10
});
console.log('Crawled content:', results);
}
main();
```
</CodeGroup>
</LanguageContent>
<LanguageContent language="python">
<CodeGroup exampleTitle="Crawl a website" title="Crawl a website">
```python {{ title: 'Basic' }}
import os
from dotenv import load_dotenv
from langbase import Langbase
load_dotenv()
# Get API keys from environment variables
langbase_api_key = os.getenv("LANGBASE_API_KEY")
crawl_api_key = os.getenv("CRAWL_KEY")
# Initialize the client
langbase = Langbase(api_key=langbase_api_key)
def main():
try:
# Perform the web crawl
results = langbase.tools.crawl(
url=["https://langbase.com/about"],
max_pages=5,
api_key=crawl_api_key,
)
# Print the results
print(results)
except Exception as e:
print(f"Error performing web crawl: {e}")
if __name__ == "__main__":
main()
```
```python {{ title: 'Multiple URLs' }}
import os
from dotenv import load_dotenv
from langbase import Langbase
load_dotenv()
# Get API keys from environment variables
langbase_api_key = os.getenv("LANGBASE_API_KEY")
crawl_api_key = os.getenv("CRAWL_KEY")
# Initialize the client
langbase = Langbase(api_key=langbase_api_key)
def main():
"""
Crawls specified URLs using spider.cloud service.
"""
try:
# Perform the web crawl
results = langbase.tools.crawl(
url=["https://langbase.com", "https://langbase.com/about"],
max_pages=10,
api_key=crawl_api_key,
)
# Print the results
print(results)
except Exception as e:
print(f"Error performing web crawl: {e}")
if __name__ == "__main__":
main()
```
</CodeGroup>
</LanguageContent>
</Col>
</Row>
---
<Row>
<Col>
## Response
<Properties>
<Property name="ToolCrawlResponse[]" type="Array<object>">
An array of objects containing the URL and the extracted content returned by the `langbase.tools.crawl()` function.
```ts {{title: 'ToolCrawlResponse Type'}}
url: string;
content: string;
```
</Property>
<Properties>
<Property name="url" type="string">
The URL of the crawled page.
</Property>
<Property name="content" type="string">
The extracted content from the crawled page.
</Property>
</Properties>
</Properties>
</Col>
<Col sticky>
```json {{ title: 'ToolCrawlResponse Example' }}
[
{
"url": "https://example.com/page1",
"content": "Extracted content from the webpage..."
},
{
"url": "https://example.com/page2",
"content": "More extracted content..."
}
]
```
</Col>
</Row>
</LanguageProvider>
---
</content>
</doc>
<doc>
<metadata>
<title>usePipe()</title>
<url>https://langbase.com/docs/sdk/pipe/use-pipe/</url>
</metadata>
<content>
import { generateMetadata } from '@/lib/generate-metadata';
# usePipe()
You can use the Langbase `usePipe()` React hook to generate text or handle stream from model provider. It internally manages the state and provides all the necessary callbacks and properties to work with LLM.
Check out how to use the `usePipe()` hook in [this example](https://github.com/LangbaseInc/langbase-sdk/blob/main/examples/nextjs/components/langbase/chat-advanced.tsx).
---
## API reference
## `usePipe(options)`
<Row>
<Col>
Handle text or stream from model provider.
```tsx {{title: 'hook Signature'}}
usePipe(options);
// With types.
usePipe(options: UsePipeOptions)
```
## options
<Properties>
### UsePipeOptions
<Property name="options" type="UsePipeOptions">
```ts {{title: 'UsePipeOptions Object'}}
interface UsePipeOptions {
apiRoute?: string;
onResponse?: (message: Message) => void;
onFinish?: (messages: Message[]) => void;
onConnect?: () => void;
onError?: (error: Error) => void;
threadId?: string;
initialMessages?: Message[];
stream?: boolean;
}
```
*Following are the properties of the options object.*
</Property>
</Properties>
---
### apiRoute
<Properties>
<Property name="apiRoute" type="string">
The API route to call that returns LLM response.
</Property>
</Properties>
---
### onResponse
<Properties>
<Property name="onResponse" type="(message: Message) => void">
The callback function that is called when a response is received from the API.
<Properties>
<Property name="messages" type="Message">
The message object.
<Sub name="message" type="Message">
```ts {{title: 'Message Object'}}
interface Message {
role: MessageRole;
content: string;
name?: string;
}
```
<Sub name="role" type="'user' | 'assistant' | 'system'| 'tool'">
The role of the author of this message.
</Sub>
<Sub name="content" type="string">
The contents of the chunk message. Null if a tool is called.
</Sub>
<Sub name="name" type="string | undefined">
An name for the participant. Provides the model information to differentiate between participants of the same role.
</Sub>
</Sub>
</Property>
</Properties>
</Property>
</Properties>
---
### onFinish
<Properties>
<Property name="onFinish" type="(message: Message) => void">
The callback function that is called when the API call is finished.
<Properties>
<Property name="messages" type="Message">
The message object.
<Sub name="message" type="Message">
```ts {{title: 'Message Object'}}
interface Message {
role: MessageRole;
content: string;
name?: string;
}
```
<Sub name="role" type="'user' | 'assistant' | 'system'| 'tool'">
The role of the author of this message.
</Sub>
<Sub name="content" type="string">
The contents of the chunk message. Null if a tool is called.
</Sub>
<Sub name="name" type="string | undefined">
An name for the participant. Provides the model information to differentiate between participants of the same role.
</Sub>
</Sub>
</Property>
</Properties>
</Property>
</Properties>
---
### onConnect
<Properties>
<Property name="onConnect" type="() => void">
The callback function that is called when the API call is connected.
</Property>
</Properties>
---
### onError
<Properties>
<Property name="onError" type="(error: Error) => void;">
The callback function that is called when an error occurs.
<Properties>
<Property name="error" type="Error">
The error object containing information about what went wrong.
</Property>
</Properties>
</Property>
</Properties>
---
### threadId
<Properties>
<Property name="threadId" type="string | undefined">
The ID of the thread. Enable if you want to continue the conversation in the same thread from the second message onwards. Works only with deployed pipes.
- If `threadId` is not provided, a new thread will be created. E.g. first message of a new chat will not have a threadId.
- After the first message, a new `threadId` will be returned.
- Use this `threadId` to continue the conversation in the same thread from the second message onwards.
</Property>
</Properties>
---
### initialMessages
<Properties>
<Property name="initialMessages" type="Message[] | undefined">
An array of messages to be sent to the LLM.
<Properties>
<Property name="messages" type="Message">
The message object.
<Sub name="message" type="Message">
```ts {{title: 'Message Object'}}
interface Message {
role: MessageRole;
content: string;
name?: string;
}
```
<Sub name="role" type="'user' | 'assistant' | 'system'| 'tool'">
The role of the author of this message.
</Sub>
<Sub name="content" type="string">
The contents of the chunk message. Null if a tool is called.
</Sub>
<Sub name="name" type="string | undefined">
An name for the participant. Provides the model information to differentiate between participants of the same role.
</Sub>
</Sub>
</Property>
</Properties>
</Property>
</Properties>
---
### stream
<Properties>
<Property name="stream" type="boolean | undefined">
Whether to stream the response from the API.
Default: `true`
</Property>
</Properties>
---
## Return Object
The `usePipe` hook returns the following object:
```ts {{ title: 'usePipe return object' }}
interface UsePipeReturn {
input: string;
stop: () => void;
isLoading: boolean;
error: Error | null;
messages: Message[];
threadId: string | null;
setMessages: (newMessages: Message[]) => void;
regenerate: (options: PipeRequestOptions) => Promise<void>;
sendMessage: (content: string, options: PipeRequestOptions) => Promise<void>;
handleInputChange: (event: React.ChangeEvent<HTMLInputElement | HTMLTextAreaElement>) => void;
handleSubmit: (event?: React.FormEvent<HTMLFormElement>, options: PipeRequestOptions) => void;
}
```
<Properties>
<Property name="input" type="string">
The input value of the input field.
</Property>
<Property name="stop" type="() => void">
A function that stops the response from the API.
</Property>
<Property name="isLoading" type="boolean">
A boolean value that indicates whether the API call is in progress.
</Property>
<Property name="error" type="Error | null">
The error object containing information about what went wrong.
</Property>
<Property name="messages" type="Message">
The message object.
<Sub name="message" type="Message">
```ts {{title: 'Message Object'}}
interface Message {
role: MessageRole;
content: string;
name?: string;
}
```
<Sub name="role" type="'user' | 'assistant' | 'system'| 'tool'">
The role of the author of this message.
</Sub>
<Sub name="content" type="string">
The contents of the chunk message. Null if a tool is called.
</Sub>
<Sub name="name" type="string | undefined">
An name for the participant. Provides the model information to differentiate between participants of the same role.
</Sub>
</Sub>
</Property>
<Property name="threadId" type="string | null">
The ID of the thread. Enable if you want to continue the conversation in the same thread from the second message onwards. Works only with deployed pipes.
- If `threadId` is not provided, a new thread will be created. E.g. first message of a new chat will not have a threadId.
- After the first message, a new `threadId` will be returned.
- Use this `threadId` to continue the conversation in the same thread from the second message onwards.
</Property>
<Property name="setMessages" type="(newMessages: Message[]) => void">
A function that sets the messages.
<Property name="messages" type="Message">
The message object.
<Sub name="message" type="Message">
```ts {{title: 'Message Object'}}
interface Message {
role: MessageRole;
content: string;
name?: string;
}
```
<Sub name="role" type="'user' | 'assistant' | 'system'| 'tool'">
The role of the author of this message.
</Sub>
<Sub name="content" type="string">
The contents of the chunk message. Null if a tool is called.
</Sub>
<Sub name="name" type="string | undefined">
An name for the participant. Provides the model information to differentiate between participants of the same role.
</Sub>
</Sub>
</Property>
</Property>
<Property name="regenerate" type="(options: PipeRequestOptions) => Promise<void">
A function that regenerates the response from the API.
<Sub name="PipeRequestOptions">
```ts {{title: 'PipeRequestOptions'}}
interface PipeRequestOptions {
headers?: Record<string, string> | Headers;
body?: any;
data?: any;
allowEmptySubmit?: boolean;
}
```
<Properties>
<Property name="headers" type="Record<string, string> | Headers">
Additional headers to be sent with the request.
</Property>
<Property name="body" type="any">
The body of the request.
</Property>
<Property name="data" type="any">
The data to be sent with the request.
</Property>
<Property name="allowEmptySubmit" type="boolean">
Whether to allow an empty submit. If `true`, the request will be sent even if the input is empty.
</Property>
</Properties>
</Sub>
</Property>
<Property name="sendMessage" type="(content: string, options: PipeRequestOptions) => Promise<void>">
A function that sends a message to the API.
<Properties>
<Property name="content" type="string">
The content of the message.
</Property>
</Properties>
<Sub name="PipeRequestOptions">
```ts {{title: 'PipeRequestOptions'}}
interface PipeRequestOptions {
headers?: Record<string, string> | Headers;
body?: any;
data?: any;
allowEmptySubmit?: boolean;
}
```
<Properties>
<Property name="headers" type="Record<string, string> | Headers">
Additional headers to be sent with the request.
</Property>
<Property name="body" type="any">
The body of the request.
</Property>
<Property name="data" type="any">
The data to be sent with the request.
</Property>
<Property name="allowEmptySubmit" type="boolean">
Whether to allow an empty submit. If `true`, the request will be sent even if the input is empty.
</Property>
</Properties>
</Sub>
</Property>
<Property name="handleInputChange" type="(e: React.ChangeEvent<HTMLInputElement | HTMLTextAreaElement>) => void">
A function that handles the input change event.
</Property>
<Property name="handleSubmit" type="(e?: React.FormEvent<HTMLFormElement>, options: PipeRequestOptions) => void">
A function that handles the form submit and call the API.
<Sub name="PipeRequestOptions">
```ts {{title: 'PipeRequestOptions'}}
interface PipeRequestOptions {
headers?: Record<string, string> | Headers;
body?: any;
data?: any;
allowEmptySubmit?: boolean;
}
```
<Properties>
<Property name="headers" type="Record<string, string> | Headers">
Additional headers to be sent with the request.
</Property>
<Property name="body" type="any">
The body of the request.
</Property>
<Property name="data" type="any">
The data to be sent with the request.
</Property>
<Property name="allowEmptySubmit" type="boolean">
Whether to allow an empty submit. If `true`, the request will be sent even if the input is empty.
</Property>
</Properties>
</Sub>
</Property>
</Properties>
</Col>
<Col sticky>
### `usePipe` hook example
<CodeGroup exampleTitle="usePipe()" title="usePipe()">
```tsx {{ title: 'page.tsx' }}
import { usePipe } from 'langbase/react';
export default function ChatComponent() {
const {
stop,
input,
error,
messages,
threadId,
isLoading,
regenerate,
setMessages,
sendMessage,
handleSubmit,
handleInputChange,
} = usePipe({
stream: true,
apiRoute: '<REPLACE-WITH-YOUR-API-ROUTE>',
onResponse: (message) => {},
onFinish: (messages) => {},
onError: (error) => {},
initialMessages: [
{role: 'assistant', content: 'Hello! How can I help you?'},
{role: 'user', content: 'Who is an AI engineer?'},
], // You can set initial messages here if needed
});
// UI
return <></>
}
```
```ts {{ title: 'route.ts' }}
import {Langbase, RunResponse} from 'langbase';
import {NextRequest} from 'next/server';
export async function POST(req: NextRequest) {
const options = await req.json();
// 1. Initiate the Pipe.
const langbase = new Langbase({
apiKey: process.env.LANGBASE_API_KEY!,
});
if (options.stream) {
const {stream, threadId} = await langbase.pipes.run({
...options,
stream: true,
name: 'summary-agent',
});
return new Response(stream, {
status: 200,
headers: {
'langbase-thread-id': threadId ?? '',
},
});
} else {
const response = (await langbase.pipes.run({
...options,
stream: false,
name: 'summary',
})) as unknown as RunResponse;
return new Response(JSON.stringify(response), {
status: 200,
headers: {
'langbase-thread-id': response.threadId ?? '',
},
});
}
}
```
</CodeGroup>
</Col>
</Row>
---
</content>
</doc>
<doc>
<metadata>
<title>Update Pipe <span className="text-sm font-mono text-muted-foreground/70 ml-2">langbase.pipes.update()</span></title>
<url>https://langbase.com/docs/sdk/pipe/update/</url>
</metadata>
<content>
import { generateMetadata } from '@/lib/generate-metadata';
import { LanguageProvider, SimpleLanguageToggle, LanguageContent } from '@/components/LanguageToggle';
<LanguageProvider defaultLanguage='typescript'>
# Update Pipe <span className="text-sm font-mono text-muted-foreground/70 ml-2">langbase.pipes.update()</span>
Update an existing AI agent pipe on Langbase using the `langbase.pipes.update()` function.
---
## Generate a User/Org API key
You will need to generate an API key to authenticate your requests. For more information, visit the [User/Org API key documentation](/api-reference/api-keys).
<Spoiler title="Get your Langbase API key: User or Org">
You can generate API keys from the [Langbase Studio](https://studio.langbase.com) by following these steps:
1. Switch to your user or org account.
2. From the sidebar, click on the `API keys`.
3. From here you can create a new API key or manage existing ones.
For more details, follow the [Langbase API keys](/api-reference/api-keys) documentation.
</Spoiler>
---
<div className="flex justify-between items-end">
<h3 className="text-2xl w-full">API reference</h3>
<div className="flex md:hidden items-end mb-1">
<SimpleLanguageToggle/>
</div>
</div>
## `langbase.pipes.update(options)`
<Row>
<Col>
<LanguageContent language="typescript">
<CodeGroup exampleTitle="langbase.pipes.update()" title="Function Signature">
```ts {{ title: 'index.ts' }}
langbase.pipes.update(options);
// with types.
langbase.pipes.update(options: PipeUpdateOptions);
```
</CodeGroup>
</LanguageContent>
<LanguageContent language="python">
<CodeGroup exampleTitle="langbase.pipes.update()" title="Function Signature">
```python {{ title: 'main.py' }}
langbase.pipes.update(**options)
```
</CodeGroup>
</LanguageContent>
## options
<Properties>
<Property name="options" type="PipeUpdateOptions">
<LanguageContent language="typescript">
```bash {{title: 'PipeUpdateOptions Object'}}
name: string;
description?: string;
status?: 'public' | 'private';
upsert?: boolean;
model?: string;
temperature?: number;
top_p?: number;
max_tokens?: number;
presence_penalty?: number;
frequency_penalty?: number;
stop?: string[];
stream?: boolean;
json?: boolean;
store?: boolean;
moderate?: boolean;
response_format?: ResponseFormat;
tools?: Tool[];
tool_choice?: 'auto' | 'required' | ToolChoice;
parallel_tool_calls?: boolean;
messages?: Message[]; /
variables?: Record<string, string>;
memory?: { name: string }[];
```
*Following are the properties of the options object.*
</LanguageContent>
<LanguageContent language="python">
```bash {{title: 'PipeUpdateOptions Object'}}
name: string
description?: string
status?: 'public' | 'private'
upsert?: boolean
model?: string
temperature?: number
top_p?: number
max_tokens?: number
presence_penalty?: number
frequency_penalty?: number
stop?: List[string]
stream?: boolean
json?: boolean
store?: boolean
moderate?: boolean
response_format?: ResponseFormat
tools?: List[Tool]
tool_choice?: 'auto' | 'required' | ToolChoice
parallel_tool_calls?: boolean
messages?: List[Message]
variables?: Dict[str, str]
memory?: List[Memory]
```
*Following are the properties of the options object.*
</LanguageContent>
</Property>
</Properties>
---
<Properties>
<Property name="name" type="string" required>
Name of the pipe to update.
</Property>
<Property name="description" type="string">
Description of the AI pipe.
</Property>
<Property name="status" type="'public' | 'private'">
Status of the pipe. Defaults to `public`
</Property>
<Property name="model" type="string">
Pipe LLM model. Combination of model provider and model id.
Format: `provider:model_id`
You can copy the ID of a model from the list of [supported LLM models](/supported-models-and-providers) at Langbase.
Default: `openai:gpt-4o-mini`
</Property>
<Property name="tool_choice" type="'auto' | 'required' | ToolChoice">
Tool usage configuration.
<Properties>
<Property name="'auto'" type="string">
Model decides when to use tools.
</Property>
<Property name="'required'" type="string">
Model must use specified tools.
</Property>
<Property name="ToolChoice" type="object">
Forces use of a specific function.
```ts {{title: 'ToolChoice Object'}}
type: 'function';
function: {
name: string;
};
```
</Property>
</Properties>
</Property>
<LanguageContent language="typescript">
<Property name="memory" type="Array<Memory>">
An array of memories that the Pipe should use
```ts {{title: 'Memory Object'}}
name: string;
```
</Property>
</LanguageContent>
<LanguageContent language="python">
<Property name="memory" type="List[Memory]">
An array of memories that the Pipe should use
```ts {{title: 'Memory Object'}}
name: string;
```
</Property>
</LanguageContent>
<Property name="stream" type="boolean">
If enabled, the output will be streamed in real-time like ChatGPT. This is helpful if the user is directly reading the text.
Default: `true`
</Property>
<Property name="json" type="boolean">
Enforce the output to be in JSON format.
Default: `false`
</Property>
<Property name="store" type="boolean">
If enabled, both the prompts and completions will be stored in the database. Otherwise, only the system prompt and few shot messages will be saved.
Default: `true`
</Property>
<Property name="moderate" type="boolean">
If enabled, Langbase blocks flagged requests automatically.
Default: `false`
</Property>
<Property name="temperature" type="number">
What sampling temperature to use, between 0 and 2. Higher values like 0.8 will make the output more random. Lower values like 0.2 will make it more focused and deterministic.
Default: `0.7`
</Property>
<Property name="top_p" type="number">
An alternative to sampling with temperature, called nucleus sampling, where the model considers the results of the tokens with top_p probability mass. So 0.1 means only the tokens comprising the top 10% probability mass are considered.
Default: `1`
</Property>
<Property name="max_tokens" type="number">
The maximum number of tokens in the response message returned.
Default: `1000`
</Property>
<Property name="presence_penalty" type="number">
Penalizes a word based on its occurrence in the input text.
Default: `1`
</Property>
<Property name="frequency_penalty" type="number">
Penalizes a word based on how frequently it appears in the training data.
Default: `1`
</Property>
<LanguageContent language="typescript">
<Property name="stop" type="string[]">
Up to 4 sequences where the API will stop generating further tokens.
Default: `[]`
</Property>
</LanguageContent>
<LanguageContent language="python">
<Property name="stop" type="List[string]">
Up to 4 sequences where the API will stop generating further tokens.
Default: `[]`
</Property>
</LanguageContent>
<Property name="parallel_tool_calls" type="boolean">
Call multiple tools in parallel, allowing the effects and results of these function calls to be resolved in parallel.
Default: `true`
</Property>
</Properties>
---
### messages
<Properties>
<LanguageContent language="typescript">
<Property name="messages" type="Array<Message>">
A messages array including the following properties. Optional if variables are provided.
```ts {{title: 'Message Object'}}
role: 'user' | 'assistant' | 'system'| 'tool';
content: string | null;
name?: string;
tool_call_id?: string;
tool_calls?: ToolCall[];
```
<Sub name="role" type="'user' | 'assistant' | 'system'| 'tool'">
The role of the author of this message.
</Sub>
<Sub name="content" type="string">
The contents of the chunk message.
</Sub>
<Sub name="name" type="string">
The name of the tool called by LLM
</Sub>
<Sub name="tool_call_id" type="string">
The id of the tool called by LLM
</Sub>
<Sub name="tool_calls" type="Array<ToolCall>">
The array of tools sent to LLM.
```ts {{title: 'ToolCall Object'}}
id: string;
type: 'function';
function: Function;
```
<Sub name="id" type="string">
Unique identifier for the tool call.
</Sub>
<Sub name="type" type="function">
Type of the tool call.
</Sub>
<Sub name="function" type="Function">
Function definition sent to LLM.
```ts {{title: 'Function Object'}}
name: string;
arguments: string;
```
</Sub>
</Sub>
</Property>
</LanguageContent>
<LanguageContent language="python">
<Property name="messages" type="List[Message]">
A messages array including the following properties. Optional if variables are provided.
```ts {{title: 'Message Object'}}
role: 'user' | 'assistant' | 'system'| 'tool'
content: string | null
name?: string
tool_call_id?: string
tool_calls?: List[ToolCall]
```
<Sub name="role" type="'user' | 'assistant' | 'system'| 'tool'">
The role of the author of this message.
</Sub>
<Sub name="content" type="string">
The contents of the chunk message.
</Sub>
<Sub name="name" type="string">
The name of the tool called by LLM
</Sub>
<Sub name="tool_call_id" type="string">
The id of the tool called by LLM
</Sub>
<Sub name="tool_calls" type="List[ToolCall]">
The array of tools sent to LLM.
```ts {{title: 'ToolCall Object'}}
id: string
type: 'function'
function: Function
```
<Sub name="id" type="string">
Unique identifier for the tool call.
</Sub>
<Sub name="type" type="function">
Type of the tool call.
</Sub>
<Sub name="function" type="Function">
Function definition sent to LLM.
```ts {{title: 'Function Object'}}
name: string
arguments: string
```
</Sub>
</Sub>
</Property>
</LanguageContent>
</Properties>
---
### variables
<Properties>
<LanguageContent language="typescript">
<Property name="variables" type="Record<string, string>">
An object containing pipe variables. The key is the variable name, and the value is the variable value.
Default: `{}`
</Property>
</LanguageContent>
<LanguageContent language="python">
<Property name="variables" type="Dict[str, str]">
An object containing pipe variables. The key is the variable name and the value is the variable value.
Default: `{}`
</Property>
</LanguageContent>
</Properties>
---
### response_format
<Properties>
<Property name="response_format" type="ResponseFormat">
Defines the format of the response. Primarily used for Structured Outputs. To enforce Structured Outputs, set type to `json_schema`, and provide a JSON schema for your response with `strict: true` option.
Default: `text`
<LanguageContent language="typescript">
```ts {{title: 'ResponseFormat Object'}}
type ResponseFormat =
| {type: 'text'}
| {type: 'json_object'}
| {
type: 'json_schema';
json_schema: {
description?: string;
name: string;
schema?: Record<string, unknown>;
strict?: boolean | null;
};
};
```
</LanguageContent>
<LanguageContent language="python">
```ts {{title: 'ResponseFormat Object'}}
ResponseFormat =
| {type: 'text'}
| {type: 'json_object'}
| {
type: 'json_schema'
json_schema: {
description?: string
name: string
schema?: Dict[string, unknown]
strict?: boolean | null
}
}
```
</LanguageContent>
</Property>
</Properties>
</Col>
<Col sticky>
<div className="flex justify-between items-end">
<h3 className="text-2xl w-full">Usage example</h3>
<div className="hidden md:flex items-end mb-2">
<SimpleLanguageToggle/>
</div>
</div>
<LanguageContent language="typescript">
<CodeGroup exampleTitle="Install the SDK" title="Install the SDK">
```bash {{ title: 'npm' }}
npm i langbase
```
```bash {{ title: 'pnpm' }}
pnpm i langbase
```
```bash {{ title: 'yarn' }}
yarn add langbase
```
</CodeGroup>
</LanguageContent>
<LanguageContent language="python">
<CodeGroup exampleTitle="Install the SDK" title="Install the SDK">
```bash {{ title: 'pip' }}
pip install langbase python-dotenv
```
</CodeGroup>
</LanguageContent>
### Environment variables
<CodeGroup exampleTitle="Environment variables" title="Environment variables">
```bash {{ title: '.env file' }}
LANGBASE_API_KEY="<USER/ORG-API-KEY>"
```
</CodeGroup>
### Update pipe
<LanguageContent language="typescript">
<CodeGroup exampleTitle="Update pipe config on Langbase" title="Update pipe config on Langbase">
```ts {{ title: 'update-basic-pipe.ts' }}
import {Langbase} from 'langbase';
const langbase = new Langbase({
apiKey: process.env.LANGBASE_API_KEY!,
});
async function main() {
const summaryAgent = await langbase.pipes.update({
name: 'summary-agent',
description: 'Updated pipe description',
temperature: 0.8,
});
console.log('Summary agent:', summaryAgent);
}
main();
```
```ts {{ title: 'update-advanced-pipe.ts' }}
import {Langbase} from 'langbase';
const langbase = new Langbase({
apiKey: process.env.LANGBASE_API_KEY!,
});
async function main() {
const summaryAgent = await langbase.pipes.update({
name: 'data-processing-agent',
model: 'google:gemini-2.5-pro-preview-06-05',
json: true,
tools: [
{
type: 'function',
function: {
name: 'processNewData',
description: 'Process updated data',
parameters: {
type: 'object',
properties: {
data: {
type: 'string',
description: 'Data to process',
},
},
},
},
},
],
memory: [{name: 'knowledge-base'}],
messages: [
{
role: 'system',
content: 'You are an enhanced data processing assistant.',
},
],
});
console.log('Summary agent:', summaryAgent);
}
main();
```
</CodeGroup>
</LanguageContent>
<LanguageContent language="python">
<CodeGroup exampleTitle="Update pipe config on Langbase" title="Update pipe config on Langbase">
```python {{ title: 'update-basic-pipe.py' }}
import json
import os
from dotenv import load_dotenv
from langbase import Langbase
def main():
load_dotenv()
# Get API key from environment variable
langbase_api_key = os.getenv("LANGBASE_API_KEY")
langbase = Langbase(api_key=langbase_api_key)
summary_agent = langbase.pipes.update(
name="summary-agent",
description="Updated pipe description",
temperature=0.8
)
print(json.dumps(summary_agent, indent=2))
if __name__ == "__main__":
main()
```
```python {{ title: 'update-advanced-pipe.py' }}
import json
import os
from dotenv import load_dotenv
from langbase import Langbase
def main():
load_dotenv()
# Get API key from environment variable
langbase_api_key = os.getenv("LANGBASE_API_KEY")
langbase = Langbase(api_key=langbase_api_key)
summary_agent = langbase.pipes.update(
name="data-processing-agent",
model="google:gemini-2.5-pro-preview-06-05",
json=True,
tools=[
{
"type": "function",
"function": {
"name": "processNewData",
"description": "Process updated data",
"parameters": {
"type": "object",
"properties": {
"data": {
"type": "string",
"description": "Data to process"
}
}
}
}
}
],
memory=[{"name": "knowledge-base"}],
messages=[
{
"role": "system",
"content": "You are an enhanced data processing assistant."
}
]
)
print(json.dumps(summary_agent, indent=2))
if __name__ == "__main__":
main()
```
</CodeGroup>
</LanguageContent>
</Col>
</Row>
---
<Row>
<Col>
## Response
<Properties>
<Property name="PipeUpdateResponse" type="object">
The response object returned by the `langbase.pipes.update()` function.
```ts {{title: 'PipeUpdateResponse'}}
name: string;
description: string;
status: 'public' | 'private';
owner_login: string;
url: string;
type: 'chat' | 'generate' | 'run';
api_key: string;
```
<Properties>
<Property name="name" type="string">
Name of the updated pipe.
</Property>
<Property name="description" type="string">
Updated description of the pipe.
</Property>
<Property name="status" type="'public' | 'private'">
Updated pipe visibility status.
</Property>
<Property name="owner_login" type="string">
Login of the pipe owner.
</Property>
<Property name="url" type="string">
Pipe access URL.
</Property>
<Property name="type" type="'chat' | 'generate' | 'run'">
The type of pipe.
</Property>
<Property name="api_key" type="string">
API key for pipe access.
</Property>
</Properties>
</Property>
</Properties>
</Col>
<Col sticky>
```json {{ title: 'PipeUpdateResponse type of langbase.pipes.update()' }}
{
"name": "summary-agent",
"description": "Updated AI pipe for summarization",
"status": "public",
"owner_login": "user123",
"url": "https://langbase.com/user123/summary-agent",
"type": "run",
"api_key": "pipe_xyz123"
}
```
</Col>
</Row>
</LanguageProvider>
---
</content>
</doc>
<doc>
<metadata>
<title>Run Pipe <span className="text-sm font-mono text-muted-foreground/70 ml-2">langbase.pipes.run()</span></title>
<url>https://langbase.com/docs/sdk/pipe/run/</url>
</metadata>
<content>
import { generateMetadata } from '@/lib/generate-metadata';
import { LanguageProvider, SimpleLanguageToggle, LanguageContent } from '@/components/LanguageToggle';
# Run Pipe <span className="text-sm font-mono text-muted-foreground/70 ml-2">langbase.pipes.run()</span>
<LanguageProvider defaultLanguage='typescript'>
You can use the `langbase.pipes.run()` function to run a pipe. It can both **generate** or **stream** text for a user prompt like "Who is an AI Engineer?" or give it a an entire doc and ask it to summarize it.
---
## Generate a User/Org API key
You will need to generate an API key to authenticate your requests. For more information, visit the [User/Org API key documentation](/api-reference/api-keys).
<Spoiler title="Get your Langbase API key: User or Org">
You can generate API keys from the [Langbase Studio](https://studio.langbase.com) by following these steps:
1. Switch to your user or org account.
2. From the sidebar, click on the `API keys`.
3. From here you can create a new API key or manage existing ones.
For more details, follow the [Langbase API keys](/api-reference/api-keys) documentation.
</Spoiler>
---
<div className="flex justify-between items-end">
<h3 className="text-2xl w-full">API reference</h3>
<div className="flex md:hidden items-end mb-1">
<SimpleLanguageToggle/>
</div>
</div>
### `langbase.pipes.run(options)`
<Row>
<Col>
Request LLM by running a pipe with `langbase.pipes.run()` function.
<LanguageContent language="typescript">
<CodeGroup exampleTitle="langbase.pipes.run()" title="Function Signature">
```ts {{ title: 'index.ts' }}
langbase.pipes.run(options);
// with types.
langbase.pipes.run(options: RunOptions);
```
</CodeGroup>
</LanguageContent>
<LanguageContent language="python">
<CodeGroup exampleTitle="langbase.pipes.run()" title="Function Signature">
```python {{ title: 'main.py' }}
langbase.pipes.run(**options)
```
</CodeGroup>
</LanguageContent>
## options
<Properties>
<Property name="options" type="RunOptions">
<LanguageContent language="typescript">
```bash {{title: 'RunOptions Object'}}
name: string;
apiKey?: string;
llmKey?: string;
messages: Message[];
variables?: Record<string, string>;
threadId?: string;
rawResponse?: boolean;
tools?: Tool[];
memory?: Memory[];
```
</LanguageContent>
<LanguageContent language="python">
```bash {{title: 'RunOptions Object'}}
name: string
api_key?: string
llm_key?: string
messages: List[Message]
variables?: Dict[str, str]
thread_id?: string | None
raw_response?: boolean | None
tools?: List[Tool]
memory?: List[Memory]
```
</LanguageContent>
*Following are the properties of the options object.*
</Property>
</Properties>
---
### name
<Properties>
<Property name="name" type="string" required="true">
The name of the pipe to run. E.g., `ai-agent`.
The pipe name and the User/Org API key are used to run the pipe.
</Property>
</Properties>
---
<LanguageContent language="typescript">
### apiKey
<Properties>
<Property name="apiKey" type="string">
API key of the pipe you want to run.
If provided, `pipe.run()` will use this key instead of user/org key to identify and run the pipe.
</Property>
</Properties>
</LanguageContent>
<LanguageContent language="python">
### api_key
<Properties>
<Property name="api_key" type="string">
API key of the pipe you want to run.
If provided, `pipe.run()` will use this key instead of user/org key to identify and run the pipe.
</Property>
</Properties>
</LanguageContent>
---
<LanguageContent language="typescript">
### llmKey
<Properties>
<Property name="llmKey" type="string">
LLM API key for the pipe. If not provided, the LLM key from Pipe/User/Organization keyset will be used.
Explore the [example](https://github.com/LangbaseInc/langbase-sdk/blob/main/examples/nodejs/pipes/pipe.run.stream.llmkey.ts) to learn more.
</Property>
</Properties>
</LanguageContent>
<LanguageContent language="python">
### llm_key
<Properties>
<Property name="llm_key" type="string">
LLM API key for the pipe. If not provided, the LLM key from Pipe/User/Organization keyset will be used.
Explore the [example](https://github.com/LangbaseInc/langbase-sdk/blob/main/examples/nodejs/pipes/pipe.run.stream.llmkey.ts) to learn more.
</Property>
</Properties>
</LanguageContent>
---
### messages
<Properties>
<LanguageContent language="typescript">
<Property name="messages" type="Array<Message>">
A messages array including the following properties. Optional if variables are provided.
```ts {{title: 'Message Object'}}
role: 'user' | 'assistant' | 'system'| 'tool';
content: string | null;
name?: string;
tool_call_id?: string;
tool_calls?: ToolCall[];
```
<Sub name="role" type="'user' | 'assistant' | 'system'| 'tool'">
The role of the author of this message.
</Sub>
<Sub name="content" type="string">
The contents of the chunk message.
</Sub>
<Sub name="name" type="string">
The name of the tool called by LLM
</Sub>
<Sub name="tool_call_id" type="string">
The id of the tool called by LLM
</Sub>
<Sub name="tool_calls" type="Array<ToolCall>">
The array of tools called by LLM.
```ts {{title: 'ToolCall Object'}}
id: string;
type: 'function';
function: Function;
```
<Sub name="function" type="Function">
The function that the LLM called.
```ts {{title: 'Function Object'}}
name: string;
arguments: string;
```
</Sub>
</Sub>
</Property>
</LanguageContent>
<LanguageContent language="python">
<Property name="messages" type="List[Message]">
A messages array including the following properties. Optional if variables are provided.
```ts {{title: 'Message Object'}}
role: 'user' | 'assistant' | 'system'| 'tool'
content: string | null
name?: string
tool_call_id?: string
tool_calls?: List[ToolCall]
```
<Sub name="role" type="'user' | 'assistant' | 'system'| 'tool'">
The role of the author of this message.
</Sub>
<Sub name="content" type="string">
The contents of the chunk message.
</Sub>
<Sub name="name" type="string">
The name of the tool called by LLM
</Sub>
<Sub name="tool_call_id" type="string">
The id of the tool called by LLM
</Sub>
<Sub name="tool_calls" type="List[ToolCall]">
The array of tools called by LLM.
```ts {{title: 'ToolCall Object'}}
id: string;
type: 'function';
function: Function;
```
<Sub name="function" type="Function">
The function that the LLM called.
```ts {{title: 'Function Object'}}
name: string;
arguments: string;
```
</Sub>
</Sub>
</Property>
</LanguageContent>
</Properties>
---
### variables
<Properties>
<LanguageContent language="typescript">
<Property name="variables" type="Record<string, string>">
An object containing pipe variables. The key is the variable name and the value is the variable value.
Default: `{}`
</Property>
</LanguageContent>
<LanguageContent language="python">
<Property name="variables" type="Dict[str, str]">
An object containing pipe variables. The key is the variable name and the value is the variable value.
Default: `{}`
</Property>
</LanguageContent>
</Properties>
---
<LanguageContent language="typescript">
### threadId
<Properties>
<Property name="threadId" type="string | undefined | null">
The ID of the thread. Enable if you want to continue the conversation in the same thread from the second message onwards. Works only with deployed pipes.
- If `threadId` is not provided, a new thread will be created. E.g. first message of a new chat will not have a threadId.
- After the first message, a new `threadId` will be returned.
- Use this `threadId` to continue the conversation in the same thread from the second message onwards.
</Property>
</Properties>
</LanguageContent>
<LanguageContent language="python">
### thread_id
<Properties>
<Property name="thread_id" type="string | undefined | null">
The ID of the thread. Enable if you want to continue the conversation in the same thread from the second message onwards. Works only with deployed pipes.
- If `thread_id` is not provided, a new thread will be created. E.g. first message of a new chat will not have a threadId.
- After the first message, a new `thread_id` will be returned.
- Use this `thread_id` to continue the conversation in the same thread from the second message onwards.
</Property>
</Properties>
</LanguageContent>
---
<LanguageContent language="typescript">
### rawResponse
<Properties>
<Property name="rawResponse" type="boolean | undefined">
Enable if you want to get the complete raw LLM response.
Default: `false`
</Property>
</Properties>
</LanguageContent>
<LanguageContent language="python">
### raw_response
<Properties>
<Property name="raw_response" type="boolean | undefined">
Enable if you want to get complete raw LLM response.
Default: `false`
</Property>
</Properties>
</LanguageContent>
---
### tools
<Properties>
<LanguageContent language="typescript">
<Property name="tools" type="Array<Tools>">
The list of tools the model may call.
```ts {{title: 'Tools Object'}}
type: 'function';
function: FunctionOptions
```
<Sub name="type" type="'function'">
The type of the tool. Currently, only `function` is supported.
</Sub>
<Sub name="function" type="FunctionOptions">
The function that the model may call.
```ts {{title: 'FunctionOptions Object'}}
name: string;
description?: string;
parameters?: Record<string, unknown>
```
<Sub name="name" type="string">
The name of the function to call.
</Sub>
<Sub name="description" type="string">
The description of the function.
</Sub>
<Sub name="parameters" type="Record<string, unknown>">
The parameters of the function.
</Sub>
</Sub>
</Property>
</LanguageContent>
<LanguageContent language="python">
<Property name="tools" type="List[Tools]">
A list of tools the model may call.
```ts {{title: 'Tools Object'}}
type: 'function'
function: FunctionOptions
```
<Sub name="type" type="'function'">
The type of the tool. Currently, only `function` is supported.
</Sub>
<Sub name="function" type="FunctionOptions">
The function that the model may call.
```ts {{title: 'FunctionOptions Object'}}
name: string
description?: string
parameters?: Dict[str, Any]
```
<Sub name="name" type="string">
The name of the function to call.
</Sub>
<Sub name="description" type="string">
The description of the function.
</Sub>
<Sub name="parameters" type="Dict[str, Any]">
The parameters of the function.
</Sub>
</Sub>
</Property>
</LanguageContent>
</Properties>
---
### memory
<Properties>
<LanguageContent language="typescript">
<Property name="memory" type="Array<Memory>">
An array of memory objects that specify the memories your pipe should use at run time.
If memories are defined here, they will override the default pipe memories, which will be ignored. All referenced memories must exist in your account.
```json {{title: 'Run time Memory array example'}}
"memory": [
{ "name": "runtime-memory-1" },
{ "name": "runtime-memory-2" }
]
```
If this property is not set or is empty, the pipe will fall back to using its default memories.
Default: `undefined`
Each memory in the array follows this structure:
```js {{title: 'Memory Object'}}
name: string;
```
<Sub name="name" type="string">
The name of the memory.
</Sub>
</Property>
</LanguageContent>
<LanguageContent language="python">
<Property name="memory" type="List[Memory]">
An array of memory objects that specify the memories your pipe should use at run time.
If memories are defined here, they will override the default pipe memories, which will be ignored. All referenced memories must exist in your account.
```json {{title: 'Run time Memory array example'}}
"memory": [
{ "name": "runtime-memory-1" },
{ "name": "runtime-memory-2" }
]
```
If this property is not set or is empty, the pipe will fall back to using its default memories.
Default: `undefined`
Each memory in the array follows this structure:
```js {{title: 'Memory Object'}}
name: string;
```
<Sub name="name" type="string">
The name of the memory.
</Sub>
</Property>
</LanguageContent>
</Properties>
---
## options
<Properties>
### RunOptionsStream
<Property name="options" type="RunOptions">
<LanguageContent language="typescript">
```bash {{title: 'RunOptions Object'}}
name: string;
apiKey?: string;
stream: boolean
llmKey?: string;
messages: Message[];
variables?: Record<string, string>;
threadId?: string;
rawResponse?: boolean;
tools?: Tool[];
memory?: Memory[];
```
</LanguageContent>
<LanguageContent language="python">
```bash {{title: 'RunOptions Object'}}
name: string
api_key?: string
llm_key?: string
stream: boolean
messages: List[Message]
variables?: Dict[str, str]
thread_id?: string | None
raw_response?: boolean | None
tools?: List[Tool]
memory?: List[Memory]
```
</LanguageContent>
</Property>
</Properties>
</Col>
<Col>
<div className="flex justify-between items-end">
<h3 className="text-2xl w-full">Usage example</h3>
<div className="hidden md:flex items-end mb-2">
<SimpleLanguageToggle/>
</div>
</div>
<LanguageContent language="typescript">
<CodeGroup exampleTitle="Install the SDK" title="Install the SDK">
```bash {{ title: 'npm' }}
npm i langbase
```
```bash {{ title: 'pnpm' }}
pnpm i langbase
```
```bash {{ title: 'yarn' }}
yarn add langbase
```
</CodeGroup>
</LanguageContent>
<LanguageContent language="python">
<CodeGroup exampleTitle="Install the SDK" title="Install the SDK">
```bash {{ title: 'pip' }}
pip install langbase python-dotenv
```
</CodeGroup>
</LanguageContent>
### Environment variables
```bash {{ title: '.env file' }}
LANGBASE_API_KEY="<USER/ORG-API-KEY>"
```
### `langbase.pipes.run()` examples
<LanguageContent language="typescript">
<CodeGroup exampleTitle="langbase.pipes.run()" title="langbase.pipes.run()">
```ts {{ title: 'Non-stream' }}
import {Langbase} from 'langbase';
const langbase = new Langbase({
apiKey: process.env.LANGBASE_API_KEY!,
});
async function main() {
const {completion} = await langbase.pipes.run({
name: 'summary-agent',
messages: [
{
role: 'user',
content: 'Who is an AI Engineer?',
},
],
stream: false
});
console.log('Summary agent completion:', completion);
}
main();
```
```ts {{ title: 'Stream' }}
import {getRunner, Langbase} from 'langbase';
const langbase = new Langbase({
apiKey: process.env.LANGBASE_API_KEY!,
});
async function main() {
const {stream, threadId, rawResponse} = await langbase.pipes.run({
stream: true,
name: 'summary-agent',
messages: [{role: 'user', content: 'Who is an AI Engineer?'}],
});
// Convert the stream to a stream runner.
const runner = getRunner(stream);
runner.on('connect', () => {
console.log('Stream started.\n');
});
runner.on('content', content => {
process.stdout.write(content);
});
runner.on('end', () => {
console.log('\nStream ended.');
});
runner.on('error', error => {
console.error('Error:', error);
});
}
main();
```
```ts {{ title: 'Chat w/ pipe.run()' }}
import {Langbase} from 'langbase';
const langbase = new Langbase({
apiKey: process.env.LANGBASE_API_KEY!,
});
async function main() {
// Message 1: Tell something to the LLM.
const response1 = await langbase.pipes.run({
name: 'summary-agent',
stream: false,
messages: [{role: 'user', content: 'My company is called Langbase'}],
});
console.log(response1.completion);
// Message 2: Ask something about the first message.
// Continue the conversation in the same thread by sending
// `threadId` from the second message onwards.
const response2 = await langbase.pipes.run({
name: 'summary-agent',
stream: false,
threadId: response1.threadId,
messages: [{role: 'user', content: 'Tell me the name of my company?'}],
});
console.log(response2.completion);
// You'll see that the LLM will know the company is `Langbase`
// since it's the same chat thread. This is how you can
// continue a conversation in the same thread.
}
main();
```
```ts {{ title: 'Tool Calling' }}
import 'dotenv/config';
import { Langbase, getToolsFromRun } from 'langbase';
const langbase = new Langbase({
apiKey: process.env.LANGBASE_API_KEY!
});
async function main() {
const userMsg = "What's the weather in SF";
const response = await langbase.pipes.run({
stream: false,
name: 'summary-agent',
messages: [{ role: 'user', content: userMsg }],
tools: [
{
type: 'function',
function: {
name: 'get_current_weather',
description: 'Get the current weather of a given location',
parameters: {
type: 'object',
required: ['location'],
properties: {
unit: {
enum: ['celsius', 'fahrenheit'],
type: 'string'
},
location: {
type: 'string',
description:
'The city and state, e.g. San Francisco, CA'
}
}
}
}
}
]
});
const toolCalls = await getToolsFromRun(response);
const hasToolCalls = toolCalls.length > 0;
if (hasToolCalls) {
// handle the tool calls
console.log('Tools:', toolCalls);
} else {
// handle the response
console.log('Response:', response);
}
}
main();
```
```ts {{ title: 'Use Pipe API key' }}
import {Langbase} from 'langbase';
const langbase = new Langbase({
apiKey: process.env.LANGBASE_API_KEY!,
});
async function main() {
const {completion} = await langbase.pipes.run({
// do not add pipe name
apiKey: '<PIPE-API-KEY>', // Replace with your pipe API key.
stream: false,
messages: [
{
role: 'user',
content: 'Hello, I am a {{profession}}',
},
],
});
console.log('Agent generation:', completion);
}
main();
```
```ts {{ title: 'Variables' }}
import {Langbase} from 'langbase';
const langbase = new Langbase({
apiKey: process.env.LANGBASE_API_KEY!,
});
async function main() {
const {completion} = await langbase.pipes.run({
name: 'summary-agent',
stream: false,
messages: [
{
role: 'user',
content: 'Hello, I am a {{profession}}',
},
],
variables: { profession: 'AI Engineer' },
});
console.log('Summary Agent completion:', completion);
}
main();
```
</CodeGroup>
</LanguageContent>
<LanguageContent language="python">
<CodeGroup exampleTitle="langbase.pipes.run()" title="langbase.pipes.run()">
```python {{ title: 'Non-stream' }}
import json
import os
from dotenv import load_dotenv
from langbase import Langbase
from langbase.errors import APIError
def main():
load_dotenv()
# Get API key from environment variable
langbase_api_key = os.getenv("LANGBASE_API_KEY")
# Initialize the client
langbase = Langbase(api_key=langbase_api_key)
# Run the pipe with explicit stream=False
try:
response = langbase.pipes.run(
name="summary-agent",
messages=[{"role": "user", "content": "Who is an AI Engineer?"}],
stream=False,
)
# Print the completion
print('Summary agent completion:', response['completion'])
except APIError as e:
print(f"API Error: {e}")
except Exception as e:
print(f"Unexpected error: {e}")
if __name__ == "__main__":
main()
```
```python {{ title: 'Stream' }}
import os
from dotenv import load_dotenv
from langbase import Langbase, get_runner
def main():
load_dotenv()
# Get API key from environment variable
langbase_api_key = os.getenv("LANGBASE_API_KEY")
# Initialize the client
langbase = Langbase(api_key=langbase_api_key)
# Name of the pipe to run
pipe_name = "summary-agent" # Replace with your pipe name
print("Stream started \n\n")
response1 = langbase.pipes.run(
name=pipe_name,
messages=[{"role": "user", "content": "What is an AI Engineer?"}],
stream=True,
)
runner1 = get_runner(response1)
# Use text_generator() to stream content
for content in runner1.text_generator():
print(content, end="", flush=True)
print("\n\nStream ended!") # Add a newline after first response
if __name__ == "__main__":
main()
```
```python {{ title: 'Chat w/ pipe.run()' }}
import os
from dotenv import load_dotenv
from langbase import Langbase
from langbase.errors import APIError
def main():
load_dotenv()
# Get API key from environment variable
langbase_api_key = os.getenv("LANGBASE_API_KEY")
# Initialize the client
langbase = Langbase(api_key=langbase_api_key)
# Message 1: Tell something to the LLM.
response1 = langbase.pipes.run(
name="summary-agent",
stream=False,
messages=[{"role": "user", "content": "My company is called Langbase"}],
)
print(response1["completion"])
# Check if threadId exists in the response
if "threadId" in response1:
thread_id = response1["threadId"]
print(f"Thread ID: {thread_id}")
# Message 2: Ask something about the first message.
# Continue the conversation in the same thread by sending
# `thread_id` from the second message onwards.
response2 = langbase.pipes.run(
name="summary-agent",
stream=False,
thread_id=thread_id,
messages=[{"role": "user", "content": "Tell me the name of my company?"}],
)
print(response2["completion"])
else:
print("No threadId found in response. Available keys:", list(response1.keys()))
if __name__ == "__main__":
main()
```
```python {{ title: 'Tool Calling' }}
import os
import json
from dotenv import load_dotenv
from langbase import Langbase, StreamEventType, get_typed_runner
def main():
load_dotenv()
# Get API key from environment variable
langbase_api_key = os.getenv("LANGBASE_API_KEY")
# Initialize the client
lb = Langbase(api_key=langbase_api_key)
user_msg = "What's the weather in SF"
# Get streaming response
response = lb.pipes.run(
name="summary-agent",
messages=[{"role": "user", "content": user_msg}],
stream=True,
tools=[
{
"type": "function",
"function": {
"name": "get_current_weather",
"description": "Get the current weather of a given location",
"parameters": {
"type": "object",
"required": ["location"],
"properties": {
"unit": {
"enum": ["celsius", "fahrenheit"],
"type": "string"
},
"location": {
"type": "string",
"description": "The city and state, e.g. San Francisco, CA"
}
}
}
}
}
]
)
# Create typed stream processor
runner = get_typed_runner(response)
# Register event handlers
runner.on(
StreamEventType.CONNECT,
lambda event: print(f"✓ Connected! Thread ID: {event['threadId']}\n"),
)
runner.on(
StreamEventType.CONTENT,
lambda event: print(event["content"], end="", flush=True),
)
runner.on(
StreamEventType.TOOL_CALL,
lambda event: print(
f"\n🔧 Tool call: {event['toolCall']['function']['name']}"
f"\n🔧 Tool call: {json.dumps(event['toolCall'], indent=2)}"
),
)
runner.on(
StreamEventType.COMPLETION,
lambda event: print(f"\n\n✓ Completed! Reason: {event['reason']}"),
)
runner.on(
StreamEventType.ERROR,
lambda event: print(f"\n❌ Error: {event['message']}"),
)
runner.on(
StreamEventType.END,
lambda event: print(f"⏱️ Total duration: {event['duration']:.2f}s"),
)
# Process the stream
runner.process()
if __name__ == "__main__":
main()
```
```python {{ title: 'Use Pipe API key' }}
import os
from dotenv import load_dotenv
from langbase import Langbase
from langbase.errors import APIError
def main():
load_dotenv()
# Initialize the client with user/org API key
langbase_api_key = os.getenv("LANGBASE_API_KEY")
langbase = Langbase(api_key=langbase_api_key)
response = langbase.pipes.run(
# do not add pipe name when using pipe API key
api_key="pipe_api_key", # Replace with your pipe API key # Replace with your pipe API key
stream=False,
messages=[
{
"role": "user",
"content": "What is Langbase?",
},
],
)
print(response['completion'])
if __name__ == "__main__":
main()
```
```python {{ title: 'Variables' }}
import os
from dotenv import load_dotenv
from langbase import Langbase
from langbase.errors import APIError
def main():
load_dotenv()
# Get API key from environment variable
langbase_api_key = os.getenv("LANGBASE_API_KEY")
# Initialize the client
langbase = Langbase(api_key=langbase_api_key)
response = langbase.pipes.run(
name="summary-agent",
stream=False,
messages=[
{
"role": "user",
"content": "Hello, I am a {{profession}}",
},
],
variables={"profession": "AI Engineer"},
)
print(response['completion'])
if __name__ == "__main__":
main()
```
</CodeGroup>
</LanguageContent>
</Col>
</Row>
---
<Row>
<Col>
## Response
Response of `langbase.pipes.run()` is a `Promise<RunResponse | RunResponseStream>` object.
### RunResponse Object
<LanguageContent language="typescript">
```ts {{title: 'RunResponse Object'}}
completion: string;
threadId?: string;
id: string;
object: string;
created: number;
model: string;
choices: ChoiceGenerate[];
usage: Usage;
system_fingerprint: string | null;
rawResponse?: {
headers: Record<string, string>;
};
```
</LanguageContent>
<LanguageContent language="python">
```bash {{title: 'RunResponse Object'}}
completion: string
thread_id?: string
id: string
object: string
created: number
model: string
choices: List[ChoiceGenerate]
usage: Usage
system_fingerprint: string | None
raw_response?: {
headers: Dict[str, str]
};
```
</LanguageContent>
<Properties>
<Property name="completion" type="string">
The generated text completion.
</Property>
<LanguageContent language="typescript">
<Property name="threadId" type="string">
The ID of the thread. Useful for a chat pipe to continue the conversation in the same thread. Optional.
</Property>
</LanguageContent>
<LanguageContent language="python">
<Property name="thread_id" type="string">
The ID of the thread. Useful for a chat pipe to continue the conversation in the same thread. Optional.
</Property>
</LanguageContent>
<Property name="id" type="string">
The ID of the raw response.
</Property>
<Property name="object" type="string">
The object type name of the response.
</Property>
<Property name="created" type="number">
The timestamp of the response creation.
</Property>
<Property name="model" type="string">
The model used to generate the response.
</Property>
<LanguageContent language="typescript">
<Property name="choices" type="ChoiceGenerate[]">
A list of chat completion choices. Can contain more than one element if n is greater than 1.
```ts {{title: 'Choice Object for langbase.pipes.run() with stream off'}}
index: number;
message: Message;
logprobs: boolean | null;
finish_reason: string;
```
</Property>
<Sub name="index" type="number">
The index of the choice in the list of choices.
</Sub>
<Sub name="message" type="Message">
A messages array including `role` and `content` params.
```ts {{title: 'Message Object'}}
role: 'user' | 'assistant' | 'system'| 'tool';
content: string | null;
tool_calls?: ToolCall[];
```
<Sub name="role" type="'user' | 'assistant' | 'system'| 'tool'">
The role of the author of this message.
</Sub>
<Sub name="content" type="string | null">
The contents of the chunk message. Null if a tool is called.
</Sub>
<Sub name="tool_calls" type="Array<ToolCall>">
The array of the tools called by the LLM.
```ts {{title: 'ToolCall Object'}}
id: string;
type: 'function';
function: Function;
```
<Sub name="id" type="string">
The ID of the tool call.
</Sub>
<Sub name="type" type="'function'">
The type of the tool. Currently, only `function` is supported.
</Sub>
<Sub name="function" type="Function">
The function that the model called.
```ts {{title: 'Function Object'}}
name: string;
arguments: string;
```
<Sub name="name" type="string">
The name of the function to call.
</Sub>
<Sub name="arguments" type="string">
The arguments to call the function with, as generated by the model in JSON format.
</Sub>
</Sub>
</Sub>
</Sub>
<Sub name="logprobs" type="boolean or null">
Log probability information for the choice. Whether to return log probabilities of the output tokens or not. If true, it returns the log probabilities of each output token returned in the `content` of `message`.
</Sub>
<Sub name="finish_reason" type="string">
The reason the model stopped generating tokens. This will be `stop` if the model hit a natural stop point or a provided stop sequence, length if the maximum number of tokens specified in the request was reached, `content_filter` if content was omitted due to a flag from our content filters, `tool_calls` if the model called a tool, or `function_call` (deprecated) if the model called a function. It could also be `eos` end of sequence, depending on the type of LLM used, you can check its documentation.
</Sub>
</LanguageContent>
<LanguageContent language="python">
<Property name="choices" type="List[ChoiceGenerate]">
A list of chat completion choices. Can contain more than one elements if n is greater than 1.
```ts {{title: 'Choice Object for langbase.pipes.run() with stream off'}}
index: number;
message: Message;
logprobs: boolean | null;
finish_reason: string;
```
</Property>
<Sub name="index" type="number">
The index of the choice in the list of choices.
</Sub>
<Sub name="message" type="Message">
A messages array including `role` and `content` params.
```ts {{title: 'Message Object'}}
role: 'user' | 'assistant' | 'system'| 'tool'
content: string | null
tool_calls?: List[ToolCall]
```
<Sub name="role" type="'user' | 'assistant' | 'system'| 'tool'">
The role of the author of this message.
</Sub>
<Sub name="content" type="string | null">
The contents of the chunk message. Null if a tool is called.
</Sub>
<Sub name="tool_calls" type="List[ToolCall]">
The array of the tools called by LLM
```ts {{title: 'ToolCall Object'}}
id: string
type: 'function'
function: Function
```
<Sub name="id" type="string">
The ID of the tool call.
</Sub>
<Sub name="type" type="'function'">
The type of the tool. Currently, only `function` is supported.
</Sub>
<Sub name="function" type="Function">
The function that the model called.
```ts {{title: 'Function Object'}}
name: string;
arguments: string;
```
<Sub name="name" type="string">
The name of the function to call.
</Sub>
<Sub name="arguments" type="string">
The arguments to call the function with, as generated by the model in JSON format.
</Sub>
</Sub>
</Sub>
</Sub>
<Sub name="logprobs" type="boolean or null">
Log probability information for the choice. Whether to return log probabilities of the output tokens or not. If true, returns the log probabilities of each output token returned in the `content` of `message`.
</Sub>
<Sub name="finish_reason" type="string">
The reason the model stopped generating tokens. This will be `stop` if the model hit a natural stop point or a provided stop sequence, length if the maximum number of tokens specified in the request was reached, `content_filter` if content was omitted due to a flag from our content filters, `tool_calls` if the model called a tool, or `function_call` (deprecated) if the model called a function. It could also be `eos` end of sequence and depends on the type of LLM, you can check their docs.
</Sub>
</LanguageContent>
<Property name="usage" type="Usage">
The usage object including the following properties.
```ts {{title: 'Usage Object'}}
prompt_tokens: number;
completion_tokens: number;
total_tokens: number;
```
<Sub name="prompt_tokens" type="number">
The number of tokens in the prompt (input).
</Sub>
<Sub name="completion_tokens" type="number">
The number of tokens in the completion (output).
</Sub>
<Sub name="total_tokens" type="number">
The total number of tokens.
</Sub>
</Property>
<Property name="system_fingerprint" type="string">
This fingerprint represents the backend configuration that the model runs with.
</Property>
<LanguageContent language="typescript">
<Property name="rawResponse" type="Object">
The different headers of the response.
</Property>
</LanguageContent>
<LanguageContent language="python">
<Property name="raw_response" type="Object">
The different headers of the response.
</Property>
</LanguageContent>
</Properties>
---
### RunResponseStream Object
Response of `langbase.pipes.run()` with `stream: true` is a `Promise<RunResponseStream>`.
<LanguageContent language="typescript">
```ts {{title: 'RunResponseStream Object'}}
stream: ReadableStream<any>;
threadId: string | null;
rawResponse?: {
headers: Record<string, string>;
};
```
</LanguageContent>
<LanguageContent language="python">
```bash {{title: 'RunResponseStream Object'}}
stream: ReadableStream<any>
thread_id: str | None
raw_response?: {
headers: Dict[str, str]
}
```
</LanguageContent>
<Properties>
<LanguageContent language="typescript">
<Property name="threadId" type="string">
The ID of the thread. Useful for a chat pipe to continue the conversation in the same thread. Optional.
</Property>
</LanguageContent>
<LanguageContent language="python">
<Property name="thread_id" type="string">
The ID of the thread. Useful for a chat pipe to continue the conversation in the same thread. Optional.
</Property>
</LanguageContent>
<LanguageContent language="typescript">
<Property name="rawResponse" type="Object">
The different headers of the response.
</Property>
</LanguageContent>
<LanguageContent language="python">
<Property name="raw_response" type="Object">
The different headers of the response.
</Property>
</LanguageContent>
<Property name="stream" type="ReadableStream">
Stream is an object with a streamed sequence of StreamChunk objects.
<LanguageContent language="typescript">
```ts {{title: 'StreamResponse Object'}}
type StreamResponse = ReadableStream<StreamChunk>;
```
</LanguageContent>
<LanguageContent language="python">
```py {{title: 'StreamResponse Object'}}
StreamResponse = ReadableStream[StreamChunk]
```
</LanguageContent>
### StreamChunk
<Property name="StreamChunk" type="StreamChunk">
Represents a streamed chunk of a completion response returned by model, based on the provided input.
<LanguageContent language="typescript">
```js {{title: 'StreamChunk Object'}}
id: string;
object: string;
created: number;
model: string;
choices: ChoiceStream[];
```
</LanguageContent>
<LanguageContent language="python">
```ts {{title: 'StreamChunk Object'}}
id: string
object: string
created: number
model: string
choices: List[ChoiceStream]
```
</LanguageContent>
A `StreamChunk` object has the following properties.
<Properties>
<Property name="id" type="string">
The ID of the response.
</Property>
<Property name="object" type="string">
The object type name of the response.
</Property>
<Property name="created" type="number">
The timestamp of the response creation.
</Property>
<Property name="model" type="string">
The model used to generate the response.
</Property>
<LanguageContent language="typescript">
<Property name="choices" type="ChoiceStream[]">
A list of chat completion choices. Can contain more than one element if n is greater than 1.
```js {{title: 'Choice Object for langbase.pipes.run() with stream true'}}
index: number;
delta: Delta;
logprobs: boolean | null;
finish_reason: string;
```
</Property>
</LanguageContent>
<LanguageContent language="python">
<Property name="choices" type="List[ChoiceStream]">
A list of chat completion choices. Can contain more than one elements if n is greater than 1.
```ts {{title: 'Choice Object for langbase.pipes.run() with stream true'}}
index: number;
delta: Delta;
logprobs: boolean | null;
finish_reason: string;
```
</Property>
</LanguageContent>
<Sub name="index" type="number">
The index of the choice in the list of choices.
</Sub>
<Sub name="delta" type="Delta">
A chat completion delta generated by streamed model responses.
<LanguageContent language="typescript">
```ts {{title: 'Delta Object'}}
role?: Role;
content?: string | null;
tool_calls?: ToolCall[];
```
</LanguageContent>
<LanguageContent language="python">
```ts {{title: 'Delta Object'}}
role?: Role;
content?: string | null;
tool_calls?: List[ToolCall];
```
</LanguageContent>
<Sub name="role" type="'user' | 'assistant' | 'system'| 'tool'">
The role of the author of this message.
</Sub>
<Sub name="content" type="string | null">
The contents of the chunk message. Null if a tool is called.
</Sub>
<Sub name="tool_calls" type="Array<ToolCall>">
The array of tools called by the LLM.
```js {{title: 'ToolCall Object'}}
id: string;
type: 'function';
function: Function;
```
<Sub name="id" type="string">
The ID of the tool call.
</Sub>
<Sub name="type" type="'function'">
The type of the tool. Currently, only `function` is supported.
</Sub>
<Sub name="function" type="Function">
The function that the model called.
```js {{title: 'Function Object'}}
name: string;
arguments: string;
```
<Sub name="name" type="string">
The name of the function to call.
</Sub>
<Sub name="arguments" type="string">
The arguments to call the function with, as generated by the model in JSON format.
</Sub>
</Sub>
</Sub>
</Sub>
<Sub name="logprobs" type="boolean or null">
Log probability information for the choice. Whether to return log probabilities of the output tokens or not. If true, returns the log probabilities of each output token returned in the `content` of `message`.
</Sub>
<Sub name="finish_reason" type="string">
The reason the model stopped generating tokens. This will be `stop` if the model hit a natural stop point or a provided stop sequence, length if the maximum number of tokens specified in the request was reached, `content_filter` if content was omitted due to a flag from our content filters, `tool_calls` if the model called a tool, or `function_call` (deprecated) if the model called a function. It could also be `eos` end of sequence, depending on the type of LLM used, you can refer to the relevant LLM's docs.
</Sub>
</Properties>
</Property>
</Property>
</Properties>
</Col>
<Col sticky>
```json {{ title: 'RunResponse type of langbase.pipes.run()' }}
{
"completion": "AI Engineer is a person who designs, builds, and maintains AI systems.",
"threadId": "thread_123",
"id": "chatcmpl-123",
"object": "chat.completion",
"created": 1720131129,
"model": "gpt-4o-mini",
"choices": [
{
"index": 0,
"message": {
"role": "assistant",
"content": "AI Engineer is a person who designs, builds, and maintains AI systems."
},
"logprobs": null,
"finish_reason": "stop"
}
],
"usage": {
"prompt_tokens": 28,
"completion_tokens": 36,
"total_tokens": 64
},
"system_fingerprint": "fp_123"
}
```
```js {{ title: 'RunResponseStream of langbase.pipes.run() with stream true' }}
{
"threadId": "string-uuid-123",
"stream": StreamResponse // example of streamed chunks below.
}
```
```json {{ title: 'StreamResponse has stream chunks' }}
// A stream chunk looks like this …
{
"id": "chatcmpl-123",
"object": "chat.completion.chunk",
"created": 1719848588,
"model": "gpt-4o-mini",
"system_fingerprint": "fp_44709d6fcb",
"choices": [{
"index": 0,
"delta": { "content": "Hi" },
"logprobs": null,
"finish_reason": null
}]
}
// More chunks as they come in...
{"id":"chatcmpl-123","object":"chat.completion.chunk","created":1719848588,"model":"gpt-4o-mini","system_fingerprint":"fp_44709d6fcb","choices":[{"index":0,"delta":{"content":"there"},"logprobs":null,"finish_reason":null}]}
…
{"id":"chatcmpl-123","object":"chat.completion.chunk","created":1719848588,"model":"gpt-4o-mini","system_fingerprint":"fp_44709d6fcb","choices":[{"index":0,"delta":{},"logprobs":null,"finish_reason":"stop"}]}
```
</Col>
</Row>
</LanguageProvider>
---
</content>
</doc>
<doc>
<metadata>
<title>List Pipes <span className="text-sm font-mono text-muted-foreground/70 ml-2">langbase.pipes.list()</span></title>
<url>https://langbase.com/docs/sdk/pipe/list/</url>
</metadata>
<content>
import { generateMetadata } from '@/lib/generate-metadata';
import { LanguageProvider, SimpleLanguageToggle, LanguageContent } from '@/components/LanguageToggle';
<LanguageProvider defaultLanguage='typescript'>
# List Pipes <span className="text-sm font-mono text-muted-foreground/70 ml-2">langbase.pipes.list()</span>
Retrieve a list of all your AI agent pipes on Langbase using the `langbase.pipes.list()` function.
---
## Generate a User/Org API key
You will need to generate an API key to authenticate your requests. For more information, visit the [User/Org API key documentation](/api-reference/api-keys).
<Spoiler title="Get your Langbase API key: User or Org">
You can generate API keys from the [Langbase Studio](https://studio.langbase.com) by following these steps:
1. Switch to your user or org account.
2. From the sidebar, click on the `API keys`.
3. From here you can create a new API key or manage existing ones.
For more details, follow the [Langbase API keys](/api-reference/api-keys) documentation.
</Spoiler>
---
<div className="flex justify-between items-end">
<h3 className="text-2xl w-full">API reference</h3>
<div className="flex md:hidden items-end mb-1">
<SimpleLanguageToggle/>
</div>
</div>
### `langbase.pipes.list()`
<Row>
<Col>
<LanguageContent language="typescript">
<CodeGroup exampleTitle="langbase.pipes.list()" title="Function Signature">
```ts {{ title: 'index.ts' }}
langbase.pipes.list();
```
</CodeGroup>
</LanguageContent>
<LanguageContent language="python">
<CodeGroup exampleTitle="list_pipes()" title="Function Signature">
```python {{ title: 'main.py' }}
langbase.pipes.list()
```
</CodeGroup>
</LanguageContent>
</Col>
<Col sticky>
<div className="flex justify-between items-end">
<h3 className="text-2xl w-full">Usage example</h3>
<div className="hidden md:flex items-end mb-2">
<SimpleLanguageToggle/>
</div>
</div>
<LanguageContent language="typescript">
<CodeGroup exampleTitle="Install the SDK" title="Install the SDK">
```bash {{ title: 'npm' }}
npm i langbase
```
```bash {{ title: 'pnpm' }}
pnpm i langbase
```
```bash {{ title: 'yarn' }}
yarn add langbase
```
</CodeGroup>
</LanguageContent>
<LanguageContent language="python">
<CodeGroup exampleTitle="Install the SDK" title="Install the SDK">
```bash {{ title: 'pip' }}
pip install langbase python-dotenv
```
</CodeGroup>
</LanguageContent>
### Environment variables
<CodeGroup exampleTitle="Environment variables" title="Environment variables">
```bash {{ title: '.env file' }}
LANGBASE_API_KEY="<USER/ORG-API-KEY>"
```
</CodeGroup>
### List pipes
<LanguageContent language="typescript">
<CodeGroup exampleTitle="List all pipes on Langbase" title="List all pipes">
```ts {{ title: 'list-pipes.ts' }}
import {Langbase} from 'langbase';
const langbase = new Langbase({
apiKey: process.env.LANGBASE_API_KEY!,
});
async function main() {
const pipeAgents = await langbase.pipes.list();
console.log('Pipe agents:', pipeAgents);
}
main();
```
</CodeGroup>
</LanguageContent>
<LanguageContent language="python">
<CodeGroup exampleTitle="List all pipes on Langbase" title="List all pipes">
```python {{ title: 'list-pipes.py' }}
import json
import os
from dotenv import load_dotenv
from langbase import Langbase
def main():
load_dotenv()
# Get API key from environment variable
langbase_api_key = os.getenv("LANGBASE_API_KEY")
langbase = Langbase(api_key=langbase_api_key)
pipe_agents = langbase.pipes.list()
print(json.dumps(pipe_agents, indent=2))
if __name__ == "__main__":
main()
```
</CodeGroup>
</LanguageContent>
</Col>
</Row>
---
<Row>
<Col>
## Response
<Properties>
<Property name="PipeListResponse[]" type="Array<object>">
An array of pipe objects returned by the `langbase.pipes.list()` function.
<LanguageContent language="typescript">
```bash {{title: 'PipeListResponse'}}
name: string;
description: string;
status: 'public' | 'private';
owner_login: string;
url: string;
model: string;
stream: boolean;
json: boolean;
store: boolean;
moderate: boolean;
top_p: number;
max_tokens: number;
temperature: number;
presence_penalty: number;
frequency_penalty: number;
stop: string[];
tool_choice: 'auto' | 'required' | ToolChoice;
parallel_tool_calls: boolean;
messages: Message[];
variables: Variable[] | [];
tools: ToolFunction[] | [];
memory: Memory[] | [];
```
</LanguageContent>
<LanguageContent language="python">
```ts {{title: 'PipeListResponse'}}
name: string
description: string
status: 'public' | 'private'
owner_login: string
url: string
model: string
stream: boolean
json: boolean
store: boolean
moderate: boolean
top_p: number
max_tokens: number
temperature: number
presence_penalty: number
frequency_penalty: number
stop: List[string]
tool_choice: 'auto' | 'required' | ToolChoice
parallel_tool_calls: boolean
messages: List[Message]
variables: List[Variable] | []
tools: List[ToolFunction] | []
memory: List[Memory] | []
```
</LanguageContent>
<Properties>
<Property name="name" type="string">
Name of the pipe.
</Property>
<Property name="description" type="string">
Description of the AI pipe.
</Property>
<Property name="status" type="'public' | 'private'">
Status of the pipe.
</Property>
<Property name="owner_login" type="string">
Login of the pipe owner.
</Property>
<Property name="url" type="string">
Pipe access URL.
</Property>
<Property name="model" type="string">
Pipe LLM model. Combination of model provider and model id.
Format: `provider:model_id`
</Property>
<Property name="stream" type="boolean">
Pipe stream status. If enabled, the pipe will stream the response.
</Property>
<Property name="json" type="boolean">
Pipe JSON status. If enabled, the pipe will return the response in JSON format.
</Property>
<Property name="store" type="boolean">
Whether to store the prompt and completions in the database.
</Property>
<Property name="moderate" type="boolean">
Whether to moderate the completions returned by the model.
</Property>
<Property name="top_p" type="number">
Pipe configured top_p value.
</Property>
<Property name="max_tokens" type="number">
Configured maximum tokens for the pipe.
</Property>
<Property name="temperature" type="number">
Configured temperature for the pipe.
What sampling temperature to use, between 0 and 2. Higher values like 0.8 will make the output more random. Lower values like 0.2 will make it more focused and deterministic.
</Property>
<Property name="presence_penalty" type="number">
Configured presence penalty for the pipe.
</Property>
<Property name="frequency_penalty" type="number">
Configured frequency penalty for the pipe.
</Property>
<LanguageContent language="typescript">
<Property name="stop" type="string[]">
Configured stop sequences for the pipe.
</Property>
</LanguageContent>
<LanguageContent language="python">
<Property name="stop" type="List[string]">
Configured stop sequences for the pipe.
</Property>
</LanguageContent>
<Property name="tool_choice" type="'auto' | 'required' | ToolChoice">
Tool usage configuration.
<Properties>
<Property name="'auto'" type="string">
Model decides when to use tools.
</Property>
<Property name="'required'" type="string">
Model must use specified tools.
</Property>
<Property name="ToolChoice" type="object">
Forces use of a specific function.
```ts {{title: 'ToolChoice Object'}}
type: 'function';
function: {
name: string;
};
```
</Property>
</Properties>
</Property>
<Property name="parallel_tool_calls" type="boolean">
If enabled, the pipe will make parallel tool calls.
</Property>
<LanguageContent language="typescript">
<Property name="messages" type="Array<Message>">
A messages array including the following properties. Optional if variables are provided.
```ts {{title: 'Message Object'}}
role: 'user' | 'assistant' | 'system'| 'tool';
content: string | null;
name?: string;
tool_call_id?: string;
tool_calls?: ToolCall[];
```
<Sub name="role" type="'user' | 'assistant' | 'system'| 'tool'">
The role of the author of this message.
</Sub>
<Sub name="content" type="string">
The contents of the chunk message.
</Sub>
<Sub name="name" type="string">
The name of the tool called by LLM
</Sub>
<Sub name="tool_call_id" type="string">
The id of the tool called by LLM
</Sub>
<Sub name="tool_calls" type="Array<ToolCall>">
The array of tools sent to LLM.
```ts {{title: 'ToolCall Object'}}
id: string;
type: 'function';
function: Function;
```
<Sub name="id" type="string">
Unique identifier for the tool call.
</Sub>
<Sub name="type" type="function">
Type of the tool call.
</Sub>
<Sub name="function" type="Function">
Function definition sent to LLM.
```ts {{title: 'Function Object'}}
name: string;
arguments: string;
```
</Sub>
</Sub>
</Property>
</LanguageContent>
<LanguageContent language="python">
<Property name="messages" type="List[Message]">
A messages array including the following properties. Optional if variables are provided.
```ts {{title: 'Message Object'}}
role: 'user' | 'assistant' | 'system'| 'tool'
content: string | null
name?: string
tool_call_id?: string
tool_calls?: List[ToolCall]
```
<Sub name="role" type="'user' | 'assistant' | 'system'| 'tool'">
The role of the author of this message.
</Sub>
<Sub name="content" type="string">
The contents of the chunk message.
</Sub>
<Sub name="name" type="string">
The name of the tool called by LLM
</Sub>
<Sub name="tool_call_id" type="string">
The id of the tool called by LLM
</Sub>
<Sub name="tool_calls" type="List[ToolCall]">
The array of tools sent to LLM.
```ts {{title: 'ToolCall Object'}}
id: string
type: 'function'
function: Function
```
<Sub name="id" type="string">
Unique identifier for the tool call.
</Sub>
<Sub name="type" type="function">
Type of the tool call.
</Sub>
<Sub name="function" type="Function">
Function definition sent to LLM.
```ts {{title: 'Function Object'}}
name: string
arguments: string
```
</Sub>
</Sub>
</Property>
</LanguageContent>
<LanguageContent language="typescript">
<Property name="variables" type="Array<Variable>">
A variables array including the `name` and `value` params.
```ts {{title: 'Variable Object'}}
name: string;
value: string;
```
<Sub name="name" type="string">
The name of the variable.
</Sub>
<Sub name="value" type="string">
The value of the variable.
</Sub>
</Property>
</LanguageContent>
<LanguageContent language="python">
<Property name="variables" type="List[Variable]">
A variables array including the `name` and `value` params.
```ts {{title: 'Variable Object'}}
name: string
value: string
```
<Sub name="name" type="string">
The name of the variable.
</Sub>
<Sub name="value" type="string">
The value of the variable.
</Sub>
</Property>
</LanguageContent>
<LanguageContent language="typescript">
<Property name="memory" type="Array<Memory>">
An array of memories the pipe has access to.
```ts {{title: 'Memory Object'}}
name: string;
```
</Property>
</LanguageContent>
<LanguageContent language="python">
<Property name="memory" type="List[Memory]">
An array of memories the pipe has access to.
```ts {{title: 'Memory Object'}}
name: string
```
</Property>
</LanguageContent>
</Properties>
</Property>
</Properties>
</Col>
<Col sticky>
```json {{ title: 'Example PipeListResponse' }}
[
{
"name": "summary-agent",
"description": "AI pipe for summarization",
"status": "public",
"owner_login": "user123",
"url": "https://langbase.com/user123/summary-agent",
"model": "openai:gpt-4o-mini",
"stream": true,
"json": false,
"store": true,
"moderate": false,
"top_p": 1,
"max_tokens": 1000,
"temperature": 0.7,
"presence_penalty": 1,
"frequency_penalty": 1,
"stop": [],
"tool_choice": "auto",
"parallel_tool_calls": true,
"messages": [],
"variables": [],
"tools": [],
"memory": []
}
]
```
</Col>
</Row>
</LanguageProvider>
---
</content>
</doc>
<doc>
<metadata>
<title>Create Pipe <span className="text-sm font-mono text-muted-foreground/70 ml-2">langbase.pipes.create()</span></title>
<url>https://langbase.com/docs/sdk/pipe/create/</url>
</metadata>
<content>
import { generateMetadata } from '@/lib/generate-metadata';
import { LanguageProvider, SimpleLanguageToggle, LanguageContent } from '@/components/LanguageToggle';
# Create Pipe <span className="text-sm font-mono text-muted-foreground/70 ml-2">langbase.pipes.create()</span>
<LanguageProvider defaultLanguage='typescript'>
Create a new AI agent pipe on Langbase using the `langbase.pipes.create()` function.
---
## Generate a User/Org API key
You will need to generate an API key to authenticate your requests. For more information, visit the [User/Org API key documentation](/api-reference/api-keys).
<Spoiler title="Get your Langbase API key: User or Org">
You can generate API keys from the [Langbase Studio](https://studio.langbase.com) by following these steps:
1. Switch to your user or org account.
2. From the sidebar, click on the `API keys`.
3. From here you can create a new API key or manage existing ones.
For more details follow the [Langbase API keys](/api-reference/api-keys) documentation.
</Spoiler>
---
<div className="flex justify-between items-end">
<h3 className="text-2xl w-full">API reference</h3>
<div className="flex md:hidden items-end mb-1">
<SimpleLanguageToggle/>
</div>
</div>
### `langbase.pipes.create()`
<Row>
<Col>
<LanguageContent language="typescript">
<CodeGroup exampleTitle="langbase.pipes.create()" title="Function Signature">
```ts {{ title: 'index.ts' }}
langbase.pipes.create(options);
// with types.
langbase.pipes.create(options: PipeCreateOptions);
```
</CodeGroup>
</LanguageContent>
<LanguageContent language="python">
<CodeGroup exampleTitle="create_pipe()" title="Function Signature">
```python {{ title: 'main.py' }}
langbase.pipes.create(**options)
```
</CodeGroup>
</LanguageContent>
## options
<Properties>
<Property name="options" type="PipeCreateOptions">
<LanguageContent language="typescript">
```bash {{title: 'PipeCreateOptions Object'}}
name: string;
description?: string;
status?: 'public' | 'private';
upsert?: boolean;
model?: string;
stream?: boolean;
json?: boolean;
store?: boolean;
moderate?: boolean;
top_p?: number;
max_tokens?: number;
temperature?: number;
presence_penalty?: number;
frequency_penalty?: number;
stop?: string[];
tools?: {
type: 'function';
function: {
name: string;
description?: string;
parameters?: Record<string, any>;
};
}[];
tool_choice?: 'auto' | 'required' | ToolChoice;
parallel_tool_calls?: boolean;
messages?: Message[];
variables?: Record<string, string>;
memory?: {
name: string;
}[];
response_format?: ResponseFormat;
```
*Following are the properties of the options object.*
</LanguageContent>
<LanguageContent language="python">
```bash {{title: 'PipeCreateOptions Object'}}
name: string
description?: string
status?: 'public' | 'private'
upsert?: boolean
model?: string
stream?: boolean
json?: boolean
store?: boolean
moderate?: boolean
top_p?: number
max_tokens?: number
temperature?: number
presence_penalty?: number
frequency_penalty?: number
stop?: List[string];
tools?: List[Tools]
tool_choice?: 'auto' | 'required' | ToolChoice
parallel_tool_calls?: boolean
messages?: List[Message]
variables?: Dict[str, str]
memory?: List[Memory]
response_format?: ResponseFormat
```
*Following are the properties of the options object.*
</LanguageContent>
</Property>
</Properties>
---
<Properties>
<Property name="name" type="string" required>
Name of the pipe.
</Property>
<Property name="description" type="string">
Description of the AI pipe.
</Property>
<Property name="status" type="'public' | 'private'">
Status of the pipe. Defaults to `public`
</Property>
<Property name="model" type="string">
Pipe LLM model. Combination of model provider and model id.
Format: `provider:model_id`
You can copy the ID of a model from the list of [supported LLM models](/supported-models-and-providers) at Langbase.
Default: `openai:gpt-4o-mini`
</Property>
<Property name="tool_choice" type="'auto' | 'required' | ToolChoice">
Tool usage configuration.
<Properties>
<Property name="'auto'" type="string">
Model decides when to use tools.
</Property>
<Property name="'required'" type="string">
Model must use specified tools.
</Property>
<Property name="ToolChoice" type="object">
Forces the use of a specific function.
```ts {{title: 'ToolChoice Object'}}
type: 'function';
function: {
name: string;
};
```
</Property>
</Properties>
</Property>
<LanguageContent language="typescript">
<Property name="memory" type="Array<Memory>">
An array of memories that the Pipe should use
```ts {{title: 'Memory Object'}}
name: string;
```
</Property>
</LanguageContent>
<LanguageContent language="python">
<Property name="memory" type="List[Memory]">
An array of memories that the Pipe should use
```ts {{title: 'Memory Object'}}
name: string;
```
</Property>
</LanguageContent>
<Property name="stream" type="boolean">
If enabled, the output will be streamed in real-time like ChatGPT. This is helpful if user is directly reading the text.
Default: `true`
</Property>
<Property name="json" type="boolean">
Enforce the output to be in JSON format.
Default: `false`
</Property>
<Property name="store" type="boolean">
If enabled, both the prompt and completions will be stored in the database. Otherwise, only the system prompt and few shot messages will be saved.
Default: `true`
</Property>
<Property name="moderate" type="boolean">
If enabled, Langbase blocks flagged requests automatically.
Default: `false`
</Property>
<Property name="temperature" type="number">
What sampling temperature to use, between 0 and 2. Higher values like 0.8 will make the output more random. Lower values like 0.2 will make it more focused and deterministic.
Default: `0.7`
</Property>
<Property name="top_p" type="number">
An alternative to sampling with temperature, called nucleus sampling, where the model considers the results of the tokens with top_p probability mass. So 0.1 means only the tokens comprising the top 10% probability mass are considered.
Default: `1`
</Property>
<Property name="max_tokens" type="number">
The maximum number of tokens in the response message to return.
Default: `1000`
</Property>
<Property name="presence_penalty" type="number">
Penalizes a word based on its occurrence in the input text.
Default: `1`
</Property>
<Property name="frequency_penalty" type="number">
Penalizes a word based on how frequently it appears in the training data.
Default: `1`
</Property>
<LanguageContent language="typescript">
<Property name="stop" type="string[]">
Up to 4 sequences where the API will stop generating further tokens.
Default: `[]`
</Property>
</LanguageContent>
<LanguageContent language="python">
<Property name="stop" type="List[string]">
Up to 4 sequences where the API will stop generating further tokens.
Default: `[]`
</Property>
</LanguageContent>
<Property name="parallel_tool_calls" type="boolean">
Call multiple tools in parallel, allowing the effects and results of these function calls to be resolved in parallel.
Default: `true`
</Property>
</Properties>
---
### messages
<Properties>
<LanguageContent language="typescript">
<Property name="messages" type="Array<Message>">
A messages array including the following properties. Optional if variables are provided.
```ts {{title: 'Message Object'}}
role: 'user' | 'assistant' | 'system'| 'tool';
content: string | null;
name?: string;
tool_call_id?: string;
tool_calls?: ToolCall[];
```
<Sub name="role" type="'user' | 'assistant' | 'system'| 'tool'">
The role of the author of this message.
</Sub>
<Sub name="content" type="string">
The contents of the chunk message.
</Sub>
<Sub name="name" type="string">
The name of the tool called by LLM
</Sub>
<Sub name="tool_call_id" type="string">
The id of the tool called by LLM
</Sub>
<Sub name="tool_calls" type="Array<ToolCall>">
The array of tools sent to LLM.
```ts {{title: 'ToolCall Object'}}
id: string;
type: 'function';
function: Function;
```
<Sub name="id" type="string">
Unique identifier for the tool call.
</Sub>
<Sub name="type" type="function">
Type of the tool call.
</Sub>
<Sub name="function" type="Function">
Function definition sent to LLM.
```ts {{title: 'Function Object'}}
name: string;
arguments: string;
```
</Sub>
</Sub>
</Property>
</LanguageContent>
<LanguageContent language="python">
<Property name="messages" type="List[Message]">
A messages array including the following properties. Optional if variables are provided.
```ts {{title: 'Message Object'}}
role: 'user' | 'assistant' | 'system'| 'tool'
content: string | null
name?: string
tool_call_id?: string
tool_calls?: List[ToolCall]
```
<Sub name="role" type="'user' | 'assistant' | 'system'| 'tool'">
The role of the author of this message.
</Sub>
<Sub name="content" type="string">
The contents of the chunk message.
</Sub>
<Sub name="name" type="string">
The name of the tool called by LLM
</Sub>
<Sub name="tool_call_id" type="string">
The id of the tool called by LLM
</Sub>
<Sub name="tool_calls" type="List[ToolCall]">
The array of tools sent to LLM.
```ts {{title: 'ToolCall Object'}}
id: string
type: 'function'
function: Function
```
<Sub name="id" type="string">
Unique identifier for the tool call.
</Sub>
<Sub name="type" type="function">
Type of the tool call.
</Sub>
<Sub name="function" type="Function">
Function definition sent to LLM.
```ts {{title: 'Function Object'}}
name: string
arguments: string
```
</Sub>
</Sub>
</Property>
</LanguageContent>
</Properties>
---
### variables
<Properties>
<LanguageContent language="typescript">
<Property name="variables" type="Record<string, string>">
An object containing pipe variables. The key is the variable name, and the value is the variable value.
Default: `{}`
</Property>
</LanguageContent>
<LanguageContent language="python">
<Property name="variables" type="Dict[str, str]">
An object containing pipe variables. The key is the variable name and the value is the variable value.
Default: `{}`
</Property>
</LanguageContent>
</Properties>
---
### response_format
<Properties>
<Property name="response_format" type="ResponseFormat">
Defines the format of the response. Primarily used for Structured Outputs. To enforce Structured Outputs, set type to `json_schema`, and provide a JSON schema for your response with `strict: true` option.
Default: `text`
<LanguageContent language="typescript">
```ts {{title: 'ResponseFormat Object'}}
type ResponseFormat =
| {type: 'text'}
| {type: 'json_object'}
| {
type: 'json_schema';
json_schema: {
description?: string;
name: string;
schema?: Record<string, unknown>;
strict?: boolean | null;
};
};
```
</LanguageContent>
<LanguageContent language="python">
```ts {{title: 'ResponseFormat Object'}}
ResponseFormat =
| {type: 'text'}
| {type: 'json_object'}
| {
type: 'json_schema'
json_schema: {
description?: string
name: string
schema?: Dict[string, unknown]
strict?: boolean | null
}
}
```
</LanguageContent>
</Property>
</Properties>
</Col>
<Col sticky>
<div className="flex justify-between items-end">
<h3 className="text-2xl w-full">Usage example</h3>
<div className="hidden md:flex items-end mb-2">
<SimpleLanguageToggle/>
</div>
</div>
<LanguageContent language="typescript">
<CodeGroup exampleTitle="Install the SDK" title="Install the SDK">
```bash {{ title: 'npm' }}
npm i langbase
```
```bash {{ title: 'pnpm' }}
pnpm i langbase
```
```bash {{ title: 'yarn' }}
yarn add langbase
```
</CodeGroup>
</LanguageContent>
<LanguageContent language="python">
<CodeGroup exampleTitle="Install the SDK" title="Install the SDK">
```bash {{ title: 'pip' }}
pip install langbase python-dotenv
```
</CodeGroup>
</LanguageContent>
### Environment variables
<CodeGroup exampleTitle="Environment variables" title="Environment variables">
```bash {{ title: '.env file' }}
LANGBASE_API_KEY="<USER/ORG-API-KEY>"
```
</CodeGroup>
### Create pipe
<LanguageContent language="typescript">
<CodeGroup exampleTitle="Create pipe on Langbase" title="Create pipe on Langbase">
```ts {{ title: 'create-basic-pipe.ts' }}
import {Langbase} from 'langbase';
const langbase = new Langbase({
apiKey: process.env.LANGBASE_API_KEY!,
});
async function main() {
const summaryAgent = await langbase.pipes.create({
name: 'summary-agent',
description: 'A simple pipe example',
});
console.log('Pipe created:', summaryAgent);
}
main();
```
```ts {{ title: 'create-advanced-pipe.ts' }}
import {Langbase} from 'langbase';
const langbase = new Langbase({
apiKey: process.env.LANGBASE_API_KEY!,
});
async function main() {
const summaryAgent = await langbase.pipes.create({
name: 'data-processing-agent',
description: 'Advanced pipe with tools and memory',
model: 'google:gemini-1.5-pro-latest',
json: true,
tools: [
{
type: 'function',
function: {
name: 'processData',
description: 'Process input data',
parameters: {
type: 'object',
properties: {
data: {
type: 'string',
description: 'Data to process',
},
},
},
},
},
],
memory: [{name: 'knowledge-base'}],
messages: [
{
role: 'system',
content: 'You are a data processing assistant.',
},
],
variables: {
apiEndpoint: 'https://api.example.com',
},
});
console.log('Pipe created:', summaryAgent);
}
main();
```
</CodeGroup>
</LanguageContent>
<LanguageContent language="python">
<CodeGroup exampleTitle="Create pipe on Langbase" title="Create pipe on Langbase">
```python {{ title: 'create-basic-pipe.py' }}
import json
import os
from dotenv import load_dotenv
from langbase import Langbase
def main():
load_dotenv()
# Get API key from environment variable
langbase_api_key = os.getenv("LANGBASE_API_KEY")
langbase = Langbase(api_key=langbase_api_key)
summary_agent = langbase.pipes.create(
name="summary-agent",
description="A pipe for text summarization"
)
print(json.dumps(summary_agent, indent=2))
if __name__ == "__main__":
main()
```
```python {{ title: 'create-advanced-pipe.py' }}
import json
import os
from dotenv import load_dotenv
from langbase import Langbase
def main():
load_dotenv()
# Get API key from environment variable
langbase_api_key = os.getenv("LANGBASE_API_KEY")
langbase = Langbase(api_key=langbase_api_key)
data_processing_agent = langbase.pipes.create(
name="data-processing-agent",
description="Advanced pipe with tools and memory",
model= "google:gemini-1.5-pro-latest",
json= True,
tools= [
{
"type": "function",
"function": {
"name": "processData",
"description": "Process input data",
"parameters": {
"type": "object",
"properties": {
"data": {
"type": "string",
"description": "Data to process",
},
},
},
},
}
],
messages=[
{
"role": "system",
"content": "You are a data processing assistant.",
}
],
variables= {
"apiEndpoint": "https://api.example.com",
},
)
print(json.dumps(data_processing_agent, indent=2))
if __name__ == "__main__":
main()
```
</CodeGroup>
</LanguageContent>
</Col>
</Row>
---
## Response
<Row>
<Col>
<Properties>
<Property name="PipeCreateResponse" type="object">
The response object returned by the `langbase.pipes.create()` function.
```ts {{title: 'PipeCreateResponse'}}
name: string;
description: string;
status: 'public' | 'private';
owner_login: string;
url: string;
type: 'chat' | 'generate' | 'run';
api_key: string;
```
<Properties>
<Property name="name" type="string">
Name of the pipe.
</Property>
<Property name="description" type="string">
Description of the pipe.
</Property>
<Property name="status" type="'public' | 'private'">
Pipe visibility status.
</Property>
<Property name="owner_login" type="string">
Login of the pipe owner.
</Property>
<Property name="url" type="string">
Pipe access URL.
</Property>
<Property name="type" type="'chat' | 'generate' | 'run'">
Type of the pipe.
</Property>
<Property name="api_key" type="string">
API key for pipe access.
</Property>
</Properties>
</Property>
</Properties>
</Col>
<Col sticky>
```json {{ title: 'PipeCreateResponse type of langbase.pipes.create()' }}
{
"name": "summary-agent",
"description": "AI pipe for summarization",
"status": "public",
"owner_login": "user123",
"url": "https://langbase.com/user123/summary-agent",
"type": "run",
"api_key": "pipe_xyz123"
}
```
</Col>
</Row>
</LanguageProvider>
---
</content>
</doc>
<doc>
<metadata>
<title>List Messages <span className="text-sm font-mono text-muted-foreground/70 ml-2">langbase.threads.messages.list()</span></title>
<url>https://langbase.com/docs/sdk/threads/list-messages/</url>
</metadata>
<content>
import { generateMetadata } from '@/lib/generate-metadata';
import { LanguageProvider, SimpleLanguageToggle, LanguageContent } from '@/components/LanguageToggle';
# List Messages <span className="text-sm font-mono text-muted-foreground/70 ml-2">langbase.threads.messages.list()</span>
<LanguageProvider defaultLanguage='typescript'>
You can use the `threads.messages.list()` function to retrieve all messages in a thread. This helps you access the complete conversation history of a specific thread.
---
## Generate a User/Org API key
You will need to generate an API key to authenticate your requests. For more information, visit the [User/Org API key documentation](/api-reference/api-keys).
<Spoiler title="Get your Langbase API key: User or Org">
You can generate API keys from the [Langbase Studio](https://studio.langbase.com) by following these steps:
1. Switch to your user or org account.
2. From the sidebar, click on the `API keys`.
3. From here you can create a new API key or manage existing ones.
For more details, follow the [Langbase API keys](/api-reference/api-keys) documentation.
</Spoiler>
---
<div className="flex justify-between items-end">
<h3 className="text-2xl w-full">API reference</h3>
<div className="flex md:hidden items-end mb-1">
<SimpleLanguageToggle/>
</div>
</div>
### `langbase.threads.messages.list()`
<Row>
<Col>
<LanguageContent language="typescript">
<CodeGroup exampleTitle="langbase.threads.messages.list()" title="Function Signature">
```ts {{ title: 'index.ts' }}
langbase.threads.messages.list(options);
// with types
langbase.threads.messages.list(options: ThreadsCreate);
```
</CodeGroup>
</LanguageContent>
<LanguageContent language="python">
<CodeGroup exampleTitle="list_messages()" title="Function Signature">
```python {{ title: 'main.py' }}
langbase.threads.messages.list(**options)
```
</CodeGroup>
</LanguageContent>
<LanguageContent language="typescript">
## options
<Properties>
<Property name="options" type="ThreadMessagesList">
```ts {{title: 'ThreadMessagesList Object'}}
threadId: string;
```
</Property>
</Properties>
</LanguageContent>
<LanguageContent language="python">
## options
<Properties>
<Property name="options" type="ThreadMessagesList">
```ts {{title: 'ThreadMessagesList Object'}}
thread_id: string;
```
</Property>
</Properties>
</LanguageContent>
<LanguageContent language="typescript">
<Properties>
<Property name="threadId" type="string" required>
The ID of the thread.
</Property>
</Properties>
</LanguageContent>
<LanguageContent language="python">
<Properties>
<Property name="thread_id" type="string" required>
The ID of the thread
</Property>
</Properties>
</LanguageContent>
</Col>
<Col sticky>
<div className="flex justify-between items-end">
<h3 className="text-2xl w-full">Usage example</h3>
<div className="hidden md:flex items-end mb-2">
<SimpleLanguageToggle/>
</div>
</div>
<LanguageContent language="typescript">
<CodeGroup exampleTitle="Install the SDK" title="Install the SDK">
```bash {{ title: 'npm' }}
npm i langbase
```
```bash {{ title: 'pnpm' }}
pnpm i langbase
```
```bash {{ title: 'yarn' }}
yarn add langbase
```
</CodeGroup>
</LanguageContent>
<LanguageContent language="python">
<CodeGroup exampleTitle="Install the SDK" title="Install the SDK">
```bash {{ title: 'pip' }}
pip install langbase python-dotenv
```
</CodeGroup>
</LanguageContent>
### Environment variables
<CodeGroup exampleTitle="Environment variables" title="Environment variables">
```bash {{ title: '.env file' }}
LANGBASE_API_KEY="<USER/ORG-API-KEY>"
```
</CodeGroup>
### List messages in a thread
<LanguageContent language="typescript">
<CodeGroup exampleTitle="List messages in a thread on Langbase" title="List messages in a thread on Langbase">
```ts {{ title: 'list-messages.ts' }}
const messages = await langbase.threads.messages.list({
threadId: "thread_123"
});
```
</CodeGroup>
</LanguageContent>
<LanguageContent language="python">
<CodeGroup exampleTitle="List messages in a thread on Langbase" title="List messages in a thread on Langbase">
```python {{ title: 'list-messages.py' }}
import json
import os
from dotenv import load_dotenv
from langbase import Langbase
def main():
load_dotenv()
# Get API key from environment variable
langbase_api_key = os.getenv("LANGBASE_API_KEY")
# Initialize the client
langbase = Langbase(api_key=langbase_api_key)
# List all threads
try:
threads = langbase.threads.messages.list(thread_id="thread_123")
print(json.dumps(threads, indent=2))
except Exception as e:
print(f"Error listing threads: {e}")
if __name__ == "__main__":
main()
```
</CodeGroup>
</LanguageContent>
</Col>
</Row>
---
## Response
<Row>
<Col>
<Properties>
<Property name="ThreadMessagesBaseResponse" type="array">
The response of the `threads.messages.list()` function is a promise that resolves to an array of `ThreadMessagesBaseResponse` objects.
<LanguageContent language="typescript">
```bash {{title: 'ThreadMessagesBaseResponse'}}
id: string;
created_at: number;
thread_id: string;
content: string;
role: Role;
tool_call_id: string | null;
tool_calls: ToolCall[] | [];
name: string | null;
attachments: any[] | [];
metadata: Record<string, string> | {};
```
</LanguageContent>
<LanguageContent language="python">
```bash {{title: 'ThreadMessagesBaseResponse'}}
id: string
created_at: number
thread_id: string
content: string
role: Role
tool_call_id: string | null
tool_calls: List[ToolCall] | []
name: string | null
attachments: List[any] | []
metadata: Dict[str, str] | {}
```
</LanguageContent>
</Property>
</Properties>
</Col>
<Col sticky>
```json {{ title: 'ThreadMessagesBaseResponse type of langbase.threads.messages.list()' }}
[
{
"id": "msg_125",
"thread_id": "thread_123",
"created_at": 1709544120,
"role": "assistant",
"content": "How can I help you today?",
"tool_call_id": null,
"tool_calls": [],
"name": null,
"attachments": [],
"metadata": {}
}
]
```
</Col>
</Row>
</LanguageProvider>
---
</content>
</doc>
<doc>
<metadata>
<title>Get Thread <span className="text-sm font-mono text-muted-foreground/70 ml-2">langbase.threads.get()</span></title>
<url>https://langbase.com/docs/sdk/threads/get/</url>
</metadata>
<content>
import { generateMetadata } from '@/lib/generate-metadata';
import { LanguageProvider, SimpleLanguageToggle, LanguageContent } from '@/components/LanguageToggle';
# Get Thread <span className="text-sm font-mono text-muted-foreground/70 ml-2">langbase.threads.get()</span>
<LanguageProvider defaultLanguage='typescript'>
You can use the `threads.get()` function to retrieve thread information and its metadata. This helps you access conversation history and thread details when needed.
---
## Generate a User/Org API key
You will need to generate an API key to authenticate your requests. For more information, visit the [User/Org API key documentation](/api-reference/api-keys).
<Spoiler title="Get your Langbase API key: User or Org">
You can generate API keys from the [Langbase Studio](https://studio.langbase.com) by following these steps:
1. Switch to your user or org account.
2. From the sidebar, click on the `API keys`.
3. From here you can create a new API key or manage existing ones.
For more details, follow the [Langbase API keys](/api-reference/api-keys) documentation.
</Spoiler>
---
<div className="flex justify-between items-end">
<h3 className="text-2xl w-full">API reference</h3>
<div className="flex md:hidden items-end mb-1">
<SimpleLanguageToggle/>
</div>
</div>
### `langbase.threads.get()`
<Row>
<Col>
<LanguageContent language="typescript">
<CodeGroup exampleTitle="langbase.threads.get()" title="Function Signature">
```ts {{ title: 'index.ts' }}
langbase.threads.get(options);
// with types
langbase.threads.get(options: ThreadsGet);
```
</CodeGroup>
</LanguageContent>
<LanguageContent language="python">
<CodeGroup exampleTitle="get_thread()" title="Function Signature">
```python {{ title: 'main.py' }}
langbase.threads.get(**options)
```
</CodeGroup>
</LanguageContent>
<LanguageContent language="typescript">
## options
<Properties>
<Property name="options" type="ThreadsGet">
```bash {{title: 'ThreadsGet Object'}}
threadId: string;
```
</Property>
</Properties>
</LanguageContent>
<LanguageContent language="python">
## options
<Properties>
<Property name="options" type="ThreadsGet">
```bash {{title: 'ThreadsGet Object'}}
thread_id: string
```
</Property>
</Properties>
</LanguageContent>
---
<LanguageContent language="typescript">
### threadId
<Properties>
<Property name="threadId" type="string" required>
The ID of the thread
</Property>
</Properties>
</LanguageContent>
<LanguageContent language="python">
### thread_id
<Properties>
<Property name="threadId" type="string" required>
The ID of the thread
</Property>
</Properties>
</LanguageContent>
</Col>
<Col sticky>
<div className="flex justify-between items-end">
<h3 className="text-2xl w-full">Usage example</h3>
<div className="hidden md:flex items-end mb-2">
<SimpleLanguageToggle/>
</div>
</div>
<LanguageContent language="typescript">
<CodeGroup exampleTitle="Install the SDK" title="Install the SDK">
```bash {{ title: 'npm' }}
npm i langbase
```
```bash {{ title: 'pnpm' }}
pnpm i langbase
```
```bash {{ title: 'yarn' }}
yarn add langbase
```
</CodeGroup>
</LanguageContent>
<LanguageContent language="python">
<CodeGroup exampleTitle="Install the SDK" title="Install the SDK">
```bash {{ title: 'pip' }}
pip install langbase python-dotenv
```
</CodeGroup>
</LanguageContent>
### Environment variables
<CodeGroup exampleTitle="Environment variables" title="Environment variables">
```bash {{ title: '.env file' }}
LANGBASE_API_KEY="<USER/ORG-API-KEY>"
```
</CodeGroup>
### Get a thread
<LanguageContent language="typescript">
<CodeGroup exampleTitle="Get a thread on Langbase" title="Get a thread on Langbase">
```ts {{ title: 'get-thread.ts' }}
const thread = await langbase.threads.get({
threadId: "thread_123"
});
```
</CodeGroup>
</LanguageContent>
<LanguageContent language="python">
<CodeGroup exampleTitle="Get a thread on Langbase" title="Get a thread on Langbase">
```python {{ title: 'get-thread.py' }}
import json
import os
from dotenv import load_dotenv
from langbase import Langbase
def main():
load_dotenv()
# Get API key from environment variable
langbase_api_key = os.getenv("LANGBASE_API_KEY")
# Initialize the client
langbase = Langbase(api_key=langbase_api_key)
# Thread ID to retrieve
thread_id = "thread_123" # Replace with your thread ID
# Get the specific thread
try:
thread = langbase.threads.get(thread_id=thread_id)
print(json.dumps(thread, indent=2))
except Exception as e:
print(f"Error getting thread: {e}")
if __name__ == "__main__":
main()
```
</CodeGroup>
</LanguageContent>
</Col>
</Row>
---
## Response
<Row>
<Col>
<Properties>
<Property name="ThreadsBaseResponse" type="object">
The response of the `threads.get()` function is a promise that resolves to a `ThreadsBaseResponse` object.
<LanguageContent language="typescript">
```ts {{title: 'ThreadsBaseResponse'}}
id: string;
object: 'thread';
created_at: number;
metadata: Record<string, string>;
```
</LanguageContent>
<LanguageContent language="python">
```bash {{title: 'ThreadsBaseResponse'}}
id: string
object: 'thread'
created_at: number
metadata: Dict[str, str]
```
</LanguageContent>
</Property>
</Properties>
</Col>
<Col sticky>
```json {{ title: 'ThreadsBaseResponse type of langbase.threads.get()' }}
{
"id": "thread_123",
"object": "thread",
"created_at": 1709544000,
"metadata": {
"userId": "user123",
"topic": "support",
"status": "resolved"
}
}
```
</Col>
</Row>
</LanguageProvider>
---
</content>
</doc>
<doc>
<metadata>
<title>Update Thread <span className="text-sm font-mono text-muted-foreground/70 ml-2">langbase.threads.update()</span></title>
<url>https://langbase.com/docs/sdk/threads/update/</url>
</metadata>
<content>
import { generateMetadata } from '@/lib/generate-metadata';
import { LanguageProvider, SimpleLanguageToggle, LanguageContent } from '@/components/LanguageToggle';
# Update Thread <span className="text-sm font-mono text-muted-foreground/70 ml-2">langbase.threads.update()</span>
<LanguageProvider defaultLanguage='typescript'>
You can use the `threads.update()` function to modify an existing thread's metadata. This helps you manage and organize your conversation threads effectively.
---
## Generate a User/Org API key
You will need to generate an API key to authenticate your requests. For more information, visit the [User/Org API key documentation](/api-reference/api-keys).
<Spoiler title="Get your Langbase API key: User or Org">
You can generate API keys from the [Langbase Studio](https://studio.langbase.com) by following these steps:
1. Switch to your user or org account.
2. From the sidebar, click on the `API keys`.
3. From here you can create a new API key or manage existing ones.
For more details, follow the [Langbase API keys](/api-reference/api-keys) documentation.
</Spoiler>
---
<div className="flex justify-between items-end">
<h3 className="text-2xl w-full">API reference</h3>
<div className="flex md:hidden items-end mb-1">
<SimpleLanguageToggle/>
</div>
</div>
### `langbase.threads.update()`
<Row>
<Col>
<LanguageContent language="typescript">
<CodeGroup exampleTitle="langbase.threads.update()" title="Function Signature">
```ts {{ title: 'index.ts' }}
langbase.threads.update(options);
// with types
langbase.threads.update(options: ThreadsUpdate);
```
</CodeGroup>
</LanguageContent>
<LanguageContent language="python">
<CodeGroup exampleTitle="update_thread()" title="Function Signature">
```python {{ title: 'main.py' }}
langbase.threads.update(**options)
```
</CodeGroup>
</LanguageContent>
<LanguageContent language="typescript">
## options
<Properties>
<Property name="options" type="ThreadsUpdate">
```ts {{title: 'ThreadsUpdate Object'}}
threadId: string;
metadata: Record<string, string>;
```
</Property>
</Properties>
</LanguageContent>
<LanguageContent language="python">
## options
<Properties>
<Property name="options" type="ThreadsUpdate">
```ts {{title: 'ThreadsUpdate Object'}}
thread_id: string;
metadata: Dict[str, str];
```
</Property>
</Properties>
</LanguageContent>
---
<Properties>
<LanguageContent language="typescript">
<Property name="threadId" type="string" required>
The ID of the thread to update.
</Property>
</LanguageContent>
<LanguageContent language="python">
<Property name="thread_id" type="string" required>
The ID of the thread to update.
</Property>
</LanguageContent>
<LanguageContent language="typescript">
<Property name="metadata" type="Record<string, string>" required>
The new metadata for the thread.
</Property>
</LanguageContent>
<LanguageContent language="python">
<Property name="metadata" type="Dict[str, str]" required>
The new metadata for the thread.
</Property>
</LanguageContent>
</Properties>
</Col>
<Col sticky>
<div className="flex justify-between items-end">
<h3 className="text-2xl w-full">Usage example</h3>
<div className="hidden md:flex items-end mb-2">
<SimpleLanguageToggle/>
</div>
</div>
<LanguageContent language="typescript">
<CodeGroup exampleTitle="Install the SDK" title="Install the SDK">
```bash {{ title: 'npm' }}
npm i langbase
```
```bash {{ title: 'pnpm' }}
pnpm i langbase
```
```bash {{ title: 'yarn' }}
yarn add langbase
```
</CodeGroup>
</LanguageContent>
<LanguageContent language="python">
<CodeGroup exampleTitle="Install the SDK" title="Install the SDK">
```bash {{ title: 'pip' }}
pip install langbase python-dotenv
```
</CodeGroup>
</LanguageContent>
### Environment variables
<CodeGroup exampleTitle="Environment variables" title="Environment variables">
```bash {{ title: '.env file' }}
LANGBASE_API_KEY="<USER/ORG-API-KEY>"
```
</CodeGroup>
### Update a thread
<LanguageContent language="typescript">
<CodeGroup exampleTitle="Update a thread on Langbase" title="Update a thread on Langbase">
```ts {{ title: 'update-thread.ts' }}
const updated = await langbase.threads.update({
threadId: "thread_123",
metadata: {
status: "resolved"
}
});
```
</CodeGroup>
</LanguageContent>
<LanguageContent language="python">
<CodeGroup exampleTitle="Update a thread on Langbase" title="Update a thread on Langbase">
```python {{ title: 'update-thread.py' }}
import json
import os
from dotenv import load_dotenv
from langbase import Langbase
def main():
load_dotenv()
# Get API key from environment variable
langbase_api_key = os.getenv("LANGBASE_API_KEY")
# Initialize the client
langbase = Langbase(api_key=langbase_api_key)
# Thread ID to update
thread_id = "thread_123" # Replace with your actual thread ID
# New metadata to set for the thread
updated_metadata = {
"company": "langbase",
"about": "Langbase is the most powerful serverless platform for building AI agents with memory.",
}
# Update the thread metadata
try:
updated_thread = langbase.threads.update(
thread_id=thread_id,
metadata=updated_metadata,
)
print(json.dumps(updated_thread, indent=2))
except Exception as e:
print(f"Error updating thread: {e}")
if __name__ == "__main__":
main()
```
</CodeGroup>
</LanguageContent>
</Col>
</Row>
---
## Response
<Row>
<Col>
<Properties>
<Property name="ThreadsBaseResponse" type="object">
The response of the `threads.update()` function is a promise that resolves to a `ThreadsBaseResponse` object.
<LanguageContent language="typescript">
```bash {{title: 'ThreadsBaseResponse'}}
id: string;
object: 'thread';
created_at: number;
metadata: Record<string, string>;
```
</LanguageContent>
<LanguageContent language="python">
```bash {{title: 'ThreadsBaseResponse'}}
id: string;
object: 'thread';
created_at: number;
metadata: Dict[str, str];
```
</LanguageContent>
</Property>
</Properties>
</Col>
<Col sticky>
```json {{ title: 'ThreadsBaseResponse type of langbase.threads.update()' }}
{
"id": "thread_123",
"object": "thread",
"created_at": 1709544000,
"metadata": {
"status": "resolved"
}
}
```
</Col>
</Row>
</LanguageProvider>
---
</content>
</doc>
<doc>
<metadata>
<title>Delete Thread <span className="text-sm font-mono text-muted-foreground/70 ml-2">langbase.threads.delete()</span></title>
<url>https://langbase.com/docs/sdk/threads/delete/</url>
</metadata>
<content>
import { generateMetadata } from '@/lib/generate-metadata';
import { LanguageProvider, SimpleLanguageToggle, LanguageContent } from '@/components/LanguageToggle';
# Delete Thread <span className="text-sm font-mono text-muted-foreground/70 ml-2">langbase.threads.delete()</span>
<LanguageProvider defaultLanguage='typescript'>
You can use the `threads.delete()` function to remove threads that are no longer needed. This helps you manage your conversation history and clean up unused threads.
---
## Generate a User/Org API key
You will need to generate an API key to authenticate your requests. For more information, visit the [User/Org API key documentation](/api-reference/api-keys).
<Spoiler title="Get your Langbase API key: User or Org">
You can generate API keys from the [Langbase Studio](https://studio.langbase.com) by following these steps:
1. Switch to your user or org account.
2. From the sidebar, click on the `API keys`.
3. From here you can create a new API key or manage existing ones.
For more details, follow the [Langbase API keys](/api-reference/api-keys) documentation.
</Spoiler>
---
<div className="flex justify-between items-end">
<h3 className="text-2xl w-full">API reference</h3>
<div className="flex md:hidden items-end mb-1">
<SimpleLanguageToggle/>
</div>
</div>
### `langbase.threads.delete()`
<Row>
<Col>
<LanguageContent language="typescript">
<CodeGroup exampleTitle="langbase.threads.delete()" title="Function Signature">
```ts {{ title: 'index.ts' }}
langbase.threads.delete(options);
// with types
langbase.threads.delete(options: DeleteThreadOptions);
```
</CodeGroup>
</LanguageContent>
<LanguageContent language="python">
<CodeGroup exampleTitle="delete_thread()" title="Function Signature">
```python {{ title: 'main.py' }}
langbase.threads.delete(**options)
```
</CodeGroup>
</LanguageContent>
<LanguageContent language="typescript">
## options
<Properties>
<Property name="options" type="DeleteThreadOptions">
```bash {{title: 'DeleteThreadOptions Object'}}
threadId: string;
```
</Property>
</Properties>
</LanguageContent>
<LanguageContent language="python">
## options
<Properties>
<Property name="options" type="DeleteThreadOptions">
```bash {{title: 'DeleteThreadOptions Object'}}
thread_id: string
```
</Property>
</Properties>
</LanguageContent>
---
<LanguageContent language="typescript">
### threadId
<Properties>
<Property name="threadId" type="string" required>
The ID of the thread.
</Property>
</Properties>
</LanguageContent>
<LanguageContent language="python">
### thread_id
<Properties>
<Property name="threadId" type="string" required>
The ID of the thread.
</Property>
</Properties>
</LanguageContent>
</Col>
<Col sticky>
<div className="flex justify-between items-end">
<h3 className="text-2xl w-full">Usage example</h3>
<div className="hidden md:flex items-end mb-2">
<SimpleLanguageToggle/>
</div>
</div>
<LanguageContent language="typescript">
<CodeGroup exampleTitle="Install the SDK" title="Install the SDK">
```bash {{ title: 'npm' }}
npm i langbase
```
```bash {{ title: 'pnpm' }}
pnpm i langbase
```
```bash {{ title: 'yarn' }}
yarn add langbase
```
</CodeGroup>
</LanguageContent>
<LanguageContent language="python">
<CodeGroup exampleTitle="Install the SDK" title="Install the SDK">
```bash {{ title: 'pip' }}
pip install langbase python-dotenv
```
</CodeGroup>
</LanguageContent>
### Environment variables
<CodeGroup exampleTitle="Environment variables" title="Environment variables">
```bash {{ title: '.env file' }}
LANGBASE_API_KEY="<USER/ORG-API-KEY>"
```
</CodeGroup>
### Delete a thread
<LanguageContent language="typescript">
<CodeGroup exampleTitle="Delete a thread on Langbase" title="Delete a thread on Langbase">
```ts {{ title: 'delete-thread.ts' }}
const result = await langbase.threads.delete({
threadId: "thread_123"
});
```
</CodeGroup>
</LanguageContent>
<LanguageContent language="python">
<CodeGroup exampleTitle="Delete a thread on Langbase" title="Delete a thread on Langbase">
```python {{ title: 'delete-thread.py' }}
import os
from dotenv import load_dotenv
from langbase import Langbase
def main():
load_dotenv()
# Get API key from environment variable
langbase_api_key = os.getenv("LANGBASE_API_KEY")
# Initialize the client
langbase = Langbase(api_key=langbase_api_key)
# Thread ID to delete
thread_id = "thread_123" # Replace with your actual thread ID
# Delete the thread
try:
response = langbase.threads.delete(thread_id=thread_id)
if response.get("success", False):
print(f"Successfully deleted thread {thread_id}")
else:
print(f"Failed to delete thread {thread_id}")
if "message" in response:
print(f"Message: {response['message']}")
except Exception as e:
print(f"Error deleting thread: {e}")
if __name__ == "__main__":
main()
```
</CodeGroup>
</LanguageContent>
</Col>
</Row>
---
## Response
<Row>
<Col>
<Properties>
<Property name="DeleteResponse" type="object">
The response of the `langbase.threads.delete()` function is a JSON object with the following structure:
```ts {{title: 'DeleteResponse'}}
success: boolean;
```
*The response will contain a `success` property indicating whether the thread was successfully deleted.*
</Property>
</Properties>
</Col>
<Col sticky>
```json {{ title: 'DeleteResponse type of langbase.threads.delete()' }}
{
"success": true
}
```
</Col>
</Row>
</LanguageProvider>
---
</content>
</doc>
<doc>
<metadata>
<title>Create Thread <span className="text-sm font-mono text-muted-foreground/70 ml-2">langbase.threads.create()</span></title>
<url>https://langbase.com/docs/sdk/threads/create/</url>
</metadata>
<content>
import { generateMetadata } from '@/lib/generate-metadata';
import { LanguageProvider, SimpleLanguageToggle, LanguageContent } from '@/components/LanguageToggle';
# Create Thread <span className="text-sm font-mono text-muted-foreground/70 ml-2">langbase.threads.create()</span>
<LanguageProvider defaultLanguage='typescript'>
You can use the `threads.create()` function to create new conversation threads. Threads help you organize and maintain conversation history, making it easier to build conversational applications.
---
## Generate a User/Org API key
You will need to generate an API key to authenticate your requests. For more information, visit the [User/Org API key documentation](/api-reference/api-keys).
<Spoiler title="Get your Langbase API key: User or Org">
You can generate API keys from the [Langbase Studio](https://studio.langbase.com) by following these steps:
1. Switch to your user or org account.
2. From the sidebar, click on the `API keys`.
3. From here you can create a new API key or manage existing ones.
For more details, follow the [Langbase API keys](/api-reference/api-keys) documentation.
</Spoiler>
---
<div className="flex justify-between items-end">
<h3 className="text-2xl w-full">API reference</h3>
<div className="flex md:hidden items-end mb-1">
<SimpleLanguageToggle/>
</div>
</div>
### `langbase.threads.create()`
<Row>
<Col>
<LanguageContent language="typescript">
<CodeGroup exampleTitle="langbase.threads.create()" title="Function Signature">
```ts {{ title: 'index.ts' }}
langbase.threads.create(options);
// with types
langbase.threads.create(options: ThreadsCreate);
```
</CodeGroup>
</LanguageContent>
<LanguageContent language="python">
<CodeGroup exampleTitle="create_thread()" title="Function Signature">
```python {{ title: 'main.py' }}
langbase.threads.create(**options)
```
</CodeGroup>
</LanguageContent>
<Properties>
<Property name="options" type="ThreadsCreate">
<LanguageContent language="typescript">
```bash {{title: 'ThreadsCreate Object'}}
threadId?: string;
metadata?: Record<string, string>;
messages?: ThreadMessage[];
```
*Following are the properties of the options object.*
</LanguageContent>
<LanguageContent language="python">
```bash {{title: 'ThreadsCreate Object'}}
thread_id?: string
metadata?: Dict[str, str]
messages?: List[ThreadMessage]
```
*Following are the properties of the options object.*
</LanguageContent>
</Property>
</Properties>
---
<Properties>
<LanguageContent language="typescript">
<Property name="threadId" type="string" optional>
An optional thread ID. If not provided, a new one will be generated.
</Property>
</LanguageContent>
<LanguageContent language="python">
<Property name="thread_id" type="string" optional>
An optional thread ID. If not provided, a new one will be generated.
</Property>
</LanguageContent>
<LanguageContent language="typescript">
<Property name="metadata" type="Record<string, string>" optional>
A record of metadata to associate with the thread.
</Property>
<Property name="messages" type="ThreadMessage[]" optional>
A list of initial messages for the thread.
`ThreadMessage` is an object that extends the `Message` object.
```bash {{title: 'ThreadMessage'}}
attachments?: any[];
metadata?: Record<string, string>;
role: 'user' | 'assistant' | 'system' | 'tool';
content: string | null;
name?: string;
tool_call_id?: string;
tool_calls?: ToolCall[];
```
<Sub name="attachments" type="any[]" optional>
An optional list of attachments for the message.
</Sub>
<Sub name="metadata" type="Record<string, string>" optional>
An optional dictionary of metadata for the message.
</Sub>
<Sub name="role" type="'user' | 'assistant' | 'system'| 'tool'">
The role of the author of this message.
</Sub>
<Sub name="content" type="string">
The contents of the chunk message.
</Sub>
<Sub name="name" type="string">
The name of the tool called by LLM
</Sub>
<Sub name="tool_call_id" type="string">
The id of the tool called by LLM
</Sub>
<Sub name="tool_calls" type="Array<ToolCall>">
The array of tools sent to LLM.
```ts {{title: 'ToolCall Object'}}
id: string;
type: 'function';
function: Function;
```
<Sub name="id" type="string">
Unique identifier for the tool call.
</Sub>
<Sub name="type" type="function">
Type of the tool call.
</Sub>
<Sub name="function" type="Function">
Function definition sent to LLM.
```ts {{title: 'Function Object'}}
name: string;
arguments: string;
```
</Sub>
</Sub>
</Property>
</LanguageContent>
<LanguageContent language="python">
<Property name="metadata" type="Dict[str, str]" optional>
A dictionary of metadata to associate with the thread.
</Property>
<Property name="messages" type="List[ThreadMessage]" optional>
A list of initial messages for the thread.
`ThreadMessage` is an object that extends the `Message` object.
```bash {{title: 'ThreadMessage'}}
attachments?: List[any]
metadata?: Dict[str, str]
role: 'user' | 'assistant' | 'system' | 'tool'
content: str | None
name?: string
tool_call_id?: string
tool_calls?: List[ToolCall]
```
<Sub name="attachments" type="any[]" optional>
An optional list of attachments for the message.
</Sub>
<Sub name="metadata" type="Dict[str, str]" optional>
An optional dictionary of metadata for the message.
</Sub>
<Sub name="role" type="'user' | 'assistant' | 'system'| 'tool'">
The role of the author of this message.
</Sub>
<Sub name="content" type="string">
The contents of the chunk message.
</Sub>
<Sub name="name" type="string">
The name of the tool called by LLM
</Sub>
<Sub name="tool_call_id" type="string">
The id of the tool called by LLM
</Sub>
<Sub name="tool_calls" type="List[ToolCall]">
The array of tools sent to LLM.
```ts {{title: 'ToolCall Object'}}
id: string
type: 'function'
function: Function
```
<Sub name="id" type="string">
Unique identifier for the tool call.
</Sub>
<Sub name="type" type="function">
Type of the tool call.
</Sub>
<Sub name="function" type="Function">
Function definition sent to LLM.
```ts {{title: 'Function Object'}}
name: string
arguments: string
```
</Sub>
</Sub>
</Property>
</LanguageContent>
</Properties>
</Col>
<Col sticky>
<div className="flex justify-between items-end">
<h3 className="text-2xl w-full">Usage example</h3>
<div className="hidden md:flex items-end mb-2">
<SimpleLanguageToggle/>
</div>
</div>
<LanguageContent language="typescript">
<CodeGroup exampleTitle="Install the SDK" title="Install the SDK">
```bash {{ title: 'npm' }}
npm i langbase
```
```bash {{ title: 'pnpm' }}
pnpm i langbase
```
```bash {{ title: 'yarn' }}
yarn add langbase
```
</CodeGroup>
</LanguageContent>
<LanguageContent language="python">
<CodeGroup exampleTitle="Install the SDK" title="Install the SDK">
```bash {{ title: 'pip' }}
pip install langbase python-dotenv
```
</CodeGroup>
</LanguageContent>
### Environment variables
<CodeGroup exampleTitle="Environment variables" title="Environment variables">
```bash {{ title: '.env file' }}
LANGBASE_API_KEY="<USER/ORG-API-KEY>"
```
</CodeGroup>
### Create a thread
<LanguageContent language="typescript">
<CodeGroup exampleTitle="Create a thread on Langbase" title="Create a thread on Langbase">
```ts {{ title: 'create-thread.ts' }}
const thread = await langbase.threads.create({
metadata: {
userId: "user123",
topic: "support"
},
messages: [{
role: "user",
content: "Hello, I need help!"
}]
});
```
</CodeGroup>
</LanguageContent>
<LanguageContent language="python">
<CodeGroup exampleTitle="Create a thread on Langbase" title="Create a thread on Langbase">
```python {{ title: 'create-thread.py' }}
import json
import os
from dotenv import load_dotenv
from langbase import Langbase
def main():
load_dotenv()
# Get API key from environment variable
langbase_api_key = os.getenv("LANGBASE_API_KEY")
# Initialize the client
langbase = Langbase(api_key=langbase_api_key)
# Create a thread with metadata and initial messages
try:
thread = langbase.threads.create(
metadata={"company": "langbase"},
messages=[{"role": "user", "content": "Hello, how are you?"}],
)
print(json.dumps(thread, indent=2))
except Exception as e:
print(f"Error creating thread: {e}")
if __name__ == "__main__":
main()
```
</CodeGroup>
</LanguageContent>
</Col>
</Row>
---
## Response
<Row>
<Col>
<Properties>
<Property name="ThreadsBaseResponse" type="object">
The response of the `threads.create()` function is a `Promise` that resolves to a `ThreadsBaseResponse` object.
<LanguageContent language="typescript">
```ts {{title: 'ThreadsBaseResponse'}}
id: string;
object: 'thread';
created_at: number;
metadata: Record<string, string>;
```
</LanguageContent>
<LanguageContent language="python">
```bash {{title: 'ThreadsBaseResponse'}}
id: string
object: 'thread'
created_at: number
metadata: Dict[str, str]
```
</LanguageContent>
</Property>
</Properties>
</Col>
<Col sticky>
```json {{ title: 'ThreadsBaseResponse type of langbase.threads.create()' }}
{
"id": "thread_123",
"object": "thread",
"created_at": 1709544000,
"metadata": {
"userId": "user123",
"topic": "support"
}
}
```
</Col>
</Row>
</LanguageProvider>
---
</content>
</doc>
<doc>
<metadata>
<title>Append Messages <span className="text-sm font-mono text-muted-foreground/70 ml-2">langbase.threads.append()</span></title>
<url>https://langbase.com/docs/sdk/threads/append-messages/</url>
</metadata>
<content>
import { generateMetadata } from '@/lib/generate-metadata';
import { LanguageProvider, SimpleLanguageToggle, LanguageContent } from '@/components/LanguageToggle';
# Append Messages <span className="text-sm font-mono text-muted-foreground/70 ml-2">langbase.threads.append()</span>
<LanguageProvider defaultLanguage='typescript'>
You can use the `threads.append()` function to add new messages to an existing thread. This helps you maintain conversation history and build interactive chat experiences.
---
## Generate a User/Org API key
You will need to generate an API key to authenticate your requests. For more information, visit the [User/Org API key documentation](/api-reference/api-keys).
<Spoiler title="Get your Langbase API key: User or Org">
You can generate API keys from the [Langbase Studio](https://studio.langbase.com) by following these steps:
1. Switch to your user or org account.
2. From the sidebar, click on the `API keys`.
3. From here you can create a new API key or manage existing ones.
For more details, follow the [Langbase API keys](/api-reference/api-keys) documentation.
</Spoiler>
---
<div className="flex justify-between items-end">
<h3 className="text-2xl w-full">API reference</h3>
<div className="flex md:hidden items-end mb-1">
<SimpleLanguageToggle/>
</div>
</div>
### `langbase.threads.append()`
<Row>
<Col>
<LanguageContent language="typescript">
<CodeGroup exampleTitle="langbase.threads.append()" title="Function Signature">
```ts {{ title: 'index.ts' }}
langbase.threads.append(options);
// with types
langbase.threads.append(options: ThreadsCreate);
```
</CodeGroup>
</LanguageContent>
<LanguageContent language="python">
<CodeGroup exampleTitle="append_messages()" title="Function Signature">
```python {{ title: 'main.py' }}
langbase.threads.append(**options)
```
</CodeGroup>
</LanguageContent>
<LanguageContent language="typescript">
<Properties>
<Property name="options" type="ThreadMessagesCreate">
```ts {{title: 'ThreadMessagesCreate Object'}}
threadId: string;
messages: ThreadMessage[];
```
*Following are the properties of the options object.*
</Property>
</Properties>
</LanguageContent>
<LanguageContent language="python">
<Properties>
<Property name="options" type="ThreadMessagesCreate">
```bash {{title: 'ThreadMessagesCreate Object'}}
thread_id: string
messages: ThreadMessage[]
```
*Following are the properties of the options object.*
</Property>
</Properties>
</LanguageContent>
---
<Properties>
<LanguageContent language="typescript">
<Property name="threadId" type="string" optional>
An optional thread ID. If not provided, a new one will be generated.
</Property>
</LanguageContent>
<LanguageContent language="python">
<Property name="thread_id" type="string" optional>
An optional thread ID. If not provided, a new one will be generated.
</Property>
</LanguageContent>
<LanguageContent language="typescript">
<Property name="messages" type="ThreadMessage[]" optional>
A list of initial messages for the thread.
`ThreadMessage` is an object that extends the `Message` object.
```bash {{title: 'ThreadMessage'}}
attachments?: any[];
metadata?: Record<string, string>;
role: 'user' | 'assistant' | 'system' | 'tool';
content: string | null;
name?: string;
tool_call_id?: string;
tool_calls?: ToolCall[];
```
<Sub name="attachments" type="any[]" optional>
An optional list of attachments for the message.
</Sub>
<Sub name="metadata" type="Record<string, string>" optional>
An optional dictionary of metadata for the message.
</Sub>
<Sub name="role" type="'user' | 'assistant' | 'system'| 'tool'">
The role of the author of this message.
</Sub>
<Sub name="content" type="string">
The contents of the chunk message.
</Sub>
<Sub name="name" type="string">
The name of the tool called by LLM
</Sub>
<Sub name="tool_call_id" type="string">
The id of the tool called by LLM
</Sub>
<Sub name="tool_calls" type="Array<ToolCall>">
The array of tools sent to LLM.
```ts {{title: 'ToolCall Object'}}
id: string;
type: 'function';
function: Function;
```
<Sub name="id" type="string">
Unique identifier for the tool call.
</Sub>
<Sub name="type" type="function">
Type of the tool call.
</Sub>
<Sub name="function" type="Function">
Function definition sent to LLM.
```ts {{title: 'Function Object'}}
name: string;
arguments: string;
```
</Sub>
</Sub>
</Property>
</LanguageContent>
<LanguageContent language="python">
<Property name="messages" type="List[ThreadMessage]" optional>
A list of initial messages for the thread.
`ThreadMessage` is an object that extends the `Message` object.
```bash {{title: 'ThreadMessage'}}
attachments?: List[any]
metadata?: Dict[str, str]
role: 'user' | 'assistant' | 'system' | 'tool'
content: str | None
name?: string
tool_call_id?: string
tool_calls?: List[ToolCall]
```
<Sub name="attachments" type="any[]" optional>
An optional list of attachments for the message.
</Sub>
<Sub name="metadata" type="Dict[str, str]" optional>
An optional dictionary of metadata for the message.
</Sub>
<Sub name="role" type="'user' | 'assistant' | 'system'| 'tool'">
The role of the author of this message.
</Sub>
<Sub name="content" type="string">
The contents of the chunk message.
</Sub>
<Sub name="name" type="string">
The name of the tool called by LLM
</Sub>
<Sub name="tool_call_id" type="string">
The id of the tool called by LLM
</Sub>
<Sub name="tool_calls" type="List[ToolCall]">
The array of tools sent to LLM.
```ts {{title: 'ToolCall Object'}}
id: string
type: 'function'
function: Function
```
<Sub name="id" type="string">
Unique identifier for the tool call.
</Sub>
<Sub name="type" type="function">
Type of the tool call.
</Sub>
<Sub name="function" type="Function">
Function definition sent to LLM.
```ts {{title: 'Function Object'}}
name: string
arguments: string
```
</Sub>
</Sub>
</Property>
</LanguageContent>
</Properties>
</Col>
<Col sticky>
<div className="flex justify-between items-end">
<h3 className="text-2xl w-full">Usage example</h3>
<div className="hidden md:flex items-end mb-2">
<SimpleLanguageToggle/>
</div>
</div>
<LanguageContent language="typescript">
<CodeGroup exampleTitle="Install the SDK" title="Install the SDK">
```bash {{ title: 'npm' }}
npm i langbase
```
```bash {{ title: 'pnpm' }}
pnpm i langbase
```
```bash {{ title: 'yarn' }}
yarn add langbase
```
</CodeGroup>
</LanguageContent>
<LanguageContent language="python">
<CodeGroup exampleTitle="Install the SDK" title="Install the SDK">
```bash {{ title: 'pip' }}
pip install langbase python-dotenv
```
</CodeGroup>
</LanguageContent>
### Environment variables
<CodeGroup exampleTitle="Environment variables" title="Environment variables">
```bash {{ title: '.env file' }}
LANGBASE_API_KEY="<USER/ORG-API-KEY>"
```
</CodeGroup>
### Append messages to a thread
<LanguageContent language="typescript">
<CodeGroup exampleTitle="Append messages to a thread on Langbase" title="Append messages to a thread on Langbase">
```ts {{ title: 'append-messages.ts' }}
const messages = await langbase.threads.append({
threadId: "thread_125",
messages: [{
role: "assistant",
content: "How can I help you today?"
}]
});
```
</CodeGroup>
</LanguageContent>
<LanguageContent language="python">
<CodeGroup exampleTitle="Append messages to a thread on Langbase" title="Append messages to a thread on Langbase">
```python {{ title: 'append-messages.py' }}
import os
from dotenv import load_dotenv
from langbase import Langbase
def main():
load_dotenv()
# Get API key from environment variable
langbase_api_key = os.getenv("LANGBASE_API_KEY")
# Initialize the client
langbase = Langbase(api_key=langbase_api_key)
# Thread ID to append messages to
thread_id = "thread_123" # Replace with your actual thread ID
# Messages to append
messages = [
{"role": "assistant", "content": "Nice to meet you"},
]
# Append messages to the thread
try:
response = langbase.threads.append(thread_id=thread_id, messages=messages)
print(f"Successfully appended {len(response)} messages to thread '{thread_id}'")
# Print the appended messages
for i, message in enumerate(response, 1):
print(f"\nMessage {i}:")
print(f"Role: {message.get('role')}")
print(f"Content: {message.get('content')}")
print(f"Created at: {message.get('created_at')}")
except Exception as e:
print(f"Error appending messages to thread: {e}")
if __name__ == "__main__":
main()
```
</CodeGroup>
</LanguageContent>
</Col>
</Row>
---
## Response
<Row>
<Col>
<Properties>
<Property name="ThreadMessagesBaseResponse" type="array">
The response of the `threads.append()` function is a promise that resolves to an array of `ThreadMessagesBaseResponse` objects.
<LanguageContent language="typescript">
```bash {{title: 'ThreadMessagesBaseResponse'}}
id: string;
created_at: number;
thread_id: string;
content: string;
role: Role;
tool_call_id: string | null;
tool_calls: ToolCall[] | [];
name: string | null;
attachments: any[] | [];
metadata: Record<string, string> | {};
```
</LanguageContent>
<LanguageContent language="python">
```bash {{title: 'ThreadMessagesBaseResponse'}}
id: string
created_at: number
thread_id: string
content: string
role: Role
tool_call_id: string | null
tool_calls: List[ToolCall] | []
name: string | null
attachments: List[any] | []
metadata: Dict[str, str] | {}
```
</LanguageContent>
</Property>
</Properties>
</Col>
<Col sticky>
```json {{ title: 'ThreadMessagesBaseResponse type of langbase.threads.append()' }}
[
{
"id": "msg_124",
"thread_id": "thread_123",
"created_at": 1709544120,
"role": "user",
"content": "Hello, I need help!",
"tool_call_id": null,
"tool_calls": [],
"name": null,
"attachments": [],
"metadata": {}
},
{
"id": "msg_125",
"thread_id": "thread_123",
"created_at": 1709544120,
"role": "assistant",
"content": "How can I help you today?",
"tool_call_id": null,
"tool_calls": [],
"name": null,
"attachments": [],
"metadata": {}
}
]
```
</Col>
</Row>
</LanguageProvider>
---
</content>
</doc>
<doc>
<metadata>
<title>List Memories <span className="text-sm font-mono text-muted-foreground/70 ml-2">langbase.memories.list()</span></title>
<url>https://langbase.com/docs/sdk/memory/list/</url>
</metadata>
<content>
import { generateMetadata } from '@/lib/generate-metadata';
import { LanguageProvider, SimpleLanguageToggle, LanguageContent } from '@/components/LanguageToggle';
# List Memories <span className="text-sm font-mono text-muted-foreground/70 ml-2">langbase.memories.list()</span>
<LanguageProvider defaultLanguage='typescript'>
List all memories on Langbase using the `langbase.memories.list()` function.
---
## Generate a User/Org API key
You will need to generate an API key to authenticate your requests. For more information, visit the [User/Org API key documentation](/api-reference/api-keys).
<Spoiler title="Get your Langbase API key: User or Org">
You can generate API keys from the [Langbase Studio](https://studio.langbase.com) by following these steps:
1. Switch to your user or org account.
2. From the sidebar, click on the `API keys`.
3. From here you can create a new API key or manage existing ones.
For more details, follow the [Langbase API keys](/api-reference/api-keys) documentation.
</Spoiler>
---
<div className="flex justify-between items-end">
<h3 className="text-2xl w-full">API reference</h3>
<div className="flex md:hidden items-end mb-1">
<SimpleLanguageToggle/>
</div>
</div>
### `langbase.memories.list()`
<Row>
<Col>
<LanguageContent language="typescript">
<CodeGroup exampleTitle="langbase.memories.list()" title="Function Signature">
```ts {{ title: 'index.ts' }}
langbase.memories.list();
```
</CodeGroup>
</LanguageContent>
<LanguageContent language="python">
<CodeGroup exampleTitle="langbase.memories.list()" title="Function Signature">
```python {{ title: 'index.py' }}
langbase.memories.list()
```
</CodeGroup>
</LanguageContent>
</Col>
<Col sticky>
<div className="flex justify-between items-end">
<h3 className="text-2xl w-full">Usage example</h3>
<div className="hidden md:flex items-end mb-2">
<SimpleLanguageToggle/>
</div>
</div>
<LanguageContent language="typescript">
<CodeGroup exampleTitle="Install the SDK" title="Install the SDK">
```bash {{ title: 'npm' }}
npm i langbase
```
```bash {{ title: 'pnpm' }}
pnpm i langbase
```
```bash {{ title: 'yarn' }}
yarn add langbase
```
</CodeGroup>
</LanguageContent>
<LanguageContent language="python">
<CodeGroup exampleTitle="Install the SDK" title="Install the SDK">
```bash {{ title: 'pip' }}
pip install langbase python-dotenv
```
</CodeGroup>
</LanguageContent>
### Environment variables
<CodeGroup exampleTitle="Environment variables" title="Environment variables">
```bash {{ title: '.env file' }}
LANGBASE_API_KEY="<USER/ORG-API-KEY>"
```
</CodeGroup>
### List memories
<LanguageContent language="typescript">
<CodeGroup exampleTitle="List memories on Langbase" title="List memories on Langbase">
```ts {{ title: 'list-memories.ts' }}
import {Langbase} from 'langbase';
const langbase = new Langbase({
apiKey: process.env.LANGBASE_API_KEY!,
});
async function main() {
const memories = await langbase.memories.list();
console.log('Memories:', memories);
}
main();
```
</CodeGroup>
</LanguageContent>
<LanguageContent language="python">
<CodeGroup exampleTitle="List memories on Langbase" title="List memories on Langbase">
```python {{ title: 'list-memories.py' }}
import json
import os
from dotenv import load_dotenv
from langbase import Langbase
def main():
load_dotenv()
langbase_api_key = os.getenv("LANGBASE_API_KEY")
langbase = Langbase(api_key=langbase_api_key)
memories = langbase.memories.list()
print(json.dumps(memories, indent=2))
if __name__ == "__main__":
main()
```
</CodeGroup>
</LanguageContent>
</Col>
</Row>
---
## Response
<Row>
<Col>
<Properties>
<Property name="MemoryListResponse" type="object">
The response object returned by the `langbase.memories.list()` function.
<LanguageContent language="typescript">
```ts {{title: 'MemoryListResponse'}}
name: string;
description: string;
owner_login: string;
url: string;
embeddingModel:
| 'openai:text-embedding-3-large'
| 'cohere:embed-multilingual-v3.0'
| 'cohere:embed-multilingual-light-v3.0';
```
</LanguageContent>
<LanguageContent language="python">
```python {{title: 'MemoryListResponse'}}
name: string
description: string
owner_login: string
url: string
embedding_model: EmbeddingModel
```
</LanguageContent>
<Properties>
<Property name="name" type="string">
Name of the memory.
</Property>
<Property name="description" type="string">
Description of the memory.
</Property>
<Property name="owner_login" type="string">
Login of the memory owner.
</Property>
<Property name="url" type="string">
Memory access URL.
</Property>
<Property name="embeddingModel" type="string">
The embedding model used by the AI memory.
- `openai:text-embedding-3-large`
- `cohere:embed-v4.0`
- `cohere:embed-multilingual-v3.0`
- `cohere:embed-multilingual-light-v3.0`
</Property>
</Properties>
</Property>
</Properties>
</Col>
<Col sticky>
```json {{ title: 'MemoryListResponse type of langbase.memories.list()' }}
[
{
"name": "knowledge-base",
"description": "An AI memory for storing company internal docs.",
"owner_login": "user123",
"url": "https://langbase.com/user123/document-memory",
"embeddingModel": "openai:text-embedding-3-large"
},
{
"name": "multilingual-knowledge-base",
"description": "Advanced memory with multilingual support",
"owner_login": "user123",
"url": "https://langbase.com/user123/multilingual-memory",
"embeddingModel": "cohere:embed-multilingual-v3.0"
}
]
```
</Col>
</Row>
</LanguageProvider>
---
</content>
</doc>
<doc>
<metadata>
<title>List Documents <span className="text-sm font-mono text-muted-foreground/70 ml-2">langbase.memories.documents.list()</span></title>
<url>https://langbase.com/docs/sdk/memory/document-list/</url>
</metadata>
<content>
import { generateMetadata } from '@/lib/generate-metadata';
# List Documents <span className="text-sm font-mono text-muted-foreground/70 ml-2">langbase.memories.documents.list()</span>
<LanguageProvider defaultLanguage='typescript'>
List documents in a memory on Langbase using the `langbase.memories.documents.list()` function.
---
## Generate a User/Org API key
You will need to generate an API key to authenticate your requests. For more information, visit the [User/Org API key documentation](/api-reference/api-keys).
<Spoiler title="Get your Langbase API key: User or Org">
You can generate API keys from the [Langbase Studio](https://studio.langbase.com) by following these steps:
1. Switch to your user or org account.
2. From the sidebar, click on the `API keys`.
3. From here you can create a new API key or manage existing ones.
For more details, follow the [Langbase API keys](/api-reference/api-keys) documentation.
</Spoiler>
---
<div className="flex justify-between items-end">
<h3 className="text-2xl w-full">API reference</h3>
<div className="flex md:hidden items-end mb-1">
<SimpleLanguageToggle/>
</div>
</div>
## `langbase.memories.documents.list(options)`
<Row>
<Col>
<LanguageContent language="typescript">
<CodeGroup exampleTitle="langbase.memories.documents.list()" title="Function Signature">
```ts {{ title: 'index.ts' }}
langbase.memories.documents.list(options);
// with types.
langbase.memories.documents.list(options: MemoryListDocOptions);
```
</CodeGroup>
</LanguageContent>
<LanguageContent language="python">
<CodeGroup exampleTitle="list_documents()" title="Function Signature">
```python {{ title: 'main.py' }}
langbase.memories.documents.list(**options)
```
</CodeGroup>
</LanguageContent>
## options
<Properties>
<Property name="options" type="MemoryListDocOptions">
<LanguageContent language="typescript">
```ts {{title: 'MemoryListDocOptions Object'}}
memoryName: string;
```
</LanguageContent>
<LanguageContent language="python">
```python {{title: 'MemoryListDocOptions Object'}}
memory_name: str
```
</LanguageContent>
*Following are the properties of the options object.*
</Property>
</Properties>
---
<LanguageContent language="typescript">
<Properties>
<Property name="memoryName" type="string" required>
The memory name.
</Property>
</Properties>
</LanguageContent>
<LanguageContent language="python">
<Properties>
<Property name="memory_name" type="string" required>
The memory name.
</Property>
</Properties>
</LanguageContent>
</Col>
<Col sticky>
<div className="flex justify-between items-end">
<h3 className="text-2xl w-full">Usage example</h3>
<div className="hidden md:flex items-end mb-2">
<SimpleLanguageToggle/>
</div>
</div>
<LanguageContent language="typescript">
<CodeGroup exampleTitle="Install the SDK" title="Install the SDK">
```bash {{ title: 'npm' }}
npm i langbase
```
```bash {{ title: 'pnpm' }}
pnpm i langbase
```
```bash {{ title: 'yarn' }}
yarn add langbase
```
</CodeGroup>
</LanguageContent>
<LanguageContent language="python">
<CodeGroup exampleTitle="Install the SDK" title="Install the SDK">
```bash {{ title: 'pip' }}
pip install langbase python-dotenv
```
</CodeGroup>
</LanguageContent>
### Environment variables
<CodeGroup exampleTitle="Environment variables" title="Environment variables">
```bash {{ title: '.env file' }}
LANGBASE_API_KEY="<USER/ORG-API-KEY>"
```
</CodeGroup>
### List documents
<LanguageContent language="typescript">
<CodeGroup exampleTitle="List documents in a memory" title="List documents in a memory">
```ts {{ title: 'list-documents.ts' }}
import {Langbase} from 'langbase';
const langbase = new Langbase({
apiKey: process.env.LANGBASE_API_KEY!,
});
async function main() {
const documents = await langbase.memories.documents.list({
memoryName: 'knowledge-base'
});
console.log('Documents:', documents);
}
main();
```
</CodeGroup>
</LanguageContent>
<LanguageContent language="python">
<CodeGroup exampleTitle="List documents in a memory" title="List documents in a memory">
```python {{ title: 'list-documents.py' }}
import json
import os
from dotenv import load_dotenv
from langbase import Langbase
def main():
load_dotenv()
langbase_api_key = os.getenv("LANGBASE_API_KEY")
langbase = Langbase(api_key=langbase_api_key)
memory_name = "product-knowledge" # Replace with your memory name
try:
response = langbase.memories.documents.list(memory_name=memory_name)
print(f"Documents in memory '{memory_name}':")
print(json.dumps(response, indent=2))
except Exception as e:
print(f"Error listing documents: {e}")
if __name__ == "__main__":
main()
```
</CodeGroup>
</LanguageContent>
</Col>
</Row>
---
<Row>
<Col>
## Response
<Properties>
<Property name="MemoryListDocResponse[]" type="array">
The response array returned by the `langbase.memories.documents.list()` function.
```ts {{title: 'MemoryListDocResponse'}}
name: string;
status: 'queued' | 'in_progress' | 'completed' | 'failed';
status_message: string | null;
metadata: {
size: number;
type:
| 'application/pdf'
| 'text/plain'
| 'text/markdown'
| 'text/csv'
| 'application/vnd.openxmlformats-officedocument.spreadsheetml.sheet'
| 'application/vnd.ms-excel';
};
enabled: boolean;
chunk_size: number;
chunk_overlap: number;
owner_login: string;
```
<Properties>
<Property name="name" type="string">
Name of the document.
</Property>
<Property name="status" type="string">
Current processing status of the document. Can be one of:
- `queued`: Document is waiting to be processed
- `in_progress`: Document is currently being processed
- `completed`: Document has been successfully processed
- `failed`: Document processing failed
</Property>
<Property name="status_message" type="string | null">
Additional details about the document's status, particularly useful when the status is 'failed'.
</Property>
<Property name="metadata" type="object">
Document metadata including:
- `size`: Size of the document in bytes
- `type`: MIME type of the document
</Property>
<Property name="enabled" type="boolean">
Whether the document is enabled for retrieval.
</Property>
<Property name="chunk_size" type="number">
Size of text chunks used for document processing.
</Property>
<Property name="chunk_overlap" type="number">
Overlap size between consecutive text chunks.
</Property>
<Property name="owner_login" type="string">
Login of the document owner.
</Property>
</Properties>
</Property>
</Properties>
</Col>
<Col sticky>
```json {{ title: 'Response of langbase.memories.documents.list()' }}
[
{
"name": "technical-doc.pdf",
"status": "completed",
"status_message": null,
"metadata": {
"size": 1156,
"type": "application/pdf"
},
"enabled": true,
"chunk_size": 10000,
"chunk_overlap": 2048,
"owner_login": "user123"
},
{
"name": "product-manual.pdf",
"status": "completed",
"status_message": null,
"metadata": {
"size": 1156,
"type": "application/pdf"
},
"enabled": true,
"chunk_size": 10000,
"chunk_overlap": 2048,
"owner_login": "user123"
},
{
"name": "technical-specs.md",
"status": "in_progress",
"status_message": null,
"metadata": {
"size": 1156,
"type": "text/markdown"
},
"enabled": true,
"chunk_size": 10000,
"chunk_overlap": 2048,
"owner_login": "user123"
}
]
```
</Col>
</Row>
</LanguageProvider>
---
</content>
</doc>
<doc>
<metadata>
<title>Upload Document <span className="text-sm font-mono text-muted-foreground/70 ml-2">langbase.memories.documents.upload()</span></title>
<url>https://langbase.com/docs/sdk/memory/document-upload/</url>
</metadata>
<content>
import { generateMetadata } from '@/lib/generate-metadata';
# Upload Document <span className="text-sm font-mono text-muted-foreground/70 ml-2">langbase.memories.documents.upload()</span>
<LanguageProvider defaultLanguage='typescript'>
Upload documents to a memory in using the `langbase.memories.documents.upload()` function.
This function can also be used to replace an existing document in a memory. To do this, you need to provide the same `fileName` and `memoryName` attributes as the existing document.
---
## Generate a User/Org API key
You will need to generate an API key to authenticate your requests. For more information, visit the [User/Org API key documentation](/api-reference/api-keys).
<Spoiler title="Get your Langbase API key: User or Org">
You can generate API keys from the [Langbase Studio](https://studio.langbase.com) by following these steps:
1. Switch to your user or org account.
2. From the sidebar, click on the `API keys`.
3. From here you can create a new API key or manage existing ones.
For more details, follow the [Langbase API keys](/api-reference/api-keys) documentation.
</Spoiler>
---
<div className="flex justify-between items-end">
<h3 className="text-2xl w-full">API reference</h3>
<div className="flex md:hidden items-end mb-1">
<SimpleLanguageToggle/>
</div>
</div>
## `langbase.memories.documents.upload(options)`
<Row>
<Col>
<LanguageContent language="typescript">
<CodeGroup exampleTitle="langbase.memories.documents.upload()" title="Function Signature">
```ts {{ title: 'index.ts' }}
langbase.memories.documents.upload(options);
// with types.
langbase.memories.documents.upload(options: MemoryUploadDocOptions);
```
</CodeGroup>
</LanguageContent>
<LanguageContent language="python">
<CodeGroup exampleTitle="upload_document()" title="Function Signature">
```python {{ title: 'main.py' }}
langbase.memories.documents.upload(**options)
```
</CodeGroup>
</LanguageContent>
## options
<Properties>
<Property name="options" type="MemoryUploadDocOptions">
<LanguageContent language="typescript">
```bash {{title: 'MemoryUploadDocOptions Object'}}
memoryName: string;
documentName: string;
document: Buffer | File | FormData | ReadableStream;
contentType:
| 'application/pdf'
| 'text/plain'
| 'text/markdown'
| 'text/csv';
| 'application/vnd.openxmlformats-officedocument.spreadsheetml.sheet'
| 'application/vnd.ms-excel';
meta?: Record<string, string>;
```
</LanguageContent>
<LanguageContent language="python">
```bash {{title: 'MemoryUploadDocOptions Object'}}
memory_name: string
document_name: string
document: Buffer | File | FormData | ReadableStream;
content_type: ContentType
meta: Dict[str, str]
```
</LanguageContent>
*Following are the properties of the options object.*
</Property>
</Properties>
---
<LanguageContent language="typescript">
<Properties>
<Property name="memoryName" type="string" required>
Name of the memory to upload the document to.
</Property>
<Property name="documentName" type="string" required>
Name of the document.
</Property>
<Property name="document" type="Buffer | File | FormData | ReadableStream" required>
The body of the document to be stored in the bucket. It can be
- `Buffer`
- `File`
- `FormData`
- `ReadableStream`
</Property>
<Property name="contentType" type="string" required>
MIME type of the document. Supported types:
- `application/pdf`: PDF documents
- `text/plain`: Plain text files and all major code files
- `text/markdown`: Markdown files
- `text/csv`: CSV files
- `application/vnd.openxmlformats-officedocument.spreadsheetml.sheet`: Excel files
- `application/vnd.ms-excel`: Excel files
</Property>
<Property name="meta" type="Record<string, string>">
Custom metadata for the document, limited to string key-value pairs. A maximum of 10 pairs is allowed.
</Property>
</Properties>
</LanguageContent>
<LanguageContent language="python">
<Properties>
<Property name="memory_name" type="string" required>
The memory name.
</Property>
<Property name="document_name" type="string" required>
Name of the document.
</Property>
<Property name="document" type="Buffer | File | FormData | ReadableStream" required>
The body of the document to be stored in the bucket. It can be
- `Buffer`
- `File`
- `FormData`
- `ReadableStream`
</Property>
<Property name="content_type" type="string" required>
MIME type of the document. Supported types:
- `application/pdf`: PDF documents
- `text/plain`: Plain text files and all major code files
- `text/markdown`: Markdown files
- `text/csv`: CSV files
- `application/vnd.openxmlformats-officedocument.spreadsheetml.sheet`: Excel files
- `application/vnd.ms-excel`: Excel files
</Property>
<Property name="meta" type="Dict[str, str]">
Custom metadata for the document, limited to string key-value pairs. A maximum of 10 pairs is allowed.
</Property>
</Properties>
</LanguageContent>
</Col>
<Col sticky>
<div className="flex justify-between items-end">
<h3 className="text-2xl w-full">Usage example</h3>
<div className="hidden md:flex items-end mb-2">
<SimpleLanguageToggle/>
</div>
</div>
<LanguageContent language="typescript">
<CodeGroup exampleTitle="Install the SDK" title="Install the SDK">
```bash {{ title: 'npm' }}
npm i langbase
```
```bash {{ title: 'pnpm' }}
pnpm i langbase
```
```bash {{ title: 'yarn' }}
yarn add langbase
```
</CodeGroup>
</LanguageContent>
<LanguageContent language="python">
<CodeGroup exampleTitle="Install the SDK" title="Install the SDK">
```bash {{ title: 'pip' }}
pip install langbase python-dotenv
```
</CodeGroup>
</LanguageContent>
### Environment variables
<CodeGroup exampleTitle="Environment variables" title="Environment variables">
```bash {{ title: '.env file' }}
LANGBASE_API_KEY="<USER/ORG-API-KEY>"
```
</CodeGroup>
### Upload document
<LanguageContent language="typescript">
<CodeGroup exampleTitle="Upload document to memory on Langbase" title="Upload document to memory on Langbase">
```ts {{ title: 'upload-file-node.ts' }}
import {Langbase} from 'langbase';
import {readFileSync} from 'fs';
const langbase = new Langbase({
apiKey: process.env.LANGBASE_API_KEY!,
});
async function main() {
const hasDocumentUploaded = await langbase.memories.documents.upload({
memoryName: 'knowledge-base',
contentType: 'application/pdf',
documentName: 'technical-doc.pdf',
document: readFileSync('document.pdf'),
meta: {
category: 'technical',
section: 'overview',
},
});
if (hasDocumentUploaded.ok) {
console.log('Document uploaded successfully');
}
}
main();
```
</CodeGroup>
</LanguageContent>
<LanguageContent language="python">
<CodeGroup exampleTitle="Upload document to memory on Langbase" title="Upload document to memory on Langbase">
```python {{ title: 'upload-document.py' }}
import os
from dotenv import load_dotenv
from langbase import Langbase
def main():
load_dotenv()
langbase_api_key = os.getenv("LANGBASE_API_KEY")
langbase = Langbase(api_key=langbase_api_key)
memory_name = "product-knowledge" # Replace with your memory name
try:
# Example 1: Upload string content as bytes
content1 = "Langbase is a powerful platform for building AI applications with composable AI."
response1 = langbase.memories.documents.upload(
memory_name=memory_name,
document_name="intro.txt",
document=content1.encode("utf-8"), # Convert string to bytes
content_type="text/plain",
meta={"source": "documentation", "section": "introduction"},
)
print("Document 1 uploaded successfully!")
print(f"Status: {response1.status_code}")
except Exception as e:
print(f"Error uploading documents: {e}")
if __name__ == "__main__":
main()
```
</CodeGroup>
</LanguageContent>
</Col>
</Row>
---
<Row>
<Col>
## Response
<Properties>
<Property name="Response" type="object">
The response object returned by the `langbase.memories.documents.upload()` function.
```ts {{title: 'Response'}}
ok: boolean;
status: number;
statusText: string;
```
<Properties>
<Property name="ok" type="boolean">
Indicates whether the upload was successful.
</Property>
<Property name="status" type="number">
HTTP status code of the upload response.
</Property>
<Property name="statusText" type="string">
HTTP status message corresponding to the status code.
</Property>
</Properties>
</Property>
</Properties>
</Col>
<Col sticky>
```json {{ title: 'Response of langbase.memories.documents.upload()' }}
{
"ok": true,
"status": 200,
"statusText": "OK"
}
```
</Col>
</Row>
</LanguageProvider>
---
</content>
</doc>
<doc>
<metadata>
<title>Retrieve Memories <span className="text-sm font-mono text-muted-foreground/70 ml-2">langbase.memories.retrieve()</span></title>
<url>https://langbase.com/docs/sdk/memory/retrieve/</url>
</metadata>
<content>
import { generateMetadata } from '@/lib/generate-metadata';
import { LanguageProvider, SimpleLanguageToggle, LanguageContent } from '@/components/LanguageToggle';
# Retrieve Memories <span className="text-sm font-mono text-muted-foreground/70 ml-2">langbase.memories.retrieve()</span>
<LanguageProvider defaultLanguage='typescript'>
Retrieve memories on Langbase using the `langbase.memories.retrieve()` function.
---
## Generate a User/Org API key
You will need to generate an API key to authenticate your requests. For more information, visit the [User/Org API key documentation](/api-reference/api-keys).
<Spoiler title="Get your Langbase API key: User or Org">
You can generate API keys from the [Langbase Studio](https://studio.langbase.com) by following these steps:
1. Switch to your user or org account.
2. From the sidebar, click on the `API keys`.
3. From here you can create a new API key or manage existing ones.
For more details, follow the [Langbase API keys](/api-reference/api-keys) documentation.
</Spoiler>
---
<div className="flex justify-between items-end">
<h3 className="text-2xl w-full">API reference</h3>
<div className="flex md:hidden items-end mb-1">
<SimpleLanguageToggle/>
</div>
</div>
### `langbase.memories.retrieve()`
<Row>
<Col>
<LanguageContent language="typescript">
<CodeGroup exampleTitle="langbase.memories.retrieve()" title="Function Signature">
```ts {{ title: 'index.ts' }}
langbase.memories.retrieve(options);
// with types.
langbase.memories.retrieve(options: MemoryRetrieveOptions);
```
</CodeGroup>
</LanguageContent>
<LanguageContent language="python">
<CodeGroup exampleTitle="retrieve_memories()" title="Function Signature">
```python {{ title: 'main.py' }}
langbase.memories.retrieve(**options)
```
</CodeGroup>
</LanguageContent>
## options
<Properties>
<Property name="options" type="MemoryRetrieveOptions">
<LanguageContent language="typescript">
```bash {{title: 'MemoryRetrieveOptions Object'}}
query: string;
memory: Memory[];
topK?: number;
```
</LanguageContent>
<LanguageContent language="python">
```bash {{title: 'MemoryRetrieveOptions Object'}}
query: string
memory: List[Memory]
top_k: number
```
</LanguageContent>
*Following are the properties of the options object.*
</Property>
</Properties>
---
<Properties>
<Property name="query" type="string" required>
The search query for retrieving similar chunks.
</Property>
<LanguageContent language="typescript">
<Property name="memory" type="Array<Memory>" required>
An array of memory objects from which to retrieve similar chunks. Each object can include optional filters to narrow down the search.
<CodeGroup exampleTitle="Memory Object" title="Memory Object">
```bash{{ title: 'Memory Object' }}
name: string;
filters?: MemoryFilters;
```
</CodeGroup>
<Sub name="name" type="string" required="true">
The name of the memory.
</Sub>
<Sub name="filters" type="MemoryFilters" optional="true">
Optional array of filters to narrow down the search results.
```ts {{title: 'MemoryFilters Type'}}
type FilterOperator = 'Eq' | 'NotEq' | 'In' | 'NotIn' | 'And' | 'Or';
type FilterConnective = 'And' | 'Or';
type FilterValue = string | string[];
type FilterCondition = [string, FilterOperator, FilterValue];
type MemoryFilters = [FilterConnective, MemoryFilters[]] | FilterCondition;
```
Filters can be either:
- A single condition: `["field", "operator", "value"]`
- A nested structure: `["And"|"Or", MemoryFilters]`
</Sub>
</Property>
</LanguageContent>
<LanguageContent language="python">
<Property name="memory" type="List[Memory]" required>
An array of memory objects from which to retrieve similar chunks. Each object can include optional filters to narrow down the search.
<CodeGroup exampleTitle="Memory Object" title="Memory Object">
```ts {{ title: 'Memory Object' }}
name: string;
filters?: MemoryFilters;
```
</CodeGroup>
<Sub name="name" type="string" required="true">
The name of the memory.
</Sub>
<Sub name="filters" type="MemoryFilters" optional="true">
Optional array of filters to narrow down the search results.
```py {{title: 'MemoryFilters Type'}}
FilterOperator = 'Eq' | 'NotEq' | 'In' | 'NotIn' | 'And' | 'Or'
FilterConnective = 'And' | 'Or'
FilterValue = string | List[string]
FilterCondition = [string, FilterOperator, FilterValue]
MemoryFilters = [FilterConnective, List[MemoryFilters]] | FilterCondition
```
Filters can be either:
- A single condition: `["field", "operator", "value"]`
- A nested structure: `["And"|"Or", MemoryFilters]`
</Sub>
</Property>
</LanguageContent>
<LanguageContent language="typescript">
<Property name="topK" type="number">
The number of top similar chunks to return from memory.
Default is 20, minimum is 1, and maximum is 100.
</Property>
</LanguageContent>
<LanguageContent language="python">
<Property name="top_k" type="number">
The number of top similar chunks to return from memory.
Default is 20, minimum is 1, and maximum is 100.
</Property>
</LanguageContent>
</Properties>
</Col>
<Col sticky>
<div className="flex justify-between items-end">
<h3 className="text-2xl w-full">Usage example</h3>
<div className="hidden md:flex items-end mb-2">
<SimpleLanguageToggle/>
</div>
</div>
<LanguageContent language="typescript">
<CodeGroup exampleTitle="Install the SDK" title="Install the SDK">
```bash {{ title: 'npm' }}
npm i langbase
```
```bash {{ title: 'pnpm' }}
pnpm i langbase
```
```bash {{ title: 'yarn' }}
yarn add langbase
```
</CodeGroup>
</LanguageContent>
<LanguageContent language="python">
<CodeGroup exampleTitle="Install the SDK" title="Install the SDK">
```bash {{ title: 'pip' }}
pip install langbase python-dotenv
```
</CodeGroup>
</LanguageContent>
### Environment variables
<CodeGroup exampleTitle="Environment variables" title="Environment variables">
```bash {{ title: '.env file' }}
LANGBASE_API_KEY="<USER/ORG-API-KEY>"
```
</CodeGroup>
### Retrieve memories
<LanguageContent language="typescript">
<CodeGroup exampleTitle="Retrieve from memory on Langbase" title="Retrieve from memory on Langbase">
```ts {{ title: 'Basic' }}
import {Langbase} from 'langbase';
const langbase = new Langbase({
apiKey: process.env.LANGBASE_API_KEY!,
});
async function main() {
const chunks = await langbase.memories.retrieve({
query: "What are the key features?",
memory: [{
name: "knowledge-base"
}]
});
console.log('Memory chunk:', chunks);
}
main();
```
```ts {{ title: 'With Filters' }}
import {Langbase} from 'langbase';
const langbase = new Langbase({
apiKey: process.env.LANGBASE_API_KEY!,
});
async function main() {
const chunks = await langbase.memories.retrieve({
query: 'What are the key features?',
memory: [
{
name: 'knowledge-base',
filters: ['category', 'Eq', 'features'],
},
],
});
console.log('Memory chunk:', chunks);
}
main();
```
```ts {{ title: 'Advanced Filters' }}
import {Langbase} from 'langbase';
const langbase = new Langbase({
apiKey: process.env.LANGBASE_API_KEY!,
});
async function main() {
const chunks = await langbase.memories.retrieve({
query: 'What are the key features?',
memory: [
{
name: 'knowledge-base',
filters: [
'And',
[
['category', 'Eq', 'features'],
['section', 'In', ['overview', 'features']],
],
],
},
],
});
console.log('Memory chunk:', chunks);
}
main();
```
</CodeGroup>
</LanguageContent>
<LanguageContent language="python">
<CodeGroup exampleTitle="Retrieve memories on Langbase" title="Retrieve memories on Langbase">
```python {{ title: 'Basic' }}
import json
import os
from dotenv import load_dotenv
from langbase import Langbase
def main():
load_dotenv()
langbase_api_key = os.getenv("LANGBASE_API_KEY")
langbase = Langbase(api_key=langbase_api_key)
try:
chunks = langbase.memories.retrieve(
query="What are the key features?",
memory=[{"name": "product-knowledge"}]
)
print('Memory chunk:', json.dumps(chunks, indent=2))
except Exception as e:
print(f"Error retrieving memories: {e}")
if __name__ == "__main__":
main()
```
```python {{ title: 'With Filters' }}
import json
import os
from dotenv import load_dotenv
from langbase import Langbase
def main():
load_dotenv()
langbase_api_key = os.getenv("LANGBASE_API_KEY")
langbase = Langbase(api_key=langbase_api_key)
try:
chunks = langbase.memories.retrieve(
query="What are the key features?",
memory=[
{
"name": "product-knowledge",
"filters": ["category", "Eq", "features"],
}
]
)
print('Memory chunk:', json.dumps(chunks, indent=2))
except Exception as e:
print(f"Error retrieving memories: {e}")
if __name__ == "__main__":
main()
```
```python {{ title: 'Advanced Filters' }}
import json
import os
from dotenv import load_dotenv
from langbase import Langbase
def main():
load_dotenv()
langbase_api_key = os.getenv("LANGBASE_API_KEY")
langbase = Langbase(api_key=langbase_api_key)
try:
chunks = langbase.memories.retrieve(
query="What are the key features?",
memory=[
{
"name": "product-knowledge",
"filters": [
"And",
[
["category", "Eq", "features"],
["section", "In", ["overview", "features"]],
],
],
}
]
)
print('Memory chunk:', json.dumps(chunks, indent=2))
except Exception as e:
print(f"Error retrieving memories: {e}")
if __name__ == "__main__":
main()
```
</CodeGroup>
</LanguageContent>
</Col>
</Row>
---
## Response
<Row>
<Col>
<Properties>
<Property name="MemoryRetrieveResponse" type="object">
The response object returned by the `langbase.memories.retrieve()` function.
<LanguageContent language="typescript">
```ts {{title: 'MemoryRetrieveResponse Object'}}
text: string;
similarity: number;
meta: Record<string, string>;
```
</LanguageContent>
<LanguageContent language="python">
```ts {{title: 'MemoryRetrieveResponse Object'}}
text: string
similarity: number
meta: Dict[str, str]
```
</LanguageContent>
<Properties>
<Property name="text" type="string">
The retrieved memory text.
</Property>
<Property name="similarity" type="number">
The similarity score of the retrieved memory.
</Property>
<LanguageContent language="typescript">
<Property name="meta" type="Record<string, string>">
Metadata associated with the retrieved memory.
</Property>
</LanguageContent>
<LanguageContent language="python">
<Property name="meta" type="Dict[str, str]">
Metadata associated with the retrieved memory.
</Property>
</LanguageContent>
</Properties>
</Property>
</Properties>
</Col>
<Col sticky>
<CodeGroup exampleTitle="Response Examples" title="Response Examples">
```json {{ title: 'Basic' }}
[
{
"text": "Key features of Langbase include: semantic search capabilities, flexible memory management, and scalable architecture for handling large datasets.",
"similarity": 0.92,
"meta": {
"category": "features",
"section": "overview"
}
},
{
"text": "Our platform offers advanced features like real-time memory updates, custom metadata filtering, and enterprise-grade security.",
"similarity": 0.87,
"meta": {
"category": "updates",
"section": "highlights"
}
},
{
"text": "Platform highlights include AI-powered memory retrieval, customizable embedding models, and advanced filtering capabilities.",
"similarity": 0.85,
"meta": {
"category": "features",
"section": "highlights"
}
}
]
```
```json {{ title: 'With Filters' }}
[
{
"text": "Key features of Langbase include: semantic search capabilities, flexible memory management, and scalable architecture for handling large datasets.",
"similarity": 0.92,
"meta": {
"category": "features",
"section": "overview"
}
},
{
"text": "Platform highlights include AI-powered memory retrieval, customizable embedding models, and advanced filtering capabilities.",
"similarity": 0.85,
"meta": {
"category": "features",
"section": "highlights"
}
}
]
```
```json {{ title: 'With Advanced Filters' }}
[
{
"text": "Key features of Langbase include: semantic search capabilities, flexible memory management, and scalable architecture for handling large datasets.",
"similarity": 0.92,
"meta": {
"category": "features",
"section": "overview"
}
}
]
```
</CodeGroup>
</Col>
</Row>
</LanguageProvider>
---
</content>
</doc>
<doc>
<metadata>
<title>Retry Doc Embedding <span className="text-sm font-mono text-muted-foreground/70 ml-2">langbase.memories.documents.embeddings.retry()</span></title>
<url>https://langbase.com/docs/sdk/memory/document-embeddings-retry/</url>
</metadata>
<content>
import { generateMetadata } from '@/lib/generate-metadata';
# Retry Doc Embedding <span className="text-sm font-mono text-muted-foreground/70 ml-2">langbase.memories.documents.embeddings.retry()</span>
<LanguageProvider defaultLanguage='typescript'>
Retry the embedding process for a failed document using the `langbase.memories.documents.embeddings.retry()` function.
Document embeddings generation may fail due to various reasons such as OpenAI API rate limits, invalid API keys, document parsing errors, special characters, corrupted or locked PDFs, and excessively large documents. If the issue is related to the API key, it needs to be corrected; before retrying, ensure that the document is accessible and can be parsed correctly.
---
## Generate a User/Org API key
You will need to generate an API key to authenticate your requests. For more information, visit the [User/Org API key documentation](/api-reference/api-keys).
<Spoiler title="Get your Langbase API key: User or Org">
You can generate API keys from the [Langbase Studio](https://studio.langbase.com) by following these steps:
1. Switch to your user or org account.
2. From the sidebar, click on the `API keys`.
3. From here you can create a new API key or manage existing ones.
For more details, follow the [Langbase API keys](/api-reference/api-keys) documentation.
</Spoiler>
---
<div className="flex justify-between items-end">
<h3 className="text-2xl w-full">API reference</h3>
<div className="flex md:hidden items-end mb-1">
<SimpleLanguageToggle/>
</div>
</div>
## `langbase.memories.documents.embeddings.retry(options)`
<Row>
<Col>
<LanguageContent language="typescript">
<CodeGroup exampleTitle="langbase.memories.documents.embeddings.retry()" title="Function Signature">
```ts {{ title: 'index.ts' }}
langbase.memories.documents.embeddings.retry(options);
// with types.
langbase.memories.documents.embeddings.retry(options: MemoryRetryDocEmbedOptions);
```
</CodeGroup>
</LanguageContent>
<LanguageContent language="python">
<CodeGroup exampleTitle="retry_embedding()" title="Function Signature">
```python {{ title: 'main.py' }}
langbase.memories.documents.embeddings.retry(**options)
```
</CodeGroup>
</LanguageContent>
## options
<Properties>
<Property name="options" type="MemoryRetryDocEmbedOptions">
<LanguageContent language="typescript">
```bash {{title: 'MemoryRetryDocEmbedOptions Object'}}
memoryName: string;
documentName: string;
```
</LanguageContent>
<LanguageContent language="python">
```bash {{title: 'MemoryRetryDocEmbedOptions Object'}}
memory_name: str
document_name: str
```
</LanguageContent>
*Following are the properties of the options object.*
</Property>
</Properties>
---
<LanguageContent language="typescript">
<Properties>
<Property name="memoryName" type="string" required>
The name of memory to which the document belongs.
</Property>
<Property name="documentName" type="string" required>
The name of the document.
</Property>
</Properties>
</LanguageContent>
<LanguageContent language="python">
<Properties>
<Property name="memory_name" type="string" required>
The name of memory to which the document belongs.
</Property>
<Property name="document_name" type="string" required>
The name of the document.
</Property>
</Properties>
</LanguageContent>
</Col>
<Col sticky>
<div className="flex justify-between items-end">
<h3 className="text-2xl w-full">Usage example</h3>
<div className="hidden md:flex items-end mb-2">
<SimpleLanguageToggle/>
</div>
</div>
<LanguageContent language="typescript">
<CodeGroup exampleTitle="Install the SDK" title="Install the SDK">
```bash {{ title: 'npm' }}
npm i langbase
```
```bash {{ title: 'pnpm' }}
pnpm i langbase
```
```bash {{ title: 'yarn' }}
yarn add langbase
```
</CodeGroup>
</LanguageContent>
<LanguageContent language="python">
<CodeGroup exampleTitle="Install the SDK" title="Install the SDK">
```bash {{ title: 'pip' }}
pip install langbase python-dotenv
```
</CodeGroup>
</LanguageContent>
### Environment variables
<CodeGroup exampleTitle="Environment variables" title="Environment variables">
```bash {{ title: '.env file' }}
LANGBASE_API_KEY="<USER/ORG-API-KEY>"
```
</CodeGroup>
### Retry document embedding
<LanguageContent language="typescript">
<CodeGroup exampleTitle="Retry document embedding on Langbase" title="Retry document embedding on Langbase">
```ts {{ title: 'retry-embedding.ts' }}
import {Langbase} from 'langbase';
const langbase = new Langbase({
apiKey: process.env.LANGBASE_API_KEY!,
});
async function main() {
const hasEmbeddingRetried = await langbase.memories.documents.embeddings.retry(
{
memoryName: 'knowledge-base',
documentName: 'technical-doc.pdf',
},
);
console.log('Has embeddings been retried:', hasEmbeddingRetried);
}
main();
```
</CodeGroup>
</LanguageContent>
<LanguageContent language="python">
<CodeGroup exampleTitle="Retry document embedding on Langbase" title="Retry document embedding on Langbase">
```python {{ title: 'retry-embedding.py' }}
import os
from dotenv import load_dotenv
from langbase import Langbase
def main():
load_dotenv()
langbase_api_key = os.getenv("LANGBASE_API_KEY")
langbase = Langbase(api_key=langbase_api_key)
memory_name = "product-knowledge"
document_name = "old-report.txt"
try:
response = langbase.memories.documents.embeddings.retry(
memory_name=memory_name, document_name=document_name
)
print(f"Retry embedding initiated for memory '{memory_name}'")
print(response)
except Exception as e:
print(f"Error retrying embedding: {e}")
if __name__ == "__main__":
main()
```
</CodeGroup>
</LanguageContent>
</Col>
</Row>
---
<Row>
<Col>
## Response
<Properties>
<Property name="MemoryRetryDocEmbedResponse" type="object">
The response object returned by the `langbase.memories.documents.embeddings.retry()` function.
```ts {{title: 'MemoryRetryDocEmbedResponse'}}
success: boolean;
```
<Properties>
<Property name="success" type="boolean">
Indicates whether the embedding retry was successfully initiated.
</Property>
</Properties>
</Property>
</Properties>
</Col>
<Col sticky>
```json {{ title: 'Response of langbase.memories.documents.embeddings.retry()' }}
{
"success": true
}
```
</Col>
</Row>
</LanguageProvider>
---
</content>
</doc>
<doc>
<metadata>
<title>Delete Document <span className="text-sm font-mono text-muted-foreground/70 ml-2">langbase.memories.documents.delete()</span></title>
<url>https://langbase.com/docs/sdk/memory/document-delete/</url>
</metadata>
<content>
import { generateMetadata } from '@/lib/generate-metadata';
# Delete Document <span className="text-sm font-mono text-muted-foreground/70 ml-2">langbase.memories.documents.delete()</span>
<LanguageProvider defaultLanguage='typescript'>
Delete an existing document from a memory on Langbase using the `langbase.memories.documents.delete()` function.
---
## Generate a User/Org API key
You will need to generate an API key to authenticate your requests. For more information, visit the [User/Org API key documentation](/api-reference/api-keys).
<Spoiler title="Get your Langbase API key: User or Org">
You can generate API keys from the [Langbase Studio](https://studio.langbase.com) by following these steps:
1. Switch to your user or org account.
2. From the sidebar, click on the `API keys`.
3. From here you can create a new API key or manage existing ones.
For more details, follow the [Langbase API keys](/api-reference/api-keys) documentation.
</Spoiler>
---
<div className="flex justify-between items-end">
<h3 className="text-2xl w-full">API reference</h3>
<div className="flex md:hidden items-end mb-1">
<SimpleLanguageToggle/>
</div>
</div>
## `langbase.memories.documents.delete(options)`
<Row>
<Col>
<LanguageContent language="typescript">
<CodeGroup exampleTitle="langbase.memories.documents.delete()" title="Function Signature">
```ts {{ title: 'index.ts' }}
langbase.memories.documents.delete(options);
// with types.
langbase.memories.documents.delete(options: MemoryDeleteDocOptions);
```
</CodeGroup>
</LanguageContent>
<LanguageContent language="python">
<CodeGroup exampleTitle="delete_document()" title="Function Signature">
```python {{ title: 'main.py' }}
langbase.memories.documents.delete(**options)
```
</CodeGroup>
</LanguageContent>
## options
<Properties>
<Property name="options" type="MemoryDeleteDocOptions">
<LanguageContent language="typescript">
```bash {{title: 'MemoryDeleteDocOptions Object'}}
memoryName: string;
documentName: string;
```
</LanguageContent>
<LanguageContent language="python">
```bash {{title: 'MemoryDeleteDocOptions Object'}}
memory_name: string
document_name: string
```
</LanguageContent>
*Following are the properties of the options object.*
</Property>
</Properties>
---
<LanguageContent language="typescript">
<Properties>
<Property name="memoryName" type="string" required>
Name of the memory instance containing the document.
</Property>
<Property name="documentName" type="string" required>
Name of the document to delete.
</Property>
</Properties>
</LanguageContent>
<LanguageContent language="python">
<Properties>
<Property name="memory_name" type="string" required>
The memory name.
</Property>
<Property name="document_name" type="string" required>
Name of the document to delete.
</Property>
</Properties>
</LanguageContent>
</Col>
<Col sticky>
<div className="flex justify-between items-end">
<h3 className="text-2xl w-full">Usage example</h3>
<div className="hidden md:flex items-end mb-2">
<SimpleLanguageToggle/>
</div>
</div>
<LanguageContent language="typescript">
<CodeGroup exampleTitle="Install the SDK" title="Install the SDK">
```bash {{ title: 'npm' }}
npm i langbase
```
```bash {{ title: 'pnpm' }}
pnpm i langbase
```
```bash {{ title: 'yarn' }}
yarn add langbase
```
</CodeGroup>
</LanguageContent>
<LanguageContent language="python">
<CodeGroup exampleTitle="Install the SDK" title="Install the SDK">
```bash {{ title: 'pip' }}
pip install langbase python-dotenv
```
</CodeGroup>
</LanguageContent>
### Environment variables
<CodeGroup exampleTitle="Environment variables" title="Environment variables">
```bash {{ title: '.env file' }}
LANGBASE_API_KEY="<USER/ORG-API-KEY>"
```
</CodeGroup>
### Delete document
<LanguageContent language="typescript">
<CodeGroup exampleTitle="Delete document from memory" title="Delete document from memory">
```ts {{ title: 'delete-document.ts' }}
import {Langbase} from 'langbase';
const langbase = new Langbase({
apiKey: process.env.LANGBASE_API_KEY!,
});
async function main() {
const hasDocDeleted = await langbase.memories.documents.delete({
memoryName: 'knowledge-base',
documentName: 'old-report.pdf'
});
console.log('Document deleted:', hasDocDeleted);
}
main();
```
</CodeGroup>
</LanguageContent>
<LanguageContent language="python">
<CodeGroup exampleTitle="Delete document from memory" title="Delete document from memory">
```python {{ title: 'delete-document.py' }}
import os
from dotenv import load_dotenv
from langbase import Langbase
def main():
load_dotenv()
# Get API key from environment variable
langbase_api_key = os.getenv("LANGBASE_API_KEY")
langbase = Langbase(api_key=langbase_api_key)
memory_name = "product-knowledge"
document_name = "old-report.txt"
try:
response = langbase.memories.documents.delete(
memory_name=memory_name, document_name=document_name
)
print(
f"Document '{document_name}' deleted successfully from memory '{memory_name}'"
)
print(response)
except Exception as e:
print(f"Error deleting document: {e}")
if __name__ == "__main__":
main()
```
</CodeGroup>
</LanguageContent>
</Col>
</Row>
---
<Row>
<Col>
## Response
<Properties>
<Property name="MemoryDeleteDocResponse" type="object">
The response object returned by the `langbase.memories.documents.delete()` function.
```ts {{title: 'MemoryDeleteDocResponse'}}
success: boolean;
```
<Properties>
<Property name="success" type="boolean">
Indicates whether the document deletion was successful.
</Property>
</Properties>
</Property>
</Properties>
</Col>
<Col sticky>
```json {{ title: 'Response of langbase.memories.documents.delete()' }}
{
"success": true
}
```
</Col>
</Row>
</LanguageProvider>
---
</content>
</doc>
<doc>
<metadata>
<title>Delete Memory <span className="text-sm font-mono text-muted-foreground/70 ml-2">langbase.memories.delete()</span></title>
<url>https://langbase.com/docs/sdk/memory/delete/</url>
</metadata>
<content>
import { generateMetadata } from '@/lib/generate-metadata';
# Delete Memory <span className="text-sm font-mono text-muted-foreground/70 ml-2">langbase.memories.delete()</span>
<LanguageProvider defaultLanguage='typescript'>
Delete an AI memory on Langbase using the `langbase.memories.delete()` function.
---
## Generate a User/Org API key
You will need to generate an API key to authenticate your requests. For more information, visit the [User/Org API key documentation](/api-reference/api-keys).
<Spoiler title="Get your Langbase API key: User or Org">
You can generate API keys from the [Langbase Studio](https://studio.langbase.com) by following these steps:
1. Switch to your user or org account.
2. From the sidebar, click on the `API keys`.
3. From here you can create a new API key or manage existing ones.
For more details, follow the [Langbase API keys](/api-reference/api-keys) documentation.
</Spoiler>
---
<div className="flex justify-between items-end">
<h3 className="text-2xl w-full">API reference</h3>
<div className="flex md:hidden items-end mb-1">
<SimpleLanguageToggle/>
</div>
</div>
## `langbase.memories.delete(options)`
<Row>
<Col>
<LanguageContent language="typescript">
<CodeGroup exampleTitle="langbase.memories.delete()" title="Function Signature">
```ts {{ title: 'index.ts' }}
langbase.memories.delete(options);
// with types.
langbase.memories.delete(options: MemoryDeleteOptions);
```
</CodeGroup>
</LanguageContent>
<LanguageContent language="python">
<CodeGroup exampleTitle="delete_memory()" title="Function Signature">
```python {{ title: 'main.py' }}
langbase.memories.delete(**options)
```
</CodeGroup>
</LanguageContent>
## options
<Properties>
<Property name="options" type="MemoryDeleteOptions">
```ts {{title: 'MemoryDeleteOptions Object'}}
name: string;
```
*Following are the properties of the options object.*
</Property>
</Properties>
---
<Properties>
<Property name="name" type="string" required>
Name of the AI memory to delete.
</Property>
</Properties>
</Col>
<Col sticky>
<div className="flex justify-between items-end">
<h3 className="text-2xl w-full">Usage example</h3>
<div className="hidden md:flex items-end mb-2">
<SimpleLanguageToggle/>
</div>
</div>
<LanguageContent language="typescript">
<CodeGroup exampleTitle="Install the SDK" title="Install the SDK">
```bash {{ title: 'npm' }}
npm i langbase
```
```bash {{ title: 'pnpm' }}
pnpm i langbase
```
```bash {{ title: 'yarn' }}
yarn add langbase
```
</CodeGroup>
</LanguageContent>
<LanguageContent language="python">
<CodeGroup exampleTitle="Install the SDK" title="Install the SDK">
```bash {{ title: 'pip' }}
pip install langbase python-dotenv
```
</CodeGroup>
</LanguageContent>
### Environment variables
<CodeGroup exampleTitle="Environment variables" title="Environment variables">
```bash {{ title: '.env file' }}
LANGBASE_API_KEY="<USER/ORG-API-KEY>"
```
</CodeGroup>
### Delete memory
<LanguageContent language="typescript">
<CodeGroup exampleTitle="Delete memory on Langbase" title="Delete memory on Langbase">
```ts {{ title: 'delete-memory.ts' }}
import {Langbase} from 'langbase';
const langbase = new Langbase({
apiKey: process.env.LANGBASE_API_KEY!,
});
async function main() {
const hasMemoryDeleted = await langbase.memories.delete({
name: 'knowledge-base'
});
console.log('Memory deleted:', hasMemoryDeleted);
}
main();
```
</CodeGroup>
</LanguageContent>
<LanguageContent language="python">
<CodeGroup exampleTitle="Delete memory on Langbase" title="Delete memory on Langbase">
```python {{ title: 'delete-memory.py' }}
import os
from dotenv import load_dotenv
from langbase import Langbase
def main():
load_dotenv()
# Get API key from environment variable
langbase_api_key = os.getenv("LANGBASE_API_KEY")
# Initialize the client
langbase = Langbase(api_key=langbase_api_key)
memory_name = "knowledge-base"
try:
response = langbase.memories.delete(
name=memory_name
)
print(f"Memory '{memory_name}' deleted successfully.")
print(response)
except Exception as e:
print(f"Error deleting memory: {e}")
if __name__ == "__main__":
main()
```
</CodeGroup>
</LanguageContent>
</Col>
</Row>
---
<Row>
<Col>
## Response
<Properties>
<Property name="MemoryDeleteResponse" type="object">
The response object returned by the `langbase.memories.delete()` function.
```ts {{title: 'MemoryDeleteResponse'}}
success: boolean;
```
<Properties>
<Property name="success" type="boolean">
Indicates whether the deletion was successful.
</Property>
</Properties>
</Property>
</Properties>
</Col>
<Col sticky>
```json {{ title: 'Response of langbase.memories.delete()' }}
{
"success": true
}
```
</Col>
</Row>
</LanguageProvider>
---
</content>
</doc>
<doc>
<metadata>
<title>Create Memory <span className="text-sm font-mono text-muted-foreground/70 ml-2">langbase.memories.create()</span></title>
<url>https://langbase.com/docs/sdk/memory/create/</url>
</metadata>
<content>
import { generateMetadata } from '@/lib/generate-metadata';
import { LanguageProvider, SimpleLanguageToggle, LanguageContent } from '@/components/LanguageToggle';
# Create Memory <span className="text-sm font-mono text-muted-foreground/70 ml-2">langbase.memories.create()</span>
<LanguageProvider defaultLanguage='typescript'>
Create a new memory on Langbase using the `langbase.memories.create()` function.
---
## Generate a User/Org API key
You will need to generate an API key to authenticate your requests. For more information, visit the [User/Org API key documentation](/api-reference/api-keys).
<Spoiler title="Get your Langbase API key: User or Org">
You can generate API keys from the [Langbase Studio](https://studio.langbase.com) by following these steps:
1. Switch to your user or org account.
2. From the sidebar, click on the `API keys`.
3. From here you can create a new API key or manage existing ones.
For more details follow the [Langbase API keys](/api-reference/api-keys) documentation.
</Spoiler>
---
<div className="flex justify-between items-end">
<h3 className="text-2xl w-full">API reference</h3>
<div className="flex md:hidden items-end mb-1">
<SimpleLanguageToggle/>
</div>
</div>
### `langbase.memories.create()`
<Row>
<Col>
<LanguageContent language="typescript">
<CodeGroup exampleTitle="langbase.memories.create()" title="Function Signature">
```ts {{ title: 'index.ts' }}
langbase.memories.create(options);
// with types.
langbase.memories.create(options: MemoryCreateOptions);
```
</CodeGroup>
</LanguageContent>
<LanguageContent language="python">
<CodeGroup exampleTitle="create_memory()" title="Function Signature">
```python {{ title: 'main.py' }}
langbase.memories.create(**options)
```
</CodeGroup>
</LanguageContent>
## options
<Properties>
<Property name="options" type="MemoryCreateOptions">
```ts {{title: 'MemoryCreateOptions Object'}}
name: string;
description?: string;
top_k?: number;
chunk_size?: number;
chunk_overlap?: number;
embedding_model?:
| 'openai:text-embedding-3-large'
| 'cohere:embed-v4.0'
| 'cohere:embed-multilingual-v3.0'
| 'cohere:embed-multilingual-light-v3.0'
| 'google:text-embedding-004';
```
*Following are the properties of the options object.*
</Property>
</Properties>
---
<Properties>
<Property name="name" type="string" required>
Name of the memory.
</Property>
<Property name="description" type="string">
Description of the memory.
</Property>
<Property name="top_k" type="number">
Number of chunks to return.
Default: `10`
Minimum: `1`
Maximum: `100`
</Property>
<Property name="chunk_size" type="number">
Maximum number of characters in a single chunk.
Default: `10000`
Maximum: `30000`
<Note sub="Appropriate value">
Cohere has a limit of 512 tokens (1 token ~= 4 characters in English). If you are using Cohere models, adjust the `chunk_size` accordingly. For most use cases, default values should work fine.
</Note>
</Property>
<Property name="chunk_overlap" type="number">
Number of characters to overlap between chunks.
Default: `2048`
Maximum: Less than `chunk_size`
</Property>
<Property name="embedding_model" type="string">
The model to use for text embeddings. Available options:
- `openai:text-embedding-3-large`
- `cohere:embed-multilingual-v3.0`
- `cohere:embed-multilingual-light-v3.0`
- `google:text-embedding-004`
Default: `openai:text-embedding-3-large`
</Property>
</Properties>
</Col>
<Col sticky>
<div className="flex justify-between items-end">
<h3 className="text-2xl w-full">Usage example</h3>
<div className="hidden md:flex items-end mb-2">
<SimpleLanguageToggle/>
</div>
</div>
<LanguageContent language="typescript">
<CodeGroup exampleTitle="Install the SDK" title="Install the SDK">
```bash {{ title: 'npm' }}
npm i langbase
```
```bash {{ title: 'pnpm' }}
pnpm i langbase
```
```bash {{ title: 'yarn' }}
yarn add langbase
```
</CodeGroup>
</LanguageContent>
<LanguageContent language="python">
<CodeGroup exampleTitle="Install the SDK" title="Install the SDK">
```bash {{ title: 'pip' }}
pip install langbase python-dotenv
```
</CodeGroup>
</LanguageContent>
### Environment variables
<CodeGroup exampleTitle="Environment variables" title="Environment variables">
```bash {{ title: '.env file' }}
LANGBASE_API_KEY="<USER/ORG-API-KEY>"
```
</CodeGroup>
### Create memory
<LanguageContent language="typescript">
<CodeGroup exampleTitle="Create memory on Langbase" title="Create memory on Langbase">
```ts {{ title: 'create-memory.ts' }}
import {Langbase} from 'langbase';
const langbase = new Langbase({
apiKey: process.env.LANGBASE_API_KEY!,
});
async function main() {
const memory = await langbase.memories.create({
name: 'knowledge-base',
description: 'An AI memory for storing company internal docs.',
});
console.log('Memory created:', memory);
}
main();
```
```ts {{ title: 'configure-embedding-model.ts' }}
import {Langbase} from 'langbase';
const langbase = new Langbase({
apiKey: process.env.LANGBASE_API_KEY!,
});
async function main() {
const memory = await langbase.memories.create({
name: 'knowledge-base',
description: 'Advanced memory with multilingual support',
embedding_model: 'cohere:embed-multilingual-v3.0',
});
console.log('Memory created:', memory);
}
main();
```
```ts {{ title: 'custom-chunking.ts' }}
import {Langbase} from 'langbase';
const langbase = new Langbase({
apiKey: process.env.LANGBASE_API_KEY!,
});
async function main() {
const memory = await langbase.memories.create({
name: "knowledge-base",
description: 'An AI memory for storing company internal docs.',
top_k: 10,
chunk_size: 10000,
chunk_overlap: 2048,
});
console.log('Memory created:', memory);
}
main();
```
</CodeGroup>
</LanguageContent>
<LanguageContent language="python">
<CodeGroup exampleTitle="Create memory on Langbase" title="Create memory on Langbase">
```python {{ title: 'create-memory.py' }}
import json
import os
from dotenv import load_dotenv
from langbase import Langbase
def main():
load_dotenv()
# Get API key from environment variable
langbase_api_key = os.getenv("LANGBASE_API_KEY")
langbase = Langbase(api_key=langbase_api_key)
memory = langbase.memories.create(
name="product-knowledge",
description="Memory store for product documentation and information",
embedding_model="openai:text-embedding-3-large",
)
print(json.dumps(memory, indent=2))
if __name__ == "__main__":
main()
```
</CodeGroup>
</LanguageContent>
</Col>
</Row>
---
## Response
<Row>
<Col>
<Properties>
<Property name="MemoryCreateResponse" type="object">
The response object returned by the `langbase.memories.create()` function.
```ts {{title: 'MemoryCreateResponse'}}
name: string;
description: string;
owner_login: string;
url: string;
embedding_model:
| 'openai:text-embedding-3-large'
| 'cohere:embed-v4.0'
| 'cohere:embed-multilingual-v3.0'
| 'cohere:embed-multilingual-light-v3.0';
chunk_size: number;
chunk_overlap: number;
top_k: number;
```
<Properties>
<Property name="name" type="string">
Name of the memory.
</Property>
<Property name="description" type="string">
Description of the AI memory.
</Property>
<Property name="owner_login" type="string">
Login of the memory owner.
</Property>
<Property name="url" type="string">
Memory access URL.
</Property>
<Property name="embedding_model" type="string">
The embedding model used by the AI memory.
- `openai:text-embedding-3-large`
- `cohere:embed-multilingual-v3.0`
- `cohere:embed-multilingual-light-v3.0`
</Property>
</Properties>
</Property>
</Properties>
</Col>
<Col sticky>
```json {{ title: 'Response of langbase.memories.create()' }}
{
"name": "knowledge-base",
"description": "An AI memory for storing company internal docs.",
"owner_login": "user123",
"url": "https://langbase.com/user123/document-memory",
"embedding_model": "openai:text-embedding-3-large",
"chunk_size": 10000,
"chunk_overlap": 2048,
"top_k": 10,
}
```
</Col>
</Row>
</LanguageProvider>
---
</content>
</doc>
<doc>
<metadata>
<title>Stream Text <span className="text-sm font-mono text-muted-foreground/70 ml-2">pipe.streamText()</span></title>
<url>https://langbase.com/docs/sdk/deprecated/stream-text/</url>
</metadata>
<content>
import { generateMetadata } from '@/lib/generate-metadata';
# Stream Text <span className="text-sm font-mono text-muted-foreground/70 ml-2">pipe.streamText()</span>
You can use a pipe to get any LLM to stream text based on a user prompt. Streaming provides a better user experience, as the moment an LLM starts generating text the user can start seeing words print out in a stream just like ChatGPT.
For example, you can ask a pipe to stream a text completion based on a user prompt like "Who is an AI Engineer?" or give it a an entire doc and ask it to summarize it.
The Langbase AI SDK provides a `streamText()` function to stream text using pipes with any LLM.
<Warn sub="Deprecation Notice">
This SDK method has been deprecated. Please use the new [`run`](/sdk/pipe/run) SDK method with `stream` true.
</Warn>
---
## API reference
## `streamText(options)` {{ tag: 'Deprecated', status: 'deprecated' }}
<Row>
<Col>
Stream a text completion using `streamText()` function.
```js {{title: 'Function Signature'}}
streamText(options)
// With types.
streamText(options: StreamOptions)
```
## options
<Properties>
<Property name="options" type="StreamOptions">
```js {{title: 'StreamOptions Object'}}
interface StreamOptions {
messages?: Message[];
variables?: Variable[];
chat?: boolean;
threadId?: string | null;
}
```
*Following are the properties of the options object.*
</Property>
</Properties>
---
### messages
<Properties>
<Property name="messages" type="Array<Message>">
A messages array including the following properties. Optional if variables are provided.
```js {{title: 'Message Object'}}
interface Message {
role: 'user' | 'assistant' | 'system'| 'tool';
content: string;
name?: string;
tool_call_id?: string;
}
```
<Properties>
<Property name="role" type="'user' | 'assistant' | 'system'| 'tool'">
The role of the author of this message.
</Property>
<Property name="content" type="string">
The contents of the chunk message.
</Property>
<Property name="name" type="string">
The name of the tool called by LLM
</Property>
<Property name="tool_call_id" type="string">
The id of the tool called by LLM
</Property>
</Properties>
</Property>
</Properties>
---
### variables
<Properties>
<Property name="variables" type="Array<Variable>">
A variables array including the `name` and `value` params. Optional if messages are provided.
```js {{title: 'Variable Object'}}
interface Variable {
name: string;
value: string;
}
```
<Properties>
<Property name="name" type="string">
The name of the variable.
</Property>
<Property name="value" type="string">
The value of the variable.
</Property>
</Properties>
</Property>
</Properties>
---
### chat
<Properties>
<Property name="chat" type="boolean" def>
For a chat pipe, set `chat` to `true`.
This is useful when you want to use a chat pipe to generate text as it returns a `threadId`. Defaults to `false`.
</Property>
</Properties>
---
### threadId
<Properties>
<Property name="threadId" type="string | null">
The ID of the thread. Useful for a chat pipe to continue the conversation in the same thread. Optional.
- If `threadId` is not provided, a new thread will be created. E.g. first message of a new chat will not have a threadId.
- After the first message, a new `threadId` will be returned.
- Use this `threadId` to continue the conversation in the same thread from the second message onwards.
</Property>
</Properties>
</Col>
<Col sticky>
## Usage example
```bash {{ title: 'Install the SDK' }}
npm i langbase
pnpm i langbase
yarn add langbase
```
```bash {{ title: '.env file' }}
# Add your Pipe API key here.
LANGBASE_MY_PIPE_API_KEY="pipe_12345"
# … add more keys if you have more pipes.
```
```js {{ title: 'Generate Pipe: Use streamText()' }}
import { Pipe } from 'langbase';
// 1. Initiate your Pipes. `myPipe` as an example.
const myPipe = new Pipe({
apiKey: process.env.LANGBASE_MY_PIPE_API_KEY!,
});
// 2. SIMPLE example. Stream text by asking a question.
const {stream} = await myPipe.streamText({
messages: [{role: 'user', content: 'Who is an AI Engineer?'}],
});
// 3. Print the stream
// NOTE: This is a Node.js only example.
// Stream works differently in browsers.
// For browers, Next.js, and more examples:
// https://langbase.com/docs/sdk/examples
for await (const chunk of stream) {
// Streaming text part — a single word or several.
const textPart = chunk.choices[0]?.delta?.content || '';
// Demo: Print the stream to shell output — you can use it however.
process.stdout.write(textPart);
}
```
```js {{ title: 'Variables with streamText()' }}
// 1. Initiate the Pipe.
// … same as above
// 2. Stream text by asking a question.
const {stream} = await myPipe.streamText({
messages: [{role: 'user', content: 'Who is {{question}}?'}],
variables: [{name: 'question', value: 'AI Engineer'}],
});
// 3. Print the stream
// … same as above
```
```js {{ title: 'Chat Pipe: Use streamText()' }}
import { Pipe } from 'langbase';
// 1. Initiate the Pipe.
const myPipe = new Pipe({
apiKey: process.env.LANGBASE_MY_PIPE_API_KEY!,
});
// 2. Stream text by asking a question.
const {stream, threadId} = await myPipe.streamText({
messages: [{role: 'user', content: 'My company is called Langbase'}],
chat: true,
});
// 3. Print the stream
// NOTE: This is a Node.js only example.
// Stream works differently in browsers.
// For browers, Next.js, and more examples:
// https://langbase.com/docs/sdk/examples
for await (const chunk of stream) {
// Streaming text part — a single word or several.
const textPart = chunk.choices[0]?.delta?.content || '';
// Demo: Print the stream to shell output — you can use it however.
process.stdout.write(textPart);
}
// 4. Continue the conversation in the same thread by sending `threadId` from the second message onwards.
const {stream} = await myPipe.streamText({
messages: [{role: 'user', content: 'Tell me the name of my company?'}],
chat: true,
threadId,
});
// You'll see any LLM will know the company is `Langbase`
// since it's the same chat thread. This is how you can
// continue a conversation in the same thread.
```
</Col>
</Row>
---
<Row>
<Col>
## Response
Response of `streamText()` is a `Promise<StreamResponse>` which is an object with `stream` and `threadId` for chat pipes.
```js {{title: 'StreamResponse Object'}}
interface StreamResponse = {
threadId: string | null;
stream: StreamText;
};
```
---
### threadId
<Properties>
<Property name="threadId" type="string">
The ID of the thread. Useful for a chat pipe to continue the conversation in the same thread. Optional.
</Property>
</Properties>
---
### stream
<Properties>
<Property name="stream" type="StreamText">
Stream is a `StreamText` object with a streamed sequence of `StreamChunk` objects.
</Property>
</Properties>
```js {{title: 'StreamResponse Object'}}
type StreamText = Stream<StreamChunk>;
```
### StreamChunk
<Properties>
<Property name="StreamChunk" type="StreamChunk">
Represents a streamed chunk of a completion response returned by model, based on the provided input.
</Property>
</Properties>
```js {{title: 'StreamResponse Object'}}
interface StreamChunk {
id: string;
object: string;
created: number;
model: string;
choices: ChoiceStream[];
}
```
A `StreamChunk` object has the following properties.
<Properties>
<Property name="id" type="string">
The ID of the response.
</Property>
<Property name="object" type="string">
The object type name of the response.
</Property>
<Property name="created" type="number">
The timestamp of the response creation.
</Property>
<Property name="model" type="string">
The model used to generate the response.
</Property>
<Property name="choices" type="ChoiceStream[]">
A list of chat completion choices. Can contain more than one elements if n is greater than 1.
```js {{title: 'Choice Object for streamText()'}}
interface ChoiceStream {
index: number;
delta: Delta;
logprobs: boolean | null;
finish_reason: string;
}
```
</Property>
<Sub name="index" type="number">
The index of the choice in the list of choices.
</Sub>
<Sub name="delta" type="Delta">
A chat completion delta generated by streamed model responses.
```js {{title: 'Delta Object'}}
interface Delta {
role?: Role;
content?: string | null;
tool_calls?: ToolCall[];
}
```
<Sub name="role" type="'user' | 'assistant' | 'system'| 'tool'">
The role of the author of this message.
</Sub>
<Sub name="content" type="string | null">
The contents of the chunk message. Null if a tool is called.
</Sub>
<Sub name="tool_calls" type="Array<ToolCall>">
The array of the tools called by LLM
```js {{title: 'ToolCall Object'}}
interface ToolCall {
id: string;
type: 'function';
function: Function;
}
```
<Sub name="id" type="string">
The ID of the tool call.
</Sub>
<Sub name="type" type="'function'">
The type of the tool. Currently, only `function` is supported.
</Sub>
<Sub name="function" type="Function">
The function that the model called.
```js {{title: 'Function Object'}}
export interface Function {
name: string;
arguments: string;
}
```
<Sub name="name" type="string">
The name of the function to call.
</Sub>
<Sub name="arguments" type="string">
The arguments to call the function with, as generated by the model in JSON format.
</Sub>
</Sub>
</Sub>
</Sub>
<Sub name="logprobs" type="boolean or null">
Log probability information for the choice. Whether to return log probabilities of the output tokens or not. If true, returns the log probabilities of each output token returned in the `content` of `message`.
</Sub>
<Sub name="finish_reason" type="string">
The reason the model stopped generating tokens. This will be `stop` if the model hit a natural stop point or a provided stop sequence, length if the maximum number of tokens specified in the request was reached, `content_filter` if content was omitted due to a flag from our content filters, `tool_calls` if the model called a tool, or `function_call` (deprecated) if the model called a function. It could also be `eos` end of sequence and depends on the type of LLM, you can check their docs.
</Sub>
</Properties>
</Col>
<Col sticky>
```js {{ title: 'Response of streamText()' }}
// Response of a streamText() call is a Promise<StreamResponse>.
{
threadId: 'string-uuid-123',
stream: StreamText // example of streamed chunks below.
}
```
```js {{ title: 'StreamText has stream chunks' }}
// A stream chunk looks like this …
{
"id":"chatcmpl-123",
"object":"chat.completion.chunk",
"created":1719848588,
"model":"gpt-4o-mini",
"system_fingerprint":"fp_44709d6fcb"
"choices":[{
"index":0,
"delta":{"content":"Hi"},
"logprobs":null,
"finish_reason":null
}]
}
// More chunks as they come in...
{"id":"chatcmpl-123","object":"chat.completion.chunk","created":1719848588,"model":"gpt-4o-mini","system_fingerprint":"fp_44709d6fcb","choices":[{"index":0,"delta":{"content":"there"},"logprobs":null,"finish_reason":null}]}
…
{"id":"chatcmpl-123","object":"chat.completion.chunk","created":1719848588,"model":"gpt-4o-mini","system_fingerprint":"fp_44709d6fcb","choices":[{"index":0,"delta":{},"logprobs":null,"finish_reason":"stop"}]}
```
```js {{ title: 'Response stream with tool fn calls' }}
// Stream chunks with tool fn calls have content null and include a `tool_calls` array.
{"id":"chatcmpl-123","object":"chat.completion.chunk","created":1723757387,"model":"gpt-4o-mini","system_fingerprint":null,"choices":[{"index":0,"delta":{"role":"assistant","content":null,"tool_calls":[{"index":0,"id":"call_123","type":"function","function":{"name":"get_current_weather","arguments":""}}]},"logprobs":null,"finish_reason":null}]}
{"id":"chatcmpl-123","object":"chat.completion.chunk","created":1723757387,"model":"gpt-4o-mini","system_fingerprint":null,"choices":[{"index":0,"delta":{"tool_calls":[{"index":0,"function":{"arguments":"{\""}}]},"logprobs":null,"finish_reason":null}]}
{"id":"chatcmpl-123","object":"chat.completion.chunk","created":1723757387,"model":"gpt-4o-mini","system_fingerprint":null,"choices":[{"index":0,"delta":{"tool_calls":[{"index":0,"function":{"arguments":"location"}}]},"logprobs":null,"finish_reason":null}]}
...
{"id":"chatcmpl-123","object":"chat.completion.chunk","created":1723757387,"model":"gpt-4o-mini","system_fingerprint":null,"choices":[{"index":0,"delta":{},"logprobs":null,"finish_reason":"tool_calls"}]}
```
</Col>
</Row>
---
</content>
</doc>
<doc>
<metadata>
<title>Generate Text <span className="text-sm font-mono text-muted-foreground/70 ml-2">pipe.generateText()</span></title>
<url>https://langbase.com/docs/sdk/deprecated/generate-text/</url>
</metadata>
<content>
import { generateMetadata } from '@/lib/generate-metadata';
# Generate Text <span className="text-sm font-mono text-muted-foreground/70 ml-2">pipe.generateText()</span>
You can use a pipe to get any LLM to generate text based on a user prompt. For example, you can ask a pipe to generate a text completion based on a user prompt like "Who is an AI Engineer?" or give it a an entire doc and ask it to summarize it.
The Langbase AI SDK provides a `generateText()` function to generate text using pipes with any LLM.
<Warn sub="Deprecation Notice">
This SDK method has been deprecated. Please use the new [`run`](/sdk/pipe/run) SDK method with `stream` false.
</Warn>
---
## API reference
## `generateText(options)` {{ tag: 'Deprecated', status: 'deprecated' }}
<Row>
<Col>
Generate a text completion using `generateText()` function.
```js {{title: 'Function Signature'}}
generateText(options)
// With types.
generateText(options: GenerateOptions)
```
## options
<Properties>
<Property name="options" type="GenerateOptions">
```js {{title: 'GenerateOptions Object'}}
interface GenerateOptions {
messages?: Message[];
variables?: Variable[];
chat?: boolean;
threadId?: string;
}
```
*Following are the properties of the options object.*
</Property>
</Properties>
---
### messages
<Properties>
<Property name="messages" type="Array<Message>">
A messages array including the following properties. Optional if variables are provided.
```js {{title: 'Message Object'}}
interface Message {
role: 'user' | 'assistant' | 'system'| 'tool';
content: string;
name?: string;
tool_call_id?: string;
}
```
---
<Properties>
<Property name="role" type="'user' | 'assistant' | 'system'| 'tool'">
The role of the author of this message.
</Property>
<Property name="content" type="string">
The contents of the chunk message.
</Property>
<Property name="name" type="string">
The name of the tool called by LLM
</Property>
<Property name="tool_call_id" type="string">
The id of the tool called by LLM
</Property>
</Properties>
</Property>
</Properties>
---
### variables
<Properties>
<Property name="variables" type="Array<Variable>">
A variables array including the `name` and `value` params. Optional if messages are provided.
```js {{title: 'Variable Object'}}
interface Variable {
name: string;
value: string;
}
```
<Properties>
<Property name="name" type="string">
The name of the variable.
</Property>
<Property name="value" type="string">
The value of the variable.
</Property>
</Properties>
</Property>
</Properties>
---
### chat
<Properties>
<Property name="chat" type="boolean" def>
For a chat pipe, set `chat` to `true`.
This is useful when you want to use a chat pipe to generate text as it returns a `threadId`. Defaults to `false`.
</Property>
</Properties>
---
### threadId
<Properties>
<Property name="threadId" type="string | null">
The ID of the thread. Useful for a chat pipe to continue the conversation in the same thread. Optional.
- If `threadId` is not provided, a new thread will be created. E.g. first message of a new chat will not have a threadId.
- After the first message, a new `threadId` will be returned.
- Use this `threadId` to continue the conversation in the same thread from the second message onwards.
</Property>
</Properties>
</Col>
<Col sticky>
## Usage example
```bash {{ title: 'Install the SDK' }}
npm i langbase
pnpm i langbase
yarn add langbase
```
```bash {{ title: '.env file' }}
# Add your Pipe API key here.
LANGBASE_MY_PIPE_API_KEY="pipe_12345"
# … add more keys if you have more pipes.
```
```js {{ title: 'Generate Pipe: Use generateText()' }}
import {Pipe} from 'langbase';
// 1. Initiate the Pipe.
const myPipe = new Pipe({
apiKey: process.env.LANGBASE_PIPE_API_KEY!,
});
// 2. Generate the text by asking a question.
const {completion} = await myPipe.generateText({
messages: [{role: 'user', content: 'Who is an AI Engineer?'}],
});
console.log(completion);
```
```js {{ title: 'Variables with generateText()' }}
// 1. Initiate the Pipe.
// … same as above
// 2. Stream text by asking a question.
const {completion} = await myPipe.streamText({
messages: [{role: 'user', content: 'Who is {{question}}?'}],
variables: [{name: 'question', value: 'AI Engineer'}],
});
```
```js {{ title: 'Chat Pipe: Use generateText()' }}
import {Pipe} from 'langbase';
// Initiate the Pipe.
const myPipe = new Pipe({
apiKey: process.env.LANGBASE_PIPE_API_KEY!,
});
// Message 1: Tell something to the LLM.
const {completion, threadId} = await myPipe.generateText({
messages: [{role: 'user', content: 'My company is called Langbase'}],
chat: true,
});
console.log(completion);
// Message 2: Ask something about the first message.
// Continue the conversation in the same thread by sending
// `threadId` from the second message onwards.
const {completion: completion2} = await myPipe.generateText({
messages: [{role: 'user', content: 'Tell me the name of my company?'}],
chat: true,
threadId,
});
console.log(completion2);
// You'll see any LLM will know the company is `Langbase`
// since it's the same chat thread. This is how you can
// continue a conversation in the same thread.
```
</Col>
</Row>
---
<Row>
<Col>
## Response
Response of `generateText()` is a `Promise<GenerateResponse>`.
```js {{title: 'GenerateResponse Object'}}
interface GenerateResponse {
completion: string;
threadId?: string;
id: string;
object: string;
created: number;
model: string;
system_fingerprint: string | null;
choices: ChoiceGenerate[];
usage: Usage;
}
```
<Properties>
<Property name="completion" type="string">
The generated text completion.
</Property>
<Property name="threadId" type="string">
The ID of the thread. Useful for a chat pipe to continue the conversation in the same thread. Optional.
</Property>
<Property name="id" type="string">
The ID of the raw response.
</Property>
<Property name="object" type="string">
The object type name of the response.
</Property>
<Property name="created" type="number">
The timestamp of the response creation.
</Property>
<Property name="model" type="string">
The model used to generate the response.
</Property>
<Property name="system_fingerprint" type="string">
This fingerprint represents the backend configuration that the model runs with.
</Property>
<Property name="choices" type="ChoiceGenerate[]">
A list of chat completion choices. Can contain more than one elements if n is greater than 1.
```js {{title: 'Choice Object for generateText()'}}
interface ChoiceGenerate {
index: number;
message: Message;
logprobs: boolean | null;
finish_reason: string;
}
```
</Property>
<Sub name="index" type="number">
The index of the choice in the list of choices.
</Sub>
<Sub name="message" type="Message">
A messages array including `role` and `content` params.
```js {{title: 'Message Object'}}
interface Message {
role: 'user' | 'assistant' | 'system'| 'tool';
content: string | null;
tool_calls?: ToolCall[];
}
```
<Sub name="role" type="'user' | 'assistant' | 'system'| 'tool'">
The role of the author of this message.
</Sub>
<Sub name="content" type="string | null">
The contents of the chunk message. Null if a tool is called.
</Sub>
<Sub name="tool_calls" type="Array<ToolCall>">
The array of the tools called by LLM
```js {{title: 'ToolCall Object'}}
interface ToolCall {
id: string;
type: 'function';
function: Function;
}
```
<Sub name="id" type="string">
The ID of the tool call.
</Sub>
<Sub name="type" type="'function'">
The type of the tool. Currently, only `function` is supported.
</Sub>
<Sub name="function" type="Function">
The function that the model called.
```js {{title: 'Function Object'}}
export interface Function {
name: string;
arguments: string;
}
```
<Sub name="name" type="string">
The name of the function to call.
</Sub>
<Sub name="arguments" type="string">
The arguments to call the function with, as generated by the model in JSON format.
</Sub>
</Sub>
</Sub>
</Sub>
<Sub name="logprobs" type="boolean or null">
Log probability information for the choice. Whether to return log probabilities of the output tokens or not. If true, returns the log probabilities of each output token returned in the `content` of `message`.
</Sub>
<Sub name="finish_reason" type="string">
The reason the model stopped generating tokens. This will be `stop` if the model hit a natural stop point or a provided stop sequence, length if the maximum number of tokens specified in the request was reached, `content_filter` if content was omitted due to a flag from our content filters, `tool_calls` if the model called a tool, or `function_call` (deprecated) if the model called a function. It could also be `eos` end of sequence and depends on the type of LLM, you can check their docs.
</Sub>
<Property name="usage" type="Usage">
The usage object including the following properties.
```js {{title: 'Usage Object'}}
interface Usage {
prompt_tokens: number;
completion_tokens: number;
total_tokens: number;
}
```
<Sub name="prompt_tokens" type="number">
The number of tokens in the prompt (input).
</Sub>
<Sub name="completion_tokens" type="number">
The number of tokens in the completion (output).
</Sub>
<Sub name="total_tokens" type="number">
The total number of tokens.
</Sub>
</Property>
</Properties>
</Col>
<Col sticky>
```js {{ title: 'Response of generateText()' }}
{
"completion": "AI Engineer is a person who designs, builds, and maintains AI systems.",
"raw": {
"id": "chatcmpl-123",
"object": "chat.completion",
"created": 1720131129,
"model": "gpt-4o-mini",
"choices": [
{
"index": 0,
"message": {
"role": "assistant",
"content": "AI Engineer is a person who designs, builds, and maintains AI systems.",
},
"logprobs": null,
"finish_reason": "stop"
}
],
usage: { prompt_tokens: 28, completion_tokens: 36, total_tokens: 64 },
"system_fingerprint": "fp_123"
}
}
```
```js {{ title: 'Response with function call' }}
// Completion is null when an LLM responds
// with a tool function call.
{
"completion": null,
"raw": {
"id": "chatcmpl-123",
"object": "chat.completion",
"created": 1720131129,
"model": "gpt-3.5-turbo-0125",
"choices": [
{
"index": 0,
"message": {
"role": "assistant",
"content": null,
"tool_calls": [
{
"id": "call_abc123",
"type": "function",
"function": {
"name": "get_current_weather",
"arguments": "{\n\"location\": \"Boston, MA\"\n}"
}
}
]
},
"logprobs": null,
"finish_reason": "stop"
}
],
usage: { prompt_tokens: 28, completion_tokens: 36, total_tokens: 64 },
"system_fingerprint": null
}
}
```
</Col>
</Row>
---
</content>
</doc>
<doc>
<metadata>
<title>Agent Run <span className="text-sm font-mono text-muted-foreground/70 ml-2">langbase.agent.run()</span></title>
<url>https://langbase.com/docs/sdk/agent/run/</url>
</metadata>
<content>
import { generateMetadata } from '@/lib/generate-metadata';
import { LanguageProvider, SimpleLanguageToggle, LanguageContent } from '@/components/LanguageToggle';
# Agent Run <span className="text-sm font-mono text-muted-foreground/70 ml-2">langbase.agent.run()</span>
<LanguageProvider defaultLanguage='typescript'>
Agent, an AI Primitive by Langbase, works as a runtime LLM agent. You can specify all parameters at runtime and get the response from the agent.
You can use the agent.run() function as runtime LLM agent. You can specify all parameters at runtime and get the response from the agent.
This makes agent.run() ideal for scenarios where you want maximum flexibility — you can dynamically set the input, tools, and configuration without predefining them.
---
## Generate a User/Org API key
You will need to generate an API key to authenticate your requests. For more information, visit the [User/Org API key documentation](/api-reference/api-keys).
<Spoiler title="Get your Langbase API key: User or Org">
You can generate API keys from the [Langbase Studio](https://studio.langbase.com) by following these steps:
1. Switch to your user or org account.
2. From the sidebar, click on the `API keys`.
3. From here you can create a new API key or manage existing ones.
For more details, follow the [Langbase API keys](/api-reference/api-keys) documentation.
</Spoiler>
---
<div className="flex justify-between items-end">
<h3 className="text-2xl w-full">API reference</h3>
<div className="flex md:hidden items-end mb-1">
<SimpleLanguageToggle/>
</div>
</div>
### `langbase.agent.run()`
<Row>
<Col>
<LanguageContent language="typescript">
Request the Agent by running the `langbase.agent.run()` function.
<CodeGroup exampleTitle="langbase.agent.run()" title="Function Signature">
```ts {{ title: 'index.ts' }}
langbase.agent.run(options);
// with types.
langbase.agent.run(options: AgentRunOptions);
```
</CodeGroup>
</LanguageContent>
<LanguageContent language="python">
Request the Agent by running the `langbase.agent.run()` function.
<CodeGroup exampleTitle="agent.run()" title="Function Signature">
```python {{ title: 'main.py' }}
langbase.agent.run(**options)
```
</CodeGroup>
</LanguageContent>
## options
<Properties>
<LanguageContent language="typescript">
<Property name="options" type="AgentRunOptions">
```bash {{title: 'AgentRunOptions Object'}}
model: string;
apiKey: string;
input: string | Array<InputMessage>;
instructions?: string;
stream?: boolean;
tools?: Tool[];
tool_choice?: 'auto' | 'required' | ToolChoice;
parallel_tool_calls?: boolean;
reasoning_effort?: 'none' | 'low' | 'medium' | 'high';
mcp_servers?: McpServerSchema[];
top_p?: number;
max_tokens?: number;
temperature?: number;
presence_penalty?: number;
frequency_penalty?: number;
stop?: string[];
customModelParams?: Record<string, any>;
```
*Following are the properties of the options object.*
</Property>
</LanguageContent>
<LanguageContent language="python">
<Property name="options" type="AgentRunOptions">
```bash {{title: 'AgentRunOptions Object'}}
model: string
api_key: string
input: string | List[InputMessage]
instructions?: string
stream?: boolean
tools?: List[Tool]
tool_choice?: 'auto' | 'required' | ToolChoice
parallel_tool_calls?: boolean
reasoning_effort?: 'none' | 'low' | 'medium' | 'high'
mcp_servers?: List[McpServerSchema]
top_p?: number
max_tokens?: number
temperature?: number
presence_penalty?: number
frequency_penalty?: number
stop?: List[str]
custom_model_params?: Dict[str, Any]
```
*Following are the properties of the options object.*
</Property>
</LanguageContent>
</Properties>
---
### model
<Properties>
<Property name="model" type="string" required="true">
LLM model. Combination of model provider and model id, like `openai:gpt-4o-mini`
Format: `provider:model_id`
You can copy the ID of a model from the list of [supported LLM models](/supported-models-and-providers) at Langbase.
</Property>
</Properties>
---
<LanguageContent language="typescript">
### apiKey
<Properties>
<Property name="apiKey" type="string" required="true">
LLM API key for the selected model.
</Property>
</Properties>
</LanguageContent>
<LanguageContent language="python">
### api_key
<Properties>
<Property name="api_key" type="string" required="true">
LLM API key for the selected model.
</Property>
</Properties>
</LanguageContent>
---
### input
<Properties>
<LanguageContent language="typescript">
<Property name="input" type="String | Array<InputMessage>" required="true">
A string (for simple text queries) or an array of input messages.
When using a string, it will be treated as a single user message. Use it for simple queries. For example:
```ts {{title: 'String Input Example'}}
langbase.agent.run({
input: 'What is an AI Agent?',
...
});
```
When using an array of input messages `InputMessage[]`. Each input message should include the following properties:
```ts {{title: 'Input Message Object'}}
role: 'user' | 'assistant' | 'system'| 'tool';
content: string | ContentType[] | null;
name?: string;
tool_call_id?: string;
```
<Sub name="role" type="'user' | 'assistant' | 'system'| 'tool'">
The role of the author of this message.
</Sub>
<Sub name="content" type="string | ContentType[] | null">
The content of the message.
1. `String` For text generation, it's a plain string.
2. `Null` or `undefined` Tool call messages can have no content.
3. `ContentType[]` Array used in vision and audio models, where content consists of structured parts (e.g., text, image URLs).
```js {{ title: 'ContentType Object' }}
type: string;
text?: string | undefined;
image_url?:
| {
url: string;
detail?: string | undefined;
}
| undefined;
```
</Sub>
<Sub name="name" type="string">
The name of the tool called by LLM
</Sub>
<Sub name="tool_call_id" type="string">
The id of the tool called by LLM
</Sub>
</Property>
</LanguageContent>
<LanguageContent language="python">
<Property name="input" type="String | List[InputMessage]" required="true">
A string (for simple text queries) or an array of input messages.
When using a string, it will be treated as a single user message. Use it for simple queries. For example:
```ts {{title: 'String Input Example'}}
langbase.agent.run({
input: 'What is an AI Agent?',
...
});
```
When using an array of input messages `InputMessage[]`. Each input message should include the following properties:
```python {{title: 'Input Message Object'}}
role: 'user' | 'assistant' | 'system'| 'tool'
content: string | List[ContentType] | null
name?: string
tool_call_id?: string
```
<Sub name="role" type="'user' | 'assistant' | 'system'| 'tool'">
The role of the author of this message.
</Sub>
<Sub name="content" type="string | List[ContentType] | null">
The content of the message.
1. `String` For text generation, it's a plain string.
2. `Null` or `undefined` Tool call messages can have no content.
3. `List[ContentType]` Array used in vision and audio models, where content consists of structured parts (e.g., text, image URLs).
```python {{ title: 'ContentType Object' }}
type: string
text?: string | None
image_url?:
| {
url: string
detail?: string | None
}
| undefined
```
</Sub>
<Sub name="name" type="string">
The name of the tool called by LLM
</Sub>
<Sub name="tool_call_id" type="string">
The id of the tool called by LLM
</Sub>
</Property>
</LanguageContent>
</Properties>
---
### instructions
<Properties>
<Property name="instructions" type="string">
Used to give high level instructions to the model about the task it should perform, including tone, goals, and examples of correct responses.
This is equivalent to a system/developer role message at the top of LLM's context.
</Property>
</Properties>
---
### stream
<Properties>
<Property name="stream" type="boolean">
Whether to stream the response or not. If `true`, the response will be streamed.
</Property>
</Properties>
---
### tools
<Properties>
<LanguageContent language="typescript">
<Property name="tools" type="Array<Tools>">
A list of tools the model may call.
```ts {{title: 'Tools Object'}}
type: 'function';
function: FunctionOptions
```
<Sub name="type" type="'function'">
The type of the tool. Currently, only `function` is supported.
</Sub>
<Sub name="function" type="FunctionOptions">
The function that the model may call.
```ts {{title: 'FunctionOptions Object'}}
name: string;
description?: string;
parameters?: Record<string, unknown>
```
<Sub name="name" type="string">
The name of the function to call.
</Sub>
<Sub name="description" type="string">
The description of the function.
</Sub>
<Sub name="parameters" type="Record<string, unknown>">
The parameters of the function.
</Sub>
</Sub>
</Property>
</LanguageContent>
<LanguageContent language="python">
<Property name="tools" type="List[Tool]">
A list of tools the model may call.
```python {{title: 'Tools Object'}}
type: 'function'
function: FunctionOptions
```
<Sub name="type" type="'function'">
The type of the tool. Currently, only `function` is supported.
</Sub>
<Sub name="function" type="FunctionOptions">
The function that the model may call.
```python {{title: 'FunctionOptions Object'}}
name: string
description?: string
parameters?: Dict[str, Any]
```
<Sub name="name" type="string">
The name of the function to call.
</Sub>
<Sub name="description" type="string">
The description of the function.
</Sub>
<Sub name="parameters" type="Dict[str, Any]">
The parameters of the function.
</Sub>
</Sub>
</Property>
</LanguageContent>
</Properties>
---
### tool_choice
<Properties>
<Property name="tool_choice" type="'auto' | 'required' | ToolChoice">
Tool usage configuration.
<Properties>
<Property name="'auto'" type="string">
Model decides when to use tools.
</Property>
<Property name="'required'" type="string">
Model must use specified tools.
</Property>
<Property name="ToolChoice" type="object">
Forces use of a specific function.
```ts {{title: 'ToolChoice Object'}}
type: 'function';
function: {
name: string;
};
```
</Property>
</Properties>
</Property>
</Properties>
---
### parallel_tool_calls
<Properties>
<Property name="parallel_tool_calls" type="boolean">
Call multiple tools in parallel, allowing the effects and results of these function calls to be resolved in parallel.
</Property>
</Properties>
---
### reasoning_effort
<Properties>
<Property name="reasoning_effort" type="'none' | 'low' | 'medium' | 'high'">
How much reasoning the model should apply before answering, for models that support reasoning effort.
OpenAI GPT-5.4 and newer models only support tool calls when the reasoning effort is `none`. Langbase sets it to `none` automatically when the run includes tools; set it explicitly to control the behavior yourself.
</Property>
</Properties>
---
### mcp_servers
<Properties>
<LanguageContent language="typescript">
<Property name="mcp_servers" type="McpServerSchema[]">
An SSE type MCP servers array
```js {{ title: 'McpServerSchema Object' }}
name: string;
type: 'url';
url: string;
authorization_token?: string;
tool_configuration?: {
allowed_tools?: string[];
enabled?: boolean;
};
custom_headers?: Record<string, string>;
```
<Sub name="name" type="string">
The name of the MCP server.
</Sub>
<Sub name="type" type="'url'">
Type of the MCP server.
</Sub>
<Sub name="url" type="string">
The URL of the MCP server.
</Sub>
<Sub name="authorization_token" type="string">
The authorization token is for MCP servers that require OAuth authentication, you’ll need to obtain an access token. Please note that we do not store this token.
</Sub>
<Sub name="tool_configuration" type="object">
Tool configuration for the MCP server have the following properties:
1. `allowed_tools` - Specify the tool names that the MCP server is permitted to use.
2. `enabled` - Whether to enable tools from this server.
</Sub>
<Sub name="custom_headers" type="Record<string, string>">
Custom headers are additional headers for MCP servers if required.
</Sub>
</Property>
</LanguageContent>
<LanguageContent language="python">
<Property name="mcp_servers" type="List[McpServerSchema]">
An SSE type MCP servers array
```python {{ title: 'McpServerSchema Object' }}
name: string
type: 'url'
url: string
authorization_token?: string
tool_configuration?: {
allowed_tools?: List[str]
enabled?: bool
}
custom_headers?: Dict[str, str]
```
<Sub name="name" type="string">
The name of the MCP server.
</Sub>
<Sub name="type" type="'url'">
Type of the MCP server.
</Sub>
<Sub name="url" type="string">
The URL of the MCP server.
</Sub>
<Sub name="authorization_token" type="string">
The authorization token is for MCP servers that require OAuth authentication, you’ll need to obtain an access token. Please note that we do not store this token.
</Sub>
<Sub name="tool_configuration" type="object">
Tool configuration for the MCP server have the following properties:
1. `allowed_tools` - Specify the tool names that the MCP server is permitted to use.
2. `enabled` - Whether to enable tools from this server.
</Sub>
<Sub name="custom_headers" type="Dict[str, str]">
Custom headers are additional headers for MCP servers if required.
</Sub>
</Property>
</LanguageContent>
</Properties>
---
### temperature
<Properties>
<Property name="temperature" type="number">
What sampling temperature to use, between 0 and 2. Higher values like 0.8 will make the output more random. Lower values like 0.2 will make it more focused and deterministic.
Default: `0.7`
</Property>
</Properties>
---
### top_p
<Properties>
<Property name="top_p" type="number">
An alternative to sampling with temperature, called nucleus sampling, where the model considers the results of the tokens with top_p probability mass. So 0.1 means only the tokens comprising the top 10% probability mass are considered.
Default: `1`
</Property>
</Properties>
---
### max_tokens
<Properties>
<Property name="max_tokens" type="number">
Maximum number of tokens in the response message returned.
Default: `1000`
</Property>
</Properties>
---
### presence_penalty
<Properties>
<Property name="presence_penalty" type="number">
Penalizes a word based on its occurrence in the input text.
Default: `0`
</Property>
</Properties>
---
### frequency_penalty
<Properties>
<Property name="frequency_penalty" type="number">
Penalizes a word based on how frequently it appears in the training data.
Default: `0`
</Property>
</Properties>
---
### stop
<Properties>
<Property name="stop" type="string[]">
Up to 4 sequences where the API will stop generating further tokens.
</Property>
</Properties>
---
<LanguageContent language="typescript">
### customModelParams
<Properties>
<Property name="customModelParams" type="Record<string, any>">
Additional parameters to pass to the model as key-value pairs. These parameters are passed on to the model as-is.
```ts {{title: 'CustomModelParams Object'}}
[key: string]: any;
```
Example:
```ts
{
"logprobs": true,
"service_tier": "auto",
}
```
</Property>
</Properties>
</LanguageContent>
<LanguageContent language="python">
### custom_model_params
<Properties>
<Property name="custom_model_params" type="Dict[str, Any]">
Additional parameters to pass to the model as key-value pairs. These parameters are passed on to the model as-is.
```python {{title: 'CustomModelParams Object'}}
Dict[str, Any]
```
Example:
```python
{
"logprobs": true,
"service_tier": "auto",
}
```
</Property>
</Properties>
</LanguageContent>
</Col>
<Col>
<div className="flex justify-between items-end">
<h3 className="text-2xl w-full">Usage example</h3>
<div className="hidden md:flex items-end mb-2">
<SimpleLanguageToggle/>
</div>
</div>
<LanguageContent language="typescript">
<CodeGroup exampleTitle="Install the SDK" title="Install the SDK">
```bash {{ title: 'npm' }}
npm i langbase
```
```bash {{ title: 'pnpm' }}
pnpm i langbase
```
```bash {{ title: 'yarn' }}
yarn add langbase
```
</CodeGroup>
</LanguageContent>
<LanguageContent language="python">
<CodeGroup exampleTitle="Install the SDK" title="Install the SDK">
```bash {{ title: 'pip' }}
pip install langbase python-dotenv
```
</CodeGroup>
</LanguageContent>
### Environment variables
<CodeGroup exampleTitle="Environment variables" title="Environment variables">
```bash {{ title: '.env file' }}
LANGBASE_API_KEY="<USER/ORG-API-KEY>"
LLM_API_KEY="<YOUR-LLM-API-KEY>"
```
</CodeGroup>
### `langbase.agent.run()` examples
<LanguageContent language="typescript">
<CodeGroup exampleTitle="langbase.agent.run()" title="langbase.agent.run()">
```ts {{ title: 'Non-stream' }}
import {Langbase} from 'langbase';
const langbase = new Langbase({
apiKey: process.env.LANGBASE_API_KEY!,
});
async function main() {
const {output} = await langbase.agent.run({
model: 'openai:gpt-4o-mini',
instructions: 'You are a helpful AI Agent.',
input: 'Who is an AI Engineer?',
apiKey: process.env.LLM_API_KEY!,
stream: false,
});
console.log('Agent response:', output);
}
main();
```
```ts {{ title: 'Stream' }}
import {getRunner, Langbase} from 'langbase';
const langbase = new Langbase({
apiKey: process.env.LANGBASE_API_KEY!,
});
async function main() {
const {stream, rawResponse} = await langbase.agent.run({
model: 'openai:gpt-4o-mini',
instructions: 'You are a helpful AI Agent.',
input: 'Who is an AI Engineer?',
apiKey: process.env.LLM_API_KEY!,
stream: true,
});
// Convert the stream to a stream runner.
const runner = getRunner(stream);
runner.on('connect', () => {
console.log('Stream started.\n');
});
runner.on('content', content => {
process.stdout.write(content);
});
runner.on('end', () => {
console.log('\nStream ended.');
});
runner.on('error', error => {
console.error('Error:', error);
});
}
main();
```
```ts {{ title: 'Tool Calling' }}
// Tool Calling Example
import { Langbase } from 'langbase';
const langbase = new Langbase({
apiKey: process.env.LANGBASE_API_KEY!,
});
async function main() {
const tools = [
{
type: 'function',
function: {
name: 'get_current_weather',
description: 'Get the current weather in a given location',
parameters: {
type: 'object',
properties: {
location: {
type: 'string',
description: 'The city and state, e.g. San Francisco, CA',
},
unit: { type: 'string', enum: ['celsius', 'fahrenheit'] },
},
required: ['location'],
},
},
},
];
const response = await langbase.agent.run({
model: 'openai:gpt-4o-mini',
input: 'What is the weather like in SF today?',
tools: tools,
tool_choice: 'auto',
apiKey: process.env.LLM_API_KEY!,
stream: false,
});
console.log(response);
}
main();
```
```ts {{ title: 'Vision' }}
// Vision Example
import { Langbase } from 'langbase';
const langbase = new Langbase({
apiKey: process.env.LANGBASE_API_KEY!,
});
async function main() {
const response = await langbase.agent.run({
model: 'openai:gpt-4o-mini',
input: [
{
role: 'user',
content: [
{
type: 'text',
text: 'Extract the text from this image',
},
{
type: 'image_url',
image_url: {
url: 'https://upload.wikimedia.org/wikipedia/commons/a/a7/Handwriting.png',
},
},
],
}
],
apiKey: process.env.LLM_API_KEY!,
stream: false,
});
console.log(response);
}
main();
```
</CodeGroup>
</LanguageContent>
<LanguageContent language="python">
<CodeGroup exampleTitle="agent.run()" title="agent.run()">
```python {{ title: 'Non-stream' }}
import os
from dotenv import load_dotenv
from langbase import Langbase
load_dotenv()
def main():
# Check for required environment variables
langbase_api_key = os.environ.get("LANGBASE_API_KEY")
llm_api_key = os.environ.get("LLM_API_KEY")
if not langbase_api_key:
print("❌ Missing LANGBASE_API_KEY in environment variables.")
print("Please set: export LANGBASE_API_KEY='your_langbase_api_key'")
exit(1)
if not llm_api_key:
print("❌ Missing LLM_API_KEY in environment variables.")
print("Please set: export LLM_API_KEY='your_llm_api_key'")
exit(1)
# Initialize Langbase client
langbase = Langbase(api_key=langbase_api_key)
# Run the agent
response = langbase.agent.run(
stream=False,
model="openai:gpt-4.1-mini",
api_key=llm_api_key,
instructions="You are a helpful assistant that help users summarize text.",
input=[{"role": "user", "content": "Who is an AI Engineer?"}],
)
print("response:", response.get("output"))
if __name__ == "__main__":
main()
```
```python {{ title: 'Stream' }}
import os
from dotenv import load_dotenv
from langbase import Langbase, get_runner
load_dotenv()
def main():
# Check for required environment variables
langbase_api_key = os.environ.get("LANGBASE_API_KEY")
api_key = os.environ.get("LLM_API_KEY")
if not langbase_api_key:
print("❌ Missing LANGBASE_API_KEY in environment variables.")
print("Please set: export LANGBASE_API_KEY='your_langbase_api_key'")
exit(1)
# Initialize Langbase client
langbase = Langbase(api_key=langbase_api_key)
try:
# Get readable stream - equivalent to const {stream} = await langbase.agent.run(...)
response = langbase.agent.run(
stream=True,
model="openai:gpt-4.1-mini",
instructions="You are a helpful assistant that help users summarize text.",
input=[{"role": "user", "content": "Who is an AI Engineer?"}],
api_key=api_key,
)
# Convert the stream to a stream runner - equivalent to getRunner(stream)
runner = get_runner(response)
# Event-like handling in Python
# Method 1: Using iterator pattern (Python equivalent of event listeners)
# Equivalent to runner.on('connect', ...)
print("Stream started.\n")
try:
# Equivalent to runner.on('content', content => {...})
for content in runner.text_generator():
print(content, end="", flush=True)
# Equivalent to runner.on('end', ...)
print("\nStream ended.")
except Exception as error:
# Equivalent to runner.on('error', error => {...})
print(f"Error: {error}")
except Exception as e:
print(f"Error: {e}")
if __name__ == "__main__":
main()
```
```python {{ title: 'Tool Calling' }}
import json
import os
import requests
from dotenv import load_dotenv
from langbase import Langbase
load_dotenv()
# Define the tool schema for sending emails
send_email_tool_schema = {
"type": "function",
"function": {
"name": "send_email",
"description": "Send an email using Resend API",
"parameters": {
"type": "object",
"required": ["from", "to", "subject", "html", "text"],
"properties": {
"from": {"type": "string"},
"to": {"type": "string"},
"subject": {"type": "string"},
"html": {"type": "string"},
"text": {"type": "string"},
},
"additionalProperties": False,
},
},
}
# Actual tool function
def send_email(args):
"""Send an email using the Resend API."""
from_email = args.get("from")
to_email = args.get("to")
subject = args.get("subject")
html = args.get("html")
text = args.get("text")
# response = requests.post(
# "https://api.resend.com/emails",
# headers={
# "Authorization": f"Bearer {os.environ.get('RESEND_API_KEY')}",
# "Content-Type": "application/json",
# },
# json={
# "from": from_email,
# "to": to_email,
# "subject": subject,
# "html": html,
# "text": text,
# },
# )
# if not response.ok:
# raise Exception("Failed to send email")
return f"✅ Email sent successfully to {to_email}!"
def main():
# Check for required environment variables
langbase_api_key = os.environ.get("LANGBASE_API_KEY")
llm_api_key = os.environ.get("LLM_API_KEY")
# resend_api_key = os.environ.get("RESEND_API_KEY")
if not langbase_api_key:
print("❌ Missing LANGBASE_API_KEY in environment variables.")
exit(1)
if not llm_api_key:
print("❌ Missing LLM_API_KEY in environment variables.")
exit(1)
# if not resend_api_key:
# print("❌ Missing RESEND_API_KEY in environment variables.")
# exit(1)
# Initialize Langbase client
langbase = Langbase(api_key=langbase_api_key)
recipient_info = {"email": "sam@example.com"}
email = {
"subject": "Welcome to Langbase!",
"html_email": "Hello Sam! Welcome to Langbase.",
"full_email": "Hello Sam! Welcome to Langbase.",
}
input_messages = [{"role": "user", "content": "Send a welcome email to Sam."}]
# Initial run with tool
response = langbase.agent.run(
model="openai:gpt-4.1-mini",
api_key=llm_api_key,
instructions="You are an email agent. You are given a task to send an email to a recipient. You have the ability to send an email using the send_email tool.",
input=input_messages,
tools=[send_email_tool_schema],
stream=False,
)
# Check if response contains choices (for tool calls)
choices = response.get("choices", [])
print("\n📨 Initial Response:")
print(
f"Output: {response.get('output', 'No direct output - checking for tool calls...')}"
)
if not choices:
print("❌ No choices found in response")
return
# Push agent tool call to messages
input_messages.append(choices[0].get("message", {}))
# Detect tool call
tool_calls = choices[0].get("message", {}).get("tool_calls", [])
has_tool_calls = tool_calls and len(tool_calls) > 0
if has_tool_calls:
print(f"\n🔧 Tool calls detected: {len(tool_calls)}")
for i, tool_call in enumerate(tool_calls, 1):
# Process each tool call
function = tool_call.get("function", {})
name = function.get("name")
args = function.get("arguments")
print(f"\n Tool Call #{i}:")
print(f" - Name: {name}")
print(f" - Raw Arguments: {args}")
try:
parsed_args = json.loads(args)
print(f" - Parsed Arguments: {json.dumps(parsed_args, indent=4)}")
except json.JSONDecodeError:
print(f" ❌ Error parsing tool call arguments: {args}")
continue
# Set email parameters
print("\n 📧 Preparing email with full details...")
parsed_args["from"] = "onboarding@resend.dev"
parsed_args["to"] = recipient_info["email"]
parsed_args["subject"] = email["subject"]
parsed_args["html"] = email["html_email"]
parsed_args["text"] = email["full_email"]
print(f" - From: {parsed_args['from']}")
print(f" - To: {parsed_args['to']}")
print(f" - Subject: {parsed_args['subject']}")
# Execute the tool
try:
print(f"\n ⚡ Executing {name}...")
result = send_email(parsed_args)
print(f" ✅ Tool result: {result}")
# Add tool result to messages
input_messages.append(
{
"role": "tool",
"tool_call_id": tool_call.get("id"),
"name": name,
"content": result,
}
)
except Exception as e:
print(f" ❌ Error executing tool: {e}")
continue
print("\n🤖 Sending tool results back to agent for final response...")
# Final agent response with tool result
final_response = langbase.agent.run(
model="openai:gpt-4.1-mini",
api_key=llm_api_key,
instructions="You are an email sending assistant. Confirm the email has been sent successfully.",
input=input_messages,
stream=False,
)
print("\n✨ Final Response:")
print(f"Agent: {final_response.get('output')}")
print("\n" + "=" * 50)
if __name__ == "__main__":
main()
```
```python {{ title: 'Vision' }}
import os
import json
from dotenv import load_dotenv
from langbase import Langbase
load_dotenv()
def main():
# Check for required environment variables
langbase_api_key = os.environ.get("LANGBASE_API_KEY")
llm_api_key = os.environ.get("LLM_API_KEY")
if not langbase_api_key:
print("❌ Missing LANGBASE_API_KEY in environment variables.")
print("Please set: export LANGBASE_API_KEY='your_langbase_api_key'")
exit(1)
if not llm_api_key:
print("❌ Missing LLM_API_KEY in environment variables.")
print("Please set: export LLM_API_KEY='your_llm_api_key'")
exit(1)
# Initialize Langbase client
langbase = Langbase(api_key=langbase_api_key)
# Run the agent with vision capabilities
response = langbase.agent.run(
stream=False,
model="openai:gpt-4o-mini",
api_key=llm_api_key,
input=[
{
"role": "user",
"content": [
{
"type": "text",
"text": "Extract the text from this image"
},
{
"type": "image_url",
"image_url": {
"url": "https://upload.wikimedia.org/wikipedia/commons/a/a7/Handwriting.png"
}
}
]
}
]
)
print("Response:", json.dumps(response, indent=4))
if __name__ == "__main__":
main()
```
</CodeGroup>
</LanguageContent>
</Col>
</Row>
---
<Row>
<Col>
## Response
Response of `langbase.agent.run()` is a `Promise<AgentRunResponse | AgentRunResponseStream>` object.
### RunResponse Object
<LanguageContent language="typescript">
```ts {{title: 'AgentRunResponse Object'}}
output: string | null;
id: string;
object: string;
created: number;
model: string;
choices: ChoiceGenerate[];
usage: Usage;
system_fingerprint: string | null;
rawResponse?: {
headers: Record<string, string>;
};
```
</LanguageContent>
<LanguageContent language="python">
```python {{title: 'AgentRunResponse Object'}}
output: string | null
id: string
object: string
created: number
model: string
choices: List[ChoiceGenerate]
usage: Usage
system_fingerprint: str | None
raw_response?: {
headers: Dict[str, str]
}
```
</LanguageContent>
<Properties>
<Property name="output" type="string">
The generated text response (also called completion) from the agent. It can be a string or null if the model called a tool.
</Property>
<Property name="id" type="string">
The ID of the raw response.
</Property>
<Property name="object" type="string">
The object type name of the response.
</Property>
<Property name="created" type="number">
The timestamp of the response creation.
</Property>
<Property name="model" type="string">
The model used to generate the response.
</Property>
<LanguageContent language="typescript">
<Property name="choices" type="ChoiceGenerate[]">
A list of chat completion choices. Can contain more than one elements if n is greater than 1.
```ts {{title: 'Choice Object for langbase.agent.run() with stream off'}}
index: number;
message: Message;
logprobs: boolean | null;
finish_reason: string;
```
</Property>
</LanguageContent>
<LanguageContent language="python">
<Property name="choices" type="List[ChoiceGenerate]">
A list of chat completion choices. Can contain more than one elements if n is greater than 1.
```ts {{title: 'Choice Object for langbase.agent.run() with stream off'}}
index: number
message: Message
logprobs: boolean | null
finish_reason: string
```
</Property>
</LanguageContent>
<Sub name="index" type="number">
The index of the choice in the list of choices.
</Sub>
<Sub name="message" type="Message">
A messages array including `role` and `content` params.
<LanguageContent language="typescript">
```ts {{title: 'Message Object'}}
role: 'user' | 'assistant' | 'system'| 'tool';
content: string | null;
tool_calls?: ToolCall[];
```
</LanguageContent>
<LanguageContent language="python">
```python {{title: 'Message Object'}}
role: 'user' | 'assistant' | 'system'| 'tool'
content: string | null
tool_calls?: List[ToolCall]
```
</LanguageContent>
<Sub name="role" type="'user' | 'assistant' | 'system'| 'tool'">
The role of the author of this message.
</Sub>
<Sub name="content" type="string | null">
The contents of the chunk message. Null if a tool is called.
</Sub>
<LanguageContent language="typescript">
<Sub name="tool_calls" type="Array<ToolCall>">
The array of the tools called by the agent
```ts {{title: 'ToolCall Object'}}
id: string;
type: 'function';
function: Function;
```
<Sub name="id" type="string">
The ID of the tool call.
</Sub>
<Sub name="type" type="'function'">
The type of the tool. Currently, only `function` is supported.
</Sub>
<Sub name="function" type="Function">
The function that the model called.
```ts {{title: 'Function Object'}}
name: string;
arguments: string;
```
<Sub name="name" type="string">
The name of the function to call.
</Sub>
<Sub name="arguments" type="string">
The arguments to call the function with, as generated by the model in JSON format.
</Sub>
</Sub>
</Sub>
</LanguageContent>
<LanguageContent language="python">
<Sub name="tool_calls" type="List[ToolCall]">
The array of the tools called by the agent
```python {{title: 'ToolCall Object'}}
id: string
type: 'function'
function: Function
```
<Sub name="id" type="string">
The ID of the tool call.
</Sub>
<Sub name="type" type="'function'">
The type of the tool. Currently, only `function` is supported.
</Sub>
<Sub name="function" type="Function">
The function that the model called.
```ts {{title: 'Function Object'}}
name: string
arguments: string
```
<Sub name="name" type="string">
The name of the function to call.
</Sub>
<Sub name="arguments" type="string">
The arguments to call the function with, as generated by the model in JSON format.
</Sub>
</Sub>
</Sub>
</LanguageContent>
</Sub>
<Sub name="logprobs" type="boolean or null">
Log probability information for the choice. Whether to return log probabilities of the output tokens or not. If true, returns the log probabilities of each output token returned in the `content` of `message`.
</Sub>
<Sub name="finish_reason" type="string">
The reason the model stopped generating tokens. This will be `stop` if the model hit a natural stop point or a provided stop sequence, length if the maximum number of tokens specified in the request was reached, `content_filter` if content was omitted due to a flag from our content filters, `tool_calls` if the model called a tool, or `function_call` (deprecated) if the model called a function. It could also be `eos` end of sequence and depends on the type of LLM, you can check their docs.
</Sub>
<Property name="usage" type="Usage">
The usage object including the following properties.
```ts {{title: 'Usage Object'}}
prompt_tokens: number;
completion_tokens: number;
total_tokens: number;
```
<Sub name="prompt_tokens" type="number">
The number of tokens in the prompt (input).
</Sub>
<Sub name="completion_tokens" type="number">
The number of tokens in the completion (output).
</Sub>
<Sub name="total_tokens" type="number">
The total number of tokens.
</Sub>
</Property>
<Property name="system_fingerprint" type="string">
This fingerprint represents the backend configuration that the model runs with.
</Property>
<LanguageContent language="typescript">
<Property name="rawResponse" type="Object">
The different headers of the response.
</Property>
</LanguageContent>
<LanguageContent language="python">
<Property name="raw_response" type="Dict[str, str]">
The different headers of the response.
</Property>
</LanguageContent>
</Properties>
---
### RunResponseStream Object
Response of `langbase.agent.run()` with `stream: true` is a `Promise<AgentRunResponseStream>`.
<LanguageContent language="typescript">
```ts {{title: 'AgentRunResponseStream Object'}}
stream: ReadableStream<any>;
rawResponse?: {
headers: Record<string, string>;
};
```
</LanguageContent>
<LanguageContent language="python">
```python {{title: 'AgentRunResponseStream Object'}}
stream: ReadableStream<any>
raw_response?: {
headers: Dict[str, str]
};
```
</LanguageContent>
<Properties>
<LanguageContent language="typescript">
<Property name="rawResponse" type="Object">
The different headers of the response.
</Property>
</LanguageContent>
<LanguageContent language="python">
<Property name="raw_response" type="Dict[str, str]">
The different headers of the response.
</Property>
</LanguageContent>
<Property name="stream" type="ReadableStream">
Stream is an object with a streamed sequence of StreamChunk objects.
<LanguageContent language="typescript">
```ts {{title: 'StreamResponse Object'}}
type StreamResponse = ReadableStream<StreamChunk>;
```
</LanguageContent>
<LanguageContent language="python">
```python {{title: 'StreamResponse Object'}}
StreamResponse = ReadableStream[StreamChunk]
```
</LanguageContent>
### StreamChunk
<Property name="StreamChunk" type="StreamChunk">
Represents a streamed chunk of a completion response returned by model, based on the provided input.
<LanguageContent language="typescript">
```js {{title: 'StreamChunk Object'}}
id: string;
object: string;
created: number;
model: string;
choices: ChoiceStream[];
```
</LanguageContent>
<LanguageContent language="python">
```ts {{title: 'StreamChunk Object'}}
id: string
object: string
created: number
model: string
choices: List[ChoiceStream]
```
</LanguageContent>
A `StreamChunk` object has the following properties.
<Properties>
<Property name="id" type="string">
The ID of the response.
</Property>
<Property name="object" type="string">
The object type name of the response.
</Property>
<Property name="created" type="number">
The timestamp of the response creation.
</Property>
<Property name="model" type="string">
The model used to generate the response.
</Property>
<LanguageContent language="typescript">
<Property name="choices" type="ChoiceStream[]">
A list of chat completion choices. Can contain more than one elements if n is greater than 1.
```js {{title: 'Choice Object for langbase.agent.run() with stream true'}}
index: number;
delta: Delta;
logprobs: boolean | null;
finish_reason: string;
```
</Property>
</LanguageContent>
<LanguageContent language="python">
<Property name="choices" type="List[ChoiceStream]">
A list of chat completion choices. Can contain more than one elements if n is greater than 1.
```js {{title: 'Choice Object for langbase.agent.run() with stream true'}}
index: number;
delta: Delta;
logprobs: boolean | null;
finish_reason: string;
```
</Property>
</LanguageContent>
<Sub name="index" type="number">
The index of the choice in the list of choices.
</Sub>
<Sub name="delta" type="Delta">
A chat completion delta generated by streamed model responses.
<LanguageContent language="typescript">
```js {{title: 'Delta Object'}}
role?: Role;
content?: string | null;
tool_calls?: ToolCall[];
```
</LanguageContent>
<LanguageContent language="python">
```ts {{title: 'Delta Object'}}
role?: Role
content?: str | None
tool_calls?: List[ToolCall]
```
</LanguageContent>
<Sub name="role" type="'user' | 'assistant' | 'system'| 'tool'">
The role of the author of this message.
</Sub>
<Sub name="content" type="string | null">
The contents of the chunk message. Null if a tool is called.
</Sub>
<Sub name="tool_calls" type="Array<ToolCall>">
The array of the tools called by LLM
```js {{title: 'ToolCall Object'}}
id: string;
type: 'function';
function: Function;
```
<Sub name="id" type="string">
The ID of the tool call.
</Sub>
<Sub name="type" type="'function'">
The type of the tool. Currently, only `function` is supported.
</Sub>
<Sub name="function" type="Function">
The function that the model called.
```js {{title: 'Function Object'}}
name: string;
arguments: string;
```
<Sub name="name" type="string">
The name of the function to call.
</Sub>
<Sub name="arguments" type="string">
The arguments to call the function with, as generated by the model in JSON format.
</Sub>
</Sub>
</Sub>
</Sub>
<Sub name="logprobs" type="boolean or null">
Log probability information for the choice. Whether to return log probabilities of the output tokens or not. If true, returns the log probabilities of each output token returned in the `content` of `message`.
</Sub>
<Sub name="finish_reason" type="string">
The reason the model stopped generating tokens. This will be `stop` if the model hit a natural stop point or a provided stop sequence, length if the maximum number of tokens specified in the request was reached, `content_filter` if content was omitted due to a flag from our content filters, `tool_calls` if the model called a tool, or `function_call` (deprecated) if the model called a function. It could also be `eos` end of sequence and depends on the type of LLM, you can check their docs.
</Sub>
</Properties>
</Property>
</Property>
</Properties>
</Col>
<Col sticky>
```json {{ title: 'RunResponse type of langbase.agent.run()' }}
{
"output": "AI Engineer is a person who designs, builds, and maintains AI systems.",
"id": "chatcmpl-123",
"object": "chat.completion",
"created": 1720131129,
"model": "gpt-4o-mini",
"choices": [
{
"index": 0,
"message": {
"role": "assistant",
"content": "AI Engineer is a person who designs, builds, and maintains AI systems."
},
"logprobs": null,
"finish_reason": "stop"
}
],
"usage": {
"prompt_tokens": 28,
"completion_tokens": 36,
"total_tokens": 64
},
"system_fingerprint": "fp_123"
}
```
```js {{ title: 'RunResponseStream of langbase.agent.run() with stream true' }}
{
"stream": StreamResponse // example of streamed chunks below.
}
```
```json {{ title: 'StreamResponse has stream chunks' }}
// A stream chunk looks like this …
{
"id": "chatcmpl-123",
"object": "chat.completion.chunk",
"created": 1719848588,
"model": "gpt-4o-mini",
"system_fingerprint": "fp_44709d6fcb",
"choices": [{
"index": 0,
"delta": { "content": "Hi" },
"logprobs": null,
"finish_reason": null
}]
}
// More chunks as they come in...
{"id":"chatcmpl-123","object":"chat.completion.chunk","created":1719848588,"model":"gpt-4o-mini","system_fingerprint":"fp_44709d6fcb","choices":[{"index":0,"delta":{"content":"there"},"logprobs":null,"finish_reason":null}]}
…
{"id":"chatcmpl-123","object":"chat.completion.chunk","created":1719848588,"model":"gpt-4o-mini","system_fingerprint":"fp_44709d6fcb","choices":[{"index":0,"delta":{},"logprobs":null,"finish_reason":"stop"}]}
```
</Col>
</Row>
</LanguageProvider>
---
</content>
</doc>
<doc>
<metadata>
<title>Pricing for Parser Primitive</title>
<url>https://langbase.com/docs/parser/platform/pricing/</url>
</metadata>
<content>
import { generateMetadata } from '@/lib/generate-metadata';
# Pricing for Parser Primitive
Requests to the Parser primitive are counted as **Runs** against your subscription plan.
| Plan | Runs | Overage |
|------------|----------|----------|
| Hobby | 500 | - |
| Enterprise | [Contact Us][contact-us] | [Contact Us][contact-us] |
<Note title="What is a run?">
Each run is an API request which can have at the max 1,000 Tokens in it which is equivalent to almost 750 words (an article). If your API request has, for instance, 1500 tokens in it, it will count as 2 runs.
</Note>
### Free Users
- **Limit**: 500 runs per month.
- **Overage**: No overage.
### Enterprise Users
There are no hard limits for Enterprise. Billing is based solely on the number of runs during each billing period.
If you have questions about your usage or need assistance, please don't hesitate to [contact us](mailto:support@langbase.com).
---
[contact-us]: mailto:support@langbase.com
</content>
</doc>
<doc>
<metadata>
<title>Limits for Parser Primitive</title>
<url>https://langbase.com/docs/parser/platform/limits/</url>
</metadata>
<content>
import { generateMetadata } from '@/lib/generate-metadata';
# Limits for Parser Primitive
The following Rate and Usage Limits apply for the Parser primitive:
### Rate Limits
Parser primitive requests follow our standard rate limits. See the [Rate Limits](/api-reference/limits/rate-limits) page for more details.
### Usage Limits
Requests to the Parser primitive are counted as **Runs** against your subscription plan. See the [Run Usage Limits](/api-reference/limits/usage-limits) page for more details.
</content>
</doc>
<doc>
<metadata>
<title>Guide: Set up Chatbot in Next.js</title>
<url>https://langbase.com/docs/guides/setup-docs-agent/setup-chatbot/</url>
</metadata>
<content>
import { generateMetadata } from '@/lib/generate-metadata';
# Guide: Set up Chatbot in Next.js
### A step-by-step guide to set up a chatbot in Next.js using Langbase components.
---
## Prerequisites: Create an AI memory & AI agent
This guide assumes you have already created an AI memory and agent on Langbase. If you haven't, please follow these guides:
- [Create an AI memory](/guides/setup-docs-agent/create-memory)
- [Create an AI agent](/guides/setup-docs-agent/create-agent)
---
In this guide, we will learn how to setup a chatbot in Next.js using Langbase components. We will:
- **Langbase SDK and components**: Install Langbase SDK and components to your Next.js app.
- **API route**: Create an API route to call our AI agent.
- **Chatbot component**: Set up chatbot component in your Next.js app.
Let's get started.
---
## Step #1: Install Langbase SDK and components
We will use Langbase SDK to call our [AI agent](/guides/setup-docs-agent/create-agent) and Langbase components to import a pre-built chatbot component.
```bash
npm i langbase @langbase/components
```
## Step #2: Create an API route
Go ahead and create an API route in your Next.js app where we will request our AI agent pipe using the Langbase SDK. Add the following code in the API route:
```ts
import { NextRequest } from 'next/server';
import { Langbase } from 'langbase';
const langbase = new Langbase({
apiKey: process.env.LANGBASE_API_KEY! // Your Langbase API key
});
export async function POST(req: NextRequest) {
const options = await req.json();
const { stream, threadId } = await langbase.pipes.run({
...options,
name: 'REPLACE-WITH-PIPE-NAME' // e.g. 'ask-xyz-docs'
});
return new Response(stream, {
status: 200,
headers: {
'lb-thread-id': threadId ?? ''
}
});
}
```
Please replace `REPLACE-WITH-PIPE-NAME` with the name of your AI agent pipe.
## Step #3: Set up chatbot component
First, we need to import the CSS for the chatbot component. Add the following code in your root layout:
```tsx
import '@langbase/components/styles'
```
Now, go ahead and import the chatbot component in the root page of your Next.js app:
```tsx
'use client';
import { Chatbot } from '@langbase/components';
<Chatbot
apiRoute="<REPLACE-WITH-API-ROUTE>" // e.g. '/api/chat'
suggestions={[
{
title: `Explain how to get started in easy steps`,
prompt: `Explain how to get started in easy steps?`
},
{
title: `How do I create an API key?`,
prompt: `How do I create an API key?`
},
{
title: `What are the supported providers?`,
prompt: `What are the supported providers?`
},
{
title: `How do I reset my password?`,
prompt: `How do I reset my password?`
}
]}
/>
```
You can read complete API reference of `Chatbot` component [here](https://www.npmjs.com/package/@langbase/components).
## Step #4: Test your chatbot
Go ahead and run the Next.js app. You should see the chatbot on the bottom right corner of your app.
<Img
caption="Docs agent"
light="https://raw.githubusercontent.com/LangbaseInc/docs-images/refs/heads/main/chat-with-docs/cwd-demo-light.jpg"
dark="https://raw.githubusercontent.com/LangbaseInc/docs-images/refs/heads/main/chat-with-docs/cwd-demo-dark.jpg"
/>
You can now ask questions from your documentation and the chatbot will answer them using the Docs agent.
<Img
caption="Ask questions from your docs"
light="https://raw.githubusercontent.com/LangbaseInc/docs-images/refs/heads/main/chat-with-docs/cwd-response-light.jpg"
dark="https://raw.githubusercontent.com/LangbaseInc/docs-images/refs/heads/main/chat-with-docs/cwd-response-dark.jpg"
/>
## Wrap up
That's all you need to add AI to your docs using Langbase. To summarize, we:
1. [Created an AI Memory](/guides/setup-docs-agent/create-memory)
2. [Created an AI Agent](/guides/setup-docs-agent/create-agent)
3. [Set up a Chatbot](/guides/setup-docs-agent/setup-chatbot)
The chatbot is now ready to answer questions from your documentation.
---
## Next Steps
- Build something cool with Langbase.
- Join our [Discord community](https://langbase.com/discord) for feedback, requests, and support.
---
</content>
</doc>
<doc>
<metadata>
<title>Guide: Create an AI Memory</title>
<url>https://langbase.com/docs/guides/setup-docs-agent/create-memory/</url>
</metadata>
<content>
import { generateMetadata } from '@/lib/generate-metadata';
# Guide: Create an AI Memory
### A step-by-step guide to create an AI memory using BaseAI.
---
In this guide, we will learn how to create an AI memory using BaseAI and sync it with a Git repository. We will:
- **Initialize BaseAI**: Setup BaseAI in your Next.js app.
- **Create an AI Memory**: Generate an AI memory to track changes in your Git repository.
- **Add doc metadata**: Add metadata to each document in the memory.
- **Add Langbase API Key**: Add your Langbase API key to the `.env` file.
- **Deploy the Memory**: Deploy the AI memory to Langbase.
BaseAI makes it easy to build an AI memory within a code repo and deploy it to **Langbase serverless** AI cloud.
---
## Prerequisites: Generate Langbase API Key
We will use BaseAI and Langbase SDK in this guide. To work with both, you need to generate an API key. Visit [User/Org API key documentation](/api-reference/api-keys) page to learn more.
<Spoiler title="Get your Langbase API key: User or Org">
You can generate API keys from the [Langbase Studio](https://studio.langbase.com) by following these steps:
1. Switch to your user or org account.
2. From the sidebar, click on the `API keys`.
3. From here, you can create a new API key or manage existing ones.
For more details, follow the [Langbase API keys](/api-reference/api-keys) documentation.
</Spoiler>
---
## Why use BaseAI?
It's useful if your company **docs** are present inside a **Git repository**. An AI memory created via BaseAI can track changes in your repository. This is useful:
1. When you **add** a new doc to repository, you can deploy and only add the new doc to Langbase.
2. When you **update** a doc in repository, you can sync the **changes** to Langbase.
3. When you **delete** a doc in repository, you can deploy and **delete** the doc from Langbase.
*Let's now create an AI memory using BaseAI.*
---
## Step #1: Initialize BaseAI
Run the following command to initialize BaseAI in your Next.js app:
```bash
npx baseai@latest init
```
## Step #2: Create an AI Memory
Run the following command to create an AI memory:
```bash
npx baseai@latest memory
```
It will also prompt you if you want to create a memory from the current project git repository. Select yes. This will create a memory at `baseai/memory/company-docs.ts` and track files in the current git repository. It prints the path of the memory created.
Open that file in your editor, it looks like this:
```ts {{title: 'baseai/memory/company-docs.ts'}}
import {MemoryI} from '@baseai/core';
const docsMemory = (): MemoryI => ({
name: 'company-docs',
description: "All docs as memory for an AI agent pipe",
git: {
enabled: true,
include: ['**/*'],
gitignore: true,
deployedAt: '',
embeddedAt: ''
}
});
export default docsMemory;
```
Below is the explanation of the fields in the memory file:
- **enabled**: Set to true to enable tracking of git repository.
- **include**: Follows glob pattern to include files from the git repository. You can change the pattern to include only specific files or directories where docs are present.
- **gitignore**: Set to true to include .gitignore file in the memory.
- **deployedAt**: Set to the commit hash where the memory was last deployed. It is used to track the changes in the memory for deployment. Try to avoid changing this field manually.
- **embeddedAt**: Set to the commit hash where the memory was last embedded. It is used to track the changes in the memory for local development. Try to avoid changing this field manually.
## Step #3: Add doc metadata
Go ahead and add metadata to each document, like its hosting URL. The AI agent will then **include the URL** in its response when referencing the document.
Let's edit the memory file to add a `documents` field. Set `meta` to a function that returns an object with string key/value pairs, like a `url` for each document.
```ts {{title: 'baseai/memory/company-docs.ts'}}
import {MemoryI} from '@baseai/core';
const docsMemory = (): MemoryI => ({
name: 'company-docs',
description: 'All docs as memory for an AI agent pipe',
git: {
enabled: true,
include: ['**/*'],
gitignore: true,
deployedAt: '',
embeddedAt: '',
},
documents: {
meta: doc => {
// generate a URL for each document
const url = `https://example.com/${doc.path}`;
return {
url,
name: doc.name,
};
},
},
});
export default docsMemory;
```
The `doc` is of type `MemoryDocumentI`.
```ts {{title: 'MemoryDocumentI Object'}}
interface MemoryDocumentI {
name: string;
size: string;
content: string;
blob: Blob;
path: string;
}
```
Following are the properties of the `MemoryDocumentI` object:
- **name**: name of the document.
- **size**: size of the document.
- **content**: content of the document.
- **blob**: blob of the document.
- **path**: path of the document.
If your docs have path based URL structure, you can use the `path` field to generate the URL.
## Step #4: Commit changes
Once you are done, commit all the changes in the repository. This is important because the BaseAI will use the latest commit hash as a reference to track changes in the memory.
```bash
git add .
git commit -m "Setup AI BaseAI memory"
```
## Step #5: Add Langbase API Key
Add your Langbase API key to the `.env` file:
```bash
LANGBASE_API_KEY=YOUR_API_KEY
```
## Step #6: Deploy the Memory
Run the following command to deploy the memory to serverless cloud:
```bash
npx baseai@latest deploy -m <MEMORY-NAME>
```
Go ahead and replace `<MEMORY-NAME>` with the name of the memory. In this case, it is `company-docs`. This will deploy the AI memory and all its documents to Langbase.
Next time you make changes to the git repository, you can run the deploy command again to update the memory. Make sure to commit all the changes before deploying.
<Note title="Git sync">
BaseAI memory git sync helps you to **track** changes in the git repository and deploy only the changes to Langbase instead of the whole memory every time. This is useful to **avoid** embedding generation for every document in the memory.
</Note>
---
## Next steps
Now that you have created an AI memory, you can proceed to create an AI agent pipe using Langbase.
<CTAButtons
primary={{ href: '/guides/setup-docs-agent/create-agent', text: '⌘ Create AI agent pipe', sub:'(using Langbase)' }}
secondary={{ href: '/memory', text: 'Learn about AI memory' }}
/>
---
</content>
</doc>
<doc>
<metadata>
<title>Guide: Create an AI agent</title>
<url>https://langbase.com/docs/guides/setup-docs-agent/create-agent/</url>
</metadata>
<content>
import { generateMetadata } from '@/lib/generate-metadata';
# Guide: Create an AI agent
### A step-by-step guide to create an AI agent pipe on Langbase.
---
## Prerequisites: Create an AI memory
This guide assumes you have already created an AI memory on Langbase using BaseAI. If you haven't, you can follow the [Create an AI memory](/guides/setup-docs-agent/create-memory) guide to create one.
---
In this guide, we will learn how to create an AI agent pipe on Langbase that will use OpenAI `gpt-4o-mini` to answer user queries from documentation. We will:
- **Create an AI Agent**: Generate an AI agent pipe to interact with the AI memory.
- **System prompts**: Update system prompts to the AI agent.
- **Attach AI Memory**: Attach the AI memory to the AI agent.
- **RAG prompts**: Update RAG prompts to the AI agent.
Let's get started.
---
## Step #1: Create an AI Agent pipe
To get started, you'll need to [create a free personal account on Langbase.com](https://langbase.com/signup) and verify your email address.
0. When logged in, you can always go to [pipe.new](https://pipe.new) to create a new Pipe.
1. Give your Pipe a name. Let's call it `ask-xyz-docs`.
2. Click on the `[Create Pipe]` button. And just like that, you have created an AI agent pipe.
<Note title="Start with a fork">
You can also fork the [`ask-xyz-docs`](https://langbase.com/examples/ask-xyz-docs) pipe by clicking on the `Fork` button. Forking a pipe is a great way
to start experimenting with it.
</Note>
<Img
caption="Create an AI agent pipe"
light="https://raw.githubusercontent.com/LangbaseInc/docs-images/refs/heads/main/chat-with-docs/ask-xyz-docs-light.jpg"
dark="https://raw.githubusercontent.com/LangbaseInc/docs-images/refs/heads/main/chat-with-docs/ask-xyz-docs-dark.jpg"
/>
## Step #2: System prompts
A system prompt sets the context, instructions, and guidelines for a language model before it receives questions or tasks. It helps define the model's role, personality, tone, and other details to improve its responses to user input.
Let's add the following system prompts to the AI agent pipe:
```
You are an AI chatbot designed to assist users with questions about {{company}}, which helps {{tagline}}. Your responses should be based strictly on the provided {{company}} documentation. Provide accurate and concise answers, avoiding any information not included in the documentation. If you are unsure of an answer, inform the user and suggest consulting the official {{company}} documentation or support for further assistance.
Always ensure your answers are clear, accurate, and derived directly from the {{company}} documentation. Include any relevant extra detail.
```
## Step #3: Attach AI Memory
Inside Pipe IDE, click on Memory. It will open a sidebar where you can select and attach the AI memory you created [earlier](/guides/setup-docs-agent/create-memory). This will allow the AI agent to access the AI memory and provide accurate responses to user queries based on the documentation.
<Img
caption="Attach AI memory to the AI agent pipe"
light="https://raw.githubusercontent.com/LangbaseInc/docs-images/refs/heads/main/chat-with-docs/ask-xyz-docs-attach-memory-light.jpg"
dark="https://raw.githubusercontent.com/LangbaseInc/docs-images/refs/heads/main/chat-with-docs/ask-xyz-docs-attach-memory-dark.jpg"
/>
## Step #4: RAG prompt
A RAG prompt is a prompt that helps the AI model understand the context of the conversation. It is a prompt that is used to guide the AI model to generate responses that are relevant, accurate, and grammatically correct.
Let's update the RAG prompt of the AI agent pipe:
```
Below is the CONTEXT to answer the questions. ONLY use information from the CONTEXT to respond. The CONTEXT consists of multiple information chunks, each attributed to a specific source.
When providing responses:
1. Cite the source for each piece of information in brackets, e.g., [1].
2. At the end of your response, list all referenced sources in a new section, formatted as follows:
**Sources:**
[1] [Document Name](url)
[2] Document Name
- Use the filename given in the CONTEXT and remove prefixes like `src-app` or file extensions (e.g., `.mdx`).
- Capitalize words and insert spaces, e.g., `src-app-user-guide.mdx` becomes `User Guide`.
- If a URL is present, hyperlink the document name.
- If no URL is provided, list only the document name.
If the answer is not found in the CONTEXT, state:
"I could not find the answer in the provided CONTEXT. Please provide more details or ask a more specific question."
```
Feel free to **customize** the RAG prompt to suit your use case.
---
## Next steps
Lastly, we will now setup the chatbot using Langbase components.
<CTAButtons
primary={{ href: '/guides/setup-docs-agent/setup-chatbot', text: '⌘ Setup chatbot', sub:'(using Langbase components)' }}
secondary={{ href: '/pipe', text: 'Learn about AI pipes' }}
/>
---
</content>
</doc>
<doc>
<metadata>
<title>Page</title>
<url>https://langbase.com/docs/examples/workflow/email-processing/</url>
</metadata>
<content>
import { generateMetadata } from '@/lib/generate-metadata';
import { LanguageProvider, SimpleLanguageToggle, LanguageContent } from '@/components/LanguageToggle';
## Create an email processing workflow
This example demonstrates how to create a workflow that analyzes an email and generates a response when needed.
<LanguageProvider defaultLanguage='typescript'>
<RunExample api="/docs/api/workflow"
title="Email Processing Workflow Example"
output={`{
"summary": "The sender is interested in learning more about the product for their
company of about 50 people. They are requesting pricing information, particularly for
the enterprise tier, and would like to schedule a demo next week.",
"sentiment": "positive",
"responseNeeded": true,
"response": "Subject: RE: Pricing Information and Demo Request
Hello Jamie,
Thank you for your interest in our platform! I'd be happy to provide you with
information about our pricing tiers and arrange a demo for your team.
For an enterprise-level organization with 50 users, our Enterprise tier would indeed
be the most suitable option. This package includes:
- Unlimited access for all team members
- Advanced security features
- Dedicated account manager
- Custom integrations
- Priority support
I've attached our complete pricing brochure with detailed information about all our
plans. For your team size, we offer custom pricing with volume discounts.
Regarding the demo, I'd be delighted to schedule one for next week. Could you please
let me know what days and times work best for you and your team? Our demos typically
take about 45 minutes and include time for questions.
If you have any specific features or use cases you'd like us to focus on during the demo,
please let me know so I can tailor the presentation to your needs.
Looking forward to hearing from you and showing you how our platform can benefit your
growing company.
Best regards,
[Your Name]
[Your Position]
[Contact Information]"
}
`}
explanation={`
This code illustrates how to build an email processing workflow. Here's a step-by-step guide:
1. Workflow Setup:
- Create a multi-step email processing workflow
2. Email Analysis:
- Summarizes the content of the email
- Analyzes the sentiment of the message
- Determines if a response is needed
3. Response Generation:
- If a response is needed, generates an appropriate reply
- Tailors the response based on the email content and sentiment
`}
>
<LanguageContent language="typescript">
<CodeGroup title="Email Processing Workflow Example" exampleTitle="Email Processing Workflow Example">
```ts {{ title: 'index.ts' }}
import "dotenv/config";
import { Langbase } from "langbase";
async function processEmail({ emailContent }: { emailContent: string }) {
// Initialize Langbase
const langbase = new Langbase({
apiKey: process.env.LANGBASE_API_KEY!,
});
// Create a new workflow
const workflow = langbase.workflow();
const { step } = workflow;
try {
// Steps 1 & 2: Run summary and sentiment analysis in parallel
const [summary, sentiment] = await Promise.all([
step({
id: "summarize_email", // The id for the step
run: async () => {
const { output } = await langbase.agent.run({
model: "openai:gpt-4.1-mini",
instructions: `Create a concise summary of this email. Focus on the main points,
requests, and any action items mentioned.`,
apiKey: process.env.LLM_API_KEY!,
input: [{ role: "user", content: emailContent }],
stream: false,
});
return output;
},
}),
step({
id: "analyze_sentiment",
run: async () => {
const { output } = await langbase.agent.run({
model: "openai:gpt-4.1-mini",
instructions: `Analyze the sentiment of this email. Provide a brief analysis
that includes the overall tone (positive, neutral, or negative) and any notable
emotional elements.`,
apiKey: process.env.LLM_API_KEY!,
input: [{ role: "user", content: emailContent }],
stream: false,
});
return output;
},
}),
]);
// Step 3: Determine if response is needed (using the results from previous steps)
const responseNeeded = await step({
id: "determine_response_needed",
run: async () => {
const { output } = await langbase.agent.run({
model: "openai:gpt-4.1-mini",
instructions: `Based on the email summary and sentiment analysis, determine if a
response is needed. Answer with 'yes' if a response is required, or 'no' if no
response is needed. Consider factors like: Does the email contain a question?
Is there an explicit request? Is it urgent?`,
apiKey: process.env.LLM_API_KEY!,
input: [
{
role: "user",
content: `Email: ${emailContent}\n\nSummary: ${summary}\n\nSentiment: ${sentiment}\n\nDoes this email
require a response?`,
},
],
stream: false,
});
return output.toLowerCase().includes("yes");
},
});
// Step 4: Generate response if needed
let response = null;
if (responseNeeded) {
response = await step({
id: "generate_response",
run: async () => {
const { output } = await langbase.agent.run({
model: "openai:gpt-4.1-mini",
instructions: `Generate a professional email response. Address all questions
and requests from the original email. Be helpful, clear, and maintain a
professional tone that matches the original email sentiment.`,
apiKey: process.env.LLM_API_KEY!,
input: [
{
role: "user",
content: `Original Email: ${emailContent}\n\nSummary: ${summary}\n\n
Sentiment Analysis: ${sentiment}\n\nPlease draft a response email.`,
},
],
stream: false,
});
return output;
},
});
}
// Return the results
return {
summary,
sentiment,
responseNeeded,
response,
};
} catch (error) {
console.error("Email processing workflow failed:", error);
throw error;
} finally {
// Optional: Use to enable tracing
await workflow.end();
}
}
async function main() {
const sampleEmail = `
Subject: Pricing Information and Demo Request
Hello,
I came across your platform and I'm interested in learning more about your product
for our growing company. Could you please send me some information on your pricing tiers?
We're particularly interested in the enterprise tier as we now have a team of about
50 people who would need access. Would it be possible to schedule a demo sometime next week?
Thanks in advance for your help!
Best regards,
Jamie
`;
const results = await processEmail({ emailContent: sampleEmail });
console.log(JSON.stringify(results, null, 2));
}
main();
```
</CodeGroup>
</LanguageContent>
<LanguageContent language="python">
<CodeGroup title="Email Processing Workflow Example" exampleTitle="Email Processing Workflow Example">
```python {{ title: 'index.py' }}
import os
import json
from langbase import Langbase, Workflow
async def process_email(email_data: dict):
# Initialize Langbase
langbase = Langbase(api_key=os.getenv('LANGBASE_API_KEY'))
# Create a new workflow
workflow = Workflow()
try:
# Steps 1 & 2: Run summary and sentiment analysis in parallel
async def summarize_email():
response = await langbase.agent.run(
model='openai:gpt-4.1-mini',
instructions='Create a concise summary of this email. Focus on the main points, requests, and any action items mentioned.',
api_key=os.getenv('LLM_API_KEY'),
input=[{'role': 'user', 'content': email_data['emailContent']}],
stream=False
)
return response.output
async def analyze_sentiment():
response = await langbase.agent.run(
model='openai:gpt-4.1-mini',
instructions='Analyze the sentiment of this email. Provide a brief analysis that includes the overall tone (positive, neutral, or negative) and any notable emotional elements.',
api_key=os.getenv('LLM_API_KEY'),
input=[{'role': 'user', 'content': email_data['emailContent']}],
stream=False
)
return response.output
summary, sentiment = await asyncio.gather(
workflow.step(id='summarize_email', run=summarize_email),
workflow.step(id='analyze_sentiment', run=analyze_sentiment)
)
# Step 3: Determine if response is needed
async def determine_response_needed():
response = await langbase.agent.run(
model='openai:gpt-4.1-mini',
instructions='Based on the email summary and sentiment analysis, determine if a response is needed. Answer with \'yes\' if a response is required, or \'no\' if no response is needed. Consider factors like: Does the email contain a question? Is there an explicit request? Is it urgent?',
api_key=os.getenv('LLM_API_KEY'),
input=[{
'role': 'user',
'content': f'Email: {email_data["emailContent"]}\n\nSummary: {summary}\n\nSentiment: {sentiment}\n\nDoes this email require a response?'
}],
stream=False
)
return 'yes' in response.output.lower()
response_needed = await workflow.step(
id='determine_response_needed',
run=determine_response_needed
)
# Step 4: Generate response if needed
response = None
if response_needed:
async def generate_response():
response = await langbase.agent.run(
model='openai:gpt-4.1-mini',
instructions='Generate a professional email response. Address all questions and requests from the original email. Be helpful, clear, and maintain a professional tone that matches the original email sentiment.',
api_key=os.getenv('LLM_API_KEY'),
input=[{
'role': 'user',
'content': f'Original Email: {email_data["emailContent"]}\n\nSummary: {summary}\n\nSentiment Analysis: {sentiment}\n\nPlease draft a response email.'
}],
stream=False
)
return response.output
response = await workflow.step(
id='generate_response',
run=generate_response
)
# Return the results
return {
'summary': summary,
'sentiment': sentiment,
'responseNeeded': response_needed,
'response': response
}
except Exception as error:
print(f'Email processing workflow failed: {error}')
raise error
async def main():
sample_email = """
Subject: Pricing Information and Demo Request
Hello,
I came across your platform and I'm interested in learning more about your product
for our growing company. Could you please send me some information on your pricing tiers?
We're particularly interested in the enterprise tier as we now have a team of about
50 people who would need access. Would it be possible to schedule a demo sometime next week?
Thanks in advance for your help!
Best regards,
Jamie
"""
results = await process_email({'emailContent': sample_email})
print(json.dumps(results, indent=2))
if __name__ == '__main__':
main()
```
</CodeGroup>
</LanguageContent>
</RunExample>
</LanguageProvider>
</content>
</doc>
<doc>
<metadata>
<title>Summarization workflow</title>
<url>https://langbase.com/docs/examples/workflow/summarization/</url>
</metadata>
<content>
import { generateMetadata } from '@/lib/generate-metadata';
import { LanguageProvider, SimpleLanguageToggle, LanguageContent } from '@/components/LanguageToggle';
# Summarization workflow
This example demonstrates how to create a workflow that summarizes text input with parallel processing.
<LanguageProvider defaultLanguage='typescript'>
<RunExample api="/docs/api/workflow"
title="Summarization workflow example"
output={`{
"response": "Langbase is a serverless AI platform for building and deploying AI agents with memory capabilities. It provides three main products: AI Pipes (serverless agents with tools), AI Memory (serverless RAG), and AI Studio (developer platform). The platform boasts being 30-50x less expensive than competitors while supporting 250+ LLM models."
}`}
explanation={`
This code illustrates how to create a basic workflow with retries. Here's a step-by-step guide:
1. Workflow Setup:
- Creates a new Workflow instance with debug mode enabled
2. Single Agent Step:
- Configures a single workflow step with retry capability
- Uses a simple backoff strategy to handle potential failures
3. Error Handling:
- Implements proper error catching and logging
`}
>
<LanguageContent language="typescript">
<CodeGroup title="Simple Agent Workflow Example" exampleTitle="Simple Agent Workflow Example">
```ts {{ title: 'index.ts' }}
import 'dotenv/config';
import { Langbase } from 'langbase';
async function processText({ input }: { input: string }) {
// Initialize Langbase
const langbase = new Langbase({
apiKey: process.env.LANGBASE_API_KEY!,
});
// Create workflow with debug mode
const workflow = langbase.workflow({
debug: true
});
const { step } = workflow;
try {
// Define a single step with retries
const response = await step({
id: 'process_text',
retries: {
limit: 2,
delay: 1000,
backoff: 'exponential'
},
run: async () => {
const { output } = await langbase.agent.run({
model: 'openai:gpt-4o',
instructions: `Summarize the following text in a
single paragraph. Be concise but capture the key information.`,
apiKey: process.env.LLM_API_KEY!,
input: [{ role: 'user', content: input }],
stream: false
});
return output;
}
});
// Return the result
return {
response
};
} catch (error) {
console.error('Workflow step failed:', error);
throw error;
} finally {
// Optional: Use to enable tracing
await workflow.end();
}
}
async function main() {
const sampleText = `
Langbase is the most powerful serverless AI platform for building AI agents with memory.
Build, deploy, and scale AI agents with tools and memory (RAG). Simple AI primitives
with a world-class developer experience without using any frameworks.
Compared to complex AI frameworks, Langbase is serverless and the first composable
AI platform. Build AI agents without any bloated frameworks. You write the logic,
we handle the logistics.
Langbase offers AI Pipes (serverless agents with tools), AI Memory (serverless RAG),
and AI Studio (developer platform). The platform is 30-50x less expensive than
competitors, supports 250+ LLM models, and enables collaboration among team members.
`;
const results = await processText({ input: sampleText });
console.log(JSON.stringify(results, null, 2));
}
main();
```
</CodeGroup>
</LanguageContent>
<LanguageContent language="python">
<CodeGroup title="Simple Agent Workflow Example" exampleTitle="Simple Agent Workflow Example">
```python {{ title: 'index.py' }}
import asyncio
import json
import os
from dotenv import load_dotenv
from langbase import Langbase, Workflow
load_dotenv()
async def process_text(input_text: str):
"""
Process text input by summarizing it with retry logic and debug mode.
Args:
input_text: The text to be summarized
Returns:
Dictionary containing the response
"""
# Check for required environment variables
langbase_api_key = os.environ.get("LANGBASE_API_KEY")
llm_api_key = os.environ.get("LLM_API_KEY")
if not langbase_api_key:
print("❌ Missing LANGBASE_API_KEY in environment variables.")
print("Please set: LANGBASE_API_KEY='your_langbase_api_key' in .env file")
exit(1)
if not llm_api_key:
print("❌ Missing LLM_API_KEY in environment variables.")
print("Please set: LLM_API_KEY='your_llm_api_key' in .env file")
exit(1)
# Initialize Langbase
langbase = Langbase(api_key=langbase_api_key)
# Create workflow with debug mode
workflow = Workflow(debug=True)
try:
# Define a single step with retries
async def process_text_step():
response = langbase.agent.run(
model="openai:gpt-4o",
instructions="""Summarize the following text in a
single paragraph. Be concise but capture the key information.""",
api_key=llm_api_key,
input=[{"role": "user", "content": input_text}],
stream=False,
)
return response.get("output")
response = await workflow.step(
{
"id": "process_text",
"retries": {"limit": 2, "delay": 1000, "backoff": "exponential"},
"run": process_text_step,
}
)
# Return the result
return {"response": response}
except Exception as error:
print(f"Workflow step failed: {error}")
raise error
async def main():
sample_text = """
Langbase is the most powerful serverless AI platform for building AI agents with memory.
Build, deploy, and scale AI agents with tools and memory (RAG). Simple AI primitives
with a world-class developer experience without using any frameworks.
Compared to complex AI frameworks, Langbase is serverless and the first composable
AI platform. Build AI agents without any bloated frameworks. You write the logic,
we handle the logistics.
Langbase offers AI Pipes (serverless agents with tools), AI Memory (serverless RAG),
and AI Studio (developer platform). The platform is 30-50x less expensive than
competitors, supports 250+ LLM models, and enables collaboration among team members.
"""
results = await process_text(sample_text)
print(json.dumps(results, indent=2, ensure_ascii=False))
if __name__ == "__main__":
asyncio.run(main())
```
</CodeGroup>
</LanguageContent>
</RunExample>
</LanguageProvider>
</content>
</doc>
<doc>
<metadata>
<title>Website Crawler</title>
<url>https://langbase.com/docs/examples/tools/website-crawler/</url>
</metadata>
<content>
import { generateMetadata } from '@/lib/generate-metadata';
import { LanguageProvider, SimpleLanguageToggle, LanguageContent } from '@/components/LanguageToggle';
# Website Crawler
This example demonstrates how to crawl a website using Langbase website crawler tool.
<LanguageProvider defaultLanguage='typescript'>
<RunExample api="/docs/api/pipe"
title="Website Crawler Example"
output={`[{
"url": "https://langbase.com/about",
"content": "⌘Langbase –Serverless AI Agents platform# # ⌘Langbase –Serverless AI Agents platformThe most powerful serverless platform for building AI agents. Build. Deploy. Scale."
},
{
"url": "https://langbase.com",
"content": "⌘Langbase –Serverless AI Agents platform# # ⌘Langbase –Serverless AI Agents platformThe most powerful serverless platform for building AI agents. Build. Deploy. Scale."
}]`}
explanation={`
This code demonstrates how to crawl a website using the Langbase website crawler tool. Here's a step-by-step guide:
1. URL Specification:
- Specifies the URLs of the websites to be crawled
2. Service and Parameters:
- Defines the crawling service (spider.cloud) and parameters such as the maximum number of pages to crawl
- Specifies the spider.cloud API key for authentication
3. Execution:
- The crawl request is executed using the Langbase SDK
- Outputs the crawl results to display the relevant information
`}
>
<LanguageContent language="typescript">
<CodeGroup title="Website Crawler Example" exampleTitle="Website Crawler Example">
```ts {{ title: 'index.ts' }}
import 'dotenv/config';
import {Langbase} from 'langbase';
const langbase = new Langbase({
apiKey: process.env.LANGBASE_API_KEY!,
});
/**
* Crawls specified URLs using spider.cloud service.
*
* Get your API key from the following link and set it in .env file.
*
* @link https://spider.cloud/docs/quickstart
*/
async function main() {
const results = await langbase.tools.crawl({
url: ['https://langbase.com', 'https://langbase.com/about'],
maxPages: 1,
apiKey: process.env.CRAWL_KEY,
});
console.log(results);
}
main();
```
</CodeGroup>
</LanguageContent>
<LanguageContent language="python">
<CodeGroup title="Website Crawler Example" exampleTitle="Website Crawler Example">
```python {{ title: 'index.py' }}
import os
from langbase import Langbase
from dotenv import load_dotenv
load_dotenv()
langbase = Langbase(api_key=os.getenv('LANGBASE_API_KEY'))
def main():
"""
Crawls specified URLs using spider.cloud service.
Get your API key from the following link and set it in .env file.
@link https://docs.firecrawl.dev/introduction#api-key
"""
results = langbase.tools.crawl(
url=['https://langbase.com', 'https://langbase.com/about'],
max_pages=1,
api_key=os.getenv('CRAWL_KEY')
)
print(results)
if __name__ == '__main__':
main()
```
</CodeGroup>
</LanguageContent>
</RunExample>
</LanguageProvider>
</content>
</doc>
<doc>
<metadata>
<title>Web Search</title>
<url>https://langbase.com/docs/examples/tools/web-search/</url>
</metadata>
<content>
import { generateMetadata } from '@/lib/generate-metadata';
import { LanguageProvider, SimpleLanguageToggle, LanguageContent } from '@/components/LanguageToggle';
# Web Search
This example demonstrates how to perform a web search using Langbase web search tool with Exa.
<LanguageProvider defaultLanguage='typescript'>
<RunExample api="/docs/api/pipe"
title="Web Search Example"
output={`[{
"url": "https://langbase.com/",
"content": "The most powerful serverless platform for building AI products. Build agentic AI agents with pipes, memory and tools."
},
{
"url": "https://langbase.com/about",
"content": "The most powerful serverless platform for building AI products. Build agentic AI agents with pipes, memory and tools."
}]`}
explanation={`
This code demonstrates how to perform a web search using the Langbase web search tool with Exa. Here's a step-by-step guide:
1. Search Query:
- Specifies the search query to be used for the web search
2. Service and Parameters:
- Defines the web search service (Exa) and parameters such as total results and domains to be searched
- Specifies the Exa API key for authentication
3. Execution:
- The web search request is executed using the Langbase SDK
- Outputs the search results to display the relevant information
`}
>
<LanguageContent language="typescript">
<CodeGroup title="Web Search Example" exampleTitle="Web Search Example">
```ts {{ title: 'index.ts' }}
import 'dotenv/config';
import {Langbase} from 'langbase';
// Learn more about Langbase SDK keys: https://langbase.com/docs/api-reference/api-keys
const langbase = new Langbase({
apiKey: process.env.LANGBASE_API_KEY!,
});
async function main() {
const results = await langbase.tools.webSearch({
service: 'exa',
totalResults: 2,
query: 'What is Langbase?',
domains: ['https://langbase.com'],
apiKey: process.env.EXA_API_KEY!, // Find Exa key: https://dashboard.exa.ai/api-keys
});
console.log(results);
}
main();
```
</CodeGroup>
</LanguageContent>
<LanguageContent language="python">
<CodeGroup title="Web Search Example" exampleTitle="Web Search Example">
```python {{ title: 'index.py' }}
import json
import os
from dotenv import load_dotenv
from langbase import Langbase
load_dotenv()
def main():
langbase_api_key = os.getenv("LANGBASE_API_KEY")
search_api_key = os.getenv("EXA_API_KEY")
langbase = Langbase(api_key=langbase_api_key)
search_results = langbase.tools.web_search(
query="What is Langbase?",
service="exa",
total_results=2,
domains=["https://langbase.com"],
api_key=search_api_key,
)
print(json.dumps(search_results, indent=2))
if __name__ == "__main__":
main()
```
</CodeGroup>
</LanguageContent>
</RunExample>
</LanguageProvider>
</content>
</doc>
<doc>
<metadata>
<title>List Messages in a Thread</title>
<url>https://langbase.com/docs/examples/threads/list-messages/</url>
</metadata>
<content>
import { generateMetadata } from '@/lib/generate-metadata';
import { LanguageProvider, SimpleLanguageToggle, LanguageContent } from '@/components/LanguageToggle';
# List Messages in a Thread
This example demonstrates how to list messages in a thread.
<LanguageProvider defaultLanguage='typescript'>
<RunExample api="/docs/api/pipe"
title="List Messages in a Thread Example"
output={`[{
id: "1f8807d9-7393-42a9-9f5c-63e02b192bce",
created_at: 1743212407,
thread_id: "1e3af16c-bfe6-4129-8a2a-4c098fc6933d",
content: "hello",
role: "user",
tool_call_id: null,
tool_calls: [],
name: null,
attachments: [],
metadata: {
size: "small",
}
},
{
id: "c7912edd-6441-4c45-a268-7ebf4cebdd38",
created_at: 1743212462,
thread_id: "1e3af16c-bfe6-4129-8a2a-4c098fc6933d",
content: "Nice to meet you",
role: "assistant",
tool_call_id: null,
tool_calls: [],
name: null,
attachments: [],
metadata: {
size: "small",
}
}]`}
explanation={`
This code demonstrates how to list messages in a thread in Langbase. Here's a step-by-step guide:
1. Thread Identification:
- Specifies the thread ID of the thread whose messages are to be listed
2. Execution:
- The list request is executed using the Langbase SDK
- Outputs the response to display the messages in the thread
`}
>
<LanguageContent language="typescript">
<CodeGroup title="List Messages in a Thread Example" exampleTitle="List Messages in a Thread Example">
```ts {{ title: 'index.ts' }}
import 'dotenv/config';
import {Langbase} from 'langbase';
const langbase = new Langbase({
apiKey: process.env.LANGBASE_API_KEY!,
});
async function main() {
const response = await langbase.threads.messages.list({
threadId: 'REPLACE_WITH_THREAD_ID',
});
console.log(response);
}
main();
```
</CodeGroup>
</LanguageContent>
<LanguageContent language="python">
<CodeGroup title="List Messages in a Thread Example" exampleTitle="List Messages in a Thread Example">
```python {{ title: 'index.py' }}
import json
import os
from dotenv import load_dotenv
from langbase import Langbase
def main():
load_dotenv()
# Get API key from environment variable
langbase_api_key = os.getenv("LANGBASE_API_KEY")
# Initialize the client
langbase = Langbase(api_key=langbase_api_key)
# List all threads
try:
threads = langbase.threads.messages.list(thread_id="thread_123")
print(json.dumps(threads, indent=2))
except Exception as e:
print(f"Error listing threads: {e}")
if __name__ == "__main__":
main()
```
</CodeGroup>
</LanguageContent>
</RunExample>
</LanguageProvider>
</content>
</doc>
<doc>
<metadata>
<title>Get a Thread</title>
<url>https://langbase.com/docs/examples/threads/get/</url>
</metadata>
<content>
import { generateMetadata } from '@/lib/generate-metadata';
import { LanguageProvider, SimpleLanguageToggle, LanguageContent } from '@/components/LanguageToggle';
# Get a Thread
This example demonstrates how to get a thread.
---
<LanguageProvider defaultLanguage='typescript'>
<RunExample api="/docs/api/pipe"
title="Get a Thread Example"
output={`{
id: "1e3af16c-bfe6-4129-8a2a-4c098fc6933d",
object: "thread",
created_at: 1743212406,
metadata: {
company: "langbase",
}
}`}
explanation={`
This code demonstrates how to retrieve a thread in Langbase. Here's a step-by-step guide:
1. Thread Identification:
- Specifies the thread ID of the thread to be retrieved
2. Execution:
- The get request is executed using the Langbase SDK
- Outputs the response to confirm successful retrieval
`}
>
<LanguageContent language="typescript">
<CodeGroup title="Get a Thread Example" exampleTitle="Get a Thread Example">
```ts {{ title: 'index.ts' }}
import 'dotenv/config';
import {Langbase} from 'langbase';
const langbase = new Langbase({
apiKey: process.env.LANGBASE_API_KEY!,
});
async function main() {
const response = await langbase.threads.get({
threadId: 'REPLACE_WITH_THREAD_ID',
});
console.log(response);
}
main();
```
</CodeGroup>
</LanguageContent>
<LanguageContent language="python">
<CodeGroup title="Get a Thread Example" exampleTitle="Get a Thread Example">
```python {{ title: 'index.py' }}
import json
import os
from dotenv import load_dotenv
from langbase import Langbase
def main():
load_dotenv()
# Get API key from environment variable
langbase_api_key = os.getenv("LANGBASE_API_KEY")
# Initialize the client
langbase = Langbase(api_key=langbase_api_key)
# Thread ID to retrieve
thread_id = "thread_123" # Replace with your thread ID
# Get the specific thread
try:
thread = langbase.threads.get(thread_id=thread_id)
print(json.dumps(thread, indent=2))
except Exception as e:
print(f"Error getting thread: {e}")
if __name__ == "__main__":
main()
```
</CodeGroup>
</LanguageContent>
</RunExample>
</LanguageProvider>
---
</content>
</doc>
<doc>
<metadata>
<title>Delete a Thread</title>
<url>https://langbase.com/docs/examples/threads/delete/</url>
</metadata>
<content>
import { generateMetadata } from '@/lib/generate-metadata';
import { LanguageProvider, SimpleLanguageToggle, LanguageContent } from '@/components/LanguageToggle';
# Delete a Thread
This example demonstrates how to delete a thread.
---
<LanguageProvider defaultLanguage='typescript'>
<RunExample api="/docs/api/pipe"
title="Delete a Thread Example"
output={`{ "success": true }`}
explanation={`
This code demonstrates how to delete a thread in Langbase. Here's a step-by-step guide:
1. Thread Identification:
- Specifies the thread ID of the thread to be deleted
2. Execution:
- The delete request is executed using the Langbase SDK
- Outputs the response to confirm successful deletion
`}
>
<LanguageContent language="typescript">
<CodeGroup title="Delete a Thread Example" exampleTitle="Delete a Thread Example">
```ts {{ title: 'index.ts' }}
import 'dotenv/config';
import {Langbase} from 'langbase';
const langbase = new Langbase({
apiKey: process.env.LANGBASE_API_KEY!,
});
async function main() {
const response = await langbase.threads.delete({
threadId: 'REPLACE_WITH_THREAD_ID',
});
console.log(response);
}
main();
```
</CodeGroup>
</LanguageContent>
<LanguageContent language="python">
<CodeGroup title="Delete a Thread Example" exampleTitle="Delete a Thread Example">
```python {{ title: 'index.py' }}
import os
from dotenv import load_dotenv
from langbase import Langbase
def main():
load_dotenv()
# Get API key from environment variable
langbase_api_key = os.getenv("LANGBASE_API_KEY")
# Initialize the client
langbase = Langbase(api_key=langbase_api_key)
# Thread ID to delete
thread_id = "thread_123" # Replace with your actual thread ID
# Delete the thread
try:
response = langbase.threads.delete(thread_id=thread_id)
if response.get("success", False):
print(f"Successfully deleted thread {thread_id}")
else:
print(f"Failed to delete thread {thread_id}")
if "message" in response:
print(f"Message: {response['message']}")
except Exception as e:
print(f"Error deleting thread: {e}")
if __name__ == "__main__":
main()
```
</CodeGroup>
</LanguageContent>
</RunExample>
</LanguageProvider>
---
</content>
</doc>
<doc>
<metadata>
<title>Update a Thread</title>
<url>https://langbase.com/docs/examples/threads/update-message/</url>
</metadata>
<content>
import { generateMetadata } from '@/lib/generate-metadata';
import { LanguageProvider, SimpleLanguageToggle, LanguageContent } from '@/components/LanguageToggle';
# Update a Thread
This example demonstrates how to update a thread.
<LanguageProvider defaultLanguage='typescript'>
<RunExample api="/docs/api/pipe"
title="Update a Thread Example"
output={`{
id: "1e3af16c-bfe6-4129-8a2a-4c098fc6933d",
object: "thread",
metadata: {
company: "langbase",
about: "Langbase is the most powerful serverless platform for building AI agents with memory.",
}
}`}
explanation={`
This code demonstrates how to update a thread in Langbase. Here's a step-by-step guide:
1. Thread Identification:
- Specifies the thread ID of the thread to be updated
2. Metadata and Message Update:
- Updates the thread's metadata and messages with new information
3. Execution:
- The update request is executed using the Langbase SDK
- Outputs the response to confirm successful update
`}
>
<LanguageContent language="typescript">
<CodeGroup title="Update a Thread Example" exampleTitle="Update a Thread Example">
```ts {{ title: 'index.ts' }}
import 'dotenv/config';
import {Langbase} from 'langbase';
const langbase = new Langbase({
apiKey: process.env.LANGBASE_API_KEY!,
});
async function main() {
const response = await langbase.threads.update({
threadId: 'REPLACE_WITH_THREAD_ID',
metadata: {
company: 'langbase',
about: 'Langbase is the most powerful serverless platform for building AI agents with memory.',
},
});
console.log(response);
}
main();
```
</CodeGroup>
</LanguageContent>
<LanguageContent language="python">
<CodeGroup title="Update Message in a Thread Example" exampleTitle="Update Message in a Thread Example">
```python {{ title: 'index.py' }}
import json
import os
from dotenv import load_dotenv
from langbase import Langbase
def main():
load_dotenv()
# Get API key from environment variable
langbase_api_key = os.getenv("LANGBASE_API_KEY")
# Initialize the client
langbase = Langbase(api_key=langbase_api_key)
# Thread ID to update
thread_id = "thread_123" # Replace with your actual thread ID
# New metadata to set for the thread
updated_metadata = {
"company": "langbase",
"about": "Langbase is the most powerful serverless platform for building AI agents with memory.",
}
# Update the thread metadata
try:
updated_thread = langbase.threads.update(
thread_id=thread_id,
metadata=updated_metadata,
)
print(json.dumps(updated_thread, indent=2))
except Exception as e:
print(f"Error updating thread: {e}")
if __name__ == "__main__":
main()
```
</CodeGroup>
</LanguageContent>
</RunExample>
</LanguageProvider>
</content>
</doc>
<doc>
<metadata>
<title>Create a Thread</title>
<url>https://langbase.com/docs/examples/threads/create/</url>
</metadata>
<content>
import { generateMetadata } from '@/lib/generate-metadata';
import { LanguageProvider, SimpleLanguageToggle, LanguageContent } from '@/components/LanguageToggle';
# Create a Thread
This example demonstrates how to create a thread.
---
<LanguageProvider defaultLanguage='typescript'>
<RunExample api="/docs/api/pipe"
title="Create a Thread Example"
output={`{
id: "1e3af16c-bfe6-4129-8a2a-4c098fc6933d",
object: "thread",
metadata: {
company: "langbase",
}
}`}
explanation={`
This code demonstrates how to create a new thread in Langbase. Here's a step-by-step guide:
1. Thread Creation:
- Provides the initial messages and metadata to create a new thread
2. Message Initialization:
- Initializes the thread with a message from the user role with specific content and metadata
3. Execution:
- The create request is executed using the Langbase SDK
- Outputs the response to confirm successful thread creation
`}
>
<LanguageContent language="typescript">
<CodeGroup title="Create a Thread Example" exampleTitle="Create a Thread Example">
```ts {{ title: 'index.ts' }}
import 'dotenv/config';
import {Langbase} from 'langbase';
const langbase = new Langbase({
apiKey: process.env.LANGBASE_API_KEY!,
});
async function main() {
const response = await langbase.threads.create({
messages: [{role: 'user', content: 'hello', metadata: {size: 'small'}}],
metadata: {company: 'langbase'},
});
console.log(response);
}
main();
```
</CodeGroup>
</LanguageContent>
<LanguageContent language="python">
<CodeGroup title="Create a Thread Example" exampleTitle="Create a Thread Example">
```python {{ title: 'index.py' }}
import json
import os
from dotenv import load_dotenv
from langbase import Langbase
def main():
load_dotenv()
# Get API key from environment variable
langbase_api_key = os.getenv("LANGBASE_API_KEY")
# Initialize the client
langbase = Langbase(api_key=langbase_api_key)
# Create a thread with metadata and initial messages
try:
thread = langbase.threads.create(
metadata={"company": "langbase"},
messages=[{"role": "user", "content": "Hello, how are you?"}],
)
print(json.dumps(thread, indent=2))
except Exception as e:
print(f"Error creating thread: {e}")
if __name__ == "__main__":
main()
```
</CodeGroup>
</LanguageContent>
</RunExample>
</LanguageProvider>
---
</content>
</doc>
<doc>
<metadata>
<title>Append to a Thread</title>
<url>https://langbase.com/docs/examples/threads/append/</url>
</metadata>
<content>
import { generateMetadata } from '@/lib/generate-metadata';
import { LanguageProvider, SimpleLanguageToggle, LanguageContent } from '@/components/LanguageToggle';
# Append to a Thread
This example demonstrates how to append to a thread.
---
<LanguageProvider defaultLanguage='typescript'>
<RunExample api="/docs/api/pipe"
title="Append to a Thread Example"
output={`[{
id: "1f8807d9-7393-42a9-9f5c-63e02b192bce",
created_at: 1743212407,
thread_id: "1e3af16c-bfe6-4129-8a2a-4c098fc6933d",
content: "hello",
role: "user",
tool_call_id: null,
tool_calls: [],
name: null,
attachments: [],
metadata: {
size: "small"
}
},
{
id: "c7912edd-6441-4c45-a268-7ebf4cebdd38",
created_at: 1743212462,
thread_id: "1e3af16c-bfe6-4129-8a2a-4c098fc6933d",
content: "Nice to meet you",
role: "assistant",
tool_call_id: null,
tool_calls: [],
name: null,
attachments: [],
metadata: {
size: "small"
}
}]`}
explanation={`
This code demonstrates how to append messages to an existing thread in Langbase. Here's a step-by-step guide:
1. Thread Identification:
- Specifies the thread ID to which messages will be appended
2. Message Appending:
- Appends a new message from the assistant role with specific content and metadata
3. Execution:
- The append request is executed using the Langbase SDK
- Outputs the response to confirm successful appending
`}
>
<LanguageContent language="typescript">
<CodeGroup title="Append to a Thread Example" exampleTitle="Append to a Thread Example">
```ts {{ title: 'index.ts' }}
import 'dotenv/config';
import {Langbase} from 'langbase';
const langbase = new Langbase({
apiKey: process.env.LANGBASE_API_KEY!,
});
async function main() {
const response = await langbase.threads.append({
threadId: 'REPLACE_WITH_THREAD_ID',
messages: [
{
role: 'assistant',
content: 'Nice to meet you',
metadata: {size: 'small'},
},
],
});
console.log(response);
}
main();
```
</CodeGroup>
</LanguageContent>
<LanguageContent language="python">
<CodeGroup title="Append to a Thread Example" exampleTitle="Append to a Thread Example">
```python {{ title: 'index.py' }}
import os
from dotenv import load_dotenv
from langbase import Langbase
def main():
load_dotenv()
# Get API key from environment variable
langbase_api_key = os.getenv("LANGBASE_API_KEY")
# Initialize the client
langbase = Langbase(api_key=langbase_api_key)
# Thread ID to append messages to
thread_id = "thread_123" # Replace with your actual thread ID
# Messages to append
messages = [
{"role": "assistant", "content": "Nice to meet you"},
]
# Append messages to the thread
try:
response = langbase.threads.append(thread_id=thread_id, messages=messages)
print(f"Successfully appended {len(response)} messages to thread '{thread_id}'")
# Print the appended messages
for i, message in enumerate(response, 1):
print(f"\nMessage {i}:")
print(f"Role: {message.get('role')}")
print(f"Content: {message.get('content')}")
print(f"Created at: {message.get('created_at')}")
except Exception as e:
print(f"Error appending messages to thread: {e}")
if __name__ == "__main__":
main()
```
</CodeGroup>
</LanguageContent>
</RunExample>
</LanguageProvider>
---
</content>
</doc>
<doc>
<metadata>
<title>Update Pipe Agent</title>
<url>https://langbase.com/docs/examples/pipe-agent/update-pipe-agent/</url>
</metadata>
<content>
import { generateMetadata } from '@/lib/generate-metadata';
import { LanguageProvider, SimpleLanguageToggle, LanguageContent } from '@/components/LanguageToggle';
# Update Pipe Agent
This example demonstrates how to update a pipe agent.
<LanguageProvider defaultLanguage='typescript'>
<RunExample api="/docs/api/pipe"
isJson
title="Update Pipe Agent Example"
output={`{
name: "summary",
description: "This is a pipe updated with the SDK",
status: "public",
type: "generate"
}`}
explanation={`
This guide is tailored to demonstrate how to effectively update a pipe agent.
1. Update the Pipe Agent:
- Call langbase.pipes.update() with the 'summary-agent' and the updated details.
- The agent will be updated with the new details.
2. Complete the Execution:
- The Langbase SDK handles the update.
- Display the updated details to observe the agent's updated configuration.
`}
>
<LanguageContent language="typescript">
<CodeGroup title="Update Pipe Agent Example" exampleTitle="Update Pipe Agent Example">
```ts {{ title: 'index.ts' }}
import 'dotenv/config';
import {Langbase} from 'langbase';
const langbase = new Langbase({
apiKey: process.env.LANGBASE_API_KEY!,
});
function main() {
const response = await langbase.pipes.update({
name: 'summary-agent',
description: 'This is a pipe updated with the SDK',
model: 'google:gemini-1.5-flash-8b-latest',
});
console.log(response);
}
main();
```
</CodeGroup>
</LanguageContent>
<LanguageContent language="python">
<CodeGroup title="Update Pipe Agent Example" exampleTitle="Update Pipe Agent Example">
```python {{ title: 'index.py' }}
import os
from langbase import Langbase
from dotenv import load_dotenv
load_dotenv()
langbase = Langbase(api_key=os.getenv('LANGBASE_API_KEY'))
def main():
response = langbase.pipes.update(
name='summary-agent',
description='This is a pipe updated with the SDK',
model='google:gemini-1.5-flash-8b-latest'
)
print(response)
if __name__ == '__main__':
main()
```
</CodeGroup>
</LanguageContent>
</RunExample>
</LanguageProvider>
</content>
</doc>
<doc>
<metadata>
<title>Run Pipe Agent with Tools</title>
<url>https://langbase.com/docs/examples/pipe-agent/run-pipe-agent-tools/</url>
</metadata>
<content>
import { generateMetadata } from '@/lib/generate-metadata';
import { LanguageProvider, SimpleLanguageToggle, LanguageContent } from '@/components/LanguageToggle';
# Run Pipe Agent with Tools
This example demonstrates how to run a pipe agent with tools and use function calling capabilities with a Langbase pipe agent.
<LanguageProvider defaultLanguage='typescript'>
<RunExample api="/docs/api/pipe"
title="Run Pipe Agent with Tools Example"
output={`
{
"completion": "The current weather in San Francisco, CA is sunny with a temperature of 75°F (approximately 24°C).",
"id": "chatcmpl-BKD5Qavj0jtPl7UCd59EGc2acaYyT",
"object": "chat.completion",
"model": "gpt-4o-mini-2024-07-18",
"choices": [
{
"index": 0,
"message": {
"role": "assistant",
"content": "The current weather in San Francisco, CA is sunny with a temperature of 75°F (approximately 24°C).",
"refusal": null,
"annotations": []
},
"logprobs": null,
"finish_reason": "stop"
}
],
"usage": {
"prompt_tokens": 121,
"completion_tokens": 25,
"total_tokens": 146,
"prompt_tokens_details": {
"cached_tokens": 0,
"audio_tokens": 0
},
"completion_tokens_details": {
"reasoning_tokens": 0,
"audio_tokens": 0,
"accepted_prediction_tokens": 0,
"rejected_prediction_tokens": 0
}
},
"service_tier": "default",
"system_fingerprint": "fp_b376dfbbd4",
"threadId": "8e7dab74-8711-4913-ab22-a36ddcf44c53"
}`}
explanation={`
This code illustrates how to run a Pipe agent with tools. Here's a step-by-step guide:
1. Create Summary Agent:
- Calls the langbase.pipes.create() to create a 'summary-agent'.
2. Run the Pipe Agent:
- Call langbase.pipes.run() with the 'summary-agent' and tools.
- The agent uses a tool called weatherToolSchema to fetch weather information.
3. Fetch the tool calls:
- Use getToolsFromRun() to extract any tool calls from the agent response.
- Store them in the toolCalls variable.
4. Process Tool Calls:
- Check if tool calls exist by verifying toolCalls.length > 0.
- For each tool call, extract the function name and parameters, run the function, and get the result.
- Create a response message with the tool result.
5. Call the Pipe agent with Updated Messages:
- If there were tool calls, run the agent pipe again using the same threadId.
- Include the tool results as new messages so the agent can use them in its final response.
5. Execution:
- If tools were used, print the agent's final response using the updated context.
- If not, print the direct response from the original run.
`}
>
<LanguageContent language="typescript">
<CodeGroup title="Run Pipe Agent with Tools Example" exampleTitle="Run Pipe Agent with Tools Example">
```ts {{ title: 'index.ts' }}
import 'dotenv/config';
import { Langbase, Message, Tools, getToolsFromRun } from 'langbase';
const langbase = new Langbase({
apiKey: process.env.LANGBASE_API_KEY!,
});
async function main() {
await createSummaryAgent();
const response = await langbase.pipes.run({
stream: false,
name: 'summary-agent',
messages: [
{
role: 'user',
content: "What's the weather in SF?",
},
],
tools: [weatherToolSchema],
});
const toolCalls = await getToolsFromRun(response);
const hasToolCalls = toolCalls.length > 0;
const threadId = response.threadId;
if (hasToolCalls) {
// Process each tool call
const toolResultPromises = toolCalls.map(async (toolCall): Promise<Message> => {
const toolName = toolCall.function.name;
const toolParameters = JSON.parse(toolCall.function.arguments);
const toolFunction = tools[toolName as keyof typeof tools];
// Call the tool function with the parameters
const toolResponse = await toolFunction(toolParameters);
// Return the tool result
return {
role: 'tool',
name: toolName,
content: toolResponse,
tool_call_id: toolCall.id,
};
});
// Wait for all tool calls to complete
const toolResults = await Promise.all(toolResultPromises);
// Call the agent pipe again with the updated messages
const finalResponse = await langbase.pipes.run({
threadId,
stream: false,
name: 'summary-agent',
messages: toolResults,
tools: [weatherToolSchema],
});
console.log(JSON.stringify(finalResponse, null, 2));
} else {
console.log('Direct response (no tools called):');
console.log(JSON.stringify(response, null, 2));
}
}
// Mock implementation of the weather function
async function getCurrentWeather(args: { location: string }) {
return 'Sunny, 75°F';
}
// Weather tool schema
const weatherToolSchema: Tools = {
type: 'function',
function: {
name: 'getCurrentWeather',
description: 'Get the current weather of a given location',
parameters: {
type: 'object',
required: ['location'],
properties: {
unit: {
enum: ['celsius', 'fahrenheit'],
type: 'string',
},
location: {
type: 'string',
description: 'The city and state, e.g. San Francisco, CA',
},
},
},
},
};
// Object to hold all tools
const tools = {
getCurrentWeather
};
/**
* Creates a summary agent pipe if it doesn't already exist.
*
* This function checks if a pipe with the name 'summary-agent' exists in the system.
* If the pipe doesn't exist, it creates a new private pipe with a system message
* configuring it as a helpful assistant.
*
* @async
* @returns {Promise<void>} A promise that resolves when the operation is complete
* @throws {Error} Logs any errors encountered during the creation process
*/
async function createSummaryAgent() {
try {
await langbase.pipes.create({
name: 'summary-agent',
upsert: true,
status: 'private',
messages: [
{
role: 'system',
content: 'You are a helpful assistant that help users summarize text.',
},
],
});
} catch (error) {
console.error('Error creating summary agent:', error);
}
}
main();
```
</CodeGroup>
</LanguageContent>
<LanguageContent language="python">
<CodeGroup title="Run Pipe Agent Tools Example" exampleTitle="Run Pipe Agent Tools Example">
```python {{ title: 'index.py' }}
import os
import json
from langbase import Langbase
from dotenv import load_dotenv
load_dotenv()
langbase = Langbase(api_key=os.getenv('LANGBASE_API_KEY'))
def main():
create_summary_agent()
response = langbase.pipes.run(
stream=False,
name='summary-agent',
messages=[
{
"role": "user",
"content": "What's the weather in SF?"
},
],
tools=[weather_tool_schema],
)
tool_calls = get_tools_from_run(response)
has_tool_calls = len(tool_calls) > 0
thread_id = response.get('threadId')
if has_tool_calls:
# Get the assistant message with tool calls from the response
assistant_message = response['choices'][0]['message']
# Process each tool call
tool_results = []
for tool_call in tool_calls:
tool_name = tool_call['function']['name']
tool_parameters = json.loads(tool_call['function']['arguments'])
tool_function = tools[tool_name]
# Call the tool function with the parameters
tool_response = tool_function(tool_parameters)
# Create the tool result message
tool_result = {
"role": "tool",
"name": tool_name,
"content": tool_response,
"tool_call_id": tool_call['id'],
}
tool_results.append(tool_result)
# Prepare messages: original user message + assistant message with tool calls + tool results
messages_with_tools = [
{
"role": "user",
"content": "What's the weather in SF?"
},
assistant_message, # This contains the tool_calls
*tool_results # Add all tool results
]
# Call the agent pipe again with the complete conversation history
final_response = langbase.pipes.run(
thread_id=thread_id,
stream=False,
name='summary-agent',
messages=messages_with_tools,
tools=[weather_tool_schema],
)
print(json.dumps(final_response, indent=2))
else:
print('Direct response (no tools called):')
print(json.dumps(response, indent=2))
# Mock implementation of the weather function
def get_current_weather(args):
return 'Sunny, 75°F'
# Weather tool schema
weather_tool_schema = {
"type": "function",
"function": {
"name": "getCurrentWeather",
"description": "Get the current weather of a given location",
"parameters": {
"type": "object",
"required": ["location"],
"properties": {
"unit": {
"enum": ["celsius", "fahrenheit"],
"type": "string",
},
"location": {
"type": "string",
"description": "The city and state, e.g. San Francisco, CA",
},
},
},
},
}
# Dictionary to hold all tools
tools = {
"getCurrentWeather": get_current_weather
}
def get_tools_from_run(response):
"""Extract tool calls from the response."""
# This function mimics the getToolsFromRun utility from the JS SDK
# You may need to adjust this based on the actual response structure
if 'choices' in response and len(response['choices']) > 0:
message = response['choices'][0].get('message', {})
return message.get('tool_calls', [])
return []
def create_summary_agent():
"""
Creates a summary agent pipe if it doesn't already exist.
This function checks if a pipe with the name 'summary-agent' exists in the system.
If the pipe doesn't exist, it creates a new private pipe with a system message
configuring it as a helpful assistant.
"""
try:
langbase.pipes.create(
stream=False,
name='summary-agent',
upsert=True,
status='private',
messages=[
{
"role": "system",
"content": "You are a helpful assistant that help users summarize text.",
},
],
)
except Exception as error:
print(f'Error creating summary agent: {error}')
if __name__ == "__main__":
main()
```
</CodeGroup>
</LanguageContent>
</RunExample>
</LanguageProvider>
</content>
</doc>
<doc>
<metadata>
<title>Run Pipe Agent with Structured Output</title>
<url>https://langbase.com/docs/examples/pipe-agent/run-pipe-agent-structured-output/</url>
</metadata>
<content>
import { generateMetadata } from '@/lib/generate-metadata';
import { LanguageProvider, SimpleLanguageToggle, LanguageContent } from '@/components/LanguageToggle';
# Run Pipe Agent with Structured Output
This example demonstrates how to run a pipe agent with structured output.
<LanguageProvider defaultLanguage='typescript'>
<RunExample api="/docs/api/pipe"
title="Run Pipe Agent with Structured Output Example"
output={`
{
steps: [
{
explanation: "We start with the given equation.",
output: "8x + 22 = -23",
},
{
explanation: "Subtract 22 from both sides to isolate the term with x.",
output: "8x + 22 - 22 = -23 - 22",
},
{
explanation: "After simplifying, we have 8x equal to -45.",
output: "8x = -45",
},
{
explanation: "Divide both sides by 8 to solve for x.",
output: "8x/8 = -45/8",
},
{
explanation: "Simplifying the division gives x equal to -45/8.",
output: "x = -45/8",
}
],
final_answer: "x = -45/8",
}`}
explanation={`
This code illustrates how to run a Pipe agent with structured output. Here's a step-by-step guide:
1. Create the Pipe Agent:
- Calls the langbase.pipes.create() to create a 'math-tutor-agent'.
- Set the model to 'openai:gpt-4o'
- Set the response_format to the JSON schema.
- Set the system message to 'You are a helpful math tutor. Guide the user through the solution step by step.'
2. Run the Pipe Agent:
- Call langbase.pipes.run() with the 'math-tutor-agent'
- The pipe agent will return a structured output.
3. Parse the response:
- Parse the response using Zod and validate the response is correct.
- Display the response to the user.
4. Execution:
- The Langbase SDK executes the agent and returns a structured output.
`}>
<LanguageContent language="typescript">
<CodeGroup title="Run Pipe Agent with Structured Output Example" exampleTitle="Run Pipe Agent with Structured Output Example">
```ts {{ title: 'index.ts' }}
import 'dotenv/config';
import {Langbase} from 'langbase';
import {z} from 'zod';
import {zodToJsonSchema} from 'zod-to-json-schema';
const langbase = new Langbase({
apiKey: process.env.LANGBASE_API_KEY!,
});
// Define the Strucutred Output JSON schema with Zod
const MathReasoningSchema = z.object({
steps: z.array(
z.object({
explanation: z.string(),
output: z.string(),
}),
),
final_answer: z.string(),
});
const jsonSchema = zodToJsonSchema(MathReasoningSchema, {target: 'openAi'});
async function main() {
if (!process.env.LANGBASE_API_KEY) {
console.error('❌ Missing LANGBASE_API_KEY in environment variables.');
process.exit(1);
}
await createMathTutorPipe();
await runMathTutorPipe('How can I solve 8x + 22 = -23?');
}
/**
* Create the pipe agent with the name 'math-tutor-agent'
* Set the model to 'openai:gpt-4o'
* Set the response_format to the JSON schema.
* Set the system message to 'You are a helpful math tutor. Guide the user through the solution step by step.'
*/
async function createMathTutorPipe() {
await langbase.pipes.create({
name: 'math-tutor-agent',
model: 'openai:gpt-4o',
upsert: true,
messages: [
{
role: 'system',
content: 'You are a helpful math tutor. Guide the user through the solution step by step.'
},
],
json: true,
response_format: {
type: 'json_schema',
json_schema: {
name: 'math_reasoning',
schema: jsonSchema,
},
},
});
}
/**
* Run the pipe agent with the name 'math-tutor-agent'
* Send the user message to the pipe agent.
* Parse the response using Zod and validate the response is correct.
* Display the response to the user.
**/
async function runMathTutorPipe(question: string) {
const {completion} = await langbase.pipes.run({
stream: false,
name: 'math-tutor-agent',
messages: [
{
role: 'user',
content: question
}
],
});
// Parse and validate the response using Zod
const solution = MathReasoningSchema.parse(JSON.parse(completion));
console.log('✅ Structured Output Response:', solution);
}
main();
```
</CodeGroup>
</LanguageContent>
<LanguageContent language="python">
<CodeGroup title="Run Pipe Agent with Structured Output Example" exampleTitle="Run Pipe Agent with Structured Output Example">
```python {{ title: 'index.py' }}
import pprint
import json
import os
from dotenv import load_dotenv
from langbase import Langbase
load_dotenv()
def main():
# Check for required environment variables
langbase_api_key = os.environ.get("LANGBASE_API_KEY")
llm_api_key = os.environ.get("LLM_API_KEY")
if not langbase_api_key:
print("❌ Missing LANGBASE_API_KEY in environment variables.")
exit(1)
if not llm_api_key:
print("❌ Missing LLM_API_KEY in environment variables.")
exit(1)
# Initialize Langbase client
langbase = Langbase(api_key=langbase_api_key)
# Define the structured output JSON schema
math_reasoning_schema = {
"type": "object",
"properties": {
"steps": {
"type": "array",
"items": {
"type": "object",
"properties": {
"explanation": {"type": "string"},
"output": {"type": "string"},
},
"required": ["explanation", "output"],
},
},
"final_answer": {"type": "string"},
},
"required": ["steps", "final_answer"],
}
math_agent = langbase.pipes.create(
name="math-agent",
model="openai:gpt-4o",
upsert=True,
description="You are a helpful math tutor. Guide the user through the solution step by step.",
json=True,
response_format={
"type": "json_schema",
"json_schema": {
"name": "math_reasoning",
"schema": math_reasoning_schema,
},
}
)
response = langbase.pipes.run(
name="math-agent",
messages=[{"role": "user", "content": "How can I solve 8x + 22 = -23?"}],
stream=False,
)
# Parse and display the structured response
print("✅ Structured Output Response:")
try:
# Get the completion from the response
completion = response.get("completion", "")
# Try to parse as JSON if it's a string
if isinstance(completion, str):
solution = json.loads(completion)
else:
solution = completion
print(json.dumps(solution, indent=2))
except json.JSONDecodeError as e:
print(f"❌ Error parsing JSON response: {e}")
print(f"Raw completion: {response.get('completion')}")
except Exception as e:
print(f"❌ Error processing response: {e}")
print(f"Full response: {response}")
if __name__ == "__main__":
main()
```
</CodeGroup>
</LanguageContent>
</RunExample>
</LanguageProvider>
</content>
</doc>
<doc>
<metadata>
<title>Run Pipe Agent Streaming</title>
<url>https://langbase.com/docs/examples/pipe-agent/run-pipe-agent-streaming/</url>
</metadata>
<content>
import { generateMetadata } from '@/lib/generate-metadata';
import { LanguageProvider, SimpleLanguageToggle, LanguageContent } from '@/components/LanguageToggle';
# Run Pipe Agent Streaming
This example demonstrates how to run a pipe agent with streaming response.
<LanguageProvider defaultLanguage='typescript'>
<RunExample api="/docs/api/pipe"
title="Run Pipe Agent Streaming Example"
output={`
Stream started.
An AI engineer is a professional who specializes in the development and implementation of artificial intelligence (AI) systems and applications. They work at the intersection of software engineering, data science, and machine learning, using their skills to create algorithms and models that enable machines to perform tasks that typically require human intelligence.
AI engineers typically have a background in computer science, data science, mathematics, or related fields, often holding at least a bachelor's degree, with many having master's degrees or PhDs in specialized areas.
Overall, AI engineers play a critical role in advancing the capabilities of AI technologies and applying them to real-world challenges across various industries.
Stream ended.
`}
explanation={`
This code illustrates how to run a pipe agent with streaming response. Here's a step-by-step guide:
1. Create Summary Agent:
- Calls the langbase.pipes.create() to create a 'summary-agent'.
2. Run the Pipe Agent:
- Use the langbase.pipes.run() with the 'summary-agent'.
- The agent processes the message and streams the response.
3. Handle the Stream:
- Convert the stream to a stream runner.
- Use event listeners to handle the stream events.
- Write the content to the console.
4. Complete the Execution:
- The Langbase SDK handles the stream.
- Display the streaming responses to observe the agent's output.
`}
>
<LanguageContent language="typescript">
<CodeGroup title="Run Pipe Agent Streaming Example" exampleTitle="Run Pipe Agent Streaming Example">
```ts {{ title: 'index.ts' }}
import 'dotenv/config';
import {getRunner, Langbase} from 'langbase';
const langbase = new Langbase({
apiKey: process.env.LANGBASE_API_KEY!,
});
async function main() {
await createSummaryAgent();
// Get readable stream
const {stream, threadId, rawResponse} = await langbase.pipes.run({
stream: true,
name: 'summary-agent',
rawResponse: true,
messages: [
{
role: 'user',
content: 'Who is an AI Engineer?'
}
]
});
// Convert the stream to a stream runner.
const runner = getRunner(stream);
// Method 1: Using event listeners
runner.on('connect', () => {
console.log('Stream started.\n');
});
runner.on('content', content => {
process.stdout.write(content);
});
runner.on('end', () => {
console.log('\nStream ended.');
});
runner.on('error', error => {
console.error('Error:', error);
});
}
/**
* Creates a summary agent pipe if it doesn't already exist.
*
* This function checks if a pipe with the name 'summary-agent' exists in the system.
* If the pipe doesn't exist, it creates a new private pipe with a system message
* configuring it as a helpful assistant.
*
* @async
* @returns {Promise<void>} A promise that resolves when the operation is complete
* @throws {Error} Logs any errors encountered during the creation process
*/
async function createSummaryAgent() {
try {
await langbase.pipes.create({
name: 'summary-agent',
upsert: true,
status: 'private',
messages: [
{
role: 'system',
content: 'You are a helpful assistant that help users summarize text.',
},
],
});
} catch (error) {
console.error('Error creating summary agent:', error);
}
}
main();
```
</CodeGroup>
</LanguageContent>
<LanguageContent language="python">
<CodeGroup title="Run Pipe Agent Streaming Example" exampleTitle="Run Pipe Agent Streaming Example">
```python {{ title: 'index.py' }}
import os
import asyncio
from langbase import Langbase, get_runner
from dotenv import load_dotenv
load_dotenv()
langbase = Langbase(api_key=os.getenv('LANGBASE_API_KEY'))
def main():
create_summary_agent()
# Get readable stream
response = langbase.pipes.run(
stream=True,
name='summary-agent',
raw_response=True,
messages=[
{
'role': 'user',
'content': 'Who is an AI Engineer?'
}
]
)
runner = get_runner(response)
print('Stream started \n\n')
# Use text_generator() to stream content
for content in runner.text_generator():
print(content, end="", flush=True)
print("\n\nStream ended!") # Add a newline after first response
def create_summary_agent():
"""
Creates a summary agent pipe if it doesn't already exist.
This function checks if a pipe with the name 'summary-agent' exists in the system.
If the pipe doesn't exist, it creates a new private pipe with a system message
configuring it as a helpful assistant.
Returns:
None
"""
try:
langbase.pipes.create(
name='summary-agent',
upsert=True,
status='private',
messages=[
{
'role': 'system',
'content': 'You are a helpful assistant that help users summarize text.',
}
]
)
except Exception as error:
print(f'Error creating summary agent: {error}')
if __name__ == '__main__':
main()
```
</CodeGroup>
</LanguageContent>
</RunExample>
</LanguageProvider>
</content>
</doc>
<doc>
<metadata>
<title>Run Pipe Agent Chat with Pipe API Keys</title>
<url>https://langbase.com/docs/examples/pipe-agent/run-pipe-agent-chat-pipe-api-keys/</url>
</metadata>
<content>
import { generateMetadata } from '@/lib/generate-metadata';
import { LanguageProvider, SimpleLanguageToggle, LanguageContent } from '@/components/LanguageToggle';
# Run Pipe Agent Chat with Pipe API Keys
This example demonstrates how to run a pipe agent chat with pipe API keys.
<LanguageProvider defaultLanguage='typescript'>
<RunExample api="/docs/api/pipe"
title="Run Pipe Agent Chat with Pipe API Keys Example"
output={`
Stream started.
An AI Engineer is a professional who develops and implements artificial intelligence models and systems. They work on creating algorithms, designing machine learning applications, and optimizing AI performance to solve real-world problems.
Stream ended.`}
explanation={`
This code illustrates how to run a pipe agent chat with Pipe API keys using Langbase. Follow these steps:
1. Create Summary Agent:
- Calls the langbase.pipes.create() to create a 'summary-agent'.
2. Set the Pipe API key:
- Sets the Pipe API key in the .env file.
- Passes the API key to langbase.pipes.run() via process.env.PIPE_API_KEY
3. Run the Pipe Agent with the User Message:
- Call langbase.pipes.run() using the pipe API key.
- The agent processes the user message and returns a response.
4. Handle the Stream:
- Convert the stream to a stream runner.
- Use event listeners to handle the stream events.
- Write the content to the console.
4. Complete the Execution:
- The Langbase SDK handles the stream.
`}
>
<LanguageContent language="typescript">
<CodeGroup title="Run Pipe Agent Chat with Pipe API Keys Example" exampleTitle="Run Pipe Agent Chat with Pipe API Keys Example">
```ts {{ title: 'index.ts' }}
import 'dotenv/config';
import {getRunner, Langbase} from 'langbase';
const langbase = new Langbase({
apiKey: process.env.LANGBASE_API_KEY!,
});
async function main() {
await createSummaryAgent();
// Get readable stream
if (!process.env.PIPE_API_KEY) {
console.log(`PIPE_API_KEY is not set in the environment variables get it from https://langbase.com/pipes`);
}
else {
const {stream, threadId, rawResponse} = await langbase.pipes.run({
stream: true,
rawResponse: true,
apiKey: process.env.PIPE_API_KEY!,
messages: [
{
role: 'user',
content: 'Who is an AI Engineer?'
}
]
});
// Convert the stream to a stream runner.
const runner = getRunner(stream);
// Method 1: Using event listeners
runner.on('connect', () => {
console.log('Stream started.\n');
});
runner.on('content', content => {
process.stdout.write(content);
});
runner.on('end', () => {
console.log('\nStream ended.');
});
runner.on('error', error => {
console.error('Error:', error);
});
}
}
/**
* Creates a summary agent pipe if it doesn't already exist.
*
* This function checks if a pipe with the name 'summary-agent' exists in the system.
* If the pipe doesn't exist, it creates a new private pipe with a system message
* configuring it as a helpful assistant.
*
* @async
* @returns {Promise<void>} A promise that resolves when the operation is complete
* @throws {Error} Logs any errors encountered during the creation process
*/
async function createSummaryAgent() {
try {
await langbase.pipes.create({
name: 'summary-agent',
upsert: true,
status: 'private',
messages: [
{
role: 'system',
content: 'You are a helpful assistant that help users summarize text.',
},
],
});
} catch (error) {
console.error('Error creating summary agent:', error);
}
}
main();
```
</CodeGroup>
</LanguageContent>
<LanguageContent language="python">
<CodeGroup title="Run Pipe Agent Chat with Pipe API Keys Example" exampleTitle="Run Pipe Agent Chat with Pipe API Keys Example">
```python {{ title: 'index.py' }}
import os
from langbase import Langbase, StreamEventType, get_typed_runner
from dotenv import load_dotenv
load_dotenv()
langbase = Langbase(api_key=os.getenv('LANGBASE_API_KEY'))
def main():
create_summary_agent()
# Use a pipe API key if available
pipe_api_key = os.getenv('PIPE_API_KEY')
if not pipe_api_key:
print('PIPE_API_KEY is not set in the environment variables get it from https://langbase.com/pipes')
return
response = langbase.pipes.run(
stream=True,
raw_response=True,
api_key=pipe_api_key,
messages=[
{
'role': 'user',
'content': 'Who is an AI Engineer?'
}
],
)
runner = get_typed_runner(response)
runner.on(StreamEventType.CONNECT, lambda e: print('Stream started.\n'))
runner.on(StreamEventType.CONTENT, lambda e: print(e['content'], end='', flush=True))
runner.on(StreamEventType.END, lambda e: print('\nStream ended.'))
runner.on(StreamEventType.ERROR, lambda e: print('Error:', e['message']))
runner.process()
def create_summary_agent():
"""
Creates a summary agent pipe if it doesn't already exist.
This function checks if a pipe with the name 'summary-agent' exists in the system.
If the pipe doesn't exist, it creates a new private pipe with a system message
configuring it as a helpful assistant.
Returns:
None
"""
try:
langbase.pipes.create(
name='summary-agent-ex',
upsert=True,
status='private',
messages=[
{
'role': 'system',
'content': 'You are a helpful assistant that help users summarize text.',
}
]
)
except Exception as error:
print(f'Error creating summary agent: {error}')
if __name__ == '__main__':
main()
```
</CodeGroup>
</LanguageContent>
</RunExample>
</LanguageProvider>
</content>
</doc>
<doc>
<metadata>
<title>Run Pipe Agent Streaming Chat</title>
<url>https://langbase.com/docs/examples/pipe-agent/run-pipe-agent-streaming-chat/</url>
</metadata>
<content>
import { generateMetadata } from '@/lib/generate-metadata';
import { LanguageProvider, SimpleLanguageToggle, LanguageContent } from '@/components/LanguageToggle';
# Run Pipe Agent Streaming Chat
This example demonstrates how to use streaming responses with a Langbase pipe agent while maintaining conversation context.
<LanguageProvider defaultLanguage='typescript'>
<RunExample api="/docs/api/pipe"
title="Run Pipe Agent Streaming Chat Example"
output={`
That sounds interesting! What does Langbase do? Are you looking for help with branding, marketing, or something else related to your company?
Your company's name is Langbase. If you need assistance with anything related to it, feel free to ask!
`}
explanation={`
This code illustrates how to run a Pipe agent streaming chat using Langbase. Follow these steps to maintain a seamless conversation:
1. Create Summary Agent:
- Calls the langbase.pipes.create() to create a 'summary-agent'.
2. Run the Pipe Agent with the User Message:
- Call langbase.pipes.run() with the 'summary-agent'.
- The agent will process the message and provide a streaming response.
3. Maintain Conversation Context using threadId:
- Execute the run method again, utilizing the threadId from the initial response to maintain the conversation's context.
- The agent will handle the follow-up message within the same thread.
3. Handle the Stream:
- Convert the stream to a stream runner.
- Use event listeners to handle the stream events.
- Write the content to the console.
4. Complete the Execution:
- The Langbase SDK handles the stream.
- Display the streaming responses to observe the agent's output.
`}
>
<LanguageContent language="typescript">
<CodeGroup title="Run Pipe Agent Streaming Chat Example" exampleTitle="Run Pipe Agent Streaming Chat Example">
```ts {{ title: 'index.ts' }}
import 'dotenv/config';
import {Langbase, getRunner} from 'langbase';
const langbase = new Langbase({
apiKey: process.env.LANGBASE_API_KEY!,
});
async function main() {
await createSummaryAgent();
// Message 1: Tell something to the LLM.
const response1 = await langbase.pipes.run({
stream: true,
name: 'summary-agent',
messages: [
{
role: 'user',
content: 'My company is called Langbase'
}
]
});
const runner = await getRunner(response1.stream);
for await (const chunk of runner) {
if (chunk.choices[0]?.delta?.content) {
process.stdout.write(chunk.choices[0].delta.content);
}
}
console.log("\n");
const threadId = response1.threadId;
// Message 2: Ask something about the first message.
// Continue the conversation in the same thread by sending
// `threadId` from the second message onwards.
const response2 = await langbase.pipes.run({
stream: true,
name: 'summary-agent',
threadId: threadId!,
messages: [
{
role: 'user',
content: 'Tell me the name of my company?'
}
]
});
const runner2 = getRunner(response2.stream);
runner2.on('content', content => {
process.stdout.write(content);
});
}
/**
* Creates a summary agent pipe if it doesn't already exist.
*
* This function checks if a pipe with the name 'summary-agent' exists in the system.
* If the pipe doesn't exist, it creates a new private pipe with a system message
* configuring it as a helpful assistant.
*
* @async
* @returns {Promise<void>} A promise that resolves when the operation is complete
* @throws {Error} Logs any errors encountered during the creation process
*/
async function createSummaryAgent() {
try {
await langbase.pipes.create({
name: 'summary-agent',
upsert: true,
status: 'private',
messages: [
{
role: 'system',
content: 'You are a helpful assistant that help users summarize text.',
},
],
});
} catch (error) {
console.error('Error creating summary agent:', error);
}
}
main();
```
</CodeGroup>
</LanguageContent>
<LanguageContent language="python">
<CodeGroup title="Run Pipe Agent Streaming Chat Example" exampleTitle="Run Pipe Agent Streaming Chat Example">
```python {{ title: 'index.py' }}
import os
from langbase import Langbase, get_runner
from dotenv import load_dotenv
load_dotenv()
langbase = Langbase(api_key=os.getenv('LANGBASE_API_KEY'))
def main():
create_summary_agent()
# Message 1: Tell something to the LLM.
response1 = langbase.pipes.run(
stream=True,
name='summary-agent-ex',
messages=[
{
'role': 'user',
'content': 'My company is called Langbase'
}
]
)
runner1 = get_runner(response1)
for content in runner1.text_generator():
print(content, end="", flush=True)
print("\n")
thread_id = response1.get('thread_id')
# Message 2: Ask something about the first message, continuing the same thread.
response2 = langbase.pipes.run(
stream=True,
name='summary-agent-ex',
thread_id=thread_id,
messages=[
{
'role': 'user',
'content': 'Tell me the name of my company?'
}
]
)
runner2 = get_runner(response2)
for content in runner2.text_generator():
print(content, end="", flush=True)
print("\n")
def create_summary_agent():
"""
Creates a summary agent pipe if it doesn't already exist.
This function checks if a pipe with the name 'summary-agent' exists in the system.
If the pipe doesn't exist, it creates a new private pipe with a system message
configuring it as a helpful assistant.
Returns:
None
"""
try:
langbase.pipes.create(
name='summary-agent-ex',
upsert=True,
status='private',
messages=[
{
'role': 'system',
'content': 'You are a helpful assistant that help users summarize text.',
}
]
)
except Exception as error:
print(f'Error creating summary agent: {error}')
if __name__ == '__main__':
main()
```
</CodeGroup>
</LanguageContent>
</RunExample>
</LanguageProvider>
</content>
</doc>
<doc>
<metadata>
<title>Run Pipe Agent with Tools and Streaming</title>
<url>https://langbase.com/docs/examples/pipe-agent/run-pipe-agent-tools-streaming/</url>
</metadata>
<content>
import { generateMetadata } from '@/lib/generate-metadata';
import { LanguageProvider, SimpleLanguageToggle, LanguageContent } from '@/components/LanguageToggle';
# Run Pipe Agent with Tools and Streaming
This example demonstrates how to run a pipe agent with tools to use function calling with streaming responses.
<LanguageProvider defaultLanguage='typescript'>
<RunExample api="/docs/api/pipe"
title="Run Pipe Agent with Tools and Streaming Example"
output={`The current weather in San Francisco, CA is sunny with a temperature of 75°F.`}
explanation={`
This code illustrates how to run a Pipe agent with tools to use function calling with streaming responses. Here's a step-by-step guide:
1. Create Summary Agent:
- Calls the langbase.pipes.create() to create a 'summary-agent'.
2. Run the Pipe Agent:
- Call langbase.pipes.run() with the 'summary-agent' pipe agent name.
- The agent uses a tool called weatherToolSchema to fetch weather information.
3. Fetch the tool calls:
- Use getToolsFromRunStream() to extract any tool calls from the agent response stream.
- Store them in the toolCalls variable.
4. Process Tool Calls:
- Check if tool calls exist by verifying toolCalls.length > 0.
- For each tool call, extract the function name and parameters, run the function, and get the result.
- Create a response message with the tool result.
5. Call the Agent Pipe with Updated Messages:
- If there were tool calls, run the agent pipe again using the same threadId.
- Include the tool results as new messages so the agent can use them in its final response.
5. Execution:
- If tools were used, print the agent's final response using the updated context.
- If not, print the direct response from the original run.
`}
>
<LanguageContent language="typescript">
<CodeGroup title="Run Pipe Agent with Tools and Streaming Example" exampleTitle="Run Pipe Agent with Tools and Streaming Example">
```ts {{ title: 'index.ts' }}
import 'dotenv/config';
import { Langbase, Message, Tools, getRunner, getToolsFromRunStream, getTextPart, ChunkStream } from 'langbase';
const langbase = new Langbase({
apiKey: process.env.LANGBASE_API_KEY!,
});
async function main() {
await createSummaryAgent();
// Call summary agent pipe
const response = await langbase.pipes.run({
stream: true,
name: 'summary-agent',
messages: [
{
role: 'user',
content: "What's the weather in SF ?"
},
],
tools: [weatherToolSchema],
});
const [streamForResponse, streamForToolCall] = response.stream.tee();
const toolCalls = await getToolsFromRunStream(streamForToolCall);
const hasToolCalls = toolCalls.length > 0;
const threadId = response.threadId
if (hasToolCalls) {
// Process each tool call
const toolResultPromises = toolCalls.map(async (toolCall): Promise<Message> => {
const toolName = toolCall.function.name;
const toolParameters = JSON.parse(toolCall.function.arguments);
const toolFunction = tools[toolName as keyof typeof tools];
// Call the tool function with the parameters
const toolResponse = await toolFunction(toolParameters);
// Return the tool result
return {
role: 'tool',
name: toolName,
content: toolResponse,
tool_call_id: toolCall.id,
};
});
// Wait for all tool calls to complete
const toolResults = await Promise.all(toolResultPromises);
// Call the agent pipe again with the updated messages
const finalResponse = await langbase.pipes.run({
stream: true,
name: 'summary-agent',
threadId: threadId!,
messages: toolResults,
tools: [weatherToolSchema],
});
const runner = await getRunner(finalResponse.stream);
for await (const chunk of runner) {
const textContent = getTextPart(chunk as ChunkStream);
process.stdout.write(textContent);
}
console.log("\n");
}
else {
console.log("Direct response (no tools called):");
const runner = await getRunner(streamForResponse);
for await (const chunk of runner) {
const textContent = getTextPart(chunk as ChunkStream);
process.stdout.write(textContent);
}
}
}
// Mock implementation of the weather function
async function getCurrentWeather(args: { location: string }) {
return 'Sunny, 75°F';
}
// Weather tool schema
const weatherToolSchema: Tools = {
type: 'function',
function: {
name: 'getCurrentWeather',
description: 'Get the current weather of a given location',
parameters: {
type: 'object',
required: ['location'],
properties: {
unit: {
enum: ['celsius', 'fahrenheit'],
type: 'string',
},
location: {
type: 'string',
description: 'The city and state, e.g. San Francisco, CA',
},
},
},
},
};
// Object to hold all tools
const tools = {
getCurrentWeather
};
/**
* Creates a summary agent pipe if it doesn't already exist.
*
* This function checks if a pipe with the name 'summary-agent' exists in the system.
* If the pipe doesn't exist, it creates a new private pipe with a system message
* configuring it as a helpful assistant.
*
* @async
* @returns {Promise<void>} A promise that resolves when the operation is complete
* @throws {Error} Logs any errors encountered during the creation process
*/
async function createSummaryAgent() {
try {
await langbase.pipes.create({
name: 'summary-agent',
upsert: true,
status: 'private',
messages: [
{
role: 'system',
content:'You are a helpful assistant that can answer questions and help with tasks in json format',
}
]
});
} catch (error) {
console.error('Error creating summary agent:', error);
}
}
main();
```
</CodeGroup>
</LanguageContent>
<LanguageContent language="python">
<CodeGroup title="Run Pipe Agent with Tools and Streaming Example" exampleTitle="Run Pipe Agent with Tools and Streaming Example">
```python {{ title: 'index.py' }}
import os
import json
from langbase import Langbase, get_runner
from dotenv import load_dotenv
load_dotenv()
langbase = Langbase(api_key=os.getenv('LANGBASE_API_KEY'))
def main():
create_summary_agent()
user_message = {
"role": "user",
"content": "What's the weather in SF ?"
}
# First, make a non-streaming call to get tool calls
response = langbase.pipes.run(
stream=False,
name='summary-agent',
messages=[user_message],
tools=[weather_tool_schema],
)
# Check for tool calls in the response
tool_calls = []
if 'choices' in response and len(response['choices']) > 0:
message = response['choices'][0].get('message', {})
tool_calls = message.get('tool_calls', [])
has_tool_calls = len(tool_calls) > 0
thread_id = response.get("threadId")
if has_tool_calls:
print(f"🔧 Tool calls detected: {len(tool_calls)}")
# Get the assistant message with tool calls
assistant_message = response['choices'][0]['message']
# Process each tool call
tool_results = []
for tool_call in tool_calls:
tool_name = tool_call['function']['name']
tool_parameters = json.loads(tool_call['function']['arguments'])
tool_function = tools[tool_name]
print(f" - Calling {tool_name} with: {tool_parameters}")
# Call the tool function with the parameters
tool_response = tool_function(tool_parameters)
# Create the tool result message
tool_result = {
"role": "tool",
"name": tool_name,
"content": tool_response,
"tool_call_id": tool_call['id'],
}
tool_results.append(tool_result)
# Prepare the complete conversation: user message + assistant message with tool_calls + tool results
messages_with_tools = [
user_message,
assistant_message, # This contains the tool_calls
*tool_results # Add all tool results
]
# Call the agent pipe again with streaming and complete conversation history
final_response = langbase.pipes.run(
stream=True,
name='summary-agent',
thread_id=thread_id,
messages=messages_with_tools,
tools=[weather_tool_schema],
)
print("\n🤖 Final response with tool results:")
runner = get_runner(final_response["stream"])
for content in runner.text_generator():
print(content, end="", flush=True)
print("\n")
else:
print("Direct response (no tools called):")
print(response.get('choices', [{}])[0].get('message', {}).get('content', 'No content'))
# Mock implementation of the weather function
def get_current_weather(args):
return 'Sunny, 75°F'
# Weather tool schema
weather_tool_schema = {
"type": "function",
"function": {
"name": "get_current_weather",
"description": "Get the current weather of a given location",
"parameters": {
"type": "object",
"required": ["location"],
"properties": {
"unit": {
"enum": ["celsius", "fahrenheit"],
"type": "string",
},
"location": {
"type": "string",
"description": "The city and state, e.g. San Francisco, CA",
},
},
},
},
}
# Dictionary to hold all tools
tools = {
"get_current_weather": get_current_weather
}
def create_summary_agent():
"""
Creates a summary agent pipe if it doesn't already exist.
This function checks if a pipe with the name 'summary-agent' exists in the system.
If the pipe doesn't exist, it creates a new private pipe with a system message
configuring it as a helpful assistant.
"""
try:
langbase.pipes.create(
name='summary-agent',
upsert=True,
status='private',
messages=[
{
"role": "system",
"content": "You are a helpful assistant that can answer questions and help with tasks in json format",
},
],
)
except Exception as error:
print(f'Error creating summary agent: {error}')
if __name__ == "__main__":
main()
```
</CodeGroup>
</LanguageContent>
</RunExample>
</LanguageProvider>
</content>
</doc>
<doc>
<metadata>
<title>Run Pipe Agent Chat with LLM API Keys</title>
<url>https://langbase.com/docs/examples/pipe-agent/run-pipe-agent-chat-llm-api-keys/</url>
</metadata>
<content>
import { generateMetadata } from '@/lib/generate-metadata';
import { LanguageProvider, SimpleLanguageToggle, LanguageContent } from '@/components/LanguageToggle';
# Run Pipe Agent Chat with LLM API Keys
This example demonstrates how to run a pipe agent chat with LLM API keys.
<LanguageProvider defaultLanguage='typescript'>
<RunExample api="/docs/api/pipe"
title="Run Pipe Agent Chat with LLM API Keys Example"
output={`
Stream started.
An AI Engineer is a professional who specializes in the development, implementation, and management of artificial intelligence (AI) systems and applications. Their role typically involves leveraging machine learning, deep learning, natural language processing, and other AI technologies to create intelligent systems that can perform tasks that typically require human intelligence.
AI Engineers typically have a strong background in computer science, mathematics, and statistics, along with experience in data science and engineering practices. They also need to have problem-solving skills and the ability to work with complex systems.
Stream ended.`}
explanation={`
This code illustrates how to run a pipe agent chat with LLM API keys using Langbase. Here's a step-by-step guide:
1. Summary Agent:
- Calls the langbase.pipes.create() to create a 'summary-agent'.
2. Set the LLM API key:
- Sets the LLM API key in the .env file.
- Passes the API key to langbase.pipes.run() via process.env.LLM_KEY
3. Run Pipe Agent:
- Calls the langbase.pipes.run() with the 'summary-agent'
- Call langbase.pipes.run() using the LLM API key.
3. Handle the Stream:
- Convert the stream to a stream runner.
- Use event listeners to handle the stream events.
- Write the content to the console.
4. Complete the Execution:
- The Langbase SDK handles the stream.
- Display the streaming responses to observe the agent's output.
`}
>
<LanguageContent language="typescript">
<CodeGroup title="Run Pipe Agent Chat with LLM API Keys Example" exampleTitle="Run Pipe Agent Chat with LLM API Keys Example">
```ts {{ title: 'index.ts' }}
import 'dotenv/config';
import {getRunner, Langbase} from 'langbase';
const langbase = new Langbase({
apiKey: process.env.LANGBASE_API_KEY!
});
async function main() {
await createSummaryAgent();
// Get readable stream
const { stream } = await langbase.pipes.run({
stream: true,
name: 'summary-agent',
rawResponse: true,
messages: [
{
role: 'user',
content: 'Who is an AI Engineer?'
}
],
llmKey: process.env.LLM_KEY!, // Your LLM API key
});
// Convert the stream to a stream runner.
const runner = getRunner(stream);
// Method 1: Using event listeners
runner.on('connect', () => {
console.log('Stream started.\n');
});
runner.on('content', content => {
process.stdout.write(content);
});
runner.on('end', () => {
console.log('\nStream ended.');
});
runner.on('error', error => {
console.error('Error:', error);
});
}
/**
* Creates a summary agent pipe if it doesn't already exist.
*
* This function checks if a pipe with the name 'summary-agent' exists in the system.
* If the pipe doesn't exist, it creates a new private pipe with a system message
* configuring it as a helpful assistant.
*
* @async
* @returns {Promise<void>} A promise that resolves when the operation is complete
* @throws {Error} Logs any errors encountered during the creation process
*/
async function createSummaryAgent() {
try {
await langbase.pipes.create({
name: 'summary-agent',
upsert: true,
status: 'private',
messages: [
{
role: 'system',
content: 'You are a helpful assistant that help users summarize text.',
},
],
});
} catch (error) {
console.error('Error creating summary agent:', error);
}
}
main();
```
</CodeGroup>
</LanguageContent>
<LanguageContent language="python">
<CodeGroup title="Run Pipe Agent Chat with LLM API Keys Example" exampleTitle="Run Pipe Agent Chat with LLM API Keys Example">
```python {{ title: 'index.py' }}
import os
from langbase import Langbase, get_runner
from dotenv import load_dotenv
load_dotenv()
langbase = Langbase(api_key=os.getenv('LANGBASE_API_KEY'))
def main():
create_summary_agent()
# Run the pipe in streaming mode
print('Stream started\n')
response = langbase.pipes.run(
stream=True,
name='summary-agent-ex',
raw_response=True,
messages=[
{
'role': 'user',
'content': 'Who is an AI Engineer?'
}
],
llm_key=os.getenv('LLM_KEY'),
)
runner = get_runner(response)
# Use text_generator() to stream content
for content in runner.text_generator():
print(content, end="", flush=True)
print("\n\nStream ended!") # Add a newline after first response
def create_summary_agent():
"""
Creates a summary agent pipe if it doesn't already exist.
This function checks if a pipe with the name 'summary-agent' exists in the system.
If the pipe doesn't exist, it creates a new private pipe with a system message
configuring it as a helpful assistant.
Returns:
None
"""
try:
langbase.pipes.create(
name='summary-agent-ex',
upsert=True,
status='private',
messages=[
{
'role': 'system',
'content': 'You are a helpful assistant that help users summarize text.',
}
]
)
except Exception as error:
print(f'Error creating summary agent: {error}')
if __name__ == '__main__':
main()
```
</CodeGroup>
</LanguageContent>
</RunExample>
</LanguageProvider>
</content>
</doc>
<doc>
<metadata>
<title>Run Pipe Agent Chat</title>
<url>https://langbase.com/docs/examples/pipe-agent/run-pipe-agent-chat/</url>
</metadata>
<content>
import { generateMetadata } from '@/lib/generate-metadata';
import { LanguageProvider, SimpleLanguageToggle, LanguageContent } from '@/components/LanguageToggle';
# Run Pipe Agent Chat
This example demonstrates how to maintain a conversational thread with a Langbase pipe agent.
<LanguageProvider defaultLanguage='typescript'>
<RunExample api="/docs/api/pipe"
title="Run Pipe Agent Chat Example"
output={`That's great! What kind of business is Langbase involved in? Are you looking for assistance with branding, marketing, or something else related to your company?
Your company is called Langbase. If you need help with anything related to it, feel free to ask!`}
explanation={`
This code illustrates how to maintain a conversational thread with a Langbase pipe agent. Here's a step-by-step guide:
1. Initial User Message:
- Defines the first user message that will be sent to the pipe agent
2. Run Pipe Agent with Initial Message:
- Calls the langbase.pipes.run() with the 'summary-agent'
- The agent processes the initial user message and generates a response
3. Follow-up User Message:
- Defines a follow-up user message that continues the conversation
4. Run Pipe Agent with Follow-up Message:
- Calls the langbase.pipes.run() with the 'summary-agent' and the threadId from the initial response
- The agent processes the follow-up user message within the same conversation thread and generates a response
5. Execution:
- The Langbase SDK executes the agent for both messages
- Outputs the responses to display the results of the agent's processing
`}
>
<LanguageContent language="typescript">
<CodeGroup title="Run Pipe Agent Chat Example" exampleTitle="Run Pipe Agent Chat Example">
```ts {{ title: 'index.ts' }}
import 'dotenv/config';
import {Langbase} from 'langbase';
const langbase = new Langbase({
apiKey: process.env.LANGBASE_API_KEY!,
});
async function main() {
await createSummaryAgent();
// Message 1: Tell something to the LLM.
const response1 = await langbase.pipes.run({
stream: false,
name: 'summary-agent',
messages: [{role: 'user', content: 'My company is called Langbase'}],
});
console.log(response1.completion);
// Message 2: Ask something about the first message.
// Continue the conversation in the same thread by sending
// `threadId` from the second message onwards.
const response2 = await langbase.pipes.run({
stream: false,
name: 'summary-agent',
threadId: response1.threadId!,
messages: [{role: 'user', content: 'Tell me the name of my company?'}],
});
console.log(response2.completion);
// You'll see any LLM will know the company is `Langbase`
// since it's the same chat thread. This is how you can
// continue a conversation in the same thread.
}
/**
* Creates a summary agent pipe if it doesn't already exist.
*
* This function checks if a pipe with the name 'summary-agent' exists in the system.
* If the pipe doesn't exist, it creates a new private pipe with a system message
* configuring it as a helpful assistant.
*
* @async
* @returns {Promise<void>} A promise that resolves when the operation is complete
* @throws {Error} Logs any errors encountered during the creation process
*/
async function createSummaryAgent() {
try {
await langbase.pipes.create({
name: 'summary-agent',
upsert: true,
status: 'private',
messages: [
{
role: 'system',
content: 'You are a helpful assistant that help users summarize text.',
},
],
});
} catch (error) {
console.error('Error creating summary agent:', error);
}
}
main();
```
</CodeGroup>
</LanguageContent>
<LanguageContent language="python">
<CodeGroup title="Run Pipe Agent Chat Example" exampleTitle="Run Pipe Agent Chat Example">
```python {{ title: 'index.py' }}
import os
from langbase import Langbase
import json
from dotenv import load_dotenv
load_dotenv()
langbase = Langbase(api_key=os.getenv('LANGBASE_API_KEY'))
def main():
create_summary_agent()
# First message
response1 = langbase.pipes.run(
stream=False,
name='summary-agent',
messages=[
{
'role': 'user',
'content': 'My company is called Langbase',
}
]
)
print('First response: ', response1['completion'])
# Second message with thread continuation
response2 = langbase.pipes.run(
stream=False,
name='summary-agent',
thread_id=response1['threadId'], # Continue the same conversation
messages=[
{
'role': 'user',
'content': 'Tell me the name of my company?',
}
]
)
print('Second response: ', response2['completion'])
def create_summary_agent():
"""
Creates a summary agent pipe if it doesn't already exist.
This function checks if a pipe with the name 'summary-agent' exists in the system.
If the pipe doesn't exist, it creates a new private pipe with a system message
configuring it as a helpful assistant.
Returns:
None
"""
try:
langbase.pipes.create(
name='summary-agent',
upsert=True,
status='private',
messages=[
{
'role': 'system',
'content': 'You are a helpful assistant that help users summarize text.',
}
]
)
except Exception as error:
print(f'Error creating summary agent: {error}')
if __name__ == '__main__':
main()
```
</CodeGroup>
</LanguageContent>
</RunExample>
</LanguageProvider>
</content>
</doc>
<doc>
<metadata>
<title>Run Pipe Agent</title>
<url>https://langbase.com/docs/examples/pipe-agent/run-pipe/</url>
</metadata>
<content>
import { generateMetadata } from '@/lib/generate-metadata';
import { LanguageProvider, SimpleLanguageToggle, LanguageContent } from '@/components/LanguageToggle';
# Run Pipe Agent
This example demonstrates how to run a pipe agent with a user message.
---
<LanguageProvider defaultLanguage='typescript'>
<RunExample api="/docs/api/pipe"
title="Run Pipe Agent Example"
output={`"An AI Engineer is a professional who designs, develops, and implements artificial intelligence systems and applications. They work with machine learning algorithms, data processing, and software development to create intelligent solutions."`}
explanation={`
This code illustrates how to run a pipe agent using Langbase. Here's a step-by-step guide:
1. Create Pipe Agent:
- Creates a new pipe agent with a system message
2. Run Pipe Agent:
- Calls the langbase.pipes.run() with the 'summary-agent'
- The agent processes the user message and generates a response
3. Execution:
- The Langbase SDK executes the agent
- Outputs the response to display the result of the agent's processing`}
>
<LanguageContent language="typescript">
<CodeGroup title="Run Pipe Agent Example" exampleTitle="Run Pipe Agent Example">
```ts {{ title: 'index.ts' }}
import 'dotenv/config';
import { Langbase } from 'langbase';
const langbase = new Langbase({
apiKey: process.env.LANGBASE_API_KEY!,
});
async function main() {
await createSummaryAgent();
const response = await langbase.pipes.run({
stream: false,
name: 'summary-agent',
messages: [
{
role: 'user',
content: 'Who is an AI Engineer?',
},
],
});
console.log('response: ', response.completion);
}
/**
* Creates a summary agent pipe if it doesn't already exist.
*
* This function checks if a pipe with the name 'summary-agent' exists in the system.
* If the pipe doesn't exist, it creates a new private pipe with a system message
* configuring it as a helpful assistant.
*
* @async
* @returns {Promise<void>} A promise that resolves when the operation is complete
* @throws {Error} Logs any errors encountered during the creation process
*/
async function createSummaryAgent() {
try {
await langbase.pipes.create({
name: 'summary-agent',
upsert: true,
status: 'private',
messages: [
{
role: 'system',
content: 'You are a helpful assistant that help users summarize text.',
},
],
});
} catch (error) {
console.error('Error creating summary agent:', error);
}
}
main();
```
</CodeGroup>
</LanguageContent>
<LanguageContent language="python">
<CodeGroup title="Run Pipe Agent Example" exampleTitle="Run Pipe Agent Example">
```python {{ title: 'index.py' }}
import os
from langbase import Langbase
import json
from dotenv import load_dotenv
load_dotenv()
langbase = Langbase(api_key=os.getenv('LANGBASE_API_KEY'))
def main():
create_summary_agent()
response = langbase.pipes.run(
stream=False,
name='summary-agent',
messages=[
{
'role': 'user',
'content': 'Who is an AI Engineer?',
}
]
)
print('response: ', response['completion'])
def create_summary_agent():
"""
Creates a summary agent pipe if it doesn't already exist.
This function checks if a pipe with the name 'summary-agent' exists in the system.
If the pipe doesn't exist, it creates a new private pipe with a system message
configuring it as a helpful assistant.
Returns:
None
"""
try:
langbase.pipes.create(
name='summary-agent',
upsert=True,
status='private',
messages=[
{
'role': 'system',
'content': 'You are a helpful assistant that help users summarize text.',
}
]
)
except Exception as error:
print(f'Error creating summary agent: {error}')
if __name__ == '__main__':
main()
```
</CodeGroup>
</LanguageContent>
</RunExample>
</LanguageProvider>
---
</content>
</doc>
<doc>
<metadata>
<title>Multi Agent</title>
<url>https://langbase.com/docs/examples/pipe-agent/multi-agent/</url>
</metadata>
<content>
import { generateMetadata } from '@/lib/generate-metadata';
import { LanguageProvider, SimpleLanguageToggle, LanguageContent } from '@/components/LanguageToggle';
# Multi Agent
This example demonstrates how to create an multi agentic workflow chaining multiple agents where one agent's output feeds into another.
<LanguageProvider defaultLanguage='typescript'>
<RunExample api="/docs/api/pipe"
title="Multi Agent Example"
output={`{
"summary": "Artificial intelligence (AI) is the intelligence shown by machines, contrasting with the natural intelligence of humans. AI research focuses on intelligent agents, which are systems that perceive their environment and act to maximize their chances of achieving goals."
}
{
"questions": [
"What is artificial intelligence (AI) and how does it differ from natural human intelligence?",
"What are intelligent agents in the context of AI research?",
"How do intelligent agents operate to achieve their goals?"
]
}`}
explanation={`
### Components
- **summary-agent**: An agent that summarizes text
- **generate-questions-agent**: An agent that generates questions from summaries
This code illustrates how to create a multi-agent workflow using Langbase SDK. Here's a step-by-step guide:
1. Summarize Text:
- Calls the langbase.pipes.run() with the "summary-agent" agent
- The agent generates a summary of the provided text
2. Generate Questions:
- Calls the langbase.pipes.run() with the "generate-questions-agent" agent
- The agent generates questions based on the summary provided by the first agent
3. Execution:
- The Langbase SDK executes the agents in sequence
- Outputs the responses to display the summary and the generated questions`}
>
<LanguageContent language="typescript">
<CodeGroup title="List Pipe Agents Example" exampleTitle="List Pipe Agents Example">
```ts {{ title: 'index.ts' }}
// Basic example to demonstrate how to feed the output of an agent as an input to another agent.
import dotenv from "dotenv";
import { Langbase } from "langbase";
dotenv.config();
const langbase = new Langbase({
apiKey: process.env.LANGBASE_API_KEY!,
});
async function main() {
await createSummaryAgent();
// First agent: Summarize text
const summarizeAgent = async (text: string) => {
const response = await langbase.pipes.run({
stream: false,
name: "summary-agent",
json: true,
messages: [
{
role: "user",
content: `Summarize the following text: ${text}`
}
]
});
return response.completion;
};
await createGenerateQuestionsAgent();
// Second agent: Generate questions
const questionsAgent = async (summary: string) => {
const response = await langbase.pipes.run({
stream: false,
name: "generate-questions-agent",
messages: [
{
role: "user",
content: `Generate 3 questions based on this summary: ${summary}`
}
]
});
return response.completion;
};
// Router agent: Orchestrate the flow
const workflow = async (inputText: string) => {
const summary = await summarizeAgent(inputText);
const questions = await questionsAgent(summary);
return { summary, questions };
};
// Example usage
const inputText = "Artificial intelligence (AI) is intelligence demonstrated by machines, as opposed to natural intelligence displayed by humans. AI research has been defined as the field of study of intelligent agents, which refers to any system that perceives its environment and takes actions that maximize its chance of achieving its goals.";
const result = await workflow(inputText);
console.log(result.summary);
console.log(result.questions);
}
/**
* Creates a summary agent pipe if it doesn't already exist.
*
* This function checks if a pipe with the name 'summary-agent' exists in the system.
* If the pipe doesn't exist, it creates a new private pipe with a system message
* configuring it as a helpful assistant.
*
* @async
* @returns {Promise<void>} A promise that resolves when the operation is complete
* @throws {Error} Logs any errors encountered during the creation process
*/
async function createSummaryAgent() {
try {
await langbase.pipes.create({
name: 'summary-agent',
upsert: true,
status: 'private',
json: true,
messages: [
{
role: 'system',
content: 'You are a helpful assistant that help users summarize text.',
},
],
});
} catch (error) {
console.error('Error creating summary agent:', error);
}
}
/**
* Creates a questions agent pipe if it doesn't already exist.
*
* This function checks if a pipe with the name 'questions-agent' exists in the system.
* If the pipe doesn't exist, it creates a new private pipe with a system message
* configuring it as a helpful assistant.
*
* @async
* @returns {Promise<void>} A promise that resolves when the operation is complete
* @throws {Error} Logs any errors encountered during the creation process
*/
async function createGenerateQuestionsAgent() {
try {
await langbase.pipes.create({
name: 'generate-questions-agent',
upsert: true,
status: 'private',
json: true,
messages: [
{
role: 'system',
content: 'You are a helpful assistant that help user to generate questions based on the text.',
}
]
});
} catch (error) {
console.error('Error creating questions agent:', error);
}
}
main();
```
</CodeGroup>
</LanguageContent>
<LanguageContent language="python">
<CodeGroup title="Multi Agent Example" exampleTitle="Multi Agent Example">
```python {{ title: 'index.py' }}
import os
import json
from dotenv import load_dotenv
from langbase import Langbase
load_dotenv()
# Initialize the client
langbase = Langbase(api_key=os.getenv("LANGBASE_API_KEY"))
def create_summary_agent() -> None:
"""Create or upsert the summary agent pipe."""
try:
langbase.pipes.create(
name="summary-agent",
description="Summarize input text clearly and concisely",
messages=[
{
"role": "system",
"content": "You are a helpful assistant that helps users summarize text.",
}
],
upsert=True,
)
except Exception as e:
print(f"Error creating summary agent: {e}")
def create_generate_questions_agent() -> None:
"""Create or upsert the question generator agent pipe."""
try:
langbase.pipes.create(
name="generate-questions-agent",
description="Generate questions based on a given summary",
messages=[
{
"role": "system",
"content": "You are a helpful assistant that generates questions from summaries.",
}
],
upsert=True,
)
except Exception as e:
print(f"Error creating questions agent: {e}")
def summarize_agent(text: str) -> str:
"""Run the summary-agent on provided text and return its completion."""
response = langbase.pipes.run(
name="summary-agent",
messages=[
{"role": "user", "content": f"Summarize the following text: {text}"}
],
stream=False,
)
return response.get("completion", "")
def questions_agent(summary: str) -> str:
"""Run the generate-questions-agent on the summary and return its completion."""
response = langbase.pipes.run(
name="generate-questions-agent",
messages=[
{
"role": "user",
"content": f"Generate 3 questions based on this summary: {summary}",
}
],
stream=False,
)
return response.get("completion", "")
def workflow(input_text: str) -> dict:
"""Orchestrate the two agents: summarize, then generate questions."""
summary = summarize_agent(input_text)
questions = questions_agent(summary)
return {"summary": summary, "questions": questions}
def main():
# Ensure both agents exist
create_summary_agent()
create_generate_questions_agent()
input_text = (
"Artificial intelligence (AI) is intelligence demonstrated by machines, as opposed "
"to natural intelligence displayed by humans. AI research has been defined as the "
"field of study of intelligent agents, which refers to any system that perceives its "
"environment and takes actions that maximize its chance of achieving its goals."
)
result = workflow(input_text)
print(result["summary"]) # Summary text
print(result["questions"]) # Generated questions
if __name__ == "__main__":
main()
```
</CodeGroup>
</LanguageContent>
</RunExample>
</LanguageProvider>
</content>
</doc>
<doc>
<metadata>
<title>List Pipe Agents</title>
<url>https://langbase.com/docs/examples/pipe-agent/list-pipe-agents/</url>
</metadata>
<content>
import { generateMetadata } from '@/lib/generate-metadata';
import { LanguageProvider, SimpleLanguageToggle, LanguageContent } from '@/components/LanguageToggle';
# List Pipe Agents
This example demonstrates how to list all the pipe agents.
<LanguageProvider defaultLanguage='typescript'>
<RunExample
api="/docs/api/pipe"
title="List Pipe Agents Example"
output={`[
{
name: 'ai-support-agent',
description: 'An AI agent to support users with their queries.',
status: 'public',
model: "openai:gpt-4o-mini",
stream: false,
json: false,
store: true,
top_p: 0.75,
max_tokens: 4096,
temperature: 0.2,
presence_penalty: 0.5,
frequency_penalty: 0.5,
stop: [],
tool_choice: 'auto',
parallel_tool_calls: true,
messages: [],
variables: [],
tools: [],
memory: []
},
{
name: 'demo-few-shot',
owner_login: 'your-login',
description: 'Few-shot train any LLM',
status: 'private',
model: 'openai:gpt-4o-mini',
stream: true,
json: false,
store: true,
top_p: 1,
max_tokens: 1000,
temperature: 0.7,
presence_penalty: 1,
frequency_penalty: 1,
stop: [],
tool_choice: 'auto',
parallel_tool_calls: true,
messages: [],
variables: [],
tools: [],
memory: []
}
]`}
explanation={`This code illustrates how to list all the pipe agents using Langbase. Here's a step-by-step guide:
1. Listing Pipe Agents:
- Calls the langbase.pipes.list() method to fetch all pipe agents
2. Execution:
- The Langbase SDK returns a list of available pipe agents.
- The response is logged to the console for display.
`}
>
<LanguageContent language="typescript">
<CodeGroup title="List Pipe Agents Example" exampleTitle="List Pipe Agents Example">
```ts {{ title: 'index.ts' }}
import 'dotenv/config';
import {Langbase} from 'langbase';
const langbase = new Langbase({
apiKey: process.env.LANGBASE_API_KEY!,
});
async function main() {
const response = await langbase.pipes.list();
console.log(response);
}
main();
```
</CodeGroup>
</LanguageContent>
<LanguageContent language="python">
<CodeGroup title="List Pipe Agents Example" exampleTitle="List Pipe Agents Example">
```python {{ title: 'index.py' }}
import os
import json
from langbase import Langbase
from dotenv import load_dotenv
load_dotenv()
langbase = Langbase(api_key=os.getenv('LANGBASE_API_KEY'))
def main():
response = langbase.pipes.list()
print(json.dumps(response, indent=2))
if __name__ == '__main__':
main()
```
</CodeGroup>
</LanguageContent>
</RunExample>
</LanguageProvider>
</content>
</doc>
<doc>
<metadata>
<title>Create a Pipe Agent</title>
<url>https://langbase.com/docs/examples/pipe-agent/create-pipe-example/</url>
</metadata>
<content>
import { generateMetadata } from '@/lib/generate-metadata';
import { LanguageProvider, SimpleLanguageToggle, LanguageContent } from '@/components/LanguageToggle';
# Create a Pipe Agent
This example demonstrates how to create a private pipe in Langbase.
<LanguageProvider defaultLanguage='typescript'>
<RunExample api="/docs/api/pipe"
title="Create Pipe Example"
output={`{
name: "summary-agent",
description: "AI pipe for summarization",
status: "private",
type: 'generate',
owner_login: "your-login",
api_key: "pipe_22SZSTjjUu3ntHpg.....",
url: "https://langbase.com/your-login/summary-agent"
}`}
explanation={`
This code illustrates the creation of a simple pipe using Langbase. Here's a step-by-step guide:
1. Pipe Agent Creation:
- Initializes a new pipe named "summary-agent"
- Sets the pipe's status to private
2. Execution:
- The pipe is created using the Langbase SDK
- Outputs the response to confirm successful creation
`}
>
<LanguageContent language="typescript">
<CodeGroup title="Create Pipe Example" exampleTitle="Create Pipe Example">
```ts {{ title: 'index.ts' }}
import 'dotenv/config';
import {Langbase} from 'langbase';
const langbase = new Langbase({
apiKey: process.env.LANGBASE_API_KEY!,
});
async function main() {
const response = await langbase.pipes.create({
name: 'summary-agent',
status: 'private',
description: 'An AI pipe agent that summarizes text',
messages: [{
role: 'system',
content: 'You are a helpful assistant that helps user to summarize text.',
}]
});
console.log(response);
}
main();
```
</CodeGroup>
</LanguageContent>
<LanguageContent language="python">
<CodeGroup title="Create Pipe Agent Example" exampleTitle="Create Pipe Agent Example">
```python {{ title: 'index.py' }}
import os
import json
from langbase import Langbase
from dotenv import load_dotenv
load_dotenv()
langbase = Langbase(api_key=os.getenv('LANGBASE_API_KEY'))
def main():
response = langbase.pipes.create(
name='summary-agent',
status='private',
description='An AI pipe agent that summarizes text',
messages=[{
'role': 'system',
'content': 'You are a helpful assistant that helps user to summarize text.',
}],
upsert=True
)
print(json.dumps(response, indent=2))
if __name__ == "__main__":
main()
```
</CodeGroup>
</LanguageContent>
</RunExample>
</LanguageProvider>
</content>
</doc>
<doc>
<metadata>
<title>Page</title>
<url>https://langbase.com/docs/examples/parser/parse-document/</url>
</metadata>
<content>
import { generateMetadata } from '@/lib/generate-metadata';
import { LanguageProvider, SimpleLanguageToggle, LanguageContent } from '@/components/LanguageToggle';
## Parse a document
This example demonstrates how to parse a document.
<LanguageProvider defaultLanguage='typescript'>
<RunExample api="/docs/api/pipe"
title="Parse a document Example"
output={`{
"documentName": "langbase.md",
"content": "Langbase is the most powerful serverless AI platform for building AI agents with memory. Build, deploy, and scale AI agents with tools and memory (RAG). Simple AI primitives with a world-class developer experience without using any frameworks.",
}`}
explanation={`
This code demonstrates how to parse a document in Langbase. Here's a step-by-step guide:
1. Document Preparation:
- Specifies the path and name of the document to be parsed
2. Execution:
- The parse request is executed using the Langbase SDK
- Outputs the response to display the parsed content
`}
>
<LanguageContent language="typescript">
<CodeGroup title="Parse a document Example" exampleTitle="Parse a document Example">
```ts {{ title: 'index.ts' }}
import 'dotenv/config';
import {Langbase} from 'langbase';
const langbase = new Langbase({
apiKey: process.env.LANGBASE_API_KEY!,
});
async function main() {
const content = "Langbase is the most powerful serverless AI platform for building AI agents with memory. Build, deploy, and scale AI agents with tools and memory (RAG). Simple AI primitives with a world-class developer experience without using any frameworks."
const document_bytes = Buffer.from(content, 'utf-8')
const results = await langbase.parser({
document: document_bytes,
documentName: 'langbase.md',
contentType: 'text/plain',
});
console.log(results);
}
main();
```
</CodeGroup>
</LanguageContent>
<LanguageContent language="python">
<CodeGroup title="Parse a document Example" exampleTitle="Parse a document Example">
```python {{ title: 'index.py' }}
import json
import os
from dotenv import load_dotenv
from langbase import Langbase
load_dotenv()
langbase_api_key = os.getenv("LANGBASE_API_KEY")
langbase = Langbase(api_key=langbase_api_key)
def main():
content = "Langbase is the most powerful serverless AI platform for building AI agents with memory. Build, deploy, and scale AI agents with tools and memory (RAG). Simple AI primitives with a world-class developer experience without using any frameworks."
document_bytes = content.encode('utf-8')
# Parse the document
results = langbase.parser(
document=document_bytes,
document_name="langbase.md",
content_type="text/plain",
)
print(json.dumps(results, indent=2))
if __name__ == "__main__":
main()
```
</CodeGroup>
</LanguageContent>
</RunExample>
</LanguageProvider>
</content>
</doc>
<doc>
<metadata>
<title>Retry Embedding</title>
<url>https://langbase.com/docs/examples/memory/retry-embedding/</url>
</metadata>
<content>
import { generateMetadata } from '@/lib/generate-metadata';
import { LanguageProvider, SimpleLanguageToggle, LanguageContent } from '@/components/LanguageToggle';
# Retry Embedding
This example demonstrates how to retry embedding generation for a document in Langbase memory.
<LanguageProvider defaultLanguage='typescript'>
<RunExample api="/docs/api/memory"
title="Retry Embedding Example"
output={`{ "success": true }`}
explanation={`
This code demonstrates how to retry embedding generation for a document in Langbase memory, tailored to our specific use case. Here's a step-by-step guide:
1. Embedding Retry:
- Specifies the memory name "memory-sdk"
- Specifies the document name "memory.upload.doc.ts" for which embedding generation needs to be retried
2. Execution:
- The retry request is executed using the Langbase SDK with the specified memory and document names
- Handles the response to confirm the retry operation
`}
>
<LanguageContent language="typescript">
<CodeGroup title="Retry Embedding Example" exampleTitle="Retry Embedding Example">
```ts {{ title: 'index.ts' }}
import 'dotenv/config';
import {Langbase} from 'langbase';
const langbase = new Langbase({
apiKey: process.env.LANGBASE_API_KEY!,
});
async function main() {
const response = await langbase.memories.documents.embeddings.retry({
memoryName: 'memory-sdk',
documentName: 'readme.md',
});
console.log(response);
}
main();
```
</CodeGroup>
</LanguageContent>
<LanguageContent language="python">
<CodeGroup title="Retry Embedding Example" exampleTitle="Retry Embedding Example">
```python {{ title: 'index.py' }}
import json
import os
from dotenv import load_dotenv
from langbase import Langbase
def main():
load_dotenv()
# Get API key from environment variable
langbase_api_key = os.getenv("LANGBASE_API_KEY")
# Initialize the client
langbase = Langbase(api_key=langbase_api_key)
# Memory name to retry embedding for
memory_name = "memory-sdk"
document_name = "readme.md"
# Retry embedding for failed documents
try:
response = langbase.memories.documents.embeddings.retry(
memory_name=memory_name, document_name=document_name
)
print(f"Retry embedding initiated for memory '{memory_name}'")
print(json.dumps(response, indent=2))
except Exception as e:
print(f"Error retrying embedding: {e}")
if __name__ == "__main__":
main()
```
</CodeGroup>
</LanguageContent>
</RunExample>
</LanguageProvider>
</content>
</doc>
<doc>
<metadata>
<title>Retrieve Memories using multiple filters</title>
<url>https://langbase.com/docs/examples/memory/retrieve-filters-advanced/</url>
</metadata>
<content>
import { generateMetadata } from '@/lib/generate-metadata';
import { LanguageProvider, SimpleLanguageToggle, LanguageContent } from '@/components/LanguageToggle';
# Retrieve Memories using multiple filters
This example demonstrates how to retrieve memories from Langbase with multiple filters.
<LanguageProvider defaultLanguage='typescript'>
<RunExample api="/docs/api/memory"
title="Retrieve from a Memory Example"
output={`[
{
text: "Langbase is a platform for building and deploying AI agents. Chunk is a primitive in Langbase.",
similarity: 0.50209558,
meta: {
docName: "readme.md",
documentName: "readme.md",
category: "docs",
primitive: "Chunk",
company: "Langbase",
}
},
{
text: "Langbase is a platform for building and deploying AI agents. Threads is a primitive in Langbase.",
similarity: 0.50209558,
meta: {
docName: "readme.md",
documentName: "readme.md",
category: "docs",
primitive: "Threads",
company: "Langbase",
}
},
{
text: "Langbase have pipe agent, memory, and many other features",
similarity: 0.50209558,
meta: {
docName: "readme.md",
documentName: "readme.md",
category: "docs",
primitive: "Pipe Agent",
company: "Langbase",
}
}
]`}
explanation={`
This code illustrates how to retrieve filtered information from a memory using Langbase. Here's a step-by-step guide:
1. Memory Retrieval with Filters:
- Specifies the memory name "memory-sdk"
- Defines the filters to narrow down the search results
- Defines the query to retrieve relevant information
2. Execution:
- The query is executed using the Langbase SDK with the specified filters
- Retrieves the top 5 relevant results from the specified memory
`}
>
<LanguageContent language="typescript">
<CodeGroup title="Retrieve from a Memory Example" exampleTitle="Retrieve from a Memory Example">
```ts {{ title: 'index.ts' }}
/**
* Advanced example to demonstrate how to retrieve memories with filters.
*
* - And: This filter is used to retrieve memories that match all the filters.
* - Or: This filter is used to retrieve memories that match any of the filters.
* - In: This filter is used to retrieve memories that match any of the value/values in the array.
* - Eq: This filter is used to retrieve memories that match the exact value.
*
* In this example, we retrieve memories with the following filters:
* - company: Langbase
* - category: docs or examples
* - primitive: Chunk or Threads
*
* We expect to get all chunks of memory from the Langbase Docs memory
* that have the company Langbase, the category docs or examples, and the primitive can be Chunk or Threads.
*
*/
import 'dotenv/config';
import {Langbase} from 'langbase';
const langbase = new Langbase({
apiKey: process.env.LANGBASE_API_KEY!,
});
async function main() {
const response = await langbase.memories.retrieve({
memory: [
{
name: "memory-sdk",
filters: [
"And", [
["company", "Eq", "Langbase"],
["Or", [
["category", "Eq", "docs"],
["category", "Eq", "examples"]
]],
["primitive", "In", ["Chunk", "Threads"]]
]
]
}
],
query: "What are primitives in Langbase?",
topK: 3
});
console.log(response);
}
main();
```
</CodeGroup>
</LanguageContent>
<LanguageContent language="python">
<CodeGroup title="Retrieve from a Memory Example" exampleTitle="Retrieve from a Memory Example">
```python {{ title: 'index.py' }}
import os
from langbase import Langbase
from dotenv import load_dotenv
load_dotenv()
langbase = Langbase(api_key=os.getenv('LANGBASE_API_KEY'))
def main():
response = langbase.memories.retrieve(
memory=[
{
'name': 'memory-sdk',
}
],
query='What are primitives in Langbase?',
top_k=2,
filters=[
"And", [
["company", "Eq", "Langbase"],
["category", "Eq", "docs"],
["primitive", "In", ["Chunk", "Threads"]]
]
]
)
print(response)
if __name__ == '__main__':
main()
```
</CodeGroup>
</LanguageContent>
</RunExample>
</LanguageProvider>
</content>
</doc>
<doc>
<metadata>
<title>Upload Documents to a Memory</title>
<url>https://langbase.com/docs/examples/memory/upload-documents/</url>
</metadata>
<content>
import { generateMetadata } from '@/lib/generate-metadata';
import { LanguageProvider, SimpleLanguageToggle, LanguageContent } from '@/components/LanguageToggle';
# Upload Documents to a Memory
This example demonstrates how to upload documents to a memory.
<LanguageProvider defaultLanguage='typescript'>
<RunExample api="/docs/api/memory"
title="Upload Documents to a Memory Example"
output={`{
ok: true,
status: 200,
statusText: "OK",
headers: {
"content-type": "text/plain; charset=utf-8",
"transfer-encoding": "chunked",
"connection": "keep-alive",
},
redirected: false,
bodyUsed: false,
}`}
explanation={`
This code demonstrates how to upload documents to a memory using Langbase, tailored to our specific use case. Here's a step-by-step guide:
1. Document Preparation:
- Specifies the memory name "memory-sdk"
- Prepares the document to be uploaded, in this case, a TypeScript file
2. Execution:
- The upload request is executed using the Langbase SDK with the specified memory and document
- Confirms the successful upload of the document to the specified memory
`}
>
<LanguageContent language="typescript">
<CodeGroup title="Upload Documents to a Memory Example" exampleTitle="Upload Documents to a Memory Example">
```ts {{ title: 'index.ts' }}
import 'dotenv/config';
import {Langbase} from 'langbase';
import fs from 'fs';
import path from 'path';
const langbase = new Langbase({
apiKey: process.env.LANGBASE_API_KEY!,
});
async function main() {
const src = path.join(
process.cwd(),
'examples',
'memory',
'memory.docs.upload.ts',
);
const response = await langbase.memories.documents.upload({
document: fs.readFileSync(src),
memoryName: 'memory-sdk',
documentName: 'memory.docs.upload.ts',
contentType: 'text/plain',
meta: {
extension: 'ts',
description: 'This is a test file',
},
});
console.log(response);
}
main();
```
</CodeGroup>
</LanguageContent>
<LanguageContent language="python">
<CodeGroup title="Upload Documents to a Memory Example" exampleTitle="Upload Documents to a Memory Example">
```python {{ title: 'index.py' }}
import os
from dotenv import load_dotenv
from langbase import Langbase
def main():
load_dotenv()
# Get API key from environment variable
langbase_api_key = os.getenv("LANGBASE_API_KEY")
# Initialize the client
langbase = Langbase(api_key=langbase_api_key)
# Memory name to upload documents to
memory_name = "product-knowledge" # Replace with your memory name
try:
content = "Langbase is a powerful platform for building AI applications with composable AI."
response = langbase.memories.documents.upload(
memory_name=memory_name,
document_name="readme.md",
document=content.encode("utf-8"), # Convert string to bytes
content_type="text/plain",
meta={"extension": "md", "description": "This is a test file"},
)
print("Document uploaded successfully!")
print(f"Status: {response.status_code}")
except Exception as e:
print(f"Error uploading documents: {e}")
if __name__ == "__main__":
main()
```
</CodeGroup>
</LanguageContent>
</RunExample>
</LanguageProvider>
</content>
</doc>
<doc>
<metadata>
<title>Retrieve Memories with Filters NotIn</title>
<url>https://langbase.com/docs/examples/memory/retrieve-filters-NotIn/</url>
</metadata>
<content>
import { generateMetadata } from '@/lib/generate-metadata';
import { LanguageProvider, SimpleLanguageToggle, LanguageContent } from '@/components/LanguageToggle';
# Retrieve Memories with Filters NotIn
This example demonstrates how to retrieve memories from Langbase with filters.
<LanguageProvider defaultLanguage='typescript'>
<RunExample api="/docs/api/memory"
title="Retrieve from a Memory Example with Filters And"
output={`[
{
text: 'Langbase is a platform for building and deploying AI agents.',
similarity: 0.50209558,
meta: {
docName: 'readme.md',
documentName: 'readme.md',
company: 'Langbase'
}
},
{
text: 'Langbase have pipe agent, memory, and many other features',
similarity: 0.50209558,
meta: {
docName: 'readme.md',
documentName: 'readme.md',
company: 'Langbase'
}
},
{
text: 'Langbase is a platform for building and deploying AI agents.',
similarity: 0.50209558,
meta: {
docName: 'readme.md',
documentName: 'readme.md',
company: 'Langbase'
}
}
];
`}
explanation={`
This code demonstrates how to retrieve filtered information from a memory using Langbase, tailored to our specific use case. Here's a step-by-step guide:
1. Memory Retrieval with Filters:
- Specifies the memory name "memory-sdk"
- Defines the filters to narrow down the search results based on our specific criteria
- Defines the query to retrieve relevant information
2. Execution:
- The query is executed using the Langbase SDK with the specified filters
- Retrieves the top 3 relevant results from the specified memory
`}
>
<LanguageContent language="typescript">
<CodeGroup title="Retrieve from a Memory Example with Filters And" exampleTitle="Retrieve from a Memory Example with Filters And">
```ts {{ title: 'index.ts' }}
/**
* Basic example to demonstrate how to retrieve memories with filters.
*
* - NotIn: This filter is used to retrieve memories that do not match any of the value/values in the array.
*
* In this example, we retrieve memories with the following filters:
* - company: Google
*
* We expect to get all chunks of memory from the Langbase Docs memory that do not have the company Google.
*
*/
import 'dotenv/config';
import {Langbase} from 'langbase';
const langbase = new Langbase({
apiKey: process.env.LANGBASE_API_KEY!,
});
async function main() {
const response = await langbase.memories.retrieve({
memory: [
{
name: "memory-sdk",
filters: ["company", "NotIn", "Google"],
},
],
query: "What are pipes in Langbase?",
topK: 3
});
console.log(response);
}
main();
```
</CodeGroup>
</LanguageContent>
<LanguageContent language="python">
<CodeGroup title="Retrieve from a Memory Example with Filters NotIn" exampleTitle="Retrieve from a Memory Example with Filters NotIn">
```python {{ title: 'index.py' }}
import os
from langbase import Langbase
from dotenv import load_dotenv
load_dotenv()
langbase = Langbase(api_key=os.getenv('LANGBASE_API_KEY'))
def main():
response = langbase.memories.retrieve(
memory=[
{
'name': 'memory-sdk',
'filters': [
["company", "NotIn", ["Google"]]
]
}
],
query='What are pipes in Langbase Docs?',
top_k=3
)
print(response)
if __name__ == '__main__':
main()
```
</CodeGroup>
</LanguageContent>
</RunExample>
</LanguageProvider>
</content>
</doc>
<doc>
<metadata>
<title>Retrieve Memories with Filters NotEq</title>
<url>https://langbase.com/docs/examples/memory/retrieve-filters-NotEq/</url>
</metadata>
<content>
import { generateMetadata } from '@/lib/generate-metadata';
import { LanguageProvider, SimpleLanguageToggle, LanguageContent } from '@/components/LanguageToggle';
# Retrieve Memories with Filters NotEq
This example demonstrates how to retrieve memories from Langbase with filters.
<LanguageProvider defaultLanguage='typescript'>
<RunExample api="/docs/api/memory"
title="Retrieve from a Memory Example with Filters NotEq"
output={`[
{
text: 'Langbase is a platform for building and deploying AI agents.',
similarity: 0.50209558,
meta: {
docName: 'readme.md',
documentName: 'readme.md',
company: 'Langbase'
}
},
{
text: 'Langbase have pipe agent, memory, and many other features',
similarity: 0.50209558,
meta: {
docName: 'readme.md',
documentName: 'readme.md',
company: 'Langbase'
}
},
{
text: 'Langbase is a platform for building and deploying AI agents.',
similarity: 0.50209558,
meta: {
docName: 'readme.md',
documentName: 'readme.md',
company: 'Langbase'
}
}
];`}
explanation={`
This code demonstrates how to retrieve filtered information from a memory using Langbase, tailored to our specific use case. Here's a step-by-step guide:
1. Memory Retrieval with Filters:
- Specifies the memory name "memory-sdk"
- Defines the filters to narrow down the search results based on our criteria
- Defines the query to retrieve relevant information
2. Execution:
- The query is executed using the Langbase SDK with the specified filters
- Retrieves the top 3 relevant results from the specified memory
`}
>
<LanguageContent language="typescript">
<CodeGroup title="Retrieve from a Memory Example with Filters NotEq" exampleTitle="Retrieve from a Memory Example with Filters NotEq">
```ts {{ title: 'index.ts' }}
/**
* Basic example to demonstrate how to retrieve memories with filters.
*
* - NotEq: This filter is used to retrieve memories that do not match the exact value.
*
* In this example, we retrieve memories with the following filters:
* - company: Langbase
*
* We expect to get all chunks of memory from the Langbase Docs memory that do not have the company Langbase.
*
*/
import 'dotenv/config';
import {Langbase} from 'langbase';
const langbase = new Langbase({
apiKey: process.env.LANGBASE_API_KEY!,
});
async function main() {
const response = await langbase.memories.retrieve({
memory: [
{
name: "memory-sdk",
filters: ["company", "NotEq", "Google"],
},
],
query: "What is Langbase?",
topK: 3
});
console.log(response);
}
main();
```
</CodeGroup>
</LanguageContent>
<LanguageContent language="python">
<CodeGroup title="Retrieve from a Memory Example with Filters NotEq" exampleTitle="Retrieve from a Memory Example with Filters NotEq">
```python {{ title: 'index.py' }}
import os
from langbase import Langbase
from dotenv import load_dotenv
load_dotenv()
langbase = Langbase(api_key=os.getenv('LANGBASE_API_KEY'))
def main():
response = langbase.memories.retrieve(
memory=[
{
'name': 'memory-sdk',
'filters': [
["company", "NotEq", "Google"]
]
}
],
query='What are pipes in Langbase Docs?',
top_k=3
)
print(response)
if __name__ == '__main__':
main()
```
</CodeGroup>
</LanguageContent>
</RunExample>
</LanguageProvider>
</content>
</doc>
<doc>
<metadata>
<title>Retrieve Memories with Filters In</title>
<url>https://langbase.com/docs/examples/memory/retrieve-filters-In/</url>
</metadata>
<content>
import { generateMetadata } from '@/lib/generate-metadata';
import { LanguageProvider, SimpleLanguageToggle, LanguageContent } from '@/components/LanguageToggle';
# Retrieve Memories with Filters In
This example demonstrates how to retrieve memories from Langbase with filters.
<LanguageProvider defaultLanguage='typescript'>
<RunExample api="/docs/api/memory"
title="Retrieve from a Memory Example with Filters In"
output={`[
{
text: "Langbase is a platform for building and deploying AI agents.",
similarity: 0.50209558,
meta: {
docName: "readme.md",
documentName: "readme.md",
company: "Langbase",
}
},
{
text: "Google is a company that has a search engine.",
similarity: 0.50209558,
meta: {
docName: "readme.md",
documentName: "readme.md",
company: "Google",
}
},
{
text: "Langbase have pipe agent, memory, and many other features",
similarity: 0.50209558,
meta: {
docName: "readme.md",
documentName: "readme.md",
company: "Langbase",
}
}
]`}
explanation={`
This code demonstrates how to retrieve filtered information from a memory using Langbase, tailored to our specific use case. Here's a step-by-step guide:
1. Memory Retrieval with Filters:
- Specifies the memory name "memory-sdk"
- Defines the filters to narrow down the search results based on our criteria
- Defines the query to retrieve relevant information
2. Execution:
- The query is executed using the Langbase SDK with the specified filters
- Retrieves the top 3 relevant results from the specified memory
`}
>
<LanguageContent language="typescript">
<CodeGroup title="Retrieve from a Memory Example with Filters In" exampleTitle="Retrieve from a Memory Example with Filters In">
```ts {{ title: 'index.ts' }}
/**
* Basic example to demonstrate how to retrieve memories with filters.
*
* - In: This filter is used to retrieve memories that match any of the value/values in the array.
*
* In this example, we retrieve memories with the following filters:
* - company: Langbase or Google
*
* We expect to get all chunks of memory from the Langbase Docs memory that have the company Langbase or Google.
*
*/
import 'dotenv/config';
import {Langbase} from 'langbase';
const langbase = new Langbase({
apiKey: process.env.LANGBASE_API_KEY!,
});
async function main() {
const response = await langbase.memories.retrieve({
memory: [
{
name: "memory-sdk",
filters: ["company", "In", ["Langbase","Google"]],
},
],
query: "What are pipes in Langbase?",
topK: 3
});
console.log(response);
}
main();
```
</CodeGroup>
</LanguageContent>
<LanguageContent language="python">
<CodeGroup title="Retrieve from a Memory Example with Filters In" exampleTitle="Retrieve from a Memory Example with Filters In">
```python {{ title: 'index.py' }}
import os
from langbase import Langbase
from dotenv import load_dotenv
load_dotenv()
langbase = Langbase(api_key=os.getenv('LANGBASE_API_KEY'))
def main():
response = langbase.memories.retrieve(
memory=[
{
'name': 'memory-sdk',
'filters': [
["company", "In", ["Langbase","Google"]]
]
}
],
query='What are pipes in Langbase?',
top_k=3
)
print(response)
if __name__ == '__main__':
main()
```
</CodeGroup>
</LanguageContent>
</RunExample>
</LanguageProvider>
</content>
</doc>
<doc>
<metadata>
<title>Retrieve Memories with Filters Eq</title>
<url>https://langbase.com/docs/examples/memory/retrieve-filters-Eq/</url>
</metadata>
<content>
import { generateMetadata } from '@/lib/generate-metadata';
import { LanguageProvider, SimpleLanguageToggle, LanguageContent } from '@/components/LanguageToggle';
# Retrieve Memories with Filters Eq
This example demonstrates how to retrieve memories from Langbase with filters.
<LanguageProvider defaultLanguage='typescript'>
<RunExample api="/docs/api/memory"
title="Retrieve from a Memory Example with Filters Eq"
output={`[{
text: "Langbase is a platform for building and deploying AI agents.",
similarity: 0.50209558,
meta: {
docName: "readme.md",
documentName: "readme.md",
company: "Langbase",
category: "docs"
}
},
{
text: "Langbase have pipe agent, memory, and many other features",
similarity: 0.50209558,
meta: {
docName: "readme.md",
documentName: "readme.md",
company: "Langbase",
category: "docs"
}
},
{
text: "Langbase is a platform for building and deploying AI agents.",
similarity: 0.50209558,
meta: {
docName: "readme.md",
documentName: "readme.md",
company: "Langbase",
category: "docs"
}
}]`}
explanation={`
This code demonstrates how to retrieve filtered information from a memory using Langbase, tailored to our specific use case. Here's a step-by-step guide:
1. Memory Retrieval with Filters:
- Specifies the memory name "memory-sdk"
- Defines the filters to narrow down the search results based on our criteria
- Defines the query to retrieve relevant information
2. Execution:
- The query is executed using the Langbase SDK with the specified filters
- Retrieves the top 3 relevant results from the specified memory
`}
>
<LanguageContent language="typescript">
<CodeGroup title="Retrieve from a Memory Example with Filters Eq" exampleTitle="Retrieve from a Memory Example with Filters Eq">
```ts {{ title: 'index.ts' }}
/**
* Basic example to demonstrate how to retrieve memories with filters.
*
* - And: This filter is used to retrieve memories that match all the filters.
* - Eq: This filter is used to retrieve memories that match the exact value.
*
* In this example, we retrieve memories with the following filters:
* - company: Langbase
* - category: docs
*
* We expect to get all chunks of memory from the Langbase Docs memory that have the company Langbase and the category docs.
*
*/
import 'dotenv/config';
import {Langbase} from 'langbase';
const langbase = new Langbase({
apiKey: process.env.LANGBASE_API_KEY!,
});
async function main() {
const response = await langbase.memories.retrieve({
memory: [
{
name: "memory-sdk",
filters: ["And", [
["company", "Eq", "Langbase"],
["category", "Eq", "docs"]
]]
},
],
query: "What are pipes in Langbase Docs?",
topK: 3
});
console.log(response);
}
main();
```
</CodeGroup>
</LanguageContent>
<LanguageContent language="python">
<CodeGroup title="Retrieve from a Memory Example with Filters Eq" exampleTitle="Retrieve from a Memory Example with Filters Eq">
```python {{ title: 'index.py' }}
import os
from langbase import Langbase
from dotenv import load_dotenv
load_dotenv()
langbase = Langbase(api_key=os.getenv('LANGBASE_API_KEY'))
def main():
response = langbase.memories.retrieve(
memory=[
{
'name': 'memory-sdk',
'filters': [
"And", [
["company", "Eq", "Langbase"],
["category", "Eq", "docs"]
]
]
}
],
query='What are pipes in Langbase Docs?',
top_k=3
)
print(response)
if __name__ == '__main__':
main()
```
</CodeGroup>
</LanguageContent>
</RunExample>
</LanguageProvider>
</content>
</doc>
<doc>
<metadata>
<title>Retrieve Memories with Filters And</title>
<url>https://langbase.com/docs/examples/memory/retrieve-filters-And/</url>
</metadata>
<content>
import { generateMetadata } from '@/lib/generate-metadata';
import { LanguageProvider, SimpleLanguageToggle, LanguageContent } from '@/components/LanguageToggle';
# Retrieve Memories with Filters And
This example demonstrates how to retrieve memories from Langbase with filters.
<LanguageProvider defaultLanguage='typescript'>
<RunExample api="/docs/api/memory"
title="Retrieve from a Memory Example with Filters And"
output={`[{
text: "Langbase is a serverless platform for building and deploying AI agents.",
similarity: 0.50209558,
meta: {
docName: "readme.md",
documentName: "readme.md",
company: "Langbase",
}
},
{
text: "Langbase is a platform for building and deploying AI agents.",
similarity: 0.50209558,
meta: {
docName: "readme.md",
documentName: "readme.md",
company: "Langbase",
category: "docs",
},
},
{
text: "Langbase have pipe agent, memory, and many other features",
similarity: 0.50209558,
meta: {
docName: "readme.md",
documentName: "readme.md",
company: "Langbase",
category: "docs",
}
}]`}
explanation={`
This code demonstrates how to retrieve filtered information from a memory using Langbase, tailored to our specific use case. Here's a step-by-step guide:
1. Memory Retrieval with Filters:
- Specifies the memory name "memory-sdk"
- Defines the filters to narrow down the search results based on our criteria
- Defines the query to retrieve relevant information
2. Execution:
- The query is executed using the Langbase SDK with the specified filters
- Retrieves the top 3 relevant results from the specified memory
`}
>
<LanguageContent language="typescript">
<CodeGroup title="Retrieve from a Memory Example with Filters And" exampleTitle="Retrieve from a Memory Example with Filters And">
```ts {{ title: 'index.ts' }}
/**
* Basic example to demonstrate how to retrieve memories with filters.
*
* - And: This filter is used to retrieve memories that match all the filters.
* - Eq: This filter is used to retrieve memories that match the exact value.
*
* In this example, we retrieve memories with the following filters:
* - company: Langbase
* - category: docs
*
* We expect to get all chunks of memory from the Langbase Docs memory that have the company Langbase and the category docs.
*
*/
import 'dotenv/config';
import {Langbase} from 'langbase';
const langbase = new Langbase({
apiKey: process.env.LANGBASE_API_KEY!,
});
async function main() {
const response = await langbase.memories.retrieve({
memory: [
{
name: "memory-sdk",
filters: ["And", [
["company", "Eq", "Langbase"],
["category", "Eq", "docs"]
]]
},
],
query: "What are pipes in Langbase Docs?",
topK: 3
});
console.log(response);
}
main();
```
</CodeGroup>
</LanguageContent>
<LanguageContent language="python">
<CodeGroup title="Retrieve from a Memory Example with Filters And" exampleTitle="Retrieve from a Memory Example with Filters And">
```python {{ title: 'index.py' }}
import os
from langbase import Langbase
from dotenv import load_dotenv
load_dotenv()
langbase = Langbase(api_key=os.getenv('LANGBASE_API_KEY'))
def main():
response = langbase.memories.retrieve(
memory=[
{
'name': 'memory-sdk',
'filters': [
"And", [
["company", "Eq", "Langbase"],
["category", "Eq", "docs"]
]
]
}
],
query='What are pipes in Langbase Docs?',
top_k=3
)
print(response)
if __name__ == '__main__':
main()
```
</CodeGroup>
</LanguageContent>
</RunExample>
</LanguageProvider>
</content>
</doc>
<doc>
<metadata>
<title>Retrieve from a Memory</title>
<url>https://langbase.com/docs/examples/memory/retrieve/</url>
</metadata>
<content>
import { generateMetadata } from '@/lib/generate-metadata';
import { LanguageProvider, SimpleLanguageToggle, LanguageContent } from '@/components/LanguageToggle';
# Retrieve from a Memory
This example demonstrates how to retrieve from a memory.
---
<LanguageProvider defaultLanguage='typescript'>
<RunExample api="/docs/api/memory"
title="Retrieve from a Memory Example"
output={`[
{
text: "Langbase is a platform for building and deploying AI agents.",
similarity: 0.5548995999999995,
meta: {
docName: "readme.md",
documentName: "readme.md",
}
},
{
text: "Langbase have pipe agent, memory, and many other features",
similarity: 0.5548995999999995,
meta: {
docName: "readme.md",
documentName: "readme.md",
}
}
]`}
explanation={`
This code illustrates how to retrieve information from a memory using Langbase. Here's a step-by-step guide:
1. Memory Retrieval:
- Specifies the memory name "memory-sdk"
- Defines the query to retrieve relevant information
2. Execution:
- The query is executed using the Langbase SDK
- Retrieves the top 2 relevant results from the specified memory
`}
>
<LanguageContent language="typescript">
<CodeGroup title="Retrieve from a Memory Example" exampleTitle="Retrieve from a Memory Example">
```ts {{ title: 'index.ts' }}
import 'dotenv/config';
import {Langbase} from 'langbase';
const langbase = new Langbase({
apiKey: process.env.LANGBASE_API_KEY!,
});
async function main() {
const response = await langbase.memories.retrieve({
memory: [
{
name: 'memory-sdk',
},
],
query: 'What is Langbase?',
topK: 2,
});
console.log(response);
}
main();
```
</CodeGroup>
</LanguageContent>
<LanguageContent language="python">
<CodeGroup title="Retrieve from a Memory Example" exampleTitle="Retrieve from a Memory Example">
```python {{ title: 'index.py' }}
import os
from langbase import Langbase
from dotenv import load_dotenv
load_dotenv()
langbase = Langbase(api_key=os.getenv('LANGBASE_API_KEY'))
def main():
response = langbase.memories.retrieve(
memory=[
{
'name': 'memory-sdk',
}
],
query='What is Langbase?',
top_k=2
)
print(response)
if __name__ == '__main__':
main()
```
</CodeGroup>
</LanguageContent>
</RunExample>
</LanguageProvider>
---
</content>
</doc>
<doc>
<metadata>
<title>Multi-Agent Routing</title>
<url>https://langbase.com/docs/examples/memory/multi-agent-memory-routing/</url>
</metadata>
<content>
import { generateMetadata } from '@/lib/generate-metadata';
import { LanguageProvider, SimpleLanguageToggle, LanguageContent } from '@/components/LanguageToggle';
# Multi-Agent Routing
This example demonstrates how to implement intelligent routing between memory and non-memory agents based on query context.
<LanguageProvider defaultLanguage='typescript'>
<RunExample api="/docs/api/memory"
title="Multi-Agent Routing Example"
output={`{
"routerAgentResponse": {
"useMemory": false
},
"memoryAgentResponse": {
"response": "AI is a field of computer science that focuses on creating intelligent machines that can perform tasks that typically require human intelligence, such as visual perception, speech recognition, decision-making, and language understanding."
}
}`}
explanation={`
### Components
- **Router Agent**: Analyzes queries to determine if memory context is needed
- **Memory Agent**: Handles AI/ML related queries with context
- **Non-Memory Agent**: Handles general queries
This code illustrates the multi-agent routing using Langbase. Here's a step-by-step guide:
1. Query Analysis:
- The router agent analyzes the query to determine if it requires memory context.
- It uses a predefined model to decide whether to route the query to the memory agent.
2. Execution:
- If the query requires memory context, it is routed to the memory agent.
- The memory agent processes the query and provides a context-aware response.
- If the query does not require memory context, it is handled by the non-memory agent.
`}
>
<LanguageContent language="typescript">
<CodeGroup title="Multi-Agent Routing Example" exampleTitle="Multi-Agent Routing Example">
```ts {{ title: 'index.ts' }}
import dotenv from "dotenv";
import { Langbase } from 'langbase';
dotenv.config();
// Initialize Langbase with your API key
const langbase = new Langbase({
apiKey: process.env.LANGBASE_API_KEY!
});
// Router agent checks whether or not to use memory agent.
async function runRouterAgent(query) {
const response = await langbase.pipes.run({
stream: false,
name: 'router-agent',
model: 'openai:gpt-4o-mini', // Ensure this model supports JSON mode
messages: [
{
role: 'system', // Update the content with your memory description
content: `You are an expert query analyzer. Given a query, analyze whether it needs to use the memory agent or not.
The memory agent contains a knowledge base that provides context-aware responses about AI, machine learning,
and related topics. If the query is related to these topics, indicate that the memory agent should be used.
Otherwise, indicate that it should not be used.
Always respond in JSON format with the following structure: {"useMemory": true/false}.`
},
{ role: 'user', content: query }
]
});
// Parse the response to determine if we should use the memory agent
const parsedResponse = JSON.parse(response.completion);
return parsedResponse.useMemory;
}
// Example usage
async function main() {
const query = 'What is AI?';
const useMemory = await runRouterAgent(query);
console.log('Use Memory:', useMemory);
if (useMemory) {
// Run the memory agent
const response = await langbase.pipes.run({
stream: false,
name: 'memory-agent', // Name of your memory agent
messages: [
{ role: 'user', content: query }
]
});
console.log('Response from memory agent:', response);
} else {
// Run the non-memory agent
const response = await langbase.pipes.run({
stream: false,
name: 'non-memory-agent', // Name of your non-memory agent
messages: [
{ role: 'user', content: query }
]
});
console.log('Response from non-memory agent:', response);
}
}
main();
```
</CodeGroup>
</LanguageContent>
<LanguageContent language="python">
<CodeGroup title="Multi-Agent Routing Example" exampleTitle="Multi-Agent Routing Example">
```python {{ title: 'index.py' }}
import json
import os
from dotenv import load_dotenv
from langbase import Langbase
def main():
load_dotenv()
# Get API keys from environment variables
langbase_api_key = os.getenv("LANGBASE_API_KEY")
llm_api_key = os.getenv("LLM_API_KEY")
if not langbase_api_key:
print("❌ Missing LANGBASE_API_KEY in environment variables.")
return
if not llm_api_key:
print("❌ Missing LLM_API_KEY in environment variables.")
return
# Initialize the client
langbase = Langbase(api_key=langbase_api_key)
query = 'What is Langbase?'
# Step 1: Run router agent to determine if memory should be used
use_memory = run_router_agent(langbase, llm_api_key, query)
print(f'Use Memory: {use_memory}')
if use_memory:
# Run agent with memory retrieval
run_agent_with_memory(langbase, llm_api_key, query)
else:
# Run agent without memory
run_agent_without_memory(langbase, llm_api_key, query)
def run_router_agent(langbase, llm_api_key, query):
"""Router agent checks whether or not to use memory agent."""
try:
response = langbase.agent.run(
model='openai:gpt-4o-mini',
api_key=llm_api_key,
instructions='''You are an expert query analyzer. Given a query, analyze whether it needs to use memory/knowledge base or not.
If the query is about AI, machine learning, programming, or technical topics, respond with "true".
For general conversation, greetings, or simple questions, respond with "false".
Respond with only "true" or "false".''',
input=[{'role': 'user', 'content': query}]
)
# Parse the response to determine if we should use memory
output = response.get('output', '').strip().lower()
return output == 'true'
except Exception as e:
print(f"Error running router agent: {e}")
return False # Default to not using memory on error
def run_agent_with_memory(langbase, llm_api_key, query):
"""Run agent with memory retrieval."""
try:
# Step 1: Try to retrieve relevant memory (if memory exists)
memory_context = ""
try:
memory_response = langbase.memories.retrieve(
query=query,
memory=[{"name": "memory-sdk"}], # Replace with your memory name
top_k=3
)
if memory_response:
memory_context = f"\n\nRelevant context from knowledge base:\n{json.dumps(memory_response, indent=2)}"
except Exception as memory_error:
print(f"Note: No memory found or memory error: {memory_error}")
memory_context = ""
# Step 2: Run agent with memory context
response = langbase.agent.run(
model='openai:gpt-4o-mini',
api_key=llm_api_key,
instructions='You are an AI expert assistant. Use the provided context to give comprehensive answers about AI and technical topics.',
input=[{
'role': 'user',
'content': f"{query}{memory_context}"
}]
)
print('\n🧠 Response from memory-enhanced agent:')
print(response.get('output', 'No output received'))
except Exception as e:
print(f"Error running memory agent: {e}")
def run_agent_without_memory(langbase, llm_api_key, query):
"""Run agent without memory."""
try:
response = langbase.agent.run(
model='openai:gpt-4o-mini',
api_key=llm_api_key,
instructions='You are a helpful assistant. Provide clear and concise answers.',
input=[{'role': 'user', 'content': query}]
)
print('\n💬 Response from standard agent:')
print(response.get('output', 'No output received'))
except Exception as e:
print(f"Error running standard agent: {e}")
if __name__ == "__main__":
main()
```
</CodeGroup>
</LanguageContent>
</RunExample>
</LanguageProvider>
</content>
</doc>
<doc>
<metadata>
<title>List Documents from a Memory</title>
<url>https://langbase.com/docs/examples/memory/list-documents/</url>
</metadata>
<content>
import { generateMetadata } from '@/lib/generate-metadata';
import { LanguageProvider, SimpleLanguageToggle, LanguageContent } from '@/components/LanguageToggle';
# List Documents from a Memory
This example demonstrates how to list documents with name and metadata from a memory.
<LanguageProvider defaultLanguage='typescript'>
<RunExample api="/docs/api/memory"
title="List Documents from a Memory Example"
output={`[{
name: "readme.md",
status: "completed",
status_message: null,
metadata: {
size: 5,
type: "text/markdown",
},
enabled: true,
chunk_size: 10000,
chunk_overlap: 2048,
owner_login: "user-76795",
}]`}
explanation={`
This code illustrates the listing of documents from a memory using Langbase. Here's a step-by-step guide:
1. Document Listing:
- Specifies the memory name "memory-sdk"
- Retrieves the list of documents along with their metadata
2. Execution:
- The documents are listed using the Langbase SDK
- Outputs the response to confirm successful retrieval
`}
>
<LanguageContent language="typescript">
<CodeGroup title="List Documents from a Memory Example" exampleTitle="List Documents from a Memory Example">
```ts {{ title: 'index.ts' }}
import 'dotenv/config';
import {Langbase} from 'langbase';
const langbase = new Langbase({
apiKey: process.env.LANGBASE_API_KEY!,
});
async function main() {
const response = await langbase.memories.documents.list({
memoryName: 'memory-sdk',
});
console.log(response);
}
main();
```
</CodeGroup>
</LanguageContent>
<LanguageContent language="python">
<CodeGroup title="List Documents in a Memory Example" exampleTitle="List Documents in a Memory Example">
```python {{ title: 'index.py' }}
import json
import os
from dotenv import load_dotenv
from langbase import Langbase
def main():
load_dotenv()
# Get API key from environment variable
langbase_api_key = os.getenv("LANGBASE_API_KEY")
# Initialize the client
langbase = Langbase(api_key=langbase_api_key)
# List documents in the memory
memory_name = "memory-sdk"
try:
response = langbase.memories.documents.list(memory_name=memory_name)
print(f"Documents in memory '{memory_name}':")
print(json.dumps(response, indent=2))
except Exception as e:
print(f"Error listing documents: {e}")
if __name__ == "__main__":
main()
```
</CodeGroup>
</LanguageContent>
</RunExample>
</LanguageProvider>
</content>
</doc>
<doc>
<metadata>
<title>List Memories</title>
<url>https://langbase.com/docs/examples/memory/list-memories/</url>
</metadata>
<content>
import { generateMetadata } from '@/lib/generate-metadata';
import { LanguageProvider, SimpleLanguageToggle, LanguageContent } from '@/components/LanguageToggle';
# List Memories
This example demonstrates how to list memories from Langbase.
<LanguageProvider defaultLanguage='typescript'>
<RunExample api="/docs/api/memory"
title="List Memories Example"
output={`[{
name: "support-agent-memory",
description: "Memory storage for the AI support agent",
owner_login: "user-76795",
embeddingModel: "openai:text-embedding-3-large",
url: "https://langbase.com/memorysets/user-76795/support-agent-memory"
},
{
name: "langbase-docs-memory",
description: "",
owner_login: "user-76795",
embeddingModel: "openai:text-embedding-3-large",
url: "https://langbase.com/memorysets/user-76795/langbase-docs-memory"
}]`}
explanation={`
This code illustrates the listing of memories using Langbase. Here's a step-by-step guide:
1. Memory Listing:
- Retrieves the list of memories
2. Execution:
- The memories are listed using the Langbase SDK
- Outputs the response to confirm successful retrieval
`}
>
<LanguageContent language="typescript">
<CodeGroup title="List Memories Example" exampleTitle="List Memories Example">
```ts {{ title: 'index.ts' }}
import 'dotenv/config';
import {Langbase} from 'langbase';
const langbase = new Langbase({
apiKey: process.env.LANGBASE_API_KEY!,
});
async function main() {
const response = await langbase.memories.list();
console.log(response);
}
main();
```
</CodeGroup>
</LanguageContent>
<LanguageContent language="python">
<CodeGroup title="List Memories Example" exampleTitle="List Memories Example">
```python {{ title: 'index.py' }}
import json
import os
from dotenv import load_dotenv
from langbase import Langbase
def main():
load_dotenv()
# Get API key from environment variable
langbase_api_key = os.getenv("LANGBASE_API_KEY")
# Initialize the client
langbase = Langbase(api_key=langbase_api_key)
try:
response = langbase.memories.list()
print(json.dumps(response, indent=2))
except Exception as e:
print(f"Error listing memories: {e}")
if __name__ == "__main__":
main()
```
</CodeGroup>
</LanguageContent>
</RunExample>
</LanguageProvider>
</content>
</doc>
<doc>
<metadata>
<title>Delete a Memory</title>
<url>https://langbase.com/docs/examples/memory/delete-memory/</url>
</metadata>
<content>
import { generateMetadata } from '@/lib/generate-metadata';
import { LanguageProvider, SimpleLanguageToggle, LanguageContent } from '@/components/LanguageToggle';
# Delete a Memory
This example demonstrates how to delete a memory from Langbase.
<LanguageProvider defaultLanguage='typescript'>
<RunExample api="/docs/api/memory"
title="Delete a Memory Example"
output={`{ "success": true }`}
explanation={`
This code illustrates the deletion of a memory using Langbase. Here's a step-by-step guide:
1. Memory Deletion:
- Specifies the memory name "memory-sdk"
2. Execution:
- The memory is deleted using the Langbase SDK
- Outputs the response to confirm successful deletion
`}
>
<LanguageContent language="typescript">
<CodeGroup title="Delete a Memory Example" exampleTitle="Delete a Memory Example">
```ts {{ title: 'index.ts' }}
import 'dotenv/config';
import {Langbase} from 'langbase';
const langbase = new Langbase({
apiKey: process.env.LANGBASE_API_KEY!,
});
async function main() {
const response = await langbase.memories.delete({
name: 'memory-sdk',
});
console.log(response);
}
main();
```
</CodeGroup>
</LanguageContent>
<LanguageContent language="python">
<CodeGroup title="Delete Memory Example" exampleTitle="Delete Memory Example">
```python {{ title: 'index.py' }}
import os
from langbase import Langbase
from dotenv import load_dotenv
load_dotenv()
langbase = Langbase(api_key=os.getenv('LANGBASE_API_KEY'))
def main():
response = langbase.memories.delete(
name='memory-sdk'
)
print(response)
if __name__ == '__main__':
main()
```
</CodeGroup>
</LanguageContent>
</RunExample>
</LanguageProvider>
</content>
</doc>
<doc>
<metadata>
<title>Delete Documents from a Memory</title>
<url>https://langbase.com/docs/examples/memory/delete-documents/</url>
</metadata>
<content>
import { generateMetadata } from '@/lib/generate-metadata';
import { LanguageProvider, SimpleLanguageToggle, LanguageContent } from '@/components/LanguageToggle';
# Delete Documents from a Memory
This example demonstrates how to delete documents from a memory.
## Key Features
- Delete a specific document from a memory
- Delete multiple documents from a memory
- Delete all documents from a memory
<LanguageProvider defaultLanguage='typescript'>
<RunExample api="/docs/api/memory"
title="Delete Documents from a Memory Example"
output={`{ "success": true }`}
explanation={`
This code illustrates the deletion of documents from a memory using Langbase. Here's a step-by-step guide:
1. Document Deletion:
- Specifies the memory name "memory-sdk"
- Identifies the document to be deleted, e.g., "readme.md"
2. Execution:
- The document is deleted using the Langbase SDK
- Outputs the response to confirm successful deletion`}
>
<LanguageContent language="typescript">
<CodeGroup title="Delete Documents from a Memory Example" exampleTitle="Delete Documents from a Memory Example">
```ts {{ title: 'index.ts' }}
import 'dotenv/config';
import {Langbase} from 'langbase';
const langbase = new Langbase({
apiKey: process.env.LANGBASE_API_KEY!,
});
async function main() {
const response = await langbase.memories.documents.delete({
memoryName: 'memory-sdk',
documentName: 'readme.md',
});
console.log(response);
}
main();
```
</CodeGroup>
</LanguageContent>
<LanguageContent language="python">
<CodeGroup title="Delete Documents from a Memory Example" exampleTitle="Delete Documents from a Memory Example">
```python {{ title: 'index.py' }}
import json
import os
from dotenv import load_dotenv
from langbase import Langbase
def main():
load_dotenv()
# Get API key from environment variable
langbase_api_key = os.getenv("LANGBASE_API_KEY")
# Initialize the client
langbase = Langbase(api_key=langbase_api_key)
try:
response = langbase.memories.documents.delete(
memory_name="memory-sdk",
document_name="readme.md",
)
print(f"Document 'readme.md' deleted successfully from memory 'memory-sdk'")
print(json.dumps(response, indent=2))
except Exception as e:
print(f"Error deleting document: {e}")
if __name__ == "__main__":
main()
```
</CodeGroup>
</LanguageContent>
</RunExample>
</LanguageProvider>
</content>
</doc>
<doc>
<metadata>
<title>Create a Memory</title>
<url>https://langbase.com/docs/examples/memory/create-memory/</url>
</metadata>
<content>
import { generateMetadata } from '@/lib/generate-metadata';
import { LanguageProvider, SimpleLanguageToggle, LanguageContent } from '@/components/LanguageToggle';
# Create a Memory
This example demonstrates how to create a memory.
<LanguageProvider defaultLanguage='typescript'>
<RunExample api="/docs/api/memory"
title="Create Memory Example"
output={`{
name: "memory-sdk",
owner_login: "user-4543",
embedding_model: "cohere:embed-multilingual-v3.0",
chunk_size: 1024,
chunk_overlap: 256
}`}
explanation={`
This code illustrates the creation of a memory using Langbase. Here's a step-by-step guide:
1. Memory Creation:
- Initializes a new memory named "memory-sdk"
- Sets the embedding model to "cohere:embed-multilingual-v3.0"
2. Execution:
- The memory is created using the Langbase SDK
- Outputs the response to confirm successful creation`}
>
<LanguageContent language="typescript">
<CodeGroup title="Create Memory Example" exampleTitle="Create Memory Example">
```ts {{ title: 'index.ts' }}
import 'dotenv/config';
import {Langbase} from 'langbase';
const langbase = new Langbase({
apiKey: process.env.LANGBASE_API_KEY!,
});
async function main() {
const response = await langbase.memories.create({
name: 'memory-sdk',
embedding_model: 'openai:text-embedding-3-large'
});
console.log(response);
}
main();
```
</CodeGroup>
</LanguageContent>
<LanguageContent language="python">
<CodeGroup title="Create Memory Example" exampleTitle="Create Memory Example">
```python {{ title: 'index.py' }}
import json
import os
from dotenv import load_dotenv
from langbase import Langbase
def main():
load_dotenv()
# Get API key from environment variable
langbase_api_key = os.getenv("LANGBASE_API_KEY")
# Initialize the client
langbase = Langbase(api_key=langbase_api_key)
# Create the memory
try:
response = langbase.memories.create(
name="memory-sdk",
embedding_model="openai:text-embedding-3-large",
)
print(json.dumps(response, indent=2))
except Exception as e:
print(f"Error creating memory: {e}")
if __name__ == "__main__":
main()
```
</CodeGroup>
</LanguageContent>
</RunExample>
</LanguageProvider>
</content>
</doc>
<doc>
<metadata>
<title>Page</title>
<url>https://langbase.com/docs/examples/images/generate-image-together/</url>
</metadata>
<content>
import { generateMetadata } from '@/lib/generate-metadata';
import { LanguageProvider, SimpleLanguageToggle, LanguageContent } from '@/components/LanguageToggle';
## Generate Image with Together AI Flux
This example demonstrates how to generate images using Together AI's Flux models through the Langbase Images API.
---
<LanguageProvider defaultLanguage='typescript'>
<RunExample api="/docs/api/images"
title="Generate Image with Together AI Example"
output={`Image generated successfully!
Image URL: https://api.together.ai/shrt/IDOitKKrtd4BcHud,`}
explanation={`
This code demonstrates how to generate an AI image using Together AI's Flux models. Here's a step-by-step guide:
1. Initialize Langbase:
- Set up the Langbase client with your API key
2. Configure Image Generation:
- Provide a descriptive prompt for the image you want to generate
- Specify the Together AI Flux model (e.g., black-forest-labs/FLUX.1-schnell-Free)
- Set optional parameters like width, height, steps, and number of images
- Pass your Together AI API key
3. Execution:
- The image generation request is executed using the Langbase SDK
- Returns the generated image URL(s)`}
>
<LanguageContent language="typescript">
<CodeGroup title="Generate Image with Together AI" exampleTitle="Generate Image with Together AI">
```ts {{ title: 'index.ts' }}
import 'dotenv/config';
import { Langbase } from 'langbase';
const langbase = new Langbase({
apiKey: process.env.LANGBASE_API_KEY!,
});
async function main() {
// Check if API keys are available
if (!process.env.LANGBASE_API_KEY) {
console.error('❌ LANGBASE_API_KEY is not set in environment variables');
return;
}
if (!process.env.TOGETHER_API_KEY) {
console.error('❌ TOGETHER_API_KEY is not set in environment variables');
console.log('Please add your Together AI API key to the .env file');
return;
}
const result = await langbase.images.generate({
prompt: "A serene mountain landscape at sunset with a crystal clear lake reflecting the sky",
model: "together:black-forest-labs/FLUX.1-schnell-Free",
width: 1024,
height: 1024,
n: 1,
apiKey: process.env.TOGETHER_API_KEY!,
});
if (!result?.choices?.[0]?.message?.images?.[0]?.image_url?.url) {
console.error('❌ Image generation did not return an image. Full response:', result);
return;
}
console.log('✅ Image generated successfully!');
console.log('Image URL:', result.choices[0].message.images[0].image_url.url);
}
main();
```
</CodeGroup>
</LanguageContent>
<LanguageContent language="python">
<CodeGroup title="Generate Image with Together AI" exampleTitle="Generate Image with Together AI">
```python {{ title: 'index.py' }}
import os
from langbase import Langbase
from dotenv import load_dotenv
load_dotenv()
langbase = Langbase(api_key=os.getenv('LANGBASE_API_KEY'))
def main():
# Check if API keys are available
if not os.getenv('LANGBASE_API_KEY'):
print('❌ LANGBASE_API_KEY is not set in environment variables')
return
if not os.getenv('TOGETHER_API_KEY'):
print('❌ TOGETHER_API_KEY is not set in environment variables')
print('Please add your Together AI API key to the .env file')
return
result = langbase.images.generate(
prompt="A serene mountain landscape at sunset with a crystal clear lake reflecting the sky",
model="together:black-forest-labs/FLUX.1-schnell-Free",
width=1024,
height=1024,
n=1,
api_key=os.getenv('TOGETHER_API_KEY')
)
if not result.get('choices', [{}])[0].get('message', {}).get('images', [{}])[0].get('image_url', {}).get('url'):
print('❌ Image generation did not return an image. Full response:', result)
return
print('✅ Image generated successfully!')
print('Image URL:', result['choices'][0]['message']['images'][0]['image_url']['url'])
if __name__ == '__main__':
main()
```
</CodeGroup>
</LanguageContent>
</RunExample>
</LanguageProvider>
---
</content>
</doc>
<doc>
<metadata>
<title>Page</title>
<url>https://langbase.com/docs/examples/images/generate-image-openrouter/</url>
</metadata>
<content>
import { generateMetadata } from '@/lib/generate-metadata';
import { LanguageProvider, SimpleLanguageToggle, LanguageContent } from '@/components/LanguageToggle';
## Generate Image with OpenRouter
This example demonstrates how to generate images using OpenRouter's unified API through the Langbase Images API.
---
<LanguageProvider defaultLanguage='typescript'>
<RunExample api="/docs/api/images"
title="Generate Image with OpenRouter Example"
output={`Image generated successfully via OpenRouter!
Image URL: data:image/png;base64,`}
explanation={`
This code demonstrates how to generate an AI image using OpenRouter's unified API. Here's a step-by-step guide:
1. Initialize Langbase:
- Set up the Langbase client with your API key
2. Configure Image Generation:
- Provide a descriptive prompt for the image you want to generate
- Specify the OpenRouter model (e.g., openrouter:google/gemini-2.5-flash-image-preview)
- Pass your OpenRouter API key
3. Execution:
- The image generation request is executed using the Langbase SDK
- Returns the generated image URL
Note: OpenRouter provides access to multiple image generation models through a single API, making it easy to switch between different providers.`}
>
<LanguageContent language="typescript">
<CodeGroup title="Generate Image with OpenRouter" exampleTitle="Generate Image with OpenRouter">
```ts {{ title: 'index.ts' }}
import 'dotenv/config';
import { Langbase } from 'langbase';
const langbase = new Langbase({
apiKey: process.env.LANGBASE_API_KEY!,
});
async function main() {
// Check if API keys are available
if (!process.env.LANGBASE_API_KEY) {
console.error('❌ LANGBASE_API_KEY is not set in environment variables');
return;
}
if (!process.env.OPENROUTER_API_KEY) {
console.error('❌ OPENROUTER_API_KEY is not set in environment variables');
console.log('Please add your OpenRouter API key to the .env file');
return;
}
const result = await langbase.images.generate({
prompt: "A majestic dragon soaring through clouds above a fantasy castle, epic fantasy art style, detailed scales and wings",
model: "openrouter:google/gemini-2.5-flash-image-preview",
apiKey: process.env.OPENROUTER_API_KEY!
});
console.log('✅ Image generated successfully via OpenRouter!');
console.log('Image URL:', result.choices[0].message.images[0].image_url.url);
}
main();
```
</CodeGroup>
</LanguageContent>
<LanguageContent language="python">
<CodeGroup title="Generate Image with OpenRouter" exampleTitle="Generate Image with OpenRouter">
```python {{ title: 'index.py' }}
import os
from langbase import Langbase
from dotenv import load_dotenv
load_dotenv()
langbase = Langbase(api_key=os.getenv('LANGBASE_API_KEY'))
def main():
# Check if API keys are available
if not os.getenv('LANGBASE_API_KEY'):
print('❌ LANGBASE_API_KEY is not set in environment variables')
return
if not os.getenv('OPENROUTER_API_KEY'):
print('❌ OPENROUTER_API_KEY is not set in environment variables')
print('Please add your OpenRouter API key to the .env file')
return
result = langbase.images.generate(
prompt="A majestic dragon soaring through clouds above a fantasy castle, epic fantasy art style, detailed scales and wings",
model="openrouter:google/gemini-2.5-flash-image-preview",
api_key=os.getenv('OPENROUTER_API_KEY')
)
print('✅ Image generated successfully via OpenRouter!')
print('Image URL:', result['choices'][0]['message']['images'][0]['image_url']['url'])
if __name__ == '__main__':
main()
```
</CodeGroup>
</LanguageContent>
</RunExample>
</LanguageProvider>
---
</content>
</doc>
<doc>
<metadata>
<title>Page</title>
<url>https://langbase.com/docs/examples/images/generate-image-openai/</url>
</metadata>
<content>
import { generateMetadata } from '@/lib/generate-metadata';
import { LanguageProvider, SimpleLanguageToggle, LanguageContent } from '@/components/LanguageToggle';
## Generate Image with OpenAI DALL-E
This example demonstrates how to generate images using OpenAI's DALL-E model through the Langbase Images API.
---
<LanguageProvider defaultLanguage='typescript'>
<RunExample api="/docs/api/images"
title="Generate Image with OpenAI Example"
output={`Image generated successfully!
Image URL: data:image/png;base64,`}
explanation={`
This code demonstrates how to generate an AI image using OpenAI's DALL-E model. Here's a step-by-step guide:
1. Initialize Langbase:
- Set up the Langbase client with your API key
2. Configure Image Generation:
- Provide a descriptive prompt for the image you want to generate
- Specify the OpenAI model (gpt-image-1, dall-e-3, or dall-e-2)
- Set optional parameters like width and height
- Pass your OpenAI API key
3. Execution:
- The image generation request is executed using the Langbase SDK
- Returns the generated image URL`}
>
<LanguageContent language="typescript">
<CodeGroup title="Generate Image with OpenAI" exampleTitle="Generate Image with OpenAI">
```ts {{ title: 'index.ts' }}
import 'dotenv/config';
import { Langbase } from 'langbase';
const langbase = new Langbase({
apiKey: process.env.LANGBASE_API_KEY!,
});
async function main() {
// Check if API keys are available
if (!process.env.LANGBASE_API_KEY) {
console.error('❌ LANGBASE_API_KEY is not set in environment variables');
return;
}
if (!process.env.OPENAI_API_KEY) {
console.error('❌ OPENAI_API_KEY is not set in environment variables');
console.log('Please add your OpenAI API key to the .env file');
return;
}
const result = await langbase.images.generate({
prompt: "A futuristic cityscape with flying cars and neon lights, cyberpunk style, highly detailed, 8k resolution",
model: "openai:gpt-image-1",
size: "1024x1024",
apiKey: process.env.OPENAI_API_KEY!
});
console.log('✅ Image generated successfully!');
console.log('Image URL:', result.choices[0].message.images[0].image_url.url);
}
main();
```
</CodeGroup>
</LanguageContent>
<LanguageContent language="python">
<CodeGroup title="Generate Image with OpenAI" exampleTitle="Generate Image with OpenAI">
```python {{ title: 'index.py' }}
import os
from langbase import Langbase
from dotenv import load_dotenv
load_dotenv()
langbase = Langbase(api_key=os.getenv('LANGBASE_API_KEY'))
def main():
# Check if API keys are available
if not os.getenv('LANGBASE_API_KEY'):
print('❌ LANGBASE_API_KEY is not set in environment variables')
return
if not os.getenv('OPENAI_API_KEY'):
print('❌ OPENAI_API_KEY is not set in environment variables')
print('Please add your OpenAI API key to the .env file')
return
result = langbase.images.generate(
prompt="A futuristic cityscape with flying cars and neon lights, cyberpunk style, highly detailed, 8k resolution",
model="openai:gpt-image-1",
width=1024,
height=1024,
api_key=os.getenv('OPENAI_API_KEY')
)
print('✅ Image generated successfully!')
print('Image URL:', result['choices'][0]['message']['images'][0]['image_url']['url'])
if __name__ == '__main__':
main()
```
</CodeGroup>
</LanguageContent>
</RunExample>
</LanguageProvider>
---
</content>
</doc>
<doc>
<metadata>
<title>Page</title>
<url>https://langbase.com/docs/examples/images/generate-image-google/</url>
</metadata>
<content>
import { generateMetadata } from '@/lib/generate-metadata';
import { LanguageProvider, SimpleLanguageToggle, LanguageContent } from '@/components/LanguageToggle';
## Generate Image with Google Imagen
This example demonstrates how to generate images using Google's Imagen model through the Langbase Images API.
---
<LanguageProvider defaultLanguage='typescript'>
<RunExample api="/docs/api/images"
title="Generate Image with Google Example"
output={`Image generated successfully!
Image URL: data:image/png;base64,`}
explanation={`
This code demonstrates how to generate an AI image using Google's Imagen model. Here's a step-by-step guide:
1. Initialize Langbase:
- Set up the Langbase client with your API key
2. Configure Image Generation:
- Provide a descriptive prompt for the image you want to generate
- Specify the Google Imagen model (e.g., gemini-2.5-flash-image-preview)
- Pass your Google API key
3. Execution:
- The image generation request is executed using the Langbase SDK
- Returns the generated image URL`}
>
<LanguageContent language="typescript">
<CodeGroup title="Generate Image with Google" exampleTitle="Generate Image with Google">
```ts {{ title: 'index.ts' }}
import 'dotenv/config';
import { Langbase } from 'langbase';
const langbase = new Langbase({
apiKey: process.env.LANGBASE_API_KEY!,
});
async function main() {
// Check if API keys are available
if (!process.env.LANGBASE_API_KEY) {
console.error('❌ LANGBASE_API_KEY is not set in environment variables');
return;
}
if (!process.env.GOOGLE_API_KEY) {
console.error('❌ GOOGLE_API_KEY is not set in environment variables');
console.log('Please add your Google API key to the .env file');
return;
}
const result = await langbase.images.generate({
prompt: "A peaceful zen garden with cherry blossoms and a traditional Japanese bridge",
model: "google:gemini-2.5-flash-image-preview",
apiKey: process.env.GOOGLE_API_KEY!
});
console.log('✅ Image generated successfully!');
console.log('Image URL:', result.choices[0].message.images[0].image_url.url);
}
main();
```
</CodeGroup>
</LanguageContent>
<LanguageContent language="python">
<CodeGroup title="Generate Image with Google" exampleTitle="Generate Image with Google">
```python {{ title: 'index.py' }}
import os
from langbase import Langbase
from dotenv import load_dotenv
load_dotenv()
langbase = Langbase(api_key=os.getenv('LANGBASE_API_KEY'))
def main():
# Check if API keys are available
if not os.getenv('LANGBASE_API_KEY'):
print('❌ LANGBASE_API_KEY is not set in environment variables')
return
if not os.getenv('GOOGLE_API_KEY'):
print('❌ GOOGLE_API_KEY is not set in environment variables')
print('Please add your Google API key to the .env file')
return
result = langbase.images.generate(
prompt="A peaceful zen garden with cherry blossoms and a traditional Japanese bridge",
model="google:gemini-2.5-flash-image-preview",
api_key=os.getenv('GOOGLE_API_KEY')
)
print('✅ Image generated successfully!')
print('Image URL:', result['choices'][0]['message']['images'][0]['image_url']['url'])
if __name__ == '__main__':
main()
```
</CodeGroup>
</LanguageContent>
</RunExample>
</LanguageProvider>
---
</content>
</doc>
<doc>
<metadata>
<title>Page</title>
<url>https://langbase.com/docs/examples/embed/generate-embeddings/</url>
</metadata>
<content>
import { generateMetadata } from '@/lib/generate-metadata';
import { LanguageProvider, SimpleLanguageToggle, LanguageContent } from '@/components/LanguageToggle';
## Generate Embeddings from chunks
This example demonstrates how to generate embeddings for a given text.
---
<LanguageProvider defaultLanguage='typescript'>
<RunExample api="/docs/api/pipe"
title="Generate Embeddings Example"
output={`[
[
-0.051607393, -0.0351734, -0.06450924, -0.027093882, 0.008677022, 0.03193736,
0.024302006, 0.08016066, 0.011008873, 0.1034686, 0.037182704, 0.020071892, -0.056810435,
-0.011093475, 0.021890841, 0.038790148, -0.050507564, -0.0072863717, 0.023286778,
-0.096615806, -0.0040344717, -0.10803712, -0.005826982, 0.023329081, 0.0051157945,
-0.03409472, 0.10592206, 0.01652917, -0.11379007, 0.009618223, 0.15575281, 0.024534663,
0.0020608588, -0.02958965, -0.045304522, -0.13079514, 0.11201342, -0.033925515,
-0.050084554, 0.018073164, 0.03510995, 0.028024508, -0.14999986, -0.0184856, 0.046362054,
-0.009977782, -0.009909043, -0.11353627, -0.057444952, -0.04767339, -0.018675955,
-0.09805405, 0.11505911, -0.004864631, 0.0070537156, -0.010099398, 0.10033831,
0.07931464, 0.09712342, -0.022694563, -0.055033788, 0.015513944, -0.060702138,
0.015884079, -0.006339884, 0.020716984, 0.041899282, 0.023773242, -0.016698375,
0.03326985, -0.014752523, -0.030224167, 0.0051448764, -0.029822305, 0.07491532,
0.053257138, 0.04966154, 0.0777918, 0.0011315555, -0.0019656813, 0.05812177, 0.027580345,
0.016296515, 0.037098102, 0.14864622, -0.0022115565, 0.057529554, -0.16776633,
0.077580296, -0.06374782, -0.0111252, 0.04703887, -0.051691998, 0.017745329, -0.023773242,
0.03824023, -0.06332481, -0.012394235, -0.029928058, 0.07478842,
... 156 more items
]
]`}
explanation={`
This code demonstrates how to generate embeddings for a given text in Langbase. Here's a step-by-step guide:
1. Text Preparation:
- Specifies the text chunks for which embeddings need to be generated
2. Execution:
- The embedding request is executed using the Langbase SDK
- Outputs the response to display the generated embeddings`}
>
<LanguageContent language="typescript">
<CodeGroup title="Generate Embeddings Example" exampleTitle="Generate Embeddings Example">
```ts {{ title: 'index.ts' }}
import 'dotenv/config';
import {Langbase} from 'langbase';
const langbase = new Langbase({
apiKey: process.env.LANGBASE_API_KEY!,
});
/**
* Generates embeddings for the given text chunks.
*/
async function main() {
const response = await langbase.embed({
chunks: [
'Langbase is the most powerful serverless platform for building AI agents with memory. Build, scale, and evaluate AI agents with semantic memory (RAG) and world-class developer experience. We process billions of AI messages/tokens daily. Built for every developer, not just AI/ML experts.',
],
embeddingModel: 'openai:text-embedding-3-large',
});
console.log(response);
}
main();
```
</CodeGroup>
</LanguageContent>
<LanguageContent language="python">
<CodeGroup title="Generate Embeddings Example" exampleTitle="Generate Embeddings Example">
```python {{ title: 'index.py' }}
import os
from langbase import Langbase
from dotenv import load_dotenv
load_dotenv()
langbase = Langbase(api_key=os.getenv('LANGBASE_API_KEY'))
def main():
response = langbase.embed(
chunks=[
'Langbase is the most powerful serverless platform for building AI agents with memory. Build, scale, and evaluate AI agents with semantic memory (RAG) and world-class developer experience. We process billions of AI messages/tokens daily. Built for every developer, not just AI/ML experts.'
],
embedding_model='openai:text-embedding-3-large'
)
print(response)
if __name__ == '__main__':
main()
```
</CodeGroup>
</LanguageContent>
</RunExample>
</LanguageProvider>
---
</content>
</doc>
<doc>
<metadata>
<title>Page</title>
<url>https://langbase.com/docs/examples/chunker/chunk-text/</url>
</metadata>
<content>
import { generateMetadata } from '@/lib/generate-metadata';
import { LanguageProvider, SimpleLanguageToggle, LanguageContent } from '@/components/LanguageToggle';
## Chunk Text
This example demonstrates how to chunk text.
---
<LanguageProvider defaultLanguage='typescript'>
<RunExample api="/docs/api/pipe"
title="Chunk Text Example"
output={`[
"Langbase is the most powerful serverless AI platform for building AI agents with memory.Build, deploy, and scale AI agents with tools and memory (RAG). Simple AI primitives with a world-class developer experience without using any frameworks.Compared to complex AI frameworks, Langbase is serverless and the first composable AI platform.Build AI agents without any bloated frameworks. You write the logic, we handle the logistics.Start by building simple AI agents (pipes)Then train serverless semantic Memory agents (RAG) to get accurate and trusted resultsLangbase provides several options to get started:AI Studio: Build, collaborate, and deploy AI Agents with tools and Memory (RAG).Langbase SDK: Easiest wasy to build AI Agents with TypeScript. (recommended)HTTP API: Build AI agents with any language (Python, Go, PHP, etc.).Products\tDescription AI Pipes(Serverless Agents)",
"HTTP API: Build AI agents with any language (Python, Go, PHP, etc.).Products\tDescription AI Pipes(Serverless Agents)Pipes are serverless AI agents with agentic tools. Work with any language or framework. Pipe is a serverless AI agent. It has agentic memory and tools. Deploy thousands of serverless agent pipes as easily as a website. Build and scale AI experiences powered by industry-leading 250+ LLM models and tools. Learn more about AI Pipes. AI Memory(Serverless RAG)Langbase memory agents are the next frontier in semantic retrieval-augmented generation (RAG) as a serverless and infinitely scalable API designed for developers. 30-50x less expensive than compeition, with industry-leading accuracy in advanced agentic routing and intelligent reranking.",
"Memory is multi-tanent by design. Have tens of millions of memory RAG stores. Per user or per use-case memory RAGs. Memory is a powerful tool for developers to build AI features and products. Learn more about AI Memory agents. AI Studio(Dev Platform)Langbase Studio is your playground to build, collaborate, and deploy AI. It allows you to experiment with your pipes in real-time, with real data, store messages, version your prompts, and truly helps you take your idea from building prototypes to deployed in production with LLMOps on usage, cost, and quality. Access Langbase Studio.A complete AI developers platform.- Collaborate: Invite all team members to collaborate on the pipe. Build AI together.- Developers & Stakeholders: All your R&D team, engineering, product, GTM (marketing and sales), literally all your stakeholders can collaborate on the same pipe. It's like a powerful version of GitHub x Google Docs for AI. A complete AI developers platform.Join today",
"Join today. Langbase is free for anyone to get started. We process billions of AI messages tokens daily, used by thousands of developers. Tweet us what will you ship with Langbase? It all started with a developer thinking GPT is amazing, I want it everywhere, that's what Langbase does for me."
]`}
explanation={`
This code demonstrates how to chunk text in Langbase. Here's a step-by-step guide:
- The chunk request is executed using the Langbase SDK
- Outputs the response to display the chunked content
`}
>
<LanguageContent language="typescript">
<CodeGroup title="Chunk Text Example" exampleTitle="Chunk Text Example">
```ts {{ title: 'index.ts' }}
import {Langbase} from 'langbase';
import 'dotenv/config';
const langbase = new Langbase({
apiKey: process.env.LANGBASE_API_KEY!,
});
async function main() {
const content = `Langbase is the most powerful serverless AI platform for building AI agents with memory. Build, deploy, and scale AI agents with tools and memory (RAG). Simple AI primitives with a world-class developer experience without using any frameworks.`;
const results = await langbase.chunker({
content,
chunkMaxLength: 1024,
chunkOverlap: 256,
});
console.log(results);
}
main();
```
</CodeGroup>
</LanguageContent>
<LanguageContent language="python">
<CodeGroup title="Chunk Text Example" exampleTitle="Chunk Text Example">
```python {{ title: 'index.py' }}
import os
from langbase import Langbase
from dotenv import load_dotenv
load_dotenv()
langbase = Langbase(api_key=os.getenv('LANGBASE_API_KEY'))
def main():
content = "Langbase is the most powerful serverless AI platform for building AI agents with memory. Build, deploy, and scale AI agents with tools and memory (RAG). Simple AI primitives with a world-class developer experience without using any frameworks."
results = langbase.chunker(
content=content,
chunk_max_length=1024,
chunk_overlap=256
)
print(results)
if __name__ == '__main__':
main()
```
</CodeGroup>
</LanguageContent>
</RunExample>
</LanguageProvider>
---
</content>
</doc>
<doc>
<metadata>
<title>Run Agent Streaming</title>
<url>https://langbase.com/docs/examples/agent/run-stream/</url>
</metadata>
<content>
import { generateMetadata } from '@/lib/generate-metadata';
import { LanguageProvider, SimpleLanguageToggle, LanguageContent } from '@/components/LanguageToggle';
# Run Agent Streaming
This example demonstrates how to run an agent with streaming response.
---
<LanguageProvider defaultLanguage='typescript'>
<RunExample api="/docs/api/pipe"
title="Run Agent Streaming Example"
output={`
Stream started.
An AI engineer is a professional who specializes in the development and implementation of artificial intelligence (AI) systems and applications. They work at the intersection of software engineering, data science, and machine learning, using their skills to create algorithms and models that enable machines to perform tasks that typically require human intelligence.
AI engineers typically have a background in computer science, data science, mathematics, or related fields, often holding at least a bachelor's degree, with many having master's degrees or PhDs in specialized areas.
Overall, AI engineers play a critical role in advancing the capabilities of AI technologies and applying them to real-world challenges across various industries.
Stream ended.
`}
explanation={`
This guide provides a streamlined approach to running an agent with streaming responses. Here's a simplified breakdown:
1. Start with a User Message:
- Set up the initial message to be sent to the agent.
2. Execute the Agent:
- Use the langbase.agent.run() with the 'summary-agent'.
- The agent processes the message and streams the response.
3. Handle the Stream:
- Convert the stream to a stream runner.
- Use event listeners to handle the stream events.
- Write the content to the console.
4. Complete the Execution:
- The Langbase SDK handles the stream.
- Display the streaming responses to observe the agent's output.
`}
>
<LanguageContent language="typescript">
<CodeGroup title="Run Agent Streaming Example" exampleTitle="Run Agent Streaming Example">
```ts {{ title: 'index.ts' }}
import 'dotenv/config';
import {getRunner, Langbase} from 'langbase';
const langbase = new Langbase({
apiKey: process.env.LANGBASE_API_KEY!,
});
async function main() {
// Get readable stream
const {stream} = await langbase.agent.run({
stream: true,
apiKey: process.env.OPENAI_API_KEY!,
model: 'openai:gpt-4.1-mini',
instructions: 'You are a helpful assistant that help users summarize text.',
input: [
{
role: 'user',
content: 'Who is an AI Engineer?'
}
]
});
// Convert the stream to a stream runner.
const runner = getRunner(stream);
// Method 1: Using event listeners
runner.on('connect', () => {
console.log('Stream started.\n');
});
runner.on('content', content => {
process.stdout.write(content);
});
runner.on('end', () => {
console.log('\nStream ended.');
});
runner.on('error', error => {
console.error('Error:', error);
});
}
main();
```
</CodeGroup>
</LanguageContent>
<LanguageContent language="python">
<CodeGroup title="Run Agent Streaming Example" exampleTitle="Run Agent Streaming Example">
```python {{ title: 'index.py' }}
import os
from dotenv import load_dotenv
from langbase import Langbase, get_runner
load_dotenv()
def main():
langbase_api_key = os.environ.get("LANGBASE_API_KEY")
api_key = os.environ.get("LLM_API_KEY")
langbase = Langbase(api_key=langbase_api_key)
response = langbase.agent.run(
stream=True,
model="openai:gpt-4.1-mini",
instructions="You are a helpful assistant that help users summarize text.",
input=[{"role": "user", "content": "Who is an AI Engineer?"}],
api_key=api_key,
)
runner = get_runner(response)
print("Stream started.\n")
for content in runner.text_generator():
print(content, end="", flush=True)
print("\nStream ended.")
if __name__ == "__main__":
main()
```
</CodeGroup>
</LanguageContent>
</RunExample>
</LanguageProvider>
---
</content>
</doc>
<doc>
<metadata>
<title>Run Agent with MCP</title>
<url>https://langbase.com/docs/examples/agent/run-mcp/</url>
</metadata>
<content>
import { generateMetadata } from '@/lib/generate-metadata';
import { LanguageProvider, SimpleLanguageToggle, LanguageContent } from '@/components/LanguageToggle';
# Run Agent with MCP
This example demonstrates how to run an agent with MCP.
---
<LanguageProvider defaultLanguage='typescript'>
<RunExample api="/docs/api/agent/run"
title="Run Agent with Deepwiki MCP Server"
output={`The 2025-03-26 version of the MCP spec supports two transport protocols: stdio transport: where the client launches the MCP server as a subprocess and communication occurs over standard input/output with JSON-RPC messages.
Streamable HTTP transport: where the server handles multiple client connections via a single HTTP endpoint supporting POST and GET methods, optionally using Server-Sent Events (SSE) for streaming messages.
Both use JSON-RPC 2.0 for message exchange. Custom transports may also be implemented if they preserve the JSON-RPC message format and lifecycle requirements.
`}
explanation={`
This guide provides a streamlined approach to running an agent with MCP. Here's a simplified breakdown:
1. Start with a User Message:
- Set up the initial message to be sent to the agent to get a response from the MCP servers.
2. Execute the Agent:
- Use the langbase.agent.run() with the Deepwiki MCP server.
- The agent processes the message and returns the response.
3. Complete the Execution:
- The Langbase SDK handles the MCP servers.
- Display the response to observe the agent's output.
`}
>
<LanguageContent language="typescript">
<CodeGroup title="Run Agent with Deepwiki MCP Server" exampleTitle="Run Agent with Deepwiki MCP Server">
```ts {{ title: 'index.ts' }}
import 'dotenv/config';
import {Langbase} from 'langbase';
const langbase = new Langbase({
apiKey: process.env.LANGBASE_API_KEY!,
});
async function main() {
const response = await langbase.agent.run({
stream: false,
mcp_servers: [
{
type: 'url',
name: 'deepwiki',
url: 'https://mcp.deepwiki.com/sse',
},
],
model: 'openai:gpt-4.1-mini',
apiKey: process.env.OPENAI_API_KEY!,
instructions:
'You are a helpful assistant that help users summarize text.',
input: [
{
role: 'user',
content:
'What transport protocols does the 2025-03-26 version of the MCP spec (modelcontextprotocol/modelcontextprotocol) support?',
},
],
});
console.log('response: ', response.output);
}
main();
```
</CodeGroup>
</LanguageContent>
<LanguageContent language="python">
<CodeGroup title="Run Agent with Deepwiki MCP Server" exampleTitle="Run Agent with Deepwiki MCP Server">
```python {{ title: 'index.py' }}
import os
from dotenv import load_dotenv
from langbase import Langbase
load_dotenv()
def main():
langbase_api_key = os.environ.get("LANGBASE_API_KEY")
llm_api_key = os.environ.get("LLM_API_KEY")
langbase = Langbase(api_key=langbase_api_key)
response = langbase.agent.run(
stream=False,
model="openai:gpt-4.1-mini",
api_key=llm_api_key,
instructions="You are a helpful assistant that help users summarize text.",
input=[
{
"role": "user",
"content": "What transport protocols does the 2025-03-26 version of the MCP spec (modelcontextprotocol/modelcontextprotocol) support?",
}
],
mcp_servers=[
{"type": "url", "name": "deepwiki", "url": "https://mcp.deepwiki.com/sse"}
],
)
print("response:", response.get("output"))
if __name__ == "__main__":
main()
```
</CodeGroup>
</LanguageContent>
</RunExample>
</LanguageProvider>
---
</content>
</doc>
<doc>
<metadata>
<title>Run Agent with Vision</title>
<url>https://langbase.com/docs/examples/agent/run-agent-with-vision/</url>
</metadata>
<content>
import { generateMetadata } from '@/lib/generate-metadata';
import { LanguageProvider, SimpleLanguageToggle, LanguageContent } from '@/components/LanguageToggle';
# Run Agent with Vision
This example demonstrates how to run a Langbase agent that can analyze visual content using image inputs. The agent uses a vision-capable model to understand and respond to user prompts involving images — such as extracting text from a photo.
---
<LanguageProvider defaultLanguage='typescript'>
<RunExample
api="/docs/api/pipe"
title="Run Agent with Vision Example"
output={`The text from the image is: 'The quick brown fox jumps over the lazy dog.' +
'0123456789\n' +
'The quick brown fox jumps over the lazy dog.\n'`}
explanation={`
This example demonstrates how to use a Langbase agent to interpret images using OpenAI's GPT-4o vision model:
1. Use a Vision-Capable Model:
- Set the model to \`openai:gpt-4o-mini\` or another that supports images.
2. Structure the User Input:
- Combine text and image in a single user message.
- Format the input using \`content: [ { type: 'text' }, { type: 'image_url' } ]\`.
3. Run the Agent:
- Pass the input to \`langbase.agent.run()\` as usual.
- The model will interpret both the text and image together.
4. Get the Response:
- The agent will respond with extracted text or visual insights based on the image.
`}>
<LanguageContent language="typescript">
<CodeGroup title="Run Agent with Vision Example" exampleTitle="Run Agent with Vision Example">
```ts {{ title: 'index.ts' }}
import 'dotenv/config';
import { Langbase } from 'langbase';
const langbase = new Langbase({
apiKey: process.env.LANGBASE_API_KEY!,
});
async function main() {
const response = await langbase.agent.run({
model: 'openai:gpt-4o-mini',
input: [
{
role: 'user',
content: [
{
type: 'text',
text: 'Extract the text from this image',
},
{
type: 'image_url',
image_url: {
url: 'https://upload.wikimedia.org/wikipedia/commons/a/a7/Handwriting.png',
},
},
],
},
],
apiKey: process.env.LLM_API_KEY!,
stream: false,
});
console.log('Vision Agent Response:', response);
}
main();
```
</CodeGroup>
</LanguageContent>
<LanguageContent language="python">
<CodeGroup title="Run Agent with Vision Example" exampleTitle="Run Agent with Vision Example">
```python {{ title: 'index.py' }}
import os
from langbase import Langbase
langbase = Langbase(api_key=os.getenv('LANGBASE_API_KEY'))
async def main():
response = await langbase.agent.run(
model='openai:gpt-4o-mini',
input=[
{
'role': 'user',
'content': [
{
'type': 'text',
'text': 'Extract the text from this image',
},
{
'type': 'image_url',
'image_url': {
'url': 'https://upload.wikimedia.org/wikipedia/commons/a/a7/Handwriting.png',
},
},
],
},
],
api_key=os.getenv('LLM_API_KEY'),
stream=False,
)
print('Vision Agent Response:', response)
if __name__ == '__main__':
main()
```
</CodeGroup>
</LanguageContent>
</RunExample>
</LanguageProvider>
</content>
</doc>
<doc>
<metadata>
<title>Run Agent with Tool</title>
<url>https://langbase.com/docs/examples/agent/run-agent-with-tool/</url>
</metadata>
<content>
import { generateMetadata } from '@/lib/generate-metadata';
import { LanguageProvider, SimpleLanguageToggle, LanguageContent } from '@/components/LanguageToggle';
# Run Agent with Tool
This example demonstrates how to run an agent that can call a tool — in this case, a function that sends an email using the Resend API.
---
<LanguageProvider defaultLanguage='typescript'>
<RunExample
api="/docs/api/pipe"
title="Run Agent with Tool Example"
output={`"The welcome email has been sent successfully to Sam."`}
explanation={`
This example shows how to empower a Langbase agent to call a function as a tool:
1. Define a Tool:
- Create a tool schema that describes the function’s name, description, and parameters.
- This schema tells the agent how and when to call the tool.
2. Register Tool with Agent:
- Pass the tool schema in the \`tools\` array when calling \`agent.run()\`.
3. Agent Calls Tool:
- Based on the user's message, the agent will decide to call the function.
- You handle the actual function logic (e.g. send the email via Resend API).
4. Return the Result:
- Return a success response back to the agent.
`}>
<LanguageContent language="typescript">
<CodeGroup title="Run Agent with Tool Example" exampleTitle="Run Agent with Tool Example">
```ts {{ title: 'index.ts' }}
import 'dotenv/config';
import { Langbase, Message, type Tools } from 'langbase';
const langbase = new Langbase({
apiKey: process.env.LANGBASE_API_KEY!,
});
// Define the tool schema for sending emails
const sendEmailToolSchema: Tools = {
type: "function",
function: {
name: "send_email",
description: "Send an email using Resend API",
parameters: {
type: "object",
required: ["from", "to", "subject", "html", "text"],
properties: Object.fromEntries(
["from", "to", "subject", "html", "text"].map((field) => [
field,
{ type: "string" },
])
),
additionalProperties: false,
},
},
};
// Actual tool function
async function send_email(args: any) {
const { from, to, subject, html, text } = args;
const response = await fetch('https://api.resend.com/emails', {
method: 'POST',
headers: {
Authorization: `Bearer ${process.env.RESEND_API_KEY}`,
'Content-Type': 'application/json',
},
body: JSON.stringify({
from,
to,
subject,
html,
text,
}),
});
if (!response.ok) {
throw new Error('Failed to send email');
}
const data = await response.json();
return `✅ Email sent successfully to ${to}!`;
}
async function main() {
if (!process.env.LANGBASE_API_KEY || !process.env.RESEND_API_KEY || !process.env.OPENAI_API_KEY) {
console.error('❌ Missing required API keys.');
process.exit(1);
}
const recipientInfo = {
email: "sam@example.com",
};
const email = {
subject: "Welcome to Langbase!",
htmlEmail: "<h1>Hello Sam!</h1><p>Welcome to Langbase.</p>",
fullEmail: "Hello Sam! Welcome to Langbase.",
};
const inputMessages: Message[] = [
{
role: 'user',
content: 'Send a welcome email to Sam.',
},
];
// Initial run with tool
const response = await langbase.agent.run({
model: "openai:gpt-4.1-mini",
apiKey: process.env.OPENAI_API_KEY!,
instructions: "You are an email sending assistant.",
input: inputMessages,
tools: [sendEmailToolSchema],
stream: false,
});
// Push agent tool call to messages
inputMessages.push(response.choices[0].message);
// Detect tool call
const toolCalls = response.choices[0].message.tool_calls;
const hasToolCalls = toolCalls && toolCalls.length > 0;
if (hasToolCalls) {
for (const toolCall of toolCalls) {
// Process each tool call
const { name, arguments: args } = toolCall.function;
const parsedArgs = JSON.parse(args);
parsedArgs.from = "onboarding@resend.dev";
parsedArgs.to = recipientInfo.email;
parsedArgs.subject = email.subject;
parsedArgs.html = email.htmlEmail;
parsedArgs.text = email.fullEmail;
const result = await send_email(parsedArgs);
inputMessages.push({
role: 'tool',
tool_call_id: toolCall.id,
name,
content: result,
});
}
}
// Final agent response with tool result
const { output: finalOutput } = await langbase.agent.run({
model: "openai:gpt-4.1-mini",
apiKey: process.env.OPENAI_API_KEY!,
instructions: `You are an email sending assistant.
Confirm the email has been sent successfully.`,
input: inputMessages,
stream: false,
});
console.log('Final Output:', finalOutput);
}
main();
```
</CodeGroup>
</LanguageContent>
<LanguageContent language="python">
<CodeGroup title="Run Agent with Tool Example" exampleTitle="Run Agent with Tool Example">
```python {{ title: 'index.py' }}
import json
import os
import requests
from dotenv import load_dotenv
from langbase import Langbase
load_dotenv()
# Define the tool schema for sending emails
send_email_tool_schema = {
"type": "function",
"function": {
"name": "send_email",
"description": "Send an email using Resend API",
"parameters": {
"type": "object",
"required": ["from", "to", "subject", "html", "text"],
"properties": {
"from": {"type": "string"},
"to": {"type": "string"},
"subject": {"type": "string"},
"html": {"type": "string"},
"text": {"type": "string"},
},
"additionalProperties": False,
},
},
}
# Actual tool function
def send_email(args):
"""Send an email using the Resend API."""
from_email = args.get("from")
to_email = args.get("to")
subject = args.get("subject")
html = args.get("html")
text = args.get("text")
# response = requests.post(
# "https://api.resend.com/emails",
# headers={
# "Authorization": f"Bearer {os.environ.get('RESEND_API_KEY')}",
# "Content-Type": "application/json",
# },
# json={
# "from": from_email,
# "to": to_email,
# "subject": subject,
# "html": html,
# "text": text,
# },
# )
# if not response.ok:
# raise Exception("Failed to send email")
return f"✅ Email sent successfully to {to_email}!"
def main():
# Check for required environment variables
langbase_api_key = os.environ.get("LANGBASE_API_KEY")
llm_api_key = os.environ.get("LLM_API_KEY")
# resend_api_key = os.environ.get("RESEND_API_KEY")
if not langbase_api_key:
print("❌ Missing LANGBASE_API_KEY in environment variables.")
exit(1)
if not llm_api_key:
print("❌ Missing LLM_API_KEY in environment variables.")
exit(1)
# if not resend_api_key:
# print("❌ Missing RESEND_API_KEY in environment variables.")
# exit(1)
# Initialize Langbase client
langbase = Langbase(api_key=langbase_api_key)
recipient_info = {"email": "sam@example.com"}
email = {
"subject": "Welcome to Langbase!",
"html_email": "Hello Sam! Welcome to Langbase.",
"full_email": "Hello Sam! Welcome to Langbase.",
}
input_messages = [{"role": "user", "content": "Send a welcome email to Sam."}]
# Initial run with tool
response = langbase.agent.run(
model="openai:gpt-4.1-mini",
api_key=llm_api_key,
instructions="You are an email agent. You are given a task to send an email to a recipient. You have the ability to send an email using the send_email tool.",
input=input_messages,
tools=[send_email_tool_schema],
stream=False,
)
# Check if response contains choices (for tool calls)
choices = response.get("choices", [])
print("\n📨 Initial Response:")
print(
f"Output: {response.get('output', 'No direct output - checking for tool calls...')}"
)
if not choices:
print("❌ No choices found in response")
return
# Push agent tool call to messages
input_messages.append(choices[0].get("message", {}))
# Detect tool call
tool_calls = choices[0].get("message", {}).get("tool_calls", [])
has_tool_calls = tool_calls and len(tool_calls) > 0
if has_tool_calls:
print(f"\n🔧 Tool calls detected: {len(tool_calls)}")
for i, tool_call in enumerate(tool_calls, 1):
# Process each tool call
function = tool_call.get("function", {})
name = function.get("name")
args = function.get("arguments")
print(f"\n Tool Call #{i}:")
print(f" - Name: {name}")
print(f" - Raw Arguments: {args}")
try:
parsed_args = json.loads(args)
print(f" - Parsed Arguments: {json.dumps(parsed_args, indent=4)}")
except json.JSONDecodeError:
print(f" ❌ Error parsing tool call arguments: {args}")
continue
# Set email parameters
print("\n 📧 Preparing email with full details...")
parsed_args["from"] = "onboarding@resend.dev"
parsed_args["to"] = recipient_info["email"]
parsed_args["subject"] = email["subject"]
parsed_args["html"] = email["html_email"]
parsed_args["text"] = email["full_email"]
print(f" - From: {parsed_args['from']}")
print(f" - To: {parsed_args['to']}")
print(f" - Subject: {parsed_args['subject']}")
# Execute the tool
try:
print(f"\n ⚡ Executing {name}...")
result = send_email(parsed_args)
print(f" ✅ Tool result: {result}")
# Add tool result to messages
input_messages.append(
{
"role": "tool",
"tool_call_id": tool_call.get("id"),
"name": name,
"content": result,
}
)
except Exception as e:
print(f" ❌ Error executing tool: {e}")
continue
print("\n🤖 Sending tool results back to agent for final response...")
# Final agent response with tool result
final_response = langbase.agent.run(
model="openai:gpt-4.1-mini",
api_key=llm_api_key,
instructions="You are an email sending assistant. Confirm the email has been sent successfully.",
input=input_messages,
stream=False,
)
print("\n✨ Final Response:")
print(f"Agent: {final_response.get('output')}")
print("\n" + "=" * 50)
if __name__ == "__main__":
main()
```
</CodeGroup>
</LanguageContent>
</RunExample>
</LanguageProvider>
</content>
</doc>
<doc>
<metadata>
<title>Run Agent with Memory</title>
<url>https://langbase.com/docs/examples/agent/run-agent-with-memory/</url>
</metadata>
<content>
import { generateMetadata } from '@/lib/generate-metadata';
import { LanguageProvider, SimpleLanguageToggle, LanguageContent } from '@/components/LanguageToggle';
# Run Agent with Memory
This example demonstrates how to retrieve and attach memory to an agent call.
---
<LanguageProvider defaultLanguage='typescript'>
<RunExample
api="/docs/api/pipe"
title="Run Agent with Memory Example"
output={`"An AI Engineer is someone who builds and deploys systems powered by artificial intelligence, including LLM-based agents."`}
explanation={`
This example demonstrates how to attach retrieved memory to an agent run:
1. Retrieve Memory:
- Use \`langbase.memories.retrieve\` to fetch relevant context.
- Define the memory name and query.
- Limit results using \`topK\`.
2. Run the Agent with Retrieved Memory:
- Inject the memory result as part of the user's input.
- Run the agent with the desired model, and conversation input.
3. Get the Response:
- Log or display the agent’s response.
`}>
<LanguageContent language="typescript">
<CodeGroup title="Run Agent with Memory Example" exampleTitle="Run Agent with Memory Example">
```ts {{ title: 'index.ts' }}
import 'dotenv/config';
import { Langbase } from 'langbase';
const langbase = new Langbase({
apiKey: process.env.LANGBASE_API_KEY!,
});
async function main() {
if (!process.env.LANGBASE_API_KEY) {
console.error('❌ Missing LANGBASE_API_KEY in environment variables.');
process.exit(1);
}
// Step 1: Retrieve memory
const memoryResponse = await langbase.memories.retrieve({
memory: [
{
name: 'career-advisor-memory',
},
],
query: 'Who is an AI Engineer?',
topK: 2,
});
// Step 2: Run the agent with the retrieved memory
const { output } = await langbase.agent.run({
model: 'openai:gpt-4.1-mini',
apiKey: process.env.LLM_API_KEY!,
instructions: 'You are a career advisor who helps users understand AI job roles.',
input: [
{
role: 'user',
content: `${memoryResponse}\n\n Now, based on the above, who is an AI Engineer?`,
},
],
});
// Step 3: Display output
console.log('Agent Response:', output);
}
main();
```
</CodeGroup>
</LanguageContent>
<LanguageContent language="python">
<CodeGroup title="Run Agent with Memory Example" exampleTitle="Run Agent with Memory Example">
```python {{ title: 'index.py' }}
import os
from langbase import Langbase
langbase = Langbase(api_key=os.getenv('LANGBASE_API_KEY'))
async def main():
if not os.getenv('LANGBASE_API_KEY'):
print('❌ Missing LANGBASE_API_KEY in environment variables.')
return
# Step 1: Retrieve memory
memory_response = await langbase.memories.retrieve(
memory=[
{
'name': 'career-advisor-memory',
}
],
query='Who is an AI Engineer?',
top_k=2
)
# Step 2: Run the agent with the retrieved memory
response = await langbase.agent.run(
model='openai:gpt-4.1-mini',
api_key=os.getenv('LLM_API_KEY'),
instructions='You are a career advisor who helps users understand AI job roles.',
input=[
{
'role': 'user',
'content': f'{memory_response}\n\n Now, based on the above, who is an AI Engineer?',
}
]
)
# Step 3: Display output
print('Agent Response:', response.output)
if __name__ == '__main__':
main()
```
</CodeGroup>
</LanguageContent>
</RunExample>
</LanguageProvider>
---
</content>
</doc>
<doc>
<metadata>
<title>Run Agent with Structured Output</title>
<url>https://langbase.com/docs/examples/agent/run-agent-structured-output/</url>
</metadata>
<content>
import { generateMetadata } from '@/lib/generate-metadata';
import { LanguageProvider, SimpleLanguageToggle, LanguageContent } from '@/components/LanguageToggle';
# Run Agent with Structured Output
This example demonstrates how to run an agent with structured output.
---
<LanguageProvider defaultLanguage='typescript'>
<RunExample api="/docs/api/pipe"
title="Run Agent with Structured Output Example"
output={`
{
steps: [
{
explanation: "We start with the given equation.",
output: "8x + 22 = -23",
},
{
explanation: "Subtract 22 from both sides to isolate the term with x.",
output: "8x + 22 - 22 = -23 - 22",
},
{
explanation: "After simplifying, we have 8x equal to -45.",
output: "8x = -45",
},
{
explanation: "Divide both sides by 8 to solve for x.",
output: "8x/8 = -45/8",
},
{
explanation: "Simplifying the division gives x equal to -45/8.",
output: "x = -45/8",
}
],
final_answer: "x = -45/8",
}`}
explanation={`
This guide is designed to demonstrate how to effectively use a Langbase agent with structured output. Follow these steps to utilize structured output:
1. Define Structured Output:
- Create the structure of the output using Zod.
- Convert the Zod schema to a JSON schema.
2. Run the Agent with Structured Output:
- Set the model to 'openai:gpt-4.1'
- Set the response_format to the JSON schema.
- Send the user message to the agent.
- Call langbase.agent.run() with the 'math-tutor-agent'
- The agent will return a structured output.
4. Get the response:
- Parse the response using Zod and validate the response is correct.
- Display the response to the user.
`}>
<LanguageContent language="typescript">
<CodeGroup title="Run Agent with Structured Output Example" exampleTitle="Run Agent with Structured Output Example">
```ts {{ title: 'index.ts' }}
import 'dotenv/config';
import {Langbase} from 'langbase';
import {z} from 'zod';
import {zodToJsonSchema} from 'zod-to-json-schema';
const langbase = new Langbase({
apiKey: process.env.LANGBASE_API_KEY!,
});
// Define the Strucutred Output JSON schema with Zod
const MathReasoningSchema = z.object({
steps: z.array(
z.object({
explanation: z.string(),
output: z.string(),
}),
),
final_answer: z.string(),
});
const jsonSchema = zodToJsonSchema(MathReasoningSchema, {target: 'openAi'});
async function main() {
if (!process.env.LANGBASE_API_KEY) {
console.error('❌ Missing LANGBASE_API_KEY in environment variables.');
process.exit(1);
}
const {output} = await langbase.agent.run({
model: 'openai:gpt-4.1',
apiKey: process.env.LLM_API_KEY!,
instructions: 'You are a helpful math tutor. Guide the user through the solution step by step.',
input: [
{
role: 'user',
content: 'How can I solve 8x + 22 = -23?',
},
],
json: true,
response_format: {
type: 'json_schema',
json_schema: {
name: 'math_reasoning',
schema: jsonSchema,
},
},
});
// Parse and validate the response using Zod
const solution = MathReasoningSchema.parse(JSON.parse(output));
console.log('✅ Structured Output Response:', solution);
}
main();
```
</CodeGroup>
</LanguageContent>
<LanguageContent language="python">
<CodeGroup title="Run Agent with Structured Output Example" exampleTitle="Run Agent with Structured Output Example">
```python {{ title: 'index.py' }}
import json
import os
from dotenv import load_dotenv
from langbase import Langbase
load_dotenv()
def main():
langbase_api_key = os.environ.get("LANGBASE_API_KEY")
llm_api_key = os.environ.get("LLM_API_KEY")
langbase = Langbase(api_key=langbase_api_key)
math_reasoning_schema = {
"type": "object",
"properties": {
"steps": {
"type": "array",
"items": {
"type": "object",
"properties": {
"explanation": {"type": "string"},
"output": {"type": "string"},
},
"required": ["explanation", "output"],
},
},
"final_answer": {"type": "string"},
},
"required": ["steps", "final_answer"],
}
# Run the agent with structured output
response = langbase.agent.run(
model="openai:gpt-4.1",
api_key=llm_api_key,
instructions="You are a helpful math tutor. Guide the user through the solution step by step.",
input=[{"role": "user", "content": "How can I solve 8x + 22 = -23?"}],
response_format={
"type": "json_schema",
"json_schema": {"name": "math_reasoning", "schema": math_reasoning_schema},
},
)
# Parse and display the structured response
try:
solution = json.loads(response.get("output", "{}"))
print("✅ Structured Output Response:")
print(json.dumps(solution, indent=2))
except json.JSONDecodeError as e:
print(f"❌ Error parsing JSON response: {e}")
print(f"Raw response: {response.get('output')}")
if __name__ == "__main__":
main()
```
</CodeGroup>
</LanguageContent>
</RunExample>
</LanguageProvider>
---
</content>
</doc>
<doc>
<metadata>
<title>Run Agent</title>
<url>https://langbase.com/docs/examples/agent/run/</url>
</metadata>
<content>
import { generateMetadata } from '@/lib/generate-metadata';
import { LanguageProvider, SimpleLanguageToggle, LanguageContent } from '@/components/LanguageToggle';
# Run Agent
This example demonstrates how to run an agent with a user message.
---
<LanguageProvider defaultLanguage='typescript'>
<RunExample api="/docs/api/pipe"
isJson
title="Run Agent Example"
output={`{ "summary": "An AI Engineer is a professional who designs, develops, and implements artificial intelligence systems and applications. They work with machine learning algorithms, data processing, and software development to create intelligent solutions." }`}
explanation={`
This code illustrates how to run an agent using Langbase. Here's a step-by-step guide:
1. Run Agent:
- Calls the langbase.agent.run() with the 'summary-agent'
- The agent processes the instructions and the user message and generates a response
2. Execution:
- The Langbase SDK executes the agent
- Outputs the response to display the result of the agent's processing`}
>
<LanguageContent language="typescript">
<CodeGroup title="Run Agent Example" exampleTitle="Run Agent Example">
```ts {{ title: 'index.ts' }}
import 'dotenv/config';
import { Langbase } from 'langbase';
const langbase = new Langbase({
apiKey: process.env.LANGBASE_API_KEY!,
});
async function main() {
const response = await langbase.agent.run({
stream: false,
model: 'openai:gpt-4.1-mini',
apiKey: process.env.LLM_API_KEY!,
instructions: 'You are a helpful assistant that help users summarize text.',
input: [
{
role: 'user',
content: 'Who is an AI Engineer?',
},
],
});
console.log('response: ', response.output);
}
main();
```
</CodeGroup>
</LanguageContent>
<LanguageContent language="python">
<CodeGroup title="Run Agent Example" exampleTitle="Run Agent Example">
```python {{ title: 'index.py' }}
import os
from dotenv import load_dotenv
from langbase import Langbase
load_dotenv()
def main():
langbase_api_key = os.environ.get("LANGBASE_API_KEY")
llm_api_key = os.environ.get("LLM_API_KEY")
langbase = Langbase(api_key=langbase_api_key)
response = langbase.agent.run(
stream=False,
model="openai:gpt-4.1-mini",
api_key=llm_api_key,
instructions="You are a helpful assistant that help users summarize text.",
input=[{"role": "user", "content": "Who is an AI Engineer?"}],
)
print("response:", response.get("output"))
if __name__ == "__main__":
main()
```
</CodeGroup>
</LanguageContent>
</RunExample>
</LanguageProvider>
---
</content>
</doc>
<doc>
<metadata>
<title>Pricing for Embed Primitive</title>
<url>https://langbase.com/docs/embed/platform/pricing/</url>
</metadata>
<content>
import { generateMetadata } from '@/lib/generate-metadata';
# Pricing for Embed Primitive
Requests to the Embed primitive are counted as **Runs** against your subscription plan.
| Plan | Runs | Overage |
|------------|----------|----------|
| Hobby | 500 | - |
| Enterprise | [Contact Us][contact-us] | [Contact Us][contact-us] |
<Note title="What is a run?">
Each run is an API request which can have at the max 1,000 Tokens in it which is equivalent to almost 750 words (an article). If your API request has, for instance, 1500 tokens in it, it will count as 2 runs.
</Note>
### Free Users
- **Limit**: 500 runs per month.
- **Overage**: No overage.
### Enterprise Users
There are no hard limits for Enterprise. Billing is based solely on the number of runs during each billing period.
If you have questions about your usage or need assistance, please don't hesitate to [contact us](mailto:support@langbase.com).
---
[contact-us]: mailto:support@langbase.com
</content>
</doc>
<doc>
<metadata>
<title>Limits for Embed Primitive</title>
<url>https://langbase.com/docs/embed/platform/limits/</url>
</metadata>
<content>
import { generateMetadata } from '@/lib/generate-metadata';
# Limits for Embed Primitive
The following Rate and Usage Limits apply for the Embed primitive:
### Rate Limits
Embed primitive requests follow our standard rate limits. See the [Rate Limits](/api-reference/limits/rate-limits) page for more details.
### Usage Limits
Requests to the Embed primitive are counted as **Runs** against your subscription plan. See the [Run Usage Limits](/api-reference/limits/usage-limits) page for more details.
</content>
</doc>
<doc>
<metadata>
<title>How to use tool calling with Generate API?</title>
<url>https://langbase.com/docs/deprecated/tool-calling/generate-api/</url>
</metadata>
<content>
import { generateMetadata } from '@/lib/generate-metadata';
# How to use tool calling with Generate API?
Follow this quick guide to learn how to use tool calling with the Generate API in Langbase.
We will not use `stream` mode for this example.
<Warn sub="Deprecation Notice">
The Generate API endpoint has been deprecated. Learn how to use tool calling with Pipe run API [here](/features/tool-calling).
</Warn>
---
## Step #0: Create a Pipe
Create a new `generate` type Pipe or open an existing `generate` Pipe in your Langbase account. Go ahead and turn off the `stream` mode for this example and deploy the Pipe.
_Alternatively, you can fork this [tool call generate Pipe](https://langbase.com/examples/tool-calling-generate-example) Pipe and skip to step 3._
---
## Step #1: Select OpenAI model
Tool calling is available with **OpenAI models**. So select any of the available OpenAI models in your Pipe.
---
## Step #2: Add a tool to the Pipe
Let's add a tool to get the current weather of a given location. Click on the `Add` button in the Tools section to add a new tool.
<Img
caption="Add a tool to the Pipe"
light="https://raw.githubusercontent.com/LangbaseInc/docs-images/main/features/function-calling-light.jpg"
dark="https://raw.githubusercontent.com/LangbaseInc/docs-images/main/features/function-calling-dark.jpg"
/>
This will open a modal where you can define the tool. The tool we are defining will take two arguments:
1. location
2. unit.
The `location` argument is required and the `unit` argument is optional.
The tool definition will look something like the following.
```json
{
"type": "function",
"function": {
"name": "get_current_weather",
"description": "Get the current weather of a given location",
"parameters": {
"type": "object",
"required": [
"location"
],
"properties": {
"unit": {
"enum": [
"celsius",
"fahrenheit"
],
"type": "string"
},
"location": {
"type": "string",
"description": "The city and state, e.g. San Francisco, CA"
}
}
}
}
}
```
Go ahead and deploy the Pipe to production.
<Note title="Playground is disabled">
If a Pipe has tools, the playground will be disabled. You can only test
tool calling with our Generate and Chat API.
</Note>
---
## Step #3: User prompt to call the tool
Go ahead and copy your Pipe API key from the Pipe API page. You will need this key to call the Generate API.
Now let's create an `index.js` file where we will define `get_current_weather` function and also call the Pipe.
```js
const get_current_weather = ({ location, unit }) => {
// get weather for the location and return the temperature
};
const tools = {
get_current_weather
};
(async () => {
const messages = [
{
role: 'user',
content: 'Whats the weather in San Francisco?'
}
];
// replace this with your Pipe API key
const pipeApiKey = ``;
const res = await fetch('https://api.langbase.com/beta/generate', {
method: 'POST',
headers: {
'Content-Type': 'application/json',
Authorization: `Bearer ${pipeApiKey}`
},
body: JSON.stringify({
messages
})
});
})();
```
Because the user prompt requires the current weather of San Francisco, the model will respond with a tool call like the following:
```json
{
"role": "assistant",
"content": null,
"tool_calls": [
{
"id": "call_u28sPmmCAWkop0OdgDYDJ9OG",
"type": "function",
"function": {
"name": "get_current_weather",
"arguments": "{\"location\": \"San Francisco\"}"
}
}
]
}
```
---
## Step #4: Handle the tool call
To check if the model has called the tool, you can check the `tool_calls` array in the model's response. If it exists, call the functions specified in the `tool_calls` array and send the response back to Langbase.
<Note title="Push assistant response in Generate API">
In Generate API, it's required that you push the assistant response (above
one) that contained `tool_calls` before pushing tool responses into the
`messages` array.
</Note>
```js
(async () => {
const messages = [
{
role: 'user',
content: 'Whats the weather in Lahore and saad?'
}
];
// add your Pipe API key here
const pipeApiKey = ``;
const res = await fetch('https://api.langbase.com/beta/generate', {
method: 'POST',
headers: {
'Content-Type': 'application/json',
Authorization: `Bearer ${pipeApiKey}`
},
body: JSON.stringify({
messages
})
});
const data = await res.json();
const { raw } = data;
// get the response message from the model
const responseMessage = raw.choices[0].message;
// get the tool calls from the response message
const toolCalls = responseMessage.tool_calls;
if (toolCalls) {
// push the assistant response to the messages array to send back to the API
messages.push(responseMessage);
// Call all the functions in the tool_calls array
toolCalls.forEach(toolCall => {
const toolName = toolCall.function.name;
const toolParameters = JSON.parse(toolCall.function.arguments);
const toolFunction = tools[toolName];
const toolResponse = toolFunction(toolParameters);
// push the tool response to the messages array to send back to the API
messages.push({
tool_call_id: toolCall.id, // required: id of the tool call
role: 'tool', // required: role of the message
name: toolName, // required: name of the tool
content: JSON.stringify(toolResponse) // required: response of the tool
});
});
// send the messages array back to the API
const res = await fetch('https://api.langbase.com/beta/generate', {
method: 'POST',
headers: {
'Content-Type': 'application/json',
Authorization: `Bearer ${pipeApiKey}`
},
body: JSON.stringify({
messages
})
});
const data = await res.json();
}
})();
```
This is what a typical model response will look like after calling the tool:
```json
{
"completion": "The current temperature in San Francisco, CA is 25°C.",
"raw": {
"id": "chatcmpl-9hQG8k2pD1A6JoFKQ0O6BKKvJzogS",
"object": "chat.completion",
"created": 1720136072,
"model": "gpt-4o-2024-05-13",
"choices": [
{
"index": 0,
"message": {
"role": "assistant",
"content": "The current temperature in San Francisco, CA is 25°C."
},
"logprobs": null,
"finish_reason": "stop"
}
],
"usage": {
"prompt_tokens": 121,
"completion_tokens": 14,
"total_tokens": 135
},
"system_fingerprint": "fp_ce0793330f"
}
}
```
And that's it! You have successfully used tool calling with the Generate API in Langbase.
</content>
</doc>
<doc>
<metadata>
<title>How to use tool calling with Chat API?</title>
<url>https://langbase.com/docs/deprecated/tool-calling/chat-api/</url>
</metadata>
<content>
import { generateMetadata } from '@/lib/generate-metadata';
# How to use tool calling with Chat API?
Follow this quick guide to learn how to use tool calling with the Chat API in Langbase.
We will not use `stream` mode for this example.
<Warn sub="Deprecation Notice">
The Chat API endpoint has been deprecated. Learn how to use tool calling with Pipe run API [here](/features/tool-calling).
</Warn>
---
## Step #0: Create a Pipe
Create a new `chat` type Pipe or open an existing `chat` Pipe in your Langbase account. Go ahead and turn off the `stream` mode for this example and deploy the Pipe.
_Alternatively, you can fork this [tool call chat Pipe](https://langbase.com/examples/tool-calling-chat-example) Pipe and skip to step 3._
---
## Step #1: Select OpenAI model
Tool calling is available with **OpenAI models**. So select any of the available OpenAI models in your Pipe.
---
## Step #2: Add a tool to the Pipe
Let's add a tool to get the current weather of a given location. Click on the `Add` button in the Tools section to add a new tool.
<Img
caption="Add a tool to the Pipe"
light="https://raw.githubusercontent.com/LangbaseInc/docs-images/main/features/function-calling-light.jpg"
dark="https://raw.githubusercontent.com/LangbaseInc/docs-images/main/features/function-calling-dark.jpg"
/>
This will open a modal where you can define the tool. The tool we are defining will take two arguments:
1. location
2. unit.
The `location` argument is required and the `unit` argument is optional.
The tool definition will look something like the following.
```json
{
"type": "function",
"function": {
"name": "get_current_weather",
"description": "Get the current weather of a given location",
"parameters": {
"type": "object",
"required": [
"location"
],
"properties": {
"unit": {
"enum": [
"celsius",
"fahrenheit"
],
"type": "string"
},
"location": {
"type": "string",
"description": "The city and state, e.g. San Francisco, CA"
}
}
}
}
}
```
Go ahead and deploy the Pipe to production.
<Note title="Playground is disabled">
If a Pipe has tools, the playground will be disabled. You can only test
tool calling with our Generate and Chat API.
</Note>
---
## Step #3: User prompt to call the tool
Go ahead and copy your Pipe API key from the Pipe API page. You will need this key to call the Generate API.
Now let's create an `index.js` file where we will define `get_current_weather` function and also call the Pipe.
```js
const get_current_weather = ({ location, unit }) => {
// get weather for the location and return the temperature
};
const tools = {
get_current_weather
};
(async () => {
const messages = [
{
role: 'user',
content: 'Whats the weather in SF?'
}
];
// replace this with your Pipe API key
const pipeApiKey = ``;
const res = await fetch('https://api.langbase.com/beta/chat', {
method: 'POST',
headers: {
'Content-Type': 'application/json',
Authorization: `Bearer ${pipeApiKey}`
},
body: JSON.stringify({
messages
})
});
})();
```
Because the user prompt requires the current weather of San Francisco, the model will respond with a tool call like the following:
```json
{
"role": "assistant",
"content": null,
"tool_calls": [
{
"id": "call_u28sPmmCAWkop0OdgDYDJ9OG",
"type": "function",
"function": {
"name": "get_current_weather",
"arguments": "{\"location\": \"San Francisco\"}"
}
}
]
}
```
---
## Step #4: Handle the tool call
To check if the model has called the tool, you can check the `tool_calls` array in the model's response. If it exists, call the functions specified in the `tool_calls` array and send the response back to Langbase.
```js
(async () => {
const messages = [
{
role: 'user',
content: 'Whats the weather in SF?',
},
];
// replace this with your Pipe API key
const pipeApiKey = ``;
const res = await fetch('https://api.langbase.com/beta/chat', {
method: 'POST',
headers: {
'Content-Type': 'application/json',
Authorization: `Bearer ${pipeApiKey}`,
},
body: JSON.stringify({
messages,
}),
});
const data = await res.json();
// get the threadId from the response headers
const threadId = await res.headers.get('lb-thread-id');
const { raw } = data;
// get the response message from the model
const responseMessage = raw.choices[0].message;
// get the tool calls from the response message
const toolCalls = responseMessage.tool_calls;
if (toolCalls) {
const toolMessages = [];
// call all the functions in the tool_calls array
toolCalls.forEach(toolCall => {
const toolName = toolCall.function.name;
const toolParameters = JSON.parse(toolCall.function.arguments);
const toolFunction = tools[toolName];
const toolResponse = toolFunction(toolParameters);
toolMessages.push({
tool_call_id: toolCall.id, // required: id of the tool call
role: 'tool', // required: role of the message
name: toolName, // required: name of the tool
content: JSON.stringify(toolResponse), // required: response of the tool
});
});
// send the tool responses back to the API
const res = await fetch('https://api.langbase.com/beta/chat', {
method: 'POST',
headers: {
'Content-Type': 'application/json',
Authorization: `Bearer ${pipeApiKey}`,
},
body: JSON.stringify({
messages: toolMessages,
threadId,
}),
});
const data = await res.json();
}
})();
```
<Note title="Send threadId to Langbase">
Unlike the Generate API, you don't need to send the assistant's response back to the Chat API. Instead, just send the role "tool" responses. Also, make sure to include the `threadId` in the request body of your next requests to the Chat API.
You can get the `threadId` from the response headers of the first request to the Chat API.
</Note>
This is what a typical model response will look like after calling the tool:
```json
{
"completion": "The current temperature in San Francisco, CA is 25°C.",
"raw": {
"id": "chatcmpl-9hQG8k2pD1A6JoFKQ0O6BKKvJzogS",
"object": "chat.completion",
"created": 1720136072,
"model": "gpt-4o-2024-05-13",
"choices": [
{
"index": 0,
"message": {
"role": "assistant",
"content": "The current temperature in San Francisco, CA is 25°C."
},
"logprobs": null,
"finish_reason": "stop"
}
],
"usage": {
"prompt_tokens": 121,
"completion_tokens": 14,
"total_tokens": 135
},
"system_fingerprint": "fp_ce0793330f"
}
}
```
And that's it! You have successfully used tool calling with the Chat API in Langbase.
</content>
</doc>
<doc>
<metadata>
<title>Pricing for Chunker Primitive</title>
<url>https://langbase.com/docs/chunker/platform/pricing/</url>
</metadata>
<content>
import { generateMetadata } from '@/lib/generate-metadata';
# Pricing for Chunker Primitive
Requests to the Chunker primitive are counted as **Runs** against your subscription plan.
| Plan | Runs | Overage |
|------------|----------|----------|
| Hobby | 500 | - |
| Enterprise | [Contact Us][contact-us] | [Contact Us][contact-us] |
<Note title="What is a run?">
Each run is an API request which can have at the max 1,000 tokens in it which is equivalent to almost 750 words (an article). If your API request has, for instance, 1500 tokens in it, it will count as 2 runs.
</Note>
### Free Users
- **Limit**: 500 runs per month.
- **Overage**: No overage.
### Enterprise Users
There are no hard limits for Enterprise. Billing is based solely on the number of runs during each billing period.
If you have questions about your usage or need assistance, please don't hesitate to [contact us](mailto:support@langbase.com).
---
[contact-us]: mailto:support@langbase.com
</content>
</doc>
<doc>
<metadata>
<title>Limits for Chunker Primitive</title>
<url>https://langbase.com/docs/chunker/platform/limits/</url>
</metadata>
<content>
import { generateMetadata } from '@/lib/generate-metadata';
# Limits for Chunker Primitive
The following Rate and Usage Limits apply for the Chunker primitive:
### Rate Limits
Chunker primitive requests follow our standard rate limits. See the [Rate Limits](/api-reference/limits/rate-limits) page for more details.
### Usage Limits
Requests to the Chunker primitive are counted as **Runs** against your subscription plan. See the [Run Usage Limits](/api-reference/limits/usage-limits) page for more details.
</content>
</doc>
<doc>
<metadata>
<title>Tools: Web Search <span className="text-xl font-mono text-muted-foreground/70">v1</span></title>
<url>https://langbase.com/docs/api-reference/tools/web-search/</url>
</metadata>
<content>
import { generateMetadata } from '@/lib/generate-metadata';
# Tools: Web Search <span className="text-xl font-mono text-muted-foreground/70">v1</span>
The `web-search` API endpoint allows you to search the web for relevant information. This is particularly useful when you need to gather up-to-date information from the internet for your AI applications.
The web search functionality is powered by [Exa](https://exa.ai).
---
## Pre-requisites
1. **Langbase API Key**: Generate your API key from the [User/Org API key documentation](/api-reference/api-keys).
2. **Exa API Key**: Sign up at [Exa Dashboard](https://dashboard.exa.ai/api-keys) to get your web search API key.
<Spoiler title="Get your Langbase API key: User or Org">
You can generate API keys from the [Langbase Studio](https://studio.langbase.com) by following these steps:
1. Switch to your user or org account.
2. From the sidebar, click on the `API keys`.
3. From here you can create a new API key or manage existing ones.
For more details, follow the [Langbase API keys](/api-reference/api-keys) documentation.
</Spoiler>
---
## Search the web {{ tag: 'POST', label: '/v1/tools/web-search' }}
<Row>
<Col>
Search the web for relevant information by sending queries to the web search API endpoint.
### Headers
<Properties>
<Property name="Content-Type" type="string" required="true">
Request content type. Needs to be `application/json`.
</Property>
<Property name="Authorization" type="string" required="true">
Replace `<YOUR_API_KEY>` with your user/org API key.
</Property>
<Property name="LB-WEB-SEARCH-KEY" type="string" required="true">
Your Exa API key – obtain one from [Exa Dashboard](https://dashboard.exa.ai/api-keys). Replace `YOUR_EXA_API_KEY` with your key.
</Property>
</Properties>
---
### Request Body
<Properties>
<Property name="query" type="string" required="true">
The search query to execute.
</Property>
<Property name="service" type="string" required="true">
Currently, it only supports `'exa'` as the search service provider.
</Property>
<Property name="totalResults" type="number">
The maximum number of results to return from the search.
</Property>
<Property name="domains" type="string[]">
Optional array of domains to restrict the search to.
</Property>
</Properties>
</Col>
<Col sticky>
## Usage example
<CodeGroup exampleTitle="Install the SDK" title="Install the SDK">
```bash {{ title: 'npm' }}
npm i langbase
```
```bash {{ title: 'pnpm' }}
pnpm i langbase
```
```bash {{ title: 'yarn' }}
yarn add langbase
```
</CodeGroup>
### Environment variables
```bash {{ title: '.env file' }}
LANGBASE_API_KEY="<YOUR_API_KEY>"
EXA_API_KEY="<YOUR_EXA_API_KEY>"
```
### Search the web
<div className="mb-8"/>
<CodeGroup exampleTitle="Web Searching" title="Web Searching" tag="POST" label="/v1/tools/web-search">
```bash {{ title: 'cURL' }}
curl https://api.langbase.com/v1/tools/web-search \
-X POST \
-H 'Authorization: Bearer <YOUR_API_KEY>' \
-H 'Content-Type: application/json' \
-H 'LB-WEB-SEARCH-KEY: <YOUR_EXA_API_KEY>' \
-d '{
"query": "What is Langbase?",
"service": "exa",
"totalResults": 2,
"domains": ["https://langbase.com"]
}'
```
```ts {{ title: 'Node.js' }}
import { Langbase } from 'langbase';
const langbase = new Langbase({
apiKey: process.env.LANGBASE_API_KEY!,
});
async function main() {
const results = await langbase.tools.webSearch({
query: 'What is Langbase?',
service: 'exa',
apiKey: process.env.EXA_API_KEY!,
totalResults: 2
});
console.log('Search results:', results);
return results;
}
main();
```
```python
import requests
import json
def search_web():
url = 'https://api.langbase.com/v1/tools/web-search'
api_key = 'YOUR_API_KEY'
exa_api_key = 'YOUR_EXA_API_KEY'
headers = {
'Authorization': f'Bearer {api_key}',
'Content-Type': 'application/json',
'LB-WEB-SEARCH-KEY': exa_api_key
}
data = {
'query': 'What is Langbase?',
'service': 'exa',
'totalResults': 2,
'domains': ['https://langbase.com']
}
response = requests.post(
url,
headers=headers,
data=json.dumps(data)
)
results = response.json()
return results
```
</CodeGroup>
</Col>
</Row>
---
<Row>
<Col>
### Response
<Properties>
<Property name="ToolWebSearchResponse[]" type="Array<object>">
An array of objects containing the URL and the extracted content returned by the web search operation.
```ts {{title: 'Web Search API Response'}}
interface ToolWebSearchResponse {
url: string;
content: string;
}
type WebSearchResponse = ToolWebSearchResponse[];
```
</Property>
<Properties>
<Property name="url" type="string">
The URL of the search result.
</Property>
<Property name="content" type="string">
The extracted content from the search result.
</Property>
</Properties>
</Properties>
</Col>
<Col sticky>
```json {{ title: 'API Response' }}
[
{
"url": "https://langbase.com/docs/introduction",
"content": "Langbase is a powerful AI development platform..."
},
{
"url": "https://langbase.com/docs/getting-started",
"content": "Get started with Langbase by installing our SDK..."
}
]
```
</Col>
</Row>
---
</content>
</doc>
<doc>
<metadata>
<title>Tools: Crawl <span className="text-xl font-mono text-muted-foreground/70">v1</span></title>
<url>https://langbase.com/docs/api-reference/tools/crawl/</url>
</metadata>
<content>
import { generateMetadata } from '@/lib/generate-metadata';
# Tools: Crawl <span className="text-xl font-mono text-muted-foreground/70">v1</span>
The `crawl` API endpoint allows you to extract content from web pages. This is particularly useful when you need to gather information from websites for your AI applications.
The crawling functionality is powered by the following services:
- [Spider.cloud](https://spider.cloud)
- [Firecrawl](https://firecrawl.dev)
---
## Limitations
- Maximum number of URLs per request: **100**
- Maximum crawl depth (pages): **50**
---
## Pre-requisites
1. **Langbase API Key**: Generate your API key from the [User/Org API key documentation](/api-reference/api-keys).
2. **Crawl API Key**: Sign up at [Spider.cloud](https://spider.cloud) OR [Firecrawl](https://firecrawl.dev) to get your crawl API key.
<Spoiler title="Get your Langbase API key: User or Org">
You can generate API keys from the [Langbase Studio](https://studio.langbase.com) by following these steps:
1. Switch to your user or org account.
2. From the sidebar, click on the `API keys`.
3. From here you can create a new API key or manage existing ones.
For more details, follow the [Langbase API keys](/api-reference/api-keys) documentation.
</Spoiler>
---
## Crawl web pages {{ tag: 'POST', label: '/v1/tools/crawl' }}
<Row>
<Col>
Extract content from web pages by sending URLs to the crawl API endpoint.
### Headers
<Properties>
<Property name="Content-Type" type="string" required="true">
Request content type. Needs to be `application/json`.
</Property>
<Property name="Authorization" type="string" required="true">
Replace `<YOUR_API_KEY>` with your user/org API key.
</Property>
<Property name="LB-CRAWL-KEY" type="string" required="true">
Your crawl API key – obtain one from [Spider.cloud](https://spider.cloud) OR [Firecrawl](https://firecrawl.dev). Replace `<CRAWL_KEY>` with your key.
</Property>
</Properties>
---
### Request Body
<Properties>
<Property name="url" type="string[]" required="true">
An array of URLs to crawl. Each URL should be a valid web address. Maximum 100 URLs per request.
</Property>
<Property name="maxPages" type="number">
The maximum number of pages to crawl. This limits the depth of the crawl operation. Maximum value: 50.
</Property>
<Property name="service" type="string">
The crawling service to use. Options are `spider` or `firecrawl`. The default is `spider`.
</Property>
</Properties>
</Col>
<Col sticky>
## Usage example
<CodeGroup exampleTitle="Install the SDK" title="Install the SDK">
```bash {{ title: 'npm' }}
npm i langbase
```
```bash {{ title: 'pnpm' }}
pnpm i langbase
```
```bash {{ title: 'yarn' }}
yarn add langbase
```
</CodeGroup>
### Environment variables
```bash {{ title: '.env file' }}
LANGBASE_API_KEY="<YOUR_API_KEY>"
CRAWL_KEY="<CRAWL_KEY>"
```
### Crawl web pages
<div className="mb-8"/>
<CodeGroup exampleTitle="Crawling" title="Crawling" tag="POST" label="/v1/tools/crawl">
```bash {{ title: 'cURL' }}
curl https://api.langbase.com/v1/tools/crawl \
-X POST \
-H 'Authorization: Bearer <YOUR_API_KEY>' \
-H 'Content-Type: application/json' \
-H 'LB-CRAWL-KEY: <CRAWL_KEY>' \
-d '{
"url": [
"https://example.com/page1",
"https://example.com/page2"
],
"maxPages": 5
}'
```
```ts {{ title: 'Node.js' }}
import { Langbase } from 'langbase';
const langbase = new Langbase({
apiKey: process.env.LANGBASE_API_KEY!,
});
async function main() {
const results = await langbase.tools.crawl({
url: ['https://example.com'],
apiKey: process.env.CRAWL_KEY!, // Spider.cloud API key
maxPages: 5
});
console.log('Crawled content:', results);
}
main();
```
```python
import requests
import json
def crawl_webpages():
url = 'https://api.langbase.com/v1/tools/crawl'
api_key = '<YOUR_API_KEY>'
crawl_api_key = '<CRAWL_KEY>'
headers = {
'Authorization': f'Bearer {api_key}',
'Content-Type': 'application/json',
'LB-CRAWL-KEY': crawl_api_key
}
data = {
'url': [
'https://example.com/page1',
'https://example.com/page2'
],
'maxPages': 5
}
response = requests.post(
url,
headers=headers,
data=json.dumps(data)
)
results = response.json()
return results
```
</CodeGroup>
</Col>
</Row>
---
<Row>
<Col>
### Response
<Properties>
<Property name="ToolCrawlResponse[]" type="Array<object>">
An array of objects containing the URL and the extracted content returned by the crawl operation.
```ts {{title: 'Crawl API Response'}}
interface ToolCrawlResponse {
url: string;
content: string;
}
type CrawlResponse = ToolCrawlResponse[];
```
</Property>
<Properties>
<Property name="url" type="string">
The URL of the crawled page.
</Property>
<Property name="content" type="string">
The extracted content from the crawled page.
</Property>
</Properties>
</Properties>
</Col>
<Col sticky>
```json {{ title: 'API Response' }}
[
{
"url": "https://example.com/page1",
"content": "Extracted content from the webpage..."
},
{
"url": "https://example.com/page2",
"content": "More extracted content..."
}
]
```
</Col>
</Row>
---
</content>
</doc>
<doc>
<metadata>
<title>Thread: Update <span className="text-xl font-mono text-muted-foreground/70">v1</span></title>
<url>https://langbase.com/docs/api-reference/threads/update/</url>
</metadata>
<content>
import { generateMetadata } from '@/lib/generate-metadata';
# Thread: Update <span className="text-xl font-mono text-muted-foreground/70">v1</span>
The Threads API allows you to update existing conversation threads. This endpoint helps you manage thread metadata for better organization and filtering of your conversational applications.
---
## Generate a User/Org API key
You will need to generate an API key to authenticate your requests. For more information, visit the [User/Org API key documentation](/api-reference/api-keys).
<Spoiler title="Get your Langbase API key: User or Org">
You can generate API keys from the [Langbase Studio](https://studio.langbase.com) by following these steps:
1. Switch to your user or org account.
2. From the sidebar, click on the `API keys`.
3. From here you can create a new API key or manage existing ones.
For more details, follow the [Langbase API keys](/api-reference/api-keys) documentation.
</Spoiler>
---
## Update an existing thread {{ tag: 'POST', label: '/v1/threads/{threadId}' }}
<Row>
<Col>
Update an existing thread's metadata.
### Headers
<Properties>
<Property name="Content-Type" type="string" required="true">
Request content type. Needs to be `application/json`
</Property>
<Property name="Authorization" type="string" required="true">
Replace `YOUR_API_KEY` with your User/Org API key
</Property>
</Properties>
---
### Path Parameters
<Properties>
<Property name="threadId" type="string" required="true">
The ID of the thread to update.
</Property>
</Properties>
---
### Body Parameters
<Properties>
<Property name="metadata" type="Record<string, string>" required="true">
Key-value pairs to update or add to the thread's metadata.
</Property>
</Properties>
</Col>
<Col sticky>
## Usage example
<CodeGroup exampleTitle="Install the SDK" title="Install the SDK">
```bash {{ title: 'npm' }}
npm i langbase
```
```bash {{ title: 'pnpm' }}
pnpm i langbase
```
```bash {{ title: 'yarn' }}
yarn add langbase
```
</CodeGroup>
### Environment variables
```bash {{ title: '.env file' }}
LANGBASE_API_KEY="<YOUR_API_KEY>"
```
### Update an existing thread
<div className="mb-8"/>
<CodeGroup exampleTitle="Update metadata" title="Update thread metadata" tag="POST" label="/v1/threads/{threadId}" id="default">
```bash {{ title: 'cURL' }}
curl -X POST https://api.langbase.com/v1/threads/{thread_id} \
-H 'Content-Type: application/json' \
-H 'Authorization: Bearer <YOUR_API_KEY>' \
-d '{
"metadata": {
"status": "resolved",
"priority": "high"
}
}'
```
```js {{ title: 'Node.js' }}
import { Langbase } from 'langbase';
const langbase = new Langbase({
apiKey: process.env.LANGBASE_API_KEY // Your User/Org API key
});
async function main() {
const threadId = "thread_abc123xyz456";
const updatedThread = await langbase.threads.update({
threadId: threadId,
metadata: {
status: "resolved",
priority: "high"
}
});
console.log('Thread updated:', updatedThread.id);
return updatedThread;
}
main();
```
```python
import requests
import json
import os
def main():
thread_id = "thread_abc123xyz456"
url = f"https://api.langbase.com/v1/threads/{thread_id}"
api_key = os.environ["LANGBASE_API_KEY"]
headers = {
"Content-Type": "application/json",
"Authorization": f"Bearer {api_key}"
}
payload = {
"metadata": {
"status": "resolved",
"priority": "high"
}
}
response = requests.post(url, headers=headers, json=payload)
updated_thread = response.json()
print(f"Thread updated: {updated_thread['id']}")
return updated_thread
main()
```
</CodeGroup>
</Col>
</Row>
---
### Response
<Row>
<Col>
The response is a `ThreadsBaseResponse` object with information about the updated thread.
<Properties>
<Property name="id" type="string">
The unique identifier for the thread.
</Property>
<Property name="object" type="string">
The type of object. Always "thread".
</Property>
<Property name="created_at" type="number">
The Unix timestamp (in seconds) for when the thread was created.
</Property>
<Property name="metadata" type="Record<string, string>">
The updated metadata associated with the thread.
</Property>
</Properties>
</Col>
<Col sticky>
```json {{ title: 'Response Example' }}
{
"id": "thread_abc123xyz456",
"object": "thread",
"created_at": 1714322048,
"metadata": {
"userId": "user123",
"topic": "support",
"status": "resolved",
"priority": "high"
}
}
```
</Col>
</Row>
---
</content>
</doc>
<doc>
<metadata>
<title>Thread Messages: List <span className="text-xl font-mono text-muted-foreground/70">v1</span></title>
<url>https://langbase.com/docs/api-reference/threads/list-messages/</url>
</metadata>
<content>
import { generateMetadata } from '@/lib/generate-metadata';
# Thread Messages: List <span className="text-xl font-mono text-muted-foreground/70">v1</span>
The List Messages API allows you to retrieve all messages in a thread. This is essential for accessing complete conversation history and building interfaces that display past interactions.
<Note>
Messages are returned in chronological order, with the oldest messages appearing first in the array. This makes it easy to reconstruct the conversation flow as it occurred.
</Note>
The List Messages API provides:
- Complete conversation history for a specific thread
- Chronological ordering of messages
- Access to message metadata and attachments
---
## Generate a User/Org API key
You will need to generate an API key to authenticate your requests. For more information, visit the [User/Org API key documentation](/api-reference/api-keys).
<Spoiler title="Get your Langbase API key: User or Org">
You can generate API keys from the [Langbase Studio](https://studio.langbase.com) by following these steps:
1. Switch to your user or org account.
2. From the sidebar, click on the `API keys`.
3. From here, you can create a new API key or manage existing ones.
For more details, follow the [Langbase API keys](/api-reference/api-keys) documentation.
</Spoiler>
---
## List messages in a thread {{ tag: 'GET', label: '/v1/threads/{threadId}/messages' }}
<Row>
<Col>
Retrieve all messages in a specific thread.
### Headers
<Properties>
<Property name="Authorization" type="string" required="true">
Replace `YOUR_API_KEY` with your User/Org API key
</Property>
</Properties>
---
### Path Parameters
<Properties>
<Property name="threadId" type="string" required="true">
The unique identifier of the thread to retrieve messages from.
</Property>
</Properties>
</Col>
<Col sticky>
## Usage example
<CodeGroup exampleTitle="Install the SDK" title="Install the SDK">
```bash {{ title: 'npm' }}
npm i langbase
```
```bash {{ title: 'pnpm' }}
pnpm i langbase
```
```bash {{ title: 'yarn' }}
yarn add langbase
```
</CodeGroup>
### Environment variables
```bash {{ title: '.env file' }}
LANGBASE_API_KEY="<YOUR_API_KEY>"
```
### List messages in a thread
<div className="mb-8"/>
<CodeGroup title="List all messages" tag="GET" label="/v1/threads/{threadId}/messages" id="default">
```bash {{ title: 'cURL' }}
curl -X GET https://api.langbase.com/v1/threads/{thread_id}/messages \
-H 'Authorization: Bearer YOUR_LANGBASE_API_KEY'
```
```js {{ title: 'Node.js' }}
import { Langbase } from 'langbase';
const langbase = new Langbase({
apiKey: process.env.LANGBASE_API_KEY // Your User/Org API key
});
async function listMessages() {
const threadId = "6f2acbcc-d808-48ec-97cb-cdbadc45166d";
const messages = await langbase.threads.messages.list({
threadId: threadId
});
console.log(`Retrieved ${messages.length} messages from thread`);
return messages;
}
listMessages();
```
```python
import requests
import os
def list_messages(thread_id):
url = f"https://api.langbase.com/v1/threads/{thread_id}/messages"
api_key = os.environ["LANGBASE_API_KEY"]
headers = {
"Authorization": f"Bearer {api_key}"
}
response = requests.get(url, headers=headers)
if response.status_code == 200:
messages = response.json()
print(f"Retrieved {len(messages)} messages from thread")
return messages
else:
print(f"Error: {response.status_code}")
print(response.json())
return None
# Call the function with your thread ID
messages = list_messages("6f2acbcc-d808-48ec-97cb-cdbadc45166d")
```
</CodeGroup>
</Col>
</Row>
---
### Response
<Row>
<Col>
The response is an array of `ThreadMessagesBaseResponse` objects representing all messages in the thread.
<Properties>
<Property name="id" type="string">
The unique identifier for the message.
</Property>
<Property name="thread_id" type="string">
The ID of the thread that this message belongs to.
</Property>
<Property name="created_at" type="number">
The Unix timestamp (in seconds) for when the message was created.
</Property>
<Property name="role" type="string">
The role of the message author. One of 'user', 'assistant', 'system', or 'tool'.
</Property>
<Property name="content" type="string | null">
The content of the message. Will be null for messages that only contain tool calls.
</Property>
<Property name="tool_call_id" type="string | null">
If the message is a tool response, this is the ID of the tool call it is responding to.
</Property>
<Property name="tool_calls" type="Array<ToolCall> | []">
If the message contains tool calls, this array will contain the tools called by the assistant.
</Property>
<Property name="name" type="string | null">
If the message is a tool response, this is the name of the tool that was called.
</Property>
<Property name="attachments" type="Array<any> | []">
Any attachments associated with the message.
</Property>
<Property name="metadata" type="Record<string, string> | {}">
Key-value pairs of metadata associated with the message.
</Property>
</Properties>
</Col>
<Col sticky>
```json {{ title: 'Response Example' }}
[
{
"id": "msg_abc123",
"thread_id": "6f2acbcc-d808-48ec-97cb-cdbadc45166d",
"created_at": 1714322048,
"role": "system",
"content": "You are a helpful assistant that provides concise responses.",
"tool_call_id": null,
"tool_calls": [],
"name": null,
"attachments": [],
"metadata": {}
},
{
"id": "msg_def456",
"thread_id": "6f2acbcc-d808-48ec-97cb-cdbadc45166d",
"created_at": 1714322148,
"role": "user",
"content": "Can you help me track my order?",
"tool_call_id": null,
"tool_calls": [],
"name": null,
"attachments": [],
"metadata": {
"userId": "user123",
"source": "mobile_app"
}
},
{
"id": "msg_ghi789",
"thread_id": "6f2acbcc-d808-48ec-97cb-cdbadc45166d",
"created_at": 1714322248,
"role": "assistant",
"content": null,
"tool_call_id": null,
"tool_calls": [
{
"id": "call_abc123",
"type": "function",
"function": {
"name": "track_order",
"arguments": "{\"order_id\":\"ORD-12345\"}"
}
}
],
"name": null,
"attachments": [],
"metadata": {}
},
{
"id": "msg_jkl012",
"thread_id": "6f2acbcc-d808-48ec-97cb-cdbadc45166d",
"created_at": 1714322348,
"role": "tool",
"content": "{\"status\":\"shipped\",\"estimated_delivery\":\"2025-05-01\",\"carrier\":\"FedEx\",\"tracking_number\":\"TRK123456789\"}",
"tool_call_id": "call_abc123",
"tool_calls": [],
"name": "track_order",
"attachments": [],
"metadata": {}
},
{
"id": "msg_mno345",
"thread_id": "6f2acbcc-d808-48ec-97cb-cdbadc45166d",
"created_at": 1714322448,
"role": "assistant",
"content": "Your order #ORD-12345 has been shipped via FedEx and is expected to arrive on May 1, 2025. You can track it with tracking number TRK123456789.",
"tool_call_id": null,
"tool_calls": [],
"name": null,
"attachments": [],
"metadata": {}
}
]
```
</Col>
</Row>
---
</content>
</doc>
<doc>
<metadata>
<title>Thread: Get <span className="text-xl font-mono text-muted-foreground/70">v1</span></title>
<url>https://langbase.com/docs/api-reference/threads/get/</url>
</metadata>
<content>
import { generateMetadata } from '@/lib/generate-metadata';
# Thread: Get <span className="text-xl font-mono text-muted-foreground/70">v1</span>
The Get Thread API allows you to retrieve thread information like its metadata and other details.
---
## Generate a User/Org API key
You will need to generate an API key to authenticate your requests. For more information, visit the [User/Org API key documentation](/api-reference/api-keys).
<Spoiler title="Get your Langbase API key: User or Org">
You can generate API keys from the [Langbase Studio](https://studio.langbase.com) by following these steps:
1. Switch to your user or org account.
2. From the sidebar, click on the `API keys`.
3. From here you can create a new API key or manage existing ones.
For more details, follow the [Langbase API keys](/api-reference/api-keys) documentation.
</Spoiler>
---
## Get a thread {{ tag: 'GET', label: '/v1/threads/{threadId}' }}
<Row>
<Col>
Retrieve a thread by its ID.
### Headers
<Properties>
<Property name="Authorization" type="string" required="true">
Replace `YOUR_API_KEY` with your User/Org API key
</Property>
</Properties>
---
### Path Parameters
<Properties>
<Property name="threadId" type="string" required="true">
The unique identifier of the thread to retrieve.
</Property>
</Properties>
</Col>
<Col sticky>
## Usage example
<CodeGroup exampleTitle="Install the SDK" title="Install the SDK">
```bash {{ title: 'npm' }}
npm i langbase
```
```bash {{ title: 'pnpm' }}
pnpm i langbase
```
```bash {{ title: 'yarn' }}
yarn add langbase
```
</CodeGroup>
### Environment variables
```bash {{ title: '.env file' }}
LANGBASE_API_KEY="<YOUR_API_KEY>"
```
### Retrieve a thread
<div className="mb-8"/>
<CodeGroup title="Get a thread" tag="GET" label="/v1/threads/{threadId}" id="default">
```bash {{ title: 'cURL' }}
curl https://api.langbase.com/v1/threads/{thread_id} \
-H 'Authorization: Bearer <YOUR_API_KEY>'
```
```js {{ title: 'Node.js' }}
import { Langbase } from 'langbase';
const langbase = new Langbase({
apiKey: process.env.LANGBASE_API_KEY // Your User/Org API key
});
async function main() {
const threadId = "5c99a194-b084-4abb-9fb7-3045e4f7c4d4";
const thread = await langbase.threads.get({
threadId: threadId
});
console.log('Thread retrieved:', thread);
return thread;
}
main();
```
```python
import requests
import os
def main(thread_id):
url = f"https://api.langbase.com/v1/threads/{thread_id}"
api_key = os.environ["LANGBASE_API_KEY"]
headers = {
"Authorization": f"Bearer {api_key}"
}
response = requests.get(url, headers=headers)
if response.status_code == 200:
thread = response.json()
print(f"Thread retrieved: {thread['id']}")
return thread
else:
print(f"Error: {response.status_code}")
print(response.json())
return None
# Call the function with your thread ID
thread = main("5c99a194-b084-4abb-9fb7-3045e4f7c4d4")
```
</CodeGroup>
</Col>
</Row>
---
### Response
<Row>
<Col>
The response is a `ThreadsBaseResponse` object with information about the requested thread.
<Properties>
<Property name="id" type="string">
The unique identifier for the thread.
</Property>
<Property name="object" type="string">
The type of object. Always "thread".
</Property>
<Property name="created_at" type="number">
The Unix timestamp (in seconds) for when the thread was created.
</Property>
<Property name="metadata" type="Record<string, string>">
The metadata associated with the thread. This may include custom fields that were added when the thread was created or updated.
</Property>
</Properties>
</Col>
<Col sticky>
```json {{ title: 'Response Example' }}
{
"id": "5c99a194-b084-4abb-9fb7-3045e4f7c4d4",
"object": "thread",
"created_at": 1714322048,
"metadata": {
"userId": "user123",
"topic": "support",
"status": "active",
"priority": "high"
}
}
```
</Col>
</Row>
---
</content>
</doc>
<doc>
<metadata>
<title>Thread: Delete <span className="text-xl font-mono text-muted-foreground/70">v1</span></title>
<url>https://langbase.com/docs/api-reference/threads/delete/</url>
</metadata>
<content>
import { generateMetadata } from '@/lib/generate-metadata';
# Thread: Delete <span className="text-xl font-mono text-muted-foreground/70">v1</span>
The Delete Thread API allows you to delete threads that are no longer needed. This helps you manage conversation history and clean up unused threads in your applications.
---
## Generate a User/Org API key
You will need to generate an API key to authenticate your requests. For more information, visit the [User/Org API key documentation](/api-reference/api-keys).
<Spoiler title="Get your Langbase API key: User or Org">
You can generate API keys from the [Langbase Studio](https://studio.langbase.com) by following these steps:
1. Switch to your user or org account.
2. From the sidebar, click on the `API keys`.
3. From here you can create a new API key or manage existing ones.
For more details, follow the [Langbase API keys](/api-reference/api-keys) documentation.
</Spoiler>
---
## Delete a thread {{ tag: 'DELETE', label: '/v1/threads/{threadId}' }}
<Row>
<Col>
Delete a thread by its ID.
### Headers
<Properties>
<Property name="Authorization" type="string" required="true">
Replace `YOUR_API_KEY` with your User/Org API key
</Property>
</Properties>
---
### Path Parameters
<Properties>
<Property name="threadId" type="string" required="true">
The unique identifier of the thread to delete.
</Property>
</Properties>
</Col>
<Col sticky>
## Usage example
<CodeGroup exampleTitle="Install the SDK" title="Install the SDK">
```bash {{ title: 'npm' }}
npm i langbase
```
```bash {{ title: 'pnpm' }}
pnpm i langbase
```
```bash {{ title: 'yarn' }}
yarn add langbase
```
</CodeGroup>
### Environment variables
```bash {{ title: '.env file' }}
LANGBASE_API_KEY="<YOUR_API_KEY>"
```
### Delete a thread
<div className="mb-8"/>
<CodeGroup title="Delete a thread" tag="DELETE" label="/v1/threads/{threadId}" id="default">
```bash {{ title: 'cURL' }}
curl -X DELETE https://api.langbase.com/v1/threads/{thread_id} \
-H 'Authorization: Bearer <YOUR_API_KEY>'
```
```js {{ title: 'Node.js' }}
import { Langbase } from 'langbase';
const langbase = new Langbase({
apiKey: process.env.LANGBASE_API_KEY // Your User/Org API key
});
async function main() {
const threadId = "918af4ef-ae06-44d8-89b5-e76d5a1eefb4";
const result = await langbase.threads.delete({
threadId: threadId
});
console.log('Thread deleted:', result.success);
return result;
}
main();
```
```python
import requests
import os
def main(thread_id):
url = f"https://api.langbase.com/v1/threads/{thread_id}"
api_key = os.environ["LANGBASE_API_KEY"]
headers = {
"Authorization": f"Bearer {api_key}"
}
response = requests.delete(url, headers=headers)
if response.status_code == 200:
result = response.json()
print(f"Thread deleted: {result['success']}")
return result
else:
print(f"Error: {response.status_code}")
print(response.json())
return None
# Call the function with your thread ID
result = main("918af4ef-ae06-44d8-89b5-e76d5a1eefb4")
```
</CodeGroup>
</Col>
</Row>
---
### Response
<Row>
<Col>
The response is a simple JSON object that confirms the deletion operation.
<Properties>
<Property name="success" type="boolean">
Indicates whether the thread was successfully deleted.
</Property>
</Properties>
</Col>
<Col sticky>
```json {{ title: 'Response Example' }}
{
"success": true
}
```
</Col>
</Row>
---
</content>
</doc>
<doc>
<metadata>
<title>Thread: Create <span className="text-xl font-mono text-muted-foreground/70">v1</span></title>
<url>https://langbase.com/docs/api-reference/threads/create/</url>
</metadata>
<content>
import { generateMetadata } from '@/lib/generate-metadata';
# Thread: Create <span className="text-xl font-mono text-muted-foreground/70">v1</span>
The Threads API allows you to create and manage conversation threads for building conversational applications. Threads help you organize and maintain conversation history across multiple interactions.
The Threads API supports:
- Creating new threads with optional initial messages
- Adding metadata to threads for organization and filtering
- Attaching initial messages to establish conversation context
---
## Generate a User/Org API key
You will need to generate an API key to authenticate your requests. For more information, visit the [User/Org API key documentation](/api-reference/api-keys).
<Spoiler title="Get your Langbase API key: User or Org">
You can generate API keys from the [Langbase Studio](https://studio.langbase.com) by following these steps:
1. Switch to your user or org account.
2. From the sidebar, click on the `API keys`.
3. From here you can create a new API key or manage existing ones.
For more details follow the [Langbase API keys](/api-reference/api-keys) documentation.
</Spoiler>
---
## Create a new thread {{ tag: 'POST', label: '/v1/threads' }}
<Row>
<Col>
Create a new thread with optional initial messages and metadata.
### Headers
<Properties>
<Property name="Content-Type" type="string" required="true">
Request content type. Needs to be `application/json`
</Property>
<Property name="Authorization" type="string" required="true">
Replace `YOUR_API_KEY` with your User/Org API key
</Property>
</Properties>
---
### Body Parameters
<Properties>
<Property name="threadId" type="string">
Optional custom ID for the thread. If not provided, a unique ID will be generated.
</Property>
<Property name="metadata" type="Record<string, string>">
Optional key-value pairs to store with the thread for organizational purposes.
</Property>
<Property name="messages" type="Array<ThreadMessage>">
Optional initial messages to populate the thread.
```ts {{ title: 'ThreadMessage Object' }}
interface ThreadMessage extends Message {
attachments?: any[];
metadata?: Record<string, string>;
}
interface Message {
role: 'user' | 'assistant' | 'system' | 'tool';
content: string | null;
name?: string;
tool_call_id?: string;
tool_calls?: ToolCall[];
}
```
<Properties>
<Property name="role" type="string" required="true">
The role of the message author: `system` | `user` | `assistant` | `tool`
</Property>
<Property name="content" type="string | null" required="true">
The content of the message. Can be null for tool calls.
</Property>
<Property name="name" type="string">
Optional name identifier for the message author.
</Property>
<Property name="tool_call_id" type="string">
ID of the tool call this message is responding to, if applicable.
</Property>
<Property name="tool_calls" type="Array<ToolCall>">
Tool calls made in this message, if any.
```ts {{ title: 'ToolCall Object' }}
interface ToolCall {
id: string;
type: 'function';
function: {
name: string;
arguments: string;
};
}
```
</Property>
<Property name="attachments" type="Array<any>">
Optional attachments for the message.
</Property>
<Property name="metadata" type="Record<string, string>">
Optional metadata for the message.
</Property>
</Properties>
</Property>
</Properties>
</Col>
<Col sticky>
## Usage example
<CodeGroup exampleTitle="Install the SDK" title="Install the SDK">
```bash {{ title: 'npm' }}
npm i langbase
```
```bash {{ title: 'pnpm' }}
pnpm i langbase
```
```bash {{ title: 'yarn' }}
yarn add langbase
```
</CodeGroup>
### Environment variables
```bash {{ title: '.env file' }}
LANGBASE_API_KEY="<YOUR_API_KEY>"
```
### Create a new thread
<div className="mb-8"/>
<CodeExamples>
<CodeGroup exampleTitle="Basic thread" title="Basic thread creation" tag="POST" label="/v1/threads" id="default">
```bash {{ title: 'cURL' }}
curl https://api.langbase.com/v1/threads \
-H 'Content-Type: application/json' \
-H 'Authorization: Bearer <YOUR_API_KEY>' \
-d '{
"metadata": {
"userId": "user123",
"topic": "support"
},
"messages": [
{
"role": "user",
"content": "Hello, I need help with my order!"
}
]
}'
```
```js {{ title: 'Node.js' }}
import { Langbase } from 'langbase';
const langbase = new Langbase({
apiKey: process.env.LANGBASE_API_KEY // Your User/Org API key
});
async function main() {
const thread = await langbase.threads.create({
metadata: {
userId: "user123",
topic: "support"
},
messages: [{
role: "user",
content: "Hello, I need help with my order!"
}]
});
console.log('Thread created:', thread.id);
return thread;
}
main();
```
```python
import requests
import json
import os
def main():
url = "https://api.langbase.com/v1/threads"
api_key = os.environ["LANGBASE_API_KEY"]
headers = {
"Content-Type": "application/json",
"Authorization": f"Bearer {api_key}"
}
payload = {
"metadata": {
"userId": "user123",
"topic": "support"
},
"messages": [{
"role": "user",
"content": "Hello, I need help with my order!"
}]
}
response = requests.post(url, headers=headers, json=payload)
thread = response.json()
print(f"Thread created: {thread['id']}")
return thread
main()
```
</CodeGroup>
<CodeGroup exampleTitle="Custom ID" title="Thread with custom ID" tag="POST" label="/v1/threads" id="custom-id">
```bash {{ title: 'cURL' }}
curl https://api.langbase.com/v1/threads \
-H 'Content-Type: application/json' \
-H 'Authorization: Bearer <YOUR_API_KEY>' \
-d '{
"threadId": "cust-thread-2024-05",
"metadata": {
"customerId": "cust-456",
"department": "billing"
}
}'
```
```js {{ title: 'Node.js' }}
import { Langbase } from 'langbase';
const langbase = new Langbase({
apiKey: process.env.LANGBASE_API_KEY
});
async function main() {
const thread = await langbase.threads.create({
threadId: "cust-thread-2024-05",
metadata: {
customerId: "cust-456",
department: "billing"
}
});
console.log('Custom thread created:', thread.id);
return thread;
}
main();
```
```python
import requests
import json
import os
def main():
url = "https://api.langbase.com/v1/threads"
api_key = os.environ["LANGBASE_API_KEY"]
headers = {
"Content-Type": "application/json",
"Authorization": f"Bearer {api_key}"
}
payload = {
"threadId": "cust-thread-2024-05",
"metadata": {
"customerId": "cust-456",
"department": "billing"
}
}
response = requests.post(url, headers=headers, json=payload)
thread = response.json()
print(f"Custom thread created: {thread['id']}")
return thread
main()
```
</CodeGroup>
<CodeGroup exampleTitle="System message" title="Thread with system message" tag="POST" label="/v1/threads" id="system-message">
```bash {{ title: 'cURL' }}
curl https://api.langbase.com/v1/threads \
-H 'Content-Type: application/json' \
-H 'Authorization: Bearer <YOUR_API_KEY>' \
-d '{
"messages": [
{
"role": "system",
"content": "You are a helpful customer support agent for Acme Corp. Be concise and friendly."
},
{
"role": "user",
"content": "I haven't received my order yet. It's been 5 days."
}
]
}'
```
```js {{ title: 'Node.js' }}
import { Langbase } from 'langbase';
const langbase = new Langbase({
apiKey: process.env.LANGBASE_API_KEY
});
async function main() {
const thread = await langbase.threads.create({
messages: [
{
role: "system",
content: "You are a helpful customer support agent for Acme Corp. Be concise and friendly."
},
{
role: "user",
content: "I haven't received my order yet. It's been 5 days."
}
]
});
console.log('Thread with system message created:', thread.id);
return thread;
}
main();
```
```python
import requests
import json
import os
def main():
url = "https://api.langbase.com/v1/threads"
api_key = os.environ["LANGBASE_API_KEY"]
headers = {
"Content-Type": "application/json",
"Authorization": f"Bearer {api_key}"
}
payload = {
"messages": [
{
"role": "system",
"content": "You are a helpful customer support agent for Acme Corp. Be concise and friendly."
},
{
"role": "user",
"content": "I haven't received my order yet. It's been 5 days."
}
]
}
response = requests.post(url, headers=headers, json=payload)
thread = response.json()
print(f"Thread with system message created: {thread['id']}")
return thread
main()
```
</CodeGroup>
</CodeExamples>
</Col>
</Row>
---
### Response
<Row>
<Col>
The response is a `ThreadsBaseResponse` object with information about the created thread.
<Properties>
<Property name="id" type="string">
The unique identifier for the thread.
</Property>
<Property name="object" type="string">
The type of object. Always "thread".
</Property>
<Property name="created_at" type="number">
The Unix timestamp (in seconds) for when the thread was created.
</Property>
<Property name="metadata" type="Record<string, string>">
The metadata associated with the thread.
</Property>
</Properties>
</Col>
<Col sticky>
```json {{ title: 'Response Example' }}
{
"id": "5f2acbcc-d808-48ec-97cb-cdbadc45166d",
"object": "thread",
"created_at": 1714322048,
"metadata": {
"userId": "user123",
"topic": "support"
}
}
```
</Col>
</Row>
---
</content>
</doc>
<doc>
<metadata>
<title>Thread Messages: Append <span className="text-xl font-mono text-muted-foreground/70">v1</span></title>
<url>https://langbase.com/docs/api-reference/threads/append-messages/</url>
</metadata>
<content>
import { generateMetadata } from '@/lib/generate-metadata';
# Thread Messages: Append <span className="text-xl font-mono text-muted-foreground/70">v1</span>
The Append Messages API allows you to add new messages to an existing thread. This is essential for building interactive chat experiences and maintaining conversation history in your applications.
The Append Messages API supports:
- Adding user messages to represent input from your users
- Adding assistant messages to represent AI responses
- Adding system messages to guide conversation behavior
- Adding tool messages to represent function call results
- Including metadata and attachments with messages
---
## Generate a User/Org API key
You will need to generate an API key to authenticate your requests. For more information, visit the [User/Org API key documentation](/api-reference/api-keys).
<Spoiler title="Get your Langbase API key: User or Org">
You can generate API keys from the [Langbase Studio](https://studio.langbase.com) by following these steps:
1. Switch to your user or org account.
2. From the sidebar, click on the `API keys`.
3. From here you can create a new API key or manage existing ones.
For more details, follow the [Langbase API keys](/api-reference/api-keys) documentation.
</Spoiler>
---
## Append messages to a thread {{ tag: 'POST', label: '/v1/threads/{threadId}/messages' }}
<Row>
<Col>
Add new messages to an existing thread.
### Headers
<Properties>
<Property name="Content-Type" type="string" required="true">
Request content type. Needs to be `application/json`
</Property>
<Property name="Authorization" type="string" required="true">
Replace `YOUR_API_KEY` with your User/Org API key
</Property>
</Properties>
---
### Path Parameters
<Properties>
<Property name="threadId" type="string" required="true">
The unique identifier of the thread to append messages to.
</Property>
</Properties>
---
### Body Parameters
<Properties>
<Property name="messages" type="Array<ThreadMessage>" required="true">
An array containing message objects to append to the thread.
```ts {{ title: 'ThreadMessage Object' }}
interface ThreadMessage extends Message {
attachments?: any[];
metadata?: Record<string, string>;
}
interface Message {
role: 'user' | 'assistant' | 'system' | 'tool';
content: string | null;
name?: string;
tool_call_id?: string;
tool_calls?: ToolCall[];
}
```
<Properties>
<Property name="role" type="string" required="true">
The role of the message author: `system` | `user` | `assistant` | `tool`
</Property>
<Property name="content" type="string | null" required="true">
The content of the message. Can be null for tool calls.
</Property>
<Property name="name" type="string">
Optional name identifier for the message author.
</Property>
<Property name="tool_call_id" type="string">
ID of the tool call this message is responding to, if applicable.
</Property>
<Property name="tool_calls" type="Array<ToolCall>">
Tool calls made in this message, if any.
```ts {{ title: 'ToolCall Object' }}
interface ToolCall {
id: string;
type: 'function';
function: {
name: string;
arguments: string;
};
}
```
</Property>
<Property name="attachments" type="Array<any>">
Optional attachments for the message.
</Property>
<Property name="metadata" type="Record<string, string>">
Optional metadata for the message.
</Property>
</Properties>
</Property>
</Properties>
</Col>
<Col sticky>
## Usage example
<CodeGroup exampleTitle="Install the SDK" title="Install the SDK">
```bash {{ title: 'npm' }}
npm i langbase
```
```bash {{ title: 'pnpm' }}
pnpm i langbase
```
```bash {{ title: 'yarn' }}
yarn add langbase
```
</CodeGroup>
### Environment variables
```bash {{ title: '.env file' }}
LANGBASE_API_KEY="<YOUR_API_KEY>"
```
### Append messages to a thread
<div className="mb-8"/>
<CodeExamples>
<CodeGroup exampleTitle="Basic message" title="Basic message append" tag="POST" label="/v1/threads/{threadId}/messages" id="default">
```bash {{ title: 'cURL' }}
curl -X POST https://api.langbase.com/v1/threads/{thread_id}/messages \
-H 'Content-Type: application/json' \
-H 'Authorization: Bearer <YOUR_API_KEY>' \
-d '[
{
"role": "user",
"content": "I have a question about my order #12345"
}
]'
```
```js {{ title: 'Node.js' }}
import { Langbase } from 'langbase';
const langbase = new Langbase({
apiKey: process.env.LANGBASE_API_KEY // Your User/Org API key
});
async function main() {
const threadId = "5c99a194-b084-4abb-9fb7-3045e4f7c4d4";
const messages = await langbase.threads.append({
threadId: threadId,
messages: [{
role: "user",
content: "I have a question about my order #12345"
}]
});
console.log('Messages appended:', messages);
return messages;
}
main();
```
```python
import requests
import json
import os
def main(thread_id, messages):
url = f"https://api.langbase.com/v1/threads/{thread_id}/messages"
api_key = os.environ["LANGBASE_API_KEY"]
headers = {
"Content-Type": "application/json",
"Authorization": f"Bearer {api_key}"
}
payload = {
"messages": messages
}
response = requests.post(url, headers=headers, json=payload)
if response.status_code == 200:
result = response.json()
print(f"Messages appended: {len(result)} message(s)")
return result
else:
print(f"Error: {response.status_code}")
print(response.json())
return None
# Call the function with your thread ID and messages
messages = main(
"5c99a194-b084-4abb-9fb7-3045e4f7c4d4",
[{
"role": "user",
"content": "I have a question about my order #12345"
}]
)
```
</CodeGroup>
<CodeGroup exampleTitle="Multiple messages" title="Adding multiple messages" tag="POST" label="/v1/threads/{threadId}/messages" id="multiple-messages">
```bash {{ title: 'cURL' }}
curl -X POST https://api.langbase.com/v1/threads/5c99a194-b084-4abb-9fb7-3045e4f7c4d4/messages \
-H 'Content-Type: application/json' \
-H 'Authorization: Bearer <YOUR_API_KEY>' \
-d '{
"messages": [
{
"role": "user",
"content": "Can you help me with my account?"
},
{
"role": "assistant",
"content": "Sure, I'\''d be happy to help with your account. What specific issue are you having?"
},
{
"role": "user",
"content": "I can'\''t reset my password."
}
]
}'
```
```js {{ title: 'Node.js' }}
import { Langbase } from 'langbase';
const langbase = new Langbase({
apiKey: process.env.LANGBASE_API_KEY
});
async function main() {
const threadId = "5c99a194-b084-4abb-9fb7-3045e4f7c4d4";
const messages = await langbase.threads.append({
threadId: threadId,
messages: [
{
role: "user",
content: "Can you help me with my account?"
},
{
role: "assistant",
content: "Sure, I'd be happy to help with your account. What specific issue are you having?"
},
{
role: "user",
content: "I can't reset my password."
}
]
});
console.log(`Appended ${messages.length} messages to thread`);
return messages;
}
main();
```
```python
import requests
import json
import os
def main(thread_id):
url = f"https://api.langbase.com/v1/threads/{thread_id}/messages"
api_key = os.environ["LANGBASE_API_KEY"]
headers = {
"Content-Type": "application/json",
"Authorization": f"Bearer {api_key}"
}
payload = {
"messages": [
{
"role": "user",
"content": "Can you help me with my account?"
},
{
"role": "assistant",
"content": "Sure, I'd be happy to help with your account. What specific issue are you having?"
},
{
"role": "user",
"content": "I can't reset my password."
}
]
}
response = requests.post(url, headers=headers, json=payload)
if response.status_code == 200:
result = response.json()
print(f"Appended {len(result)} messages to thread")
return result
else:
print(f"Error: {response.status_code}")
print(response.json())
return None
# Call the function with your thread ID
messages = main("5c99a194-b084-4abb-9fb7-3045e4f7c4d4")
```
</CodeGroup>
<CodeGroup exampleTitle="Metadata" title="Message with metadata" tag="POST" label="/v1/threads/{threadId}/messages" id="message-with-metadata">
```bash {{ title: 'cURL' }}
curl -X POST https://api.langbase.com/v1/threads/5c99a194-b084-4abb-9fb7-3045e4f7c4d4/messages \
-H 'Content-Type: application/json' \
-H 'Authorization: Bearer <YOUR_API_KEY>' \
-d '{
"messages": [
{
"role": "user",
"content": "Did you ship my order yet?",
"metadata": {
"orderId": "order-789012",
"userId": "user-456",
"source": "mobile_app",
"location": "customer_support"
}
}
]
}'
```
```js {{ title: 'Node.js' }}
import { Langbase } from 'langbase';
const langbase = new Langbase({
apiKey: process.env.LANGBASE_API_KEY
});
async function main() {
const threadId = "5c99a194-b084-4abb-9fb7-3045e4f7c4d4";
const messages = await langbase.threads.append({
threadId: threadId,
messages: [
{
role: "user",
content: "Did you ship my order yet?",
metadata: {
orderId: "order-789012",
userId: "user-456",
source: "mobile_app",
location: "customer_support"
}
}
]
});
console.log('Message with metadata appended:', messages[0]);
return messages;
}
main();
```
```python
import requests
import json
import os
def main(thread_id):
url = f"https://api.langbase.com/v1/threads/{thread_id}/messages"
api_key = os.environ["LANGBASE_API_KEY"]
headers = {
"Content-Type": "application/json",
"Authorization": f"Bearer {api_key}"
}
payload = {
"messages": [
{
"role": "user",
"content": "Did you ship my order yet?",
"metadata": {
"orderId": "order-789012",
"userId": "user-456",
"source": "mobile_app",
"location": "customer_support"
}
}
]
}
response = requests.post(url, headers=headers, json=payload)
if response.status_code == 200:
result = response.json()
print(f"Message with metadata appended: {result[0]['id']}")
return result
else:
print(f"Error: {response.status_code}")
print(response.json())
return None
# Call the function with your thread ID
messages = main("5c99a194-b084-4abb-9fb7-3045e4f7c4d4")
```
</CodeGroup>
</CodeExamples>
</Col>
</Row>
---
### Response
<Row>
<Col>
The response is an array of `ThreadMessagesBaseResponse` objects representing the newly added messages.
<Properties>
<Property name="id" type="string">
The unique identifier for the message.
</Property>
<Property name="thread_id" type="string">
The ID of the thread that this message belongs to.
</Property>
<Property name="created_at" type="number">
The Unix timestamp (in seconds) for when the message was created.
</Property>
<Property name="role" type="string">
The role of the message author. One of 'user', 'assistant', 'system', or 'tool'.
</Property>
<Property name="content" type="string | null">
The content of the message. Will be null for messages that only contain tool calls.
</Property>
<Property name="tool_call_id" type="string | null">
If the message is a tool response, this is the ID of the tool call it is responding to.
</Property>
<Property name="tool_calls" type="Array<ToolCall> | []">
If the message contains tool calls, this array will contain the tools called by the assistant.
</Property>
<Property name="name" type="string | null">
If the message is a tool response, this is the name of the tool that was called.
</Property>
<Property name="attachments" type="Array<any> | []">
Any attachments associated with the message.
</Property>
<Property name="metadata" type="Record<string, string> | {}">
Key-value pairs of metadata associated with the message.
</Property>
</Properties>
</Col>
<Col sticky>
```json {{ title: 'Response Example - Single Message' }}
[
{
"id": "95bace83-8e0f-42fe-ad4f-c02fea3ca99f",
"thread_id": "5c99a194-b084-4abb-9fb7-3045e4f7c4d4",
"created_at": 1714322048,
"role": "user",
"content": "I have a question about my order #12345",
"tool_call_id": null,
"tool_calls": [],
"name": null,
"attachments": [],
"metadata": {}
}
]
```
```json {{ title: 'Response Example - Multiple Messages' }}
[
{
"id": "6e600332-79d6-42dc-994d-2c63fbda2c3b",
"thread_id": "5c99a194-b084-4abb-9fb7-3045e4f7c4d4",
"created_at": 1714322048,
"role": "user",
"content": "Can you help me with my account?",
"tool_call_id": null,
"tool_calls": [],
"name": null,
"attachments": [],
"metadata": {}
},
{
"id": "c573e604-df17-489e-b275-e1e9505ade55",
"thread_id": "5c99a194-b084-4abb-9fb7-3045e4f7c4d4",
"created_at": 1714322048,
"role": "assistant",
"content": "Sure, I'd be happy to help with your account. What specific issue are you having?",
"tool_call_id": null,
"tool_calls": [],
"name": null,
"attachments": [],
"metadata": {}
},
{
"id": "446cd559-7986-4fdf-a9fb-d529997692d6",
"thread_id": "5c99a194-b084-4abb-9fb7-3045e4f7c4d4",
"created_at": 1714322048,
"role": "user",
"content": "I can't reset my password.",
"tool_call_id": null,
"tool_calls": [],
"name": null,
"attachments": [],
"metadata": {}
}
]
```
</Col>
</Row>
---
</content>
</doc>
<doc>
<metadata>
<title>Pipe: Update <span className="text-xl font-mono text-muted-foreground/70">v1</span></title>
<url>https://langbase.com/docs/api-reference/pipe/update/</url>
</metadata>
<content>
import { generateMetadata } from '@/lib/generate-metadata';
# Pipe: Update <span className="text-xl font-mono text-muted-foreground/70">v1</span>
The `update` pipe API endpoint allows you to update a pipe on Langbase dynamically with the API. This endpoint requires a User or Org API key.
---
## Generate a User/Org API key
You will need to generate an API key to authenticate your requests. For more information, visit the [User/Org API key documentation](/api-reference/api-keys).
<Spoiler title="Get your Langbase API key: User or Org">
You can generate API keys from the [Langbase Studio](https://studio.langbase.com) by following these steps:
1. Switch to your user or org account.
2. From the sidebar, click on the `API keys`.
3. From here you can create a new API key or manage existing ones.
For more details, follow the [Langbase API keys](/api-reference/api-keys) documentation.
</Spoiler>
---
## Update a pipe {{ tag: 'POST', label: '/v1/pipes/{pipeName}' }}
<Row>
<Col>
Update a pipe by sending the pipe configuration inside the request body.
### Headers
<Properties>
<Property name="Content-Type" type="string" required="true">
Request content type. Needs to be `application/json`.
</Property>
<Property name="Authorization" type="string" required="true">
Replace `<YOUR_API_KEY>` with your user/org API key.
</Property>
</Properties>
### Body Parameters
<Properties>
<Properties>
<Property name="name" type="string" required="true">
Name of the pipe.
</Property>
<Property name="description" type="array">
Short description of the pipe.
Default: `''`
</Property>
<Property name="status" type="string">
Status of the pipe.
Default: `public`
Can be one of: `public`, `private`
</Property>
<Property name="model" type="string">
Pipe LLM model. This is a combination of model provider and model id.
Format: `provider:model_id`
You can copy the ID of a model from the list of [supported LLM models](/supported-models-and-providers) at Langbase.
Default: `openai:gpt-4o-mini`
</Property>
<Property name="stream" type="boolean">
If enabled, the output will be streamed in real-time like ChatGPT. This is helpful if user is directly reading the text.
Default: `true`
</Property>
<Property name="json" type="boolean">
Enforce the output to be in JSON format.
Default: `false`
</Property>
<Property name="store" type="boolean">
If enabled, both prompt and completions will be stored in the database. Otherwise, only system prompt and few shot messages will be saved.
Default: `true`
</Property>
<Property name="moderate" type="boolean">
If enabled, Langbase blocks flagged requests automatically.
Default: `false`
</Property>
<Property name="top_p" type="number">
An alternative to sampling with temperature, called nucleus sampling, where the model considers the results of the tokens with top_p probability mass. So 0.1 means only the tokens comprising the top 10% probability mass are considered.
Default: `1`
</Property>
<Property name="max_tokens" type="number">
Maximum number of tokens in the response message returned.
Default: `1000`
</Property>
<Property name="temperature" type="number">
What sampling temperature to use, between 0 and 2. Higher values like 0.8 will make the output more random. Lower values like 0.2 will make it more focused and deterministic.
Default: `0.7`
</Property>
<Property name="presence_penalty" type="number">
Penalizes a word based on its occurrence in the input text.
Default: `1`
</Property>
<Property name="frequency_penalty" type="number">
Penalizes a word based on how frequently it appears in the training data.
Default: `1`
</Property>
<Property name="stop" type="array">
Up to 4 sequences where the API will stop generating further tokens.
Default: `[]`
</Property>
<Property name="tool_choice" type="'auto' | 'required' | 'object'">
Controls which (if any) tool is called by the model.
- `auto` - the model can pick between generating a message or calling one or more tools.
- `required` - the model must call one or more tools.
- `object` - Specifying a particular tool via `{"type": "function", "function": {"name": "my_function"}}` forces the model to call that tool.
Default: `auto`
</Property>
<Property name="parallel_tool_calls" type="boolean">
Call multiple tools in parallel, allowing the effects and results of these function calls to be resolved in parallel.
Default: `true`
</Property>
<Property name="messages" type="Array<Message>">
An array containing message objects.
Default: `[]`
```js {{title: 'Message Object'}}
interface Message {
role: 'user' | 'assistant' | 'system'| 'tool';
content: string;
name?: 'json' | 'safety' | 'opening' | 'rag';
}
```
<Properties>
<Property name="role" type="'user' | 'assistant' | 'system'| 'tool'">
The role of the author of this message.
</Property>
<Property name="content" type="string">
The contents of the message.
</Property>
<Property name="name" type="'json' | 'safety' | 'opening' | 'rag'">
The name of the `system` message type.
</Property>
</Properties>
</Property>
<Property name="variables" type="Record<string, string>">
An object containing pipe variables. The key is the variable name and the value is the variable value.
Default: `{}`
</Property>
<Property name="tools" type="Array<Tool>">
An array of objects with valid tool definitions.
Read more about valid [tool definition](/features/tool-calling#tool-definition-schema)
Default: `[]`
</Property>
<Property name="memory" type="Array<Memory>">
An array of memory objects.
Default: `[]`
```js {{title: 'Memory Object'}}
interface Memory {
name: string;
}
```
<Properties>
<Property name="name" type="string">
The name of the memory.
</Property>
</Properties>
</Property>
<Property name="response_format" type="ResponseFormat">
Defines the format of the response. Primarily used for Structured Outputs. To enforce Structured Outputs, set type to `json_schema`, and provide a JSON schema for your response with `strict: true` option.
Default: `text`
```ts {{title: 'ResponseFormat Object'}}
type ResponseFormat =
| {type: 'text'}
| {type: 'json_object'}
| {
type: 'json_schema';
json_schema: {
description?: string;
name: string;
schema?: Record<string, unknown>;
strict?: boolean | null;
};
};
```
</Property>
</Properties>
</Properties>
</Col>
<Col sticky>
## Usage example
<CodeGroup exampleTitle="Install the SDK" title="Install the SDK">
```bash {{ title: 'npm' }}
npm i langbase
```
```bash {{ title: 'pnpm' }}
pnpm i langbase
```
```bash {{ title: 'yarn' }}
yarn add langbase
```
</CodeGroup>
### Environment variables
```bash {{ title: '.env file' }}
LANGBASE_API_KEY="<YOUR_API_KEY>"
```
### Update a pipe
<div className="mb-8"/>
<CodeExamples>
<CodeGroup exampleTitle="Basic Pipe" title="Basic Pipe" tag="POST" label="/v1/pipes/{pipeName}">
```bash {{ title: 'cURL' }}
curl https://api.langbase.com/v1/pipes/{pipeName} \
-H 'Content-Type: application/json' \
-H "Authorization: Bearer <YOUR_API_KEY>" \
-d '{
"name": "summary-agent",
"upsert": true,
"description": "AI pipe for summarization",
"status": "public",
"model": "openai:gpt-4o-mini"
}'
```
```js {{ title: 'Node.js' }}
import {Langbase} from 'langbase';
const langbase = new Langbase({
apiKey: process.env.LANGBASE_API_KEY!,
});
async function main() {
const summaryAgent = await langbase.pipes.update({
name: 'summary-agent',
description: 'Updated pipe description',
temperature: 0.8,
});
console.log('Summary agent:', summaryAgent);
}
main();
```
```python
import requests
import json
def update_pipe():
url = 'https://api.langbase.com/v1/pipes/{pipeName}'
api_key = 'YOUR_API_KEY'
pipe = {
"name": "summary-agent",
"upsert": true,
"description": "AI pipe for summarization",
"status": "public",
"model": "openai:gpt-4o-mini"
}
headers = {
'Content-Type': 'application/json',
'Authorization': f'Bearer {api_key}',
}
response = requests.post(url, headers=headers, data=json.dumps(pipe))
updated_pipe = response.json()
return updated_pipe
```
</CodeGroup>
<CodeGroup exampleTitle="Advance Pipe" title="Advance Pipe" tag="POST" label="/v1/pipes/{pipeName}">
```bash {{ title: 'cURL' }}
curl https://api.langbase.com/v1/pipes/{pipeName} \
-H 'Content-Type: application/json' \
-H "Authorization: Bearer <YOUR_API_KEY>" \
-d '{
"name": "summary-agent",
"description": "AI pipe for summarization",
"status": "public",
"model": "openai:gpt-4o-mini",
"stream": true,
"json": true,
"store": false,
"moderate": true,
"top_p": 1,
"max_tokens": 1000,
"temperature": 0.7,
"presence_penalty": 1,
"frequency_penalty": 1,
"stop": [],
"tool_choice": "auto",
"parallel_tool_calls": false,
"tools": [
{
"type": "function",
"function": {
"name": "get_current_weather",
"description": "Get the current weather in a given location",
"parameters": {
"type": "object",
"properties": {
"location": {
"type": "string",
"description": "The city and state, e.g. San Francisco, CA"
},
"unit": {
"type": "string",
"enum": ["celsius", "fahrenheit"]
}
},
"required": ["location"]
}
}
}
],
"memory": []
}'
```
```js {{ title: 'Node.js' }}
import {Langbase} from 'langbase';
const langbase = new Langbase({
apiKey: process.env.LANGBASE_API_KEY!,
});
async function main() {
const summaryAgent = await langbase.pipes.update({
name: 'data-processing-agent',
model: 'anthropic:claude-3-5-sonnet-latest',
json: true,
tools: [
{
type: 'function',
function: {
name: 'processNewData',
description: 'Process updated data',
parameters: {
type: 'object',
properties: {
data: {
type: 'string',
description: 'Data to process',
},
},
},
},
},
],
memory: [{name: 'knowledge-base'}],
messages: [
{
role: 'system',
content: 'You are an enhanced data processing assistant.',
},
],
});
console.log('Summary agent:', summaryAgent);
}
main();
```
```python
import requests
import json
def update_pipe():
url = 'https://api.langbase.com/v1/pipes/{pipeName}'
api_key = 'YOUR_API_KEY'
pipe = {
"name": "summary-agent",
"upsert": true,
"description": "AI pipe for summarization",
"status": "public",
"model": "openai:gpt-4o-mini",
"stream": true,
"json": true,
"store": false,
"moderate": true,
"top_p": 1,
"max_tokens": 1000,
"temperature": 0.7,
"presence_penalty": 1,
"frequency_penalty": 1,
"stop": [],
"tool_choice": "auto",
"parallel_tool_calls": false,
"tools": [
{
"type": "function",
"function": {
"name": "get_current_weather",
"description": "Get the current weather in a given location",
"parameters": {
"type": "object",
"properties": {
"location": {
"type": "string",
"description": "The city and state, e.g. San Francisco, CA"
},
"unit": {
"type": "string",
"enum": ["celsius", "fahrenheit"]
}
},
"required": ["location"]
}
}
}
],
"memory": []
}
headers = {
'Content-Type': 'application/json',
'Authorization': f'Bearer {api_key}',
}
response = requests.post(url, headers=headers, data=json.dumps(pipe))
updated_pipe = response.json()
return updated_pipe
```
</CodeGroup>
</CodeExamples>
</Col>
</Row>
---
<Row>
<Col>
### Response
<Properties>
<Property name="Pipe" type="object">
The response object returned by the API endpoint.
```ts {{title: 'Pipe update response'}}
interface Pipe {
name: string;
description: string;
status: 'public' | 'private';
owner_login: string;
url: string;
type: 'chat' | 'generate' | 'run';
api_key: string;
}
```
<Properties>
<Property name="name" type="string">
Name of the pipe.
</Property>
<Property name="description" type="string">
Description of the pipe.
</Property>
<Property name="status" type="'public' | 'private'">
Pipe visibility status.
</Property>
<Property name="owner_login" type="string">
Login of the pipe owner.
</Property>
<Property name="url" type="string">
Pipe studio URL.
</Property>
<Property name="type" type="'chat' | 'generate' | 'run'">
The type of the pipe.
</Property>
<Property name="api_key" type="string">
API key for pipe access.
</Property>
</Properties>
</Property>
</Properties>
</Col>
<Col sticky>
```json {{ title: 'API Response' }}
{
"name": "summary-agent",
"description": "AI pipe for summarization",
"status": "public",
"owner_login": "user123",
"url": "https://langbase.com/user123/summary-agent",
"type": "run",
"api_key": "pipe_4FVBn2DgrzfJf..."
}
```
</Col>
</Row>
---
</content>
</doc>
<doc>
<metadata>
<title>Pipe: List <span className="text-xl font-mono text-muted-foreground/70">v1</span></title>
<url>https://langbase.com/docs/api-reference/pipe/list/</url>
</metadata>
<content>
import { generateMetadata } from '@/lib/generate-metadata';
# Pipe: List <span className="text-xl font-mono text-muted-foreground/70">v1</span>
The `list` pipe API endpoint allows you to get a list of pipes on Langbase with API. This endpoint requires a User or Org API key.
---
## Generate a User/Org API key
You will need to generate an API key to authenticate your requests. For more information, visit the [User/Org API key documentation](/api-reference/api-keys).
<Spoiler title="Get your Langbase API key: User or Org">
You can generate API keys from the [Langbase Studio](https://studio.langbase.com) by following these steps:
1. Switch to your user or org account.
2. From the sidebar, click on the `API keys`.
3. From here you can create a new API key or manage existing ones.
For more details, follow the [Langbase API keys](/api-reference/api-keys) documentation.
</Spoiler>
---
## Get a list of pipes {{ tag: 'GET', label: '/v1/pipes' }}
<Row>
<Col>
Get a list of all pipes by sending a GET request to this endpoint.
### Headers
<Properties>
<Property name="Content-Type" type="string">
Request content type. Needs to be `application/json`.
</Property>
<Property name="Authorization" type="string">
Replace `<YOUR_API_KEY>` with your user/org API key.
</Property>
</Properties>
</Col>
<Col sticky>
## Usage example
<CodeGroup exampleTitle="Install the SDK" title="Install the SDK">
```bash {{ title: 'npm' }}
npm i langbase
```
```bash {{ title: 'pnpm' }}
pnpm i langbase
```
```bash {{ title: 'yarn' }}
yarn add langbase
```
</CodeGroup>
### Environment variables
```bash {{ title: '.env file' }}
LANGBASE_API_KEY="<YOUR_API_KEY>"
```
### List pipes
<CodeGroup exampleTitle="List Pipes" title="List Pipes" tag="GET" label="/v1/pipes">
```bash {{ title: 'cURL' }}
curl https://api.langbase.com/v1/pipes \
-H 'Content-Type: application/json' \
-H "Authorization: Bearer <YOUR_API_KEY>"
```
```js {{ title: 'Node.js' }}
import {Langbase} from 'langbase';
const langbase = new Langbase({
apiKey: process.env.LANGBASE_API_KEY!,
});
async function main() {
const pipeAgents = await langbase.pipes.list();
console.log('Pipe agents:', pipeAgents);
}
main();
```
```python
import requests
def get_pipes():
url = 'https://api.langbase.com/v1/pipes'
api_key = '<YOUR_API_KEY>'
headers = {
'Content-Type': 'application/json',
'Authorization': f'Bearer {api_key}',
}
response = requests.get(url, headers=headers)
pipes_list = response.json()
return pipes_list
```
</CodeGroup>
</Col>
</Row>
---
<Row>
<Col>
### Response
<Properties>
<Property name="Pipe[]" type="Array<Pipe>">
An array of pipe objects returned by the API endpoint.
```ts {{title: 'Pipe'}}
interface Pipe {
name: string;
description: string;
status: 'public' | 'private';
owner_login: string;
url: string;
model: string;
stream: boolean;
json: boolean;
store: boolean;
moderate: boolean;
top_p: number;
max_tokens: number;
temperature: number;
presence_penalty: number;
frequency_penalty: number;
stop: string[];
tool_choice: 'auto' | 'required' | ToolChoice;
parallel_tool_calls: boolean;
messages: Message[];
variables: Variable[] | [];
tools: ToolFunction[] | [];
memory: Memory[] | [];
}
```
<Properties>
<Property name="name" type="string">
Name of the pipe.
</Property>
<Property name="description" type="string">
Description of the AI pipe.
</Property>
<Property name="status" type="'public' | 'private'">
Status of the pipe.
</Property>
<Property name="owner_login" type="string">
Login of the pipe owner.
</Property>
<Property name="url" type="string">
Pipe access URL.
</Property>
<Property name="model" type="string">
Pipe LLM model. Combination of model provider and model id.
Format: `provider:model_id`
</Property>
<Property name="stream" type="boolean">
Pipe stream status. If enabled, the pipe will stream the response.
</Property>
<Property name="json" type="boolean">
Pipe JSON status. If enabled, the pipe will return the response in JSON format.
</Property>
<Property name="store" type="boolean">
Whether to store the prompt and completions in the database.
</Property>
<Property name="moderate" type="boolean">
Whether to moderate the completions returned by the model.
</Property>
<Property name="top_p" type="number">
Pipe configured top_p value.
</Property>
<Property name="max_tokens" type="number">
Configured maximum tokens for the pipe.
</Property>
<Property name="temperature" type="number">
Configured temperature for the pipe.
What sampling temperature to use, between 0 and 2. Higher values like 0.8 will make the output more random. Lower values like 0.2 will make it more focused and deterministic.
</Property>
<Property name="presence_penalty" type="number">
Configured presence penalty for the pipe.
</Property>
<Property name="frequency_penalty" type="number">
Configured frequency penalty for the pipe.
</Property>
<Property name="stop" type="string[]">
Configured stop sequences for the pipe.
</Property>
<Property name="tool_choice" type="'auto' | 'required' | ToolChoice">
Tool usage configuration.
<Properties>
<Property name="'auto'" type="string">
Model decides when to use tools.
</Property>
<Property name="'required'" type="string">
Model must use specified tools.
</Property>
<Property name="ToolChoice" type="object">
Forces use of a specific function.
```ts {{title: 'ToolChoice Object'}}
interface ToolChoice {
type: 'function';
function: {
name: string;
};
}
```
</Property>
</Properties>
</Property>
<Property name="parallel_tool_calls" type="boolean">
If enabled, the pipe will make parallel tool calls.
</Property>
<Property name="messages" type="Array<Message>">
A messages array including the following properties.
```ts {{title: 'Message Object'}}
interface Message {
role: 'user' | 'assistant' | 'system'| 'tool';
content: string | null;
name?: 'json' | 'safety' | 'opening' | 'rag';
}
```
<Properties>
<Property name="role" type="'user' | 'assistant' | 'system'| 'tool'">
The role of the author of this message.
</Property>
<Property name="content" type="string">
The contents of the message.
</Property>
<Property name="name" type="'json' | 'safety' | 'opening' | 'rag'">
The name of the `system` message type.
</Property>
</Properties>
</Property>
<Property name="variables" type="Array<Variable>">
A variables array including the `name` and `value` params.
```ts {{title: 'Variable Object'}}
interface Variable {
name: string;
value: string;
}
```
<Properties>
<Property name="name" type="string">
The name of the variable.
</Property>
<Property name="value" type="string">
The value of the variable.
</Property>
</Properties>
</Property>
<Property name="memory" type="Array<Memory>">
An array of memories the pipe has access to.
```ts {{title: 'Memory Object'}}
interface Memory {
name: string;
}
```
</Property>
</Properties>
</Property>
</Properties>
</Col>
<Col sticky>
```json {{ title: 'API Response' }}
[
{
"name": "summary-agent",
"description": "AI pipe for summarization",
"status": "public",
"owner_login": "user123",
"url": "https://langbase.com/user123/summary-agent",
"model": "openai:gpt-4o-mini",
"stream": true,
"json": false,
"store": true,
"moderate": false,
"top_p": 1,
"max_tokens": 1000,
"temperature": 0.7,
"presence_penalty": 1,
"frequency_penalty": 1,
"stop": [],
"tool_choice": "auto",
"parallel_tool_calls": true,
"messages": [],
"variables": [],
"tools": [],
"memory": []
}
]
```
</Col>
</Row>
---
</content>
</doc>
<doc>
<metadata>
<title>Pipe: Create <span className="text-xl font-mono text-muted-foreground/70">v1</span></title>
<url>https://langbase.com/docs/api-reference/pipe/create/</url>
</metadata>
<content>
import { generateMetadata } from '@/lib/generate-metadata';
# Pipe: Create <span className="text-xl font-mono text-muted-foreground/70">v1</span>
The `create` pipe API endpoint allows you to create a new pipe using Langbase API. This endpoint requires a User or Org API key.
---
## Generate a User/Org API key
You will need to generate an API key to authenticate your requests. For more information, visit the [User/Org API key documentation](/api-reference/api-keys).
<Spoiler title="Get your Langbase API key: User or Org">
You can generate API keys from the [Langbase Studio](https://studio.langbase.com) by following these steps:
1. Switch to your user or org account.
2. From the sidebar, click on the `API keys`.
3. From here you can create a new API key or manage existing ones.
For more details, follow the [Langbase API keys](/api-reference/api-keys) documentation.
</Spoiler>
---
## Create a new pipe {{ tag: 'POST', label: '/v1/pipes' }}
<Row>
<Col>
Create a new pipe by sending the pipe configuration inside the request body.
### Headers
<Properties>
<Property name="Content-Type" type="string" required="true">
Request content type. Needs to be `application/json`.
</Property>
<Property name="Authorization" type="string" required="true">
Replace `<YOUR_API_KEY>` with your user/org API key.
</Property>
</Properties>
---
### Body Parameters
<Properties>
<Properties>
<Property name="name" type="string" required="true">
Name of the pipe.
</Property>
<Property name="upsert" type="boolean">
Upsert pipe.
Default: `false`
</Property>
<Property name="description" type="array">
Short description of the pipe.
Default: `''`
</Property>
<Property name="status" type="string">
Status of the pipe.
Default: `public`
Can be one of: `public`, `private`
</Property>
<Property name="model" type="string">
Pipe LLM model. This is a combination of model provider and model id.
Format: `provider:model_id`
You can copy the ID of a model from the list of [supported LLM models](/supported-models-and-providers) at Langbase.
Default: `openai:gpt-4o-mini`
</Property>
<Property name="stream" type="boolean">
If enabled, the output will be streamed in real-time like ChatGPT. This is helpful if user is directly reading the text.
Default: `true`
</Property>
<Property name="json" type="boolean">
Enforce the output to be in JSON format.
Default: `false`
</Property>
<Property name="store" type="boolean">
If enabled, both prompt and completions will be stored in the database. Otherwise, only system prompt and few shot messages will be saved.
Default: `true`
</Property>
<Property name="moderate" type="boolean">
If enabled, Langbase blocks flagged requests automatically.
Default: `false`
</Property>
<Property name="top_p" type="number">
An alternative to sampling with temperature, called nucleus sampling, where the model considers the results of the tokens with top_p probability mass. So 0.1 means only the tokens comprising the top 10% probability mass are considered.
Default: `1`
</Property>
<Property name="max_tokens" type="number">
Maximum number of tokens in the response message returned.
Default: `1000`
</Property>
<Property name="temperature" type="number">
What sampling temperature to use, between 0 and 2. Higher values like 0.8 will make the output more random. Lower values like 0.2 will make it more focused and deterministic.
Default: `0.7`
</Property>
<Property name="presence_penalty" type="number">
Penalizes a word based on its occurrence in the input text.
Default: `1`
</Property>
<Property name="frequency_penalty" type="number">
Penalizes a word based on how frequently it appears in the training data.
Default: `1`
</Property>
<Property name="stop" type="array">
Up to 4 sequences where the API will stop generating further tokens.
Default: `[]`
</Property>
<Property name="tool_choice" type="'auto' | 'required' | 'object'">
Controls which (if any) tool is called by the model.
- `auto` - the model can pick between generating a message or calling one or more tools.
- `required` - the model must call one or more tools.
- `object` - Specifying a particular tool via `{"type": "function", "function": {"name": "my_function"}}` forces the model to call that tool.
Default: `auto`
</Property>
<Property name="parallel_tool_calls" type="boolean">
Call multiple tools in parallel, allowing the effects and results of these function calls to be resolved in parallel.
Default: `true`
</Property>
<Property name="messages" type="Array<Message>">
An array containing message objects.
Default: `[]`
```js {{title: 'Message Object'}}
interface Message {
role: 'user' | 'assistant' | 'system'| 'tool';
content: string;
name?: 'json' | 'safety' | 'opening' | 'rag';
}
```
<Properties>
<Property name="role" type="'user' | 'assistant' | 'system'| 'tool'">
The role of the author of this message.
</Property>
<Property name="content" type="string">
The contents of the message.
</Property>
<Property name="name" type="'json' | 'safety' | 'opening' | 'rag'">
The name of the `system` message type.
</Property>
</Properties>
</Property>
<Property name="variables" type="Record<string, string>">
An object containing pipe variables. The key is the variable name and the value is the variable value.
Default: `{}`
</Property>
<Property name="tools" type="Array<Tool>">
An array of objects with valid tool definitions.
Read more about valid [tool definition](/features/tool-calling#tool-definition-schema)
Default: `[]`
</Property>
<Property name="memory" type="Array<Memory>">
An array of memory objects.
Default: `[]`
```js {{title: 'Memory Object'}}
interface Memory {
name: string;
}
```
<Properties>
<Property name="name" type="string">
The name of the memory.
</Property>
</Properties>
</Property>
<Property name="response_format" type="ResponseFormat">
Defines the format of the response. Primarily used for Structured Outputs. To enforce Structured Outputs, set type to `json_schema`, and provide a JSON schema for your response with `strict: true` option.
Default: `text`
```ts {{title: 'ResponseFormat Object'}}
type ResponseFormat =
| {type: 'text'}
| {type: 'json_object'}
| {
type: 'json_schema';
json_schema: {
description?: string;
name: string;
schema?: Record<string, unknown>;
strict?: boolean | null;
};
};
```
</Property>
</Properties>
</Properties>
</Col>
<Col sticky>
## Usage example
<CodeGroup exampleTitle="Install the SDK" title="Install the SDK">
```bash {{ title: 'npm' }}
npm i langbase
```
```bash {{ title: 'pnpm' }}
pnpm i langbase
```
```bash {{ title: 'yarn' }}
yarn add langbase
```
</CodeGroup>
### Environment variables
```bash {{ title: '.env file' }}
LANGBASE_API_KEY="<YOUR_API_KEY>"
```
### Create a new pipe
<div className="mb-8"/>
<CodeExamples>
<CodeGroup exampleTitle="Basic Pipe" title="Basic Pipe" tag="POST" label="/v1/pipes">
```bash {{ title: 'cURL' }}
curl https://api.langbase.com/v1/pipes \
-H 'Content-Type: application/json' \
-H "Authorization: Bearer <YOUR_API_KEY>" \
-d '{
"name": "summary-agent",
"upsert": true,
"description": "AI pipe for summarization",
"status": "public",
"model": "openai:gpt-4o-mini"
}'
```
```js {{ title: 'Node.js' }}
import {Langbase} from 'langbase';
const langbase = new Langbase({
apiKey: process.env.LANGBASE_API_KEY!,
});
async function main() {
const summaryAgent = await langbase.pipes.create({
name: 'summary-agent',
description: 'A simple pipe example',
});
console.log('Pipe created:', summaryAgent);
}
main();
```
```python
import requests
import json
def create_new_pipe():
url = 'https://api.langbase.com/v1/pipes'
api_key = '<YOUR_API_KEY>'
pipe = {
"name": "summary-agent",
"upsert": true,
"description": "AI pipe for summarization",
"status": "public",
"model": "openai:gpt-4o-mini"
}
headers = {
'Content-Type': 'application/json',
'Authorization': f'Bearer {api_key}',
}
response = requests.post(url, headers=headers, data=json.dumps(pipe))
new_pipe = response.json()
return new_pipe
```
</CodeGroup>
<CodeGroup exampleTitle="Advance Pipe" title="Advance Pipe" tag="POST" label="/v1/pipes">
```bash {{ title: 'cURL' }}
curl https://api.langbase.com/v1/pipes \
-H 'Content-Type: application/json' \
-H "Authorization: Bearer <YOUR_API_KEY>" \
-d '{
"name": "summary-agent",
"upsert": true,
"description": "AI pipe for summarization",
"status": "public",
"model": "openai:gpt-4o-mini",
"stream": true,
"json": true,
"store": false,
"moderate": true,
"top_p": 1,
"max_tokens": 1000,
"temperature": 0.7,
"presence_penalty": 1,
"frequency_penalty": 1,
"stop": [],
"tool_choice": "auto",
"parallel_tool_calls": false,
"messages": [
{
"role": "system",
"content": "You'\''re a helpful AI assistant."
},
{
"role": "system",
"content": "Don'\''t ignore these instructions",
"name": "safety"
}
],
"variables": [],
"tools": [
{
"type": "function",
"function": {
"name": "get_current_weather",
"description": "Get the current weather in a given location",
"parameters": {
"type": "object",
"properties": {
"location": {
"type": "string",
"description": "The city and state, e.g. San Francisco, CA"
},
"unit": {
"type": "string",
"enum": ["celsius", "fahrenheit"]
}
},
"required": ["location"]
}
}
}
],
"memory": []
}'
```
```js {{ title: 'Node.js' }}
import {Langbase} from 'langbase';
const langbase = new Langbase({
apiKey: process.env.LANGBASE_API_KEY!,
});
async function main() {
const summaryAgent = await langbase.pipes.create({
name: 'data-processing-agent',
description: 'Advanced pipe with tools and memory',
model: 'google:gemini-1.5-pro-latest',
json: true,
tools: [
{
type: 'function',
function: {
name: 'processData',
description: 'Process input data',
parameters: {
type: 'object',
properties: {
data: {
type: 'string',
description: 'Data to process',
},
},
},
},
},
],
memory: [{name: 'knowledge-base'}],
messages: [
{
role: 'system',
content: 'You are a data processing assistant.',
},
],
variables: {
apiEndpoint: 'https://api.example.com',
},
});
console.log('Pipe created:', summaryAgent);
}
main();
```
```python
import requests
import json
def create_new_pipe():
url = 'https://api.langbase.com/v1/pipes'
api_key = '<YOUR_API_KEY>'
pipe = {
"name": "summary-agent",
"upsert": true,
"description": "AI pipe for summarization",
"status": "public",
"model": "openai:gpt-4o-mini",
"stream": true,
"json": true,
"store": false,
"moderate": true,
"top_p": 1,
"max_tokens": 1000,
"temperature": 0.7,
"presence_penalty": 1,
"frequency_penalty": 1,
"stop": [],
"tool_choice": "auto",
"parallel_tool_calls": false,
"messages": [
{
"role": "system",
"content": "You're a helpful AI assistant.",
},
{
"role": "system",
"content": "Don't ignore these instructions",
"name": "safety",
},
],
"variables": [],
"tools": [
{
"type": "function",
"function": {
"name": "get_current_weather",
"description": "Get the current weather in a given location",
"parameters": {
"type": "object",
"properties": {
"location": {
"type": "string",
"description": "The city and state, e.g. San Francisco, CA"
},
"unit": {
"type": "string",
"enum": ["celsius", "fahrenheit"]
}
},
"required": ["location"]
}
}
}
],
"memory": []
}
headers = {
'Content-Type': 'application/json',
'Authorization': f'Bearer {api_key}',
}
response = requests.post(url, headers=headers, data=json.dumps(pipe))
new_pipe = response.json()
return new_pipe
```
</CodeGroup>
</CodeExamples>
</Col>
</Row>
---
<Row>
<Col>
### Response
<Properties>
<Property name="Pipe" type="object">
The response object returned by the API endpoint.
```ts {{title: 'Pipe create response'}}
interface Pipe {
name: string;
description: string;
status: 'public' | 'private';
owner_login: string;
url: string;
type: 'chat' | 'generate' | 'run';
api_key: string;
}
```
<Properties>
<Property name="name" type="string">
Name of the pipe.
</Property>
<Property name="description" type="string">
Description of the pipe.
</Property>
<Property name="status" type="'public' | 'private'">
Pipe visibility status.
</Property>
<Property name="owner_login" type="string">
Login of the pipe owner.
</Property>
<Property name="url" type="string">
Pipe studio URL.
</Property>
<Property name="type" type="'chat' | 'generate' | 'run'">
The type of the pipe.
</Property>
<Property name="api_key" type="string">
API key for pipe access.
</Property>
</Properties>
</Property>
</Properties>
</Col>
<Col sticky>
```json {{ title: 'API Response' }}
{
"name": "summary-agent",
"description": "AI pipe for summarization",
"status": "public",
"owner_login": "user123",
"url": "https://langbase.com/user123/summary-agent",
"type": "run",
"api_key": "pipe_4FVBn2DgrzfJf..."
}
```
</Col>
</Row>
---
</content>
</doc>
<doc>
<metadata>
<title>Pipe: Run <span className="text-xl font-mono text-muted-foreground/70">v1</span></title>
<url>https://langbase.com/docs/api-reference/pipe/run/</url>
</metadata>
<content>
import { generateMetadata } from '@/lib/generate-metadata';
# Pipe: Run <span className="text-xl font-mono text-muted-foreground/70">v1</span>
The Run API allows you to execute any pipe and receive its response. It supports all use cases of Pipes, including chat interactions, single generation tasks, and function calls.
The Run API supports:
- Single generation requests for straightforward tasks.
- Dynamic variables to create adaptable prompts in real-time.
- Thread management for handling multi-turn conversations.
- Seamless conversation continuation, ensuring smooth transitions across interactions.
If needed, Langbase can store messages and conversation threads, allowing for persistent conversation history for chat use cases.
---
## Run a pipe {{ tag: 'POST', label: '/v1/pipes/run' }}
<Row>
<Col>
Run a pipe by sending the required data with the request. For basic request, send a messages array inside request body.
### Headers
<Properties>
<Property name="Content-Type" type="string" required="true">
Request content type. Needs to be `application/json`
</Property>
<Property name="Authorization" type="string" required="true">
Replace `PIPE_API_KEY` with your Pipe API key
</Property>
<Property name="LB-LLM-Key" type="string">
LLM API key for the request. If not provided, the LLM key from Pipe/User/Organization keyset will be used.
</Property>
</Properties>
---
### Body Parameters
<Properties>
<Property name="messages" type="Array<Message>" required="true">
An array containing message objects.
```js {{ title: 'Message Object' }}
interface Message {
role: string;
content?: string | ContentType[] | null;
tool_call_id?: string;
name?: string;
}
```
<Properties>
<Property name="role" type="string" required="true">
The role of the message, i.e., `system` | `user` | `assistant` | `tool`
</Property>
<Property name="content" type="string | ContentType[] | null">
The content of the message.
1. `String` For text generation, it's a plain string.
2. `Null` or `undefined` Tool call messages can have no content.
3. `ContentType[]` Array used in vision and audio models, where content consists of structured parts (e.g., text, image URLs).
```js {{ title: 'ContentType Object' }}
interface ContentType {
type: string;
text?: string | undefined;
image_url?:
| {
url: string;
detail?: string | undefined;
}
| undefined;
};
```
</Property>
<Property name="tool_call_id" type="string">
The id of the called LLM tool if the role is `tool`
</Property>
<Property name="name" type="string">
The name of the called tool if the role is `tool`
</Property>
</Properties>
</Property>
</Properties>
---
<Properties>
<Property name="variables" type="Record<string, string>">
An object containing pipe variables. The key is the variable name and the value is the variable value.
Default: `{}`
</Property>
</Properties>
---
<Properties>
<Property name="threadId" type="string" >
The ID of an existing chat thread. The conversation will continue in this thread.
</Property>
</Properties>
---
<Properties>
<Property name="tools" type="Array<Tools>">
A list of tools the model may call.
```ts {{title: 'Tools Object'}}
interface ToolsOptions {
type: 'function';
function: FunctionOptions
}
```
<Properties>
<Property name="type" type="'function'">
The type of the tool. Currently, only `function` is supported.
</Property>
<Property name="function" type="FunctionOptions">
The function that the model may call.
```ts {{title: 'FunctionOptions Object'}}
export interface FunctionOptions {
name: string;
description?: string;
parameters?: Record<string, unknown>
}
```
<Property name="name" type="string">
The name of the function to call.
</Property>
<Property name="description" type="string">
The description of the function.
</Property>
<Property name="parameters" type="Record<string, unknown>">
The parameters of the function.
</Property>
</Property>
</Properties>
</Property>
<Property name="memory" type="Array<Memory>">
An array of memory objects that specify the memories your pipe should use at run time.
If memories are defined here, they will override the default pipe memories, which will be ignored. All referenced memories must exist in your account.
```json {{title: 'Run time Memory array example'}}
"memory": [
{ "name": "runtime-memory-1" },
{ "name": "runtime-memory-2" }
]
```
If this property is not set or is empty, the pipe will fall back to using its default memories.
Default: `undefined`
Each memory in the array follows this structure:
```js {{title: 'Memory Object'}}
interface Memory {
name: string;
}
```
<Properties>
<Property name="name" type="string">
The name of the memory.
</Property>
</Properties>
</Property>
</Properties>
</Col>
<Col sticky>
## Usage example
<CodeGroup exampleTitle="Install the SDK" title="Install the SDK">
```bash {{ title: 'npm' }}
npm i langbase
```
```bash {{ title: 'pnpm' }}
pnpm i langbase
```
```bash {{ title: 'yarn' }}
yarn add langbase
```
</CodeGroup>
### Run an agent pipe
<div className="mb-8"/>
<CodeExamples>
<CodeGroup exampleTitle="stream-off" title="Basic request without streaming" tag="POST" label="/v1/pipes/run" id="default">
```bash {{ title: 'cURL' }}
curl https://api.langbase.com/v1/pipes/run \
-H 'Content-Type: application/json' \
-H 'Authorization: Bearer <PIPE_API_KEY>' \
-d '{
"messages": [
{
"role": "user",
"content": "Hello!"
}
]
}'
```
```js {{ title: 'Node.js' }}
import {Langbase} from 'langbase';
const langbase = new Langbase();
async function main() {
const {completion} = await langbase.pipes.run({
apiKey: '<PIPE-API-KEY>', // Replace with your pipe API key.
messages: [
{
role: 'user',
content: 'Who is an AI Engineer?',
},
],
stream: false,
});
console.log('Summary agent completion:', completion);
}
main();
```
```python
import requests
import json
def generate_completion():
url = 'https://api.langbase.com/v1/pipes/run'
api_key = '<PIPE_API_KEY>'
body_data = {
"messages": [
{"role": "user", "content": "Hello!"}
],
"stream": False
}
headers = {
'Content-Type': 'application/json',
'Authorization': f'Bearer {api_key}'
}
response = requests.post(url, headers=headers, data=json.dumps(body_data))
res = response.json()
completion = res['completion']
return completion
```
</CodeGroup>
<CodeGroup exampleTitle="Streaming" title="Basic request with stream on" tag="POST" label="/v1/pipes/run" id="streaming">
```bash {{ title: 'cURL' }}
curl https://api.langbase.com/v1/pipes/run \
-H 'Content-Type: application/json' \
-H 'Authorization: Bearer <PIPE_API_KEY>' \
-d '{
"messages": [
{
"role": "user",
"content": "Hello!"
}
],
"stream": true
}'
```
```js {{ title: 'Node.js' }}
import {getRunner, Langbase} from 'langbase';
const langbase = new Langbase();
async function main() {
const {stream} = await langbase.pipes.run({
stream: true,
apiKey: '<PIPE-API-KEY>', // Replace with your pipe API key.
messages: [{role: 'user', content: 'Who is an AI Engineer?'}],
});
// Convert the stream to a stream runner.
const runner = getRunner(stream);
runner.on('content', content => {
process.stdout.write(content);
});
}
main();
```
```python
import requests
import json
def main():
url = 'https://api.langbase.com/v1/pipes/run'
api_key = '<PIPE_API_KEY>' # TODO: Replace with your Pipe API key.
data = {
"messages": [{"role": "user", "content": "Hello!"}],
"stream": True
}
headers = {
"Content-Type": "application/json",
"Authorization": f"Bearer {api_key}"
}
response = requests.post(url, headers=headers, data=json.dumps(data))
if not response.ok:
print(response.json())
return
for line in response.iter_lines():
if line:
try:
decoded_line = line.decode('utf-8')
if decoded_line.startswith('data: '):
json_str = decoded_line[6:]
if json_str.strip() and json_str != '[DONE]':
data = json.loads(json_str)
if data['choices'] and len(data['choices']) > 0:
delta = data['choices'][0].get('delta', {})
if 'content' in delta and delta['content']:
print(delta['content'], end='', flush=True)
except json.JSONDecodeError:
print("Failed to parse JSON") # Debug JSON parsing
continue
except Exception as e:
print(f"Error processing line: {e}")
if __name__ == "__main__":
main()
```
</CodeGroup>
<CodeGroup exampleTitle="With Variables" title="Run a pipe with variables" tag="POST" label="/v1/pipes/run" id="variables">
```bash {{ title: 'cURL' }}
curl https://api.langbase.com/v1/pipes/run \
-H 'Content-Type: application/json' \
-H 'Authorization: Bearer <PIPE_API_KEY>' \
-d '{
"messages": [
{
"role": "user",
"content": "Hello, I am a {{profession}}"}
],
"variables": {
"profession": "AI Engineer"
}
}'
```
```js {{ title: 'Node.js' }}
import {Langbase} from 'langbase';
const langbase = new Langbase();
async function main() {
const {completion} = await langbase.pipes.run({
apiKey: '<PIPE-API-KEY>', // Replace with your pipe API key.
messages: [
{
role: 'user',
content: 'Hello, I am a {{profession}}',
},
],
variables: { profession: 'AI Engineer' },
stream: false,
});
console.log('Summary Agent completion:', completion);
}
main();
```
```python
import requests
import json
def generate_completion():
url = 'https://api.langbase.com/v1/pipes/run'
api_key = '<PIPE_API_KEY>'
body_data = {
"messages": [
{"role": "user", "content": "Hello, I am a {{profession}}"}
],
"variables": {
"profession": "AI Engineer"
},
}
headers = {
'Content-Type': 'application/json',
'Authorization': f'Bearer {api_key}'
}
response = requests.post(url, headers=headers, data=json.dumps(body_data))
res = response.json()
completion = res['completion']
return completion
```
</CodeGroup>
<CodeGroup exampleTitle="Chat" title="Run API for Chat - Multi conversation turns" tag="POST" label="/v1/pipes/run">
```bash {{ title: 'cURL' }}
# NOTE: How chat thread works
# 1. You send first request without a threadId
# 2. In response headers you get back the `lb-thread-id`
# 3. To maintain the same chat thread, you send the `lb-thread-id` in all next requests
# NOTE: To start a new thread, you send a request without `threadId`.
curl https://api.langbase.com/v1/pipes/run \
-H 'Content-Type: application/json' \
-H "Authorization: Bearer <PIPE_API_KEY>" \
-d '{
"threadId": "<lb-thread-id>",
"messages": [
{
"role": "user",
"content": "Hello!"
}
]
}'
```
```js {{ title: 'Node.js' }}
import {getRunner, Langbase} from 'langbase';
const langbase = new Langbase();
async function main() {
// Message 1: Tell something to the LLM.
const response1 = await langbase.pipes.run({
apiKey: '<PIPE-API-KEY>', // Replace with your pipe API key.
stream: true,
messages: [{role: 'user', content: 'My company is called Langbase'}],
});
const runner1 = getRunner(response1.stream);
runner1.on('content', content => {
process.stdout.write(content);
});
// Message 2: Ask something about the first message.
// Continue the conversation in the same thread by sending
// `threadId` from the second message onwards.
const response2 = await langbase.pipes.run({
apiKey: '<PIPE-API-KEY>', // Replace with your pipe API key.
stream: true,
threadId: response1.threadId!,
messages: [{role: 'user', content: 'Tell me the name of my company?'}],
});
const runner2 = getRunner(response2.stream);
runner2.on('content', content => {
process.stdout.write(content);
});
}
main();
```
```python
import requests
import json
def main():
url = 'https://api.langbase.com/v1/pipes/run'
api_key = '<PIPE_API_KEY>' # TODO: Replace with your Pipe API key.
# NOTE: How chat thread works
# 1. You send first request without a threadId
# 2. In response headers you get back the `lb-thread-id`
# 3. To maintain the same chat thread, you send the `lb-thread-id` in all next requests
# NOTE: To start a new thread, you send a request without `threadId`.
thread_id = None
data = {
"messages": [{"role": "user", "content": "Hello!"}],
"stream": True,
"threadId": thread_id # In first request, thread_id is None, in next requests, it's the `lb-thread-id` from response headers.
}
headers = {
"Content-Type": "application/json",
"Authorization": f"Bearer {api_key}"
}
response = requests.post(url, headers=headers, data=json.dumps(data))
if not response.ok:
print(response.json())
return
# Get thread ID from response headers for continuing the conversation after first request.
thread_id = response.headers.get('lb-thread-id')
for line in response.iter_lines():
if line:
try:
decoded_line = line.decode('utf-8')
if decoded_line.startswith('data: '):
json_str = decoded_line[6:] # Remove 'data: ' prefix
if json_str.strip() and json_str != '[DONE]': # Check if there's actual content and not the end marker
data = json.loads(json_str)
if data['choices'] and len(data['choices']) > 0:
delta = data['choices'][0].get('delta', {})
if 'content' in delta and delta['content']:
print(delta['content'], end='', flush=True)
except json.JSONDecodeError:
print("Failed to parse JSON") # Debug JSON parsing
continue
except Exception as e:
print(f"Error processing line: {e}")
if __name__ == "__main__":
main()
```
</CodeGroup>
<CodeGroup
exampleTitle="Tool Calling"
title="Run API with tool calling"
tag="POST"
label="/v1/pipes/run"
id="tool-calling"
>
```bash {{ title: 'cURL' }}
curl https://api.langbase.com/v1/pipes/run \
-H 'Content-Type: application/json' \
-H "Authorization: Bearer <PIPE_API_KEY>" \
-d '{
"messages": [
{
"role": "user",
"content": "What\'s the weather in SF"
}
],
"stream": false,
"tools": [
{
"type": "function",
"function": {
"name": "get_current_weather",
"description": "Get the current weather of a given location",
"parameters": {
"type": "object",
"required": ["location"],
"properties": {
"unit": {
"enum": ["celsius", "fahrenheit"],
"type": "string"
},
"location": {
"type": "string",
"description": "The city and state, e.g. San Francisco, CA"
}
}
}
}
}
]
}'
```
```js {{ title: 'Node.js' }}
import 'dotenv/config';
import { Langbase, getToolsFromRun } from 'langbase';
const langbase = new Langbase();
async function main() {
const userMsg = "What's the weather in SF";
const response = await langbase.pipes.run({
stream: false,
apiKey: '<PIPE-API-KEY>', // Replace with your pipe API key.
messages: [{ role: 'user', content: userMsg }],
tools: [
{
type: 'function',
function: {
name: 'get_current_weather',
description: 'Get the current weather of a given location',
parameters: {
type: 'object',
required: ['location'],
properties: {
unit: {
enum: ['celsius', 'fahrenheit'],
type: 'string'
},
location: {
type: 'string',
description:
'The city and state, e.g. San Francisco, CA'
}
}
}
}
}
]
});
const toolCalls = await getToolsFromRun(response);
const hasToolCalls = toolCalls.length > 0;
if (hasToolCalls) {
// handle the tool calls
console.log('Tools:', toolCalls);
} else {
// handle the response
console.log('Response:', response);
}
}
main();
```
```python
import requests
import json
import os
def get_weather_info():
url = 'https://api.langbase.com/v1/pipes/run'
api_key = '<PIPE_API_KEY>'
body_data = {
"stream": False,
"messages": [
{"role": "user", "content": "What's the weather in SF"}
],
"tools": [
{
"type": "function",
"function": {
"name": "get_current_weather",
"description": "Get the current weather of a given location",
"parameters": {
"type": "object",
"required": ["location"],
"properties": {
"unit": {
"enum": ["celsius", "fahrenheit"],
"type": "string"
},
"location": {
"type": "string",
"description": "The city and state, e.g. San Francisco, CA"
}
}
}
}
}
]
}
headers = {
'Content-Type': 'application/json',
'Authorization': f'Bearer {api_key}'
}
response = requests.post(url, headers=headers, data=json.dumps(body_data))
res = response.json()
return res
```
</CodeGroup>
</CodeExamples>
</Col>
</Row>
---
### Response Headers
<Row>
<Col>
<Properties>
<Property name="lb-thread-id" type="string">
The ID of the new/existing thread. If you want to continue conversation in this thread, send it as `threadId` in the next request.
</Property>
</Properties>
_[Learn how to use tool calling with this API.](/features/tool-calling/chat-api)_
</Col>
<Col sticky>
```json {{ title: 'Response Header' }}
HTTP/2 200
lb-thread-id: "…-…-…-…-… ID of the thread"
… … … rest of the headers … : … … …
```
</Col>
</Row>
---
<Row>
<Col>
### Response Body
Response of the endpoint is a `Promise<RunResponse | RunResponseStream>` object.
### RunResponse Object
```ts {{title: 'RunResponse Object'}}
interface RunResponse {
completion: string;
raw: RawResponse;
}
```
<Properties>
<Property name="completion" type="string">
The generated text completion.
</Property>
<Property name="raw" type="RawResponse">
The raw response object.
```ts {{title: 'RawResponse Object'}}
interface RawResponse {
id: string;
object: string;
created: number;
model: string;
choices: ChoiceGenerate[];
usage: Usage;
system_fingerprint: string | null;
}
```
<Properties>
<Property name="id" type="string">
The ID of the raw response.
</Property>
<Property name="object" type="string">
The object type name of the response.
</Property>
<Property name="created" type="number">
The timestamp of the response creation.
</Property>
<Property name="model" type="string">
The model used to generate the response.
</Property>
<Property name="choices" type="ChoiceGenerate[]">
A list of chat completion choices. Can contain more than one elements if n is greater than 1.
```ts {{title: 'Choice Object for langbase.pipes.run() with stream off'}}
interface ChoiceGenerate {
index: number;
message: Message;
logprobs: boolean | null;
finish_reason: string;
}
```
</Property>
<Sub name="index" type="number">
The index of the choice in the list of choices.
</Sub>
<Sub name="message" type="Message">
A messages array including `role` and `content` params.
```ts {{title: 'Message Object'}}
interface Message {
role: 'user' | 'assistant' | 'system'| 'tool';
content: string | null;
tool_calls?: ToolCall[];
}
```
<Sub name="role" type="'user' | 'assistant' | 'system'| 'tool'">
The role of the author of this message.
</Sub>
<Sub name="content" type="string | null">
The contents of the chunk message. Null if a tool is called.
</Sub>
<Sub name="tool_calls" type="Array<ToolCall>">
The array of the tools called by LLM
```ts {{title: 'ToolCall Object'}}
interface ToolCall {
id: string;
type: 'function';
function: Function;
}
```
<Sub name="id" type="string">
The ID of the tool call.
</Sub>
<Sub name="type" type="'function'">
The type of the tool. Currently, only `function` is supported.
</Sub>
<Sub name="function" type="Function">
The function that the model called.
```ts {{title: 'Function Object'}}
export interface Function {
name: string;
arguments: string;
}
```
<Sub name="name" type="string">
The name of the function to call.
</Sub>
<Sub name="arguments" type="string">
The arguments to call the function with, as generated by the model in JSON format.
</Sub>
</Sub>
</Sub>
</Sub>
<Sub name="logprobs" type="boolean or null">
Log probability information for the choice. Whether to return log probabilities of the output tokens or not. If true, returns the log probabilities of each output token returned in the `content` of `message`.
</Sub>
<Sub name="finish_reason" type="string">
The reason the model stopped generating tokens. This will be `stop` if the model hit a natural stop point or a provided stop sequence, length if the maximum number of tokens specified in the request was reached, `content_filter` if content was omitted due to a flag from our content filters, `tool_calls` if the model called a tool, or `function_call` (deprecated) if the model called a function. It could also be `eos` end of sequence and depends on the type of LLM, you can check their docs.
</Sub>
<Property name="usage" type="Usage">
The usage object including the following properties.
```ts {{title: 'Usage Object'}}
interface Usage {
prompt_tokens: number;
completion_tokens: number;
total_tokens: number;
}
```
<Sub name="prompt_tokens" type="number">
The number of tokens in the prompt (input).
</Sub>
<Sub name="completion_tokens" type="number">
The number of tokens in the completion (output).
</Sub>
<Sub name="total_tokens" type="number">
The total number of tokens.
</Sub>
</Property>
<Property name="system_fingerprint" type="string">
This fingerprint represents the backend configuration that the model runs with.
</Property>
</Properties>
</Property>
</Properties>
---
### RunResponseStream Object
Response of the endpoint with `stream: true` is a `Promise<RunResponseStream>`.
```ts {{title: 'RunResponseStream Object'}}
interface RunResponseStream {
id: string;
object: string;
created: number;
model: string;
system_fingerprint: string | null;
choices: ChoiceStream[];
}
```
<Properties>
<Property name="id" type="string">
The ID of the response.
</Property>
<Property name="object" type="string">
The object type name of the response.
</Property>
<Property name="created" type="number">
The timestamp of the response creation.
</Property>
<Property name="model" type="string">
The model used to generate the response.
</Property>
<Property name="system_fingerprint" type="string">
This fingerprint represents the backend configuration that the model runs with.
</Property>
<Property name="choices" type="ChoiceStream[]">
A list of chat completion choices. Can contain more than one elements if n is greater than 1.
```js {{title: 'Choice Object with stream true'}}
interface ChoiceStream {
index: number;
delta: Delta;
logprobs: boolean | null;
finish_reason: string;
}
```
</Property>
<Sub name="index" type="number">
The index of the choice in the list of choices.
</Sub>
<Sub name="delta" type="Delta">
A chat completion delta generated by streamed model responses.
```js {{title: 'Delta Object'}}
interface Delta {
role?: Role;
content?: string | null;
tool_calls?: ToolCall[];
}
```
<Sub name="role" type="'user' | 'assistant' | 'system'| 'tool'">
The role of the author of this message.
</Sub>
<Sub name="content" type="string | null">
The contents of the chunk message. Null if a tool is called.
</Sub>
<Sub name="tool_calls" type="Array<ToolCall>">
The array of the tools called by LLM
```js {{title: 'ToolCall Object'}}
interface ToolCall {
id: string;
type: 'function';
function: Function;
}
```
<Sub name="id" type="string">
The ID of the tool call.
</Sub>
<Sub name="type" type="'function'">
The type of the tool. Currently, only `function` is supported.
</Sub>
<Sub name="function" type="Function">
The function that the model called.
```js {{title: 'Function Object'}}
export interface Function {
name: string;
arguments: string;
}
```
<Sub name="name" type="string">
The name of the function to call.
</Sub>
<Sub name="arguments" type="string">
The arguments to call the function with, as generated by the model in JSON format.
</Sub>
</Sub>
</Sub>
</Sub>
<Sub name="logprobs" type="boolean or null">
Log probability information for the choice. Whether to return log probabilities of the output tokens or not. If true, returns the log probabilities of each output token returned in the `content` of `message`.
</Sub>
<Sub name="finish_reason" type="string">
The reason the model stopped generating tokens. This will be `stop` if the model hit a natural stop point or a provided stop sequence, length if the maximum number of tokens specified in the request was reached, `content_filter` if content was omitted due to a flag from our content filters, `tool_calls` if the model called a tool, or `function_call` (deprecated) if the model called a function. It could also be `eos` end of sequence and depends on the type of LLM, you can check their docs.
</Sub>
</Properties>
</Col>
<Col sticky>
```json {{ title: 'RunResponse type' }}
{
"completion": "AI Engineer is a person who designs, builds, and maintains AI systems.",
"raw": {
"id": "chatcmpl-123",
"object": "chat.completion",
"created": 1720131129,
"model": "gpt-4o-mini",
"choices": [
{
"index": 0,
"message": {
"role": "assistant",
"content": "AI Engineer is a person who designs, builds, and maintains AI systems."
},
"logprobs": null,
"finish_reason": "stop"
}
],
"usage": {
"prompt_tokens": 28,
"completion_tokens": 36,
"total_tokens": 64
},
"system_fingerprint": "fp_123"
}
}
```
```json {{ title: 'RunResponseStream type with stream true' }}
// A stream chunk looks like this …
{
"id": "chatcmpl-123",
"object": "chat.completion.chunk",
"created": 1719848588,
"model": "gpt-4o-mini",
"system_fingerprint": "fp_44709d6fcb",
"choices": [{
"index": 0,
"delta": { "content": "Hi" },
"logprobs": null,
"finish_reason": null
}]
}
// More chunks as they come in...
{"id":"chatcmpl-123","object":"chat.completion.chunk","created":1719848588,"model":"gpt-4o-mini","system_fingerprint":"fp_44709d6fcb","choices":[{"index":0,"delta":{"content":"there"},"logprobs":null,"finish_reason":null}]}
…
{"id":"chatcmpl-123","object":"chat.completion.chunk","created":1719848588,"model":"gpt-4o-mini","system_fingerprint":"fp_44709d6fcb","choices":[{"index":0,"delta":{},"logprobs":null,"finish_reason":"stop"}]}
```
</Col>
</Row>
---
</content>
</doc>
<doc>
<metadata>
<title>Usage Limits</title>
<url>https://langbase.com/docs/api-reference/limits/usage-limits/</url>
</metadata>
<content>
import { generateMetadata } from '@/lib/generate-metadata';
# Usage Limits
Usage limits are the number of runs that a user can make to the Langbase API within their subscription plan.
---
## Overview
We offer the folllowing runs and overage limits for each subscription plan:
| Plan | Runs | Overage |
|------------|----------|----------|
| Hobby | 500 | - |
| Enterprise | [Contact Us][contact-us] | [Contact Us][contact-us] |
<Note title="What is a run?">
Each run is an API request which can have at the max 1,000 Tokens in it which is equivalent to almost 750 words (an article). If your API request has, for instance, 1500 tokens in it, it will count as 2 runs.
</Note>
### Free Users
The usage limit for free tier users is as follows:
- **Limit**: 500 runs per month.
- **Overage**: No overage.
### Enterprise Users
There are no hard limits for Enterprise. Billing is based solely on the number of runs during each billing period.
If you have questions about your usage or need assistance, please don't hesitate to [contact us](mailto:support@langbase.com).
---
### Usage Limit Headers
Free tier runs to the Langbase API have the following response headers. These headers convey status of the usage limits.
| Header | Description |
| --------------------------- | ------------------------------------------------------------ |
| `lb-usagelimit-limit` | The usage limit applicable to your request. |
| `lb-usagelimit-remaining` | The number of runs remaining in the current usage limit window. |
| `lb-usagelimit-used` | The number of runs made in the current usage limit window. |
### About Usage Limits
- If a free tier user exceeds the usage limit, an HTTP status code `403 USAGE_EXCEEDED` error will be sent.
- Usage limits are applied on a per-user or per-organization basis. For organizations, all runs made by the organization are collectively restricted within a single limit window.
[contact-us]: mailto:support@langbase.com
---
</content>
</doc>
<doc>
<metadata>
<title>Rate Limits</title>
<url>https://langbase.com/docs/api-reference/limits/rate-limits/</url>
</metadata>
<content>
import { generateMetadata } from '@/lib/generate-metadata';
# Rate Limits
Rate limits are the number of requests that a client can make to the Langbase API within a specific time period. These limits are enforced to ensure fair usage of the API and to prevent abuse.
---
## Overview
We have implemented the following rate limits on the Langbase API. The limits vary by your subscription plan.
| Plan | Rate Limit |
|---------------|----------------------------------------------------------------------------------------|
| **Hobby** | 25 requests per minute (RPM) |
| **Pro** | 300 requests per minute (RPM) |
| **Enterprise**| 300 requests per minute (RPM) – please [contact us][contact-us] for higher rate limits |
<Note sub="Enterprise Rate Limits">
Custom enterprise packages can go up to 1K requests per second. Please [contact us][contact-us] for higher limits.
</Note>
---
### Pipe API <span className="text-sm font-mono text-muted-foreground/70">v1</span>
Following is the list of Pipe API (v1) endpoints and their rate limits based on your subscription plan.
| API Endpoints | Hobby Plan | Pro Plan | Enterprise Plan |
|-------------------------------------|------------|----------|--------------------------|
| Run: `/v1/pipes/run` | 25 RPM | 300 RPM | [Contact Us][contact-us] |
| Create pipe: `/v1/pipes` | 25 RPM | 300 RPM | [Contact Us][contact-us] |
| List pipes: `/v1/pipes` | 25 RPM | 300 RPM | [Contact Us][contact-us] |
| Update pipe: `/v1/pipes/{pipeName}` | 25 RPM | 300 RPM | [Contact Us][contact-us] |
*RPM = requests per minute*
---
### Pipe API <span className="text-sm font-mono text-muted-foreground/70">beta</span>
Following is the list of Pipe API (beta) endpoints and their rate limits based on your subscription plan.
| API Endpoints | Hobby Plan | Pro Plan | Enterprise Plan |
|-------------------------------------------|------------|----------|--------------------------|
| Run: `/beta/run` | 25 RPM | 300 RPM | [Contact Us][contact-us] |
| Generate: `/beta/generate` | 25 RPM | 300 RPM | [Contact Us][contact-us] |
| Chat: `/beta/chat` | 25 RPM | 300 RPM | [Contact Us][contact-us] |
| Create pipe (user): `/beta/user/pipes` | 25 RPM | 300 RPM | [Contact Us][contact-us] |
| Create pipe (org): `/beta/org/{org}/pipes`| 25 RPM | 300 RPM | [Contact Us][contact-us] |
| Update pipe: `/beta/pipes/{owner}/{pipe}` | 25 RPM | 300 RPM | [Contact Us][contact-us] |
| List pipes (user): `/beta/user/pipes` | 25 RPM | 300 RPM | [Contact Us][contact-us] |
| List pipes (org): `/beta/org/{org}/pipes` | 25 RPM | 300 RPM | [Contact Us][contact-us] |
*RPM = requests per minute*
---
### Memory API <span className="text-sm font-mono text-muted-foreground/70">v1</span>
Following is the list of Memory API (v1) endpoints and their rate limits based on your subscription plan.
| API Endpoints | Hobby Plan | Pro Plan | Enterprise Plan |
|------------------------------------------|------------|----------|--------------------------|
| Create memory: `/v1/memory` | 25 RPM | 300 RPM | [Contact Us][contact-us] |
| List memory: `/v1/memory` | 25 RPM | 300 RPM | [Contact Us][contact-us] |
| Delete memory: `/v1/memory/{memoryName}` | 25 RPM | 300 RPM | [Contact Us][contact-us] |
| Retrieve memory: `/v1/memory/retrieve` | 25 RPM | 300 RPM | [Contact Us][contact-us] |
*RPS = requests per second* <br/>
*RPM = requests per minute*
---
### Memory API <span className="text-sm font-mono text-muted-foreground/70">beta</span>
Following is the list of Memory API (beta) endpoints and their rate limits based on your subscription plan.
| API Endpoints | Hobby Plan | Pro Plan | Enterprise Plan |
|-------------------------------------------------------------|------------|----------|--------------------------|
| Create memory (user): `/beta/user/memorysets` | 25 RPM | 300 RPM | [Contact Us][contact-us] |
| Create memory (org): `/beta/org/{org}/memorysets` | 25 RPM | 300 RPM | [Contact Us][contact-us] |
| List memory (user): `/beta/user/memorysets` | 25 RPM | 300 RPM | [Contact Us][contact-us] |
| List memory (org): `/beta/org/{org}/memorysets` | 25 RPM | 300 RPM | [Contact Us][contact-us] |
| Delete memory: `/beta/memorysets/{ownerLogin}/{memoryName}` | 25 RPM | 300 RPM | [Contact Us][contact-us] |
| Retrieve memory: `/beta/memory/retrieve` | 25 RPM | 300 RPM | [Contact Us][contact-us] |
*RPM = requests per minute*
---
### Document API <span className="text-sm font-mono text-muted-foreground/70">v1</span>
Following is the list of Document API (v1) endpoints and their rate limits based on your subscription plan.
| API Endpoints | Hobby Plan | Pro Plan | Enterprise Plan |
|---------------------------------------------------------------------------------------|------------|----------|--------------------------|
| Upload document: `/v1/memory/documents` | 25 RPM | 300 RPM | [Contact Us][contact-us] |
| List documents: `/v1/memory/{memoryName}/documents` | 25 RPM | 300 RPM | [Contact Us][contact-us] |
| Delete document: `/v1/memory/{memoryName}/documents/{documentName}` | 25 RPM | 300 RPM | [Contact Us][contact-us] |
| Retry embeddings: `/v1/memory/{memoryName}/documents/{documentName}/embeddings/retry` | 25 RPM | 300 RPM | [Contact Us][contact-us] |
*RPM = requests per minute*
---
### Document API <span className="text-sm font-mono text-muted-foreground/70">beta</span>
Following is the list of Document API (beta) endpoints and their rate limits based on your subscription plan.
| API Endpoints | Hobby Plan | Pro Plan | Enterprise Plan |
|-------------------------------------------------------------------------|------------|----------|--------------------------|
| Upload document (user): `/beta/user/memorysets/documents` | 25 RPM | 300 RPM | [Contact Us][contact-us] |
| Upload document (org): `/beta/org/{org}/memorysets/documents` | 25 RPM | 300 RPM | [Contact Us][contact-us] |
| List documents: `/beta/memorysets/{owner}/{memoryName}/documents` | 25 RPM | 300 RPM | [Contact Us][contact-us] |
| Retry embeddings: `/beta/memorysets/{owner}/documents/embeddings/retry` | 25 RPM | 300 RPM | [Contact Us][contact-us] |
*RPM = requests per minute*
---
### Unauthenticated Requests
If your request does not have a valid API key, it is considered an unauthenticated request. Limits for them are:
- **Limit**: 10 requests per minute
- **Reset Interval**: 60 seconds
<Warn>
Langbase is in the public beta stage right now. These limits and pricing are subject to change without notice. Please bear with us as we improve and get ready for a stable release and massive scale. Already processing tens of billions of AI tokens every month, you're in good hands. Feedback welcomed.
</Warn>
---
### Rate Limit Headers
When you make a request to the Langbase API, it returns the following response headers. These headers convey you the rate limit status.
| Header | Description |
|-----------------------------|--------------------------------------------------------------------|
| `lb-ratelimit-limit` | The rate limit applicable to your request. |
| `lb-ratelimit-remaining` | The number of requests remaining in the current rate limit window. |
| `lb-ratelimit-reset` | The time at which the current rate limit window resets. |
---
### About Rate Limits
- If you exceed the rate limit, you will receive an HTTP status code `429 Too Many Requests` error.
- Rate limits are applied on a per-user or per-organization basis. For organizations, all requests made by the organization are collectively restricted within a single limit window.
- These limits are subject to adjustment and may differ depending on your subscription plan.
- If you need higher rate limits, please [contact us](mailto:support@langbase.com).
[contact-us]: mailto:support@langbase.com
</content>
</doc>
<doc>
<metadata>
<title>Memory: List <span className="text-xl font-mono text-muted-foreground/70">v1</span></title>
<url>https://langbase.com/docs/api-reference/memory/list/</url>
</metadata>
<content>
import { generateMetadata } from '@/lib/generate-metadata';
# Memory: List <span className="text-xl font-mono text-muted-foreground/70">v1</span>
The `list` memory API endpoint allows you to get a list of memory sets on Langbase with API. This endpoint requires a User or Org API key.
---
## Generate a User/Org API key
You will need to generate an API key to authenticate your requests. For more information, visit the [User/Org API key documentation](/api-reference/api-keys).
<Spoiler title="Get your Langbase API key: User or Org">
You can generate API keys from the [Langbase Studio](https://studio.langbase.com) by following these steps:
1. Switch to your user or org account.
2. From the sidebar, click on the `API keys`.
3. From here you can create a new API key or manage existing ones.
For more details, follow the [Langbase API keys](/api-reference/api-keys) documentation.
</Spoiler>
---
## Get a list of memory {{ tag: 'GET', label: '/v1/memory' }}
<Row>
<Col>
Get a list of all memory by sending a GET request to this endpoint.
### Headers
<Properties>
<Property name="Content-Type" type="string" required="true">
Request content type. Needs to be `application/json`.
</Property>
<Property name="Authorization" type="string" required="true">
Replace `<YOUR_API_KEY>` with your user/org API key.
</Property>
</Properties>
</Col>
<Col sticky>
## Usage example
<CodeGroup exampleTitle="Install the SDK" title="Install the SDK">
```bash {{ title: 'npm' }}
npm i langbase
```
```bash {{ title: 'pnpm' }}
pnpm i langbase
```
```bash {{ title: 'yarn' }}
yarn add langbase
```
</CodeGroup>
### Environment variables
```bash {{ title: '.env file' }}
LANGBASE_API_KEY="<YOUR_API_KEY>"
```
### List Memory
<CodeGroup exampleTitle="List Memory" title="List Memory" tag="GET" label="/v1/memory">
```bash {{ title: 'cURL' }}
curl https://api.langbase.com/v1/memory \
-H 'Content-Type: application/json' \
-H "Authorization: Bearer <YOUR_API_KEY>"
```
```js {{ title: 'Node.js' }}
import {Langbase} from 'langbase';
const langbase = new Langbase({
apiKey: process.env.LANGBASE_API_KEY!,
});
async function main() {
const memoryList = await langbase.memories.list();
console.log('Memories:', memoryList);
}
main();
```
```python
import requests
def get_memory_list():
url = 'https://api.langbase.com/v1/memory'
api_key = '<YOUR_API_KEY>'
headers = {
'Content-Type': 'application/json',
'Authorization': f'Bearer {api_key}',
}
response = requests.get(url, headers=headers)
memory_list = response.json()
return memory_list
```
</CodeGroup>
</Col>
</Row>
---
<Row>
<Col>
### Response
<Properties>
<Property name="Memory[]" type="Array<Memory>">
An array of Memory objects returned by the API endpoint.
```ts {{title: 'Memory'}}
interface MemoryListResponse {
name: string;
description: string;
owner_login: string;
url: string;
embeddingModel:
| 'openai:text-embedding-3-large'
| 'cohere:embed-v4.0'
| 'cohere:embed-multilingual-v3.0'
| 'cohere:embed-multilingual-light-v3.0';
}
```
<Properties>
<Property name="name" type="string">
Name of the memory.
</Property>
<Property name="description" type="string">
Description of the AI memory.
</Property>
<Property name="owner_login" type="string">
Login of the memory owner.
</Property>
<Property name="url" type="string">
Memory studio URL.
</Property>
<Property name="embeddingModel" type="string">
The embedding model used by the AI memory.
- `openai:text-embedding-3-large`
- `cohere:embed-multilingual-v3.0`
- `cohere:embed-multilingual-light-v3.0`
</Property>
</Properties>
</Property>
</Properties>
</Col>
<Col sticky>
```json {{ title: 'API Response' }}
[
{
"name": "knowledge-base",
"description": "An AI memory for storing company internal docs.",
"owner_login": "user123",
"url": "https://langbase.com/user123/document-memory",
"embeddingModel": "openai:text-embedding-3-large"
},
{
"name": "multilingual-knowledge-base",
"description": "Advanced memory with multilingual support",
"owner_login": "user123",
"url": "https://langbase.com/user123/multilingual-memory",
"embeddingModel": "cohere:embed-multilingual-v3.0"
}
]
```
</Col>
</Row>
---
</content>
</doc>
<doc>
<metadata>
<title>Memory: Retrieve <span className="text-xl font-mono text-muted-foreground/70">v1</span></title>
<url>https://langbase.com/docs/api-reference/memory/retrieve/</url>
</metadata>
<content>
import { generateMetadata } from '@/lib/generate-metadata';
# Memory: Retrieve <span className="text-xl font-mono text-muted-foreground/70">v1</span>
The `retrieve` memory API endpoint allows you to retrieve similar chunks from an existing memory on Langbase based on a query. This endpoint requires an Org or User API key.
---
## Generate a User/Org API key
You will need to generate an API key to authenticate your requests. For more information, visit the [User/Org API key documentation](/api-reference/api-keys).
<Spoiler title="Get your Langbase API key: User or Org">
You can generate API keys from the [Langbase Studio](https://studio.langbase.com) by following these steps:
1. Switch to your user or org account.
2. From the sidebar, click on the `API keys`.
3. From here you can create a new API key or manage existing ones.
For more details, follow the [Langbase API keys](/api-reference/api-keys) documentation.
</Spoiler>
---
## Retrieve similar chunks from multiple memory {{ tag: 'POST', label: '/v1/memory/retrieve' }}
<Row>
<Col>
Retrieve similar chunks by specifying the query and memory names in the request body.
### Headers
<Properties>
<Property name="Content-Type" type="string" required="true">
Request content type. Needs to be `application/json`.
</Property>
<Property name="Authorization" type="string" required="true">
Replace `<YOUR_API_KEY>` with your user/org API key.
</Property>
</Properties>
### Body Parameters
<Properties>
<Property name="query" type="string" required="true">
The search query for retrieving similar chunks.
</Property>
<Property name="memory" type="Array<Memory>" required="true">
An array of memory objects from which to retrieve similar chunks.
```js {{title: 'Memory Object'}}
interface Memory {
name: string;
filters?: MemoryFilters;
}
```
<Properties>
<Property name="name" type="string" required="true">
The name of the memory.
</Property>
<Property name="filters" type="MemoryFilters" optional="true">
Optional array of filters to narrow down the search results.
```ts {{title: 'MemoryFilters Type'}}
type FilterOperator = 'Eq' | 'NotEq' | 'In' | 'NotIn' | 'And' | 'Or';
type FilterConnective = 'And' | 'Or';
type FilterValue = string | string[];
type FilterCondition = [string, FilterOperator, FilterValue];
type MemoryFilters = [FilterConnective, MemoryFilters[]] | FilterCondition;
```
Filters can be either:
- A single condition: `["field", "operator", "value"]`
- A nested structure: `["And"|"Or", MemoryFilters]`
</Property>
</Properties>
</Property>
<Property name="topK" type="number" optional="true" default="20" min="1" max="100">
The number of top similar chunks to return from memory. The default is 20, minimum is 1, and maximum is 100.
</Property>
</Properties>
</Col>
<Col sticky>
## Usage example
<CodeGroup exampleTitle="Install the SDK" title="Install the SDK">
```bash {{ title: 'npm' }}
npm i langbase
```
```bash {{ title: 'pnpm' }}
pnpm i langbase
```
```bash {{ title: 'yarn' }}
yarn add langbase
```
</CodeGroup>
### Environment variables
```bash {{ title: '.env file' }}
LANGBASE_API_KEY="<YOUR_API_KEY>"
```
### Retrieve Similar Chunks
<CodeExamples>
<CodeGroup exampleTitle="Basic" title="Basic" tag="POST" label="/v1/memory/retrieve" id="basic">
```bash {{ title: 'cURL' }}
curl -X POST https://api.langbase.com/v1/memory/retrieve \
-H 'Content-Type: application/json' \
-H "Authorization: Bearer <YOUR_API_KEY>" \
-d '{
"query": "What are the key features?",
"memory": [
{
"name": "knowledge-base"
}
]
}'
```
```js {{ title: 'Node.js' }}
import {Langbase} from 'langbase';
const langbase = new Langbase({
apiKey: process.env.LANGBASE_API_KEY!,
});
async function main() {
const chunks = await langbase.memories.retrieve({
query: "What are the key features?",
memory: [{
name: "knowledge-base"
}]
});
console.log('Memory chunks:', chunks);
}
main();
```
```python
import requests
def retrieve_similar_chunks():
url = 'https://api.langbase.com/v1/memory/retrieve'
api_key = '<YOUR_API_KEY>'
headers = {
'Content-Type': 'application/json',
'Authorization': f'Bearer {api_key}',
}
data = {
'query': 'What are the key features?',
'memory': [
{
'name': 'knowledge-base'
}
]
}
response = requests.post(url, headers=headers, json=data)
result = response.json()
return result
```
</CodeGroup>
<CodeGroup exampleTitle="With Filters" title="With Filters" tag="POST" label="/v1/memory/retrieve" id="with-filters">
```bash {{ title: 'cURL' }}
curl -X POST https://api.langbase.com/v1/memory/retrieve \
-H 'Content-Type: application/json' \
-H "Authorization: Bearer <YOUR_API_KEY>" \
-d '{
"query": "What are the key features?",
"memory": [
{
"name": "knowledge-base",
"filters": [
["category", "Eq", "features"]
]
}
]
}'
```
```js {{ title: 'Node.js' }}
import {Langbase} from 'langbase';
const langbase = new Langbase({
apiKey: process.env.LANGBASE_API_KEY!,
});
async function main() {
const results = await langbase.memories.retrieve({
query: "What are the key features?",
memory: [{
name: "knowledge-base",
filters: ['category', 'Eq', 'features']
}]
});
console.log('Memory chunks:', chunks);
}
main();
```
```python
import requests
def retrieve_similar_chunks():
url = 'https://api.langbase.com/v1/memory/retrieve'
api_key = '<YOUR_API_KEY>'
headers = {
'Content-Type': 'application/json',
'Authorization': f'Bearer {api_key}',
}
data = {
'query': 'What are the key features?',
'memory': [
{
'name': 'knowledge-base',
'filters': ['category', 'Eq', 'features']
}
]
}
response = requests.post(url, headers=headers, json=data)
result = response.json()
return result
```
</CodeGroup>
<CodeGroup exampleTitle="Adv. Filters" title="Advanced Filters" tag="POST" label="/v1/memory/retrieve" id="advanced-filters">
```bash {{ title: 'cURL' }}
curl -X POST https://api.langbase.com/v1/memory/retrieve \
-H 'Content-Type: application/json' \
-H "Authorization: Bearer <YOUR_API_KEY>" \
-d '{
"query": "What are the key features?",
"memory": [
{
"name": "knowledge-base",
"filters": [
["category", "Eq", "features"],
["And", [
["category", "Eq", "features"],
["section", "In", ["overview", "features"]]
]]
]
}
]
}'
```
```js {{ title: 'Node.js' }}
import {Langbase} from 'langbase';
const langbase = new Langbase({
apiKey: process.env.LANGBASE_API_KEY!,
});
async function main() {
const chunks = await langbase.memories.retrieve({
query: "What are the key features?",
memory: [{
name: "knowledge-base",
filters:
["And", [
["category", "Eq", "features"],
["section", "In", ["overview", "features"]]
]]
}]
});
console.log('Memory chunks:', chunks);
}
main();
```
```python
import requests
def retrieve_similar_chunks():
url = 'https://api.langbase.com/v1/memory/retrieve'
api_key = '<YOUR_API_KEY>'
headers = {
'Content-Type': 'application/json',
'Authorization': f'Bearer {api_key}',
}
data = {
'query': 'What are the key features?',
'memory': [
{
'name': 'knowledge-base',
'filters':
['And', [
['category', 'Eq', 'features'],
['section', 'In', ['overview', 'features']]
]]
}
]
}
response = requests.post(url, headers=headers, json=data)
result = response.json()
return result
```
</CodeGroup>
</CodeExamples>
</Col>
</Row>
---
<Row>
<Col>
### Response
<Properties>
<Property name="MemoryRetrieveResponse[]" type="array">
The array of retrieve response objects returned by the API endpoint.
```ts {{title: 'MemoryRetrieveResponse'}}
interface MemoryRetrieveResponse {
text: string;
similarity: number;
meta: Record<string, string>;
}
```
<Properties>
<Property name="text" type="string">
Retrieved text segment from memory.
</Property>
<Property name="similarity" type="number">
Similarity score between the query and retrieved text (0-1 range).
</Property>
<Property name="meta" type="Record<string, string>">
Additional metadata associated with the retrieved text.
</Property>
</Properties>
</Property>
</Properties>
</Col>
<Col sticky>
<CodeGroup exampleTitle="API Response" title="API Response">
```json {{ title: 'Basic' }}
[
{
"text": "Key features of Langbase include: semantic search capabilities, flexible memory management, and scalable architecture for handling large datasets.",
"similarity": 0.92,
"meta": {
"documentName": "technical-doc.pdf",
"category": "features",
"section": "overview"
}
},
{
"text": "Our platform offers advanced features like real-time memory updates, custom metadata filtering, and enterprise-grade security.",
"similarity": 0.87,
"meta": {
"documentName": "technical-doc.pdf",
"category": "updates",
"section": "highlights"
}
},
{
"text": "Platform highlights include AI-powered memory retrieval, customizable embedding models, and advanced filtering capabilities.",
"similarity": 0.85,
"meta": {
"documentName": "technical-doc.pdf",
"category": "features",
"section": "highlights"
}
}
]
```
```json {{ title: 'With Filters' }}
[
{
"text": "Key features of Langbase include: semantic search capabilities, flexible memory management, and scalable architecture for handling large datasets.",
"similarity": 0.92,
"meta": {
"documentName": "technical-doc.pdf",
"category": "features",
"section": "overview"
}
},
{
"text": "Platform highlights include AI-powered memory retrieval, customizable embedding models, and advanced filtering capabilities.",
"similarity": 0.85,
"meta": {
"documentName": "technical-doc.pdf",
"category": "features",
"section": "highlights"
}
}
]
```
```json {{ title: 'Advanced Filters' }}
[
{
"text": "Key features of Langbase include: semantic search capabilities, flexible memory management, and scalable architecture for handling large datasets.",
"similarity": 0.92,
"meta": {
"documentName": "technical-doc.pdf",
"category": "features",
"section": "overview"
}
}
]
```
</CodeGroup>
</Col>
</Row>
---
</content>
</doc>
<doc>
<metadata>
<title>Document: Upload <span className="text-xl font-mono text-muted-foreground/70">v1</span></title>
<url>https://langbase.com/docs/api-reference/memory/document-upload/</url>
</metadata>
<content>
import { generateMetadata } from '@/lib/generate-metadata';
# Document: Upload <span className="text-xl font-mono text-muted-foreground/70">v1</span>
The `upload` document API endpoint allows you to upload documents to a memory in Langbase with API. This endpoint requires a User or Org API key.
This endpoint can also be used to replace an existing document in a memory. To do this, you need to provide the same `documentName` and `memoryName` attributes as the existing document. We also have a separate guide on [how to replace an existing document in memory](/guides/memory-document-replace).
---
## Generate a User/Org API key
You will need to generate an API key to authenticate your requests. For more information, visit the [User/Org API key documentation](/api-reference/api-keys).
<Spoiler title="Get your Langbase API key: User or Org">
You can generate API keys from the [Langbase Studio](https://studio.langbase.com) by following these steps:
1. Switch to your user or org account.
2. From the sidebar, click on the `API keys`.
3. From here you can create a new API key or manage existing ones.
For more details, follow the [Langbase API keys](/api-reference/api-keys) documentation.
</Spoiler>
---
## Step #1: Get SignedUrl to Upload Document {{ tag: 'POST', label: '/v1/memory/documents' }}
<Row>
<Col>
Uploading a document to a memory requires a signed URL. `POST` a request to this endpoint to get a signed URL and use `PUT` method to upload the document.
### Headers
<Properties>
<Property name="Content-Type" type="string" required="true">
Request content type. Needs to be `application/json`.
</Property>
<Property name="Authorization" type="string" required="true">
Replace `<YOUR_API_KEY>` with your user/org API key.
</Property>
</Properties>
### Body Parameters
<Properties>
<Property name="memoryName" type="string" required="true">
Name of the memory to which the document will be uploaded.
</Property>
<Property name="documentName" type="string" required="true">
Name of the document.
</Property>
</Properties>
### Optional attributes
<Properties>
<Property name="meta" type="object">
Custom metadata for the document, limited to string key-value pairs. A maximum of 10 pairs is allowed.
</Property>
</Properties>
### Deprecated attributes
<Properties>
<Property name="fileName" type="string" deprecated="true">
Name of the document.
</Property>
</Properties>
</Col>
<Col sticky>
<CodeGroup exampleTitle="Upload Document" title=" " tag="POST" label="/v1/memory/documents">
```bash {{ title: 'cURL' }}
curl https://api.langbase.com/v1/memory/documents \
-H 'Content-Type: application/json' \
-H "Authorization: Bearer <YOUR_API_KEY>" \
-d '{
"memoryName": "rag-memory",
"documentName": "test-document.pdf",
"meta": {
"category": "technical",
"section": "overview"
}
}'
```
```js {{ title: 'Node.js' }}
import {Langbase} from 'langbase';
import {readFileSync} from 'fs';
const langbase = new Langbase({
apiKey: process.env.LANGBASE_API_KEY!,
});
async function main() {
const hasDocumentUploaded = await langbase.memories.documents.upload({
memoryName: 'knowledge-base',
contentType: 'application/pdf',
documentName: 'technical-doc.pdf',
document: readFileSync('document.pdf'),
meta: {
category: 'technical',
section: 'overview',
},
});
if (hasDocumentUploaded.ok) {
console.log('Document uploaded successfully');
}
}
main();
```
```python
import requests
import json
def get_signed_upload_url():
url = 'https://api.langbase.com/v1/memory/documents'
api_key = '<YOUR_API_KEY>'
newDoc = {
"memoryName": "rag-memory",
"documentName": "test-document.pdf",
"meta": {
"category": "technical",
"section": "overview"
}
}
headers = {
'Content-Type': 'application/json',
'Authorization': f'Bearer {api_key}',
}
response = requests.post(url, headers=headers, data=json.dumps(newDoc))
signed_upload_url = response.json()
return signed_upload_url
```
</CodeGroup>
</Col>
</Row>
---
<Row>
<Col>
### Response
<Properties>
<Property name="Response" type="object">
The response object returned by the API endpoint.
```ts {{title: 'Response'}}
interface Response {
signedUrl: string;
}
```
<Properties>
<Property name="signedUrl" type="string">
Signed URL that can be used to upload a document.
</Property>
</Properties>
</Property>
</Properties>
</Col>
<Col sticky>
```json {{ title: 'API Response' }}
{
"signedUrl": "https://b.langbase.com/..."
}
```
</Col>
</Row>
---
<Row>
<Col>
## Step 2: Upload Document on SignedUrl {{ tag: 'PUT', label: '{SignedUrl}' }}
Use the signed URL to upload the document to the memory. The signed URL is valid for 2 hours.
### Headers
<Properties>
<Property name="Content-Type" type="string" required="true">
Request content type. Needs to be the MIME type of the document. Currently, we support `application/pdf`, `text/plain`, `text/markdown`, `text/csv`, and all major code files as `text/plain`. For csv, pdf, text, and markdown files, it should correspond to the file type used in the `documentName` attribute in step 1. For code files, it should be `text/plain`.
</Property>
</Properties>
### Body Parameters
<Properties>
<Property name="body" type="FileBody" required="true">
The body of the file to be stored in the bucket. It can be `Buffer`, `File`, `FormData`, or `ReadableStream` type.
</Property>
</Properties>
</Col>
<Col sticky>
## Usage example
<CodeGroup exampleTitle="Install the SDK" title="Install the SDK">
```bash {{ title: 'npm' }}
npm i langbase
```
```bash {{ title: 'pnpm' }}
pnpm i langbase
```
```bash {{ title: 'yarn' }}
yarn add langbase
```
</CodeGroup>
### Environment variables
```bash {{ title: '.env file' }}
LANGBASE_API_KEY="<YOUR_API_KEY>"
```
### Upload Document
<CodeGroup exampleTitle="Upload Document" title=" " tag="PUT" label="{SignedUrl}">
```bash {{ title: 'cURL' }}
curl -X PUT \
-H 'Content-Type: application/pdf' \
--data-binary "@path/to/pdfFile" \
"{SignedUrl}"
```
```python
import requests
def upload_document(signed_url, file):
with open(file_path, 'rb') as file:
headers = {'Content-Type': 'application/pdf'}
response = requests.put(signed_url, headers=headers, data=file)
return response
```
</CodeGroup>
</Col>
</Row>
---
<Row>
<Col>
### Response
<Properties>
<Property name="Response" type="object">
The response object returned by the API endpoint.
```ts {{title: 'Response'}}
interface Response {
ok: boolean;
status: number;
statusText: string;
}
```
<Properties>
<Property name="ok" type="boolean">
Indicates whether the upload was successful.
</Property>
<Property name="status" type="number">
HTTP status code of the upload response.
</Property>
<Property name="statusText" type="string">
HTTP status message corresponding to the status code.
</Property>
</Properties>
</Property>
</Properties>
</Col>
<Col sticky>
```json {{ title: 'API Response' }}
{
"ok": true,
"status": 200,
"statusText": "OK"
}
```
</Col>
</Row>
---
</content>
</doc>
<doc>
<metadata>
<title>Document: List <span className="text-xl font-mono text-muted-foreground/70">v1</span></title>
<url>https://langbase.com/docs/api-reference/memory/document-list/</url>
</metadata>
<content>
import { generateMetadata } from '@/lib/generate-metadata';
# Document: List <span className="text-xl font-mono text-muted-foreground/70">v1</span>
The `list` document API endpoint allows you to list documents in a memory on Langbase dynamically with API. This endpoint requires a User or Org API key.
---
## Generate a User/Org API key
You will need to generate an API key to authenticate your requests. For more information, visit the [User/Org API key documentation](/api-reference/api-keys).
<Spoiler title="Get your Langbase API key: User or Org">
You can generate API keys from the [Langbase Studio](https://studio.langbase.com) by following these steps:
1. Switch to your user or org account.
2. From the sidebar, click on the `API keys`.
3. From here you can create a new API key or manage existing ones.
For more details, follow the [Langbase API keys](/api-reference/api-keys) documentation.
</Spoiler>
---
## Get a list of memory documents {{ tag: 'GET', label: '/v1/memory/{memoryName}/documents' }}
<Row>
<Col>
Get a list of documents in a memory by sending a GET request to this endpoint.
### Headers
<Properties>
<Property name="Content-Type" type="string" required="true">
Request content type. Needs to be `application/json`.
</Property>
<Property name="Authorization" type="string" required="true">
Replace `<YOUR_API_KEY>` with your user/org API key.
</Property>
</Properties>
### Path parameters
<Properties>
<Property name="memoryName" type="string" required="true">
The memory name.
Replace `{memoryName}` with the memory name.
</Property>
</Properties>
</Col>
<Col sticky>
## Usage example
<CodeGroup exampleTitle="Install the SDK" title="Install the SDK">
```bash {{ title: 'npm' }}
npm i langbase
```
```bash {{ title: 'pnpm' }}
pnpm i langbase
```
```bash {{ title: 'yarn' }}
yarn add langbase
```
</CodeGroup>
### Environment variables
```bash {{ title: '.env file' }}
LANGBASE_API_KEY="<YOUR_API_KEY>"
```
### Get memory documents
<CodeGroup exampleTitle="GET Memory Documents" title=" " tag="GET" label="/v1/memory/{memoryName}/documents">
```bash {{ title: 'cURL' }}
curl https://api.langbase.com/v1/memory/{memoryName}/documents \
-H 'Content-Type: application/json' \
-H "Authorization: Bearer <YOUR_API_KEY>"
```
```js {{ title: 'Node.js' }}
import {Langbase} from 'langbase';
const langbase = new Langbase({
apiKey: process.env.LANGBASE_API_KEY!,
});
async function main() {
const documents = await langbase.memories.documents.list({
memoryName: 'knowledge-base'
});
console.log('Documents:', documents);
}
main();
```
```python
import requests
def get_memory_documents_list():
url = 'https://api.langbase.com/v1/memory/{memoryName}/documents'
api_key = '<YOUR_API_KEY>'
headers = {
'Content-Type': 'application/json',
'Authorization': f'Bearer {api_key}',
}
response = requests.get(url, headers=headers)
memory_documents_list = response.json()
return memory_documents_list
```
</CodeGroup>
</Col>
</Row>
---
<Row>
<Col>
### Response
<Properties>
<Property name="MemoryDocument[]" type="array">
The response array returned by the API endpoint.
```ts {{title: 'MemoryDocument'}}
interface MemoryDocument {
name: string;
status:
| 'queued'
| 'in_progress'
| 'completed'
| 'failed';
status_message: string | null;
metadata: {
size: number;
type:
| 'application/pdf'
| 'text/plain'
| 'text/markdown'
| 'text/csv'
| 'application/vnd.openxmlformats-officedocument.spreadsheetml.sheet'
| 'application/vnd.ms-excel';
};
enabled: boolean;
chunk_size: number;
chunk_overlap: number;
owner_login: string;
}
```
<Properties>
<Property name="name" type="string">
Name of the document.
</Property>
<Property name="status" type="string">
Current processing status of the document. Can be one of:
- `queued`: Document is waiting to be processed
- `in_progress`: Document is currently being processed
- `completed`: Document has been successfully processed
- `failed`: Document processing failed
</Property>
<Property name="status_message" type="string | null">
Additional details about the document's status, particularly useful when status is 'failed'.
</Property>
<Property name="metadata" type="object">
Document metadata including:
- `size`: Size of the document in bytes
- `type`: MIME type of the document
</Property>
<Property name="enabled" type="boolean">
Whether the document is enabled for retrieval.
</Property>
<Property name="chunk_size" type="number">
Size of text chunks used for document processing.
</Property>
<Property name="chunk_overlap" type="number">
Overlap size between consecutive text chunks.
</Property>
<Property name="owner_login" type="string">
Login of the document owner.
</Property>
</Properties>
</Property>
</Properties>
</Col>
<Col sticky>
```json {{ title: 'API Response' }}
[
{
"name": "product-manual.pdf",
"status": "completed",
"status_message": null,
"metadata": {
"size": 1156,
"type": "application/pdf"
},
"enabled": true,
"chunk_size": 10000,
"chunk_overlap": 2048,
"owner_login": "user123"
},
{
"name": "technical-specs.md",
"status": "in_progress",
"status_message": null,
"metadata": {
"size": 1156,
"type": "text/markdown"
},
"enabled": true,
"chunk_size": 10000,
"chunk_overlap": 2048,
"owner_login": "user123"
}
]
```
</Col>
</Row>
---
</content>
</doc>
<doc>
<metadata>
<title>Document: Embeddings Retry Generate <span className="text-xl font-mono text-muted-foreground/70">v1</span></title>
<url>https://langbase.com/docs/api-reference/memory/document-embeddings-retry/</url>
</metadata>
<content>
import { generateMetadata } from '@/lib/generate-metadata';
# Document: Embeddings Retry Generate <span className="text-xl font-mono text-muted-foreground/70">v1</span>
Document embeddings generation may fail due to various reasons such as OpenAI API rate limits, invalid API keys, document parsing errors, special characters, corrupted or locked PDFs, and excessively large documents. If the issue is related to the API key, it needs to be corrected; before retrying, ensure that the document is accessible and can be parsed correctly.
You need to regenerate document embeddings in a memory before you can use them. The `retry` document API endpoint allows you to retry generating document embeddings in a memory on Langbase with API. This endpoint requires a User or Org API key.
---
## Generate a User/Org API key
You will need to generate an API key to authenticate your requests. For more information, visit the [User/Org API key documentation](/api-reference/api-keys).
<Spoiler title="Get your Langbase API key: User or Org">
You can generate API keys from the [Langbase Studio](https://studio.langbase.com) by following these steps:
1. Switch to your user or org account.
2. From the sidebar, click on the `API keys`.
3. From here you can create a new API key or manage existing ones.
For more details, follow the [Langbase API keys](/api-reference/api-keys) documentation.
</Spoiler>
---
## Retry generating document embeddings in a memory {{ tag: 'GET', label: '/v1/memory/{memoryName}/documents/{documentName}/embeddings/retry' }}
<Row>
<Col>
Retry generating document embeddings in a memory by sending a GET request to this endpoint.
### Headers
<Properties>
<Property name="Content-Type" type="string" required="true">
Request content type. Needs to be `application/json`.
</Property>
<Property name="Authorization" type="string" required="true">
Replace `<YOUR_API_KEY>` with your user/org API key.
</Property>
</Properties>
### Path Parameters
<Properties>
<Property name="memoryName" type="string" required="true">
The name of memory to which the document belongs.
Replace `{memoryName}` with the name of the memory.
</Property>
<Property name="documentName" type="string" required="true">
The name of the document.
Replace `{documentName}` with the name of the document.
</Property>
</Properties>
</Col>
<Col sticky>
## Usage example
<CodeGroup exampleTitle="Install the SDK" title="Install the SDK">
```bash {{ title: 'npm' }}
npm i langbase
```
```bash {{ title: 'pnpm' }}
pnpm i langbase
```
```bash {{ title: 'yarn' }}
yarn add langbase
```
</CodeGroup>
### Environment variables
```bash {{ title: '.env file' }}
LANGBASE_API_KEY="<YOUR_API_KEY>"
```
### Retry generating document embeddings
<CodeGroup exampleTitle="Retry Generating Document Embeddings" title=" " tag="GET" label="/v1/memory/{memoryName}/documents/{documentName}/embeddings/retry">
```bash {{ title: 'cURL' }}
curl https://api.langbase.com/v1/memory/{memoryName}/documents/{documentName}/embeddings/retry \
-H 'Content-Type: application/json' \
-H "Authorization: Bearer <YOUR_API_KEY>"
```
```js {{ title: 'Node.js' }}
import {Langbase} from 'langbase';
const langbase = new Langbase({
apiKey: process.env.LANGBASE_API_KEY!,
});
async function main() {
const hasEmbeddingRetried = await langbase.memories.documents.embeddings.retry(
{
memoryName: 'knowledge-base',
documentName: 'technical-doc.pdf',
},
);
console.log('Has embeddings been retried:', hasEmbeddingRetried);
}
main();
```
```python
import requests
def retry_document_embeddings():
url = 'https://api.langbase.com/v1/memory/{memoryName}/documents/{documentName}/embeddings/retry'
api_key = '<YOUR_API_KEY>'
headers = {
'Content-Type': 'application/json',
'Authorization': f'Bearer {api_key}',
}
response = requests.get(url, headers=headers)
res = response.json()
return res
```
</CodeGroup>
</Col>
</Row>
---
<Row>
<Col>
### Response
<Properties>
<Property name="Response" type="object">
The response object returned by the API endpoint.
```ts {{title: 'Response'}}
interface Response {
success: boolean;
}
```
<Properties>
<Property name="success" type="boolean">
Indicates whether the embedding retry was successfully initiated.
</Property>
</Properties>
</Property>
</Properties>
</Col>
<Col sticky>
```json {{ title: 'API Response' }}
{
"success": true
}
```
</Col>
</Row>
---
</content>
</doc>
<doc>
<metadata>
<title>Document: Delete <span className="text-xl font-mono text-muted-foreground/70">v1</span></title>
<url>https://langbase.com/docs/api-reference/memory/document-delete/</url>
</metadata>
<content>
import { generateMetadata } from '@/lib/generate-metadata';
# Document: Delete <span className="text-xl font-mono text-muted-foreground/70">v1</span>
The `delete` document API endpoint allows you to delete an existing document from a memory on Langbase dynamically with the API. This endpoint requires an Org or User API key.
---
## Generate a User/Org API key
You will need to generate an API key to authenticate your requests. For more information, visit the [User/Org API key documentation](/api-reference/api-keys).
<Spoiler title="Get your Langbase API key: User or Org">
You can generate API keys from the [Langbase Studio](https://studio.langbase.com) by following these steps:
1. Switch to your user or org account.
2. From the sidebar, click on the `API keys`.
3. From here you can create a new API key or manage existing ones.
For more details, follow the [Langbase API keys](/api-reference/api-keys) documentation.
</Spoiler>
---
## Delete a document {{ tag: 'DELETE', label: '/v1/memory/{memoryName}/documents/{documentName}' }}
<Row>
<Col>
Delete a document by specifying the memory name and document name in the path.
### Headers
<Properties>
<Property name="Content-Type" type="string" required="true">
Request content type. Needs to be `application/json`.
</Property>
<Property name="Authorization" type="string" required="true">
Replace `<YOUR_API_KEY>` with your user/org API key.
</Property>
</Properties>
### Path Parameters
<Properties>
<Property name="memoryName" type="string" required="true">
The name of the memory containing the document.
Replace `{memoryName}` with the name of the memory.
</Property>
<Property name="documentName" type="string" required="true">
The name of the document to delete.
Replace `{documentName}` with the name of the document.
</Property>
</Properties>
</Col>
<Col sticky>
## Usage example
<CodeGroup exampleTitle="Install the SDK" title="Install the SDK">
```bash {{ title: 'npm' }}
npm i langbase
```
```bash {{ title: 'pnpm' }}
pnpm i langbase
```
```bash {{ title: 'yarn' }}
yarn add langbase
```
</CodeGroup>
### Environment variables
```bash {{ title: '.env file' }}
LANGBASE_API_KEY="<YOUR_API_KEY>"
```
### Delete Document
<CodeGroup exampleTitle="Delete Document" title=" " tag="DELETE" label="/v1/memory/{memoryName}/documents/{documentName}">
```bash {{ title: 'cURL' }}
curl -X DELETE https://api.langbase.com/v1/memory/{memoryName}/documents/{documentName} \
-H 'Content-Type: application/json' \
-H "Authorization: Bearer <YOUR_API_KEY>"
```
```js {{ title: 'Node.js' }}
import {Langbase} from 'langbase';
const langbase = new Langbase({
apiKey: process.env.LANGBASE_API_KEY!,
});
async function main() {
const hasDocDeleted = await langbase.memories.documents.delete({
memoryName: 'knowledge-base',
documentName: 'old-report.pdf'
});
console.log('Document deleted:', hasDocDeleted);
}
main();
```
```python
import requests
def delete_document():
url = 'https://api.langbase.com/v1/memory/{memoryName}/documents/{documentName}'
api_key = '<YOUR_API_KEY>'
headers = {
'Content-Type': 'application/json',
'Authorization': f'Bearer {api_key}',
}
response = requests.delete(url, headers=headers)
result = response.json()
return result
```
</CodeGroup>
</Col>
</Row>
---
<Row>
<Col>
### Response
<Properties>
<Property name="Response" type="object">
The response object returned by the API endpoint.
```ts {{title: 'Response'}}
interface Response {
success: boolean;
}
```
<Properties>
<Property name="success" type="boolean">
Indicates whether the deletion was successful.
</Property>
</Properties>
</Property>
</Properties>
</Col>
<Col sticky>
```json {{ title: 'API Response' }}
{
"success": true
}
```
</Col>
</Row>
---
</content>
</doc>
<doc>
<metadata>
<title>Memory: Delete <span className="text-xl font-mono text-muted-foreground/70">v1</span></title>
<url>https://langbase.com/docs/api-reference/memory/delete/</url>
</metadata>
<content>
import { generateMetadata } from '@/lib/generate-metadata';
# Memory: Delete <span className="text-xl font-mono text-muted-foreground/70">v1</span>
The `delete` memory API endpoint allows you to delete an existing memory on Langbase dynamically with the API. This endpoint requires an Org or User API key.
---
## Generate a User/Org API key
You will need to generate an API key to authenticate your requests. For more information, visit the [User/Org API key documentation](/api-reference/api-keys).
<Spoiler title="Get your Langbase API key: User or Org">
You can generate API keys from the [Langbase Studio](https://studio.langbase.com) by following these steps:
1. Switch to your user or org account.
2. From the sidebar, click on the `API keys`.
3. From here you can create a new API key or manage existing ones.
For more details, follow the [Langbase API keys](/api-reference/api-keys) documentation.
</Spoiler>
---
## Delete a memory {{ tag: 'DELETE', label: '/v1/memory/{memoryName}' }}
<Row>
<Col>
Delete a memory by sending a DELETE request to this endpoint.
### Headers
<Properties>
<Property name="Content-Type" type="string" required="true">
Request content type. Needs to be `application/json`.
</Property>
<Property name="Authorization" type="string" required="true">
Replace `<YOUR_API_KEY>` with your user/org API key.
</Property>
</Properties>
### Path Parameters
<Properties>
<Property name="memoryName" type="string" required="true">
The name of the memory to delete.
Replace `{memoryName}` with the name of the memory.
</Property>
</Properties>
</Col>
<Col sticky>
## Usage example
<CodeGroup exampleTitle="Install the SDK" title="Install the SDK">
```bash {{ title: 'npm' }}
npm i langbase
```
```bash {{ title: 'pnpm' }}
pnpm i langbase
```
```bash {{ title: 'yarn' }}
yarn add langbase
```
</CodeGroup>
### Environment variables
```bash {{ title: '.env file' }}
LANGBASE_API_KEY="<YOUR_API_KEY>"
```
## Delete Memory
<CodeGroup exampleTitle="Delete Memory" title="Delete Memory" tag="DELETE" label="/v1/memory/{memoryName}">
```bash {{ title: 'cURL' }}
curl -X DELETE https://api.langbase.com/v1/memory/{memoryName} \
-H 'Content-Type: application/json' \
-H "Authorization: Bearer <YOUR_API_KEY>"
```
```js {{ title: 'Node.js' }}
import {Langbase} from 'langbase';
const langbase = new Langbase({
apiKey: process.env.LANGBASE_API_KEY!,
});
async function main() {
const hasMemoryDeleted = await langbase.memories.delete({
name: 'knowledge-base'
});
console.log('Memory deleted:', hasMemoryDeleted);
}
main();
```
```python
import requests
def delete_memory():
url = 'https://api.langbase.com/v1/memory/{memoryName}'
api_key = '<YOUR_API_KEY>'
headers = {
'Content-Type': 'application/json',
'Authorization': f'Bearer {api_key}',
}
response = requests.delete(url, headers=headers)
result = response.json()
return result
```
</CodeGroup>
</Col>
</Row>
---
<Row>
<Col>
### Response
<Properties>
<Property name="Response" type="object">
The response object returned by the API endpoint.
```ts {{title: 'Response'}}
interface Response {
success: boolean;
}
```
<Properties>
<Property name="success" type="boolean">
Indicates whether the deletion was successful.
</Property>
</Properties>
</Property>
</Properties>
</Col>
<Col sticky>
```json {{ title: 'API Response' }}
{
"success": true
}
```
</Col>
</Row>
---
</content>
</doc>
<doc>
<metadata>
<title>Memory: Create <span className="text-xl font-mono text-muted-foreground/70">v1</span></title>
<url>https://langbase.com/docs/api-reference/memory/create/</url>
</metadata>
<content>
import { generateMetadata } from '@/lib/generate-metadata';
# Memory: Create <span className="text-xl font-mono text-muted-foreground/70">v1</span>
The `create` memory API endpoint allows you to create a new memory on Langbase dynamically with API. This endpoint requires a User or Org API key.
---
## Generate a User/Org API key
You will need to generate an API key to authenticate your requests. For more information, visit the [User/Org API key documentation](/api-reference/api-keys).
<Spoiler title="Get your Langbase API key: User or Org">
You can generate API keys from the [Langbase Studio](https://studio.langbase.com) by following these steps:
1. Switch to your user or org account.
2. From the sidebar, click on the `API keys`.
3. From here you can create a new API key or manage existing ones.
For more details, follow the [Langbase API keys](/api-reference/api-keys) documentation.
</Spoiler>
---
## Create a new memory {{ tag: 'POST', label: '/v1/memory' }}
<Row>
<Col>
Create a new memory by sending the memory data inside the request body.
### Headers
<Properties>
<Property name="Content-Type" type="string" required="true">
Request content type. Needs to be `application/json`.
</Property>
<Property name="Authorization" type="string" required="true">
Replace `<YOUR_API_KEY>` with your user/org API key.
</Property>
</Properties>
### Body Parameters
<Properties>
<Property name="name" type="string" required="true">
Name of the memory.
</Property>
<Property name="description" type="string">
Short description of the memory.
Default: `''`
</Property>
</Properties>
### Optional Parameters
<Properties>
<Property name="embedding_model" type="string">
Name of the embedding model to use for the memory.
Default: `openai:text-embedding-3-large`
Supported models:
- `openai:text-embedding-3-large`
- `cohere:embed-v4.0`
- `cohere:embed-multilingual-v3.0`
- `cohere:embed-multilingual-light-v3.0`
- `google:text-embedding-004`
</Property>
<Property name="chunk_size" type="number">
Maximum number of characters in a single chunk.
Default: `10000`
Maximum: `30000`
<Note sub="Appropriate value">
Cohere has a limit of 512 tokens (1 token ~= 4 characters in English). If you are using Cohere models, adjust the `chunk_size` accordingly. For most use cases, default values should work fine.
</Note>
</Property>
<Property name="chunk_overlap" type="number">
Number of characters to overlap between chunks.
Default: `2048`
Maximum: Less than `chunk_size`
</Property>
<Property name="top_k" type="number">
Number of chunks to return.
Default: `10`
Minimum: `1`
Maximum: `100`
</Property>
</Properties>
</Col>
<Col sticky>
## Usage example
<CodeGroup exampleTitle="Install the SDK" title="Install the SDK">
```bash {{ title: 'npm' }}
npm i langbase
```
```bash {{ title: 'pnpm' }}
pnpm i langbase
```
```bash {{ title: 'yarn' }}
yarn add langbase
```
</CodeGroup>
### Environment variables
```bash {{ title: '.env file' }}
LANGBASE_API_KEY="<YOUR_API_KEY>"
```
### Create memory
<CodeGroup exampleTitle="Create Memory" title="Create Memory" tag="POST" label="/v1/memory">
```bash {{ title: 'cURL' }}
curl https://api.langbase.com/v1/memory \
-H 'Content-Type: application/json' \
-H "Authorization: Bearer <YOUR_API_KEY>" \
-d '{
"name": "knowledge-base",
"description": "An AI memory for storing company internal docs.",
"embedding_model": "openai:text-embedding-3-large",
"chunk_size": 10000,
"chunk_overlap": 2048,
"top_k": 10
}'
```
```js {{ title: 'Node.js' }}
import {Langbase} from 'langbase';
const langbase = new Langbase({
apiKey: process.env.LANGBASE_API_KEY!,
});
async function main() {
const memory = await langbase.memories.create({
name: 'knowledge-base',
description: 'Advanced memory with multilingual support',
embedding_model: 'cohere:embed-multilingual-v3.0',
});
console.log('Memory created:', memory);
}
main();
```
```python
import requests
import json
def create_new_memory():
url = 'https://api.langbase.com/v1/memory'
api_key = '<YOUR_API_KEY>'
memory = {
"name": 'knowledge-base',
"description": 'Advanced memory with multilingual support',
"embedding_model": "openai:text-embedding-3-large"
}
headers = {
'Content-Type': 'application/json',
'Authorization': f'Bearer {api_key}',
}
response = requests.post(url, headers=headers, data=json.dumps(memory))
new_memory = response.json()
return new_memory
```
</CodeGroup>
</Col>
</Row>
---
<Row>
<Col>
### Response
<Properties>
<Property name="Memory" type="object">
The response object returned by the API endpoint.
```ts {{title: 'Memory'}}
interface Memory {
name: string;
description: string;
owner_login: string;
url: string;
chunk_size: number;
chunk_overlap: number;
embedding_model:
| 'openai:text-embedding-3-large'
| 'cohere:embed-multilingual-v3.0'
| 'cohere:embed-multilingual-light-v3.0'
| 'google:text-embedding-004';
}
```
<Properties>
<Property name="name" type="string">
Name of the memory.
</Property>
<Property name="description" type="string">
Description of the AI memory.
</Property>
<Property name="owner_login" type="string">
Login of the memory owner.
</Property>
<Property name="url" type="string">
Memory studio URL.
</Property>
<Property name="embedding_model" type="string">
The embedding model used by the AI memory.
- `openai:text-embedding-3-large`
- `cohere:embed-multilingual-v3.0`
- `cohere:embed-multilingual-light-v3.0`
- `google:text-embedding-004`
</Property>
</Properties>
</Property>
</Properties>
</Col>
<Col sticky>
```json {{ title: 'API Response' }}
{
"name": "knowledge-base",
"description": "Advanced memory with multilingual support.",
"chunk_size": 10000,
"chunk_overlap": 2048,
"owner_login": "user123",
"url": "https://langbase.com/memorysets/user123/knowledge-base",
"embedding_model": "openai:text-embedding-3-large",
}
```
</Col>
</Row>
---
</content>
</doc>
<doc>
<metadata>
<title>Usage exceeded (403)</title>
<url>https://langbase.com/docs/api-reference/errors/usage_exceeded/</url>
</metadata>
<content>
import { generateMetadata } from '@/lib/generate-metadata';
# Usage exceeded (403)
The Usage Exceeded error occurs on Langbase when you have exceeded your allowed usage limits. This error indicates that you have consumed more resources or made more requests than the allocated limits within Langbase.
---
## Possible Causes
Reaching the maximum number of requests allowed by Langbase.
---
## Troubleshooting Steps
If consistently hitting usage limits within Langbase, consider upgrading service plans on Langbase.
Please refer to the [Langbase Pricing page](https://langbase.com/pricing) for more details on available plans and their respective limits.
If you are already subscribed, please check your billing page from the sidebar in [Langbase Studio](https://studio.langbase.com) to see your current plan and usage.
---
## Recommendation
If you are consistently hitting usage limits within Langbase, consider upgrading your service plan to accommodate your usage needs.
</content>
</doc>
<doc>
<metadata>
<title>Unauthorized (401)</title>
<url>https://langbase.com/docs/api-reference/errors/unauthorized/</url>
</metadata>
<content>
import { generateMetadata } from '@/lib/generate-metadata';
# Unauthorized (401)
The unauthorized error occurs when Langbase detects that the client's request lacks valid authentication credentials or the provided credentials are insufficient to access the requested resource. This error signals that proper authentication is required to proceed with the request.
---
## Possible Causes
- Missing or invalid authentication credentials (e.g., API keys, tokens, username/password) within Langbase.
- Use of expired or revoked authentication tokens.
- Attempting to access a protected resource within Langbase without providing adequate authentication.
---
## Troubleshooting Steps
1. Check Authentication Credentials: Ensure that the client provides valid and up-to-date authentication credentials (such as pipe API keys) with the request to Langbase.
2. Verify Token Validity: If using tokens for authentication within Langbase, check if the token is expired, revoked, or otherwise invalid.
3. Review Authentication Requirements: Refer to Langbase's API documentation to understand the required authentication method (e.g., OAuth, API keys) and ensure compliance with Langbase's authentication mechanisms.
4. Test with Valid Credentials: If possible, test the request with known valid credentials within Langbase to confirm if the issue is related to authentication.
---
## Recommendation
Ensure that valid authentication credentials (such as tokens, keys, etc.) are provided with the request to Langbase in order to access the requested resource successfully.
</content>
</doc>
<doc>
<metadata>
<title>Rate limited (429)</title>
<url>https://langbase.com/docs/api-reference/errors/rate_limited/</url>
</metadata>
<content>
import { generateMetadata } from '@/lib/generate-metadata';
# Rate limited (429)
This error occurs when the [rate limit](/api-reference/limits/rate-limits) for your account has been exceeded. You will need to wait for the rate limit to reset before making additional requests.
---
## Troubleshooting Steps
1. **Wait for Rate Limit Reset**: The rate limit will automatically reset after a certain period. You can check the [rate limit headers](/api-reference/limits/rate-limits) in the response to determine when the rate limit will reset.
2. **Optimize Requests**: Review your application's request patterns and optimize them to reduce the number of requests made to Langbase's API.
3. **Upgrade Plan**: If you consistently exceed the rate limit, consider upgrading your plan to accommodate higher request volumes.
---
## Recommendation
Monitor your application's request volume and optimize your requests to avoid exceeding the rate limit. Upgrading your plan can also provide additional capacity to handle higher request volumes.
</content>
</doc>
<doc>
<metadata>
<title>Not found (404)</title>
<url>https://langbase.com/docs/api-reference/errors/not_found/</url>
</metadata>
<content>
import { generateMetadata } from '@/lib/generate-metadata';
# Not found (404)
The Not Found error occurs within Langbase when the server cannot find the requested resource. This error can occur due to an incorrect URL or a resource that no longer exists.
---
## Possible Causes
- Use of incorrect pipe API endpoint.
- The requested resource within Langbase has been removed or moved.
---
## Troubleshooting Steps
1. Check endpoint: Ensure that your API endpoint is correct and points to a valid resource within Langbase.
2. Verify Resource Existence: Check the documentation to find if the requested resource exists.
---
## Recommendation
Review the API endpoint that you have integrated in your app and check documentation to find whether the API you are requesting exists or not.
</content>
</doc>
<doc>
<metadata>
<title>Internal Server Error (500)</title>
<url>https://langbase.com/docs/api-reference/errors/internal_server_error/</url>
</metadata>
<content>
import { generateMetadata } from '@/lib/generate-metadata';
# Internal Server Error (500)
The Internal Server Error is a generic error message indicating that something went wrong on Langbase's server while processing your request. This error is often used to indicate unexpected or unhandled server-side issues that prevented the request from being fulfilled.
---
## Possible Causes
- Configuration issues within Langbase's server environment.
- Database connectivity problems within Langbase.
- Resource exhaustion or server overload within Langbase.
---
## Troubleshooting Steps
If you encounter an Internal Server Error, contact Langbase's support team or system administrators for assistance.
---
## Recommendation
If you consistently encounter an Internal Server Error from Langbase API, please report the issue to Langbase's support team for further investigation and resolution.
</content>
</doc>
<doc>
<metadata>
<title>Insufficient permissions (403)</title>
<url>https://langbase.com/docs/api-reference/errors/insufficient_permissions/</url>
</metadata>
<content>
import { generateMetadata } from '@/lib/generate-metadata';
# Insufficient permissions (403)
The Insufficient Permissions error occurs within Langbase when your request lacks the necessary permissions to access the requested resource or perform the intended action. This error indicates that you are authenticated but does not have the required level of authorization.
---
## Possible Causes
- Attempting to access a restricted resource within Langbase without the necessary permissions.
- Trying to perform an action that requires higher privileges than what the user possesses within Langbase.
- Insufficient role-based access controls (RBAC) configured for the user within Langbase.
---
## Troubleshooting Steps
1. Check User Permissions: Verify that the user or client within Langbase has the appropriate permissions assigned to access the requested resource or perform the intended action.
2. Review Role-Based Access Controls (RBAC): If applicable within Langbase, ensure that the user's role or permissions are correctly configured in the organization.
---
## Recommendation
Ensure that the user has the necessary permissions granted in your organization to access the requested resource or perform the intended action successfully.
</content>
</doc>
<doc>
<metadata>
<title>Forbidden (403)</title>
<url>https://langbase.com/docs/api-reference/errors/forbidden/</url>
</metadata>
<content>
import { generateMetadata } from '@/lib/generate-metadata';
# Forbidden (403)
The Forbidden error occurs when Langbase accepts the client's request but refuses to authorize it. This refusal can be due to various reasons, such as insufficient permissions, access restrictions, or account-related issues.
---
## Possible Causes
- Lack of necessary permissions to access the resource within Langbase.
- Attempting to access a resource that requires authentication without providing valid credentials.
- Trying to perform an action that the user account or role is not permitted to do.
- Accessing a resource from an IP address or network that is blocked by Langbase's security policies.
---
## Troubleshooting Steps
1. Check Permissions: Ensure that your pipe API key is correct and you have appropriate permissions within Langbase
2. Review Access Policies: Check if Langbase has any access restrictions or policies in place that might be blocking the request. This includes IP whitelisting/blacklisting, role-based access controls, etc.
3. Check Account Status: Verify that the user account associated with the request in Langbase is active and not disabled or restricted in any way.
---
## Recommendation
Review the access permissions, authentication credentials, and account status to ensure that the request meets the server's authorization requirements.
</content>
</doc>
<doc>
<metadata>
<title>Conflict (409)</title>
<url>https://langbase.com/docs/api-reference/errors/conflict/</url>
</metadata>
<content>
import { generateMetadata } from '@/lib/generate-metadata';
# Conflict (409)
The conflict error occurs when the client attempts to create or update a resource with an identifier that is conflict. This error typically arises in situations where different resources cannot have the same name. For instance, creating a pipe through API with a name that already exists in the profile will result in a Not Unique error.
---
## Possible Causes
- Attempting to create a resource within Langbase with an identifier (e.g., username, email, ID, file) that already exists in the system.
- Updating a resource within Langbase with a value that violates a unique constraint, such as trying to assign an already-used identifier.
---
## Troubleshooting Steps
1. Check Existing Records: Verify that the identifier being used (e.g., username, email) is not already in use.
2. Use Different Identifier: Use a unique identifier that is not already in use.
---
## Recommendation
Make sure to always use unique names for resources to avoid this error. If you encounter this error, check the existing records and use a different identifier to resolve it.
</content>
</doc>
<doc>
<metadata>
<title>Bad request (400)</title>
<url>https://langbase.com/docs/api-reference/errors/bad_request/</url>
</metadata>
<content>
import { generateMetadata } from '@/lib/generate-metadata';
# Bad request (400)
The Bad Request error occurs when Langbase cannot process the client's request due to invalid request body. This error indicates that there is an issue with the request itself.
---
## Possible Causes
- Missing or incorrect request parameters.
- Invalid data format or structure in the request body.
- Malformed request headers.
- Unsupported request method or HTTP version.
- Encoding issues, such as improperly encoded characters in the request.
---
## Troubleshooting Steps
1. Check Request body: Ensure that all required parameters are included in the request body and that their values are valid according to Langbase's API documentation. Also, ensure that the format of the request body is correct.
2. Validate Data Format: If the request includes a payload (e.g., JSON or XML), validate that it follows the expected format without any syntax errors.
3. Verify Request Headers: Check the request headers for correctness and completeness as per Langbase's API requirements.
4. Use Supported Methods: Confirm that you are using the correct HTTP method (e.g., GET, POST, PUT, DELETE) for the intended operation.
5. Check Encoding: If dealing with character encoding, ensure that special characters are properly encoded according to the specified encoding standard, such as UTF-8.
---
## Recommendation
Review the request and make necessary corrections as per the API documentation or guidelines.
</content>
</doc>
<doc>
<metadata>
<title>Pipe API: Update <span className="text-xl font-mono text-muted-foreground/70">beta</span></title>
<url>https://langbase.com/docs/api-reference/deprecated/pipe-update/</url>
</metadata>
<content>
import { generateMetadata } from '@/lib/generate-metadata';
# Pipe API: Update <span className="text-xl font-mono text-muted-foreground/70">beta</span>
The `update` pipe API endpoint allows you to update a pipe on Langbase dynamically with the API. You can use this endpoint to update a pipe with all the custom configuration. This endpoint requires a User or Org API key. To generate a User or Org API key visit your profile/organization settings page on Langbase.
---
<Warn sub="Deprecation Notice">
This API endpoint has been deprecated. Please use the new [`update`](/api-reference/pipe/update) pipe API endpoint.
</Warn>
---
## Generate a User/Org API key
You will need to generate an API key to authenticate your requests. For more information, visit the [User/Org API key documentation](/api-reference/api-keys).
---
## Update a pipe {{ tag: 'Deprecated', label: '/beta/pipes/{owner}/{pipe}', status: 'deprecated' }}
<Row>
<Col>
Update a pipe by sending the pipe configuration inside the request body.
### Required headers
<Properties>
<Property name="Content-Type" type="string">
Request content type. Needs to be `application/json`.
</Property>
<Property name="Authorization" type="string">
Replace `YOUR_API_KEY` with your User/Org API key.
</Property>
</Properties>
### Required path parameters
<Properties>
<Property name="owner" type="string">
Your organization name or username.
Replace `{owner}` with your organization name or username.
</Property>
<Property name="pipe" type="string">
Name of the pipe.
Replace `{pipe}` with the name of the pipe.
</Property>
</Properties>
### Optional attributes
<Properties>
<Properties>
<Property name="name" type="string">
Name of the pipe.
</Property>
<Property name="description" type="array">
Short description of the pipe.
</Property>
<Property name="status" type="string">
Status of the pipe.
Can be one of: `public`, `private`
</Property>
<Property name="config" type="object">
Configuration object of the pipe.
</Property>
<Property name="config.meta.stream" type="boolean">
If enabled, the output will be streamed in real-time like ChatGPT. This is helpful if user is directly reading the text.
</Property>
<Property name="config.meta.json" type="boolean">
Enforce the output to be in JSON format.
</Property>
<Property name="config.meta.store" type="boolean">
If enabled, both prompt and completions will be stored in the database. Otherwise, only system prompt and few shot messages will be saved.
</Property>
<Property name="config.meta.moderate" type="boolean">
If enabled, Langbase blocks flagged requests automatically.
</Property>
<Property name="config.model.name" type="string">
ID of the LLM model. You can copy the ID of a model from the list of [supported LLM models](/supported-models-and-providers) at Langbase.
</Property>
<Property name="config.model.provider" type="string">
Name of the LLM model provider. Check out the list of all the [supported LLM providers](/supported-models-and-providers) at Langbase.
Can be one of the [supported providers](/supported-models-and-providers): `OpenAI`, `Together`, `Anthropic`, `Groq`, `Google`, `Cohere`.
</Property>
<Property name="config.model.tool_choice" type="'auto' | 'required' | 'object'">
Controls which (if any) tool is called by the model.
- `auto` - the model can pick between generating a message or calling one or more tools.
- `required` - the model must call one or more tools.
- `object` - Specifying a particular tool via `{"type": "function", "function": {"name": "my_function"}}` forces the model to call that tool.
Default: `auto`
</Property>
<Property name="config.model.parallel_tool_calls" type="boolean">
Call multiple tools in parallel, allowing the effects and results of these function calls to be resolved in parallel.
</Property>
<Property name="config.model.params.top_p" type="number">
An alternative to sampling with temperature, called nucleus sampling, where the model considers the results of the tokens with top_p probability mass. So 0.1 means only the tokens comprising the top 10% probability mass are considered.
</Property>
<Property name="config.model.params.max_tokens" type="number">
Maximum number of tokens in the response message returned.
</Property>
<Property name="config.model.params.temperature" type="number">
What sampling temperature to use, between 0 and 2. Higher values like 0.8 will make the output more random. Lower values like 0.2 will make it more focused and deterministic.
</Property>
<Property name="config.model.params.presence_penalty" type="number">
Penalizes a word based on its occurrence in the input text.
</Property>
<Property name="config.model.params.frequency_penalty" type="number">
Penalizes a word based on how frequently it appears in the training data.
</Property>
<Property name="config.model.params.stop" type="array">
Up to 4 sequences where the API will stop generating further tokens.
</Property>
<Property name="config.prompt.system" type="string">
System prompt. Insert variables in the prompt with syntax like {{variable}}.
</Property>
<Property name="config.prompt.opening" type="string">
Chat opening prompt.
</Property>
<Property name="config.prompt.safety" type="string">
AI Safety prompt.
</Property>
<Property name="config.prompt.messages" type="array">
An array containing message objects.
</Property>
<Property name="config.prompt.variables" type="array">
An array containing different variable objects.
</Property>
<Property name="config.prompt.json" type="string">
Use this prompt to define the JSON output format, schema, and more. It will be appended to the system prompt.
</Property>
<Property name="config.prompt.rag" type="string">
Use this prompt to make the LLM answer questions from Memoryset documents.
</Property>
<Property name="config.tools" type="array">
An array of objects with valid tool definitions.
Read more about valid [tool definition](/features/tool-calling#tool-definition-schema)
Default: `[]`
</Property>
<Property name="config.memorysets" type="array">
An array of memoryset names.
</Property>
</Properties>
</Properties>
</Col>
<Col sticky>
<CodeExamples>
<CodeGroup exampleTitle="Basic Pipe" title="Basic Pipe" tag="POST" label="/beta/pipes/{owner}/{pipe}" status="deprecated">
```bash {{ title: 'cURL' }}
curl https://api.langbase.com/beta/pipes/{owner}/{pipe} \
-H 'Content-Type: application/json' \
-H "Authorization: Bearer <YOUR_API_KEY>" \
-d '{
"name": "Test Pipe",
"description": "This is a test pipe",
"status": "public"
}'
```
```js {{ title: 'Node.js' }}
async function updatePipe() {
const url = 'https://api.langbase.com/beta/pipes/{owner}/{pipe}';
const apiKey = 'YOUR_API_KEY';
const pipe = {
name: 'Test Pipe',
description: 'This is a test pipe',
status: 'public'
};
const response = await fetch(url, {
method: 'POST',
headers: {
'Content-Type': 'application/json',
Authorization: `Bearer ${apiKey}`,
},
body: JSON.stringify(pipe),
});
const updatedPipe = await response.json();
return updatedPipe;
}
```
```python
import requests
import json
def update_pipe():
url = 'https://api.langbase.com/beta/pipes/{owner}/{pipe}'
api_key = 'YOUR_API_KEY'
pipe = {
"name": "Test Pipe",
"description": "This is a test pipe",
"status": "public"
}
headers = {
'Content-Type': 'application/json',
'Authorization': f'Bearer {api_key}',
}
response = requests.post(url, headers=headers, data=json.dumps(pipe))
updated_pipe = response.json()
return updated_pipe
```
</CodeGroup>
<CodeGroup exampleTitle="Advance Pipe" title="Advance Pipe" tag="POST" label="/beta/pipes/{owner}/{pipe}">
```bash {{ title: 'cURL' }}
curl https://api.langbase.com/beta/pipes/{owner}/{pipe} \
-H 'Content-Type: application/json' \
-H "Authorization: Bearer <YOUR_API_KEY>" \
-d '{
"name": "Test Pipe",
"description": "This is a test pipe",
"status": "public",
"config": {
"meta": {
"stream": true,
"json": false,
"store": true,
"moderate": false
},
"model": {
"name": "gpt-3.5-turbo",
"provider": "OpenAI",
"params": {
"top_p": 1,
"max_tokens": 1000,
"temperature": 0.7,
"presence_penalty": 1,
"frequency_penalty": 1,
"stop": []
},
"tool_choice": "required",
"parallel_tool_calls": false
},
"prompt": {
"system": "You are a helpful AI assistant.",
"opening": "Welcome to Langbase. Prompt away!",
"safety": "",
"messages": [],
"variables": [],
"json": "",
"rag": ""
},
"tool": [
{
"type": "function",
"function": {
"name": "get_current_weather",
"description": "Get the current weather in a given location",
"parameters": {
"type": "object",
"properties": {
"location": {
"type": "string",
"description": "The city and state, e.g. San Francisco, CA"
},
"unit": {
"type": "string",
"enum": ["celsius", "fahrenheit"]
}
},
"required": ["location"]
}
}
}
],
"memorysets": []
}
}'
```
```js {{ title: 'Node.js' }}
async function updatePipe() {
const url = 'https://api.langbase.com/beta/pipes/{owner}/{pipe}';
const apiKey = 'YOUR_API_KEY';
const pipe = {
name: 'Test Pipe',
description: 'This is a test pipe',
status: 'public',
config: {
meta: {
stream: true,
json: false,
store: true,
moderate: false,
},
model: {
name: 'gpt-3.5-turbo',
provider: 'OpenAI',
params: {
max_tokens: 1000,
temperature: 0.7,
top_p: 1,
frequency_penalty: 1,
presence_penalty: 1,
stop: [],
},
tool_choice: 'required',
parallel_tool_calls: false
},
prompt: {
opening: 'Welcome to Langbase. Prompt away!',
system: 'You are a helpful AI assistant.',
safety: '',
messages: [],
variables: [],
json: '',
rag: '',
},
tools: [
{
type: 'function',
function: {
name: 'get_current_weather',
description: 'Get the current weather in a given location',
parameters: {
type: 'object',
properties: {
location: {
type: 'string',
description: 'The city and state, e.g. San Francisco, CA'
},
unit: {
type: 'string',
enum: ['celsius', 'fahrenheit']
}
},
required: ['location']
}
}
}
],
memorysets: []
}
};
const response = await fetch(url, {
method: 'POST',
headers: {
'Content-Type': 'application/json',
Authorization: `Bearer ${apiKey}`,
},
body: JSON.stringify(pipe),
});
const updatedPipe = await response.json();
return updatedPipe;
}
```
```python
import requests
import json
def update_pipe():
url = 'https://api.langbase.com/beta/pipes/{owner}/{pipe}'
api_key = 'YOUR_API_KEY'
pipe = {
"name": "Test Pipe",
"description": "This is a test pipe",
"status": "public",
"config": {
"meta": {
"stream": true,
"json": false,
"store": true,
"moderate": false
},
"model": {
"name": "gpt-3.5-turbo",
"provider": "OpenAI",
"params": {
"top_p": 1,
"max_tokens": 1000,
"temperature": 0.7,
"presence_penalty": 1,
"frequency_penalty": 1,
"stop": []
},
"tool_choice": "required",
"parallel_tool_calls": false
},
"prompt": {
"system": "You are a helpful AI assistant.",
"opening": "Welcome to Langbase. Prompt away!",
"safety": "",
"messages": [],
"variables": [],
"json": "",
"rag": ""
},
"tools": [
{
"type": "function",
"function": {
"name": "get_current_weather",
"description": "Get the current weather in a given location",
"parameters": {
"type": "object",
"properties": {
"location": {
"type": "string",
"description": "The city and state, e.g. San Francisco, CA"
},
"unit": {
"type": "string",
"enum": ["celsius", "fahrenheit"]
}
},
"required": ["location"]
}
}
}
],
"memorysets": []
}
}
headers = {
'Content-Type': 'application/json',
'Authorization': f'Bearer {api_key}',
}
response = requests.post(url, headers=headers, data=json.dumps(pipe))
updated_pipe = response.json()
return updated_pipe
```
</CodeGroup>
</CodeExamples>
```json {{ title: 'Response' }}
{
"name": "test-pipe",
"type": "chat",
"description": "This is a create Pipe test from API",
"status": "private",
"api_key": "pipe_4FVBn2DgrzfJf...",
"owner_login": "langbase",
"url": "https://langbase.com/langbase/test-pipe"
}
```
</Col>
</Row>
</content>
</doc>
<doc>
<metadata>
<title>Pipe API: Run <span className="text-xl font-mono text-muted-foreground/70">beta</span></title>
<url>https://langbase.com/docs/api-reference/deprecated/pipe-run/</url>
</metadata>
<content>
import { generateMetadata } from '@/lib/generate-metadata';
# Pipe API: Run <span className="text-xl font-mono text-muted-foreground/70">beta</span>
The Run API allows you to execute any pipe and receive its response. It supports all use cases of Pipes, including chat interactions, single generation tasks, and function calls.
<Warn sub="Deprecation Notice">
This API endpoint has been deprecated. Please use the new [`run`](/api-reference/pipe/run) pipe API endpoint.
</Warn>
<Note>
The `Run` API consolidates the functionality of the previously separate `Generate` and `Chat` endpoints, providing a unified interface. As a result, we will soon be deprecating both `Generate` and `Chat` in favor of `Run`.
</Note>
The Run API supports:
- Single generation requests for straightforward tasks.
- Dynamic variables to create adaptable prompts in real-time.
- Thread management for handling multi-turn conversations.
- Seamless conversation continuation, ensuring smooth transitions across interactions.
If needed, Langbase can store messages and conversation threads, allowing for persistent conversation history for chat use cases.
---
## Run a pipe{{ tag: 'Deprecated', label: '/beta/pipes/run', status: 'deprecated' }}
<Row>
<Col>
Run a pipe by sending the required data with the request. For basic request, send a messages array inside request body.
### Required headers
<Properties>
<Property name="Content-Type" type="string">
Request content type. Needs to be `application/json`
</Property>
<Property name="Authorization" type="string">
Replace `PIPE_API_KEY` with your Pipe API key
</Property>
</Properties>
### Required attributes
<Properties>
<Property name="messages" type="array">
An array containing message objects
</Property>
<Property name="messages[0].role" type="string">
The role of the message, i.e., `system` | `user` | `assistant` | `tool`
</Property>
<Property name="messages[0].content" type="string">
The content of the message
</Property>
</Properties>
### Optional attributes
<Properties>
<Property name="messages[0].tool_call_id" type="string">
The id of the called LLM tool if the role is `tool`
</Property>
<Property name="messages[0].name" type="string">
The name of the called tool if the role is `tool`
</Property>
<Properties>
<Property name="variables" type="array">
An array containing different variable objects
</Property>
<Property name="variables[0].name" type="string">
The name of the variable
</Property>
<Property name="variables[0].value" type="string">
The value of the variable
</Property>
</Properties>
<Property name="threadId" type="string" >
The ID of an existing chat thread. The conversation will continue in this thread.
</Property>
</Properties>
### Response headers
<Properties>
<Property name="lb-thread-id" type="string">
The ID of the new/existing thread. If you want to continue conversation in this thread, send it as `threadId` in the next request.
</Property>
</Properties>
_[Learn how to use function calling with this API.](/features/tool-calling/chat-api)_
</Col>
<Col sticky>
<CodeExamples>
<CodeGroup exampleTitle="stream-off" title="Basic request without streaming" tag="POST" label="/beta/pipes/run" id="default" status="deprecated">
```bash {{ title: 'cURL' }}
curl https://api.langbase.com/beta/pipes/run \
-H 'Content-Type: application/json' \
-H 'Authorization: Bearer PIPE_API_KEY' \
-d '{
"messages": [
{
"role": "user",
"content": "Hello!"
}
]
}'
```
```js {{ title: 'Node.js' }}
async function generateCompletion() {
const url = 'https://api.langbase.com/beta/pipes/run'
const apiKey = '<PIPE_API_KEY>'
const data = {
messages: [{ role: 'user', content: 'Hello!' }],
}
const response = await fetch(url, {
method: 'POST',
headers: {
'Content-Type': 'application/json',
Authorization: `Bearer ${apiKey}`,
},
body: JSON.stringify(data),
})
const res = await response.json();
const completion = res.completion;
return completion;
}
```
```python
import requests
import json
def generate_completion():
url = 'https://api.langbase.com/beta/pipes/run'
api_key = '<PIPE_API_KEY>'
body_data = {
"messages": [
{"role": "user", "content": "Hello!"}
]
}
headers = {
'Content-Type': 'application/json',
'Authorization': f'Bearer {api_key}'
}
response = requests.post(url, headers=headers, data=json.dumps(body_data))
res = response.json()
completion = res['completion']
return completion
```
</CodeGroup>
<CodeGroup exampleTitle="Streaming" title="Basic request with stream on" tag="POST" label="/beta/pipes/run" id="streaming">
```bash {{ title: 'cURL' }}
curl https://api.langbase.com/beta/pipes/run \
-H 'Content-Type: application/json' \
-H 'Authorization: Bearer PIPE_API_KEY' \
-d '{
"messages": [
{
"role": "user",
"content": "Hello!"
}
]
}'
```
```js {{ title: 'Node.js' }}
async function main() {
const url = 'https://api.langbase.com/beta/pipes/run';
const apiKey = 'LANGBASE_PIPE_API_KEY'; // TODO: Replace with your Pipe API key.
const data = {
messages: [{role: 'user', content: 'Hello!'}],
};
const response = await fetch(url, {
method: 'POST',
headers: {
'Content-Type': 'application/json',
Authorization: `Bearer ${apiKey}`,
},
body: JSON.stringify(data),
});
if (!response.ok) return console.error(await response.json());
// Read SSE stream response (OpenAI Format) and log the response
// You can also use any OpenAI streaming helper library
const reader = response.body.getReader();
const decoder = new TextDecoder('utf-8');
while (true) {
const {done, value} = await reader.read();
if (done) break;
const chunk = decoder.decode(value);
const lines = chunk.split('\n').filter(line => line.trim() !== '');
for (const line of lines) {
if (line.startsWith('data:')) {
const json = JSON.parse(line.substring('data:'.length).trim());
if (json.choices[0].delta.content) {
console.log(json.choices[0].delta.content);
}
}
}
}
}
main();
```
```python
import requests
import json
def main():
url = 'https://api.langbase.com/beta/pipes/run'
apiKey = 'LANGBASE_PIPE_API_KEY' # TODO: Replace with your Pipe API key.
data = {
"messages": [{"role": "user", "content": "Hello!"}]
}
headers = {
"Content-Type": "application/json",
"Authorization": f"Bearer {apiKey}"
}
response = requests.post(url, headers=headers, data=json.dumps(data))
if not response.ok:
print(response.json())
return
# Read SSE stream response (OpenAI Format) and log the response
# Here, we manually process the response stream
for line in response.iter_lines():
if line:
line = line.decode('utf-8')
if line.startswith('data:'):
json_data = json.loads(line[len('data:'):].strip())
if "choices" in json_data and json_data["choices"]:
content = json_data["choices"][0].get("delta", {}).get("content")
if content:
print(content)
if __name__ == "__main__":
main()
```
</CodeGroup>
<CodeGroup exampleTitle="With Variables" title="Run a pipe with variables" tag="POST" label="/beta/pipes/run" id="variables">
```bash {{ title: 'cURL' }}
curl https://api.langbase.com/beta/pipes/run \
-H 'Content-Type: application/json' \
-H 'Authorization: Bearer PIPE_API_KEY' \
-d '{
"messages": [
{
"role": "user",
"content": "Hello!"
}
],
"variables": [
{
"name": "<VAR KEY>",
"value": "<VAR VALUE>"
}
]
}'
```
```js {{ title: 'Node.js' }}
async function generateCompletion() {
const url = 'https://api.langbase.com/beta/pipes/run'
const apiKey = '<PIPE_API_KEY>'
const data = {
messages: [{ role: 'user', content: 'Hello!' }],
variables: [{ name: '<VAR KEY>', value: '<VAR VALUE>' }],
}
const response = await fetch(url, {
method: 'POST',
headers: {
'Content-Type': 'application/json',
Authorization: `Bearer ${apiKey}`,
},
body: JSON.stringify(data),
})
const res = await response.json();
const completion = res.completion;
return completion;
}
```
```python
import requests
import json
def generate_completion():
url = 'https://api.langbase.com/beta/pipes/run'
api_key = '<PIPE_API_KEY>'
body_data = {
"messages": [
{"role": "user", "content": "Hello!"}
],
"variables": [
{"name": "<VAR KEY>", "value": "<VAR VALUE>"}
],
}
headers = {
'Content-Type': 'application/json',
'Authorization': f'Bearer {api_key}'
}
response = requests.post(url, headers=headers, data=json.dumps(body_data))
res = response.json()
completion = res['completion']
return completion
```
</CodeGroup>
<CodeGroup exampleTitle="Chat" title="Run API for Chat - Multi conversation turns" tag="POST" label="/beta/pipes/run">
```bash {{ title: 'cURL' }}
# NOTE: How chat thread works
# 1. You send first request without a threadId
# 2. In response headers you get back the `lb-thread-id`
# 3. To maintain the same chat thread, you send the `lb-thread-id` in all next requests
# NOTE: To start a new thread, you send a request without `threadId`.
curl https://api.langbase.com/beta/pipes/run \
-H 'Content-Type: application/json' \
-H "Authorization: Bearer PIPE_API_KEY" \
-d '{
"threadId": "<lb-thread-id>",
"messages": [{ "role": "user", "content": "Hello!" }]
}'
```
```js {{ title: 'Node.js' }}
async function main() {
const url = 'https://api.langbase.com/beta/pipes/run';
const apiKey = 'LANGBASE_PIPE_API_KEY'; // TODO: Replace with your Pipe API key.
const data = {
messages: [{role: 'user', content: 'Hello!'}],
// NOTE: How chat thread works
// 1. You send first request without a threadId
// 2. In response headers you get back the `lb-thread-id`
// 3. To maintain the same chat thread, you send the `lb-thread-id` in all next requests
// NOTE: To start a new thread, you send a request without `threadId`.
threadId: '<lb-thread-id>', // TODO: Add "threadId" to all requests after first request.
};
const response = await fetch(url, {
method: 'POST',
headers: {
'Content-Type': 'application/json',
Authorization: `Bearer ${apiKey}`,
},
body: JSON.stringify(data),
});
if (!response.ok) return console.error(await response.json());
// Read SSE stream response (OpenAI Format) and log the response
// You can also use any OpenAI streaming helper library
const reader = response.body.getReader();
const decoder = new TextDecoder('utf-8');
while (true) {
const {done, value} = await reader.read();
if (done) break;
const chunk = decoder.decode(value);
const lines = chunk.split('\n').filter(line => line.trim() !== '');
for (const line of lines) {
if (line.startsWith('data:')) {
const json = JSON.parse(line.substring('data:'.length).trim());
if (json.choices[0].delta.content) {
console.log(json.choices[0].delta.content);
}
}
}
}
}
main();
```
```python
import requests
import json
def main():
url = 'https://api.langbase.com/beta/pipes/run'
apiKey = 'LANGBASE_PIPE_API_KEY' # TODO: Replace with your Pipe API key.
data = {
"messages": [{"role": "user", "content": "Hello!"}]
# NOTE: How chat thread works
# 1. You send first request without a threadId
# 2. In response headers you get back the `lb-thread-id`
# 3. To maintain the same chat thread, you send the `lb-thread-id` in all next requests
# NOTE: To start a new thread, you send a request without `threadId`.
threadId: '<lb-thread-id>', # TODO: Add "threadId" to all requests after first request.
}
headers = {
"Content-Type": "application/json",
"Authorization": f"Bearer {apiKey}"
}
response = requests.post(url, headers=headers, data=json.dumps(data))
if not response.ok:
print(response.json())
return
# Read SSE stream response (OpenAI Format) and log the response
# Here, we manually process the response stream
for line in response.iter_lines():
if line:
line = line.decode('utf-8')
if line.startswith('data:'):
json_data = json.loads(line[len('data:'):].strip())
if "choices" in json_data and json_data["choices"]:
content = json_data["choices"][0].get("delta", {}).get("content")
if content:
print(content)
if __name__ == "__main__":
main()
```
</CodeGroup>
<CodeGroup
exampleTitle="Functions"
title="Run API with functions and tool calling"
tag="POST"
label="/beta/pipes/run"
id="variables"
>
```bash {{ title: 'cURL' }}
curl https://api.langbase.com/beta/pipes/run \
-H 'Content-Type: application/json' \
-H 'Authorization: Bearer PIPE_API_KEY' \
-d '{
"messages": [
{
"role": "user",
"content": "Whats the weather in SF?"
}
]
}'
```
```js {{ title: 'Node.js' }}
async function generateChatCompletion() {
const url = 'https://api.langbase.com/beta/pipes/run';
const apiKey = '<PIPE_API_KEY>';
const data = {
messages: [
{ role: 'user', content: 'Whats the weather in SF?' }
]
};
const response = await fetch(url, {
method: 'POST',
headers: {
'Content-Type': 'application/json',
Authorization: `Bearer ${apiKey}`
},
body: JSON.stringify(data)
});
const res = await response.json();
return res;
}
```
```python
import requests
import json
def generate_chat_completion():
url = 'https://api.langbase.com/beta/pipes/run'
api_key = '<PIPE_API_KEY>'
body_data = {
"messages": [
{"role": "user", "content": "Whats the weather in SF?"}
]
}
headers = {
'Content-Type': 'application/json',
'Authorization': f'Bearer {api_key}'
}
response = requests.post(url, headers=headers, data=json.dumps(body_data))
res = response.json()
return res
```
</CodeGroup>
</CodeExamples>
<CodeGroup exampleTitle="Response" title="Response" >
```json {{ title: 'STREAMING' }}
{"id":"chatcmpl-123","object":"chat.completion.chunk","created":1719848588,"model":"gpt-4o-mini","system_fingerprint":"fp_44709d6fcb","choices":[{"index":0,"delta":{"role":"assistant","content":""},"logprobs":null,"finish_reason":null}]}
{"id":"chatcmpl-123","object":"chat.completion.chunk","created":1719848588,"model":"gpt-4o-mini","system_fingerprint":"fp_44709d6fcb","choices":[{"index":0,"delta":{"content":"Hello"},"logprobs":null,"finish_reason":null}]}
...
{"id":"chatcmpl-123","object":"chat.completion.chunk","created":1719848588,"model":"gpt-4o-mini","system_fingerprint":"fp_44709d6fcb","choices":[{"index":0,"delta":{},"logprobs":null,"finish_reason":"stop"}]}
```
```json {{ title: 'STREAM-OFF' }}
{
"completion": "Hello! How can I assist you today?",
"raw": {
"id": "chatcmpl-123",
"object": "chat.completion",
"created": 1720131129,
"model": "gpt-4o-mini",
"choices": [
{
"index": 0,
"message": {
"role": "assistant",
"content": "Hello! How can I assist you today?"
},
"logprobs": null,
"finish_reason": "stop"
}
],
"usage": {
"prompt_tokens": 20,
"completion_tokens": 9,
"total_tokens": 29
},
"system_fingerprint": "fp_44709d6fcb"
}
}
```
</CodeGroup>
```json {{ title: 'Response Header' }}
HTTP/2 200
lb-thread-id: "…-…-…-…-… ID of the thread"
… … … rest of the headers … : … … …
```
</Col>
</Row>
---
</content>
</doc>
<doc>
<metadata>
<title>Pipe API: List <span className="text-xl font-mono text-muted-foreground/70">beta</span></title>
<url>https://langbase.com/docs/api-reference/deprecated/pipe-list/</url>
</metadata>
<content>
import { generateMetadata } from '@/lib/generate-metadata';
# Pipe API: List <span className="text-xl font-mono text-muted-foreground/70">beta</span>
The `list` pipe API endpoint allows you to get a list of pipes on Langbase with API. This endpoint requires a User or Org API key.
---
<Warn sub="Deprecation Notice">
This API endpoint has been deprecated. Please use the new [`list`](/api-reference/pipe/list) pipe API endpoint.
</Warn>
---
## Generate a User/Org API key
You will need to generate an API key to authenticate your requests. For more information, visit the [User/Org API key documentation](/api-reference/api-keys).
---
## Get a list of org pipes {{ tag: 'Deprecated', label: '/beta/org/{org}/pipes', status: 'deprecated' }}
<Row>
<Col>
Get a list of org pipes by sending a GET request to this endpoint.
### Required headers
<Properties>
<Property name="Content-Type" type="string">
Request content type. Needs to be `application/json`.
</Property>
<Property name="Authorization" type="string">
Replace `<ORG_API_KEY>` with your organization API key.
</Property>
</Properties>
### Required path parameters
<Properties>
<Property name="org" type="string">
The organization username.
Replace `{org}` with your organization username.
</Property>
</Properties>
</Col>
<Col sticky>
<CodeGroup exampleTitle="Get Org Pipes" title="Get Org Pipes" tag="GET" label="/beta/org/{org}/pipes" status="deprecated">
```bash {{ title: 'cURL' }}
curl https://api.langbase.com/beta/org/{org}/pipes \
-H 'Content-Type: application/json' \
-H "Authorization: Bearer <ORG_API_KEY>"
```
```js {{ title: 'Node.js' }}
async function getPipes() {
const url = 'https://api.langbase.com/beta/org/{org}/pipes';
const apiKey = '<ORG_API_KEY>';
const response = await fetch(url, {
method: 'GET',
headers: {
'Content-Type': 'application/json',
Authorization: `Bearer ${apiKey}`,
}
});
const pipesList = await response.json();
return pipesList;
}
```
```python
import requests
def get_pipes():
url = 'https://api.langbase.com/beta/org/{org}/pipes'
api_key = '<ORG_API_KEY>'
headers = {
'Content-Type': 'application/json',
'Authorization': f'Bearer {api_key}',
}
response = requests.get(url, headers=headers)
pipes_list = response.json()
return pipes_list
```
</CodeGroup>
```json {{ title: 'Response' }}
{
"pipes" : [
{
"name": "test-pipe",
"type": "chat",
"description": "This is a pipe test from API",
"status": "public",
"api_key": "pipe_4FVBn2DgrzfJf...",
"owner_login": "langbase",
"url": "https://langbase.com/langbase/test-pipe"
},
...
]
}
```
</Col>
</Row>
---
## Get a list of user pipes {{ tag: 'Deprecated', label: '/beta/user/pipes', status: 'deprecated' }}
<Row>
<Col>
Get a list of user pipes by sending a GET request to this endpoint.
### Required headers
<Properties>
<Property name="Content-Type" type="string">
Request content type. Needs to be `application/json`.
</Property>
<Property name="Authorization" type="string">
Replace `<USER_API_KEY>` with your User API key.
</Property>
</Properties>
</Col>
<Col sticky>
<CodeGroup exampleTitle="Get User Pipes" title="Get User Pipes" tag="GET" label="/beta/user/pipes" status="deprecated">
```bash {{ title: 'cURL' }}
curl https://api.langbase.com/beta/user/pipes \
-H 'Content-Type: application/json' \
-H "Authorization: Bearer <USER_API_KEY>"
```
```js {{ title: 'Node.js' }}
async function getPipes() {
const url = 'https://api.langbase.com/beta/user/pipes';
const apiKey = '<USER_API_KEY>';
const response = await fetch(url, {
method: 'GET',
headers: {
'Content-Type': 'application/json',
Authorization: `Bearer ${apiKey}`,
}
});
const pipesList = await response.json();
return pipesList;
}
```
```python
import requests
def get_pipes():
url = 'https://api.langbase.com/beta/user/pipes'
api_key = '<USER_API_KEY>'
headers = {
'Content-Type': 'application/json',
'Authorization': f'Bearer {api_key}',
}
response = requests.get(url, headers=headers)
pipes_list = response.json()
return pipes_list
```
</CodeGroup>
```json {{ title: 'Response' }}
{
"pipes" : [
{
"name": "test-pipe",
"type": "chat",
"description": "This is a pipe test from API",
"status": "public",
"api_key": "pipe_4FVBn2DgrzfJf...",
"owner_login": "langbase",
"url": "https://langbase.com/langbase/test-pipe"
},
...
]
}
```
</Col>
</Row>
---
</content>
</doc>
<doc>
<metadata>
<title>Pipe API: Generate <span className="text-xl font-mono text-muted-foreground/70">beta</span></title>
<url>https://langbase.com/docs/api-reference/deprecated/pipe-generate/</url>
</metadata>
<content>
import { generateMetadata } from '@/lib/generate-metadata';
# Pipe API: Generate <span className="text-xl font-mono text-muted-foreground/70">beta</span>
The `generate` endpoint allows easy integration of Large Language Models (LLM) like OpenAI or Claude into your app, enabling few-shot training and sending various prompts. It supports dynamic variables to send dynamic prompts.
---
<Warn sub="Deprecation Notice">
This API endpoint has been deprecated. Please use the new [`run`](/api-reference/pipe/run) pipe API endpoint.
</Warn>
---
## Generate a completion {{ tag: 'Deprecated', label: '/beta/generate', status: 'deprecated' }}
<Row>
<Col>
Generate a completion by sending a messages array inside request body.
### Required headers
<Properties>
<Property name="Content-Type" type="string">
Request content type. Needs to be `application/json`
</Property>
<Property name="Authorization" type="string">
Replace `PIPE_API_KEY` with your Pipe API key
</Property>
</Properties>
### Required attributes
<Properties>
<Property name="messages" type="array">
An array containing message objects
</Property>
<Property name="messages[0].role" type="string">
The role of the message, i.e.,`system` | `user` | `assistant` | `tool`
</Property>
<Property name="messages[0].content" type="string">
The content of the message
</Property>
</Properties>
### Optional attributes
<Properties>
<Property name="messages[0].tool_calls" type="array">
The tool calls array returned by the assistant
</Property>
<Property name="messages[0].tool_call_id" type="string">
The id of the called LLM tool if the role is `tool`
</Property>
<Property name="messages[0].name" type="string">
The name of the called tool if the role is `tool`
</Property>
<Property name="variables" type="array">
An array containing different variable objects
</Property>
<Property name="variables[0].name" type="string">
The name of the variable
</Property>
<Property name="variables[0].value" type="string">
The value of the variable
</Property>
</Properties>
_[Learn how to use function calling with the Generate API.](/features/tool-calling/generate-api)_
</Col>
<Col sticky>
<CodeExamples>
<CodeGroup exampleTitle="Streaming" title="Generate API with stream on" tag="POST" label="/beta/generate" id="streaming" status="deprecated">
```bash {{ title: 'cURL' }}
curl https://api.langbase.com/beta/generate \
-H 'Content-Type: application/json' \
-H 'Authorization: Bearer PIPE_API_KEY' \
-d '{
"messages": [
{
"role": "user",
"content": "Hello!"
}
]
}'
```
```js {{ title: 'Node.js' }}
async function main() {
const url = 'https://api.langbase.com/beta/generate';
const apiKey = 'LANGBASE_PIPE_API_KEY'; // TODO: Replace with your Pipe API key.
const data = {
messages: [{role: 'user', content: 'Hello!'}],
};
const response = await fetch(url, {
method: 'POST',
headers: {
'Content-Type': 'application/json',
Authorization: `Bearer ${apiKey}`,
},
body: JSON.stringify(data),
});
if (!response.ok) return console.error(await response.json());
// Read SSE stream response (OpenAI Format) and log the response
// You can also use any OpenAI streaming helper library
const reader = response.body.getReader();
const decoder = new TextDecoder('utf-8');
while (true) {
const {done, value} = await reader.read();
if (done) break;
const chunk = decoder.decode(value);
const lines = chunk.split('\n').filter(line => line.trim() !== '');
for (const line of lines) {
if (line.startsWith('data:')) {
const json = JSON.parse(line.substring('data:'.length).trim());
if (json.choices[0].delta.content) {
console.log(json.choices[0].delta.content);
}
}
}
}
}
main();
```
```python
import requests
import json
def main():
url = 'https://api.langbase.com/beta/generate'
apiKey = 'LANGBASE_PIPE_API_KEY' # TODO: Replace with your Pipe API key.
data = {
"messages": [{"role": "user", "content": "Hello!"}]
}
headers = {
"Content-Type": "application/json",
"Authorization": f"Bearer {apiKey}"
}
response = requests.post(url, headers=headers, data=json.dumps(data))
if not response.ok:
print(response.json())
return
# Read SSE stream response (OpenAI Format) and log the response
# Here, we manually process the response stream
for line in response.iter_lines():
if line:
line = line.decode('utf-8')
if line.startswith('data:'):
json_data = json.loads(line[len('data:'):].strip())
if "choices" in json_data and json_data["choices"]:
content = json_data["choices"][0].get("delta", {}).get("content")
if content:
print(content)
if __name__ == "__main__":
main()
```
</CodeGroup>
<CodeGroup exampleTitle="stream-off" title="Generate API with stream off" tag="POST" label="/beta/generate" id="default" status="deprecated">
```bash {{ title: 'cURL' }}
curl https://api.langbase.com/beta/generate \
-H 'Content-Type: application/json' \
-H 'Authorization: Bearer PIPE_API_KEY' \
-d '{
"messages": [
{
"role": "user",
"content": "Hello!"
}
]
}'
```
```js {{ title: 'Node.js' }}
async function generateCompletion() {
const url = 'https://api.langbase.com/beta/generate'
const apiKey = '<PIPE_API_KEY>'
const data = {
messages: [{ role: 'user', content: 'Hello!' }],
}
const response = await fetch(url, {
method: 'POST',
headers: {
'Content-Type': 'application/json',
Authorization: `Bearer ${apiKey}`,
},
body: JSON.stringify(data),
})
const res = await response.json();
const completion = res.completion;
return completion;
}
```
```python
import requests
import json
def generate_completion():
url = 'https://api.langbase.com/beta/generate'
api_key = '<PIPE_API_KEY>'
body_data = {
"messages": [
{"role": "user", "content": "Hello!"}
]
}
headers = {
'Content-Type': 'application/json',
'Authorization': f'Bearer {api_key}'
}
response = requests.post(url, headers=headers, data=json.dumps(body_data))
res = response.json()
completion = res['completion']
return completion
```
</CodeGroup>
<CodeGroup exampleTitle="With Variables" title="Generate API with variables" tag="POST" label="/beta/generate" id="variables" status="deprecated">
```bash {{ title: 'cURL' }}
curl https://api.langbase.com/beta/generate \
-H 'Content-Type: application/json' \
-H 'Authorization: Bearer PIPE_API_KEY' \
-d '{
"messages": [
{
"role": "user",
"content": "Hello!"
}
],
"variables": [
{
"name": "<VAR KEY>",
"value": "<VAR VALUE>"
}
]
}'
```
```js {{ title: 'Node.js' }}
async function generateCompletion() {
const url = 'https://api.langbase.com/beta/generate'
const apiKey = '<PIPE_API_KEY>'
const data = {
messages: [{ role: 'user', content: 'Hello!' }],
variables: [{ name: '<VAR KEY>', value: '<VAR VALUE>' }],
}
const response = await fetch(url, {
method: 'POST',
headers: {
'Content-Type': 'application/json',
Authorization: `Bearer ${apiKey}`,
},
body: JSON.stringify(data),
})
const res = await response.json();
const completion = res.completion;
return completion;
}
```
```python
import requests
import json
def generate_completion():
url = 'https://api.langbase.com/beta/generate'
api_key = '<PIPE_API_KEY>'
body_data = {
"messages": [
{"role": "user", "content": "Hello!"}
],
"variables": [
{"name": "<VAR KEY>", "value": "<VAR VALUE>"}
],
}
headers = {
'Content-Type': 'application/json',
'Authorization': f'Bearer {api_key}'
}
response = requests.post(url, headers=headers, data=json.dumps(body_data))
res = response.json()
completion = res['completion']
return completion
```
</CodeGroup>
<CodeGroup exampleTitle="Functions" title="Generate API with functions" tag="POST" label="/beta/generate" id="variables" status="deprecated">
```bash {{ title: 'cURL' }}
curl https://api.langbase.com/beta/generate \
-H 'Content-Type: application/json' \
-H 'Authorization: Bearer PIPE_API_KEY' \
-d '{
"messages": [
{ "role": "user", "content": "Whats the weather in SF?" }
]
}'
```
```js {{ title: 'Node.js' }}
async function generateCompletion() {
const url = 'https://api.langbase.com/beta/generate';
const apiKey = '<PIPE_API_KEY>';
const data = {
messages: [
{ role: 'user', content: 'Whats the weather in SF?' }
]
};
const response = await fetch(url, {
method: 'POST',
headers: {
'Content-Type': 'application/json',
Authorization: `Bearer ${apiKey}`
},
body: JSON.stringify(data)
});
const res = await response.json();
return res;
}
```
```python
import requests
import json
def generate_completion():
url = 'https://api.langbase.com/beta/generate'
api_key = '<PIPE_API_KEY>'
body_data = {
"messages": [
{"role": "user", "content": "Whats the weather in SF?"}
]
}
headers = {
'Content-Type': 'application/json',
'Authorization': f'Bearer {api_key}'
}
response = requests.post(url, headers=headers, data=json.dumps(body_data))
res = response.json()
return res
```
</CodeGroup>
</CodeExamples>
<CodeGroup exampleTitle="Response" title="Response" >
```json {{ title: 'STREAMING' }}
{"id":"chatcmpl-123","object":"chat.completion.chunk","created":1719848588,"model":"gpt-4o-mini","system_fingerprint":"fp_44709d6fcb","choices":[{"index":0,"delta":{"role":"assistant","content":"Hi"},"logprobs":null,"finish_reason":null}]}
{"id":"chatcmpl-123","object":"chat.completion.chunk","created":1719848588,"model":"gpt-4o-mini","system_fingerprint":"fp_44709d6fcb","choices":[{"index":0,"delta":{"content":"there"},"logprobs":null,"finish_reason":null}]}
...
{"id":"chatcmpl-123","object":"chat.completion.chunk","created":1719848588,"model":"gpt-4o-mini","system_fingerprint":"fp_44709d6fcb","choices":[{"index":0,"delta":{},"logprobs":null,"finish_reason":"stop"}]}
```
```json {{ title: 'STREAM-OFF' }}
{
"completion": "Hello! How can I assist you today?",
"raw": {
"id": "chatcmpl-123",
"object": "chat.completion",
"created": 1720131129,
"model": "gpt-4o-mini",
"choices": [
{
"index": 0,
"message": {
"role": "assistant",
"content": "Hello! How can I assist you today?"
},
"logprobs": null,
"finish_reason": "stop"
}
],
"usage": {
"prompt_tokens": 20,
"completion_tokens": 9,
"total_tokens": 29
},
"system_fingerprint": "fp_44709d6fcb"
}
}
```
</CodeGroup>
</Col>
</Row>
---
</content>
</doc>
<doc>
<metadata>
<title>Pipe API: Create <span className="text-xl font-mono text-muted-foreground/70">beta</span></title>
<url>https://langbase.com/docs/api-reference/deprecated/pipe-create/</url>
</metadata>
<content>
import { generateMetadata } from '@/lib/generate-metadata';
# Pipe API: Create <span className="text-xl font-mono text-muted-foreground/70">beta</span>
The `create` pipe API endpoint allows you to create a new pipe on Langbase dynamically with API. You can use this endpoint to create a new pipe with all the custom configuration. This endpoint requires a User or Org API key. To generate a User or Org API key visit your profile/organization settings page on Langbase.
---
<Warn sub="Deprecation Notice">
This API endpoint has been deprecated. Please use the new [`create`](/api-reference/pipe/create) pipe API endpoint.
</Warn>
---
## Generate a User/Org API key
You will need to generate an API key to authenticate your requests. For more information, visit the [User/Org API key documentation](/api-reference/api-keys).
---
## Create a new org pipe {{ tag: 'Deprecated', label: '/beta/org/{org}/pipes', status: 'deprecated' }}
<Row>
<Col>
Create a new organization pipe by sending the pipe configuration inside the request body.
### Required headers
<Properties>
<Property name="Content-Type" type="string">
Request content type. Needs to be `application/json`.
</Property>
<Property name="Authorization" type="string">
Replace `YOUR_API_KEY` with your Organization API key.
</Property>
</Properties>
### Required path parameters
<Properties>
<Property name="org" type="string">
The organization name.
Replace `{org}` with your organization name.
</Property>
</Properties>
### Required attributes
<Properties>
<Property name="name" type="string">
Name of the pipe.
</Property>
</Properties>
### Optional attributes
<Properties>
<Properties>
<Property name="description" type="array">
Short description of the pipe.
Default: `''`
</Property>
<Property name="status" type="string">
Status of the pipe.
Default: `public`
Can be one of: `public`, `private`
</Property>
<Property name="type" type="string">
Type of the pipe.
Default: `generate`
Can be one of: `generate`, `chat`
</Property>
<Property name="config" type="object">
Configuration object of the pipe.
Default: `{}`
</Property>
<Property name="config.meta.stream" type="boolean">
If enabled, the output will be streamed in real-time like ChatGPT. This is helpful if user is directly reading the text.
Default: `true`
</Property>
<Property name="config.meta.json" type="boolean">
Enforce the output to be in JSON format.
Default: `false`
</Property>
<Property name="config.meta.store" type="boolean">
If enabled, both prompt and completions will be stored in the database. Otherwise, only system prompt and few shot messages will be saved.
Default: `true`
</Property>
<Property name="config.meta.moderate" type="boolean">
If enabled, Langbase blocks flagged requests automatically.
Default: `false`
</Property>
<Property name="config.model.name" type="string">
ID of the LLM model. You can copy the ID of a model from the list of [supported LLM models](/supported-models-and-providers) at Langbase.
Default: `gpt-4o-mini`
</Property>
<Property name="config.model.provider" type="string">
Name of the LLM model provider. Check out the list of all the [supported LLM providers](/supported-models-and-providers) at Langbase.
Default: `OpenAI`
Can be one of the [supported providers](/supported-models-and-providers): `OpenAI`, `Together`, `Anthropic`, `Groq`, `Google`, `Cohere`.
</Property>
<Property name="config.model.tool_choice" type="'auto' | 'required' | 'object'">
Controls which (if any) tool is called by the model.
- `auto` - the model can pick between generating a message or calling one or more tools.
- `required` - the model must call one or more tools.
- `object` - Specifying a particular tool via `{"type": "function", "function": {"name": "my_function"}}` forces the model to call that tool.
Default: `auto`
</Property>
<Property name="config.model.parallel_tool_calls" type="boolean">
Call multiple tools in parallel, allowing the effects and results of these function calls to be resolved in parallel.
Default: `true`
</Property>
<Property name="config.model.params.top_p" type="number">
An alternative to sampling with temperature, called nucleus sampling, where the model considers the results of the tokens with top_p probability mass. So 0.1 means only the tokens comprising the top 10% probability mass are considered.
Default: `1`
</Property>
<Property name="config.model.params.max_tokens" type="number">
Maximum number of tokens in the response message returned.
Default: `1000`
</Property>
<Property name="config.model.params.temperature" type="number">
What sampling temperature to use, between 0 and 2. Higher values like 0.8 will make the output more random. Lower values like 0.2 will make it more focused and deterministic.
Default: `0.7`
</Property>
<Property name="config.model.params.presence_penalty" type="number">
Penalizes a word based on its occurrence in the input text.
Default: `1`
</Property>
<Property name="config.model.params.frequency_penalty" type="number">
Penalizes a word based on how frequently it appears in the training data.
Default: `1`
</Property>
<Property name="config.model.params.stop" type="array">
Up to 4 sequences where the API will stop generating further tokens.
Default: `[]`
</Property>
<Property name="config.prompt.system" type="string">
System prompt. Insert variables in the prompt with syntax like {{variable}}.
Default: `You're a helpful AI assistant.`
</Property>
<Property name="config.prompt.opening" type="string">
Chat opening prompt.
Default: `Welcome to Langbase. Prompt away!`
</Property>
<Property name="config.prompt.safety" type="string">
AI Safety prompt.
Default: `''`
</Property>
<Property name="config.prompt.messages" type="array">
An array containing message objects.
Default: `[]`
</Property>
<Property name="config.prompt.variables" type="array">
An array containing different variable objects.
Default: `[]`
</Property>
<Property name="config.prompt.json" type="string">
Use this prompt to define the JSON output format, schema, and more. It will be appended to the system prompt.
Default: `''`
</Property>
<Property name="config.prompt.rag" type="string">
Use this prompt to make the LLM answer questions from Memoryset documents.
Default: `''`
</Property>
<Property name="config.tools" type="array">
An array of objects with valid tool definitions.
Read more about valid [tool definition](/features/tool-calling#tool-definition-schema)
Default: `[]`
</Property>
<Property name="config.memorysets" type="array">
An array of memoryset names.
Default: `[]`
</Property>
</Properties>
</Properties>
</Col>
<Col sticky>
<CodeExamples>
<CodeGroup exampleTitle="Basic Pipe" title="Basic Pipe" tag="POST" label="/beta/org/{org}/pipes" status="deprecated">
```bash {{ title: 'cURL' }}
curl https://api.langbase.com/beta/org/{org}/pipes \
-H 'Content-Type: application/json' \
-H "Authorization: Bearer <YOUR_API_KEY>" \
-d '{
"name": "Test Pipe",
"description": "This is a test pipe",
"status": "public",
"type": "chat"
}'
```
```js {{ title: 'Node.js' }}
async function createNewPipe() {
const url = 'https://api.langbase.com/beta/org/{org}/pipes';
const apiKey = 'YOUR_API_KEY';
const pipe = {
name: 'Test Pipe',
description: 'This is a test pipe',
status: 'public',
type: 'chat'
};
const response = await fetch(url, {
method: 'POST',
headers: {
'Content-Type': 'application/json',
Authorization: `Bearer ${apiKey}`,
},
body: JSON.stringify(pipe),
});
const newPipe = await response.json();
return newPipe;
}
```
```python
import requests
import json
def create_new_pipe():
url = 'https://api.langbase.com/beta/org/{org}/pipes'
api_key = 'YOUR_API_KEY'
pipe = {
"name": "Test Pipe",
"description": "This is a test pipe",
"status": "public",
"type": "chat"
}
headers = {
'Content-Type': 'application/json',
'Authorization': f'Bearer {api_key}',
}
response = requests.post(url, headers=headers, data=json.dumps(pipe))
new_pipe = response.json()
return new_pipe
```
</CodeGroup>
<CodeGroup exampleTitle="Advance Pipe" title="Advance Pipe" tag="POST" label="/beta/org/{org}/pipes">
```bash {{ title: 'cURL' }}
curl https://api.langbase.com/beta/org/{org}/pipes \
-H 'Content-Type: application/json' \
-H "Authorization: Bearer <YOUR_API_KEY>" \
-d '{
"name": "Test Pipe",
"description": "This is a test pipe",
"status": "public",
"type": "chat",
"config": {
"meta": {
"stream": true,
"json": false,
"store": true,
"moderate": false
},
"model": {
"name": "gpt-3.5-turbo",
"provider": "OpenAI",
"params": {
"top_p": 1,
"max_tokens": 1000,
"temperature": 0.7,
"presence_penalty": 1,
"frequency_penalty": 1,
"stop": []
},
"tool_choice": "required",
"parallel_tool_calls": false
},
"prompt": {
"system": "You are a helpful AI assistant.",
"opening": "Welcome to Langbase. Prompt away!",
"safety": "",
"messages": [],
"variables": [],
"json": "",
"rag": ""
},
"tools": [
{
"type": "function",
"function": {
"name": "get_current_weather",
"description": "Get the current weather in a given location",
"parameters": {
"type": "object",
"properties": {
"location": {
"type": "string",
"description": "The city and state, e.g. San Francisco, CA"
},
"unit": {
"type": "string",
"enum": ["celsius", "fahrenheit"]
}
},
"required": ["location"]
}
}
}
],
"memorysets": []
}
}'
```
```js {{ title: 'Node.js' }}
async function createNewPipe() {
const url = 'https://api.langbase.com/beta/org/{org}/pipes';
const apiKey = 'YOUR_API_KEY';
const pipe = {
name: 'Test Pipe',
description: 'This is a test pipe',
status: 'public',
type: 'chat'
config: {
meta: {
stream: true,
json: false,
store: true,
moderate: false,
},
model: {
name: 'gpt-3.5-turbo',
provider: 'OpenAI',
params: {
max_tokens: 1000,
temperature: 0.7,
top_p: 1,
frequency_penalty: 1,
presence_penalty: 1,
stop: [],
},
tool_choice: 'required',
parallel_tool_calls: false
},
prompt: {
opening: 'Welcome to Langbase. Prompt away!',
system: 'You are a helpful AI assistant.',
safety: '',
messages: [],
variables: [],
json: '',
rag: '',
},
tools: [
{
type: 'function',
function: {
name: 'get_current_weather',
description: 'Get the current weather in a given location',
parameters: {
type: 'object',
properties: {
location: {
type: 'string',
description: 'The city and state, e.g. San Francisco, CA'
},
unit: {
type: 'string',
enum: ['celsius', 'fahrenheit']
}
},
required: ['location']
}
}
}
],
memorysets: []
}
};
const response = await fetch(url, {
method: 'POST',
headers: {
'Content-Type': 'application/json',
Authorization: `Bearer ${apiKey}`,
},
body: JSON.stringify(pipe),
});
const newPipe = await response.json();
return newPipe;
}
```
```python
import requests
import json
def create_new_pipe():
url = 'https://api.langbase.com/beta/org/{org}/pipes'
api_key = 'YOUR_API_KEY'
pipe = {
"name": "Test Pipe",
"description": "This is a test pipe",
"status": "public",
"type": "chat",
"config": {
"meta": {
"stream": true,
"json": false,
"store": true,
"moderate": false
},
"model": {
"name": "gpt-3.5-turbo",
"provider": "OpenAI",
"params": {
"top_p": 1,
"max_tokens": 1000,
"temperature": 0.7,
"presence_penalty": 1,
"frequency_penalty": 1,
"stop": []
},
"tool_choice": "required",
"parallel_tool_calls": false
},
"prompt": {
"system": "You are a helpful AI assistant.",
"opening": "Welcome to Langbase. Prompt away!",
"safety": "",
"messages": [],
"variables": [],
"json": "",
"rag": ""
},
"tools": [
{
"type": "function",
"function": {
"name": "get_current_weather",
"description": "Get the current weather in a given location",
"parameters": {
"type": "object",
"properties": {
"location": {
"type": "string",
"description": "The city and state, e.g. San Francisco, CA"
},
"unit": {
"type": "string",
"enum": ["celsius", "fahrenheit"]
}
},
"required": ["location"]
}
}
}
],
"memorysets": []
}
}
headers = {
'Content-Type': 'application/json',
'Authorization': f'Bearer {api_key}',
}
response = requests.post(url, headers=headers, data=json.dumps(pipe))
new_pipe = response.json()
return new_pipe
```
</CodeGroup>
</CodeExamples>
```json {{ title: 'Response' }}
{
"name": "test-pipe",
"type": "chat",
"description": "This is a create Pipe test from API",
"status": "private",
"api_key": "pipe_4FVBn2DgrzfJf...",
"owner_login": "langbase",
"url": "https://langbase.com/langbase/test-pipe"
}
```
</Col>
</Row>
---
## Create a new user pipe {{ tag: 'Deprecated', label: '/beta/user/pipes', status: 'deprecated' }}
<Row>
<Col>
Create a new user pipe by sending the pipe configuration inside the request body.
### Required headers
<Properties>
<Property name="Content-Type" type="string">
Request content type. Needs to be `application/json`.
</Property>
<Property name="Authorization" type="string">
Replace `YOUR_API_KEY` with your User API key.
</Property>
</Properties>
### Required attributes
<Properties>
<Property name="name" type="string">
Name of the pipe.
</Property>
</Properties>
### Optional attributes
<Properties>
<Properties>
<Property name="description" type="array">
Short description of the pipe.
Default: `''`
</Property>
<Property name="status" type="string">
Status of the pipe.
Default: `public`
Can be one of: `public`, `private`
</Property>
<Property name="type" type="string">
Type of the pipe.
Default: `generate`
Can be one of: `generate`, `chat`
</Property>
<Property name="config" type="object">
Configuration object of the pipe.
Default: `{}`
</Property>
<Property name="config.meta.stream" type="boolean">
If enabled, the output will be streamed in real-time like ChatGPT. This is helpful if user is directly reading the text.
Default: `true`
</Property>
<Property name="config.meta.json" type="boolean">
Enforce the output to be in JSON format.
Default: `false`
</Property>
<Property name="config.meta.store" type="boolean">
If enabled, both prompt and completions will be stored in the database. Otherwise, only system prompt and few shot messages will be saved.
Default: `true`
</Property>
<Property name="config.meta.moderate" type="boolean">
If enabled, Langbase blocks flagged requests automatically.
Default: `false`
</Property>
<Property name="config.model.name" type="string">
ID of the LLM model. You can copy the ID of a model from the list of [supported LLM models](/supported-models-and-providers) at Langbase.
Default: `gpt-3.5-turbo`
</Property>
<Property name="config.model.provider" type="string">
Name of the LLM model provider. Check out the list of all the [supported LLM providers](/supported-models-and-providers) at Langbase.
Default: `OpenAI`
Can be one of the [supported providers](/supported-models-and-providers): `OpenAI`, `Together`, `Anthropic`, `Groq`, `Google`, `Cohere`
</Property>
<Property name="config.model.tool_choice" type="'auto' | 'required' | 'object'">
Controls which (if any) tool is called by the model.
- `auto` - the model can pick between generating a message or calling one or more tools.
- `required` - the model must call one or more tools.
- `object` - Specifying a particular tool via `{"type": "function", "function": {"name": "my_function"}}` forces the model to call that tool.
Default: `auto`
</Property>
<Property name="config.model.parallel_tool_calls" type="boolean">
Call multiple tools in parallel, allowing the effects and results of these function calls to be resolved in parallel.
Default: `true`
</Property>
<Property name="config.model.params.top_p" type="number">
An alternative to sampling with temperature, called nucleus sampling, where the model considers the results of the tokens with top_p probability mass. So 0.1 means only the tokens comprising the top 10% probability mass are considered.
Default: `1`
</Property>
<Property name="config.model.params.max_tokens" type="number">
Maximum number of tokens in the response message returned.
Default: `1000`
</Property>
<Property name="config.model.params.temperature" type="number">
What sampling temperature to use, between 0 and 2. Higher values like 0.8 will make the output more random. Lower values like 0.2 will make it more focused and deterministic.
Default: `0.7`
</Property>
<Property name="config.model.params.presence_penalty" type="number">
Penalizes a word based on its occurrence in the input text.
Default: `1`
</Property>
<Property name="config.model.params.frequency_penalty" type="number">
Penalizes a word based on how frequently it appears in the training data.
Default: `1`
</Property>
<Property name="config.model.params.stop" type="array">
Up to 4 sequences where the API will stop generating further tokens.
Default: `[]`
</Property>
<Property name="config.prompt.system" type="string">
System prompt. Insert variables in the prompt with syntax like {{variable}}.
Default: `You're a helpful AI assistant.`
</Property>
<Property name="config.prompt.opening" type="string">
Chat opening prompt.
Default: `Welcome to Langbase. Prompt away!`
</Property>
<Property name="config.prompt.safety" type="string">
AI Safety prompt.
Default: `''`
</Property>
<Property name="config.prompt.messages" type="array">
An array containing message objects.
Default: `[]`
</Property>
<Property name="config.prompt.variables" type="array">
An array containing different variable objects.
Default: `[]`
</Property>
<Property name="config.prompt.json" type="string">
Use this prompt to define the JSON output format, schema, and more. It will be appended to the system prompt.
Default: `''`
</Property>
<Property name="config.prompt.rag" type="string">
Use this prompt to make the LLM answer questions from Memoryset documents.
Default: `''`
</Property>
<Property name="config.tools" type="array">
An array of objects with valid tool definitions.
Read more about valid [tool definition](/features/tool-calling#tool-definition-schema)
Default: `[]`
</Property>
<Property name="config.memorysets" type="array">
An array of memoryset names.
Default: `[]`
</Property>
</Properties>
</Properties>
</Col>
<Col sticky>
<CodeExamples>
<CodeGroup exampleTitle="Basic Pipe" title="Basic Pipe" tag="POST" label="/beta/user/pipes" status="deprecated">
```bash {{ title: 'cURL' }}
curl https://api.langbase.com/beta/user/pipes \
-H 'Content-Type: application/json' \
-H "Authorization: Bearer <YOUR_API_KEY>" \
-d '{
"name": "Test Pipe",
"description": "This is a test pipe",
"status": "public",
"type": "chat"
}'
```
```js {{ title: 'Node.js' }}
async function createNewPipe() {
const url = 'https://api.langbase.com/beta/user/pipes';
const apiKey = 'YOUR_API_KEY';
const pipe = {
name: 'Test Pipe',
description: 'This is a test pipe',
status: 'public',
type: 'chat'
};
const response = await fetch(url, {
method: 'POST',
headers: {
'Content-Type': 'application/json',
Authorization: `Bearer ${apiKey}`,
},
body: JSON.stringify(pipe),
});
const newPipe = await response.json();
return newPipe;
}
```
```python
import requests
import json
def create_new_pipe():
url = 'https://api.langbase.com/beta/user/pipes'
api_key = 'YOUR_API_KEY'
pipe = {
"name": "Test Pipe",
"description": "This is a test pipe",
"status": "public",
"type": "chat"
}
headers = {
'Content-Type': 'application/json',
'Authorization': f'Bearer {api_key}',
}
response = requests.post(url, headers=headers, data=json.dumps(pipe))
new_pipe = response.json()
return new_pipe
```
</CodeGroup>
<CodeGroup exampleTitle="Advance Pipe" title="Advance Pipe" tag="POST" label="/beta/user/pipes">
```bash {{ title: 'cURL' }}
curl https://api.langbase.com/beta/user/pipes \
-H 'Content-Type: application/json' \
-H "Authorization: Bearer <YOUR_API_KEY>" \
-d '{
"name": "Test Pipe",
"description": "This is a test pipe",
"status": "public",
"type": "chat",
"config": {
"meta": {
"stream": true,
"json": false,
"store": true,
"moderate": false
},
"model": {
"name": "gpt-3.5-turbo",
"provider": "OpenAI",
"params": {
"top_p": 1,
"max_tokens": 1000,
"temperature": 0.7,
"presence_penalty": 1,
"frequency_penalty": 1,
"stop": []
},
"tool_choice": "required",
"parallel_tool_calls": false
},
"prompt": {
"system": "You are a helpful AI assistant.",
"opening": "Welcome to Langbase. Prompt away!",
"safety": "",
"messages": [],
"variables": [],
"json": "",
"rag": ""
},
"tools": [
{
"type": "function",
"function": {
"name": "get_current_weather",
"description": "Get the current weather in a given location",
"parameters": {
"type": "object",
"properties": {
"location": {
"type": "string",
"description": "The city and state, e.g. San Francisco, CA"
},
"unit": {
"type": "string",
"enum": ["celsius", "fahrenheit"]
}
},
"required": ["location"]
}
}
}
],
"memorysets": []
}
}'
```
```js {{ title: 'Node.js' }}
async function createNewPipe() {
const url = 'https://api.langbase.com/beta/user/pipes';
const apiKey = 'YOUR_API_KEY';
const pipe = {
name: 'Test Pipe',
description: 'This is a test pipe',
status: 'public',
type: 'chat',
config: {
meta: {
stream: true,
json: false,
store: true,
moderate: false,
},
model: {
name: 'gpt-3.5-turbo',
provider: 'OpenAI',
params: {
max_tokens: 1000,
temperature: 0.7,
top_p: 1,
frequency_penalty: 1,
presence_penalty: 1,
stop: [],
},
tool_choice: 'required',
parallel_tool_calls: false
},
prompt: {
opening: 'Welcome to Langbase. Prompt away!',
system: 'You are a helpful AI assistant.',
safety: '',
messages: [],
variables: [],
json: '',
rag: '',
},
tools: [
{
type: 'function',
function: {
name: 'get_current_weather',
description: 'Get the current weather in a given location',
parameters: {
type: 'object',
properties: {
location: {
type: 'string',
description: 'The city and state, e.g. San Francisco, CA'
},
unit: {
type: 'string',
enum: ['celsius', 'fahrenheit']
}
},
required: ['location']
}
}
}
],
memorysets: []
}
};
const response = await fetch(url, {
method: 'POST',
headers: {
'Content-Type': 'application/json',
Authorization: `Bearer ${apiKey}`,
},
body: JSON.stringify(pipe),
});
const newPipe = await response.json();
return newPipe;
}
```
```python
import requests
import json
def create_new_pipe():
url = 'https://api.langbase.com/beta/user/pipes'
api_key = 'YOUR_API_KEY'
pipe = {
"name": "Test Pipe",
"description": "This is a test pipe",
"status": "public",
"type": "chat",
"config": {
"meta": {
"stream": true,
"json": false,
"store": true,
"moderate": false
},
"model": {
"name": "gpt-3.5-turbo",
"provider": "OpenAI",
"params": {
"top_p": 1,
"max_tokens": 1000,
"temperature": 0.7,
"presence_penalty": 1,
"frequency_penalty": 1,
"stop": []
},
"tool_choice": "required",
"parallel_tool_calls": false
},
"prompt": {
"system": "You are a helpful AI assistant.",
"opening": "Welcome to Langbase. Prompt away!",
"safety": "",
"messages": [],
"variables": [],
"json": "",
"rag": ""
},
"tools": [
{
"type": "function",
"function": {
"name": "get_current_weather",
"description": "Get the current weather in a given location",
"parameters": {
"type": "object",
"properties": {
"location": {
"type": "string",
"description": "The city and state, e.g. San Francisco, CA"
},
"unit": {
"type": "string",
"enum": ["celsius", "fahrenheit"]
}
},
"required": ["location"]
}
}
}
],
"memorysets": []
}
}
headers = {
'Content-Type': 'application/json',
'Authorization': f'Bearer {api_key}',
}
response = requests.post(url, headers=headers, data=json.dumps(pipe))
new_pipe = response.json()
return new_pipe
```
</CodeGroup>
</CodeExamples>
```json {{ title: 'Response' }}
{
"name": "test-pipe",
"type": "chat",
"description": "This is a create Pipe test from API",
"status": "private",
"api_key": "pipe_4FVBn2DgrzfJf...",
"owner_login": "langbase",
"url": "https://langbase.com/langbase/test-pipe"
}
```
</Col>
</Row>
---
</content>
</doc>
<doc>
<metadata>
<title>Pipe API: Chat <span className="text-xl font-mono text-muted-foreground/70">beta</span></title>
<url>https://langbase.com/docs/api-reference/deprecated/pipe-chat/</url>
</metadata>
<content>
import { generateMetadata } from '@/lib/generate-metadata';
# Pipe API: Chat <span className="text-xl font-mono text-muted-foreground/70">beta</span>
For chat-style LLM integration with OpenAI, Mistral, etc., use the chat endpoint with a chat pipe. It supports thread creation, history tracking, and seamless conversation continuation. Langbase can store all messages and threads if desired for easy chat app development.
---
<Warn sub="Deprecation Notice">
This API endpoint has been deprecated. Please use the new [`run`](/api-reference/pipe/run) pipe API endpoint.
</Warn>
---
## Generate a chat completion {{ tag: 'Deprecated', label: '/beta/chat', status: 'deprecated' }}
<Row>
<Col>
Generate a chat completion by sending messages array inside request body.
### Required headers
<Properties>
<Property name="Content-Type" type="string">
Request content type. Needs to be `application/json`
</Property>
<Property name="Authorization" type="string">
Replace `PIPE_API_KEY` with your Pipe API key
</Property>
</Properties>
### Required attributes
<Properties>
<Property name="messages" type="array">
An array containing message objects
</Property>
<Property name="messages[0].role" type="string">
The role of the message, i.e.,`system` | `user` | `assistant` | `tool`
</Property>
<Property name="messages[0].content" type="string">
The content of the message
</Property>
</Properties>
### Optional attributes
<Properties>
<Property name="messages[0].tool_call_id" type="string">
The id of the called LLM tool if the role is `tool`
</Property>
<Property name="messages[0].name" type="string">
The name of the called tool if the role is `tool`
</Property>
<Properties>
<Property name="variables" type="array">
An array containing different variable objects
</Property>
<Property name="variables[0].name" type="string">
The name of the variable
</Property>
<Property name="variables[0].value" type="string">
The value of the variable
</Property>
</Properties>
<Property name="threadId" type="string">
The ID of an existing chat thread. The conversation will continue in this thread.
</Property>
</Properties>
### Response headers
<Properties>
<Property name="lb-thread-id" type="string">
The ID of the new chat thread. Use this ID in the next request to continue the conversation.
</Property>
</Properties>
_[Learn how to use function calling with the Chat API.](/features/tool-calling/chat-api)_
</Col>
<Col sticky>
<CodeExamples>
<CodeGroup exampleTitle="Streaming" title="Chat API with stream on" tag="POST" label="/beta/chat" status="deprecated">
```bash {{ title: 'cURL' }}
# NOTE: How chat thread works
# 1. You send first request without a threadId
# 2. In response headers you get back the `lb-thread-id`
# 3. To maintain the same chat thread, you send the `lb-thread-id` in all next requests
# NOTE: To start a new thread, you send a request without `threadId`.
curl https://api.langbase.com/beta/chat \
-H 'Content-Type: application/json' \
-H "Authorization: Bearer PIPE_API_KEY" \
-d '{
"threadId": "<lb-thread-id>",
"messages": [{ "role": "user", "content": "Hello!" }]
}'
```
```js {{ title: 'Node.js' }}
async function main() {
const url = 'https://api.langbase.com/beta/chat';
const apiKey = 'LANGBASE_PIPE_API_KEY'; // TODO: Replace with your Pipe API key.
const data = {
messages: [{role: 'user', content: 'Hello!'}],
// NOTE: How chat thread works
// 1. You send first request without a threadId
// 2. In response headers you get back the `lb-thread-id`
// 3. To maintain the same chat thread, you send the `lb-thread-id` in all next requests
// NOTE: To start a new thread, you send a request without `threadId`.
threadId: '<lb-thread-id>', // TODO: Add "threadId" to all requests after first request.
};
const response = await fetch(url, {
method: 'POST',
headers: {
'Content-Type': 'application/json',
Authorization: `Bearer ${apiKey}`,
},
body: JSON.stringify(data),
});
if (!response.ok) return console.error(await response.json());
// Read SSE stream response (OpenAI Format) and log the response
// You can also use any OpenAI streaming helper library
const reader = response.body.getReader();
const decoder = new TextDecoder('utf-8');
while (true) {
const {done, value} = await reader.read();
if (done) break;
const chunk = decoder.decode(value);
const lines = chunk.split('\n').filter(line => line.trim() !== '');
for (const line of lines) {
if (line.startsWith('data:')) {
const json = JSON.parse(line.substring('data:'.length).trim());
if (json.choices[0].delta.content) {
console.log(json.choices[0].delta.content);
}
}
}
}
}
main();
```
```python
import requests
import json
def main():
url = 'https://api.langbase.com/beta/chat'
apiKey = 'LANGBASE_PIPE_API_KEY' # TODO: Replace with your Pipe API key.
data = {
"messages": [{"role": "user", "content": "Hello!"}]
# NOTE: How chat thread works
# 1. You send first request without a threadId
# 2. In response headers you get back the `lb-thread-id`
# 3. To maintain the same chat thread, you send the `lb-thread-id` in all next requests
# NOTE: To start a new thread, you send a request without `threadId`.
threadId: '<lb-thread-id>', # TODO: Add "threadId" to all requests after first request.
}
headers = {
"Content-Type": "application/json",
"Authorization": f"Bearer {apiKey}"
}
response = requests.post(url, headers=headers, data=json.dumps(data))
if not response.ok:
print(response.json())
return
# Read SSE stream response (OpenAI Format) and log the response
# Here, we manually process the response stream
for line in response.iter_lines():
if line:
line = line.decode('utf-8')
if line.startswith('data:'):
json_data = json.loads(line[len('data:'):].strip())
if "choices" in json_data and json_data["choices"]:
content = json_data["choices"][0].get("delta", {}).get("content")
if content:
print(content)
if __name__ == "__main__":
main()
```
</CodeGroup>
<CodeGroup exampleTitle="stream-off" title="Chat API with stream off" tag="POST" label="/beta/chat" status="deprecated">
```bash {{ title: 'cURL' }}
# NOTE: How chat thread works
# 1. You send first request without a threadId
# 2. In response headers you get back the `lb-thread-id`
# 3. To maintain the same chat thread, you send the `lb-thread-id` in all next requests
# NOTE: To start a new thread, you send a request without `threadId`.
curl https://api.langbase.com/beta/chat \
-H 'Content-Type: application/json' \
-H "Authorization: Bearer PIPE_API_KEY" \
-d '{
"threadId": "<lb-thread-id>", # TODO: Add "threadId" to all chats in the same thread.
"messages": [
{
"role": "user",
"content": "Hello!"
}
]
}'
```
```js {{ title: 'Node.js' }}
async function generateChatCompletion() {
const url = 'https://api.langbase.com/beta/chat'
const apiKey = '<PIPE_API_KEY>'
const bodyData = {
// NOTE: How chat thread works
// 1. You send first request without a threadId
// 2. In response headers you get back the `lb-thread-id`
// 3. To maintain the same chat thread, you send the `lb-thread-id` in all next requests
// NOTE: To start a new thread, you send a request without `threadId`.
threadId: '<lb-thread-id>', // TODO: Add "threadId" to all requests after first request.
messages: [
{
role: 'user',
content: 'Hello!',
},
]
}
const response = await fetch(url, {
method: 'POST',
headers: {
'Content-Type': 'application/json',
Authorization: `Bearer ${apiKey}`,
},
body: JSON.stringify(bodyData),
})
const resText = await response.text()
return resText
}
```
```python
import requests
import json
def generate_chat_completion():
url = 'https://api.langbase.com/beta/chat'
api_key = '<PIPE_API_KEY>'
body_data = {
# NOTE: How chat thread works
# 1. You send first request without a threadId
# 2. In response headers you get back the `lb-thread-id`
# 3. To maintain the same chat thread, you send the `lb-thread-id` in all next requests
# NOTE: To start a new thread, you send a request without `threadId`.
threadId: '<lb-thread-id>', # TODO: Add "threadId" to all requests after first request.
"messages": [
{
"role": "user",
"content": "Hello!",
},
]
}
headers = {
'Content-Type': 'application/json',
'Authorization': f'Bearer {api_key}',
}
response = requests.post(url, headers=headers, data=json.dumps(body_data))
res_text = response.text
return res_text
```
</CodeGroup>
<CodeGroup
exampleTitle="Functions"
title="Generate API with functions"
tag="POST"
label="/beta/chat"
id="variables"
status="deprecated"
>
```bash {{ title: 'cURL' }}
curl https://api.langbase.com/beta/chat \
-H 'Content-Type: application/json' \
-H 'Authorization: Bearer PIPE_API_KEY' \
-d '{
"messages": [
{
"role": "user",
"content": "Whats the weather in SF?"
}
]
}'
```
```js {{ title: 'Node.js' }}
async function generateChatCompletion() {
const url = 'https://api.langbase.com/beta/chat';
const apiKey = '<PIPE_API_KEY>';
const data = {
messages: [
{ role: 'user', content: 'Whats the weather in SF?' }
]
};
const response = await fetch(url, {
method: 'POST',
headers: {
'Content-Type': 'application/json',
Authorization: `Bearer ${apiKey}`
},
body: JSON.stringify(data)
});
const res = await response.json();
return res;
}
```
```python
import requests
import json
def generate_chat_completion():
url = 'https://api.langbase.com/beta/chat'
api_key = '<PIPE_API_KEY>'
body_data = {
"messages": [
{"role": "user", "content": "Whats the weather in SF?"}
]
}
headers = {
'Content-Type': 'application/json',
'Authorization': f'Bearer {api_key}'
}
response = requests.post(url, headers=headers, data=json.dumps(body_data))
res = response.json()
return res
```
</CodeGroup>
</CodeExamples>
<CodeGroup exampleTitle="Response" title="Response" >
```json {{ title: 'STREAMING' }}
{"id":"chatcmpl-123","object":"chat.completion.chunk","created":1719848588,"model":"gpt-4o-mini","system_fingerprint":"fp_44709d6fcb","choices":[{"index":0,"delta":{"role":"assistant","content":""},"logprobs":null,"finish_reason":null}]}
{"id":"chatcmpl-123","object":"chat.completion.chunk","created":1719848588,"model":"gpt-4o-mini","system_fingerprint":"fp_44709d6fcb","choices":[{"index":0,"delta":{"content":"Hello"},"logprobs":null,"finish_reason":null}]}
...
{"id":"chatcmpl-123","object":"chat.completion.chunk","created":1719848588,"model":"gpt-4o-mini","system_fingerprint":"fp_44709d6fcb","choices":[{"index":0,"delta":{},"logprobs":null,"finish_reason":"stop"}]}
```
```json {{ title: 'STREAM-OFF' }}
{
"completion": "Hello! How can I assist you today?",
"raw": {
"id": "chatcmpl-123",
"object": "chat.completion",
"created": 1720131129,
"model": "gpt-4o-mini",
"choices": [
{
"index": 0,
"message": {
"role": "assistant",
"content": "Hello! How can I assist you today?"
},
"logprobs": null,
"finish_reason": "stop"
}
],
"usage": {
"prompt_tokens": 20,
"completion_tokens": 9,
"total_tokens": 29
},
"system_fingerprint": "fp_44709d6fcb"
}
}
```
</CodeGroup>
```json {{ title: 'Response Header' }}
HTTP/2 200
lb-thread-id: "…-…-…-…-… ID of chat thread"
… … … rest of the headers … : … … …
```
</Col>
</Row>
---
</content>
</doc>
<doc>
<metadata>
<title>Memory API: Retrieve <span className="text-xl font-mono text-muted-foreground/70">beta</span></title>
<url>https://langbase.com/docs/api-reference/deprecated/memory-retrieve/</url>
</metadata>
<content>
import { generateMetadata } from '@/lib/generate-metadata';
# Memory API: Retrieve <span className="text-xl font-mono text-muted-foreground/70">beta</span>
The `retrieve` memory API endpoint allows you to retrieve similar chunks from an existing memory on Langbase based on a query. This endpoint requires an Org or User API key.
---
<Warn sub="Deprecation Notice">
This API endpoint has been deprecated. Please use the new [`retrieve`](/api-reference/memory/retrieve) memory API endpoint.
</Warn>
---
## Generate an Org/User API key
You will need to generate an API key to authenticate your requests. For more information, visit the [Org/User API key documentation](/api-reference/api-keys).
---
## Retrieve similar chunks from multiple memory {{ tag: 'Deprecated', label: '/beta/memory/retrieve', status: 'deprecated' }}
<Row>
<Col>
Retrieve similar chunks by specifying the owner login, query, and memory names in the request body.
### Required headers
<Properties>
<Property name="Content-Type" type="string">
Request content type. Needs to be `application/json`.
</Property>
<Property name="Authorization" type="string">
Replace `<YOUR_API_KEY>` with your Org/User API key.
</Property>
</Properties>
### Required body parameters
<Properties>
<Property name="ownerLogin" type="string">
The username of the owner (either an organization or a user).
Replace `<ownerLogin>` with your organization or user username.
</Property>
<Property name="query" type="string">
The search query for retrieving similar chunks.
</Property>
<Property name="memory" type="array">
An array of memory names from which to retrieve similar chunks.
</Property>
</Properties>
### Optional body parameters
<Properties>
<Property name="topK" type="number" optional="true" default="20" min="1" max="100">
The number of top similar chunks to return from memory. Default is 20, minimum is 1, and maximum is 100.
</Property>
</Properties>
</Col>
<Col sticky>
<CodeGroup exampleTitle="Retrieve Similar Chunks" title=" " tag="POST" label="/beta/memory/retrieve" status="deprecated">
```bash {{ title: 'cURL' }}
curl -X POST https://api.langbase.com/beta/memory/retrieve \
-H 'Content-Type: application/json' \
-H "Authorization: Bearer <YOUR_API_KEY>" \
-d '{
"ownerLogin": "<ownerLogin>",
"query": "your query here",
"memory": [
{
"name": "memory1"
},
{
"name": "memory2"
}
]
}'
```
```js {{ title: 'Node.js' }}
async function retrieveSimilarChunks() {
const url = 'https://api.langbase.com/beta/memory/retrieve';
const apiKey = '<YOUR_API_KEY>';
const response = await fetch(url, {
method: 'POST',
headers: {
'Content-Type': 'application/json',
Authorization: `Bearer ${apiKey}`,
},
body: JSON.stringify({
ownerLogin: '<ownerLogin>',
query: 'your query here',
memory: [
{ name: 'memory1' },
{ name: 'memory2' }
]
}),
});
const result = await response.json();
return result;
}
```
```python
import requests
def retrieve_similar_chunks():
url = 'https://api.langbase.com/beta/memory/retrieve'
api_key = '<YOUR_API_KEY>'
headers = {
'Content-Type': 'application/json',
'Authorization': f'Bearer {api_key}',
}
data = {
'ownerLogin': '<ownerLogin>',
'query': 'your query here',
'memory': [
{'name': 'memory1'},
{'name': 'memory2'}
]
}
response = requests.post(url, headers=headers, json=data)
result = response.json()
return result
```
</CodeGroup>
```json {{ title: 'Response' }}
[
{
"text": "This is the first similar chunk",
"similarity": 0.98,
"meta": {
"docName": "Filename.ext"
}
},
{
"text": "This is the second similar chunk",
"similarity": 0.95,
"meta": {
"docName": "Filename.ext"
}
}
]
```
</Col>
</Row>
---
## Retrieve similar chunks from memory {{ tag: 'Deprecated', label: '/beta/memorysets/{ownerLogin}/{memoryName}/retrieve', status: 'deprecated' }}
<Row>
<Col>
<Warn sub="Deprecation Notice">
This endpoint is deprecated. Please use the [new retrieve endpoint](/api-reference/memory/retrieve#retrieve-similar-chunks-from-multiple-memory) <span className="whitespace-normal break-words">`/beta/memory/retrieve`</span> instead.
</Warn>
Retrieve similar chunks by specifying the owner login and memory name in the path and providing the query in the request body.
### Required headers
<Properties>
<Property name="Content-Type" type="string">
Request content type. Needs to be `application/json`.
</Property>
<Property name="Authorization" type="string">
Replace `<YOUR_API_KEY>` with your Org/User API key.
</Property>
</Properties>
### Required path parameters
<Properties>
<Property name="ownerLogin" type="string">
The username of the owner (either an organization or a user).
Replace `{ownerLogin}` with your organization or user username.
</Property>
<Property name="memoryName" type="string">
The name of the memory from which to retrieve similar chunks.
Replace `{memoryName}` with the name of the memory.
</Property>
</Properties>
### Required body parameters
<Properties>
<Property name="query" type="string">
The search query for retrieving similar chunks.
</Property>
</Properties>
### Optional body parameters
<Properties>
<Property name="topK" type="number" optional="true" default="20" min="1" max="100">
The number of top similar chunks to return from memory. Default is 20, minimum is 1, and maximum is 100.
</Property>
</Properties>
</Col>
<Col sticky>
<CodeGroup exampleTitle="Retrieve Similar Chunks" title=" " tag="POST" label="/beta/memorysets/{ownerLogin}/{memoryName}/retrieve" status="deprecated">
```bash {{ title: 'cURL' }}
curl -X POST https://api.langbase.com/beta/memorysets/{ownerLogin}/{memoryName}/retrieve \
-H 'Content-Type: application/json' \
-H "Authorization: Bearer <YOUR_API_KEY>" \
-d '{
"query": "your query here"
}'
```
```js {{ title: 'Node.js' }}
async function retrieveSimilarChunks() {
const url = 'https://api.langbase.com/beta/memorysets/{ownerLogin}/{memoryName}/retrieve';
const apiKey = '<YOUR_API_KEY>';
const response = await fetch(url, {
method: 'POST',
headers: {
'Content-Type': 'application/json',
Authorization: `Bearer ${apiKey}`,
},
body: JSON.stringify({
query: 'your query here'
}),
});
const result = await response.json();
return result;
}
```
```python
import requests
def retrieve_similar_chunks():
url = 'https://api.langbase.com/beta/memorysets/{ownerLogin}/{memoryName}/retrieve'
api_key = '<YOUR_API_KEY>'
headers = {
'Content-Type': 'application/json',
'Authorization': f'Bearer {api_key}',
}
data = {
'query': 'your query here'
}
response = requests.post(url, headers=headers, json=data)
result = response.json()
return result
```
</CodeGroup>
```json {{ title: 'Response' }}
[
{
"text": "This is the first similar chunk",
"similarity": 0.98,
"meta": {
"docName": "Filename.ext"
}
},
{
"text": "This is the second similar chunk",
"similarity": 0.95,
"meta": {
"docName": "Filename.ext"
}
}
]
```
</Col>
</Row>
---
</content>
</doc>
<doc>
<metadata>
<title>Memory API: List <span className="text-xl font-mono text-muted-foreground/70">beta</span></title>
<url>https://langbase.com/docs/api-reference/deprecated/memory-list/</url>
</metadata>
<content>
import { generateMetadata } from '@/lib/generate-metadata';
# Memory API: List <span className="text-xl font-mono text-muted-foreground/70">beta</span>
The `list` memory API endpoint allows you to get a list of memory sets on Langbase with API. This endpoint requires a User or Org API key.
---
<Warn sub="Deprecation Notice">
This API endpoint has been deprecated. Please use the new [`list`](/api-reference/memory/list) memory API endpoint.
</Warn>
---
## Generate a User/Org API key
You will need to generate an API key to authenticate your requests. For more information, visit the [User/Org API key documentation](/api-reference/api-keys).
---
## Get a list of org memory sets {{ tag: 'Deprecated', label: '/beta/org/{org}/memorysets', status: 'deprecated' }}
<Row>
<Col>
Get a list of organization memory sets by sending a GET request to this endpoint.
### Required headers
<Properties>
<Property name="Content-Type" type="string">
Request content type. Needs to be `application/json`.
</Property>
<Property name="Authorization" type="string">
Replace `<ORG_API_KEY>` with your organization API key.
</Property>
</Properties>
### Required path parameters
<Properties>
<Property name="org" type="string">
The organization username.
Replace `{org}` with your organization username.
</Property>
</Properties>
</Col>
<Col sticky>
<CodeGroup exampleTitle="GET Memory Sets" title=" " tag="GET" label="/beta/org/{org}/memorysets" status="deprecated">
```bash {{ title: 'cURL' }}
curl https://api.langbase.com/beta/org/{org}/memorysets \
-H 'Content-Type: application/json' \
-H "Authorization: Bearer <ORG_API_KEY>"
```
```js {{ title: 'Node.js' }}
async function listMemorySets() {
const url = 'https://api.langbase.com/beta/org/{org}/memorysets';
const apiKey = '<ORG_API_KEY>';
const response = await fetch(url, {
method: 'GET',
headers: {
'Content-Type': 'application/json',
Authorization: `Bearer ${apiKey}`
},
});
const memorySetsList = await response.json();
return memorySetsList;
}
```
```python
import requests
def get_memory_sets_list():
url = 'https://api.langbase.com/beta/org/{org}/memorysets'
api_key = '<ORG_API_KEY>'
headers = {
'Content-Type': 'application/json',
'Authorization': f'Bearer {api_key}',
}
response = requests.get(url, headers=headers)
memory_sets_list = response.json()
return memory_sets_list
```
</CodeGroup>
```json {{ title: 'Response' }}
{
"memorySets" : [
{
"name": "rag-memory",
"description": "RAG memory",
"owner_login": "langbase",
"url": "https://langbase.com/memorysets/langbase/rag-memory",
},
...
]
}
```
</Col>
</Row>
---
## Get a list of user memory sets {{ tag: 'Deprecated', label: '/beta/user/memorysets', status: 'deprecated' }}
<Row>
<Col>
Get a list of user memory sets by sending a GET request to this endpoint.
### Required headers
<Properties>
<Property name="Content-Type" type="string">
Request content type. Needs to be `application/json`.
</Property>
<Property name="Authorization" type="string">
Replace `<USER_API_KEY>` with your User API key.
</Property>
</Properties>
</Col>
<Col sticky>
<CodeGroup exampleTitle="Get Memory Sets" title=" " tag="GET" label="/beta/user/memorysets" status="deprecated">
```bash {{ title: 'cURL' }}
curl https://api.langbase.com/beta/user/memorysets \
-H 'Content-Type: application/json' \
-H "Authorization: Bearer <USER_API_KEY>"
```
```js {{ title: 'Node.js' }}
async function getMemorySets() {
const url = 'https://api.langbase.com/beta/user/memorysets';
const apiKey = '<USER_API_KEY>';
const response = await fetch(url, {
method: 'GET',
headers: {
'Content-Type': 'application/json',
Authorization: `Bearer ${apiKey}`,
}
});
const memorySetsList = await response.json();
return memorySetsList;
}
```
```python
import requests
def get_memory_sets_list():
url = 'https://api.langbase.com/beta/user/memorysets'
api_key = '<USER_API_KEY>'
headers = {
'Content-Type': 'application/json',
'Authorization': f'Bearer {api_key}',
}
response = requests.get(url, headers=headers)
memory_sets_list = response.json()
return memory_sets_list
```
</CodeGroup>
```json {{ title: 'Response' }}
{
"memorySets" : [
{
"name": "rag-memory",
"description": "RAG memory",
"owner_login": "langbase",
"url": "https://langbase.com/memorysets/langbase/rag-memory",
},
...
]
}
```
</Col>
</Row>
---
</content>
</doc>
<doc>
<metadata>
<title>Memory API: Delete <span className="text-xl font-mono text-muted-foreground/70">beta</span></title>
<url>https://langbase.com/docs/api-reference/deprecated/memory-delete/</url>
</metadata>
<content>
import { generateMetadata } from '@/lib/generate-metadata';
# Memory API: Delete <span className="text-xl font-mono text-muted-foreground/70">beta</span>
The `delete` memory API endpoint allows you to delete an existing memory on Langbase dynamically with the API. This endpoint requires an Org or User API key.
---
<Warn sub="Deprecation Notice">
This API endpoint has been deprecated. Please use the new [`delete`](/api-reference/memory/delete) memory API endpoint.
</Warn>
---
## Generate an Org/User API key
You will need to generate an API key to authenticate your requests. For more information, visit the [Org/User API key documentation](/api-reference/api-keys).
---
## Delete a memory {{ tag: 'Deprecated', label: '/beta/memorysets/{ownerLogin}/{memoryName}', status: 'deprecated' }}
<Row>
<Col>
Delete a memory by specifying the owner login and memory name in the path.
### Required headers
<Properties>
<Property name="Content-Type" type="string">
Request content type. Needs to be `application/json`.
</Property>
<Property name="Authorization" type="string">
Replace `<YOUR_API_KEY>` with your Org/User API key.
</Property>
</Properties>
### Required path parameters
<Properties>
<Property name="ownerLogin" type="string">
The login name of the owner (either an organization or a user).
Replace `{ownerLogin}` with your organization or user username.
</Property>
<Property name="memoryName" type="string">
The name of the memory to delete.
Replace `{memoryName}` with the name of the memory.
</Property>
</Properties>
</Col>
<Col sticky>
<CodeGroup exampleTitle="Delete Memory" title=" " tag="DELETE" label="/beta/memorysets/{ownerLogin}/{memoryName}" status="deprecated">
```bash {{ title: 'cURL' }}
curl -X DELETE https://api.langbase.com/beta/memorysets/{ownerLogin}/{memoryName} \
-H 'Content-Type: application/json' \
-H "Authorization: Bearer <YOUR_API_KEY>"
```
```js {{ title: 'Node.js' }}
async function deleteMemory() {
const url = 'https://api.langbase.com/beta/memorysets/{ownerLogin}/{memoryName}';
const apiKey = '<YOUR_API_KEY>';
const response = await fetch(url, {
method: 'DELETE',
headers: {
'Content-Type': 'application/json',
Authorization: `Bearer ${apiKey}`,
},
});
const result = await response.json();
return result;
}
```
```python
import requests
def delete_memory():
url = 'https://api.langbase.com/beta/memorysets/{ownerLogin}/{memoryName}'
api_key = '<YOUR_API_KEY>'
headers = {
'Content-Type': 'application/json',
'Authorization': f'Bearer {api_key}',
}
response = requests.delete(url, headers=headers)
result = response.json()
return result
```
</CodeGroup>
```json {{ title: 'Response' }}
{
"success": true
}
```
</Col>
</Row>
---
</content>
</doc>
<doc>
<metadata>
<title>Memory API: Create <span className="text-xl font-mono text-muted-foreground/70">beta</span></title>
<url>https://langbase.com/docs/api-reference/deprecated/memory-create/</url>
</metadata>
<content>
import { generateMetadata } from '@/lib/generate-metadata';
# Memory API: Create <span className="text-xl font-mono text-muted-foreground/70">beta</span>
The `create` memory API endpoint allows you to create a new memory on Langbase dynamically with API. This endpoint requires a User or Org API key.
---
<Warn sub="Deprecation Notice">
This API endpoint has been deprecated. Please use the new [`create`](/api-reference/memory/create) memory API endpoint.
</Warn>
---
## Generate a User/Org API key
You will need to generate an API key to authenticate your requests. For more information, visit the [User/Org API key documentation](/api-reference/api-keys).
---
## Create a new org memory {{ tag: 'Deprecated', label: '/beta/org/{org}/memorysets', status: 'deprecated' }}
<Row>
<Col>
Create a new organization memory by sending the memory data inside the request body.
### Required headers
<Properties>
<Property name="Content-Type" type="string">
Request content type. Needs to be `application/json`.
</Property>
<Property name="Authorization" type="string">
Replace `<ORG_API_KEY>` with your organization API key.
</Property>
</Properties>
### Required path parameters
<Properties>
<Property name="org" type="string">
The organization name.
Replace `{org}` with your organization username.
</Property>
</Properties>
### Required attributes
<Properties>
<Property name="name" type="string">
Name of the memory.
</Property>
</Properties>
### Optional attributes
<Properties>
<Properties>
<Property name="description" type="array">
Short description of the memory.
Default: `''`
</Property>
</Properties>
</Properties>
</Col>
<Col sticky>
<CodeGroup exampleTitle="Create Memory" title=" " tag="POST" label="/beta/org/{org}/memorysets" status="deprecated">
```bash {{ title: 'cURL' }}
curl https://api.langbase.com/beta/org/{org}/memorysets \
-H 'Content-Type: application/json' \
-H "Authorization: Bearer <ORG_API_KEY>" \
-d '{
"name": "rag-memory",
"description": "RAG memory",
}'
```
```js {{ title: 'Node.js' }}
async function createNewMemory() {
const url = 'https://api.langbase.com/beta/org/{org}/memorysets';
const apiKey = '<ORG_API_KEY>';
const memory = {
name: 'rag-memory',
description: 'RAG memory',
};
const response = await fetch(url, {
method: 'POST',
headers: {
'Content-Type': 'application/json',
Authorization: `Bearer ${apiKey}`,
},
body: JSON.stringify(memory),
});
const newMemory = await response.json();
return newMemory;
}
```
```python
import requests
import json
def create_new_memory():
url = 'https://api.langbase.com/beta/org/{org}/memorysets'
api_key = '<ORG_API_KEY>'
memory = {
"name": 'rag-memory',
"description": 'RAG memory',
}
headers = {
'Content-Type': 'application/json',
'Authorization': f'Bearer {api_key}',
}
response = requests.post(url, headers=headers, data=json.dumps(memory))
new_memory = response.json()
return new_memory
```
</CodeGroup>
```json {{ title: 'Response' }}
{
"name": "rag-memory",
"description": "RAG memory",
"owner_login": "langbase",
"url": "https://langbase.com/memorysets/langbase/rag-memory"
}
```
</Col>
</Row>
---
## Create a new user memory {{ tag: 'Deprecated', label: '/beta/user/memorysets', status: 'deprecated' }}
<Row>
<Col>
Create a new user memory by sending the memory data inside the request body.
### Required headers
<Properties>
<Property name="Content-Type" type="string">
Request content type. Needs to be `application/json`.
</Property>
<Property name="Authorization" type="string">
Replace `<USER_API_KEY>` with your User API key.
</Property>
</Properties>
### Required attributes
<Properties>
<Property name="name" type="string">
Name of the memory.
</Property>
</Properties>
### Optional attributes
<Properties>
<Properties>
<Property name="description" type="array">
Short description of the memory.
Default: `''`
</Property>
</Properties>
</Properties>
</Col>
<Col sticky>
<CodeGroup exampleTitle="Create Memory" title=" " tag="POST" label="/beta/user/memorysets" status="deprecated">
```bash {{ title: 'cURL' }}
curl https://api.langbase.com/beta/user/memorysets \
-H 'Content-Type: application/json' \
-H "Authorization: Bearer <USER_API_KEY>" \
-d '{
"name": "rag-memory",
"description": "RAG memory",
}'
```
```js {{ title: 'Node.js' }}
async function createNewMemory() {
const url = 'https://api.langbase.com/beta/user/memorysets';
const apiKey = '<USER_API_KEY>';
const memory = {
name: "rag-memory",
description: "RAG memory",
};
const response = await fetch(url, {
method: 'POST',
headers: {
'Content-Type': 'application/json',
Authorization: `Bearer ${apiKey}`,
},
body: JSON.stringify(memory),
});
const newMemory = await response.json();
return newMemory;
}
```
```python
import requests
import json
def create_new_memory():
url = 'https://api.langbase.com/beta/user/memorysets'
api_key = '<USER_API_KEY>'
memory = {
"name": "rag-memory",
"description": "RAG memory",",
}
headers = {
'Content-Type': 'application/json',
'Authorization': f'Bearer {api_key}',
}
response = requests.post(url, headers=headers, data=json.dumps(memory))
new_memory = response.json()
return new_memory
```
</CodeGroup>
```json {{ title: 'Response' }}
{
"name": "rag-memory",
"description": "RAG memory",
"owner_login": "langbase",
"url": "https://langbase.com/memorysets/langbase/rag-memory"
}
```
</Col>
</Row>
---
</content>
</doc>
<doc>
<metadata>
<title>Document API: Upload <span className="text-xl font-mono text-muted-foreground/70">beta</span></title>
<url>https://langbase.com/docs/api-reference/deprecated/document-upload/</url>
</metadata>
<content>
import { generateMetadata } from '@/lib/generate-metadata';
# Document API: Upload <span className="text-xl font-mono text-muted-foreground/70">beta</span>
The `upload` document API endpoint allows you to upload documents to a memory in Langbase with API. This endpoint requires a User or Org API key.
This endpoint can also be used to replace an existing document in a memory. To do this, you need to provide the same `fileName` and `memoryName` attributes as the existing document. We also have a separate guide on [how to replace an existing document in memory](/guides/memory-document-replace).
---
<Warn sub="Deprecation Notice">
This API endpoint has been deprecated. Please use the new [`upload`](/api-reference/memory/document-upload) document API endpoint.
</Warn>
---
## Generate a User/Org API key
You will need to generate an API key to authenticate your requests. For more information, visit the [User/Org API key documentation](/api-reference/api-keys).
---
## Step #1: Get SignedUrl to Upload Document for org {{ tag: 'Deprecated', label: '/beta/org/{org}/memorysets/documents', status: 'deprecated' }}
<Row>
<Col>
Uploading a document to a memory requires a signed URL. `POST` a request to this endpoint to get a signed URL and use `PUT` method to upload the document.
### Required headers
<Properties>
<Property name="Content-Type" type="string">
Request content type. Needs to be `application/json`.
</Property>
<Property name="Authorization" type="string">
Replace `<ORG_API_KEY>` with your organization API key.
</Property>
</Properties>
### Required path parameters
<Properties>
<Property name="org" type="string">
The organization username.
Replace `{org}` with the organization username.
</Property>
</Properties>
### Required attributes
<Properties>
<Property name="memoryName" type="string">
Name of the memory to which the document will be uploaded.
</Property>
<Property name="ownerLogin" type="string">
It is the username of the org. It is returned in [Memory List endpoint](memory-list) as well as `owner_login`.
</Property>
<Property name="fileName" type="string">
Name of the document.
</Property>
</Properties>
Once you have the signed URL, you can upload the document using the PUT method.
## Step 2: Upload Document on SignedUrl {{ tag: 'PUT', label: '{SignedUrl}', status: 'deprecated' }}
Use the signed URL to upload the document to the memory. The signed URL is valid for 2 hours.
### Required headers
<Properties>
<Property name="Content-Type" type="string">
Request content type. Needs to be the MIME type of the document. Currently, we support `application/pdf`, `text/plain`, `text/markdown`, `text/csv`, and all major code files as `text/plain`. For csv, pdf, text, and markdown files, it should correspond to the file type used in the `fileName` attribute in step 1. For code files, it should be `text/plain`.
</Property>
</Properties>
### Required attributes
<Properties>
<Property name="body" type="FileBody">
The body of the file to be stored in the bucket. It can be `Buffer`, `File`, `FormData`, or `ReadableStream` type.
</Property>
</Properties>
</Col>
<Col sticky>
<CodeGroup exampleTitle="Upload Document" title=" " tag="POST" label="/beta/org/{org}/memorysets/documents" status="deprecated">
```bash {{ title: 'cURL' }}
curl https://api.langbase.com/beta/org/{org}/memorysets/documents \
-H 'Content-Type: application/json' \
-H "Authorization: Bearer <ORG_API_KEY>" \
-d '{
"memoryName": "rag-memory",
"ownerLogin": "langbase",
"fileName": "file.pdf"
}'
```
```js {{ title: 'Node.js' }}
async function getSignedUploadUrl() {
const url = 'https://api.langbase.com/beta/org/{org}/memorysets/documents';
const apiKey = '<ORG_API_KEY>';
const newDoc = {
memoryName: 'rag-memory',
ownerLogin: 'langbase',
fileName: 'file.pdf',
};
const response = await fetch(url, {
method: 'POST',
headers: {
'Content-Type': 'application/json',
Authorization: `Bearer ${apiKey}`,
},
body: JSON.stringify(newDoc),
});
const res = await response.json();
return res;
}
```
```python
import requests
import json
def get_signed_upload_url():
url = 'https://api.langbase.com/beta/org/{org}/memorysets/documents'
api_key = '<ORG_API_KEY>'
newDoc = {
"memoryName": "rag-memory",
"ownerLogin": "langbase",
"fileName": "file.pdf"
}
headers = {
'Content-Type': 'application/json',
'Authorization': f'Bearer {api_key}',
}
response = requests.post(url, headers=headers, data=json.dumps(newDoc))
signed_upload_url = response.json()
return signed_upload_url
```
</CodeGroup>
```json {{ title: 'Response' }}
{
"signedUrl": "https://b.langbase.com/..."
}
```
<CodeGroup exampleTitle="Upload Document" title=" " tag="PUT" label="{SignedUrl}" status="deprecated">
```bash {{ title: 'cURL' }}
curl -X PUT \
-H 'Content-Type: application/pdf' \
--data-binary "@path/to/pdfFile" \
"{SignedUrl}"
```
```js {{ title: 'Node.js' }}
const fs = require("fs");
async function uploadDocument(signedUrl, filePath) {
const file = fs.readFileSync(filePath);
const response = await fetch(signedUrl, {
method: 'PUT',
headers: {
'Content-Type': 'application/pdf',
},
body: file,
});
return response;
}
```
```python
import requests
def upload_document(signed_url, file):
with open(file_path, 'rb') as file:
headers = {'Content-Type': 'application/pdf'}
response = requests.put(signed_url, headers=headers, data=file)
return response
```
</CodeGroup>
```json {{ title: 'Response' }}
{
// ...
"status": 200,
"statusText": 'OK',
// ...
}
```
</Col>
</Row>
---
## Step #1: Get SignedUrl to Upload Document for user {{ tag: 'Deprecated', label: '/beta/user/memorysets/documents', status: 'deprecated' }}
<Row>
<Col>
Uploading a document to a memory requires a signed URL. `POST` a request to this endpoint to get a signed URL and use `PUT` method to upload the document.
### Required headers
<Properties>
<Property name="Content-Type" type="string">
Request content type. Needs to be `application/json`.
</Property>
<Property name="Authorization" type="string">
Replace `USER_API_KEY` with your User API key.
</Property>
</Properties>
### Required attributes
<Properties>
<Property name="memoryName" type="string">
Name of the memory to which the document will be uploaded.
</Property>
<Property name="ownerLogin" type="string">
It is the username of the org/user. It is returned in [Memory List endpoint](memory-list) as well as `owner_login`.
</Property>
<Property name="fileName" type="string">
Name of the document.
</Property>
</Properties>
Once you have the signed URL, you can upload the document using the PUT method.
## Step 2: Upload Document on SignedUrl {{ tag: 'PUT', label: '{SignedUrl}', status: 'deprecated' }}
Use the signed URL to upload the document to the memory. The signed URL is valid for 2 hours.
### Required headers
<Properties>
<Property name="Content-Type" type="string">
Request content type. Needs to be the MIME type of the document. Currently, we support `application/pdf`, `text/plain`, `text/markdown`, `text/csv`, and all major code files as `text/plain`. For csv, pdf, text, and markdown files, it should correspond to the file type used in the `fileName` attribute in step 1. For code files, it should be `text/plain`.
</Property>
</Properties>
### Required attributes
<Properties>
<Property name="body" type="FileBody">
The body of the file to be stored in the bucket. It can be `Buffer`, `File`, `FormData`, or `ReadableStream` type.
</Property>
</Properties>
</Col>
<Col sticky>
<CodeGroup exampleTitle="Upload Document" title=" " tag="POST" label="/beta/user/memorysets/documents" status="deprecated">
```bash {{ title: 'cURL' }}
curl https://api.langbase.com/beta/user/memorysets/documents \
-H 'Content-Type: application/json' \
-H "Authorization: Bearer <USER_API_KEY>" \
-d '{
"memoryName": "rag-memory",
"ownerLogin": "langbase",
"fileName": "file.pdf"
}'
```
```js {{ title: 'Node.js' }}
async function getSignedUploadUrl() {
const url = 'https://api.langbase.com/beta/user/memorysets/documents';
const apiKey = '<USER_API_KEY>';
const newDoc = {
memoryName: 'rag-memory',
ownerLogin: 'langbase',
fileName: 'file.pdf',
};
const response = await fetch(url, {
method: 'POST',
headers: {
'Content-Type': 'application/json',
Authorization: `Bearer ${apiKey}`,
},
body: JSON.stringify(newDoc),
});
const res = await response.json();
return res;
}
```
```python
import requests
import json
def get_signed_upload_url():
url = 'https://api.langbase.com/beta/user/memorysets/documents'
api_key = '<USER_API_KEY>'
newDoc = {
"memoryName": "rag-memory",
"ownerLogin": "langbase",
"fileName": "file.pdf"
}
headers = {
'Content-Type': 'application/json',
'Authorization': f'Bearer {api_key}',
}
response = requests.post(url, headers=headers, data=json.dumps(newDoc))
signed_upload_url = response.json()
return signed_upload_url
```
</CodeGroup>
```json {{ title: 'Response' }}
{
"signedUrl": "https://b.langbase.com/..."
}
```
<CodeGroup exampleTitle="Upload Document" title=" " tag="PUT" label="{SignedUrl}" status="deprecated">
```bash {{ title: 'cURL' }}
curl -X PUT \
-H 'Content-Type: application/pdf' \
--data-binary "@path/to/pdfFile" \
"{SignedUrl}"
```
```js {{ title: 'Node.js' }}
const fs = require("fs");
async function uploadDocument(signedUrl, filePath) {
const file = fs.readFileSync(filePath);
const response = await fetch(signedUrl, {
method: 'PUT',
headers: {
'Content-Type': 'application/pdf',
},
body: file,
});
return response;
}
```
```python
import requests
def upload_document(signed_url, file):
with open(file_path, 'rb') as file:
headers = {'Content-Type': 'application/pdf'}
response = requests.put(signed_url, headers=headers, data=file)
return response
```
</CodeGroup>
```json {{ title: 'Response' }}
{
// ...
"status": 200,
"statusText": 'OK',
// ...
}
```
</Col>
</Row>
---
</content>
</doc>
<doc>
<metadata>
<title>Document API: List <span className="text-xl font-mono text-muted-foreground/70">beta</span></title>
<url>https://langbase.com/docs/api-reference/deprecated/document-list/</url>
</metadata>
<content>
import { generateMetadata } from '@/lib/generate-metadata';
# Document API: List <span className="text-xl font-mono text-muted-foreground/70">beta</span>
The `list` document API endpoint allows you to list documents in a memory on Langbase dynamically with API. This endpoint requires a User or Org API key.
---
<Warn sub="Deprecation Notice">
This API endpoint has been deprecated. Please use the new [`list`](/api-reference/memory/document-list) document API endpoint.
</Warn>
---
## Generate a User/Org API key
You will need to generate an API key to authenticate your requests. For more information, visit the [User/Org API key documentation](/api-reference/api-keys).
---
## Get a list of org/user memory documents {{ tag: 'Deprecated', label: '/beta/memorysets/{owner}/{memoryName}/documents', status: 'deprecated' }}
<Row>
<Col>
Get a list of documents in a memory by sending a GET request to this endpoint.
### Required headers
<Properties>
<Property name="Content-Type" type="string">
Request content type. Needs to be `application/json`.
</Property>
<Property name="Authorization" type="string">
Replace `<YOUR_API_KEY>` with your User or Org API key.
</Property>
</Properties>
### Required path parameters
<Properties>
<Property name="owner" type="string">
The organization or user username.
Replace `{owner}` with the organization or user username.
</Property>
<Property name="memoryName" type="string">
The memory name.
Replace `{memoryName}` with the memory name.
</Property>
</Properties>
</Col>
<Col sticky>
<CodeGroup exampleTitle="GET Memory Documents" title=" " tag="GET" label="/beta/memorysets/{owner}/{memoryName}/documents" status="deprecated">
```bash {{ title: 'cURL' }}
curl https://api.langbase.com/beta/memorysets/{owner}/{memoryName}/documents \
-H 'Content-Type: application/json' \
-H "Authorization: Bearer <YOUR_API_KEY>"
```
```js {{ title: 'Node.js' }}
async function listMemorySets() {
const url = 'https://api.langbase.com/beta/memorysets/{owner}/{memoryName}/documents';
const apiKey = '<YOUR_API_KEY>';
const response = await fetch(url, {
method: 'GET',
headers: {
'Content-Type': 'application/json',
Authorization: `Bearer ${apiKey}`
},
});
const memoryDocumentsList = await response.json();
return memoryDocumentsList;
}
```
```python
import requests
def get_memory_sets_list():
url = 'https://api.langbase.com/beta/memorysets/{owner}/{memoryName}/documents'
api_key = '<YOUR_API_KEY>'
headers = {
'Content-Type': 'application/json',
'Authorization': f'Bearer {api_key}',
}
response = requests.get(url, headers=headers)
memory_documents_list = response.json()
return memory_documents_list
```
</CodeGroup>
```json {{ title: 'Response' }}
{
"docs" : [
{
"name": "file.pdf",
"status": "completed",
"status_message": null,
"metadata": {
"size": 1156,
"type": "application/pdf"
},
"enabled": true,
"chunk_size": 10000,
"chunk_overlap": 2048,
"owner_login": "langbase"
},
// ...
]
}
```
</Col>
</Row>
---
</content>
</doc>
<doc>
<metadata>
<title>Document API: Embeddings Retry Generate <span className="text-xl font-mono text-muted-foreground/70">beta</span></title>
<url>https://langbase.com/docs/api-reference/deprecated/document-embeddings-retry/</url>
</metadata>
<content>
import { generateMetadata } from '@/lib/generate-metadata';
# Document API: Embeddings Retry Generate <span className="text-xl font-mono text-muted-foreground/70">beta</span>
Document embeddings generation may fail due to various reasons such as OpenAI API rate limits, invalid API keys, document parsing errors, special characters, corrupted or locked PDFs, and excessively large documents. If the issue is related to the API key, it needs to be corrected; before retrying, ensure that the document is accessible and can be parsed correctly.
You need to regenerate document embeddings in a memory before you can use them. The `retry` document API endpoint allows you to retry generating document embeddings in a memory on Langbase with API. This endpoint requires a User or Org API key.
---
<Warn sub="Deprecation Notice">
This API endpoint has been deprecated. Please use the new [`embeddings retry`](/api-reference/memory/document-embeddings-retry) document API endpoint.
</Warn>
---
## Generate a User/Org API key
You will need to generate an API key to authenticate your requests. For more information, visit the [User/Org API key documentation](/api-reference/api-keys).
---
## Retry generating document embeddings in a memory {{ tag: 'Deprecated', label: '/beta/memorysets/{owner}/documents/embeddings/retry', status: 'deprecated' }}
<Row>
<Col>
Retry generate document embeddings in a memory by sending a POST request to this endpoint.
### Required headers
<Properties>
<Property name="Content-Type" type="string">
Request content type. Needs to be `application/json`.
</Property>
<Property name="Authorization" type="string">
Replace `<YOUR_API_KEY>` with your User or Org API key.
</Property>
</Properties>
### Required path parameters
<Properties>
<Property name="owner" type="string">
The organization or user username.
Replace `{owner}` with the organization or user username.
</Property>
</Properties>
## Request attributes
<Properties>
<Property name="memoryName" type="string">
The name of memory to which the document belongs.
</Property>
<Property name="documentName" type="string">
Name of the document.
</Property>
</Properties>
</Col>
<Col sticky>
<CodeGroup exampleTitle="Retry Generating Document Embeddings" title=" " tag="POST" label="/beta/memorysets/{owner}/documents/embeddings/retry" status="deprecated">
```bash {{ title: 'cURL' }}
curl https://api.langbase.com/beta/memorysets/{owner}/documents/embeddings/retry \
-H 'Content-Type: application/json' \
-H "Authorization: Bearer <YOUR_API_KEY>" \
-d '{
"memoryName": "rag-memory",
"documentName": "file.pdf"
}'
```
```js {{ title: 'Node.js' }}
async function retryDocumentEmbeddings() {
const url = 'https://api.langbase.com/beta/memorysets/{owner}/documents/embeddings/retry';
const apiKey = '<YOUR_API_KEY>';
const body = {
memoryName: 'rag-memory',
documentName: 'file.pdf'
}
const response = await fetch(url, {
method: 'POST',
headers: {
'Content-Type': 'application/json',
Authorization: `Bearer ${apiKey}`
},
body: JSON.stringify(body)
});
const res = await response.json();
return res;
}
```
```python
import requests
def retry_document_embeddings():
url = 'https://api.langbase.com/beta/memorysets/{owner}/documents/embeddings/retry'
api_key = '<YOUR_API_KEY>'
body = {
'memoryName': 'rag-memory',
'documentName': 'file.pdf'
}
headers = {
'Content-Type': 'application/json',
'Authorization': f'Bearer {api_key}',
}
response = requests.post(url, headers=headers, json=json.dumps(body))
res = response.json()
return res
```
</CodeGroup>
```json {{ title: 'Response' }}
{
"success" : true,
}
```
</Col>
</Row>
---
</content>
</doc>
<doc>
<metadata>
<title>Precondition failed (412)</title>
<url>https://langbase.com/docs/api-reference/errors/precondition_failed/</url>
</metadata>
<content>
import { generateMetadata } from '@/lib/generate-metadata';
# Precondition failed (412)
You can run into this error when the preconditions specified in the request headers are not satisfied by the current state of the resource on Langbase's server.
---
## Possible Causes
- Missing or incorrect precondition headers in your request within Langbase.
- Preconditions specified in the request headers are not satisfied by the current state of the resource on Langbase's server.
- Conflicting preconditions between client and server expectations within Langbase.
---
## Troubleshooting Steps
1. Check Request Headers: Verify that your request includes all necessary precondition headers and that their values are correct.
2. Review Preconditions: Check the preconditions expected by the server and ensure that they are compatible with the current state of the resource.
3. Resolve Conflicts: If there are conflicting preconditions between client and server expectations, communicate with relevant parties to resolve the conflicts.
4. Update Request: Adjust your request to meet the required preconditions as specified by the server.
---
## Recommendation
Review your request headers to ensure that the specified preconditions are met and compatible with Langbase's server expectations to avoid encountering the Precondition Failed error.
</content>
</doc>
<doc>
<metadata>
<title>Pricing for Agent Primitive</title>
<url>https://langbase.com/docs/agent/platform/pricing/</url>
</metadata>
<content>
import { generateMetadata } from '@/lib/generate-metadata';
# Pricing for Agent Primitive
Requests to the Agent primitive are counted as **Runs** against your subscription plan.
| Plan | Runs | Overage |
|------------|----------|----------|
| Hobby | 500 | - |
| Enterprise | [Contact Us][contact-us] | [Contact Us][contact-us] |
<Note title="What is a run?">
Each run is an API request which can have at the max 1,000 Tokens in it which is equivalent to almost 750 words (an article). If your API request has, for instance, 1500 tokens in it, it will count as 2 runs.
</Note>
### Free Users
- **Limit**: 500 runs per month.
- **Overage**: No overage.
### Enterprise Users
There are no hard limits for Enterprise. Billing is based solely on the number of runs during each billing period.
If you have questions about your usage or need assistance, please don't hesitate to [contact us](mailto:support@langbase.com).
---
[contact-us]: mailto:support@langbase.com
</content>
</doc>
<doc>
<metadata>
<title>Limits for Agent Primitive</title>
<url>https://langbase.com/docs/agent/platform/limits/</url>
</metadata>
<content>
import { generateMetadata } from '@/lib/generate-metadata';
# Limits for Agent Primitive
The following Rate and Usage Limits apply for the Agent primitive:
### Rate Limits
Agent primitive requests follow our standard rate limits. See the [Rate Limits](/api-reference/limits/rate-limits) page for more details.
### Usage Limits
Requests to the Agent primitive are counted as **Runs** against your subscription plan. See the [Run Usage Limits](/api-reference/limits/usage-limits) page for more details.
</content>
</doc>


